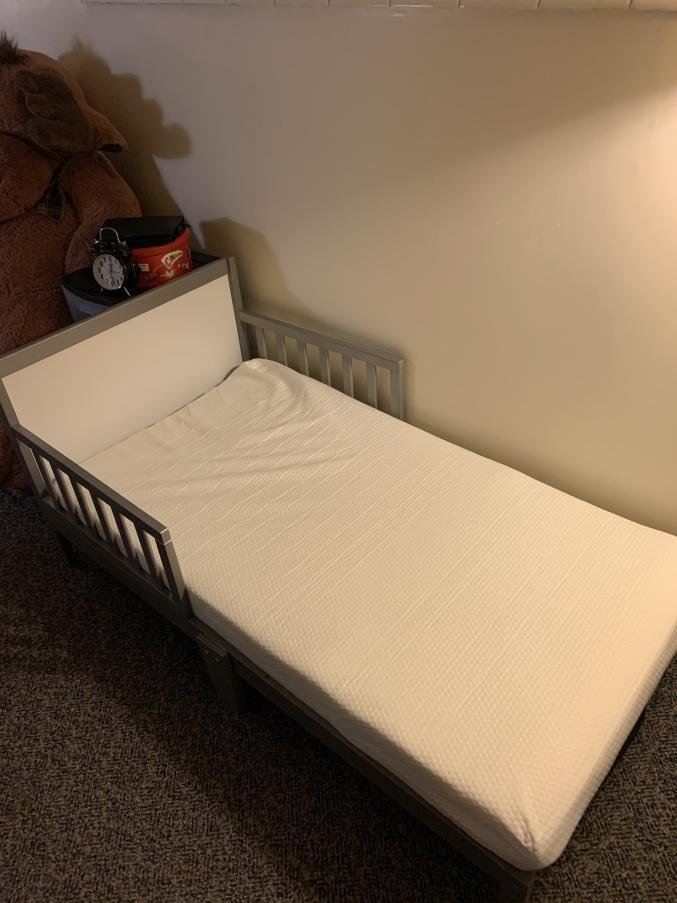
Upgrading the Kid's Bed
While many people are biting their nails about the election, I could not care less. I like neither candidate and hope the voting process modernize and reform in the future. Instead, I spent some time doing some minor home improvements. The toddler needed a new bed. Time flies and they grow up fast.
I'm no carpenter, but I'm good enough to assemble your generic furniture in a box. If anything, I get a free Allen wrench out of it. A lot of the random tools I have came from the products I've purchased in the past.
For now, the bed is good enough until the kid enters grade school. At least, that's the plan. I'm pretty sure we will need a big kid bed before then.
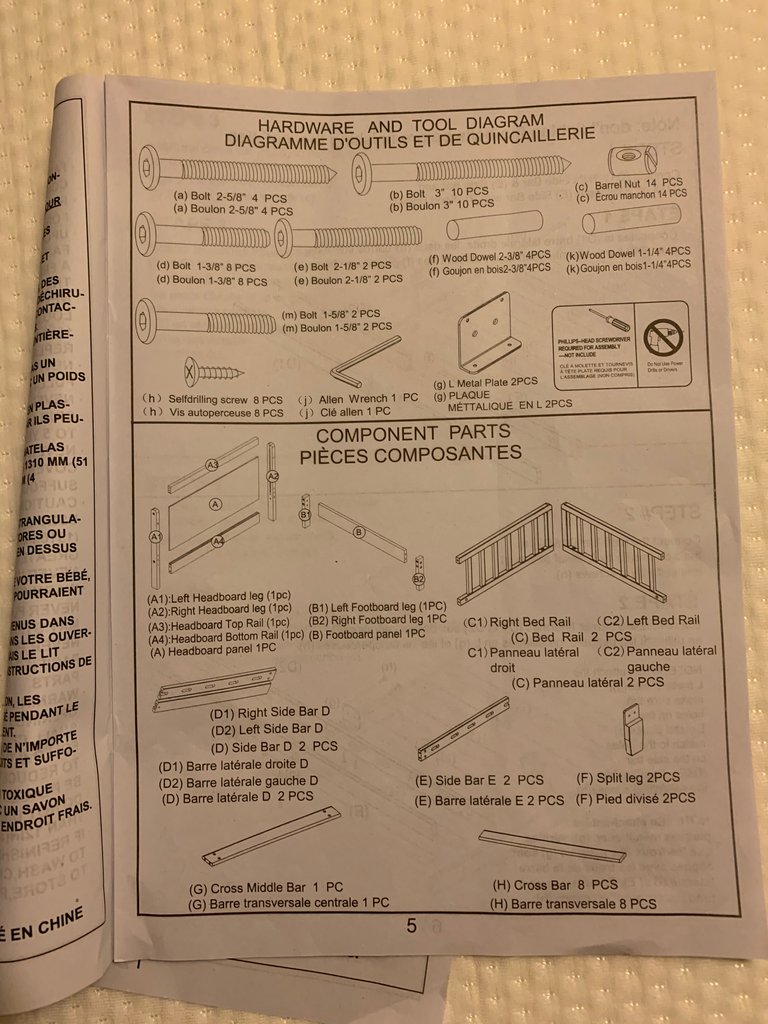
The assembly instructions aren't usually complicated. Although, I did wish it was easier to tell the different sized screws apart. I'm not versed in this trade, so distinguishing which size was which took some time.
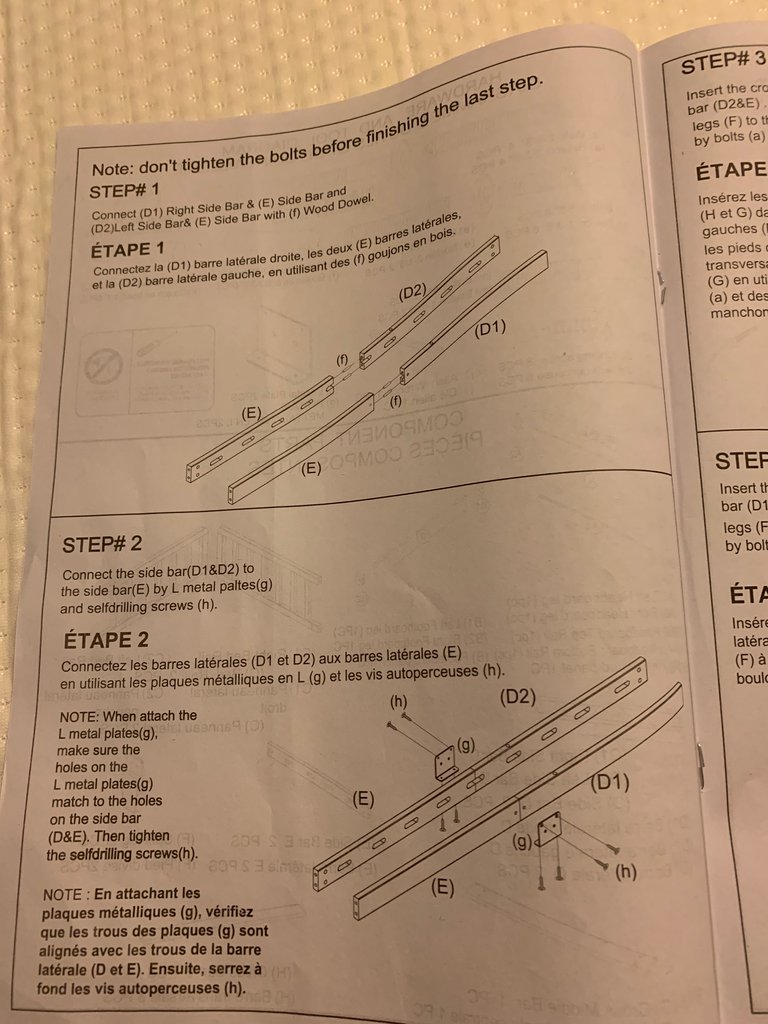
This part looked super easy until I noticed I messed up the D + E pieces. The hole on the D pieces are important later on. I'm glad I caught it before I joined everything together.
If there was one thing I wanted to complain about, it's the self-drilling screws. Those things are annoying to deal with unless you have a "guide" to help you put them in straight. The instructions discourage the use of power tools on those screws. So, I decided that I didn't want to tempt fate tonight.
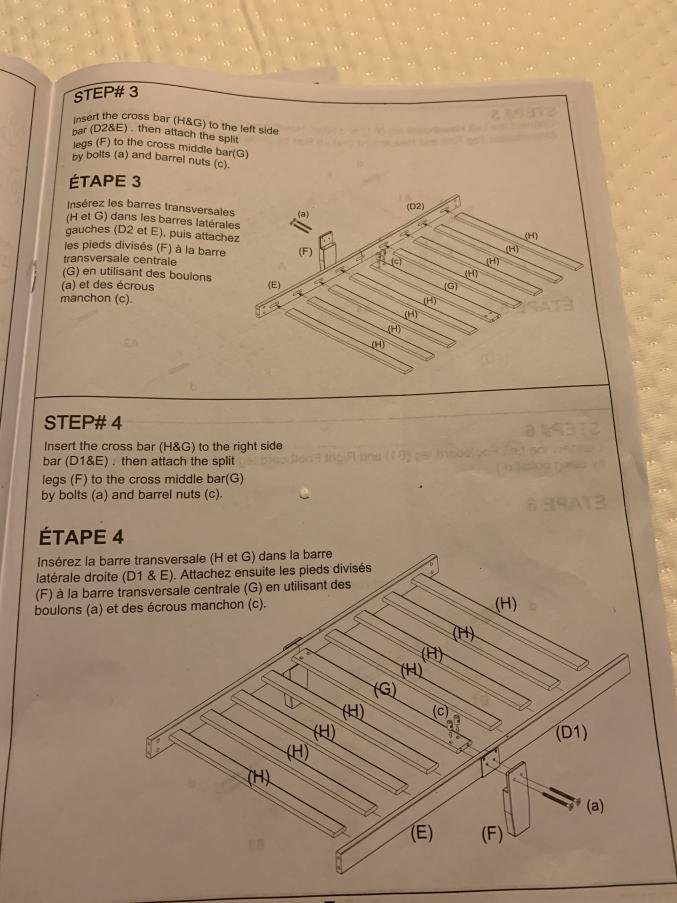
To my surprise, the hardest part of the assembly was bridging the crossbars with the sides of the bed. Doing one side and the bars was easy. But, adding the other side of the bed required a bit of coordination and finesse.
Once I finished that part, everything was smooth sailing from there. The rest of the process was straight forward and not worth mentioning.
All that's left now is waiting for the new mattress to rise to its supposed state, which will take about 72 hours. Then, the bed is ready to use. Not bad for a random weekday evening project.
@enforcer48, In my opinion Elections are not for the people and not by the people. It's really important to stay away from the Deception. Stay blessed.
It is what it is.
👍
https://twitter.com/spam2hive/status/1324279242150965250
Here's an easier way to get it done.
During corona times? Nah.
Congratulations @enforcer48! You have completed the following achievement on the Hive blockchain and have been rewarded with new badge(s) :
You can view your badges on your board and compare yourself to others in the Ranking
If you no longer want to receive notifications, reply to this comment with the word
STOPDo not miss the last post from @hivebuzz:
LOL you have any idea how many times I've done this shit. It's all from China as well. Shit breaks so easily if you screw in too far.
I'm glad I didn't go the power tool route then.
I don't tend to have to much problem with diagrams, I use to be a die setter. Though I do remember when I first started there as a brake operator and looked at my first print it was all like French to me.
For the most part, they aren't problems for me either.