Fotomontaje "Dentro" paso a paso usando PHOTOSHOP CC 2016/ Photomontage "Inside" step by step using PHOTOSHOP CC 2016
Espero todos estén muy bien. Hoy comparto con ustedes un tercer tutorial de fotomontaje en esta genial comunidad, usando como herramienta PHOTOSHOP CC 2016.
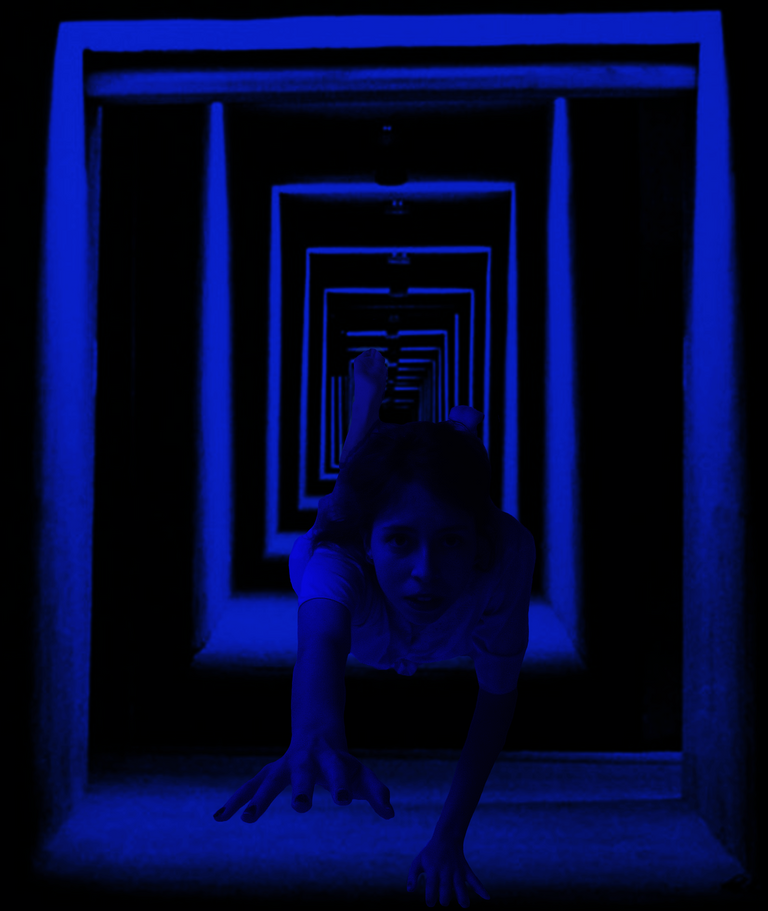
En esta oportunidad quise recrear algo nuevo, algo que se acercara a la ficción. Este se conoce como aquello que permite la existencia de lo fingido. Da lugar al invento y a la imaginación.
I hope everyone is very well. Today I share with you a third photomontage tutorial in this great community, using PHOTOSHOP CC 2016 as a tool.
This time I wanted to recreate something new, something close to fiction. This is known as that which allows the existence of the pretended. It gives place to invention and imagination.

¡Aquí vamos!
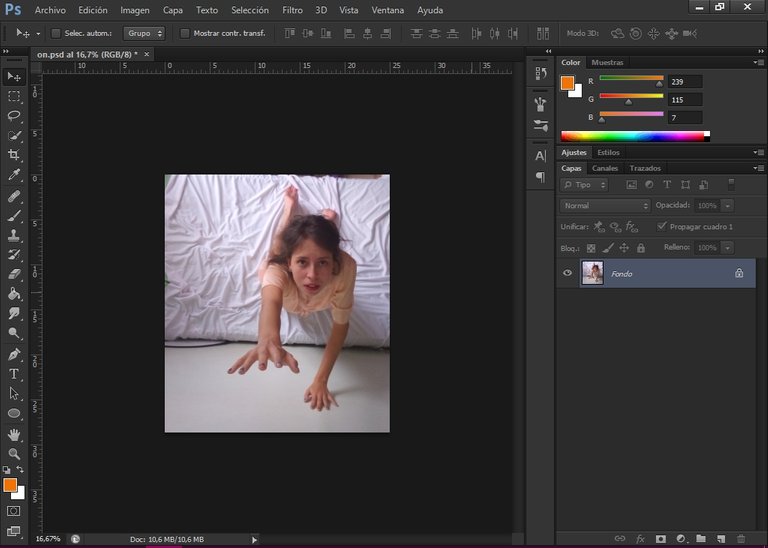
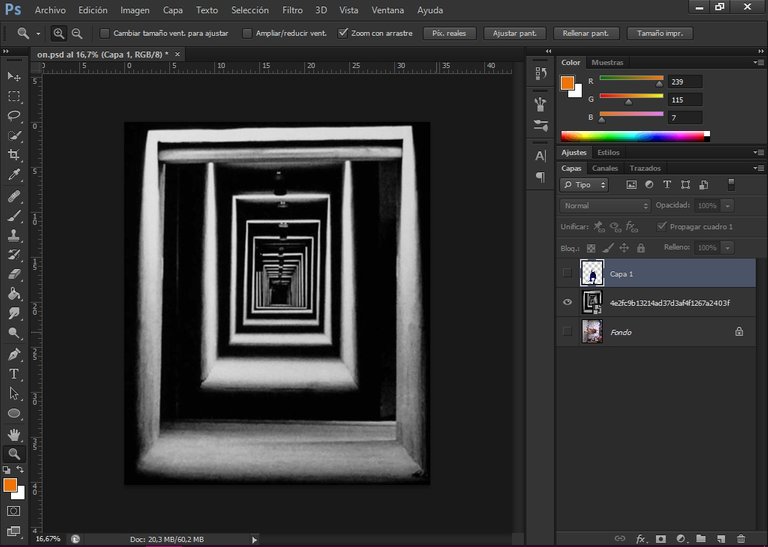
1 - Escoger una foto ideal para el montaje.
Here we go!
1 - Choose an ideal photo for the montage.
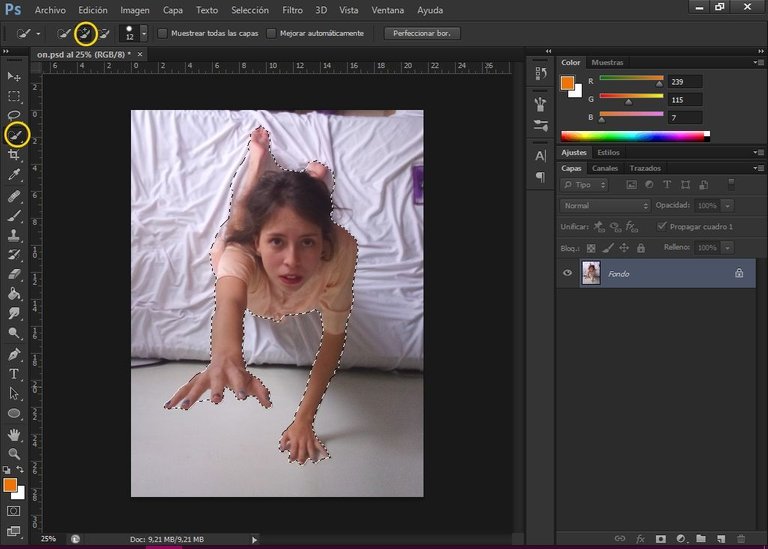
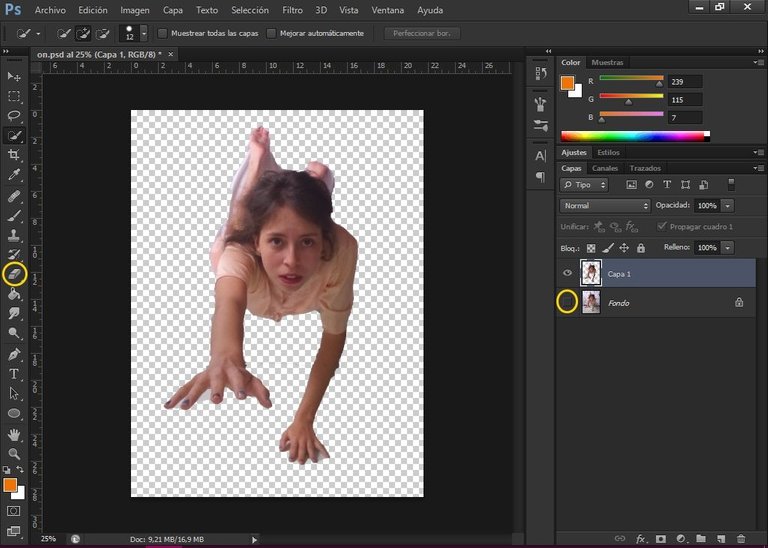
2 - Elegimos la Herramienta Selección rápida > añadir a selección. Y seleccionamos todo el cuerpo de la modelo cuidadosamente. Si nos equivocamos, presionamos las teclas Ctr+alt+Z para deshacer la selección. Luego cuando ya tengamos la parte seleccionada, presionamos Ctr+J. Aparecerá una nueva capa con la selección. Borramos aquellas partes que no nos sirven y se oculta la capa que está debajo.
2 - We choose the Quick Selection Tool > add to selection. And select the whole body of the model carefully. If we make a mistake, press Ctr+alt+Z to undo the selection. Then when we have the selected part, press Ctr+J. A new layer with the selection will appear. We delete those parts that are of no use to us and the layer underneath is hidden.
3 - Al terminar seleccionamos con las teclas Ctr+T y lo centramos y cambiamos de tamaño presionando la tecla shift+botón izquierdo del mouse sobre alguno de los puntos de la selección.
3 - When finished we select with the keys Ctr+T and we center and resize it by pressing shift+left mouse button on any of the points of the selection.

4 - Place an image similar to the one shown. Select File > place > select image.
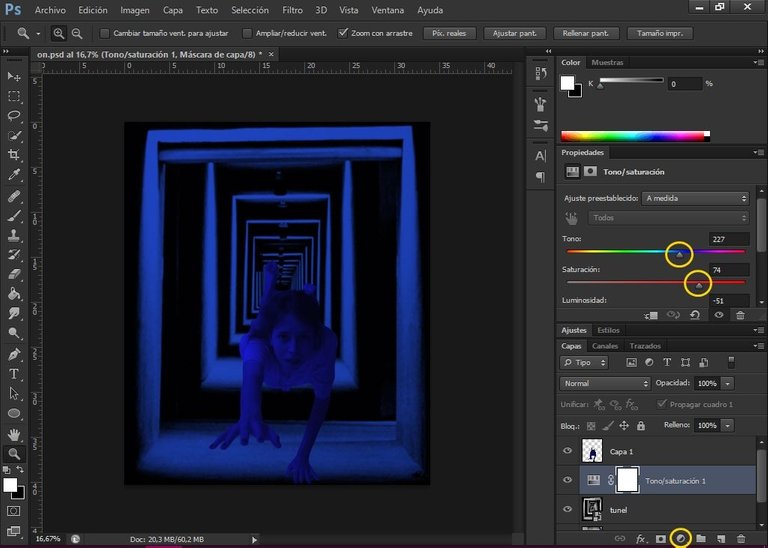
5 - Sobre la capa 1, seleccionar Crear nueva capa de relleno o ajuste > Tono/Saturación > Seleccionar el indicador sobre la barra de Tono y se ubica en el color azul > Seleccionar el indicador sobre la barra de Saturación y se sube como se indica o requiera.
5 - On layer 1, select Create New Fill or Adjustment Layer > Hue/Saturation > Select the indicator on the Hue bar and set it to blue > Select the indicator on the Saturation bar and raise it as indicated or required.
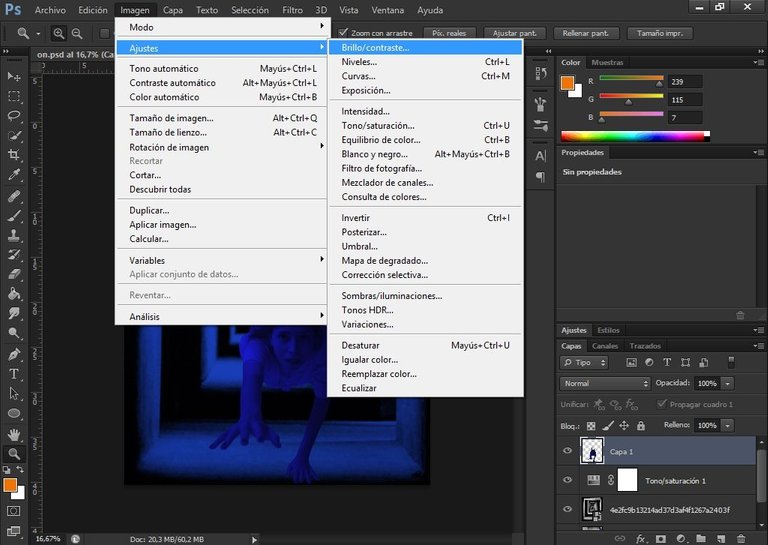
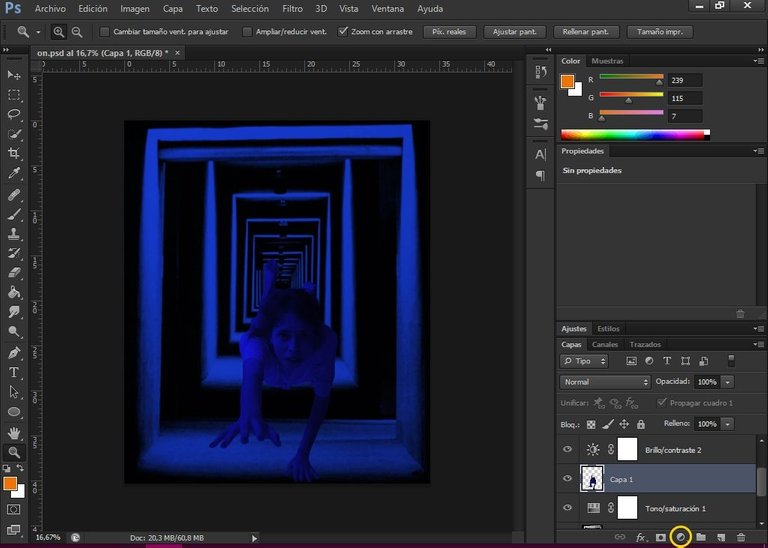
6 - Nos ubicamos en la capa 1 y seleccionamos imagen > ajustes > Brillo y contraste. A continuación subimos un poco el brillo y mucho más el contraste, recuerda que con este buscamos que la modelo se adhiera más a las luces y tonos del fondo.
6 - Go to layer 1 and select Image > Adjustments > Brightness and Contrast. Then we increase a little the brightness and much more the contrast, remember that with this we want the model to adhere more to the lights and tones of the background.
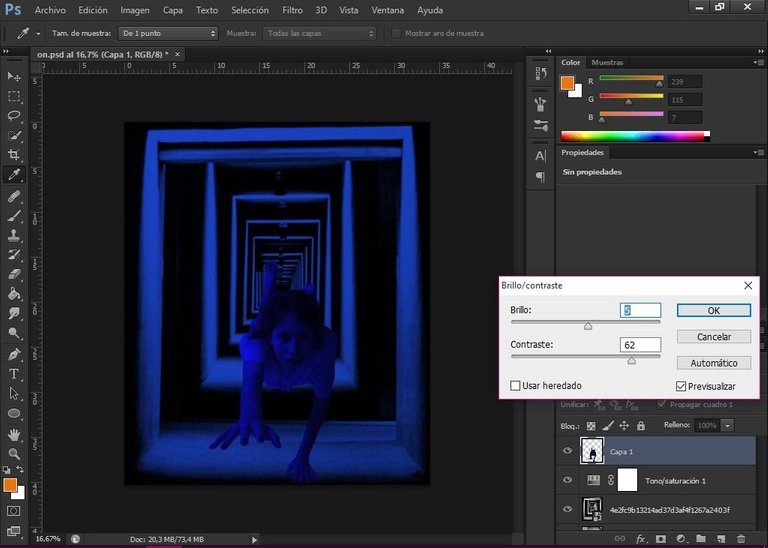
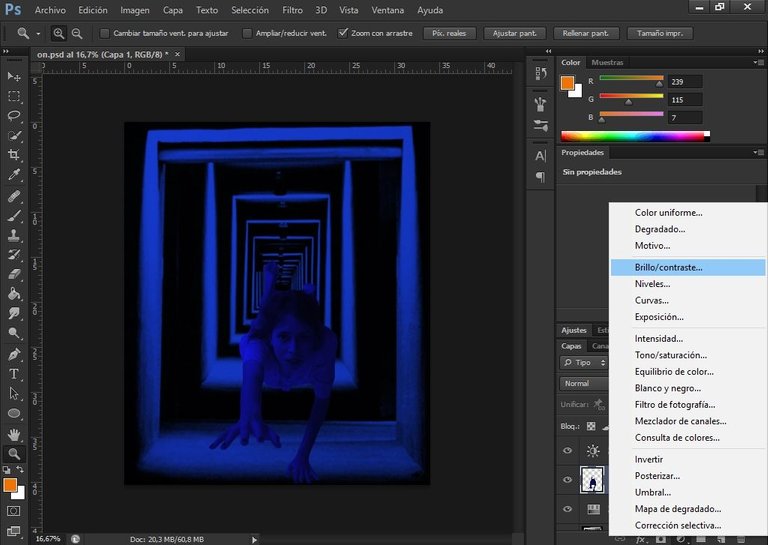
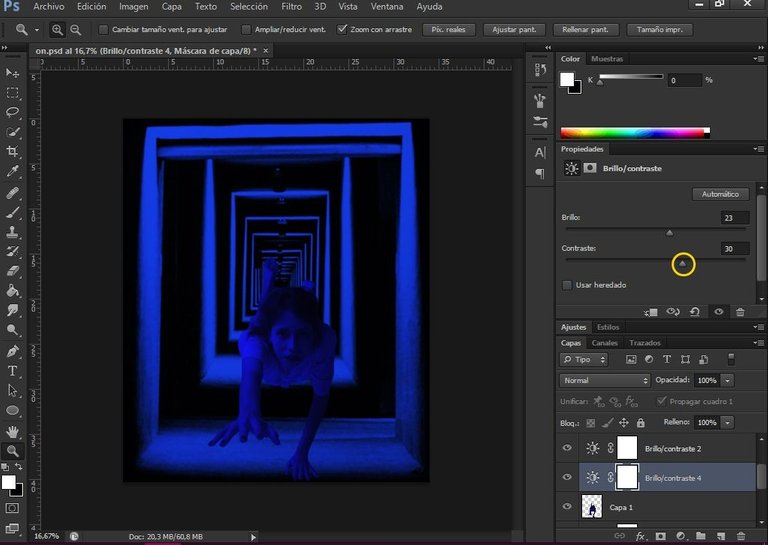
7 - Seleccionar Crear nueva capa de relleno o ajuste > Brillo/ contraste. La diferencia entre el Brillo/Contraste seleccionando la opción imagen y la opción Crear nueva capa de relleno o ajuste, es que la primera nos cambiara solo la capa, mientras la otra, nos cambia todo.
7 -Select Create New Fill or Adjustment Layer > Brightness/Contrast. The difference between the Brightness/Contrast selecting image option and the Create new fill or adjustment layer option is that the former will change only the layer, while the latter will change everything.
8 - We raise the contrast as indicated. To adhere the background with the model.
Y de esa manera terminé el montaje. Es importante recordar como debe estar el orden de las capas de acuerdo al montaje y la iluminación de la foto inicial.
Muchas gracias por llegar a este punto del paso a paso. Espero les haya gustado. Les recuerdo seguir al proyecto @aliento que apoya a esta comunidad.
También quiero comentarles que mi hermana @desraizada esta haciendo tutoriales de su trabajo fotográfico, aquí les dejo uno.
¡GRACIAS POR LEER!
And that's how I finished the assembly. It is important to remember how the order of the layers should be according to the assembly and the illumination of the initial photo.
Thank you very much for getting to this point of the step by step. I hope you liked it. I remind you to follow the @aliento project that supports this community.
I also want to tell you that my sister @desraizada is making tutorials of her photographic work, here I leave you one.
THANKS FOR READING!

Congratulations @emmilee! You have completed the following achievement on the Hive blockchain and have been rewarded with new badge(s) :
Your next target is to reach 100 replies.
You can view your badges on your board and compare yourself to others in the Ranking
If you no longer want to receive notifications, reply to this comment with the word
STOPCheck out the last post from @hivebuzz:
Support the HiveBuzz project. Vote for our proposal!
Wow... I am impreseed. This is quite an awesome tutorial. I don't have the app but it is something worth the try. Thanks for sharing. Gave you a reblog!