Test ATX PC Power Supply / Probar Fuente de poder PC ATX

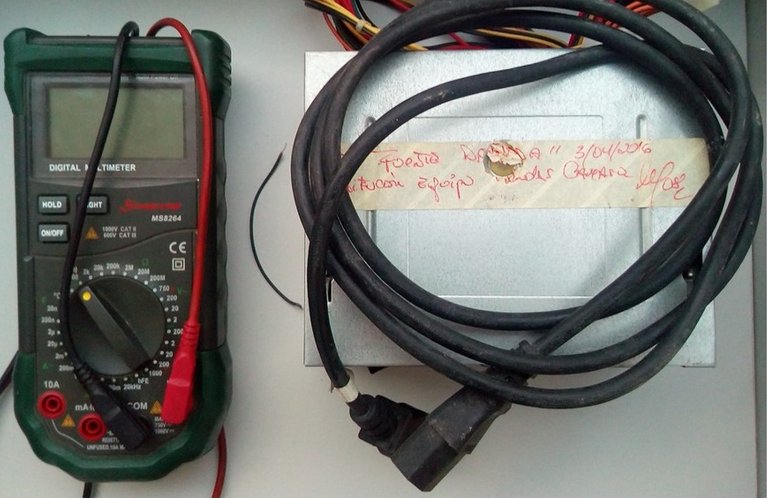
To test that a PC power supply is in good condition is very simple. We will only use the following: a multimeter or tester, a cable to make a bridge, a power supply cord and of course the power supply
Para probar que una fuente de PC está en buenas condiciones es muy sencillo. Solo usaremos lo siguiente: un multímetro o tester, un pequeño cable para hacer un puente, un cable de alimentación y por supuesto la fuente.
These steps will work for any PC power supply. The values of the voltages are generic, ie, all colors for any source should have the same values or approximate.
Estos pasos a seguir servirán para cualquier fuente de poder de PC. Los valores de los voltajes son genéricos, es decir, todos los colores para cualquier fuente deben tener los mismos valores o aproximados.

1º: Make Jumper / Realizar Puente
We must make a jumper between any "BLACK" and "GREEN" wire:
Debemos hacer un puente entre cualquier cable “NEGRO” y el cable “VERDE”:
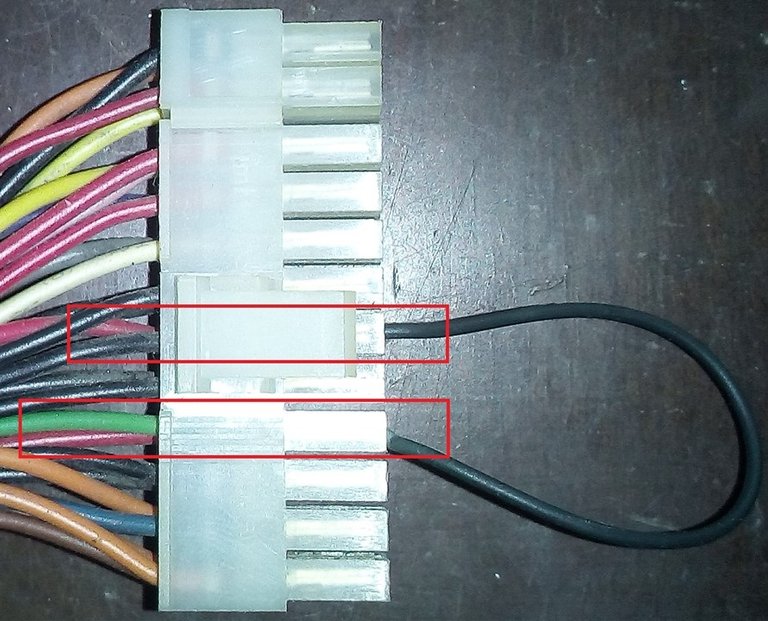
If this one has a switch and we press it, it should turn on, if on the contrary it doesn't have it when being energized with the outlet, it should turn on automatically. This will first indicate that the power supply is working.
Sí esta tiene un interruptor y lo pulsamos la misma debería encender, si por el contrario no lo tiene al estar energizada con el tomacorriente debería encender automáticamente. Esto en primera instancia nos indicará que la fuente de poder está funcionando.
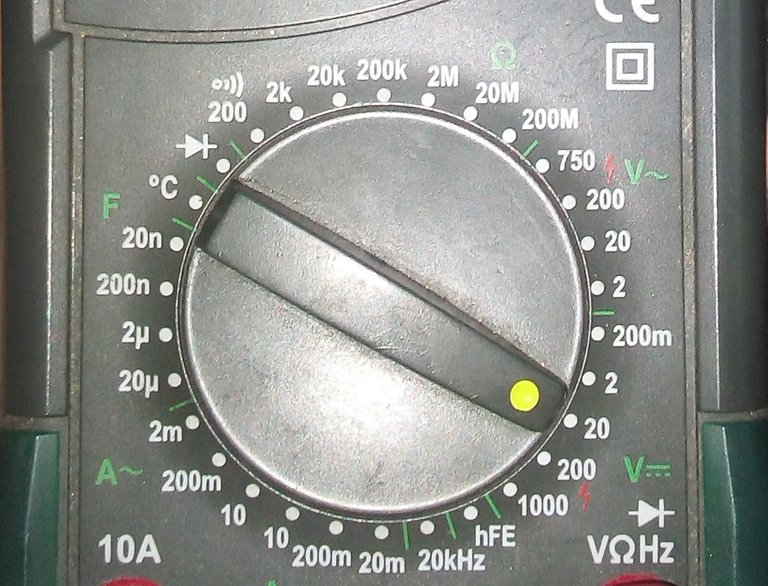
2º: Checking voltages / Comprobar voltajes
We do want to check that the output voltages are correct. We must use a multimeter in 20v DC scale.
Sí deseamos comprobar que los voltajes de salida están correctos. Debemos hacer uso de un multímetro en escala de 20v DC.
The output voltages for all of them will be the same (the potency can vary), they have a label attached with all the output voltages and amperages:
Los voltajes de salida para todas serán las mismas (lo que sí puede variar es la potencia), estas traen adherida una etiqueta con todos los voltajes de salida y amperajes:
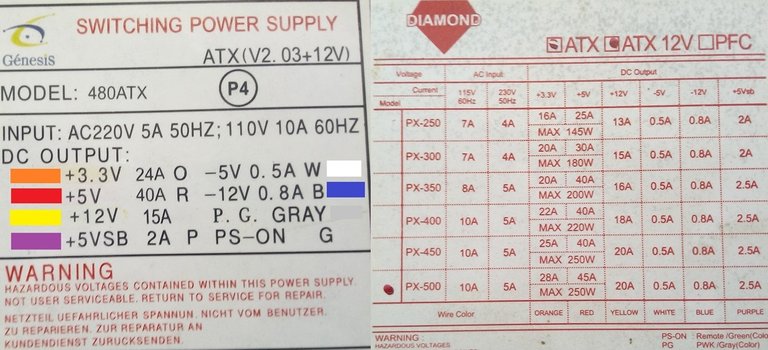
With the black tip of the tester we will make contact in any black wire, and with the red tip we will make contact in the colored wires. The output voltages will have to be approximate to those indicated on the label, for example:
Con la punta negra del tester haremos contacto en cualquier cable negro, y con la punta roja haremos contacto en los cables colores. Los voltajes de salida tendrán que ser aproximados a los indicados en la etiqueta, por ejemplo:
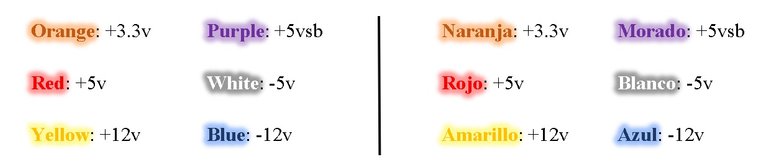
Any color we measure in any connector should give those values. In the case of purple cable, it is identified with Vsb meaning "Stand by Voltage", that is, a minimum operating voltage.
Cualquier color que midamos en cualquier conector debe dar esos valores. En el caso del cable morado, está identificado con Vsb significa “Voltaje Stand by”, es decir un voltaje de funcionamiento mínimo.

If you want you can see more details in this video I made:
Sí lo deseas puedes ver mas detalles en este video que he realizado:
Note: I took the video and photos with a krip k6 smartphone
Nota: El video y las fotos las tomé con un celular krip k6
