Save or “Export Multiple” in Audacity (ENG / ESP)

If you want to perform multiple saves on a single audio track, the free Audacity sound editing application has this useful option that makes our lives easier to separate songs.
Sí deseas realizar Guardado múltiple en una sola pista de audio, el aplicativo libre de edición de sonido Audacity, tiene esta útil opción que nos facilita la vida para separar canciones.
Before starting, we must have an audio file with multiple songs, in my case I downloaded a complete album from YouTube in a single audio track to make the example, you must also have at hand the times of each song (this was in the video description)
Antes de comenzar, debemos tener un archivo de audio con múltiples canciones, en mi caso he descargado un disco completo desde YouTube en una sola pista de audio para realizar el ejemplo, también deben tener a la mano los tiempos de cada canción (esta se encontraba en la descripción del video)
This is something very easy to do, just follow the next steps:
Esto es algo muy fácil de hacer, solo debemos seguir los siguientes pasos:
1st: Open our audio file with Audacity / Abrir nuestro archivo de audio con Audacity
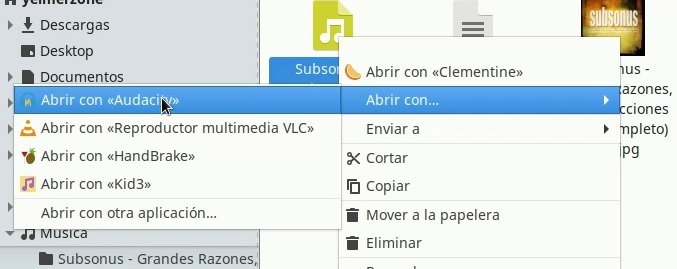
We can open it from the same program, or by right clicking on the mouse select "Open with...". -> "Open with Audacity".
Podemos Abrirlo desde el mismo programa, o haciendo clic derecho del mouses seleccionar “Abrir con..” -> “Abrir con Audacity”.
I commented previously we have at hand the times of separation of each song, this I obtained of the description of the video where I have downloaded it.
Como comenté anteriormente tengamos a la mano los tiempos de separación de cada canción, esto lo obtuve de la descripción del video donde la he descargado.

2nd: "edit labels" window / Ventana “editar etiquetas”
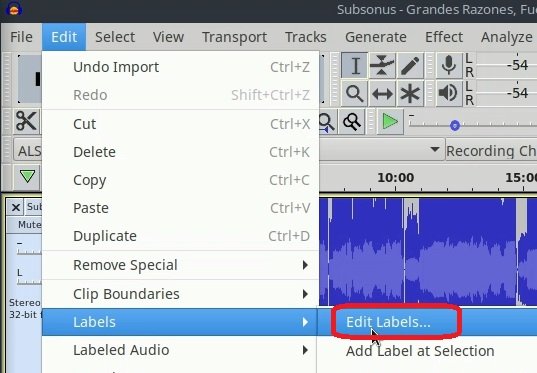
Click on the menu bar "Edit -> Labels -> edit labels".
Pulsamos en la barra de menús “Edit -> Labels (o etiquetas) -> edit labels (o editar etiquetas)”.
3rd: Add labels / Agregar Etiquetas
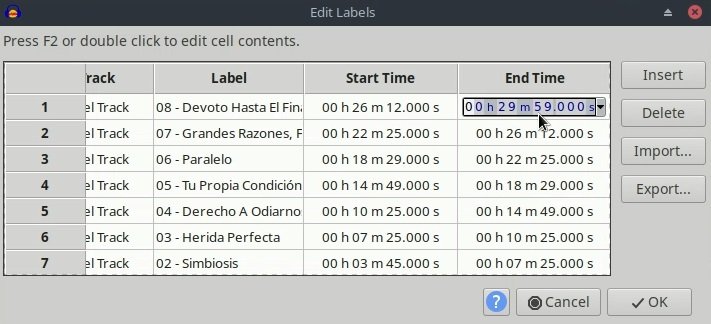
This is where we will place the name of the song in which time it begins and when it ends. For example, we copy the name of the first song. It starts at time 0:00 and ends at minute 3:45.
To add the next song we press Insert. And we do the same procedure. The beginning would be the end time of the previous song and the end would be the beginning of the next song. Procedure that must be repeated with each one.
Acá es donde vamos a colocar el nombre de la canción en que tiempo empieza y cuando termina. Por ejemplo, copiamos el nombre de la primera canción. comienza en el tiempo 0:00 y termina en el minuto 3:45.
Para agregar la próxima canción pulsamos Insert (o insertar). Y realizamos el mismo procedimiento. El comienzo sería el tiempo de finalización de la canción anterior y el fin sería el comienzo de la próxima canción. Procedimiento que se debe repetir con cada una.
When finish we press Ok / Al finalizar pulsamos Ok
4th: Adding Metadata / Agregando Metadata
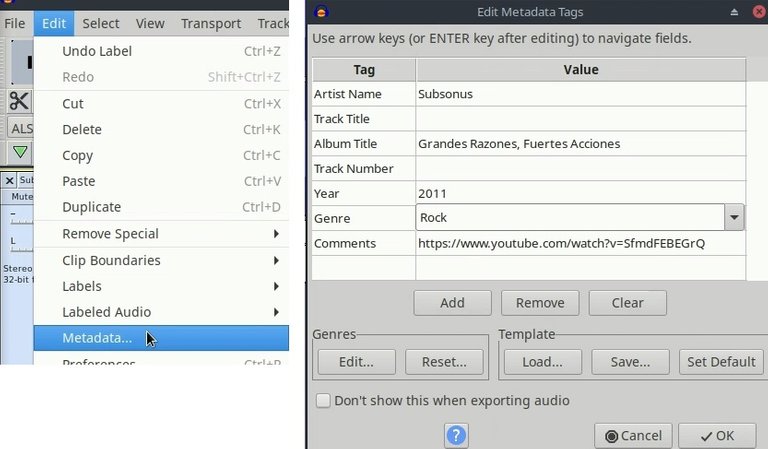
This is optional, before saving, we can identify the name of the album, year, etc. By clicking on "Edit -> Metadata"
Esto es opcional, antes de Guardar, sí queremos podemos identificar el nombre del álbum, año, etc. Pulsando clic en “Edit -> Metadata”
5th: Performing "Multiple Export / Realizar “Export Multiple”
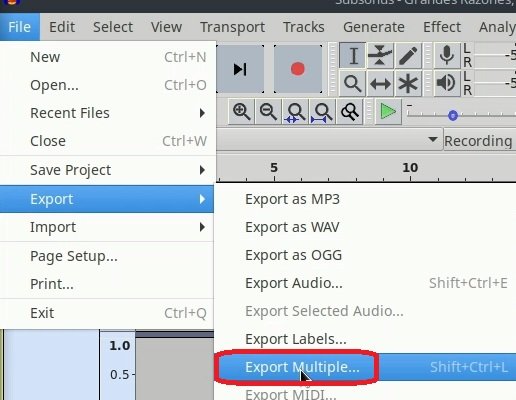
To do so, click on "File -> Export -> Export Multiple".
Para hacerlo pulsamos clic en “File (o Archivo) -> Export (o exportar) -> Export Multiple”.
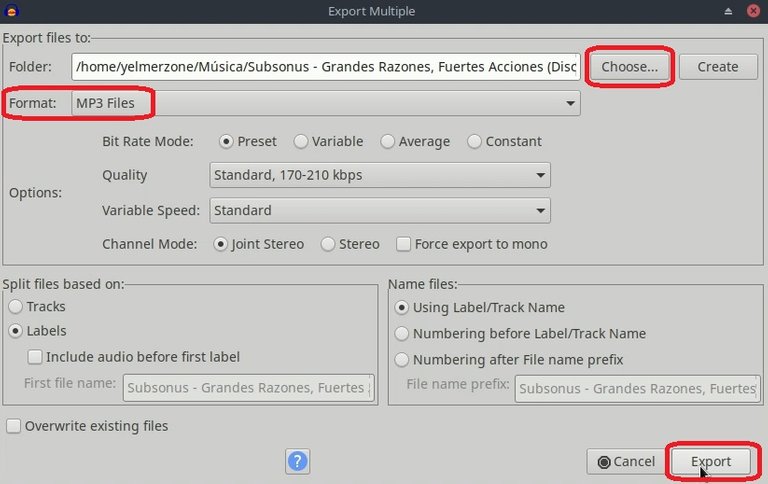
Select the format, for example "mp3", standard speed quality 170-210 kbps. We can also choose the directory where we want to save. And we press the "Export" button.
Seleccionamos el formato, por ejemplo “mp3”, velocidad standar calidad 170-210 kbps. También podemos elegir el directorio donde queremos guardar. Y pulsamos el botón “Export”.
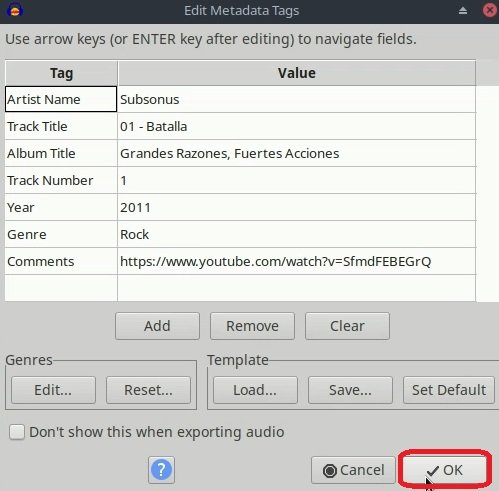
Then "Edit Metadata Tags" windows will appear, we press the Ok button repeatedly until it starts exporting.
Luego Aparecerán ventanas de “Edit Metadata Tags”, pulsamos el botón Ok repetidas veces hasta que comience a exportar.
And that's it, we already have the songs separated
y listo ya tenemos las canciones separadas
6th: Checking files / Verificar archivos
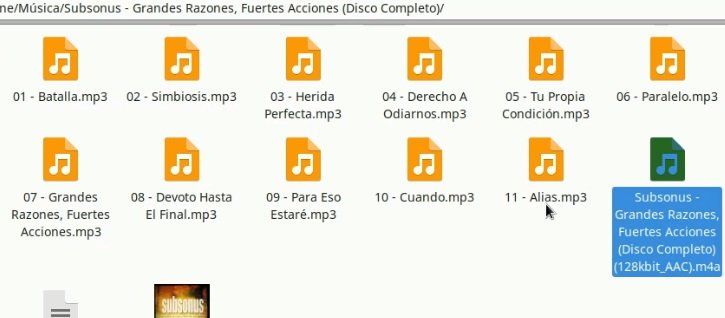
If we open the directory where we have decided to store each song, we should already be able to visualize them.
Sí abrimos el directorio donde hemos decido almacenar cada canción, ya deberíamos poder visualizarlos.
EXTRA DATA
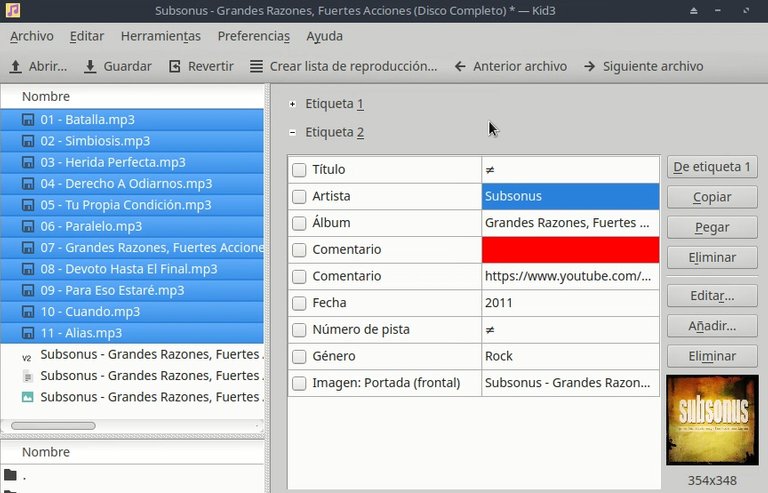
In my case I like to edit the metadata with another application, in this case I'm using Linux and I will use the program "Kid3", we open only one file with this application. And it will show us all the songs, where we can also add the album cover, and all the data we want in a much more comfortable way.
En mi caso me gusta editar los metadatos con otro aplicativo, en este caso estoy usando Linux y haré uso del programa “Kid3”, abrimos solo un archivo con este aplicativo. Y nos mostrará todas las canciones, donde también podremos agregar la portada del disco, y todos los datos que queramos de una forma mucho más cómoda.
If you use Windows you can modify it in the file properties, in the "Details" tab or in some other program.
Si usas Windows puedes modificarlo en las propiedades del archivo, en la pestaña "Detalles" o en algún otro programa.

With this we have already finished this tutorial, it is quite simple, I hope it will be useful for you.
Ya con esto hemos culminado este tutorial, es bastante sencillo, espero les sirva de utilidad.