Facing the Enemy | A Fractal Rendering Project
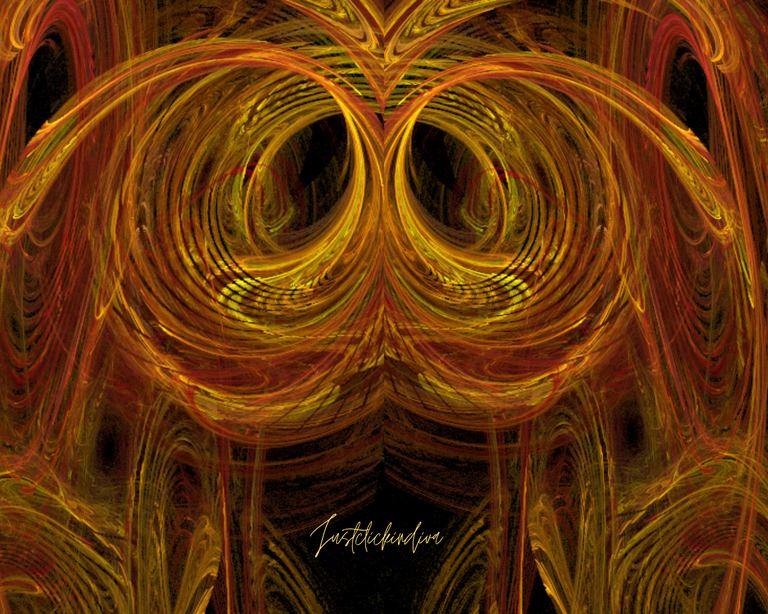
Image created by justclickindiva in Apophysis2.09 Fractal Rendering Program

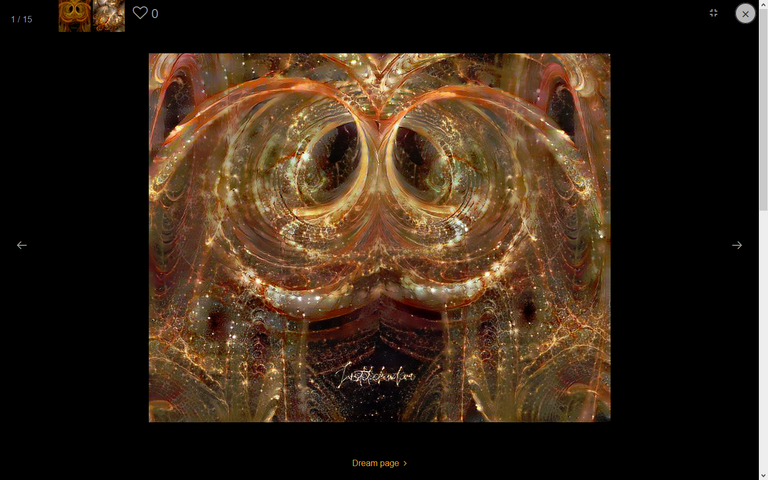
Hello everyone. I started my latest rendering not knowing what I wanted to accomplish. I just went with it. It didn't look like any recognizable object. But rotating the image gave me a new perspective.
So I kept re-positioning my triangle coordinates until the image looked like a vortex of some kind. Then I turned the image at an angle. I stepped back and took a long look at it. It looked like the skeleton neck of someone. And the large eye socket. Definitely, someone at odds with another person.
The colors turned out beautifully in the blend of red, orange, yellow, and brown. Trying to give it a name, I decided on *Facing The Enemy."
Here's how I created my Alien Art project:
I combined two digital programs.
1. Apophysis 2.09 Fractal Rendering Program
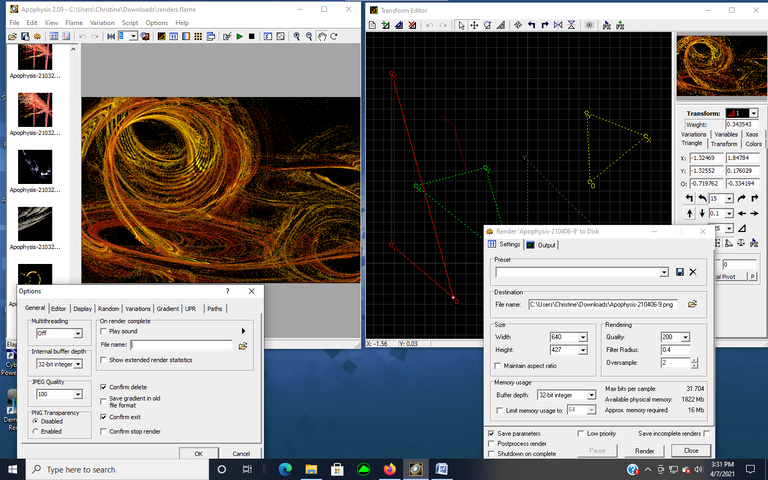
First, I knew I wanted to design a fractal. A fractal is an infinite mathematical shape that is represented by coordinates. To complete my Fractal Rendering drawing, I utilized the program Apophysis 2.09.
As I previously discussed, Apophysis 2.09 is a Windows application that is open sourced and utilized for rendering fractal flames. This program can also design and edit the drawing before rendering.
I also provided directions on how to create fractal drawings. To see complete instructions on maneuvering and manipulating the triangles, see my how-to post here.
With my current fractal project, I didn't want to render it transparent because I wanted the full background to appear. My first thought was that I'd duplicate the fractal in another program.
Here's how I created my fractal I named "Facing the Enemy."
NOTE: If you'd like to try the coordinates I used to reproduce the fractal, you're free to try these below, otherwise continue to learn how to manipulate the triangle coordinates and produce your own unique fractal:
| Triangle | X Coordinate | Y Coordinate | 0 Coordinate |
|---|---|---|---|
| 1 | -1.32469 (box 1) | -1.32552 (box 1) | -0.719772 (box 1) |
| 1.84784 (box 2) | 0.176029 (box 2) | -0.334194 (box 2) | |
| 2 | 1.15398 (box 1) | 0.575981 (box 1) | 0.609898 (box 1) |
| 1.23897 (box 2) | 1.46472 (box 2) | 0.792824 (box 2) | |
| 3 | -1.08672 (box 1) | -0.409183 (box 1) | -0.115766 (box 1) |
| 0.756479 (box 2) | 0.932334 (box 2) | 0.007579 (box 2) |
THE DRAWING GRID
To begin, you start with a blank drawing grid. To accomplish this, OPEN the program; then Open the TRANSFORM EDITOR.
To better see your design, I recommend utilizing a standard black background.
The array of colors look amazing once they're finalized against the black backdrop. You can also see your grid lines better when adding or re-positioning your triangle.
The grid line contains an anchored WHITE-colored triangle. This and can't be moved. The reason is to allow you to find your coordinates' distances from the original grid.
The grid also contains your first triangle colored RED to get you started. It sits on top of the anchored triangle. This is your 1st triangle, and can be moved.
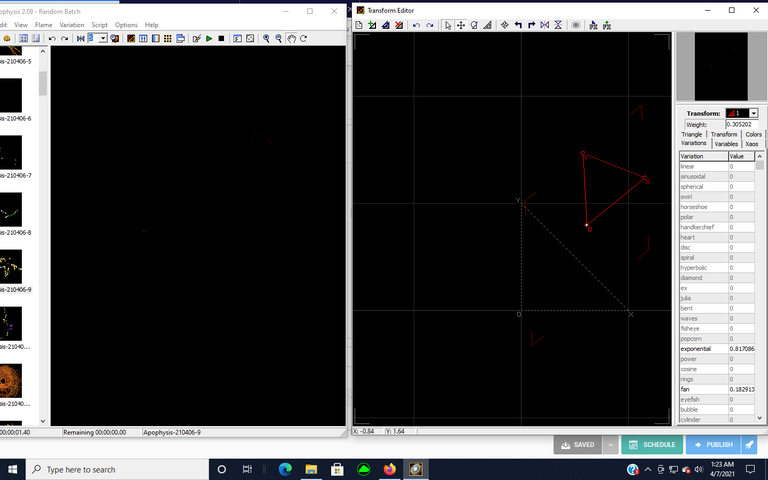

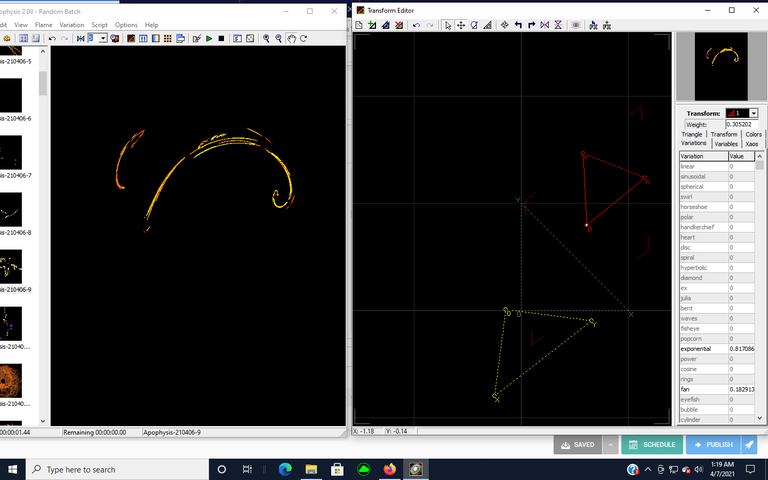
Let's start finding an image on the grid. Click on the circle near the X and Y coordinates of the RED triangle. I moved the coordinates of the RED triangle to see what image the movements would produce.
You can also change the shape of the image by using the Variations drop down menu in the TRANSFORM EDITOR. Feature shapes, such as circles, bubbles, cylinders, blurs, and hearts are a few of the variations.
Let's try the Variation EXPONENTIAL for a value of 0.817086.
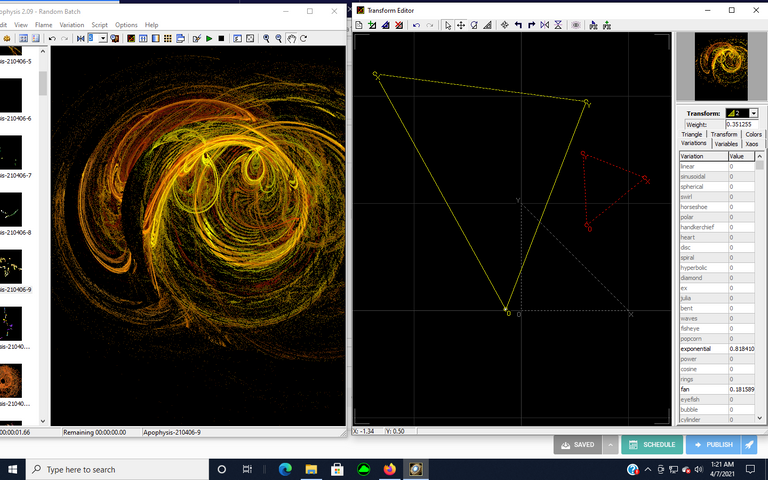
Next, let's add a second Triangle. It's color will be YELLOW.
I added my second triangle in YELLOW and moved the coordinates. You'll note that each triangle has it's own color. This makes each triangle distinguishable from each other. The color coordinates with Triangle 1, Triangle 2, Triangle 3, in the Transform box on the Transform Editor.
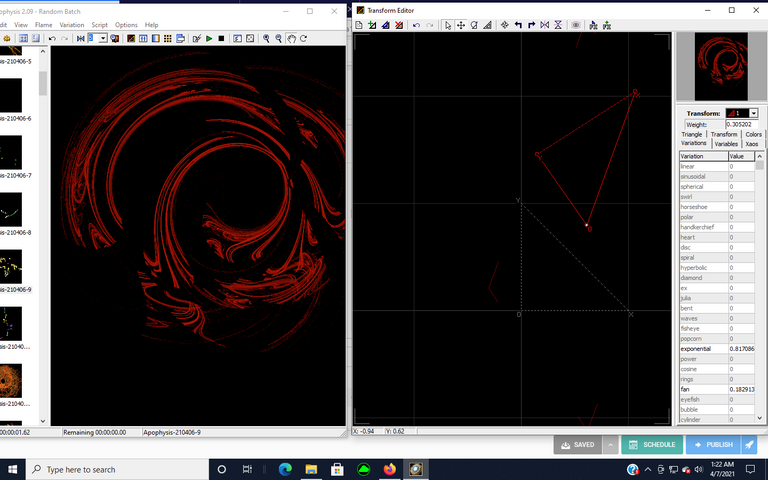
You can see in the view box on the left hand side how the image will look as you move the x and y coordinates. The movement may or may not produce an image. Just keep moving your coordinates until it locks onto a shape.
Continue moving this Triangle #2 until an image appears you like to begin drawing your fractal. DON"T MOVE Your Red Triangle #1. You're only working with Triangle #2 for now.
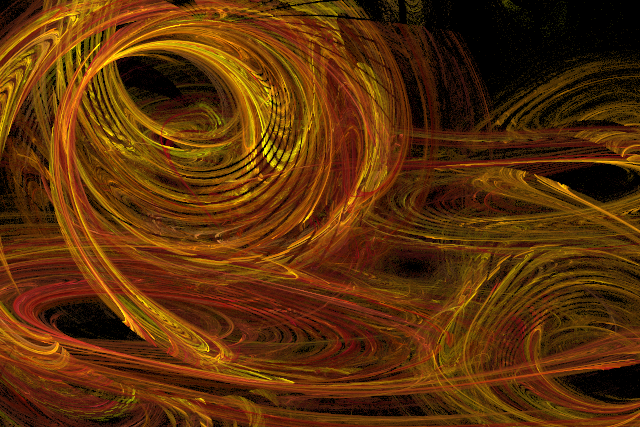
I like the direction my image is headed. Looks like it will be some type of spiral headed in a direction away from me.
Let's try some variation by adding a 3rd Triangle. This triangle will be colored GREEN.
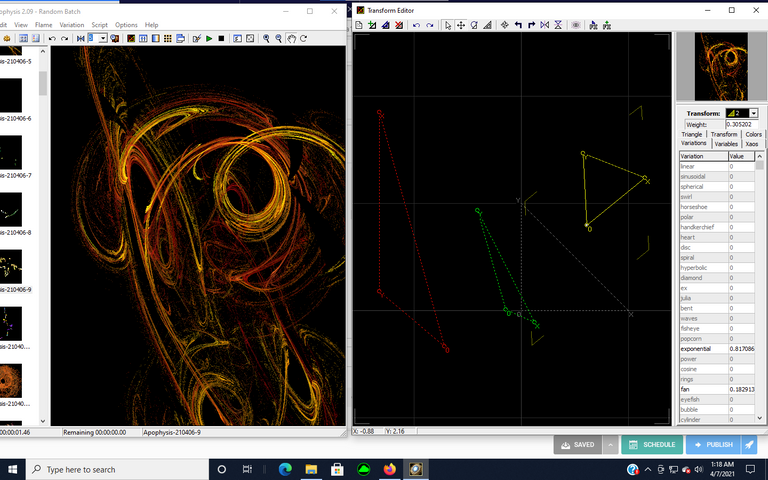
Now move Triangle #2 on the grid until you can get a blend with all the triangles and are satisfied with whatever image you want to portray.
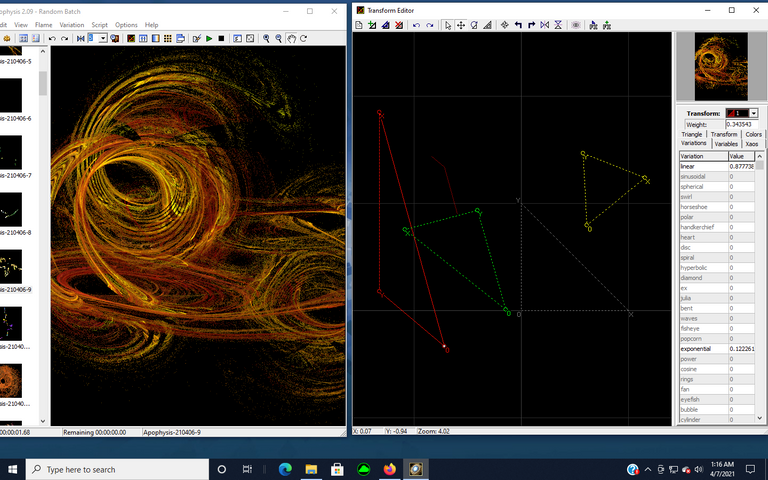
Below is the result of my leaving Triangle #1 in it's position. I move Triangle #2 close to Triangle #3 until I get a spiral shape figure.
I'm satisfied with my image. However, you can continue to move any of the triangles to create a completely different image that the one I produced. That's the beauty of working with fractals. Sometimes you can create an image within an image and go in a completely different direction.
Now it time to save my fractal. Saving the elements of a fractal drawing means you have to RENDER the Flames that were used to create the image.
To Save your image to disk:
- Click the FLAME Tab:
- Select: the File Name. You can replace the Apophysis2.09 numerical name with one that will distinguish it from other fractals you create.
- Select: Size (typically 640 size)
- Click: Render to Disk
I hope you like my Fractal Rendering image.
However, immediately I knew I wanted to take this fractal further in development.
Knowing I wanted to design a different version of the image, I decided to use Canva as a design too so that I could manipulate the image and duplicate it to see what shape it would take.
2. CANVA
I love the Canva drawing program to create beautiful collages from images. I uploaded my Facing the Enemy Fractal into Canva.com. I positioned the fractal inside the Canva frame.
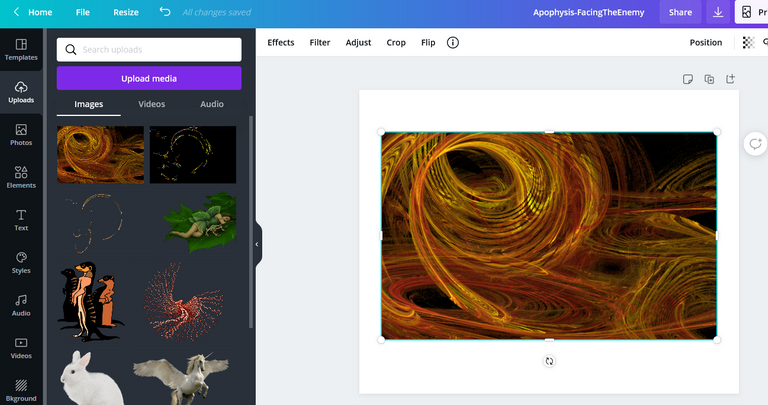
Next, I rotated the image and enlarged it so that it could fill the left hand side of the page.

Third, I duplicated the image and rotated the second version horizontally so that it would appear on the right-hand side of the screen and create a fuller image. That way, the one small fractal looks like it fills the page. The design result was nice in which the image looks like two enemies facing each other ready for battle.
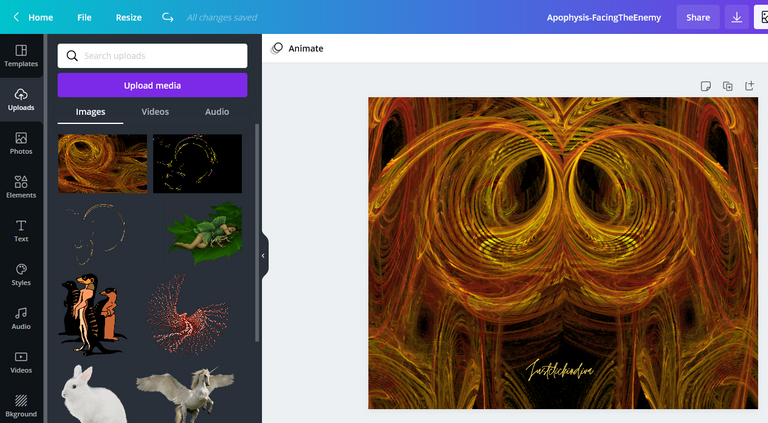
I then saved my Canva version of my Facing the Enemy fractal. The design turned out beautifully.
However, I'm never satisfied if I think I can try to take my designs one step further.
My next program is an image enhancer. I've utilized this program before to create amazing images in all color arrays and backgrounds.
So, I decided to give my fractal a try in the DeepDreamGenerator program.
3. DeepDreamGenerator
Here are the parameters and style I used to create my deep dream image:
Type:
Deep Style 2
Used settings:
Enhance: None
Resolution: 0.6MP
Iterations Boost: x1
Style Weight: 50%
Style Scale: 100%
Preserve Original Colors: No
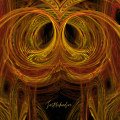

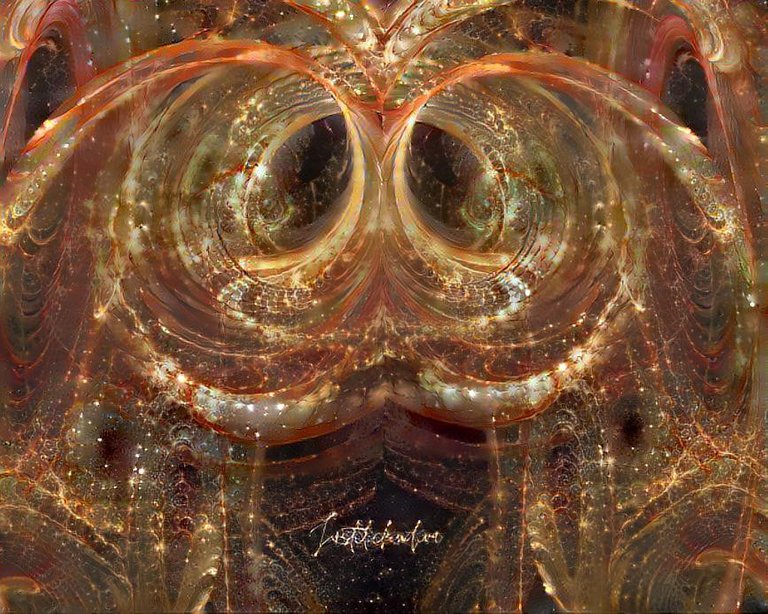
Isn't that a beautiful enhancement.
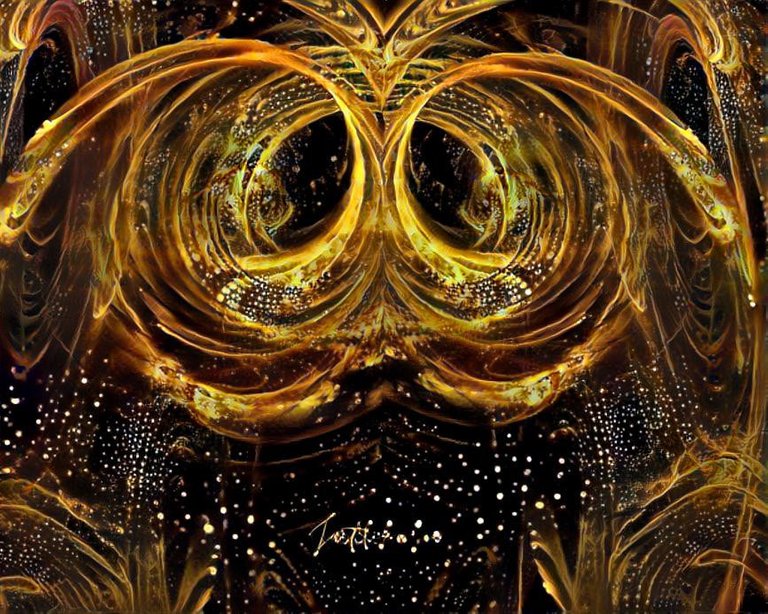
Below is another enhancement version.
Thanks for taking the time to view my post and my images.
Let me know below which version you prefer, the original fractal or the enhanced ones.
Also, if you'd like to try any of the programs I mention here, just let me know below, and I'll help if you require any.
@flaxz initiative #iamalivechallenge (Published my Fractal Rendering Drawing post today)
Thanks,
@justclickindiva
Happy rest of the week everyone with whatever your endeavors.

SOURCES:
a) JustClickindiva's Footer created in Canva utilizing its free background and images used with permission from discord admins.
b) Unless otherwise noted, all photos taken by me with my (i) Samsung Galaxy 10" Tablet, (ii) Samsung Phone, & (iii) FUJI FinePix S3380 - 14 Mega Pixels Digital Camera
c) Purple Butterfly part of purchased set of Spiritual Clip Art for my Personal Use
d) All Community logos, banners, page dividers used with permission of Discord Channel admins.
e) Ladies of Hive banner used with permission of and in accordance with the admin's guidelines.


View or trade
BEER.Hey @justclickindiva, here is a little bit of
BEERfrom @pixresteemer for you. Enjoy it!Learn how to earn FREE BEER each day by staking your
BEER.GORGEOUS (though of course, an enemy)!
Beautiful.
Digital art is just so interesting, aren't they? I also do wanna learn digital art but I just dont have much time haha.
Yes, it is beautiful in design. However, it does take quite a bit of time to learn. Then it takes up many hours to design it.
Thanks for taking the time to stop by and visit my digital art post. I appreciate your support and engagement. Talk to you soon.
I would love to see more from you and keep in touch. Followed.
Hi @justclickindiva ,
it is impressive what you do, I can imagine the time and effort you put into this project, no doubt that all the work is reflected in the quality of your work, can I ask you how long it took you to learn how to do this kind of work?
I'm promoting That curation trail on HIVE and it would help me a lot if you forward it, You can also check it yourself: you might find it interesting to join, I'd love to hear your comments.
Hello @trabajosdelsiglo Thank you for visiting my digital drawing. I have to admit that it took me about a month to really learn what I was doing with each program in the step to producing the digital art. Sometimes I utiliae one program. Other times I send the original art through one or two more processes to completion.
It has taken me varying times to learn each digital program. The Apophysis 2.09 is by far the most difficult. I still have not fully grasped the entire concept of fractals and rendering the flames. It took me about 1 month to just learn the basics. I've found that the more I work with all the programs to become familiar with them, the more I'm learning. I can't work on them daily.
Project Hope
As far as the curaion trail and promoting it, I visited the link you provided. Project Hope sounds like a good Community when it began. I just read a post from the Community account that requested that no one promote Project Hope at this time due to the plagiarism and downcoting issues they are experiencing right now. In the post, it seems as through some members of that Community had spread the word on other social media such as WhatsApp that Project Hope was a place to obtain large votes in exchange for setting the account as beneficiary. That, and other problems with members brining on family members and others has questioned the integrity of the project.
I hope you understand that I won't be able to support promoting Project Hope Community at this time.
Thanks for taking the time to engage with me. Good luck to you and take care.
Congratulations @justclickindiva! You have completed the following achievement on the Hive blockchain and have been rewarded with new badge(s) :
Your next target is to reach 7250 replies.
You can view your badges on your board and compare yourself to others in the Ranking
If you no longer want to receive notifications, reply to this comment with the word
STOPSupport the HiveBuzz project. Vote for our proposal!
This is s lovely piece of art, great job on this❤️