Commission #23 Phynesian Prairie Unicorn
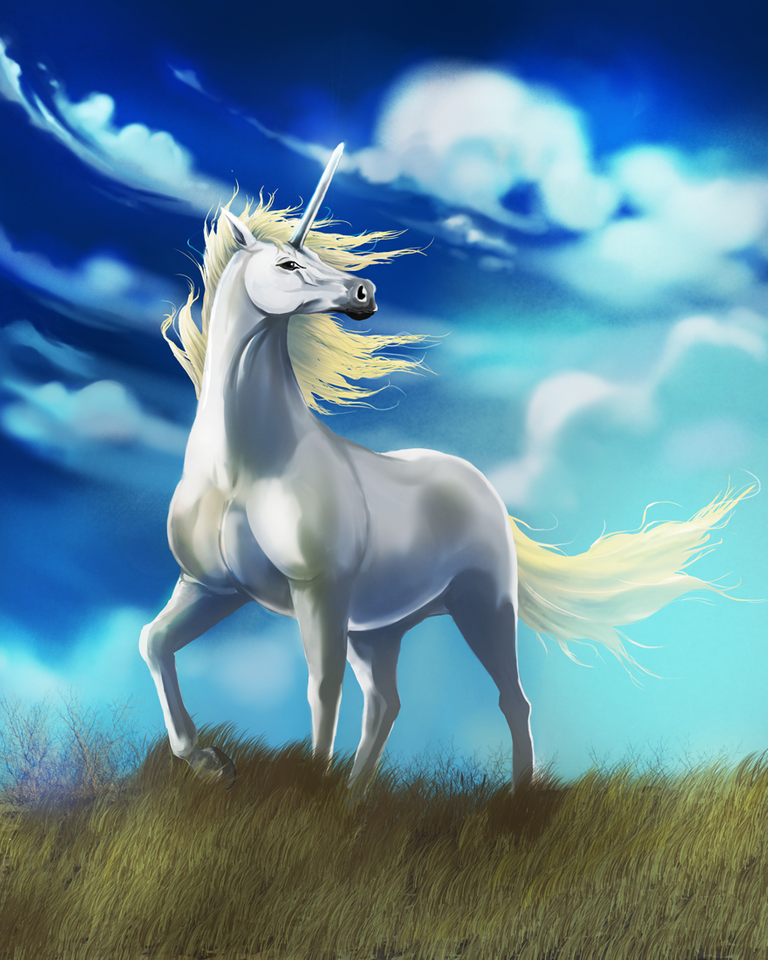
I know what I am, I know what I represent, I know the extent of my power. I advance to the meadow and stop to admire the surroundings, I realize that this time I am too close to humans. The immortality of my species has always made them jealous, we are mythical, faithful, pure and we can be noble.
Since the beginning of time we have been hunted and loved for having certain faculties, such as giving superhuman strength to those who use it wisely, or healing through our blood, but they persecute us believing that they will obtain eternal life through our sacrifice. Besides, the metal that comes out of our head is coveted for having an unmatched edge, capable of cutting through any material. But they are idiots, fools who do not know the misfortunes that come with hurting us and wanting to take our power by force.
But today I will share my beauty and magic with you, keep reading and see how this commission has been developed for @smanuels.

Tools:
- Wacom Intuos 4
- Medibang Paint
- Photoshop
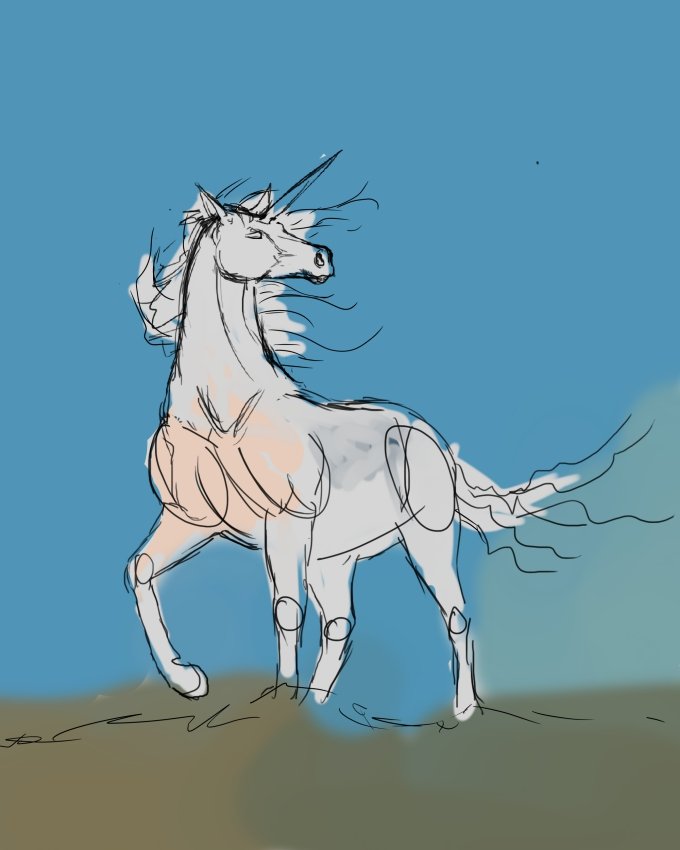
-Step 1:
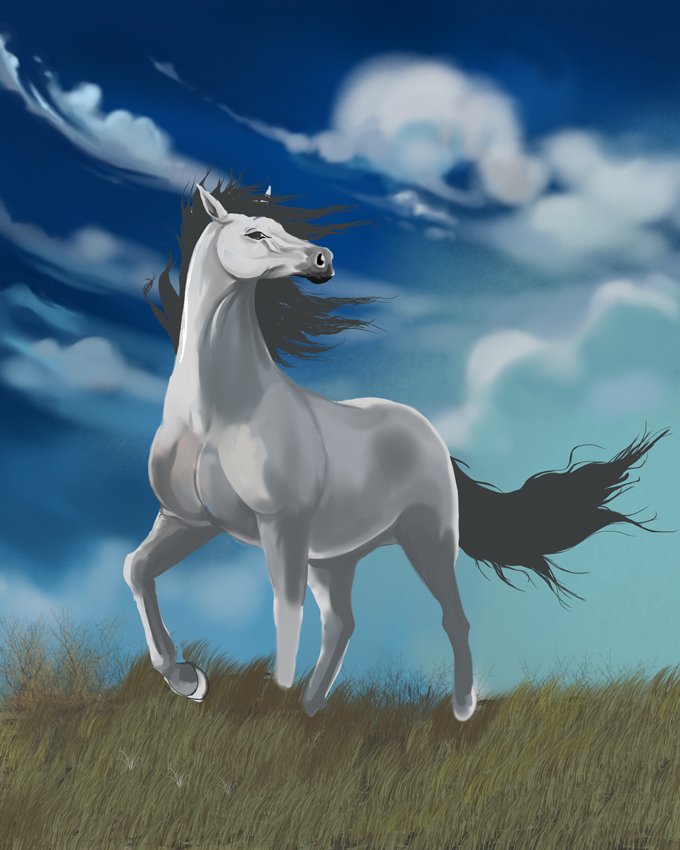
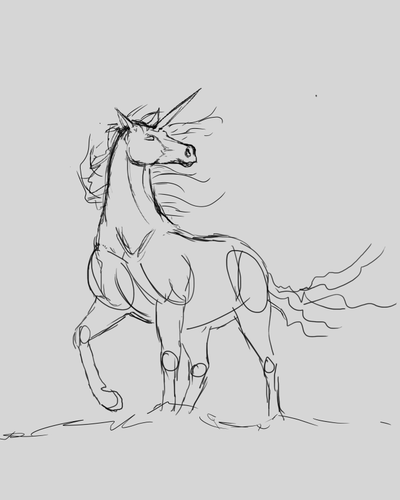
Initially, I established the posture and structure of a normal horse, I only had to add the silhouette of a horn to make it a unicorn, the hair of the mane and tail would be the ones that would give dynamism to the illustration.

-Step 2:
In two new layers, I added the coloring, in one of them I made the background and the other I left it to work the silhouette of the unicorn. I wanted to work with a palette of warm tones, since the scene would be in daylight, but these base tones were a little opaque.
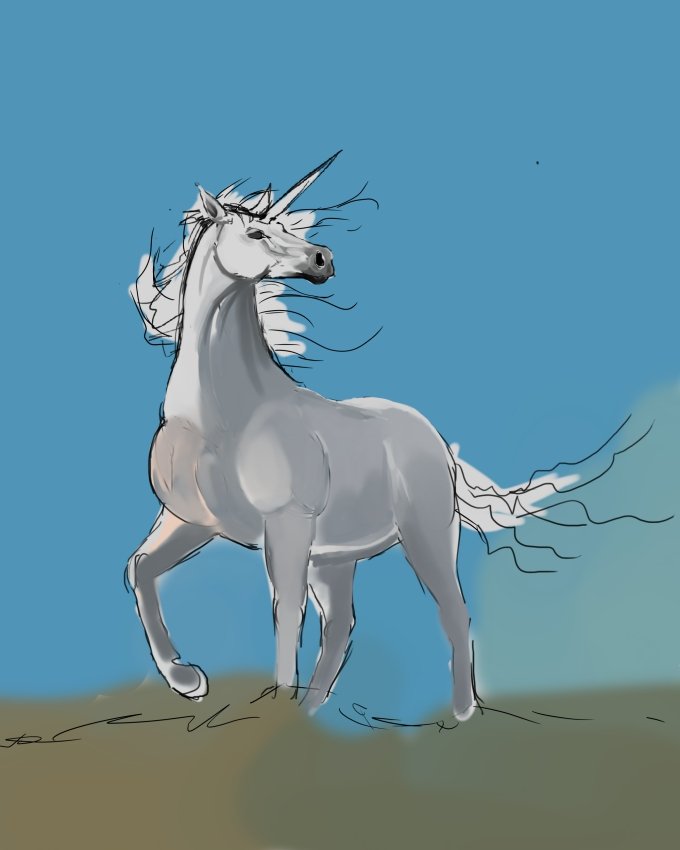
-Step 3:
On the outline I began to detail, I do it this way to be able to cover the lines of the sketch, always looking for the semi realism and the depth in the illustration.
 |  |
|---|
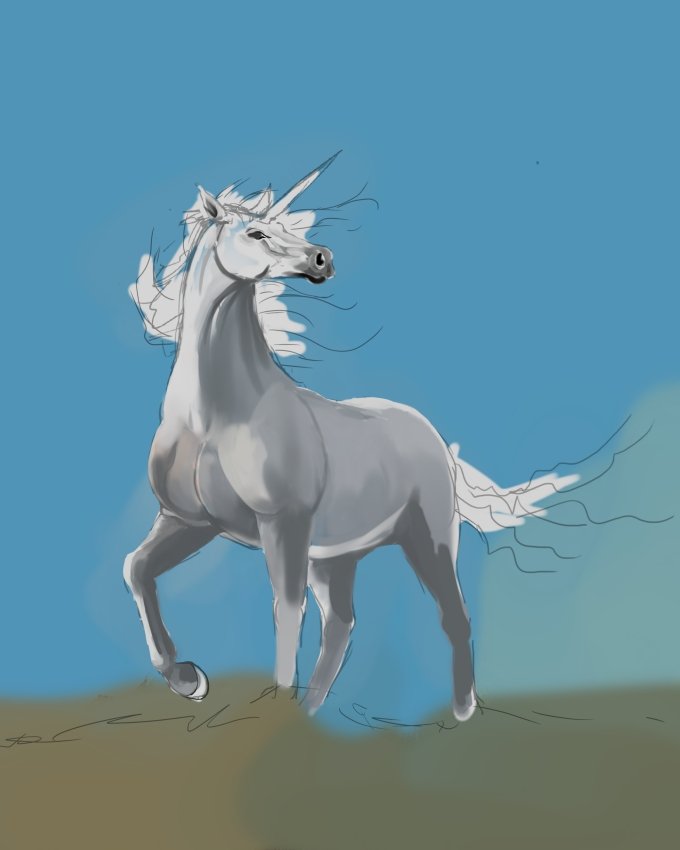
-Step 4:
Here everything gave a great jump, let's talk about the most outstanding and with better result, the grass, in spite of looking very well done and having an incredible finish, was the easiest thing to do, since some time ago I downloaded a pack of brushes for grass and turf and there is just one that was the right one for this, I only had to select the size and color desired and paint from one side to the other with it. In the sky there was more work, since I had to use a diffuse brush and to go coloring smoothly the clouds, always trying to maintain that perspective and sensation of movement in the sky so that the illustration was not static, but that you know that those clouds are moving.
-Step 5:
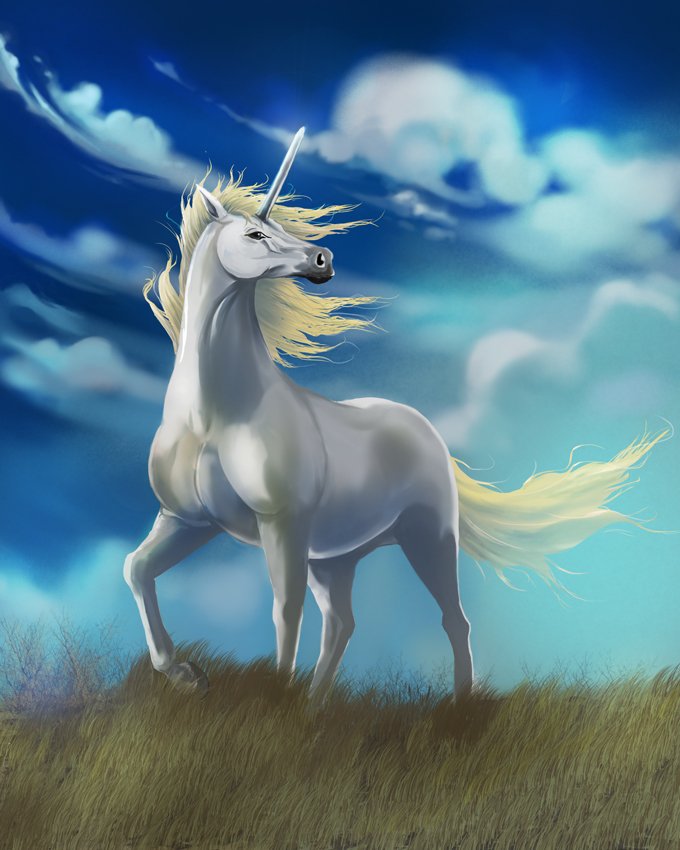
Finally comes the magic, as you can see, the hair of the mane and tail was not gray, was the silhouette that I had established to color the hair then, I have taken a blond with white highlights. On his forehead there is no horn, that is a sword, so it shines a little more due to its metallic texture, in the sketch I had made it pointed and it was a mistake, that is not the right shape of a sword. As I said at the beginning, the colour palette is too dull for a daytime scene, so with my wonderful friends the fusion modes "overlay", "soft light" and "Dodge colour" I gave that magic touch to the illustration, although in the end I had to increase the brightness a little more to the whole canvas.
I'll leave you a little gif with the whole process in it, so you can better appreciate the step by step.

See you in a future post!
Thank You for Supporting My Artwork
@tipu curate
Upvoted 👌 (Mana: 40/56)
Thanks!
Gracias por compartir tu contenido con la comunidad de El Arca (@elarca), el mismo ha sido votado por nuestra iniciativa de curación artística @stellae. Si deseas puedes delegar HP al proyecto: Delegate 25 HP Delegate 50 HP Delegate 100 HP Delegate 250HP Delegate 500HP
Amazing work