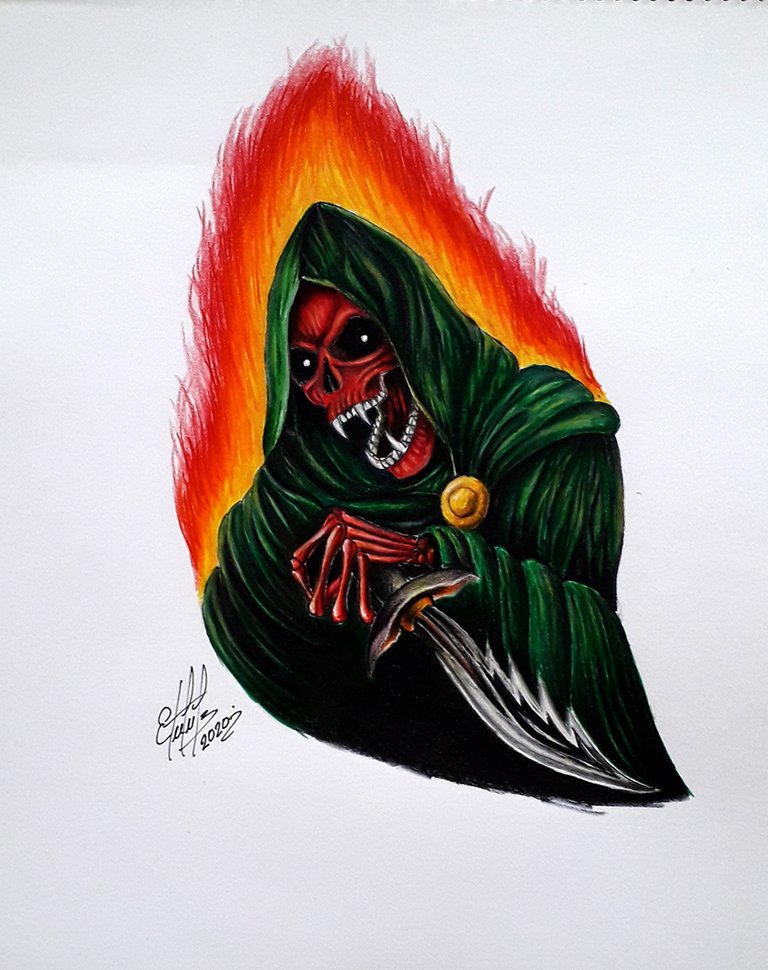
Terrifying Red Skull. I draw with colored pencils and markers.. Aterradora Calavera Roja. Dibujo con lapices y marcadores de colores.
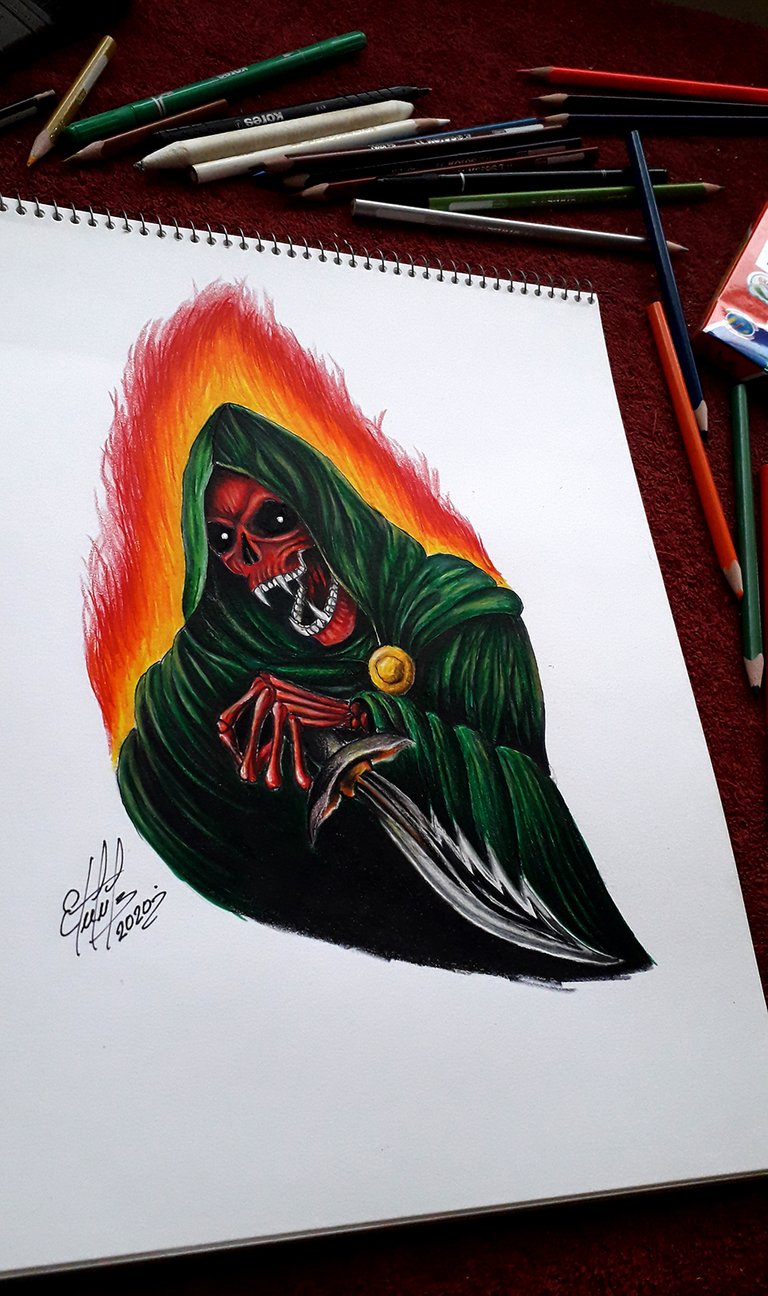

Hello friends and lovers of drawing, today I want to present a new portrait in realistic drawing and this time celebrating the Halloween holidays I draw an illustration of a fictional character and its name. The Red Skull.

Hola amigos y amantes del dibujo hoy les quiero presentar un nuevo retrato en dibujo realista y esta vez celebrando las fiestas de Halloween dibuje una ilustración de un personaje ficticio y que tiene como nombre. La Calavera Roja.
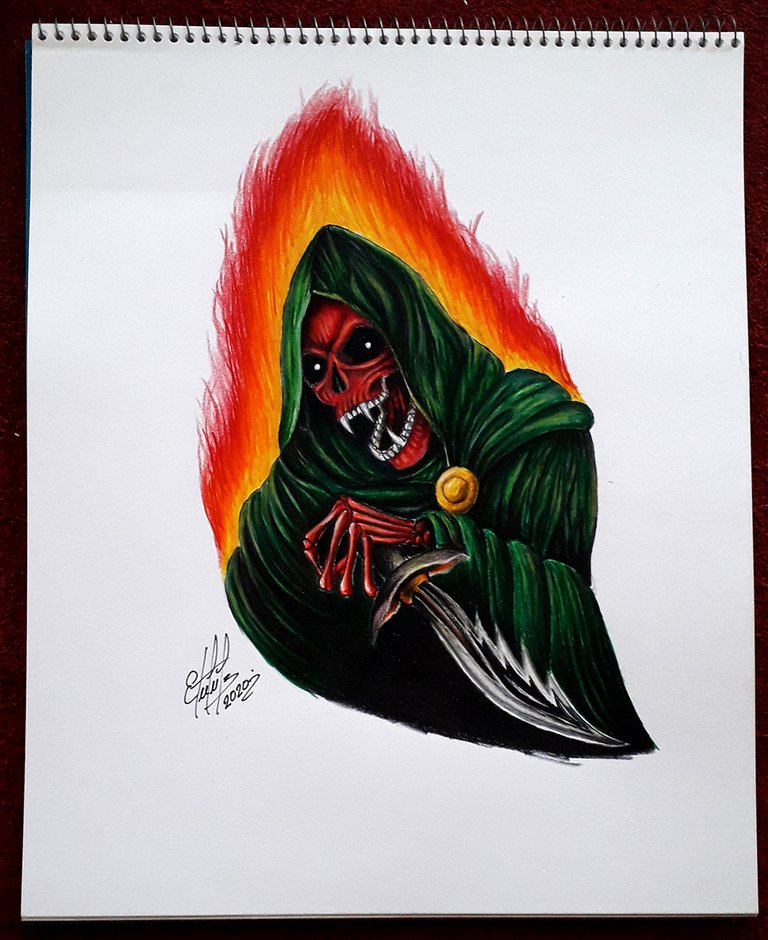
As part of the Halloween parties I decided to make a different drawing and trying other techniques and for this I used an image as a reference of the Red Skull character to personalize it and give it a more terrifying appearance.
Como parte de las fiestas de Halloween decidí hacer un dibujo distinto y probando con otras técnicas y para ello utilice una imagen como referencia del personaje Cráneo Rojo para personalizarlo y darle un aspecto mas aterrador.
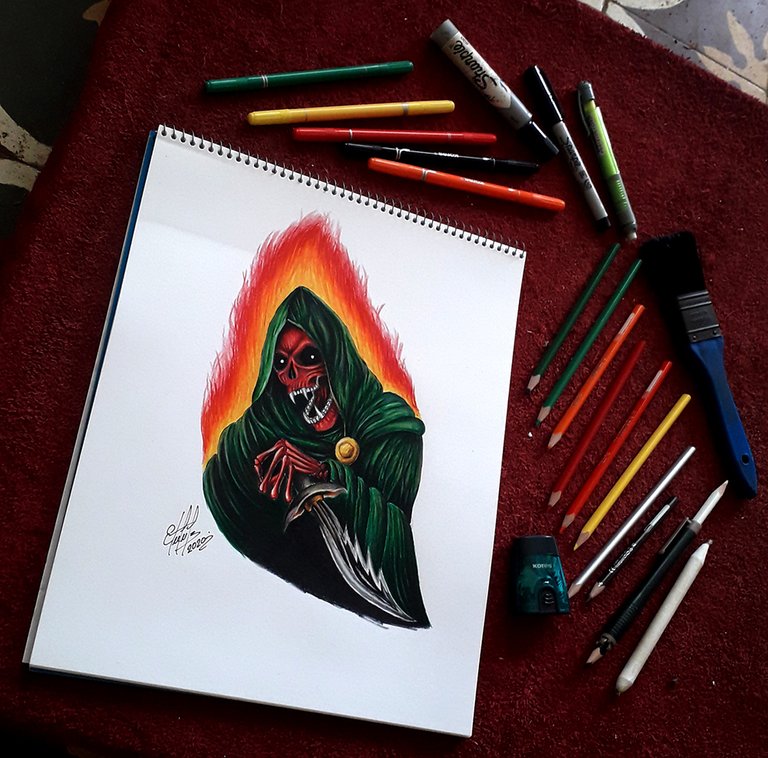
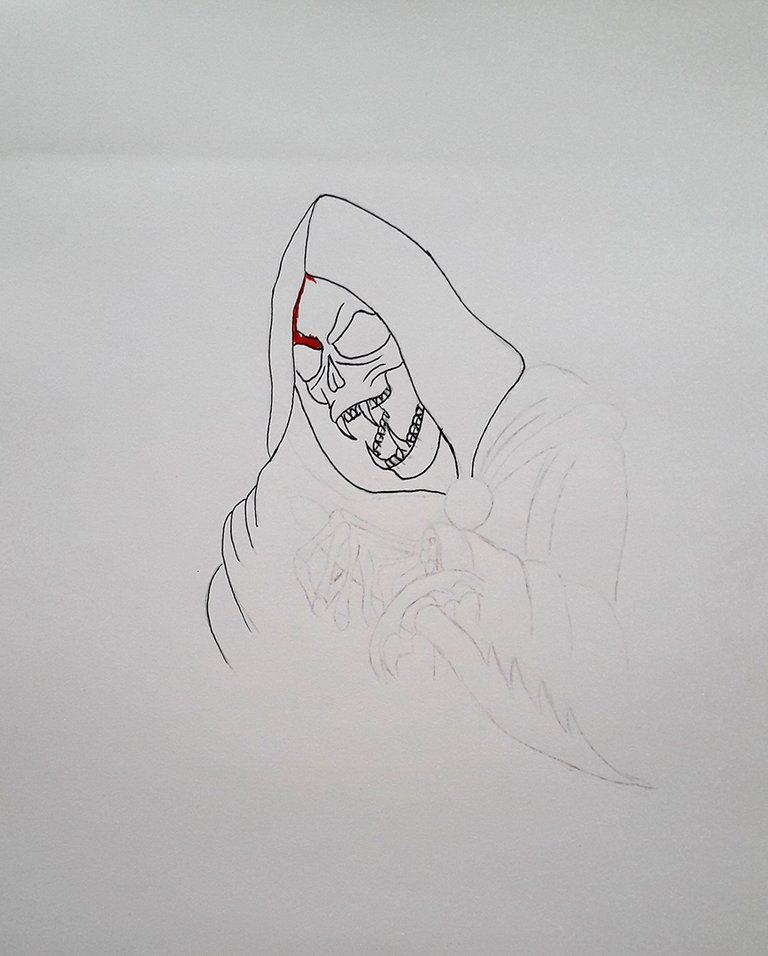
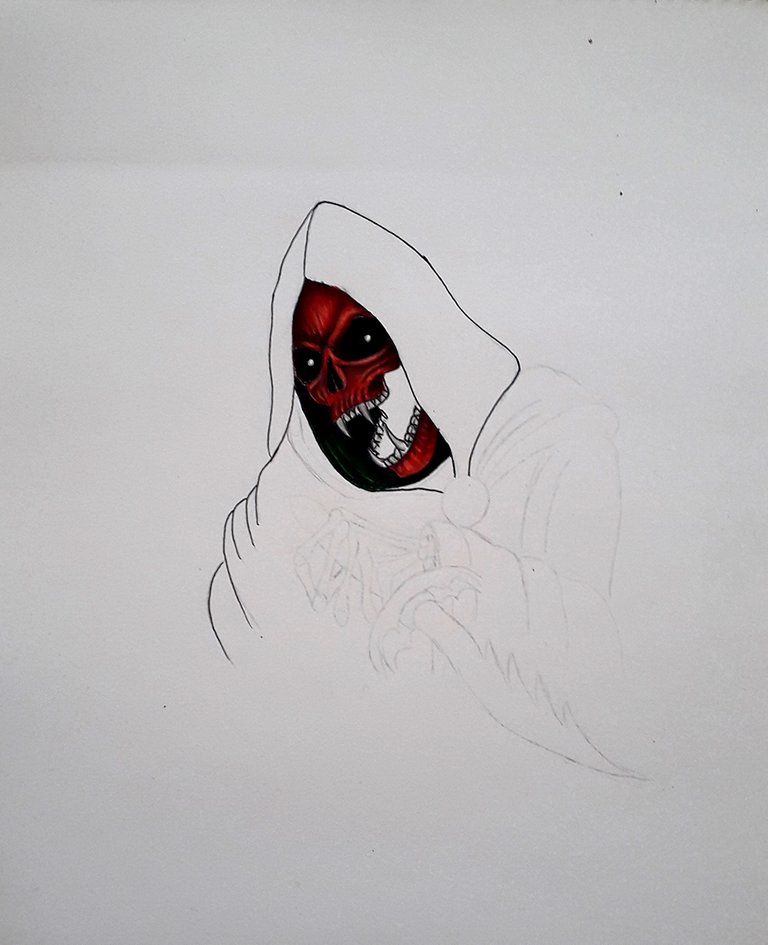
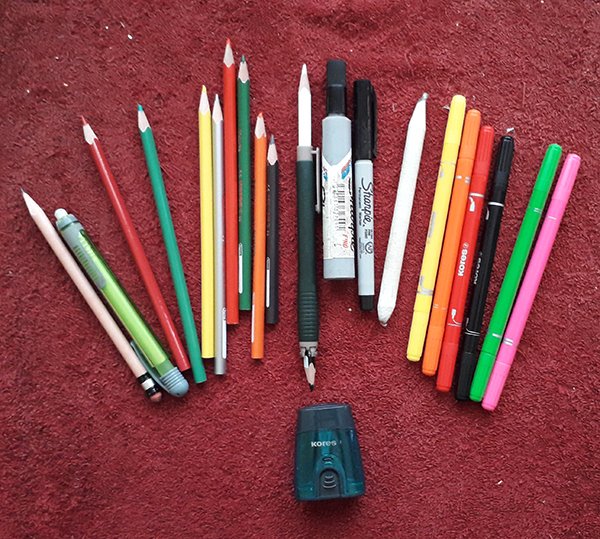
We begin with the following materials which are the combination of school colored pencils and markers. And to start drawing I began to create the sketch of a skull with fangs together with the cloak that covers it. Then I start to highlight the lines with the black fine point marker creating the outline.
Comenzamos con los siguientes materiales que son la combinación de lápices y marcadores de colores escolares. Y para empezar a dibujar comencé a crear el boceto de un cráneo con colmillos junto con el manto que lo cubre. Luego comienzo a remarcar las líneas con el marcador negro de punta fina creando el contorno.
Finishing the outline we are going to use the colored markers and make a red base on the part of the skull. Then with the colored pencils with a darker red we begin to create the first shadows so that later with the combination of dark brown and black pencils we retouch the shadows even more and they are deeper. then with the combination of white and yellow pencils we create some highlights to give it volume.
Terminando el contorno vamos a utilizar los marcadores de colores y hacemos una base de rojo en la parte del cráneo. Luego con los lápices de colores con un rojo mas oscuro empezamos a crear las primeras sombras para que luego con la combinación de lápices de color café oscuro y negro retocamos aun mas las sombra y sean mas profunda. luego con la combinación de los lápices blanco y amarillo creamos algunos toques de luces para así darle volumen.
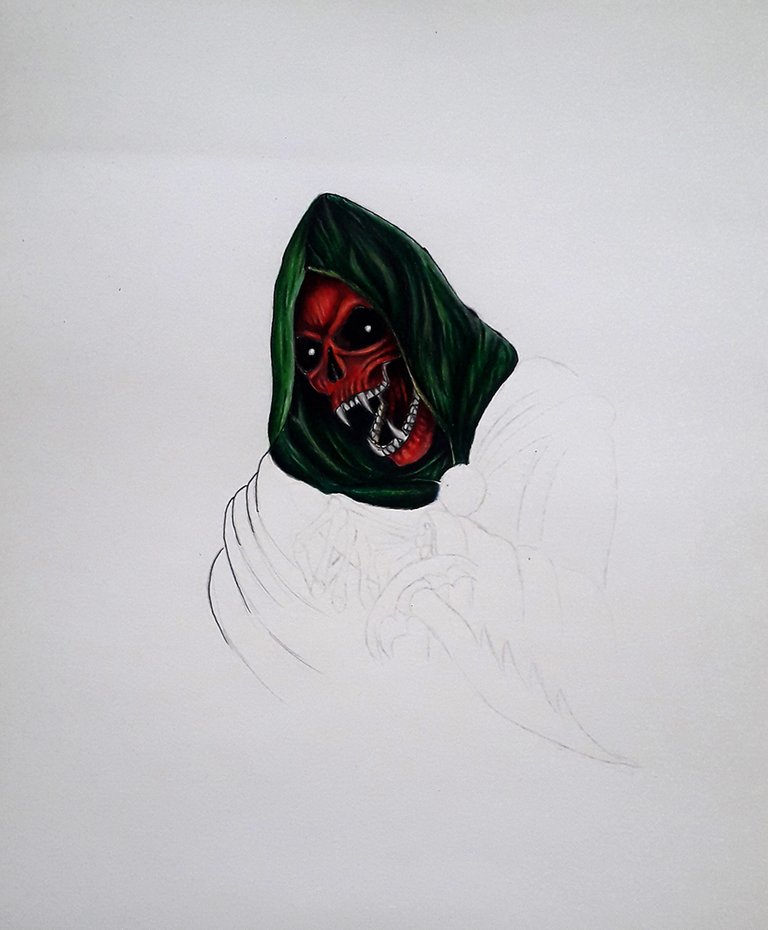
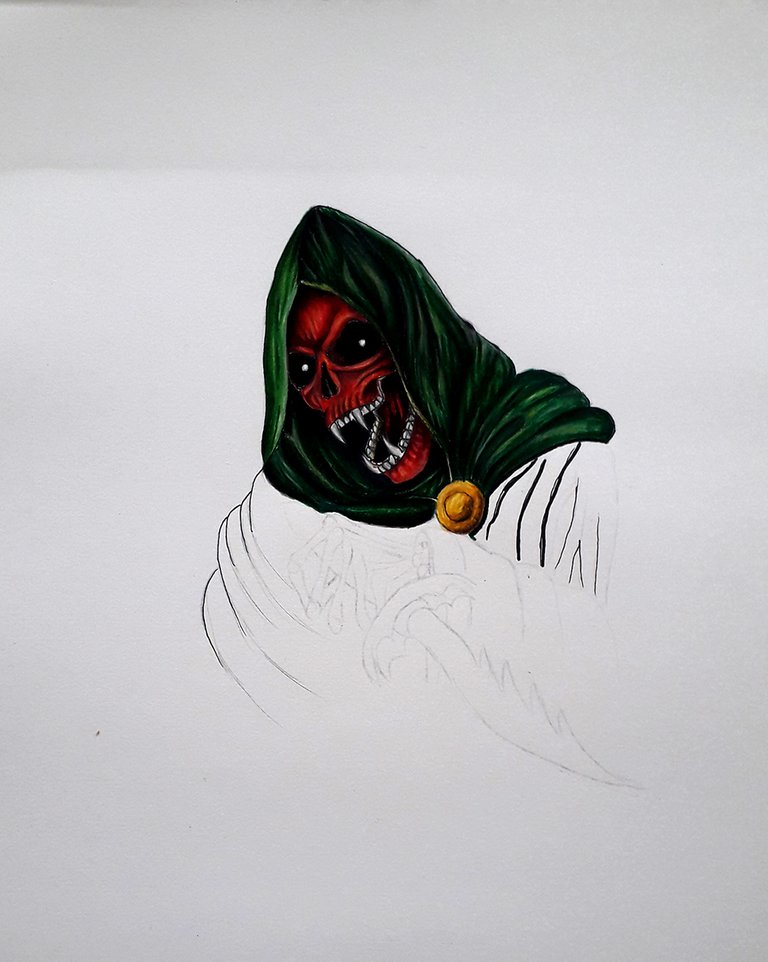
Now we continue with the layer or mantle that covers our character and this time we are going to use a light green marker as a base and fill in the entire layer so that later with the darker green and black pencil we begin to create the different shadows and wrinkles And to create even more volume with the white pencil, combining it with yellow, we created the different lights to give more life to the clothing.
Ahora seguimos con la capa o manto que cubre a nuestro personaje y esta vez vamos a utilizar como base un marcador verde claro y rellenamos toda la capa para que luego con el lápiz de color verde mas oscuro y el negro empezamos a crear las distintas sombras y arrugas. Y para crear aun mas volumen con el lápiz blanco combinándolo con el amarillo creamos las distintas luces para darle mas vida a la vestidura.
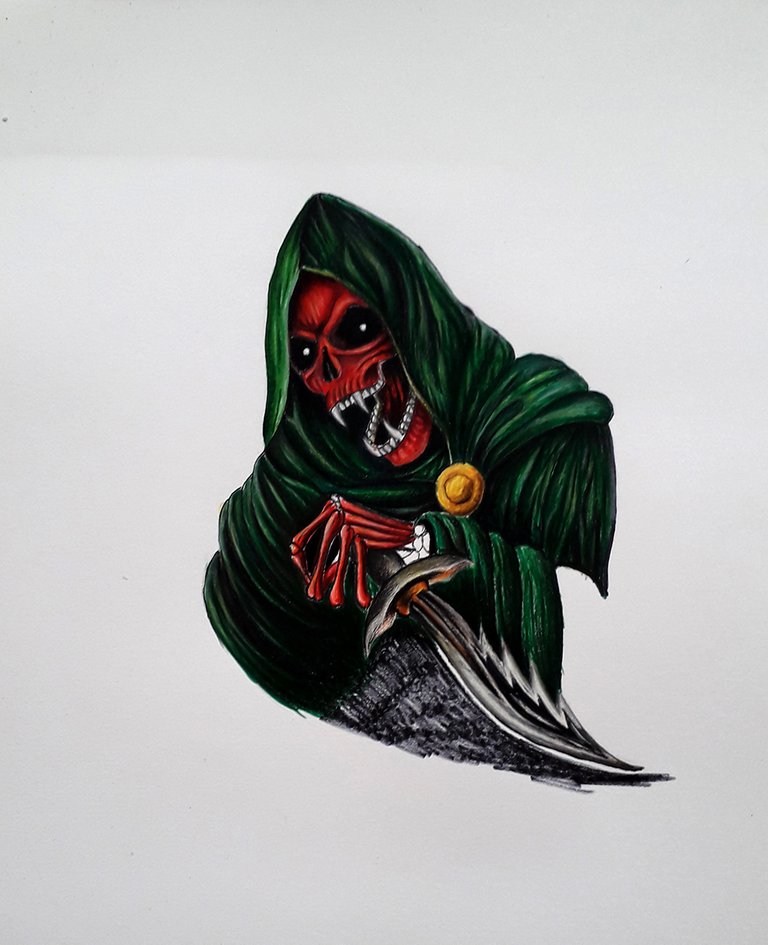
After the same technique is applied with the dagger. Applying a silver color as a base and then shading with darker tones such as a darker gray and then with black. Then to finish we create the fire that covers our character using first markers and then the yellow, orange and red pencils and with the blur expanding the colors making some final touches and having this horror character ready and finished.
Luego de la misma técnica se aplica con la daga. Aplicando como base un color plateado para luego sombrear con tonos mas oscuros como un gris mas oscuro y luego con el negro. Luego para terminar creamos el fuego que cubre a nuestro personaje usando primeramente marcadores y luego los lápices amarillo, naranja y rojo y con el difumino expandiendo los colores haciendo unos retoques finales y tener listo y terminado este personaje de terror.
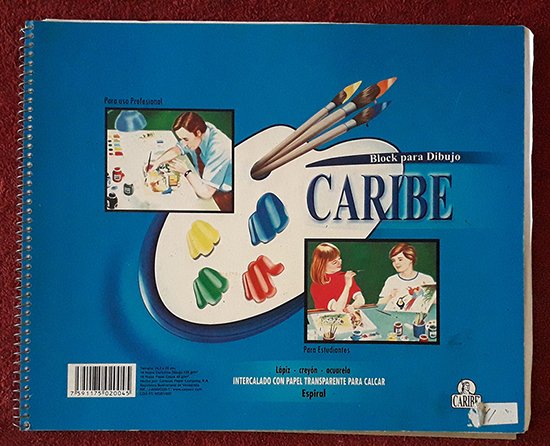
- School sketchbook of size 34.3 x 28 centimeters. with sheets of 135 g / m.
- Colored markers.
- colored pencils.
- draft.
- I blur.
- Sharpener.
- Cuaderdo de dibujo escolar de tamaño 34.3 x 28 centimetros. con hojas de 135 g/m.
- Marcadores de colores.
- lápices de colores.
- borrador.
- difumino.
- Sacapuntas.
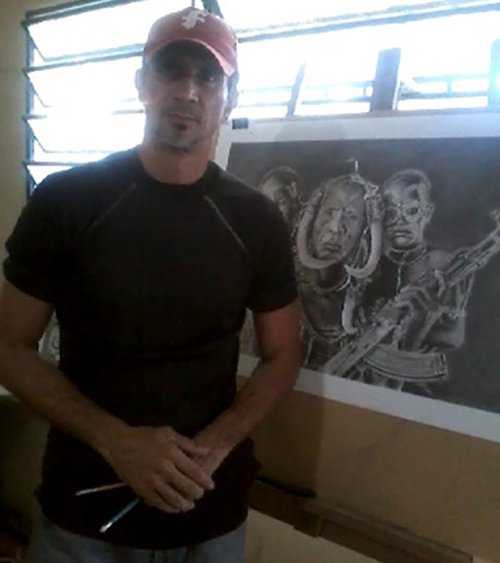
This is a hand-made and signed work. The images were taken with a Samsung J4 smartphone.
Este es un trabajo hecho a mano y firmado. Las imágenes fueron tomadas con un teléfono inteligente Samsung J4.

I hope you have enjoyed this work and awaiting your comments. Also thank you for taking the time to visit this Post. I wish you blessings and successes in each of your projects. My name is Elvis Sanchez and I am at your service and you can find me here or on my social networks. We will see each other again in the next project. See you soon.
Espero que hayan disfrutado de este trabajo y en la espera de sus comentarios. También darle gracias por tomar su tiempo en visitar este Post. Les deseo bendiciones y éxitos en cada uno de sus proyectos. Mi nombre es Elvis Sanchez y estoy a la orden y me pueden ubicar por aquí o en mis redes sociales. Nos volveremos a ver en el próximo proyecto. Hasta pronto.
![]()
Oye qué buen trabajo! Me gustó mucho este diseño, buenos detalles. Te felicito, tienes mucho talento amigo!
Muchas gracias amiga.
Excelente trabajo!
Gracias amigo.
Wow esto es arte, los colores arden de verdad, me encanto el resultado realmente llamativo e inspirador!
Me alegra que te gustara gracias por tu comentario. Saludos.
Que colores tan vivos, siempre haces cosas asombrosas y esta no es la excepción.
Gracias amiga. Saludos.
Esa túnica quedó genial, gran trabajo 👌
Hola que tal amiga. gracias por tu buen comentario.
Congratulations, your post has been upvoted by @dsc-r2cornell, which is the curating account for @R2cornell's Discord Community.
Thanks for your support.
Wow! Quedó genial. Me encantan los colores, el efecto que le da el sombreado y el fuego. Te deseo mucho éxito, tienes mucho talento ✨ Saludos.
Hola amiga como estas. Que bueno que te gusto y gracias por tu buen comentario
Excelente trabajo amigo @elsan.artes, me gustó mucho la forma en que usaste los colores, quedó realmente genial.
Recibe mis saludos y mejores deseos de éxito.
Saludos mi amigo y gracias por su apoyo y comentario. Tambien le deseo muchas bendiciones y éxitos.