[ESP-ING] Tutorial de Mandala paso a paso - Mandala step-by-step tutorial

Hola amigos de hive un gran saludo.
Hello friends of hive a great greeting.
Hoy quiero compartir con ustedes un mándala hecho en CD, según significados.com dice que un “Mandala es una palabra de origen sánscrito y significa ‘círculo’; representa la unidad, la armonía y la infinitud del universo mediante el equilibrio de los elementos visuales”.
Today I want to share with you a Mandala made on CD, according to significados.com it says that a "Mandala is a word of Sanskrit origin and means 'circle'; it represents the unity, harmony and infinity of the universe through the balance of the visual elements".
Una de las cosas que disfruto al dibujar un mandala es lo relajante que es, uno se olvida de todo, es como una terapia de relajación que requiere concentración, la cual recomiendo, ya que los mandalas en sí traen tranquilidad y sosiego.
One of the things I enjoy drawing a mandala is how relaxing it is, one forgets everything, it is like a relaxation therapy that requires concentration, which I recommend, since mandalas themselves bring peace and quiet.
Vamos a realizar un mandala básico sencillo, que cualquiera puede intentar.
We're going to perform a simple basic mandala, which anyone can try.
Materiales
- Pintura al frio
- Punteros o que se asemejen
- Cd
- Pinceles
- Regla lápiz
Materials
- Cold painting
- Pointers or similar
- Cd
- Brushes
- Pencil ruler
Procedimiento:
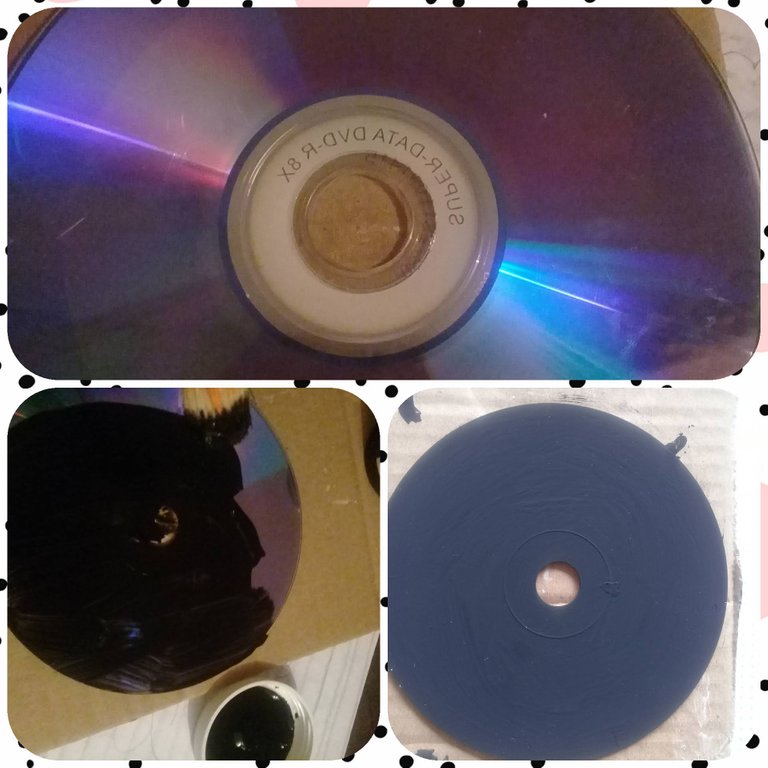
Lo primero que vamos hacer es buscar un cd que no usemos, lo limpiamos bien y vamos a pintarlo con pintura de color negro, pueden usar spray negro de tenerlo. Esperamos que este seco, si es necesario le colocamos 2 capas de ambos lados.
Procedure:
The first thing we're going to do is find a CD we don't use, clean it well and paint it with black paint, you can use black spray if you have it. We hope that it is dry, if necessary we will put 2 coats on both sides.
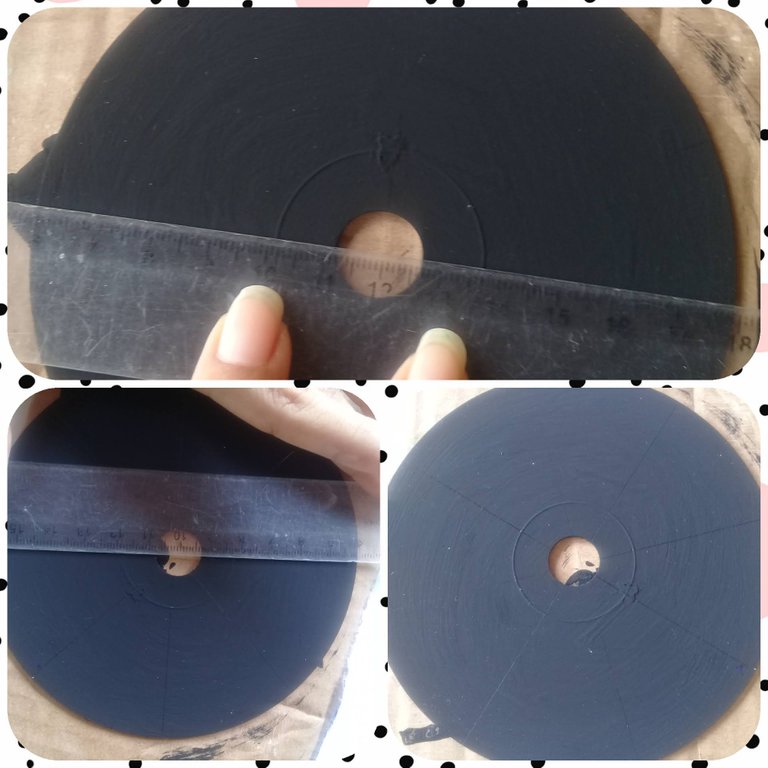
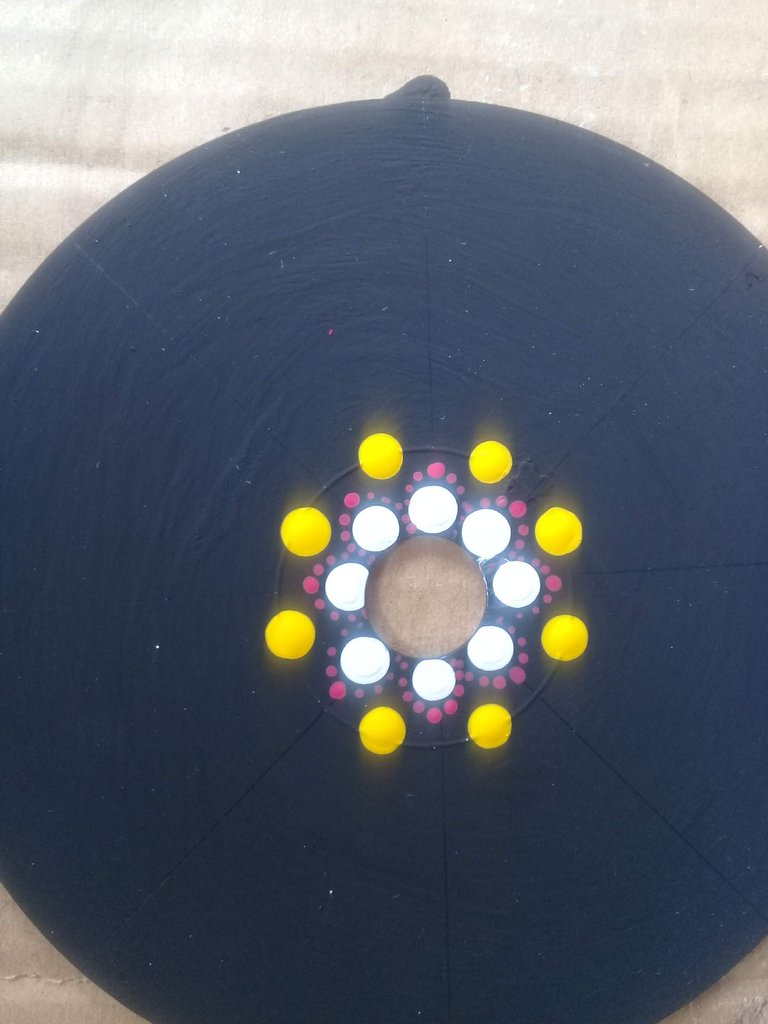
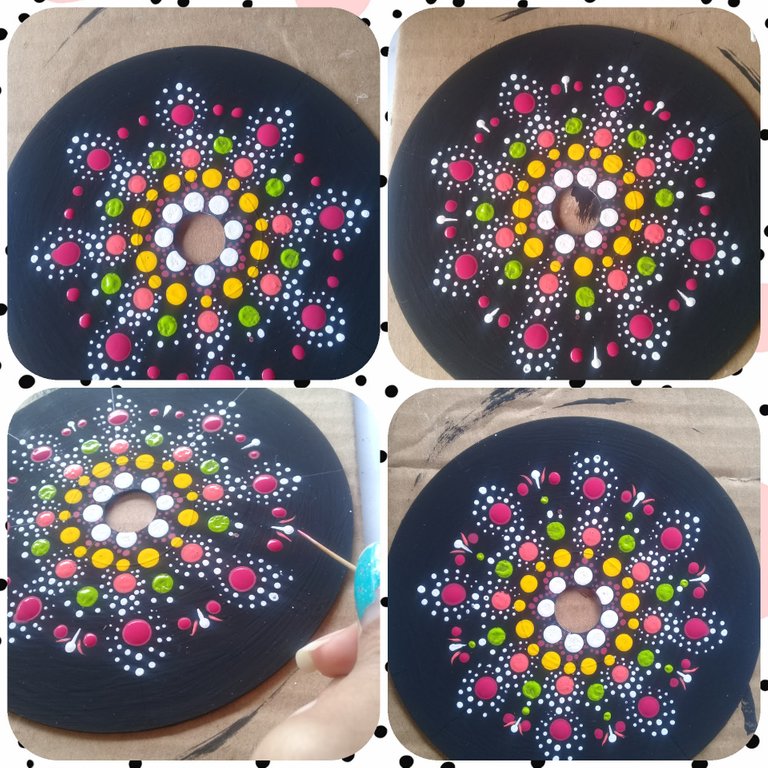
Cuando este seco nuestro CD Vamos a trazar 4 líneas de extremo a extremo, por lo que se van a formar 8 como las que se muestran en la fotografía. Estas líneas van a ser nuestras líneas guías.
When our CD is dry we will draw 4 lines from end to end, so we will form 8 like the ones shown in the picture. These lines are going to be our guide lines.
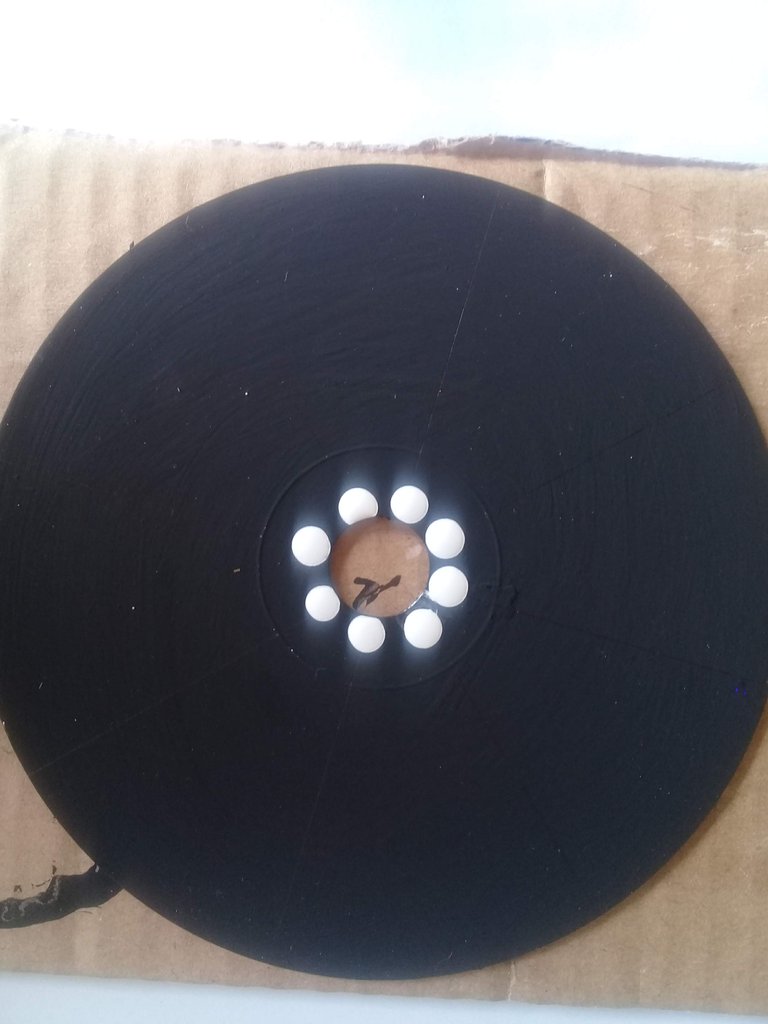
Después de tener nuestras líneas guías, vamos a comenzar a dibujar, pero solo vamos a realizar puntos grandes, medianos y puntos pequeños, el primero es un punto mediano, los cuales son 8 que haremos en donde están nuestras líneas guías.
After having our guide lines, we will start drawing, but we will only make big points and small points, the first one is a medium point, which are 8 that we will make where our guide lines are.
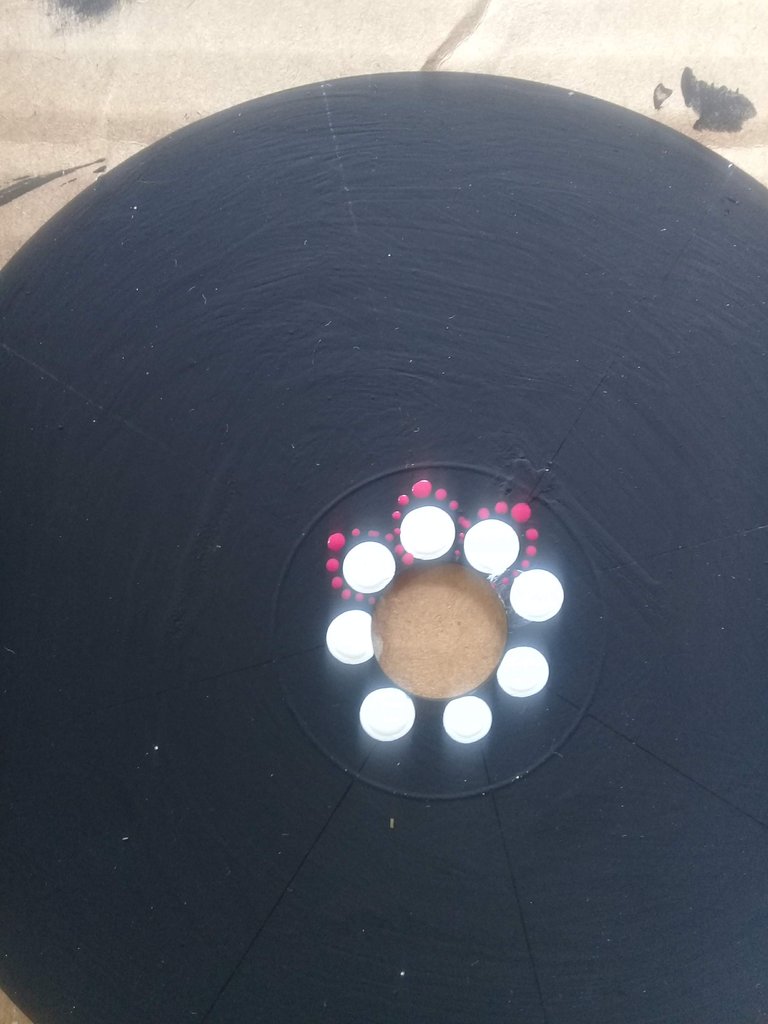
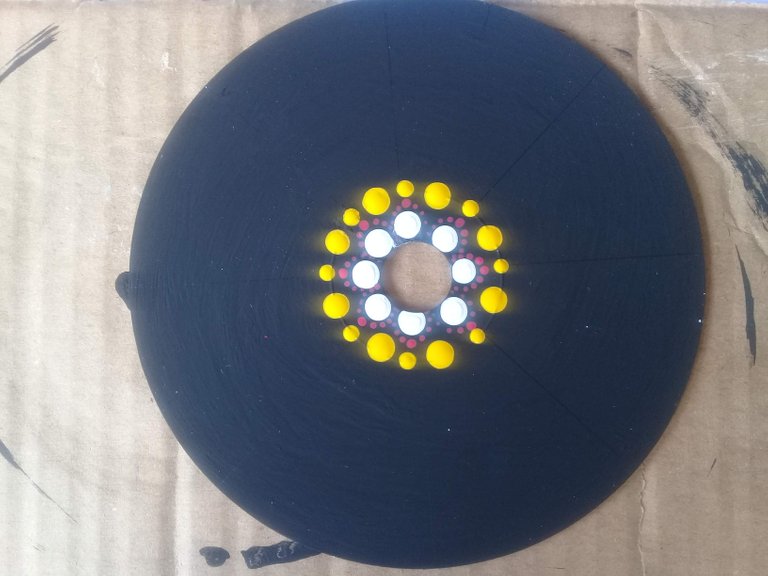
Ahora vamos realizar un punto pequeño encima de nuestro punto mediano y vamos a tratar de formar un pétalo en punto, uno arriba y 4 a los lados de manera de descarga, es decir hacemos el primer punto y seguimos a un lado sin recargar pintura para que el punto se valla haciendo más pequeño. Del otro lado agarramos pintura descargamos un punto en una hoja aparte y seguimos en nuestro cd. Eso lo haremos con cada círculo.
Now we are going to make a small point on top of our medium point and we are going to try to form a petal in point, one on top and 4 on the sides in a way that it will discharge, that is to say we make the first point and we continue to one side without reloading paint so that the point will be made smaller. On the other side we take paint, we unload a point on a separate sheet and continue on our cd. We will do this with each circle.
Ahora vamos a colocar un círculo mediano en los espacios al lado de nuestros primeros círculos.
Now let's place a medium circle in the spaces next to our first circles.
Ahora en medio de los que hicimos hacemos otro más pequeño, se puede ir variando y alternando la creatividad depende de ustedes y el uso de colores los de su preferencia.
Now in the middle of what we did we make another smaller one, you can vary and alternate the creativity depends on you and the use of colors those of your preference.
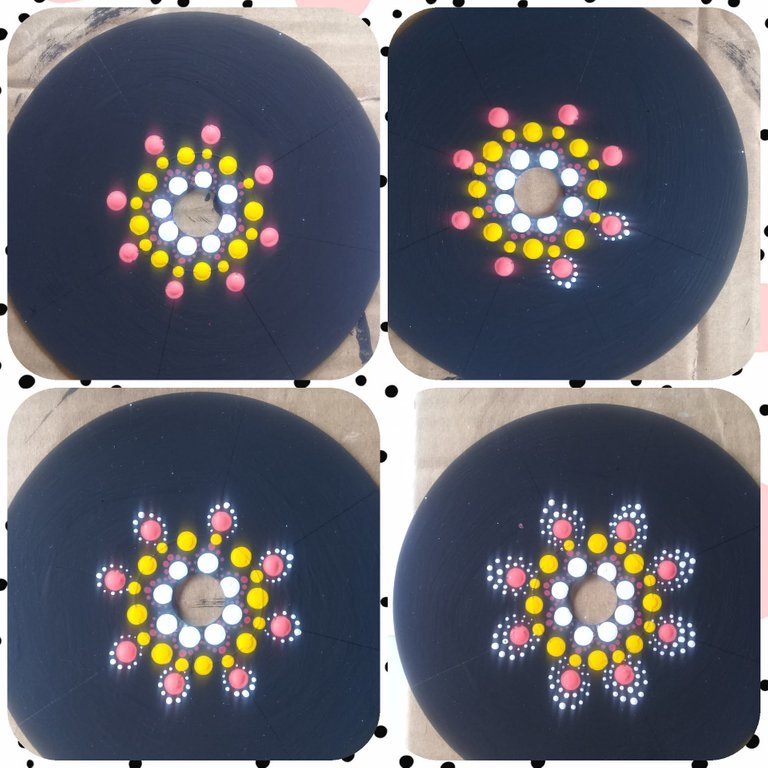
Ahora sobre nuestros círculos pequeños pinte unos más grandes. Y al igual que cuando comenzamos pinte unos círculos pequeños sobre los mismos pero esta vez doble.
Now on our small circles paint bigger ones. And just like when we started, paint some small circles over them, but this time double them.
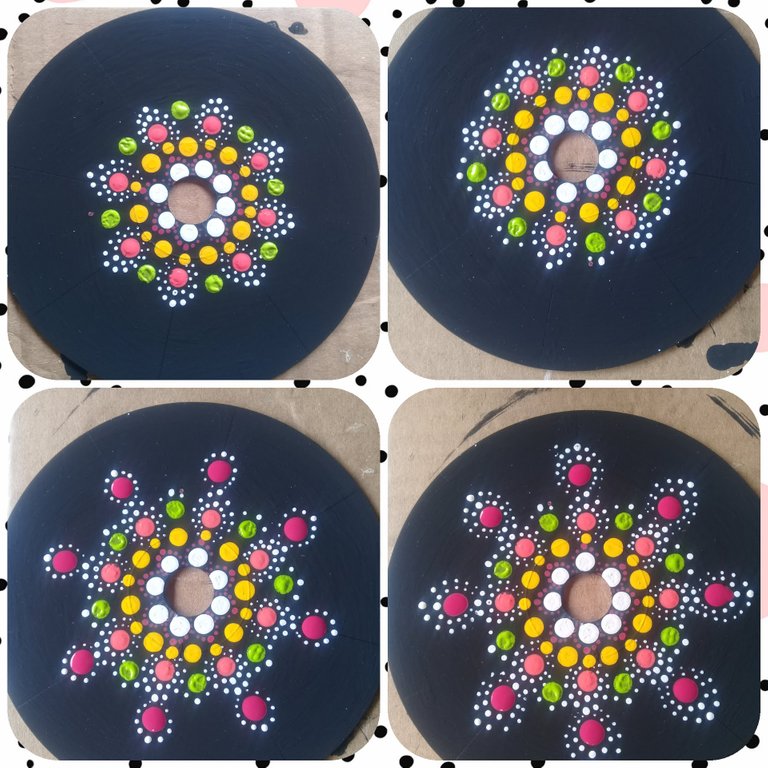
En los espacios de al lado pinte círculos más pequeños y sobre él 3 puntos y sobre los puntos dobles dibuje otro circulo y repetí el paso anterior con pequeños círculos dobles y al lado dibuje 2 círculos pequeños y sobre ellos 3 puntos, sobre los dobles repito el mismo paso.
In the spaces next to it I painted smaller circles and on it 3 points and on the double points I drew another circle and repeated the previous step with small double circles and next to it I drew 2 small circles and on them 3 points, on the doubles I repeat the same step.
Al lado de los dobles, dibuje 2 círculos pequeños. En medio de los círculos pequeños dibuje como una especie de flor, como no cuento con las herramientas adecuadas me ayude con una espina de limón.
Next to the doubles, draw 2 small circles. In the middle of the small circles I drew as a kind of flower, as I do not have the right tools help me with a lemon thorn.
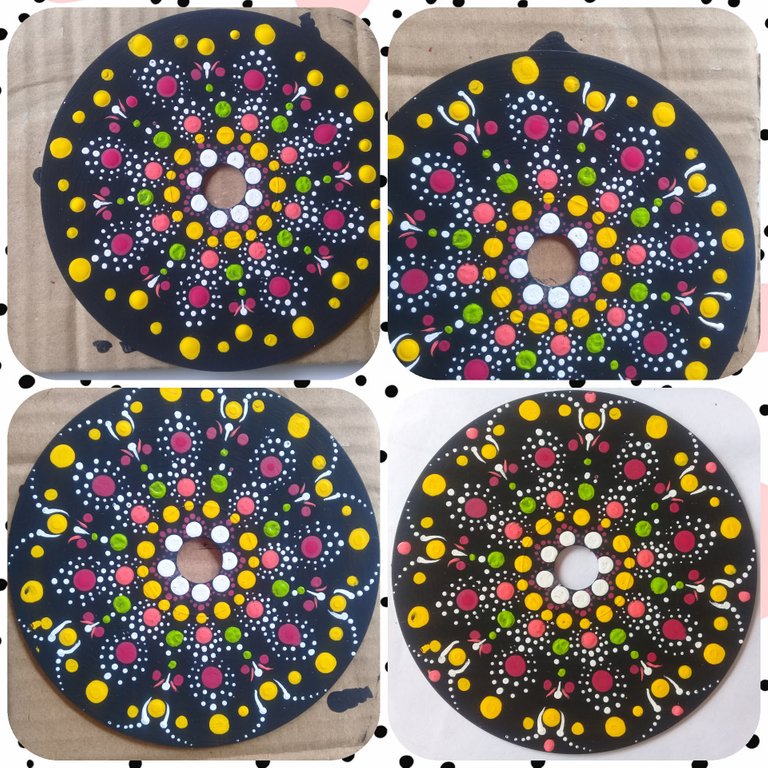
Ahora dibuje un círculo grande sobre los grandes que ya estaban, luego uno mediano sobre la flor y 2 pequeños a los lados de este. Ahora el circulo que está sobre la flor se le crea como una especie de espiga que lo agarra y al finalizar hacia los las puntos pequeños como se muestra en la imagen, para simular una flor.
Now draw a large circle over the large ones that were already there, then a medium one over the flower and 2 small ones on the sides of it. Now the circle over the flower is created as a kind of spike that grabs it and at the end towards the small points as shown in the picture, to simulate a flower.
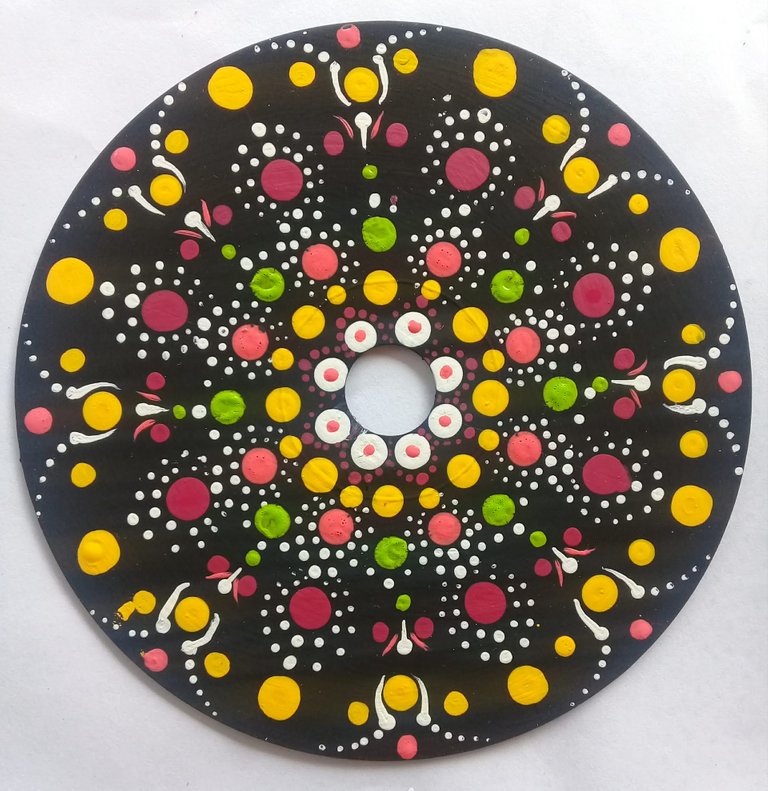
Así ha quedado nuestro mandala, espero que les gustara este post, el cual fue hecho con mucho cariño.
So much for our mandala, I hope you liked this post, which was made with a lot of love.
Nos vemos en un próximo post ❤️ Bendiciones
See you in an upcoming post ❤️ Blessings

Congratulations @yolimarag! You have completed the following achievement on the Hive blockchain and have been rewarded with new badge(s) :
You can view your badges on your board And compare to others on the Ranking
If you no longer want to receive notifications, reply to this comment with the word
STOPDo not miss the last post from @hivebuzz:
¡Me encantó tu publicación! ¿Una sugerencia? Intenta colocar de portada (primera fotografía) el resultado final...a los curadores les guía la calidad de las imágenes al escoger una publicación del feed, y -francamente- los discos compactos desnudos sin trabajar, no atraen la mirada lo suficiente como para hacer clic...en mi caso, yo las abro a pesar que la imagen no me guste mucho, para checar la publicacion completamente, y por ello la voté, porque ví el resultado. Las imágenes son vitales acá...saludos..!
De verdad muchas gracias por tu recomendación la tomare en cuenta, gracias aprecio tu aporte
Very creativee !discovery 10
Muchas gracias ❤
This post was shared and voted inside the discord by the curators team of discovery-it
Join our community! hive-193212
Discovery-it is also a Witness, vote for us here
Delegate to us for passive income. Check our 80% fee-back Program
Es una excelente opción para darle una segunda oportunidad a esos CD que ya no utilizamos. Te quedo muy lindo el diseño♡
muchas gracias 🤗
I never would have thought you made that item form a CD. How inventive. You are a talented craftswoman.
May I suggest you publish these DIY type projects in the DIYHub Community or BUILD-IT and use the tags #diyhub, #build-it #creativecoin
Thank you very much for the recommendation. I will keep it in mind for the next project.