Un saludo Creativos 🤗 / Best regards Creativos 🤗


Se acerca el día de las madres y siempre es lindo dar un detalle a todas las madres en especial a nuestras madres, por ello hoy quiero compartir con ustedes un pequeño ramo de flores ya que muchas veces no es tanto el regalo sino lo que significa, por lo tanto les dejo este pequeño tutorial para que lo puedan hacer en casa.
Este ramo puede servir también de tarjeta, es un detalle sencillo de realizar pero cargado de mucho amor para un ser que merece todo, así que manos a la obra mis creativos.

Mother's Day is coming and it is always nice to give a detail to all mothers especially to our mothers, so today I want to share with you a small bouquet of flowers because many times it is not so much the gift but what it means, so I leave you this little tutorial so you can do it at home.
This bouquet can also serve as a card, it is a simple detail to make but full of love for a being who deserves everything, so let's get to work my creatives.
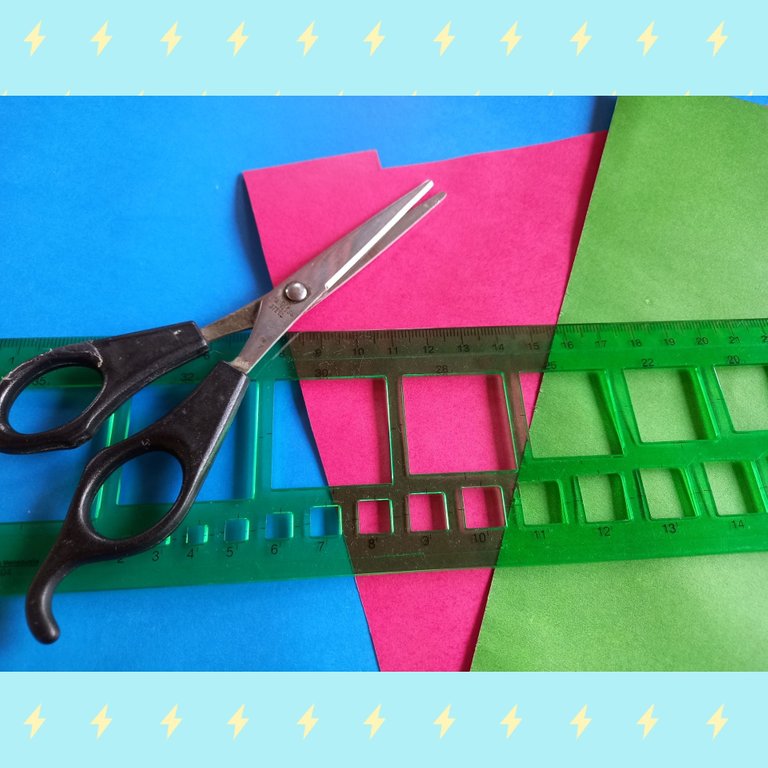
Materiales:
- Hojas de color o cartulina
- Tijera
- Pega en barra
- Regla
- Lápiz.
Materials:
- Colored sheets or poster board.
- Scissors
- Glue stick
- Ruler
- Pencil.
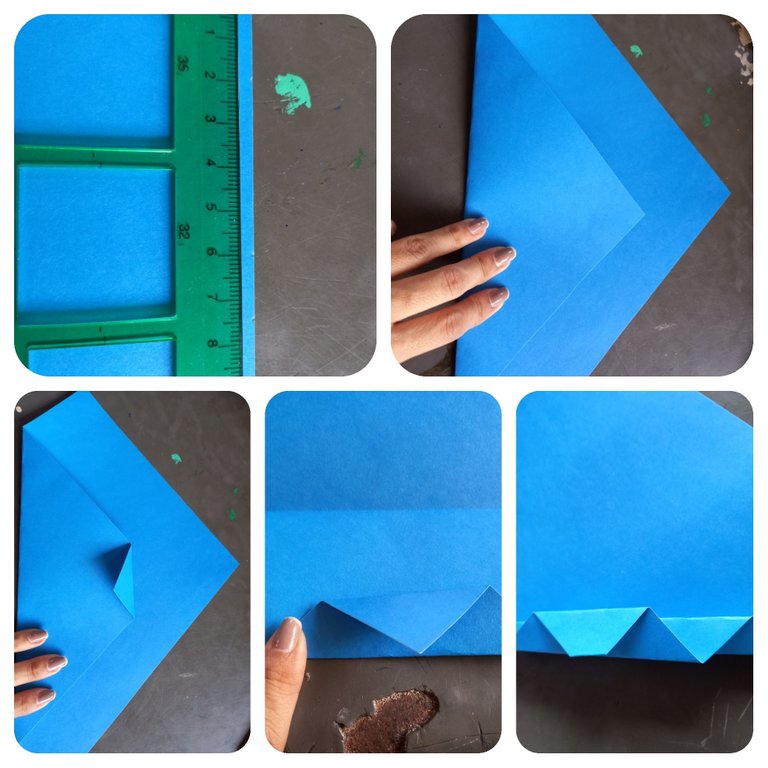
Lo primero es medir en nuestra hoja tamaño carta de color en este caso azul, 7cm de lado y lado en una sola esquina.
Doblaremos en la primera esquina donde se midieron los 7cm formando un triángulo y de allí comenzaremos a formar un triángulo con esa hoja que se formó, hacia atrás como de un centímetro y vamos a ir doblando Y doblando hasta llegar al final donde no se pueda doblar más.
The first thing to do is to measure on our letter size sheet, in this case blue, 7cm from side to side in one corner.
We will fold in the first corner where the 7cm were measured forming a triangle and from there we will begin to form a triangle with that sheet that was formed, backwards about a centimeter and we will go folding and folding until we reach the end where it can not be folded anymore.
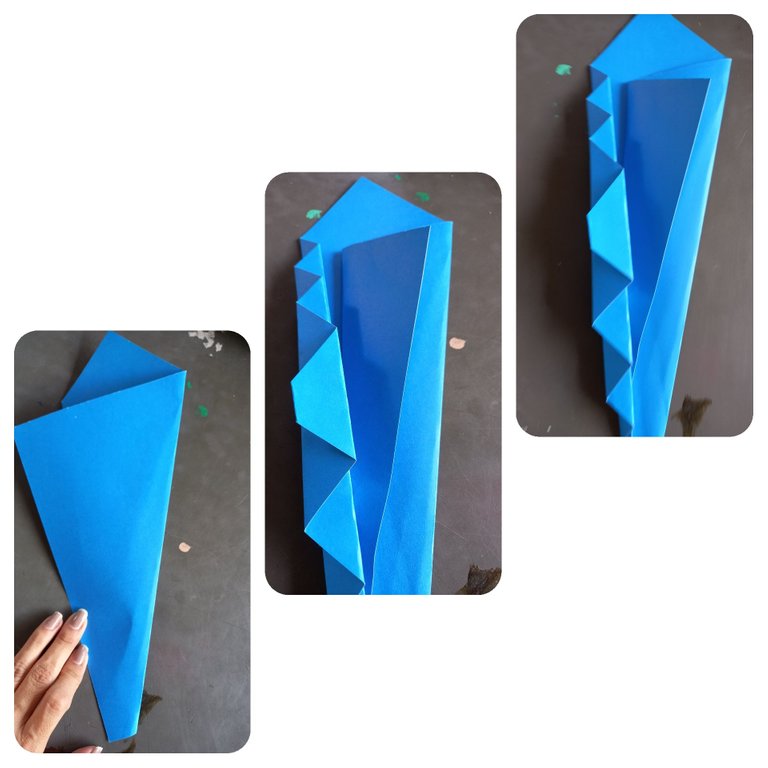
Del otro lado doblaremos igualmente otro triángulo de la parte de 7 cm y luego volvemos a doblar hacia el otro lado haciendo como una especie de solapa, para que forme donde se va agarrar el ramo.
On the other side we will also fold another triangle of the 7 cm part and then fold it again to the other side making a kind of flap, so that it forms where the bouquet will be held.
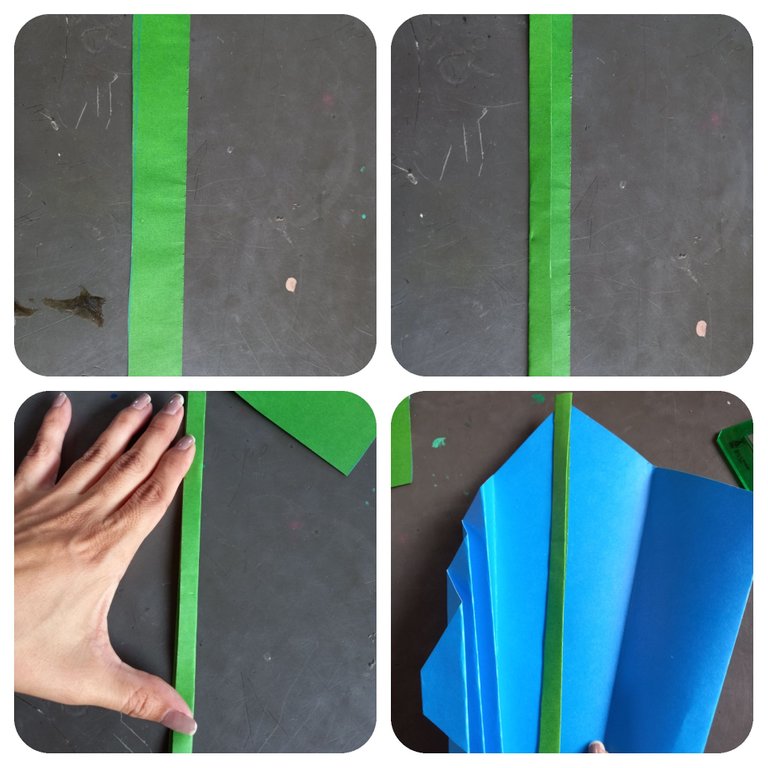
Cortaremos un rectángulo de 3 cm de ancho por 15 cm de largo en cartulina verde esto se Esto va a ser nuestro tallo de la flor y doblaremos de un centímetro a un centímetro y lo pegamos en el medio de lo que será nuestro ramo.
We will cut a rectangle of 3 cm wide by 15 cm long in green cardboard this is going to be our flower stem and we will bend it from one centimeter to one centimeter and we will glue it in the middle of what will be our bouquet.
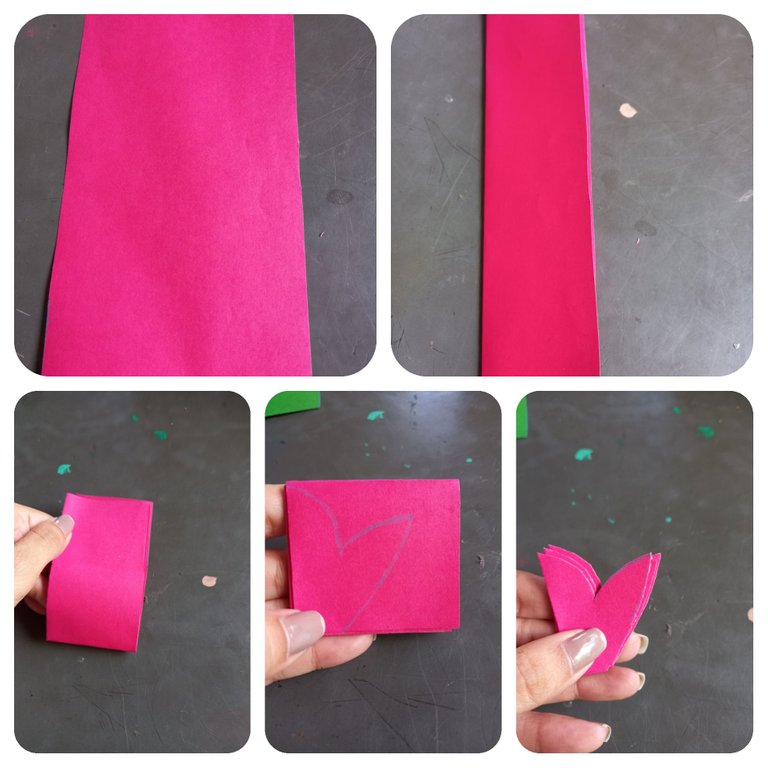
Ahora cortaremos un rectángulo de aproximadamente 12 cm de ancho por 15 cm de largo, vamos a doblar a la mitad verticalmente y luego volvemos a doblar a la mitad y luego la mitad son tres veces.
Dibujamos dos pétalos de flor y recortamos.
Now we will cut a rectangle approximately 12 cm wide by 15 cm long, we will fold it in half vertically and then fold it in half again and then in half three times.
We draw two flower petals and cut them out.

Después de recortar nos quedarán cuatro flores y vamos a pegar de lado a lado para formar una flor en 3D.
After cutting out, we will have four flowers left and we will glue them side by side to form a 3D flower.
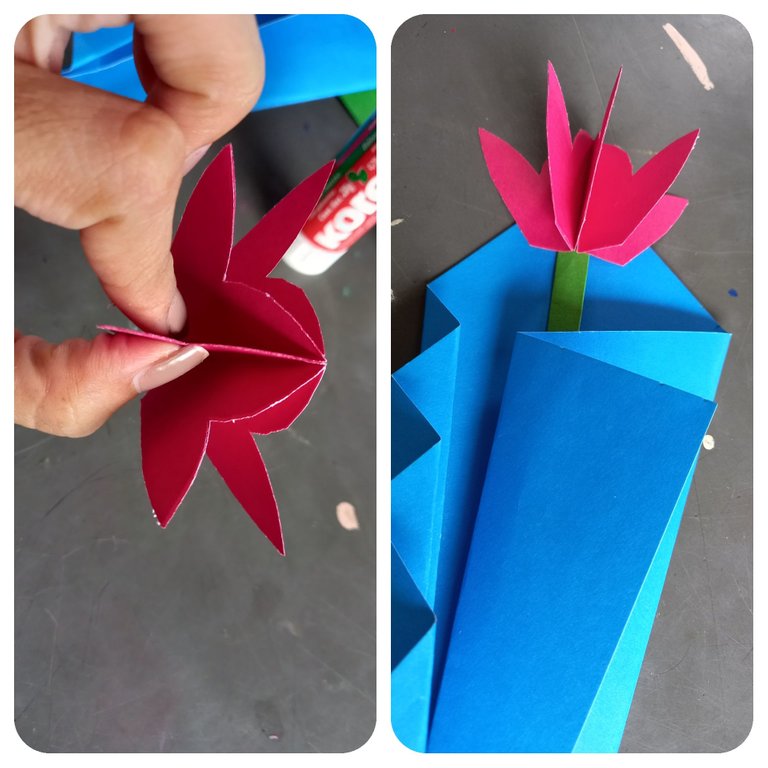
Ahora procedemos a pegarlo en la parte que será nuestro ramo sobre el tallo que ya hicimos.
Now we proceed to glue it on the part that will be our bouquet on the stem that we have already made.

Ahora formaremos nuestras hojas en un rectángulo de 12 cm para tomar 4 cm para cada hoja y de largo 15cm.
Doblamos a la mitad y le damos forma con la tijera.
Now we will form our leaves in a rectangle of 12 cm to take 4 cm for each leaf and 15cm long.
Fold in half and shape with the scissors.
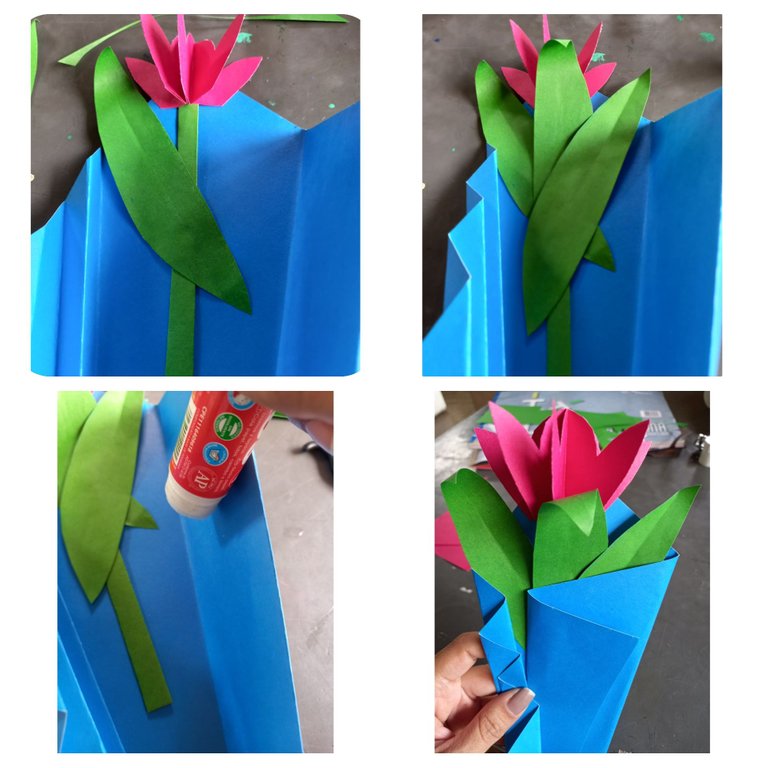
Pegaremos ahora nuestras hojas en nuestro ramo, una por una y al finalizar vamos a cerrar nuevamente las solapas pegandolas de una vez.
We will now glue our leaves on our bouquet, one by one and at the end we will close the flaps again by gluing them all at once.
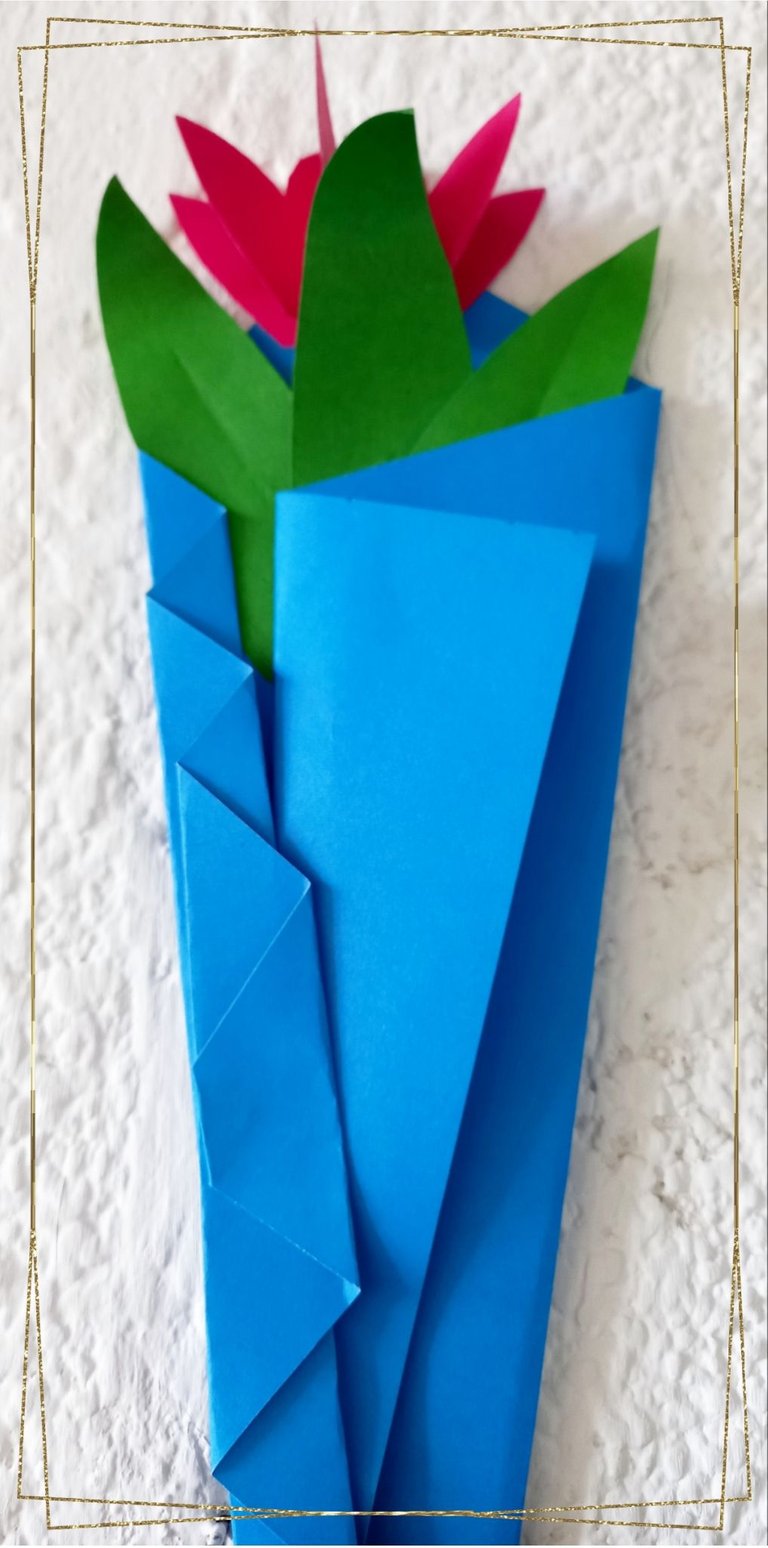
Y así ha quedado nuestro pequeño ramo para regalar, como no pegamos una parte de la solapa la de arriba allí pueden inscribir si lo desean tomar como tarjeta.
Espero que le gustará este pequeño tutorial, gracias por leer y ser parte de mi blog nos vemos en un próximo post bendiciones 🤗.
And so has been our little bouquet to give as a gift, as we did not paste a part of the flap the top there you can inscribe if you want to take it as a card.
I hope you will like this little tutorial, thanks for reading and being part of my blog see you in a next post blessings 🤗.
Fotos principal editada con Canva.
Fotos de mi Autoría derechos reservados
Cámara: Samsung A20S
Traducido con www.DeepL.com/Translator (versión gratuita)
Photos edited with Canva
Photos by me Author's rights reserved
Quote> Camera: Samsung A20S
Translated with www.DeepL.com/Translator (free version)


Your content has been voted as a part of Encouragement program. Keep up the good work!
Use Ecency daily to boost your growth on platform!
Support Ecency
Vote for Proposal
Delegate HP and earn more