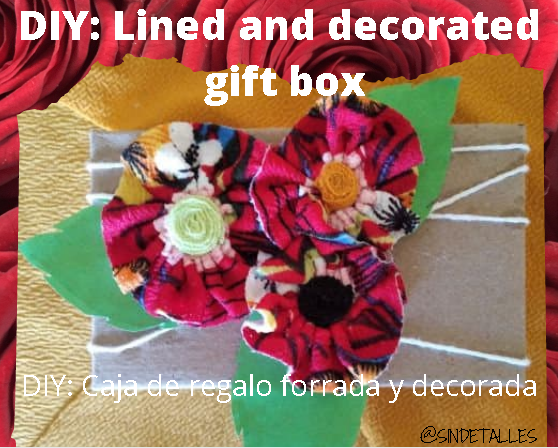
DIY: Lined and decorate gift box / DIY: Caja de regalo forrada y decorada. (Eng/Espñ)
SPANISH
¡Hola HIVERS! Cómo les ha ido? Espero que muy bien y dispuestos a consentir a las mamis este próximo domingo.
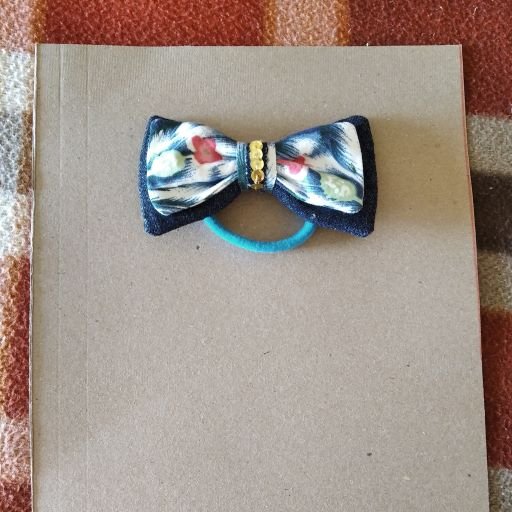
Recuerdan el lazo de jean que hice hace unos dias?. Bueno, ese lo voy a obsequiar y en esa onda de regalos y creatividad, me propuse hacer una cajita a la medida pero que estuviera forrada y decorada y cómo tenia algunos materiales que me podían servir para este proyecto, dije: Manos a la obra!
ENGLISH
Hi HIVERS! How have you been doing? I hope very well and ready to spoil the mommies this coming Sunday.
Remember the denim ribbon I made a few days ago? Well, I'm going to give that one as a gift and in the spirit of gifts and creativity, I decided to make a custom-made box but lined and decorated and since I had some materials that I could use for this project, I said: Let's get to work!

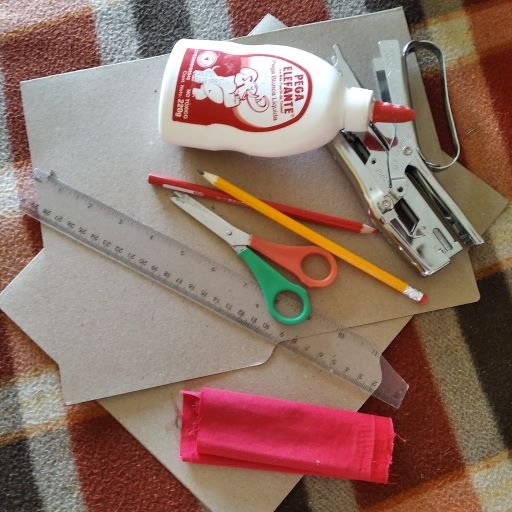
MATERIALES A UTILIZAR:
⦁ Carpeta o cartulina (2)
⦁ Retazos de tela unicolor o estampada (2)
⦁ Lápiz o marcador.
⦁ Rega
⦁ Pega o silicon
⦁ Tijeras
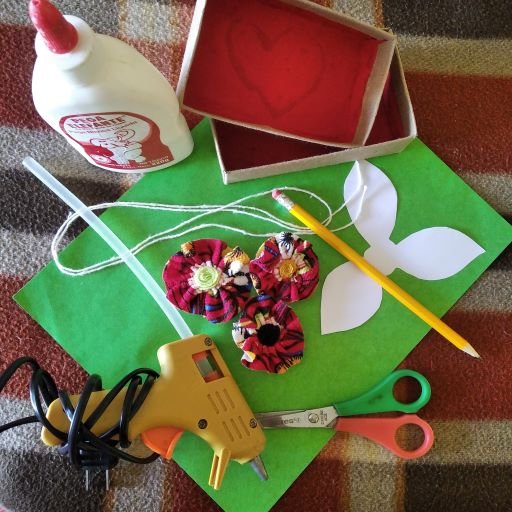
⦁ Para decorar: papel de construcción color verde, hilo pabilo, hoja blanca, flores de tela ( o las que hagas o tengas).
MATERIALS TO BE USED:
⦁ Folder or cardboard (2)
⦁ Patches of one-color or printed fabric (2)
⦁ Pencil or marker.
⦁ Rega
⦁ Glue or silicone
⦁ Scissors
⦁ To decorate green construction paper, wick twine, white sheet, fabric flowers (or whatever you make or have).
Y Aqui el proceso:
1.- Medir el objeto del regalo. En este caso mi lazo mide 11.5 cm de largo por 6.6 cm de ancho y tiene una altura de 2.5 cms.
2.- La cartulina la separo en dos partes: una para la base o contenedor de la caja y la otra para la tapa.
And here is the process:
1.- Measure the object of the gift. In this case, my ribbon measures 11.5 cm long by 6.6 cm wide and has a height of 2.5 cm.
2.- I separate the cardboard into two parts: one for the base or container of the box and the other for the lid.
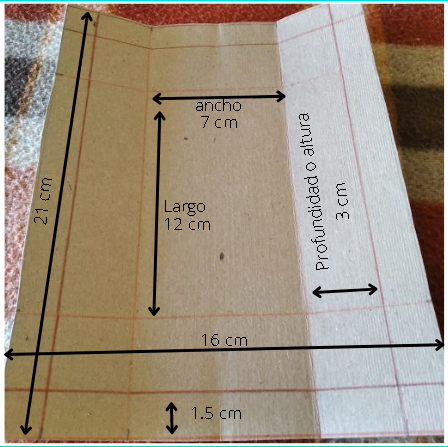
3.- Diseñamos el patrón:
Todas las medidas las llevé a enteros para facilitar el trazado y darle algo de holgura al lazo dentro de la caja. Así el ancho quedó en 7 cm, el largo en 12 y el alto en 3 cm. Adicional a estas medidas, tengo 1.5 cm que van a ser el doblez para forrar la caja.
a) Ancho: 7 cm + 6 (3 cm de alto por cada lado) + 3 (1.5 cm adicional por cada lado) = 16
cm. Esto es lo que voy a marcar de ancho en la carpeta.
b) Largo: 12 cm + 6 + 3 = 21 cm. Es lo que marcaré de largo.
Marco las líneas, buscando que las medidas del patrón queden centradas respecto a la carpeta. Es decir, ubico el centro de cada lado y a partir de allí trazo: en el centro del largo, 6 cm a la derecha y otros 6 a la izquiera (12 cm es el largo del lazo). Lo mismo hago con el ancho y así obtengo el patrón.
3.- We designed the pattern:
I took all the measurements to integers to make it easier to trace and to give some slack to the loop inside the box. So the width was 7 cm, the length was 12 cm and the height was 3 cm. In addition to these measurements, I have 1.5 cm that will be the fold to line the box.
a) Width: 7 cm + 6 (3 cm high on each side) + 3 (additional 1.5 cm on each side) = 16
cm. This is what I am going to mark as width in the folder.
b) Length: 12 cm + 6 + 3 = 21 cm. This is what I will mark as length.
I mark the lines, making sure that the measurements of the pattern are centered concerning the folder. That is to say, I locate the center of each side and from there I trace: in the center of the length, 6 cm to the right and another 6 cm to the left (12 cm is the length of the loop). I do the same with the width and so I get the pattern.
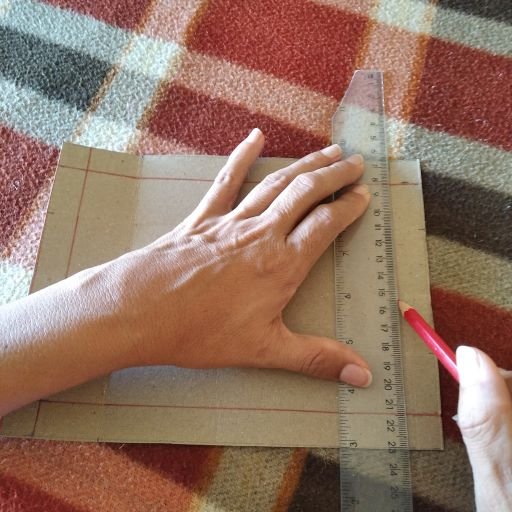
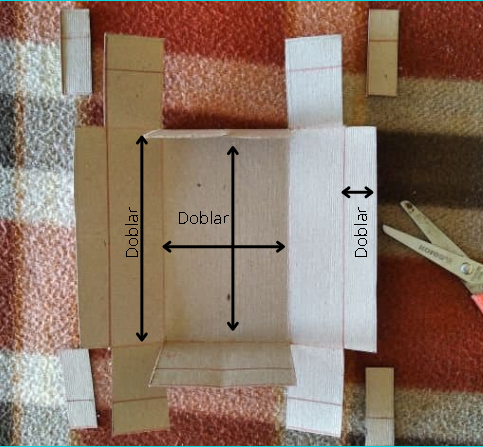
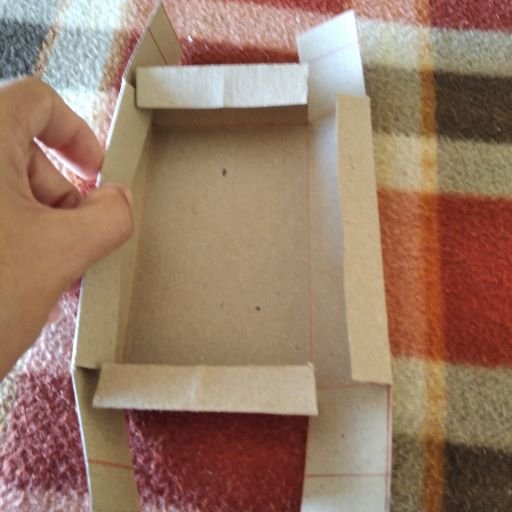
4.- Procedemos a doblar de acuerdo a lo que indico en el esquema. Se recortan las esquinas tal como se ve en la foto.
Para definir mejor nos podemos ayudar con la regla.
4.- We proceed to fold according to what I indicate in the scheme. The corners are cut as shown in the photo.
To define better we can help us with the ruler.
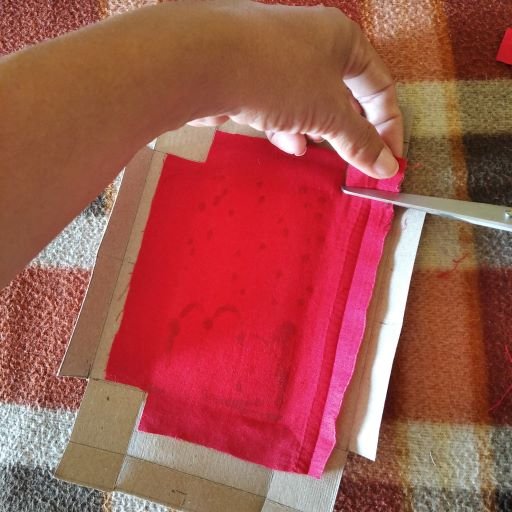
5.- Colocamos el retazo de tela sobre este patrón para sacar el forro de la caja, recortando tambien las esquinas. Pegamos sólo la parte de abajo con cola o silicon. No importa que no llegue al borde exacto de la caja o si queda ago torcida, ya que esto lo taparemos con el doblez excedente.
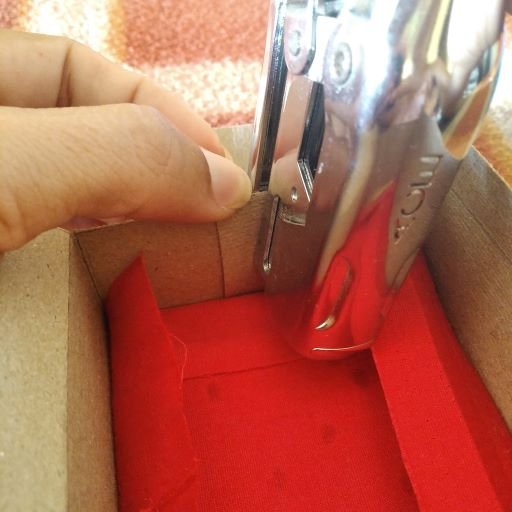
6.- Unimos lo que serán nuestras pestañas internas que deben quedar delante de la pestaña externa.
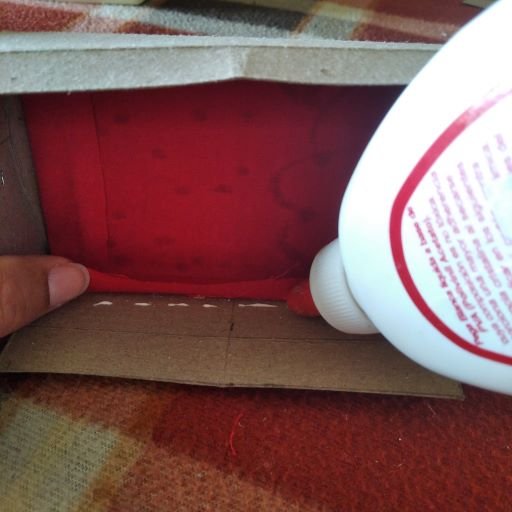
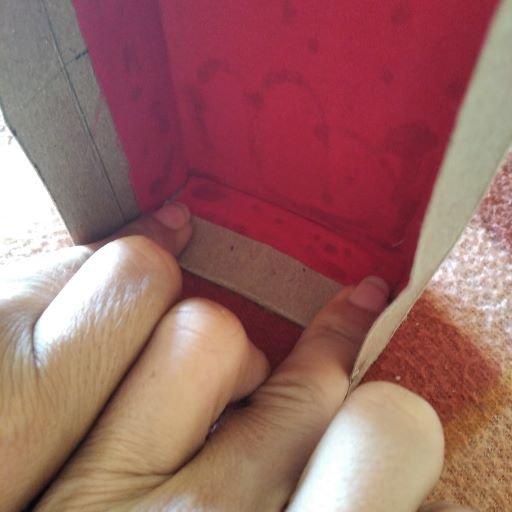
7.- Ahora sí pegaremos los laterales de la tela del forro y sobre esta las pestañas excedentes para tapar los bordes y que se vea más prolijo
8.- De igua forma haremos la tapa de la caja, con la única diferencia que debo agregarle 4 mm más al patrón para que pueda encajar fácilmente en la base.
5.- We place the piece of fabric over this pattern to remove the lining of the box, also cutting the corners. We glue only the bottom part with glue or silicon. It doesn't matter if it doesn't reach the exact edge of the box or if it is too crooked since we will cover it with the excess fold.
6.- We join what will be our internal tabs, the width should be in front of the external tab.
7.- Now we will glue the sides of the lining fabric and over it the excess tabs to cover the edges and make it look neater.
8.- In the same way, we will make the lid of the box, with the only difference that I have to add 4 mm more to the pattern so that it can easily fit in the base.
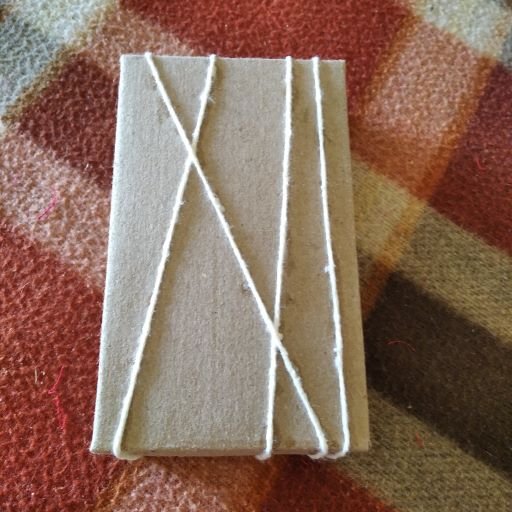
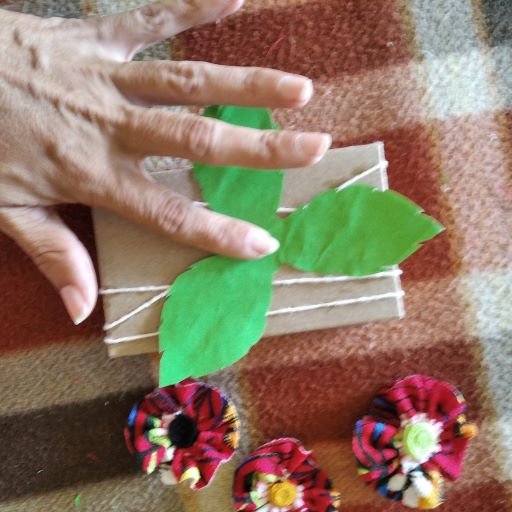
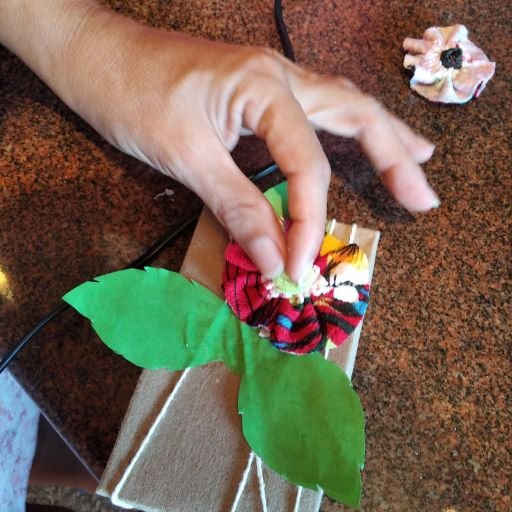
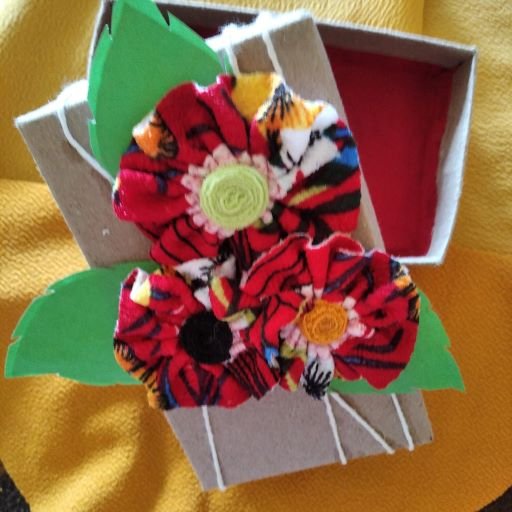
9.- Decoración:
- El hilo pabilo lo cortamos en 4 partes iguales y lo pegamos sobre la caja desde la parte interna, de la forma que más nos guste.
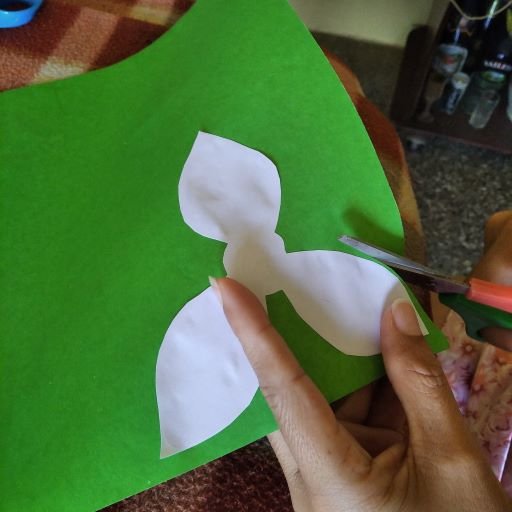
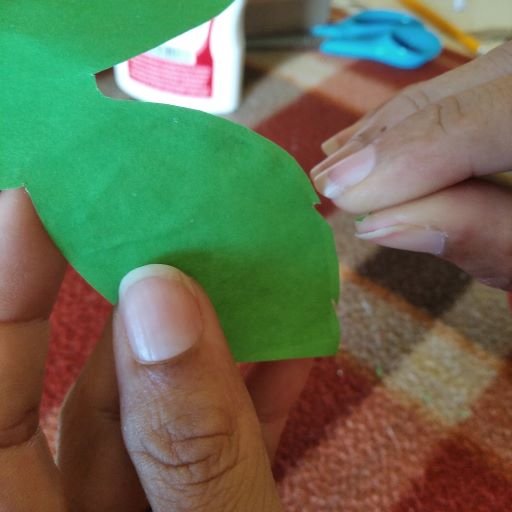
- Dibujamos un diseño de hojas cualquiera y luego lo pasamos al papel de construcción. En este caso, yo lo pegué porque era muy delgada la hoja de color verde. Le hacemos en el borde cortes simulando los que trae una hoja de planta real.
- Estas hojas las pegamos encima de los hilos y sobre ésta colocamos las flores de tela en la forma que querramos.
9.- Decoration:
We cut the wick thread into 4 equal parts and glue it on the box from the inside, in the way we like the most.
We draw ny leaf design and then transfer it to the construction paper. In this case, I glued it because the green leaf was very thin. We make cuts on the edge simulating those of a real plant leaf.
These leaves are glued on top of the threads and on top of this we place the fabric flowers in the shape we want.
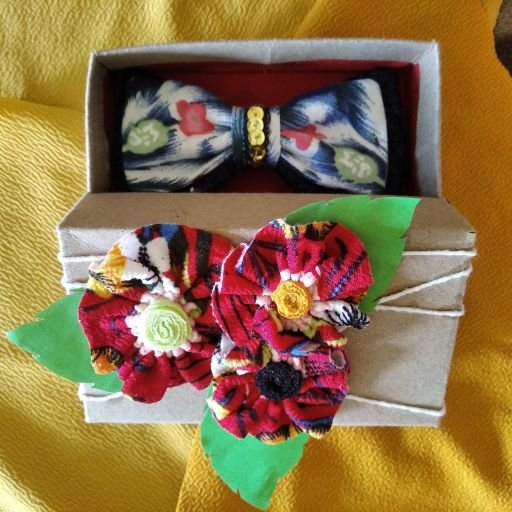
Te invito a que hagas esta cajita para tus regalos y la decores a tu gusto. Segura estoy de que tienes mucha creatividad para ello y, si quieres saber cómo hice las flores o el lazo, chequea estas publicaciones.
I invite you to make this little box for your gifts and decorate it as you like. I'm sure you have a lot of creativity for it and, if you want to know how I made the flowers or the ribbon, check these posts.
¡Gracias por tu lectura!
If you liked this content, comment, and reblog it, I will thank you with all my heart.
Thanks for reading!

Portada editada en Canva / Fotos de mi galería personal
Cover edited in Canva / Photos from my personal gallery
Congratulations @sindetalles! You have completed the following achievement on the Hive blockchain and have been rewarded with new badge(s) :
Your next target is to reach 200 comments.
Your next payout target is 100 HP.
The unit is Hive Power equivalent because your rewards can be split into HP and HBD
You can view your badges on your board and compare yourself to others in the Ranking
If you no longer want to receive notifications, reply to this comment with the word
STOPSupport the HiveBuzz project. Vote for our proposal!