The art of folding paper, How to make a bat- Step by Step
Hello lovely friends!
Making something from paper can be choose as a mean to make happiness. We can do it with our children. It can do with a simple way and inexpensive. In other hand we can do this art while remembering our childhood too. As I do with my children to make bat from paper. If you want to try it you can follow this paper folding art step by step.
1. Choose paper
We can use various types of paper that are around us. we can even choose origami, and for this time I use A4 paper then I cut it as a square shape.
![IMG20200630135711[1].jpg](https://images.hive.blog/768x0/https://images.ecency.com/DQmYF4PNUwCwir73RxpMq31g9JEFY2aAbiuGPotT6L1tiit/IMG20200630135711[1].jpg)
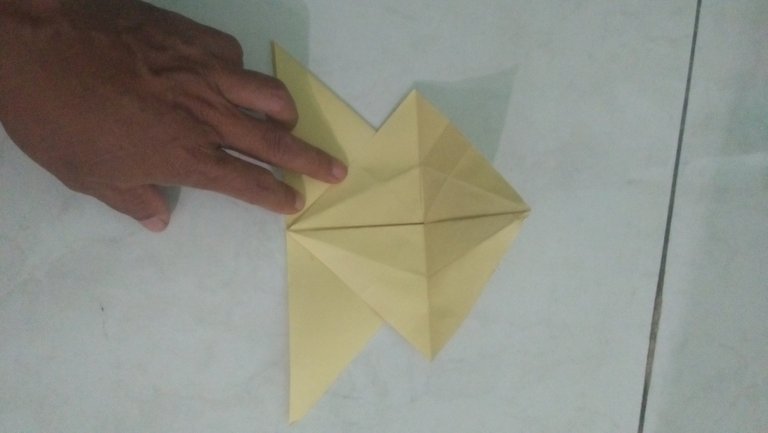
2. Create a vertical, horizontal and diagonal symmetry line as shown in the following image.
![IMG20200630135819[1].jpg](https://images.hive.blog/768x0/https://images.ecency.com/DQmYQRD6q9HBt8Soq9GaX8WMMctJWzar9v5C1y6NyLgnceC/IMG20200630135819[1].jpg)
3. Center-fold
Fold the right and left sides to the center as shown in the picture
![IMG20200630135844[1].jpg](https://images.hive.blog/768x0/https://images.ecency.com/DQmeh9QvRgfwizaRZYveWXpX5uWu73NG8fnCTfVGNNdC3pL/IMG20200630135844[1].jpg)
![IMG20200630135903[1].jpg](https://images.hive.blog/768x0/https://images.ecency.com/DQmYxnWjEagQ4cSrNd5mjaatEJpgLYijFi7FHfUaz69Y4wR/IMG20200630135903[1].jpg)
Open the paper then fold the bottom side again into the middle as shown in the picture.
![IMG20200630135957[1].jpg](https://images.hive.blog/768x0/https://images.ecency.com/DQme7Hxatyn8EBgbtRhkfE9DaBqNtZNaxdeCQjPyGKH9kGf/IMG20200630135957[1].jpg)
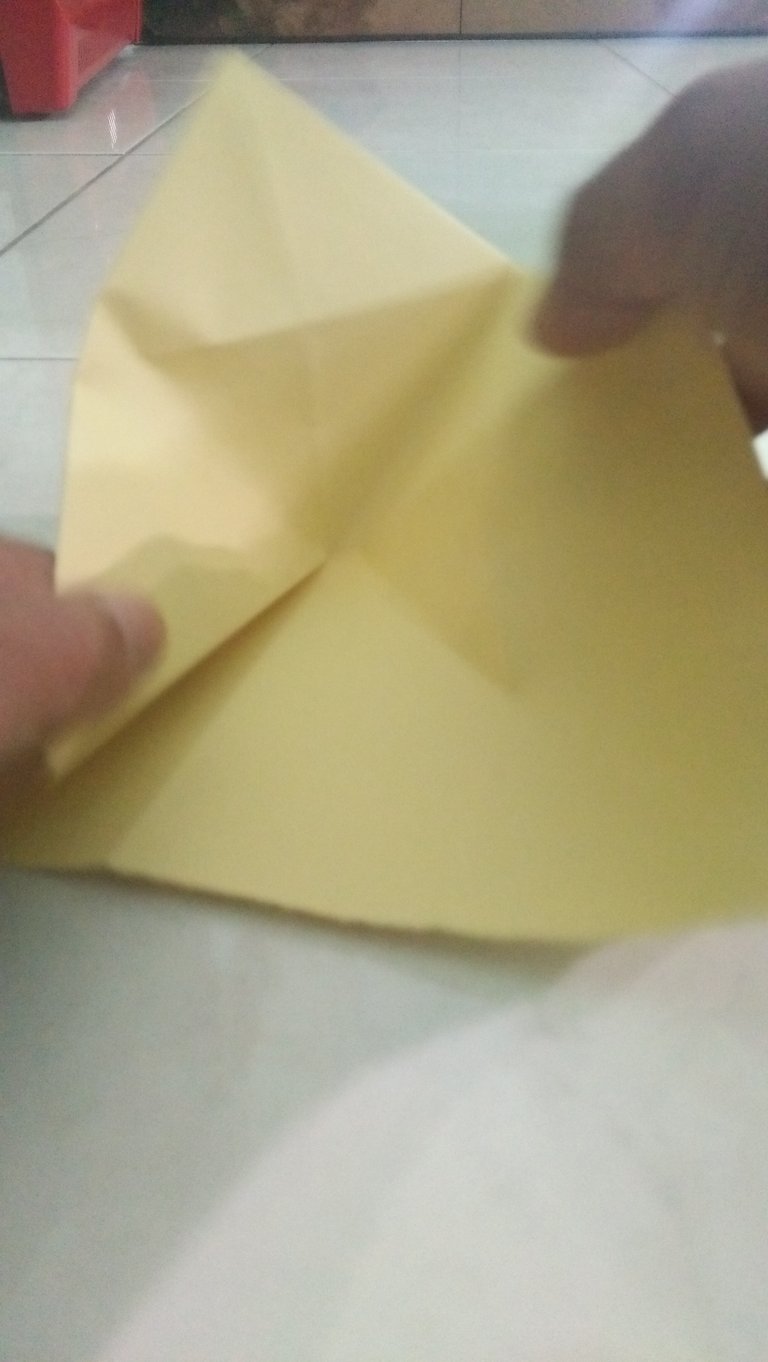
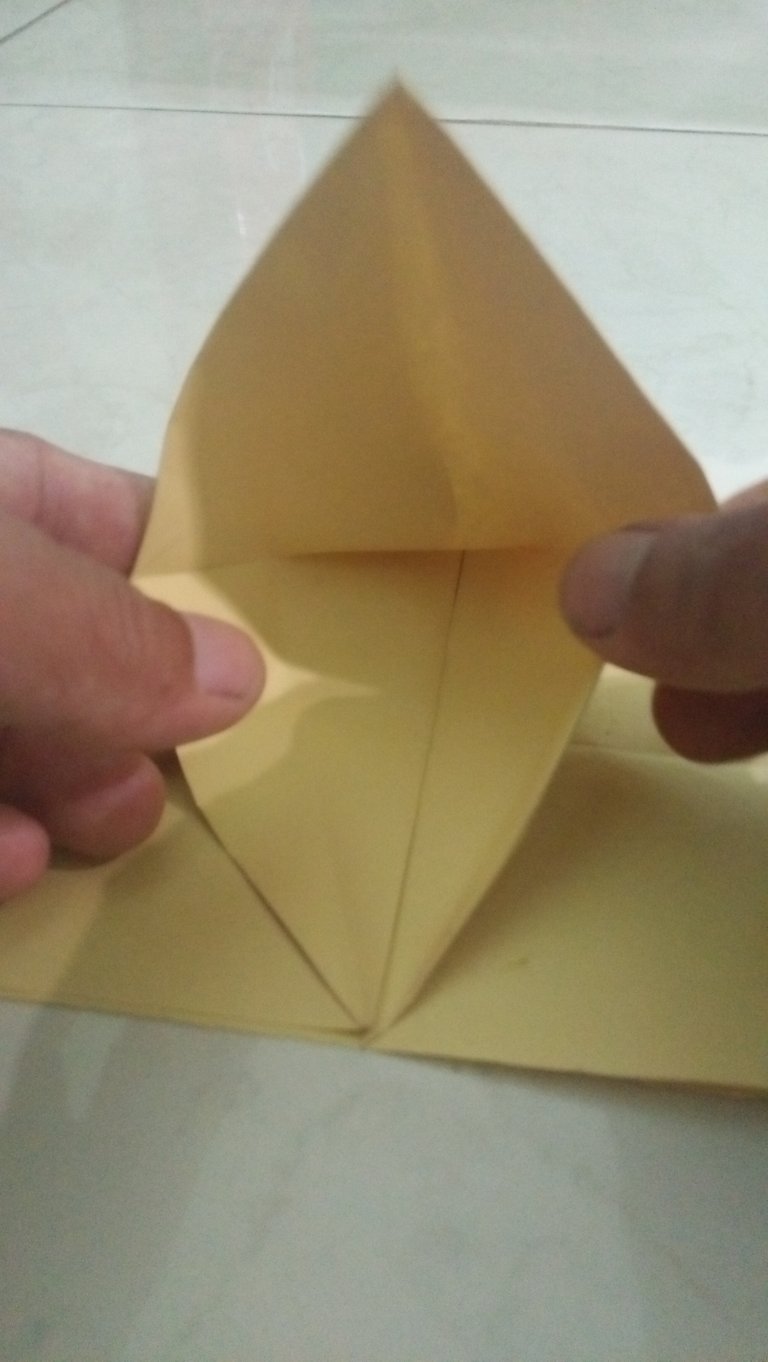
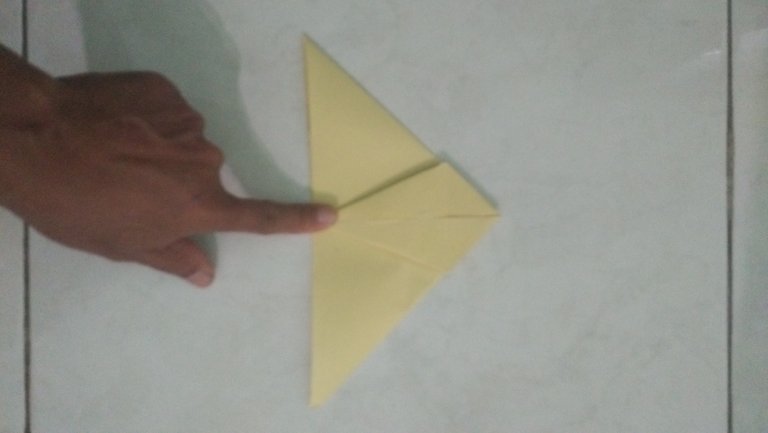
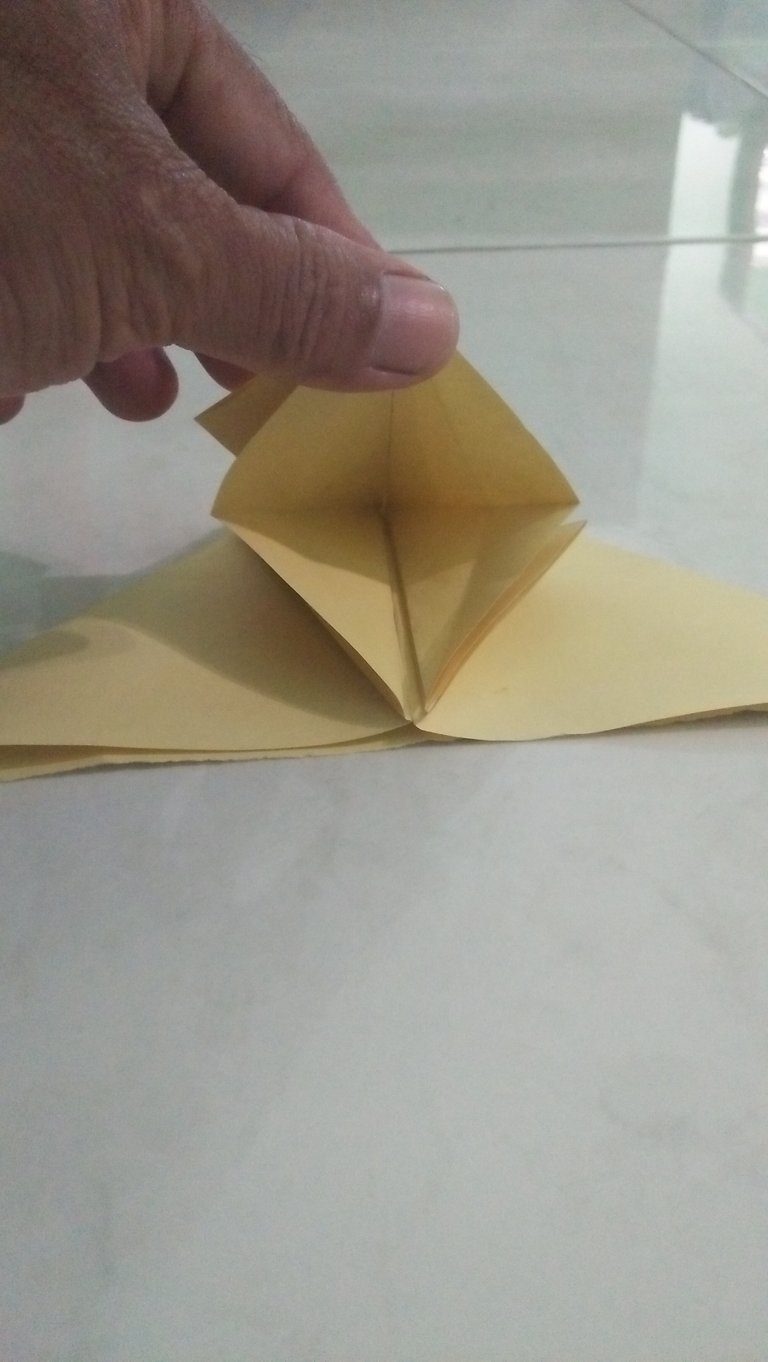
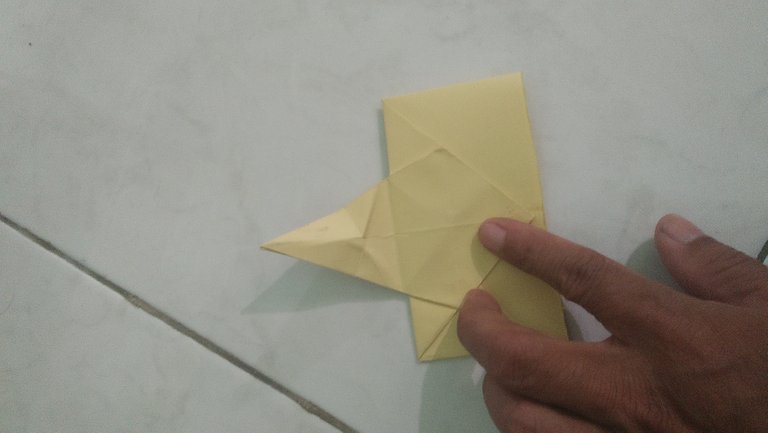
Open the paper then fold the right and left corners to the middle so that they form a triangle
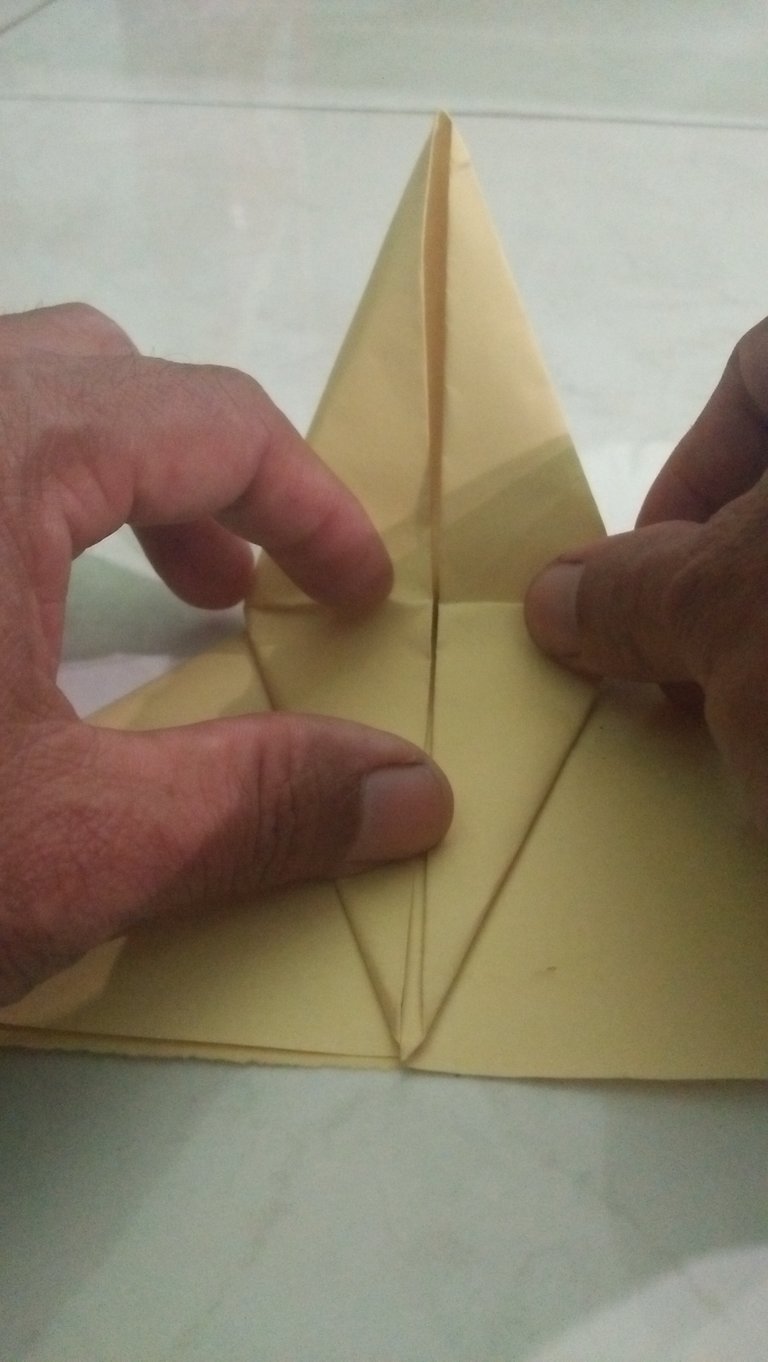
4. Make rhombus at the end of the triangle
Turn the paper over then pull the right and left sides so that they look like the picture

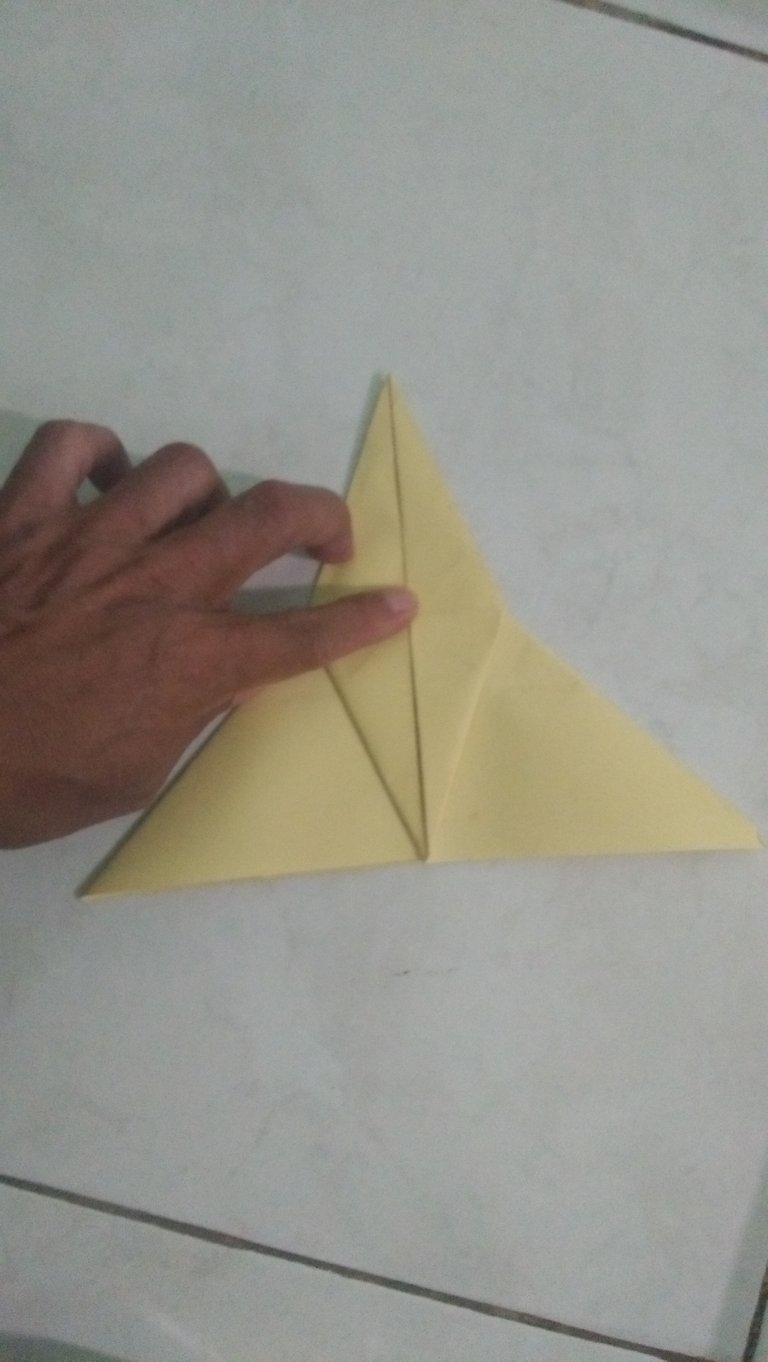
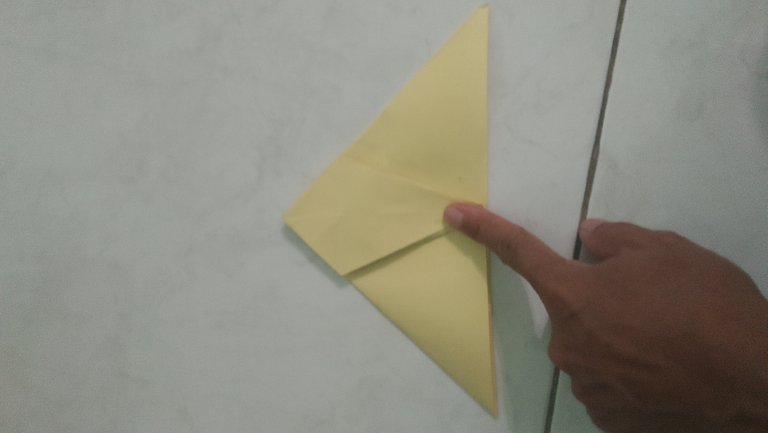
5. Make kite shape
Fold the right and left rhombus halves to the center so that you see the kite up as shown.
![IMG20200630140527[1].jpg](https://images.hive.blog/768x0/https://images.ecency.com/DQmQkCi4wnro16KCvR1yUydg6zPQ1DAyjYS9Tdh7YF3aUbX/IMG20200630140527[1].jpg)
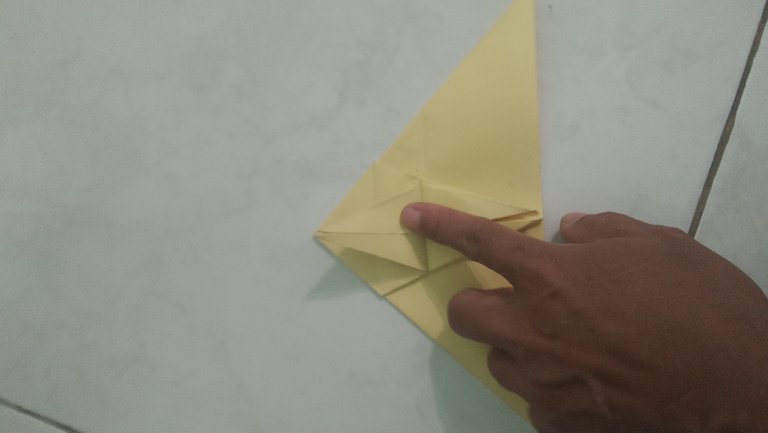
Reopen the kite up to become a rhombus with fold lines again as shown in the picture.
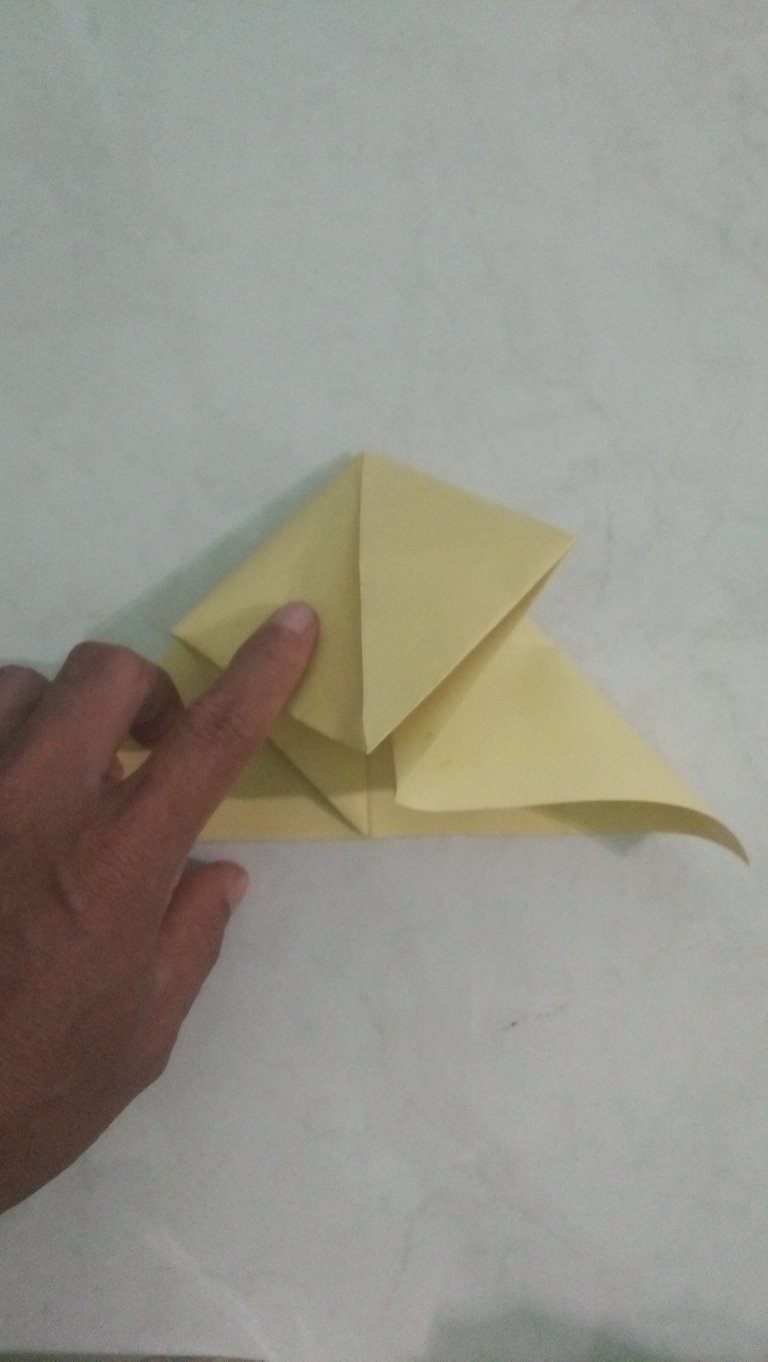
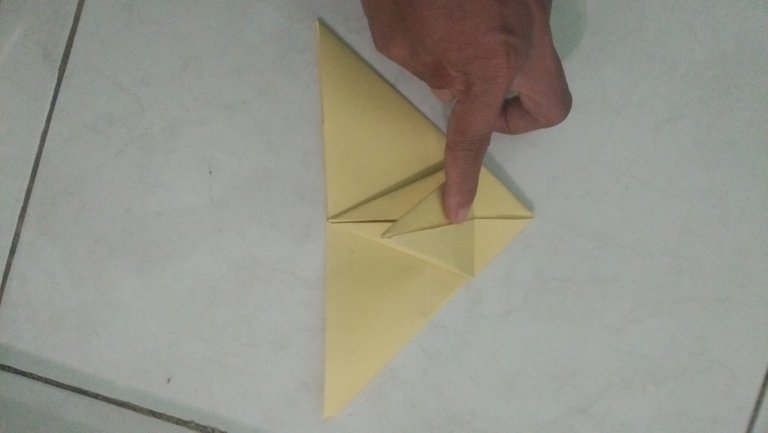
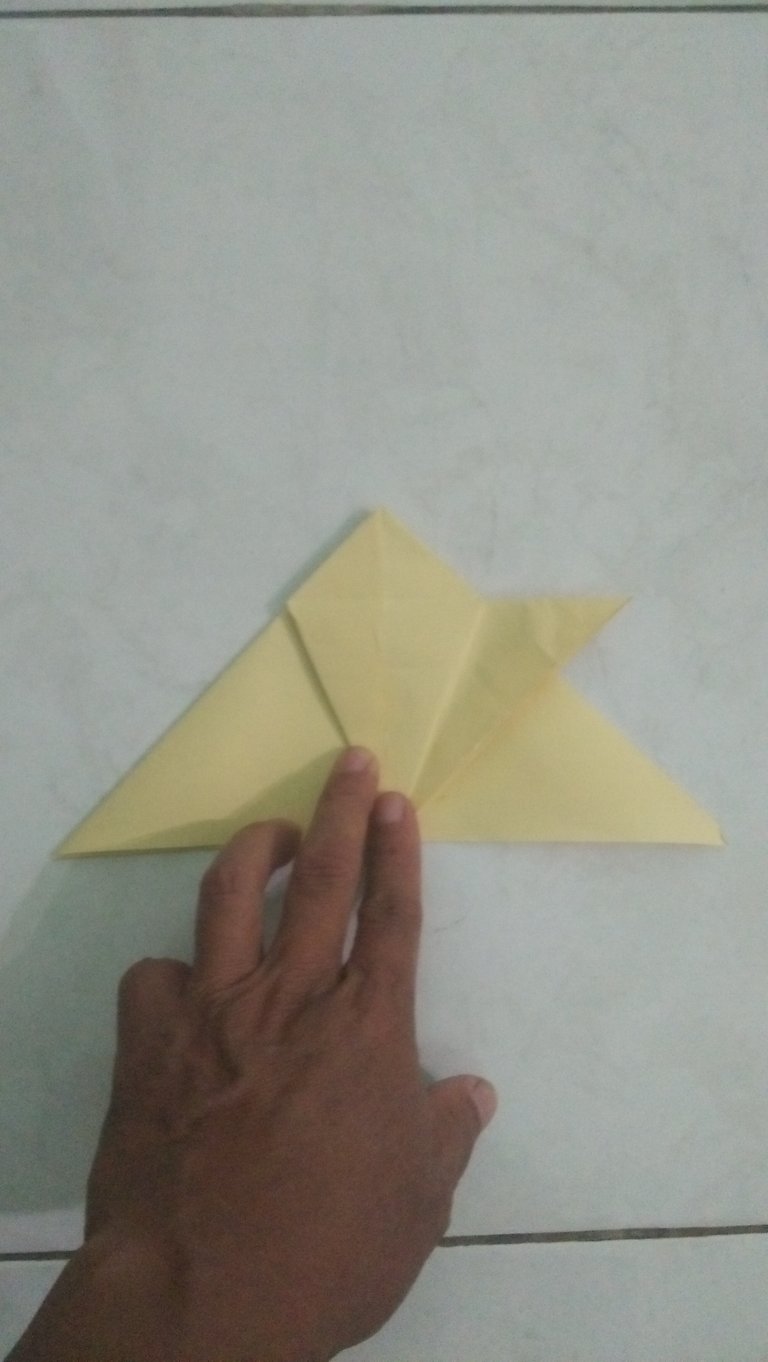
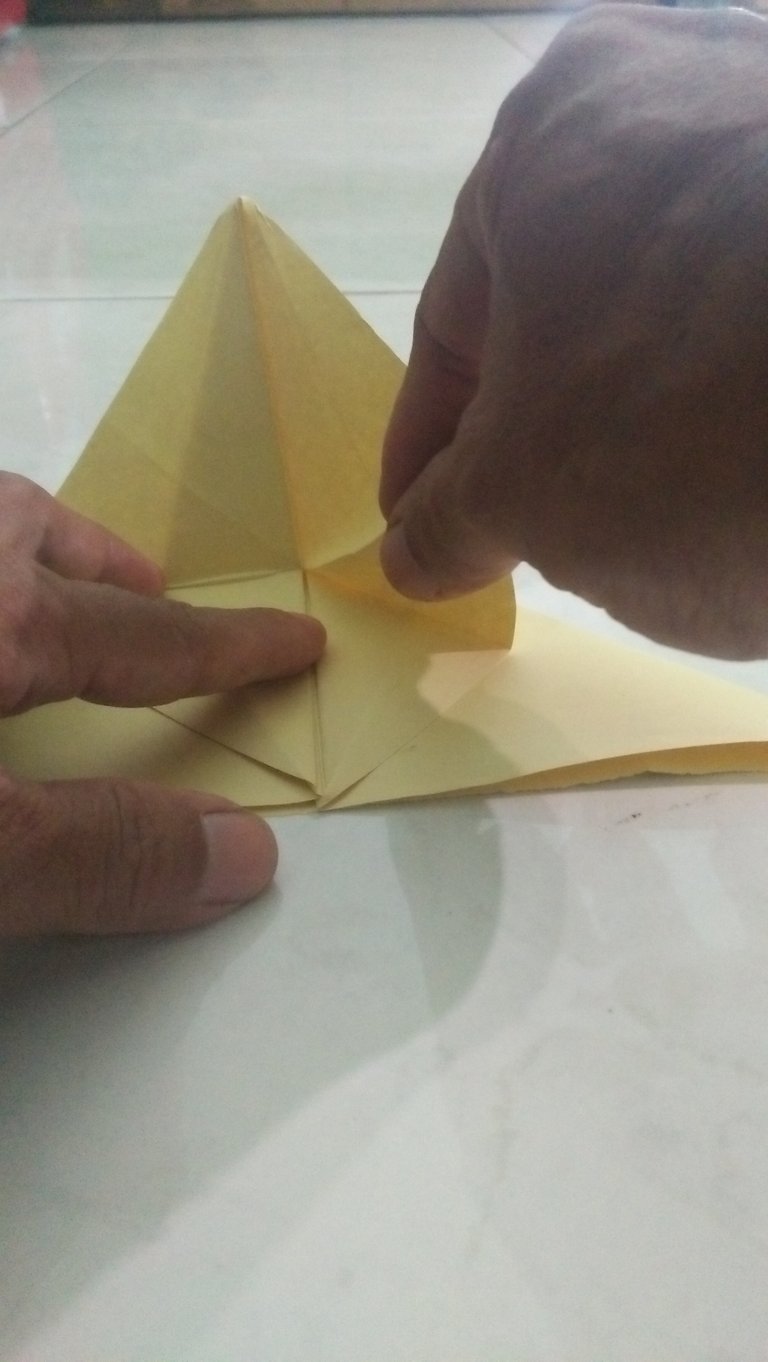
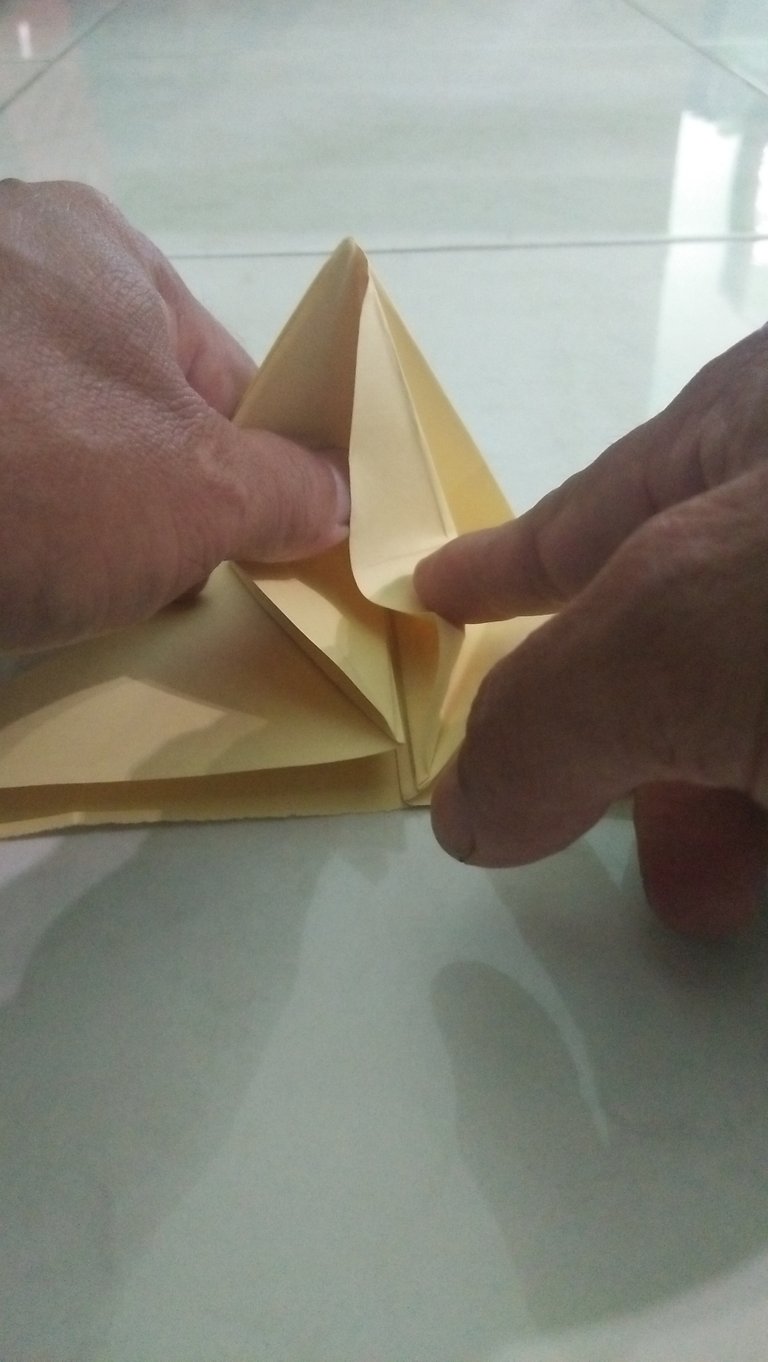
6. Making rhombus on a triangle
Open the top layer of the rhombus, fold the right and left sides inward and overlap with the top side so it looks like the picture
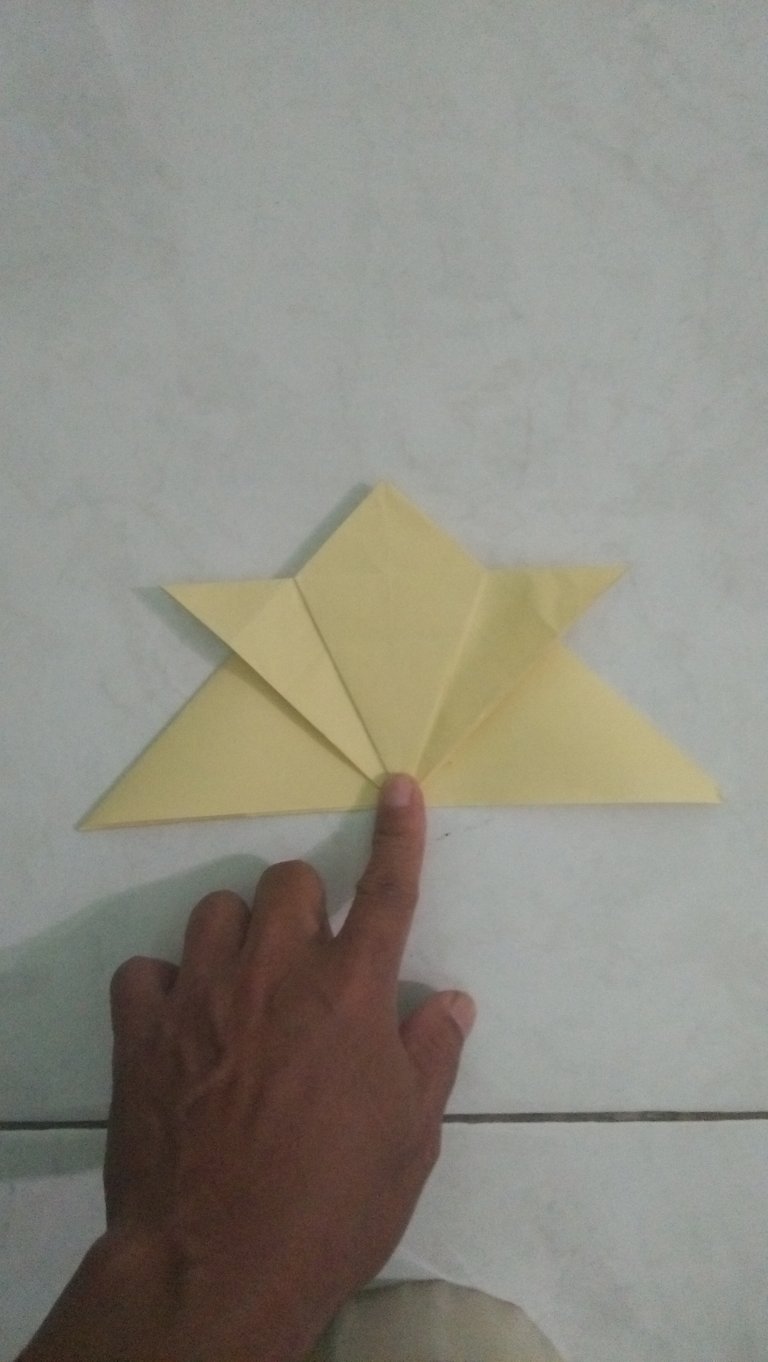
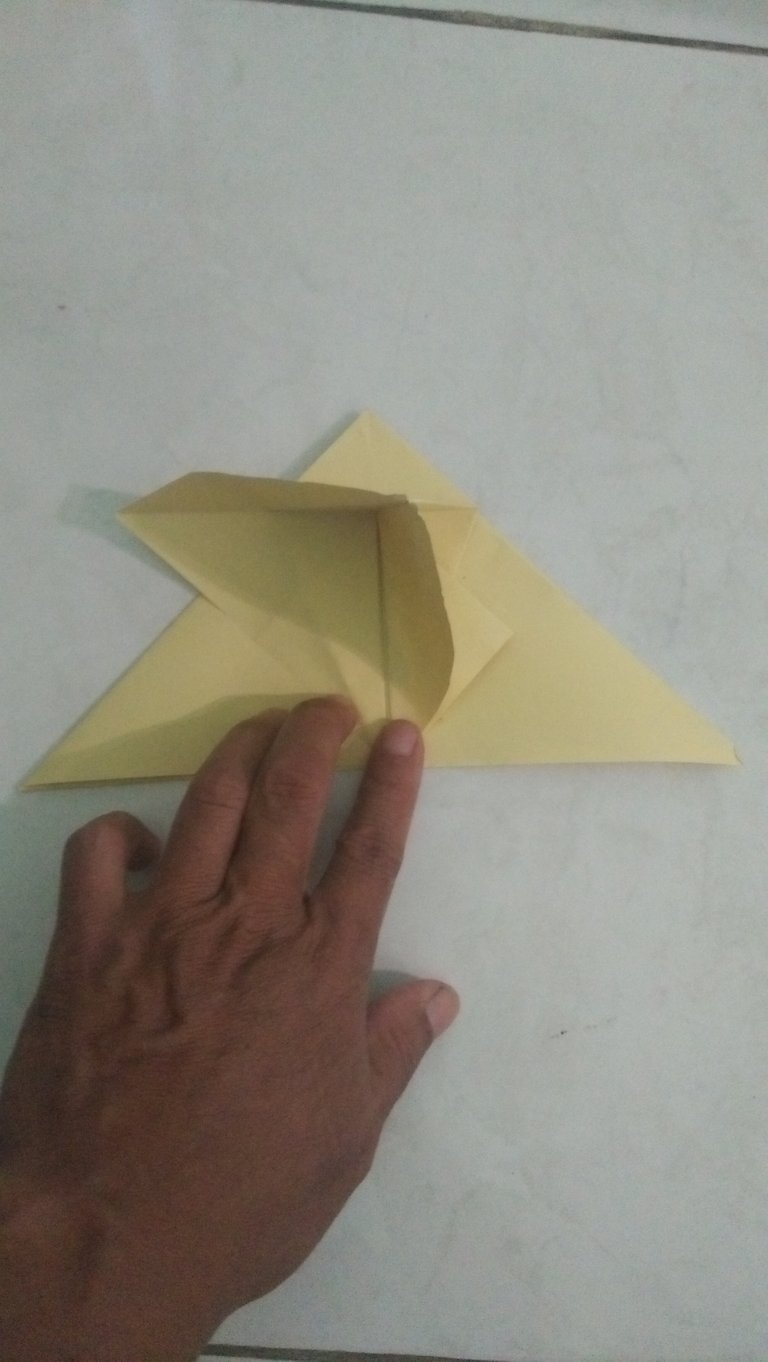
7. Change into a kite shape
Fold the upper half of rhombus as show the image
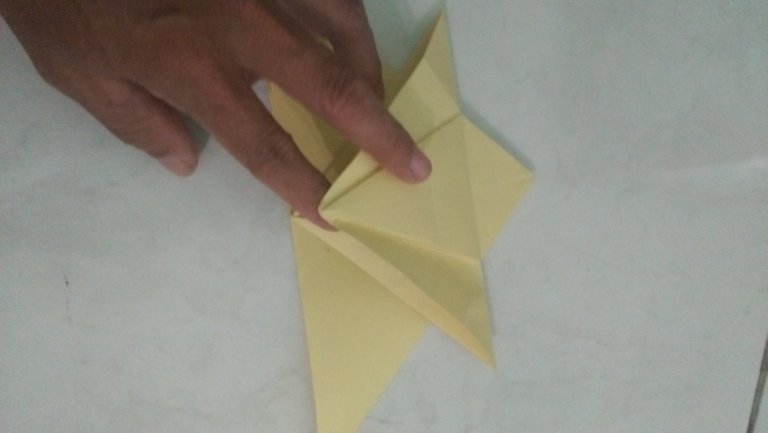
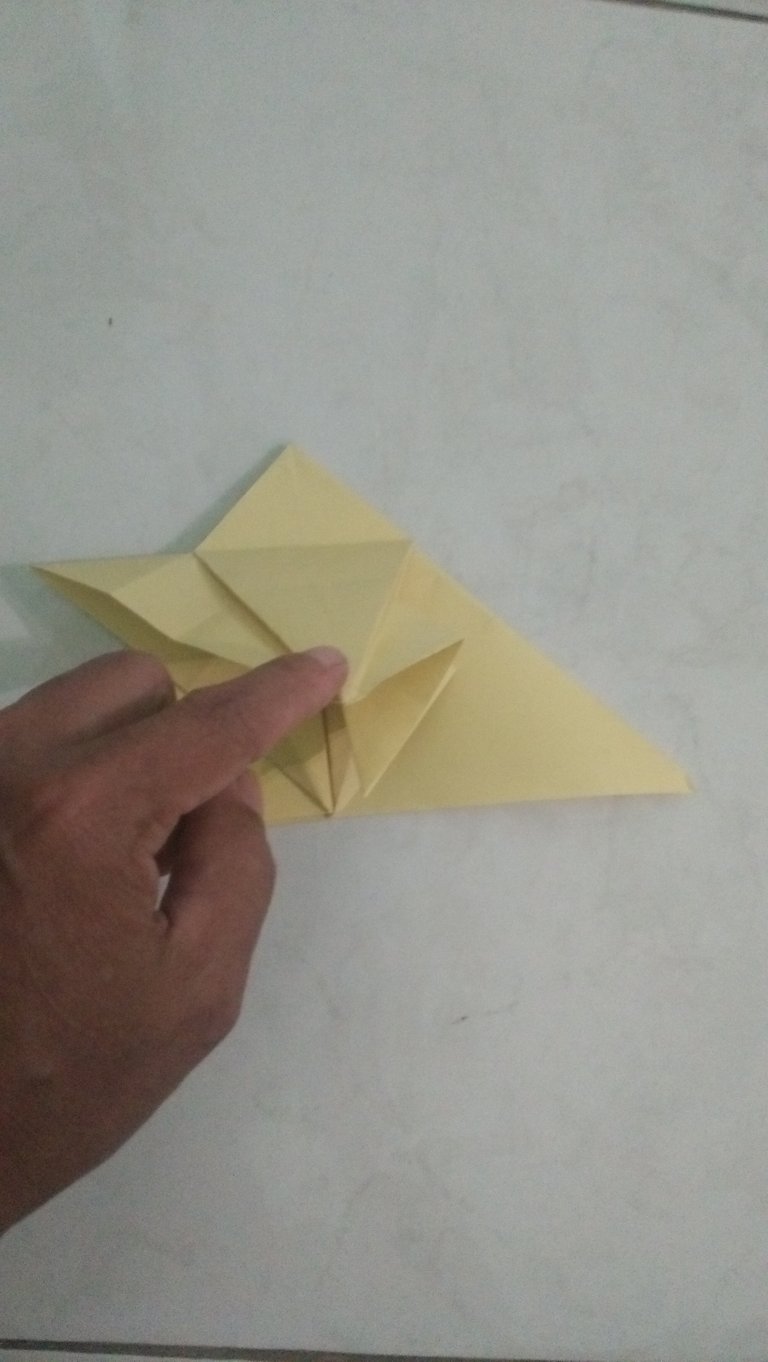
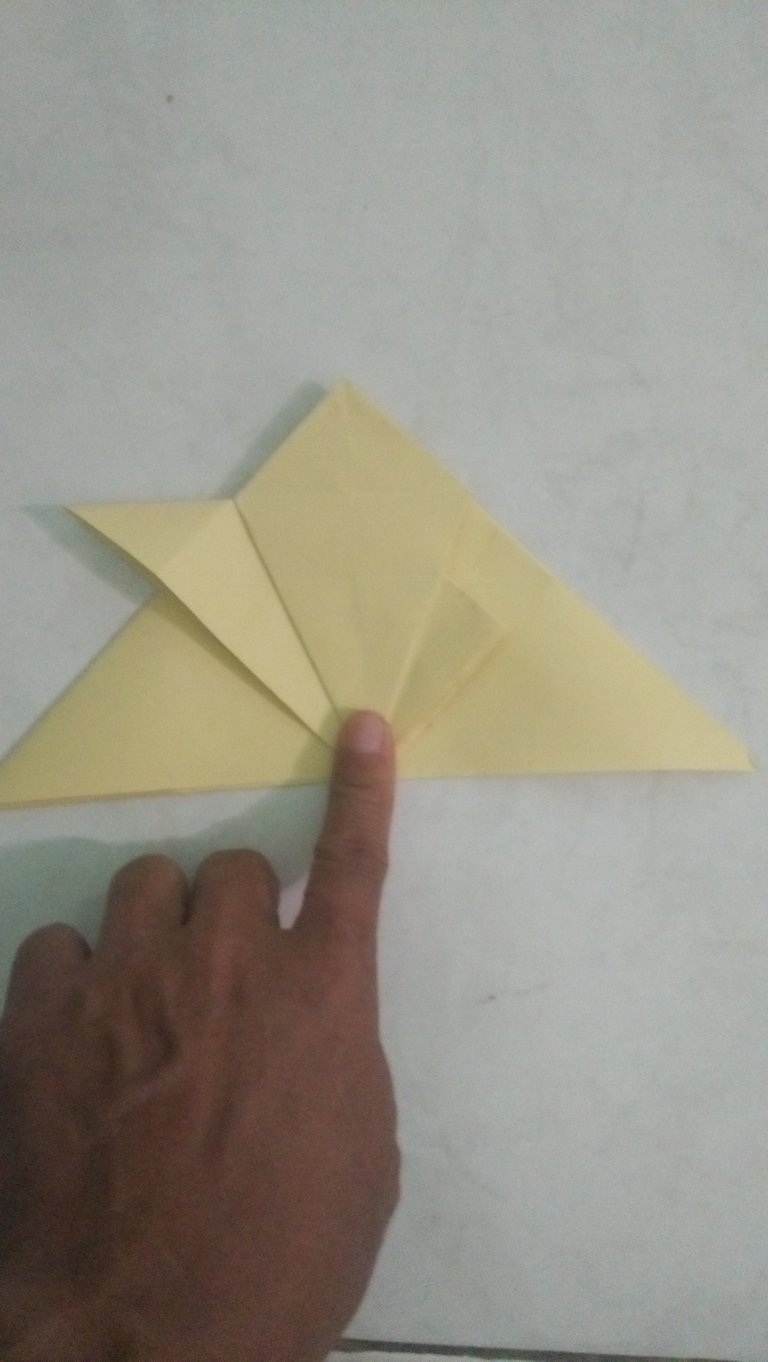
Take the right and left hemispheres of the folded kite so it looks like the picture
![IMG20200630141037[1].jpg](https://images.hive.blog/768x0/https://images.ecency.com/DQmbvaXbiZEHXnMZHx2PudgNuYp2AqeAwyQj82Mhrze8CTE/IMG20200630141037[1].jpg)
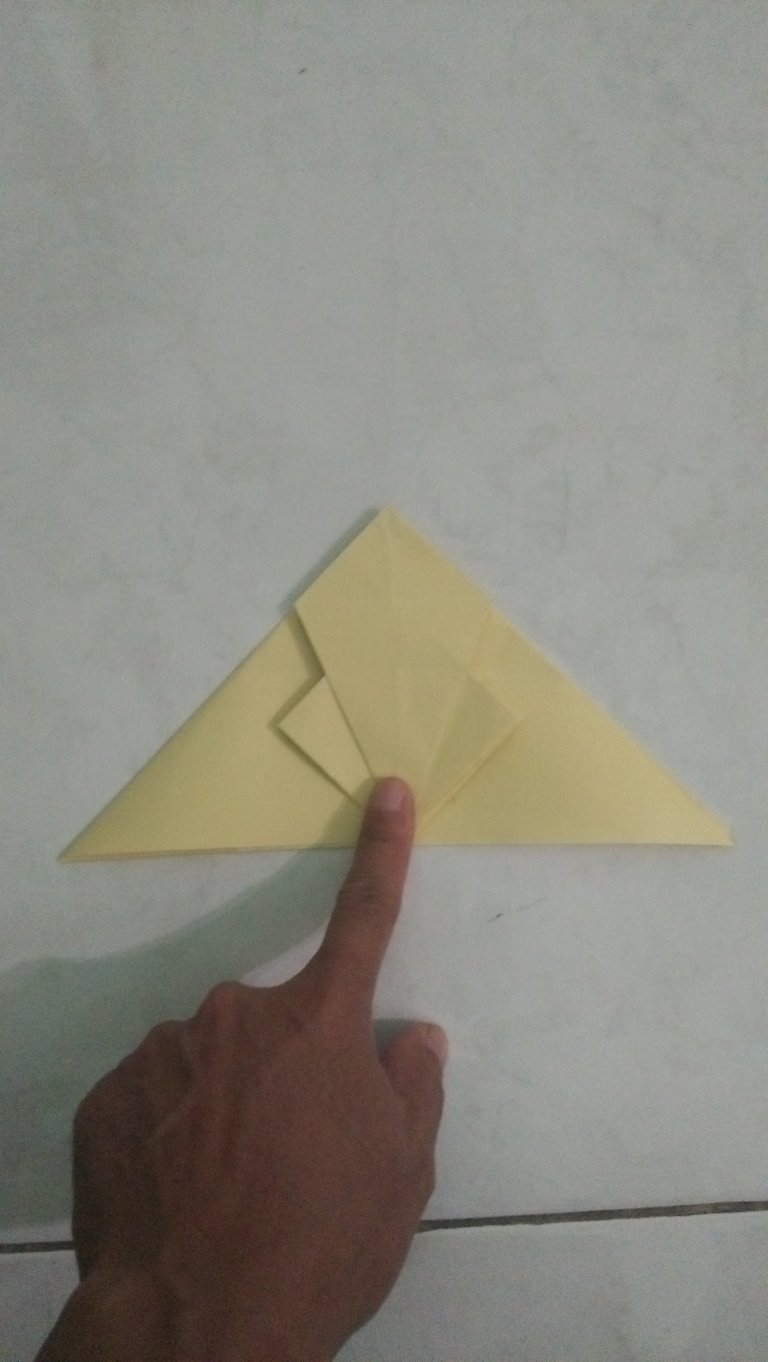
Unfold the kite up so it looks like the picture
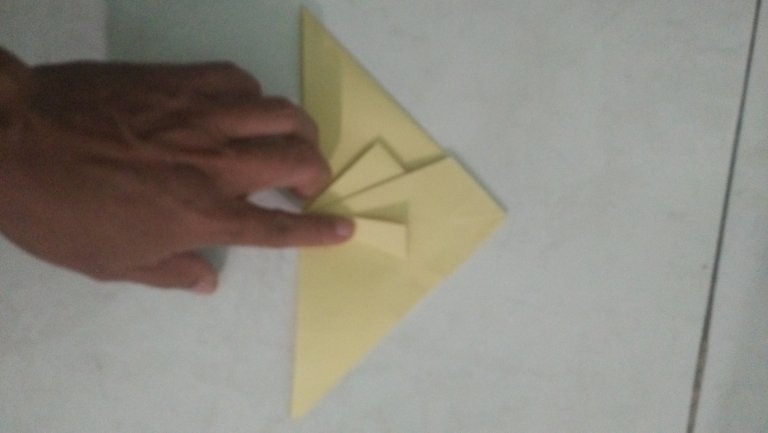
Take the right and left sides and fold in and then overlap it with the top layer as shown in the following image.
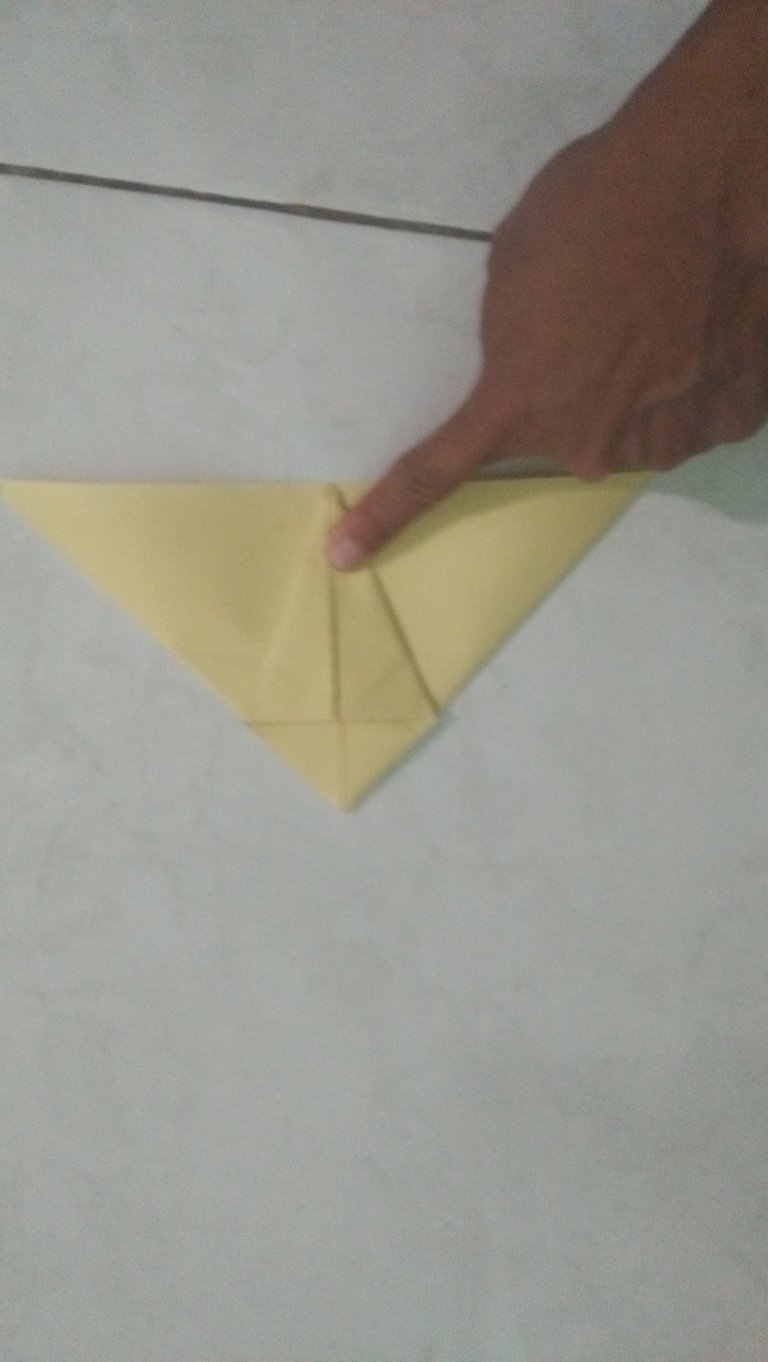
Fold the triangle shapes on the right and left sides to the center as shown in the picture
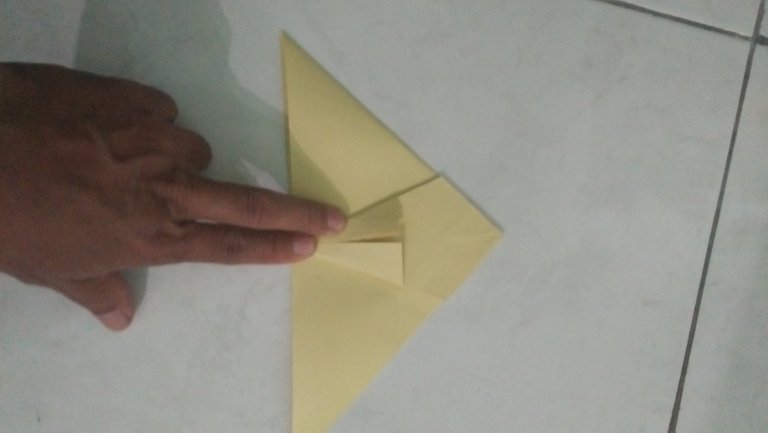
Lift the top layer, folding the right and left sides of the input into the fold in the middle so that there is only a kite up on the triangle as shown in the picture.
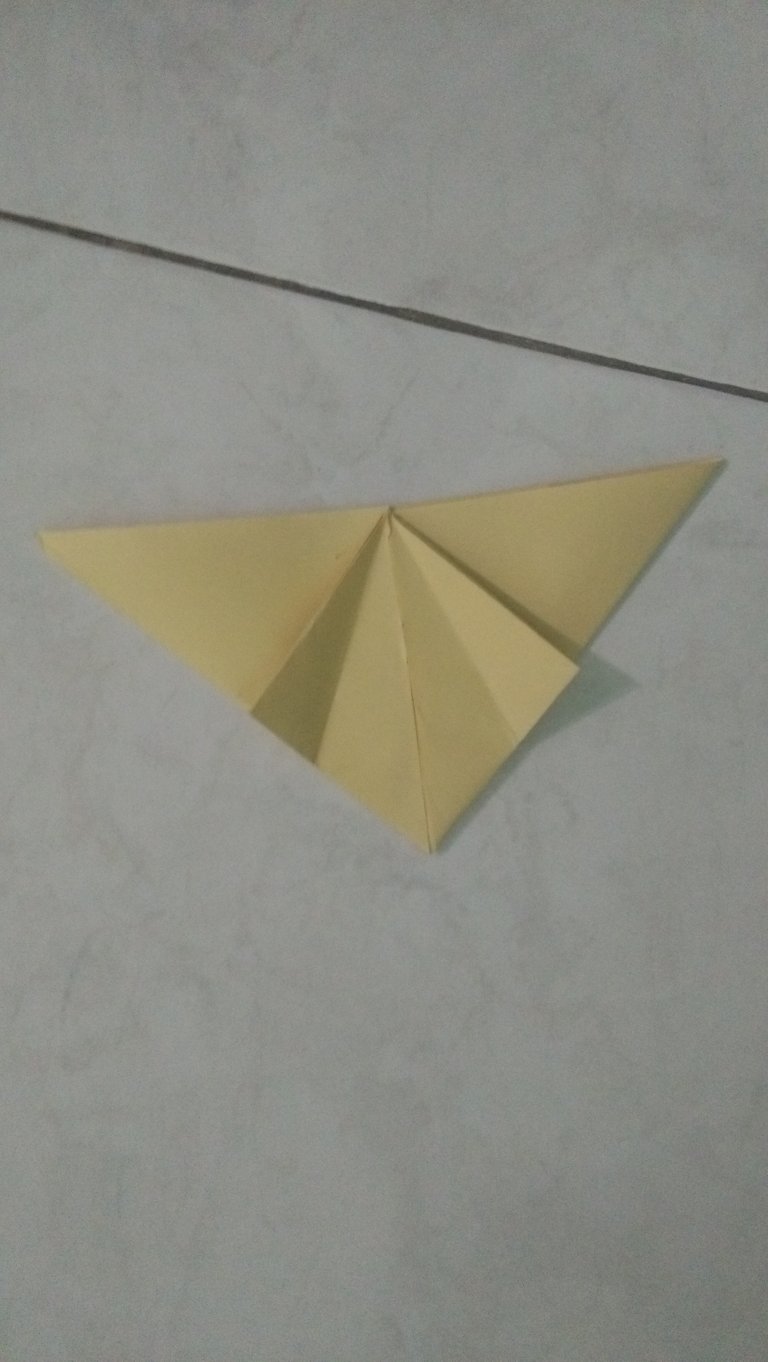
Fold the longer part of the kite into the shorter part
Fold the longer part of the kite into the shorter part
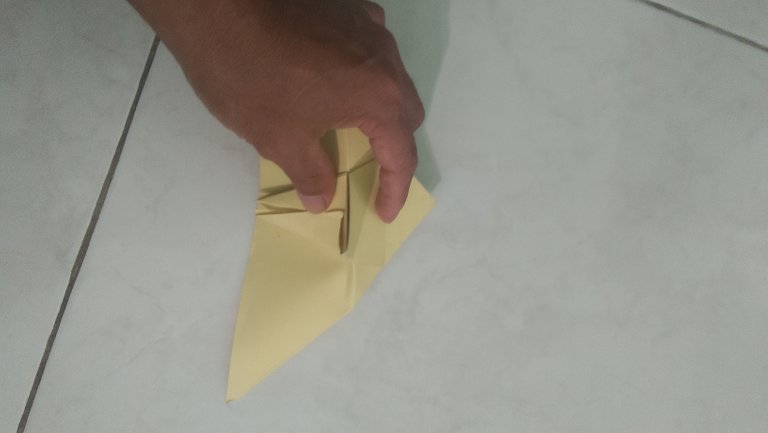
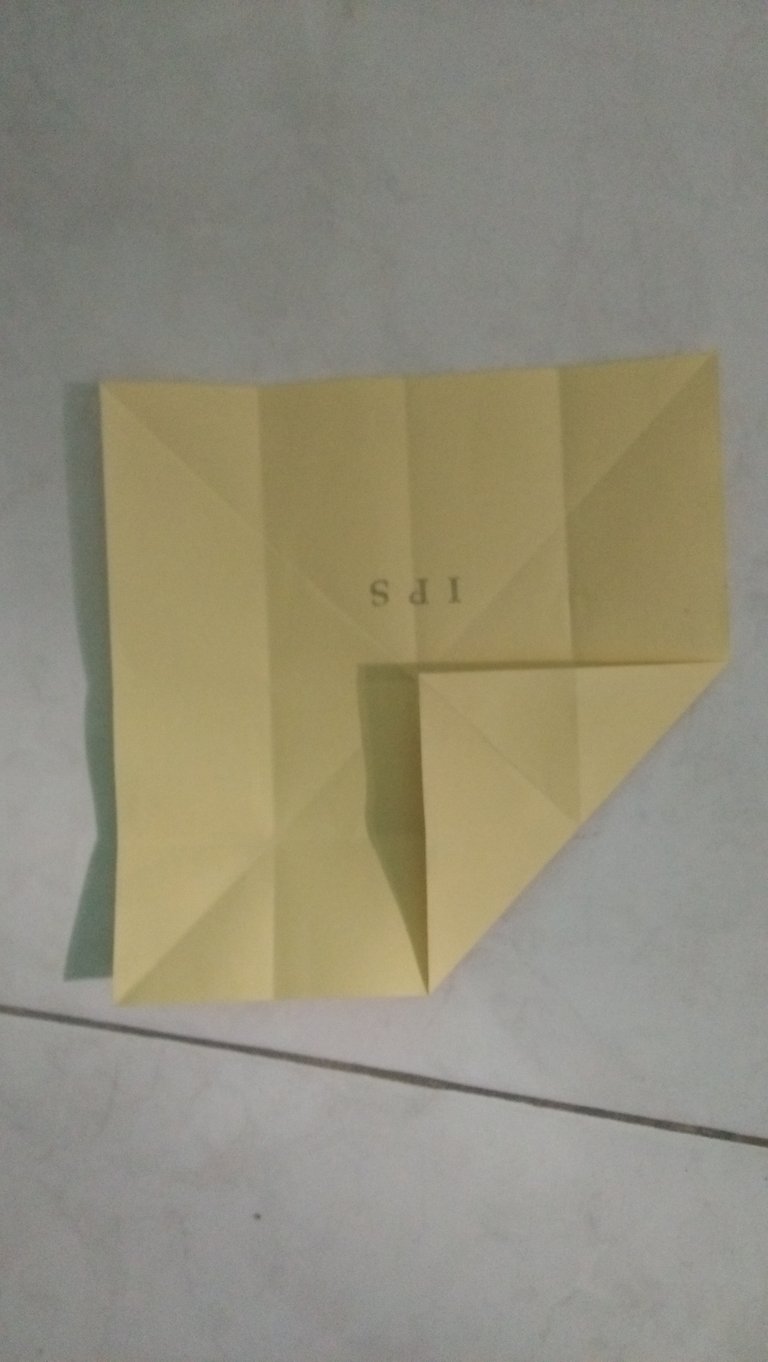
Fold the right and left sides of the triangle on the rhombus as shown in the picture.
![IMG20200630142757[1].jpg](https://images.hive.blog/768x0/https://images.ecency.com/DQmTjmqdJABwx2q1SwBaAeq7X8HzjYiZ7dYUUF2sryBLmZK/IMG20200630142757[1].jpg)
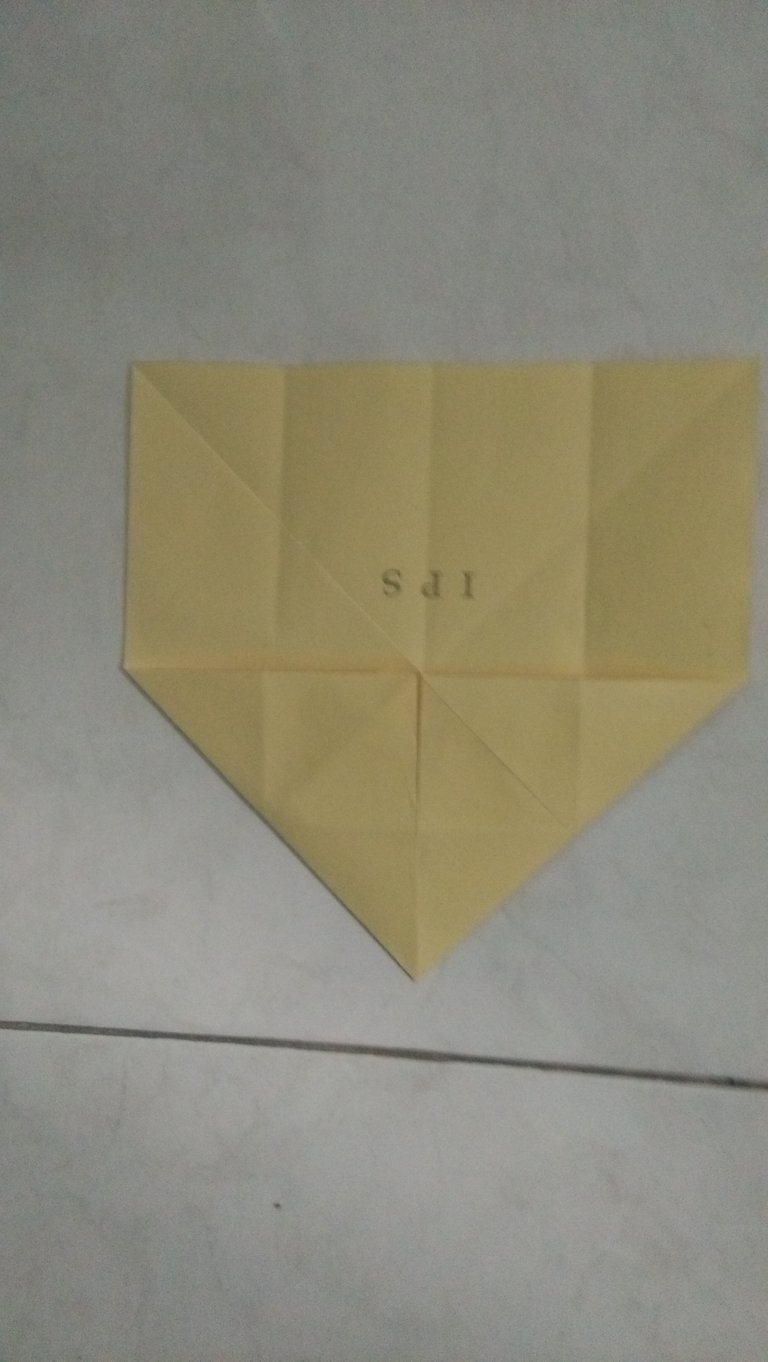
8. Preparing the bat's head
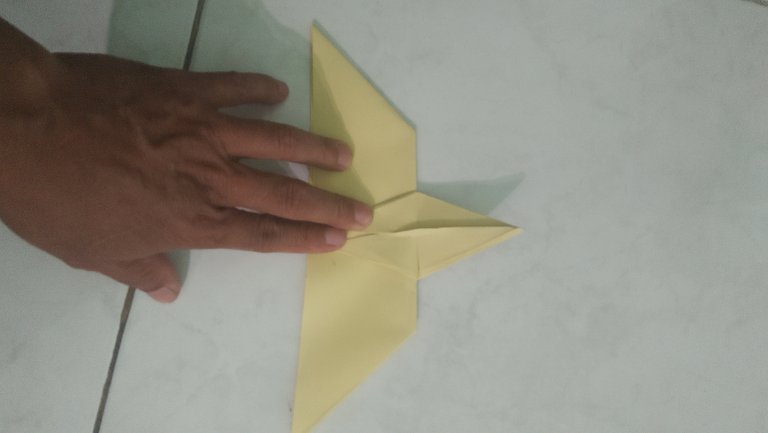
Turn the paper over so that you see another part of the kite in the triangle that was folded as shown in the picture
![IMG20200702091722[1].jpg](https://images.hive.blog/768x0/https://images.ecency.com/DQmP4VtNd766b7Mst8daLRW2KobNe2VMHSrei7Zv1Wb4Rzp/IMG20200702091722[1].jpg)
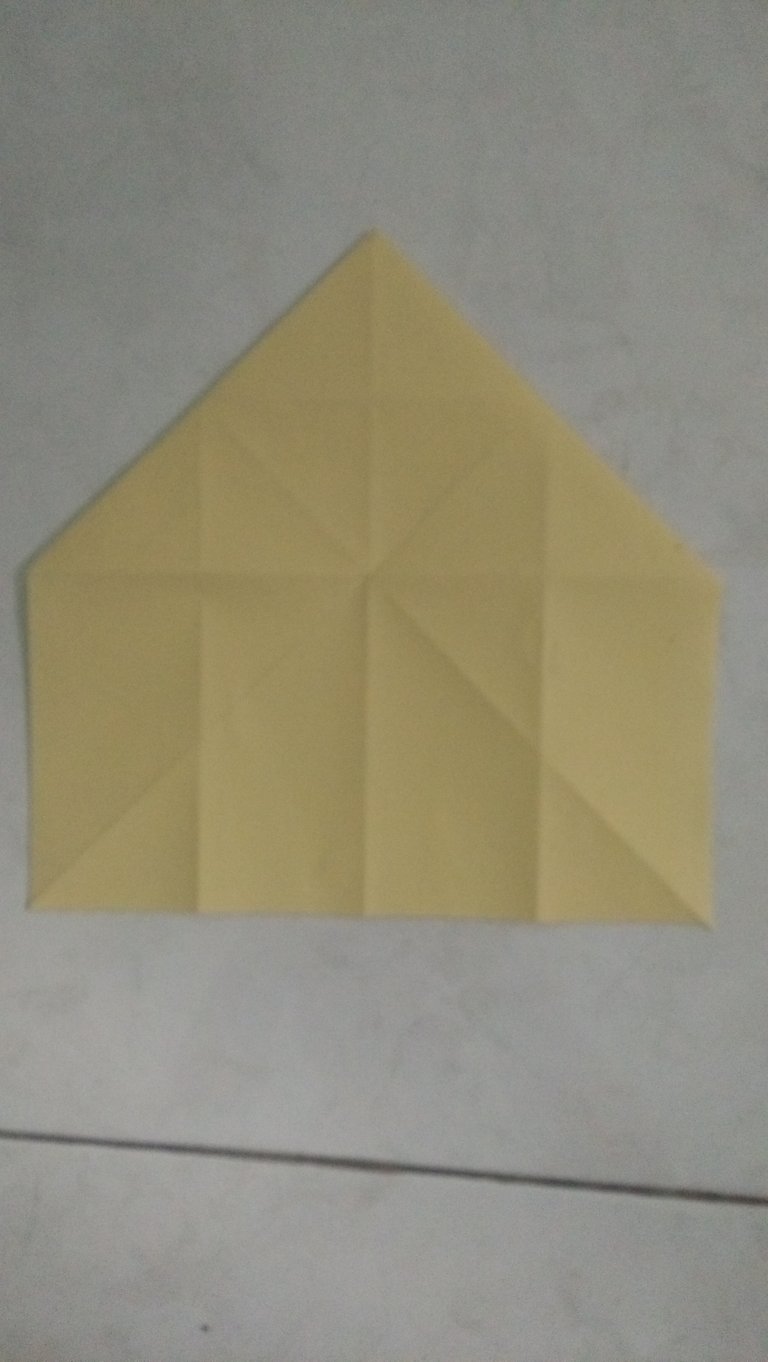
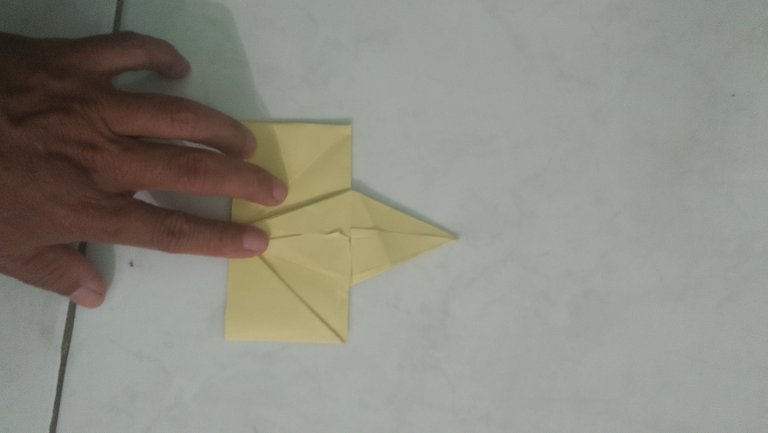
Fold the kite section to the right and left so that the sides are aligned as if there are folds in the image
![IMG20200702091554[1].jpg](https://images.hive.blog/768x0/https://images.ecency.com/DQmcf9kmK2zUk7AUqStzGKb6NMTTeLCHbmtBjUzbrZRKcuH/IMG20200702091554[1].jpg)
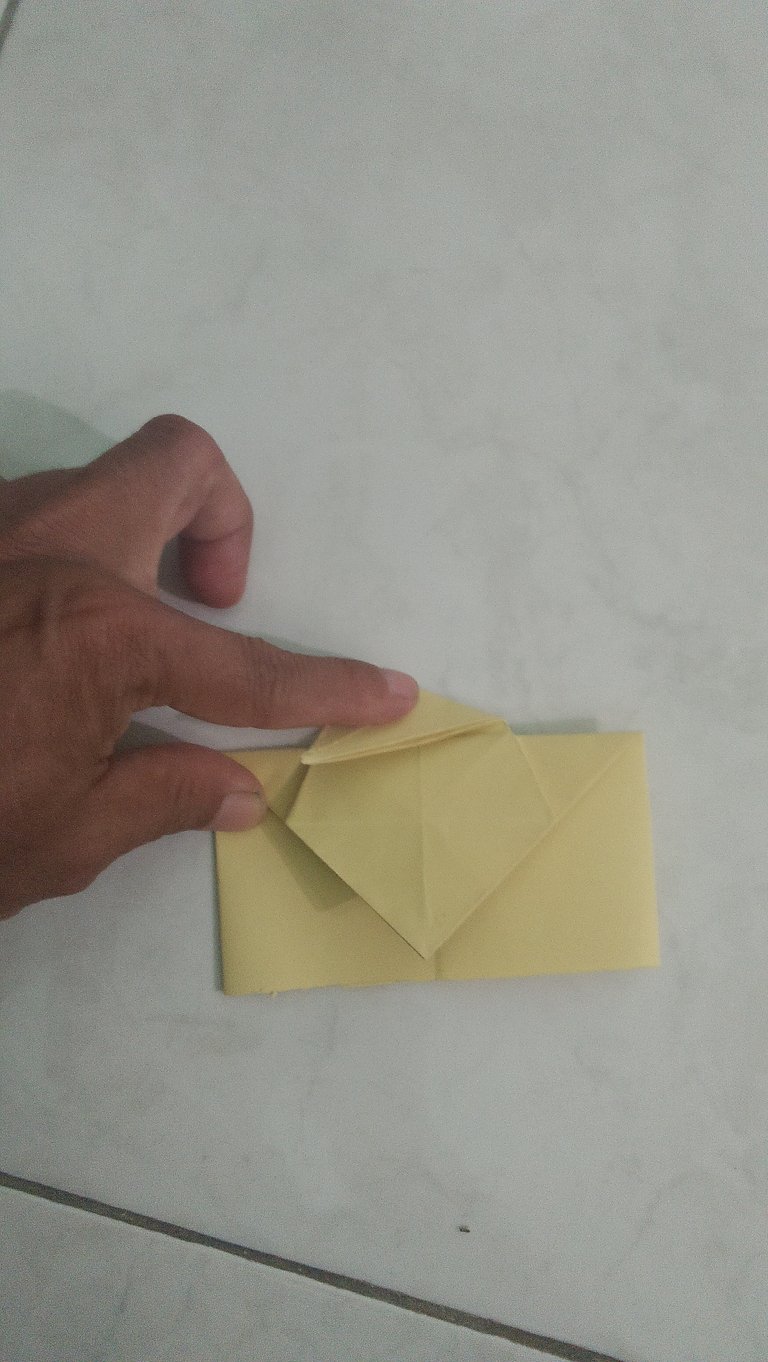
Take the edge of the kite fold symmetrically as shown
![IMG20200630143059[1].jpg](https://images.hive.blog/768x0/https://images.ecency.com/DQmWmfk8UKoFQWDgwk6UvJ6Q4B3T8gq8ohTdCtqLjBEipmC/IMG20200630143059[1].jpg)
![IMG20200630143441[1].jpg](https://images.hive.blog/768x0/https://images.ecency.com/DQmSaYoGrXSRCCdYZGHuTvA9yPoeCvV5qqGqqHjx4ZAz9Vm/IMG20200630143441[1].jpg)
Fold the kite on its base to the right and left as shown in the picture
![IMG20200702103846[1].jpg](https://images.hive.blog/768x0/https://images.ecency.com/DQmdxKVPccBYnkK7juFJg1HiQso3kDncwiaPZ1QD4pwSjNT/IMG20200702103846[1].jpg)
![IMG20200702103917[1].jpg](https://images.hive.blog/768x0/https://images.ecency.com/DQmVDQrqScRtJpYSj6u2nrbjWifP1Mdvn4qaaBvwqHNAsBG/IMG20200702103917[1].jpg)
Insert your finger into the center of the fold at the end of the kite and press so that it kills the small kite as shown in the picture.
![IMG20200630143620[1].jpg](https://images.hive.blog/768x0/https://images.ecency.com/DQmakWgj2mFLFYA9E58tteRrJxCvXgYDMx6VFDC8oanpGQN/IMG20200630143620[1].jpg)
![IMG20200702104007[1].jpg](https://images.hive.blog/768x0/https://images.ecency.com/DQmPpVKxh8F7mZ5rG1ppCqNzJMJZrPSohyaeG6FvFGMLoFS/IMG20200702104007[1].jpg)
![IMG20200702104038[1].jpg](https://images.hive.blog/768x0/https://images.ecency.com/DQmTU4ZDhAYTH2ZyNpQnJ4a3nWTmxkueQxPqMVoP7KbGthV/IMG20200702104038[1].jpg)
![IMG20200630143633[1].jpg](https://images.hive.blog/768x0/https://images.ecency.com/DQmWvcgFV8tyEyfQy1FxoXdXDdnYoXpUtT5B7PVxcsFWnhq/IMG20200630143633[1].jpg)
Turn the paper over so that it looks like the picture
![IMG20200702104055[1].jpg](https://images.hive.blog/768x0/https://images.ecency.com/DQmXDMNYJRwLw8mK9CxCpopQuqbPRwqA3WAvvagcBt6oiMj/IMG20200702104055[1].jpg)
Fold the tip of the kite in and insert the end between the other folds so that it looks more presentable.
![IMG20200702104133[1].jpg](https://images.hive.blog/768x0/https://images.ecency.com/DQmPoUjTLkQCuPy2fcRYo8EBRPbqegVHZwS3ZQMKRzr7eht/IMG20200702104133[1].jpg)
![IMG20200630144530[1].jpg](https://images.hive.blog/768x0/https://images.ecency.com/DQmRc4Jsmqf8Q78YSF2NVr9AidKCspvnSaki1WBhtiuZbkn/IMG20200630144530[1].jpg)
![IMG20200702104159[1].jpg](https://images.hive.blog/768x0/https://images.ecency.com/DQmZShXwWGvvdCfGv9sR69Su18dqx5xkM29bRT9Gko7wwun/IMG20200702104159[1].jpg)
Turn the paper over, so it looks like the picture
![IMG20200702104215[1].jpg](https://images.hive.blog/768x0/https://images.ecency.com/DQmaX4W2o49bVfd9rVMWaQdmz5WRLASFMc5anB2qp1VedzP/IMG20200702104215[1].jpg)
Fold the right and left sides of the kite with a triangle shape and insert it into the folds of the folds as shown in the following image
![IMG20200702104331[1].jpg](https://images.hive.blog/768x0/https://images.ecency.com/DQmVJK2FdKAVbDWGFLeXejxB68BY5CtW8DvbZnz1o4yC5MS/IMG20200702104331[1].jpg)
![IMG20200702104418[1].jpg](https://images.hive.blog/768x0/https://images.ecency.com/DQmfJpn75RXCD5GNACTxBKYpjpvrJgBvJLkQxDQe9oGnSWe/IMG20200702104418[1].jpg)
![IMG20200702104508[1].jpg](https://images.hive.blog/768x0/https://images.ecency.com/DQmUHqBPBwcuPNbyUi9jFEiwRZCNj9PwNWMkwv8DiLpzL45/IMG20200702104508[1].jpg)
![IMG20200702104545[1].jpg](https://images.hive.blog/768x0/https://images.ecency.com/DQmfUdYZidU6GDLyuPQdnU2ASo1ca6EqT4TEw1LaCK9fDMF/IMG20200702104545[1].jpg)
Turn the paper over and fold the right and left hemispheres upward as shown in the picture
![IMG20200702104630[1].jpg](https://images.hive.blog/768x0/https://images.ecency.com/DQmTuFNLeqWtr5e4gvTTpAF4Ty9w4uD4mAnLQxwncx5bHXP/IMG20200702104630[1].jpg)
![IMG20200702104702[1].jpg](https://images.hive.blog/768x0/https://images.ecency.com/DQmZNd8cpvZymwkDgxipi8k4zinTEjSCN9xBowQzhBVSabk/IMG20200702104702[1].jpg)
![IMG20200702104711[1].jpg](https://images.hive.blog/768x0/https://images.ecency.com/DQmW4WZcrfLTsQF7KazNGe6HkYnR7ZQAAvA8Hi21BvrxNys/IMG20200702104711[1].jpg)
9. Make wings
Turn the paper over so that you see the folds on the right and left sides
![IMG20200702104754[1].jpg](https://images.hive.blog/768x0/https://images.ecency.com/DQmQCqF18mFWt83PwNCQyw5V2dwFPASu1JC9w9KwHSppkT7/IMG20200702104754[1].jpg)
Fold the right side of the rectangle so that it is coiled with oblique folds as shown in the picture
![IMG20200702104808[1].jpg](https://images.hive.blog/768x0/https://images.ecency.com/DQmWH9wudjtqA1dedGcBJFSyNBFTHj78BQguYkxReuv4MFQ/IMG20200702104808[1].jpg)
![IMG20200702104831[1].jpg](https://images.hive.blog/768x0/https://images.ecency.com/DQmZiNor9RgpWFEpyrdw3Xrcj2mYd7n1uB4nHLxE7kDYeHh/IMG20200702104831[1].jpg)
![IMG20200702104836[1].jpg](https://images.hive.blog/768x0/https://images.ecency.com/DQmVS8kJgUfW47xojoBQkXtcf6ZF4t38Ese8n1mkmDHRWsS/IMG20200702104836[1].jpg)
Fold it again so that the bottom edges of the rectangle are aligned or squeezed like in the picture.
![IMG20200702104853[1].jpg](https://images.hive.blog/768x0/https://images.ecency.com/DQmcUXT7MwrAGV5mnv3mZsT9rMSn6HJ1m8Kie9mrzCpSSRa/IMG20200702104853[1].jpg)
Open the fold then fold it back up on the fold that it dropped in the picture
![IMG20200702104937[1].jpg](https://images.hive.blog/768x0/https://images.ecency.com/DQmShVEcBuw5RyELPpx3WrqZxkNXVwk1HdSFTZVu8AZW5hT/IMG20200702104937[1].jpg)
Fold it again so that it coincides with the folds tilted until the bottom side is aligned again as shown in the picture
![IMG20200702105005[1].jpg](https://images.hive.blog/768x0/https://images.ecency.com/DQmQXRwEfGvRYy9AFFLPo5VHYmreK8RHxfMR5MLV2a8z9hk/IMG20200702105005[1].jpg)
![IMG20200702105020[1].jpg](https://images.hive.blog/768x0/https://images.ecency.com/DQmT7Mep87rkPtEECDkKvTiQMAoDT6g52rrUqf68R7st7Tv/IMG20200702105020[1].jpg)
![IMG20200702105103[1].jpg](https://images.hive.blog/768x0/https://images.ecency.com/DQmefW6BPujffsBoaeFhT4dAd2LukBkPi2Quz35oYmW26pZ/IMG20200702105103[1].jpg)
![IMG20200702105119[1].jpg](https://images.hive.blog/768x0/https://images.ecency.com/DQmcoTU5urJKvv1eeuiuWHoAgApzpsnydpCvyPPvWrJbmsV/IMG20200702105119[1].jpg)
![IMG20200702105137[1].jpg](https://images.hive.blog/768x0/https://images.ecency.com/DQmQ6h1ZrAv35UZehUDskmaLYT8yqtyWWBRkhEFZ96ctsMi/IMG20200702105137[1].jpg)
Do the same for the left wing so that it will look like in the picture
![IMG20200702105405[1].jpg](https://images.hive.blog/768x0/https://images.ecency.com/DQmWPsDXEaQeqqRSuVTF78gji1A4dW2DzF2tVk6uwgDwvAR/IMG20200702105405[1].jpg)
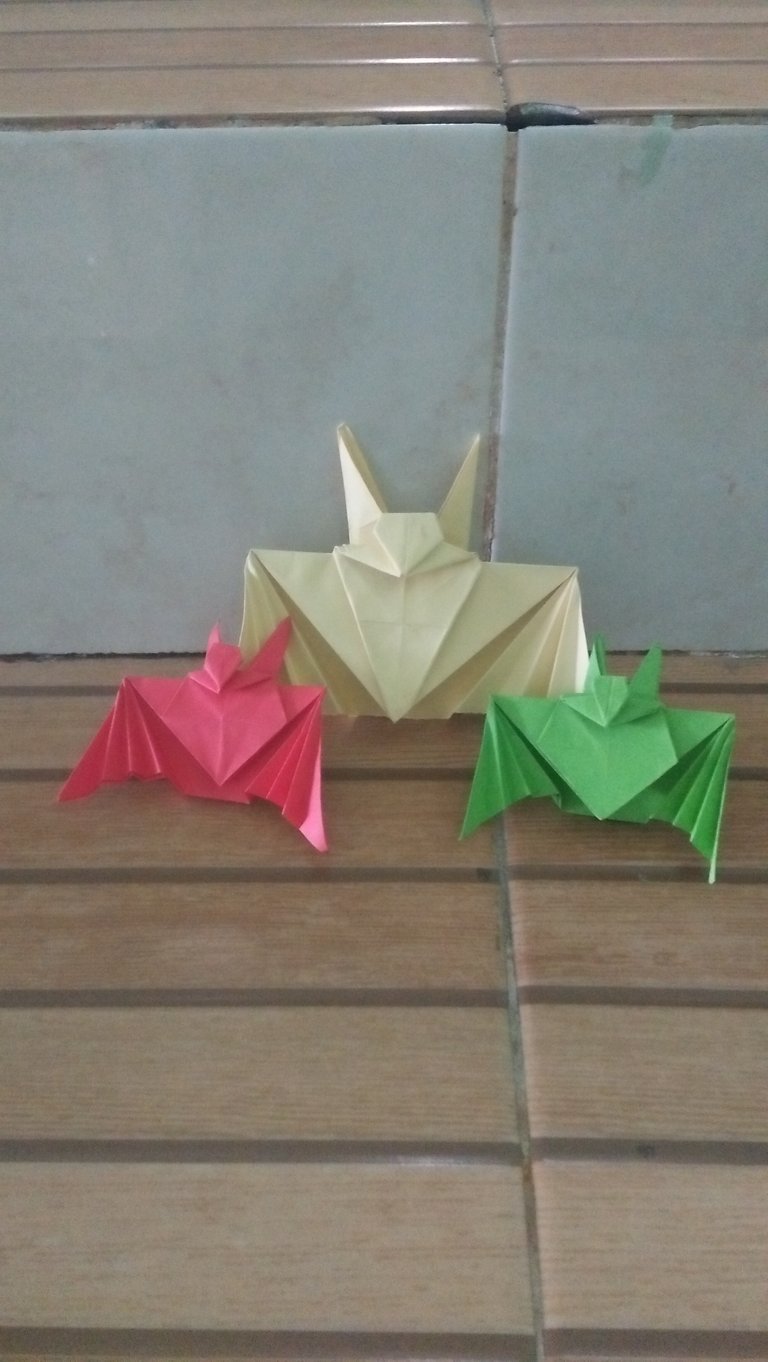
Wings can be opened and the bat is finished
![IMG20200702105421[1].jpg](https://images.hive.blog/768x0/https://images.ecency.com/DQmUoDGzL6j7a6yGHEvXmkqFkxkc7F4D73z8tDhF1MoD69B/IMG20200702105421[1].jpg)
Here are some variations of bats that I made.