Lindas bolsas hechas con papel de revista / Cute bags made with magazine paper

Imagen diseñada en Canva
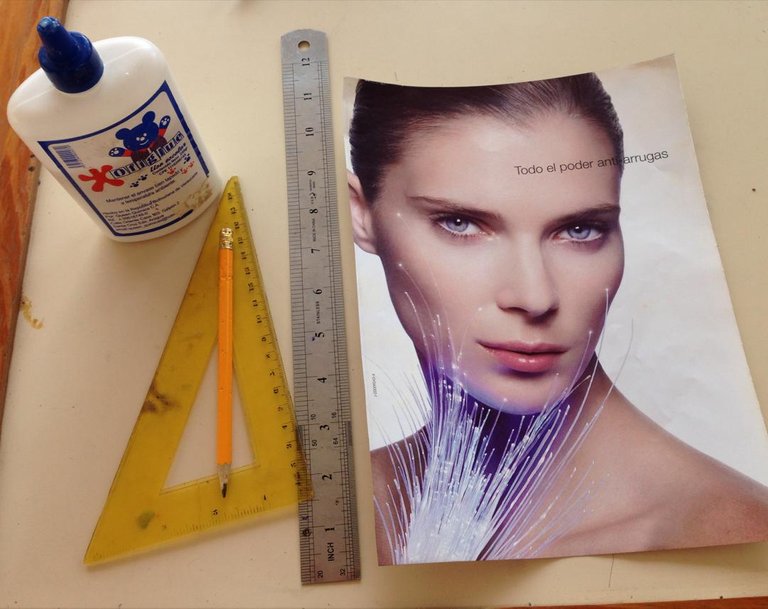
Hola amigos! Hace unos días necesitaba unas bolsitas para entregar un detallito, y se me ocurrió la idea de hacerlas yo misma, así que les quiero mostrar cómo. Sólo necesité una hoja, quise reciclar así que esta vez usé unas de revista, me parecieron muy lindas y el material me pareció increíble. Además de la revista, use reglas, pega y lápiz.
Hello friends! A few days ago I needed some bags to give a little gift, and I came up with the idea of making them myself, so I want to show you how. I only needed a sheet of paper, I wanted to recycle so this time I used some magazine sheets, I thought they were very cute and the material was amazing. Besides the magazine, I used rulers, glue and pencil.
Primeramente decidí qué lado querría el que estuviese a la vista. Una vez decidido, comenzamos a trabajar al lado contrario.
Usé la hoja horizontalmente, y medí solo en la parte superior e izquierda 1,5 cm. Doblamos y colocamos pega, pues, el otro extremo lo uniremos a este.
I first decided which side I wanted to be in view. Once decided, we started working on the opposite side.
I used the sheet horizontally, and measured only on the top and left side 1.5 cm. We folded and placed glue, as, the other end we will attach to this one.
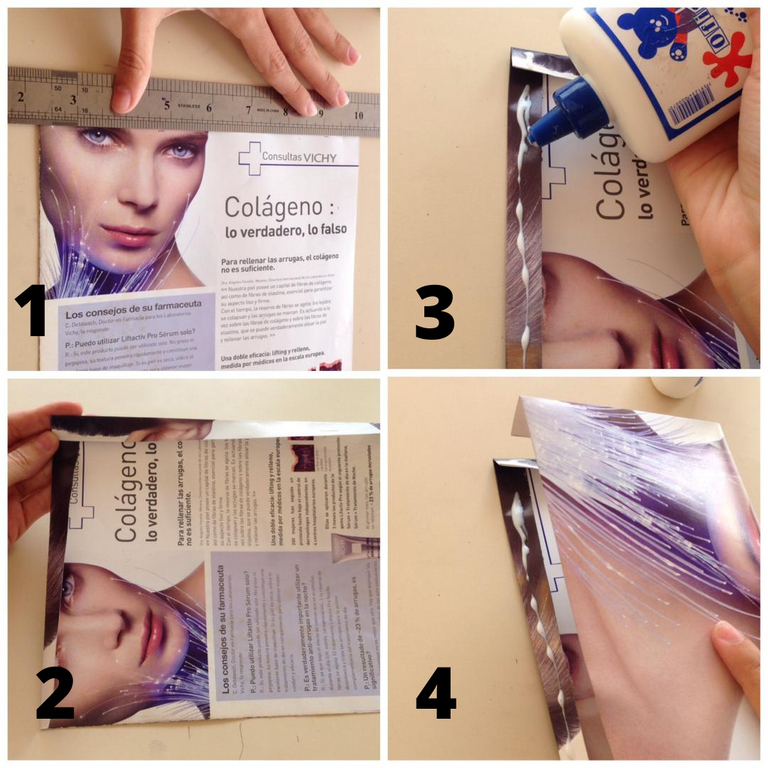
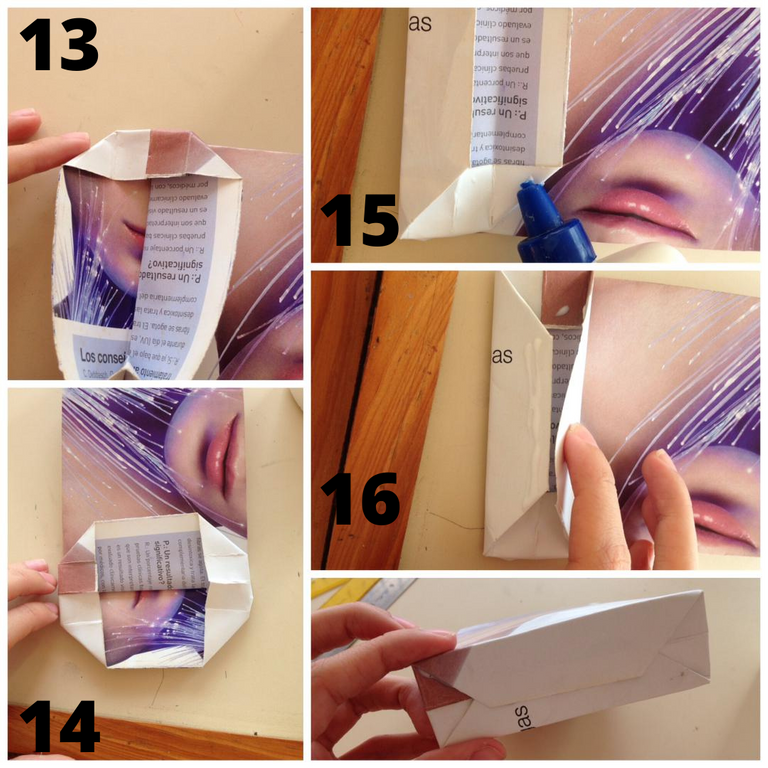
Una vez pegado, hacemos presión al lado derecho para que forme el doblez.
Una vez listo, en ambos lados vamos a doblar tiras, yo las hice nuevamente de 1,5cm. Al estar perfectamente dobladas y marcado el doblez, cambiamos la dirección del pliegue hacia adentro y tenemos ya los laterales de nuestra bolsa.
Once glued, we press the right side to form the fold.
Once ready, on both sides we are going to fold strips, I did them again of 1.5cm. Once they are perfectly folded and the fold is marked, we change the direction of the fold inwards and we have the sides of our bag.
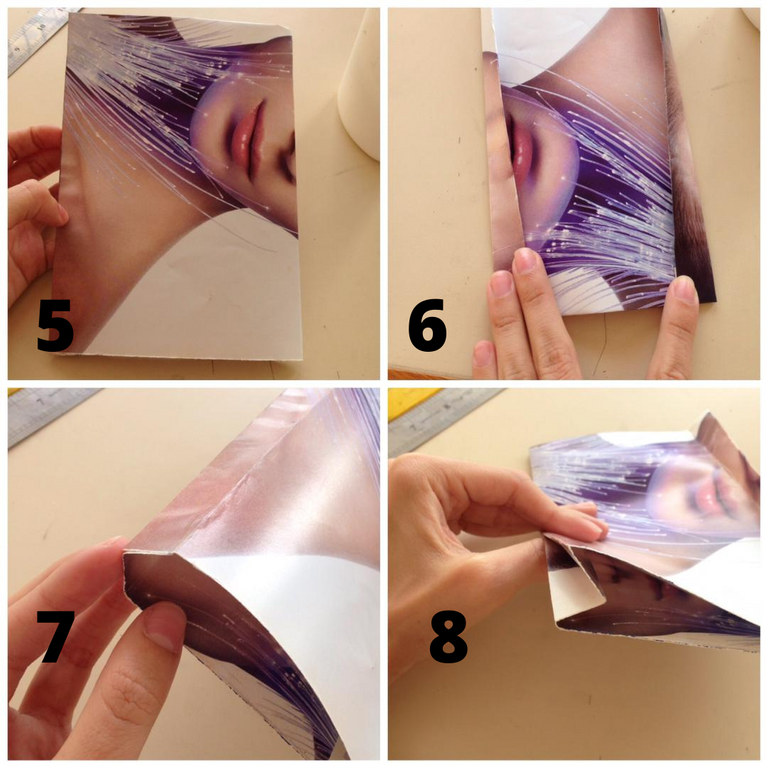
Una vez listo los laterales debemos hacer la base. Para ello, decidimos que zona será la inferior y doblamos un poco (paso 10). Luego, deshacemos el pliegue y lo llevamos hacia afuera, esto lo hacemos en ambos extremos.
Once the sides are ready, we must make the base. To do this, we decide which area will be the bottom and fold a little (step 10). Then, we undo the fold and take it outwards, we do this at both ends.
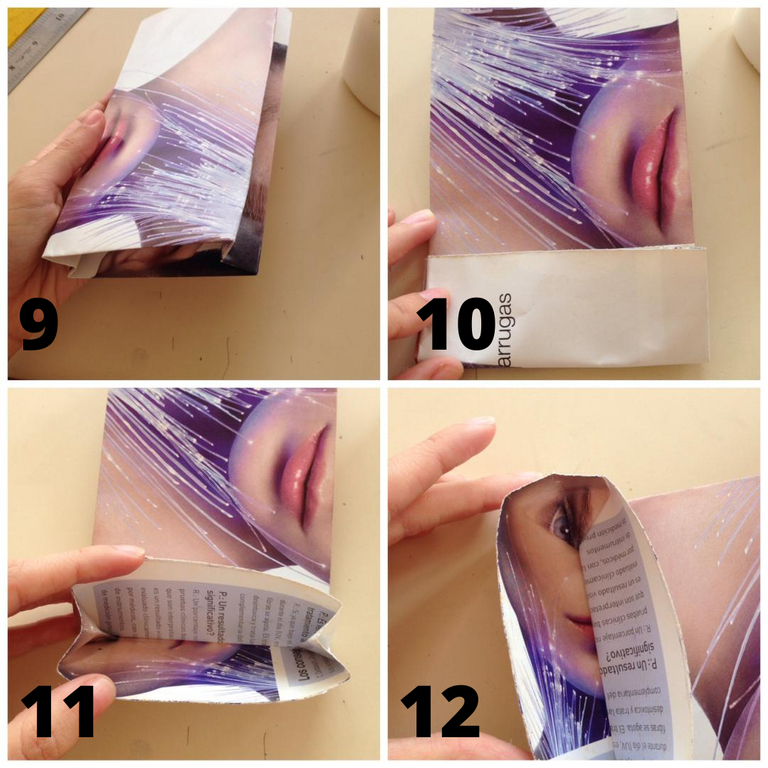
Ahora, hacemos un doblez hacia el interior en ambos extremos. Unimos las zonas superior e inferior y pegamos. Ya tenemos nuestra base.
Now, we make an inward fold at both ends. We join the upper and lower areas and glue. Now we have our base.
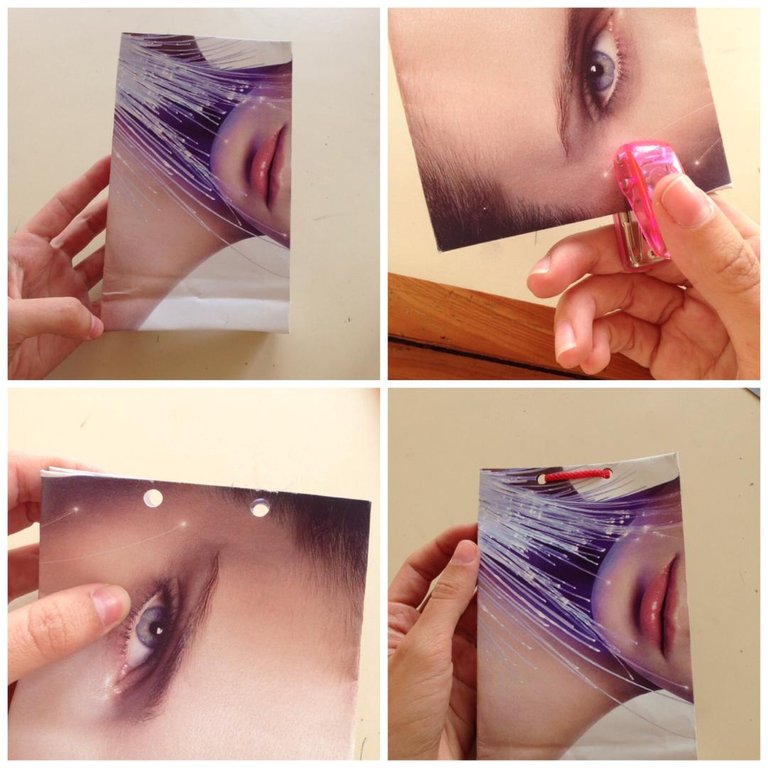
Ya nuestra bolsita tiene forma. Ahora, con un sacahuecos le haremos dos agujeros justo en el centro, y por ahí pasamos una cinta o cordón que será lo que amarre nuestra bolsa.
Now our bag has its shape. Now, with a hole punch we will make two holes right in the center, and through there we pass a ribbon or string that will be what will tie our bag.
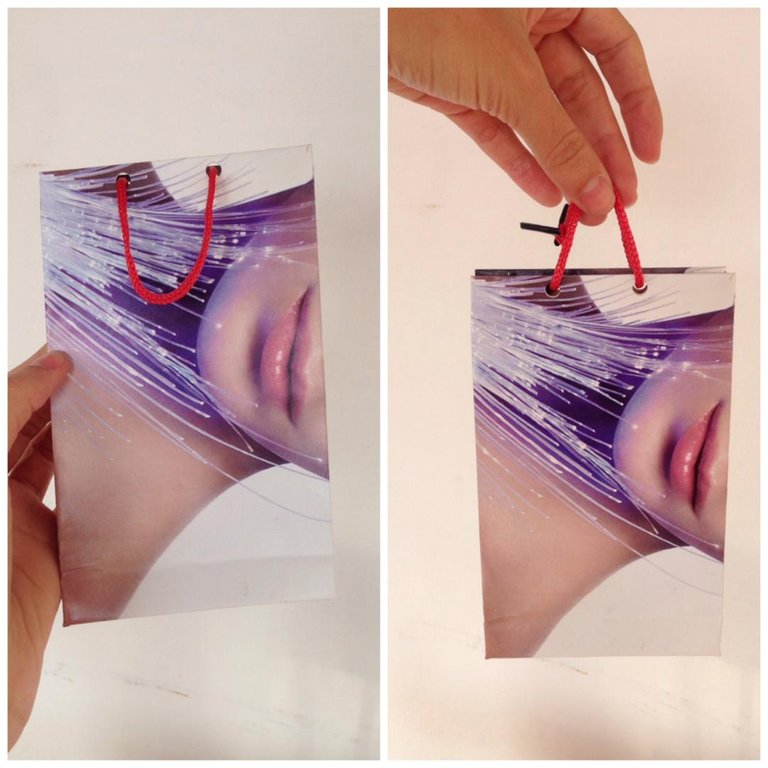
Listo!! así quedó nuestro resultado final!! qué les parece?
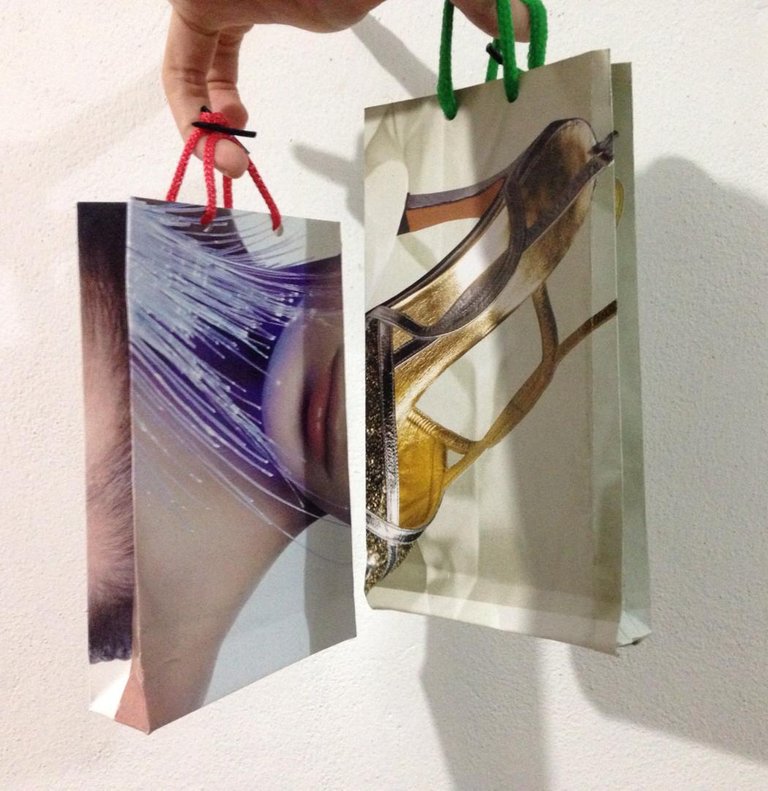
Pueden hacerlas de cualquier tamaño, pues este dependerá del tamaño de la hoja.
Ready!!! this is our final result!!! what do you think?
You can make them of any size, as this will depend on the size of the leaf.
Todas las fotos son de mi propiedad // All photos are my property