[ENG/ESP] DIY Transforming my boring clothes to cool 😎- DIY Transformando mi ropa aburrida a cool😎

Hola amigos de #hiver, espero que estén bien. Hoy les vengo con un tutorial que me encanta y se trata de transformando mi ropa. Les mostrare como cambie mi pantalón viejo y aburrido a uno muy Fashions como en tendencia. Vi mucho este tipo de modelos de pantalón en la aplicación tiktok y quise realizar uno a ver como me quedaría. Por las plataformas de ventas de jeans son muy costosos los que tienen diseñada letras. Yo la realice a mi gusto y que cantidad de letras yo quería, es cuestión de gustos la creatividad de ustedes mismos.
Quede encantada con el resultado y espero que ustedes también. Espero que les guste y lo intenten en casa. Sin mucha charla aquí vamos !Empecemos¡
Hello #hiver friends, I hope you are well. Today I come to you with a tutorial that I love and it's about transforming my clothes. I will show you how I changed my old and boring pants to a very fashionable and trendy one. I saw a lot of this type of pants models in the tiktok application and I wanted to make one to see how it would look like. For the jeans sales platforms are very expensive those with designed letters. I made it to my taste and the amount of letters I wanted, it is a matter of taste and your own creativity.
I was delighted with the result and I hope you are too. I hope you like it and try it at home. Without much talk here we go! Let's get started!

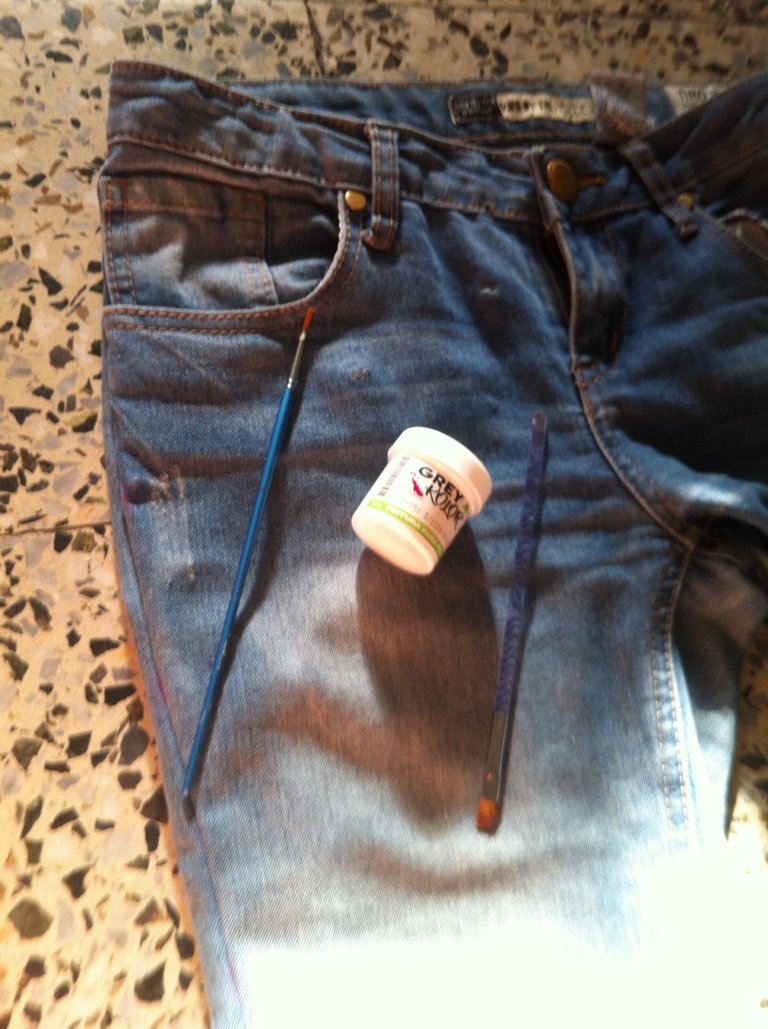
MATERIALES/ MATERIALS
- Pantalón viejo/ Old pants
- Pintura blanca para tela/ White fabric paint
- Pinceles/ Brushes
- Cartón fino/ Thin cardboard
PROCEDIMIENTO/ PROCEDURE
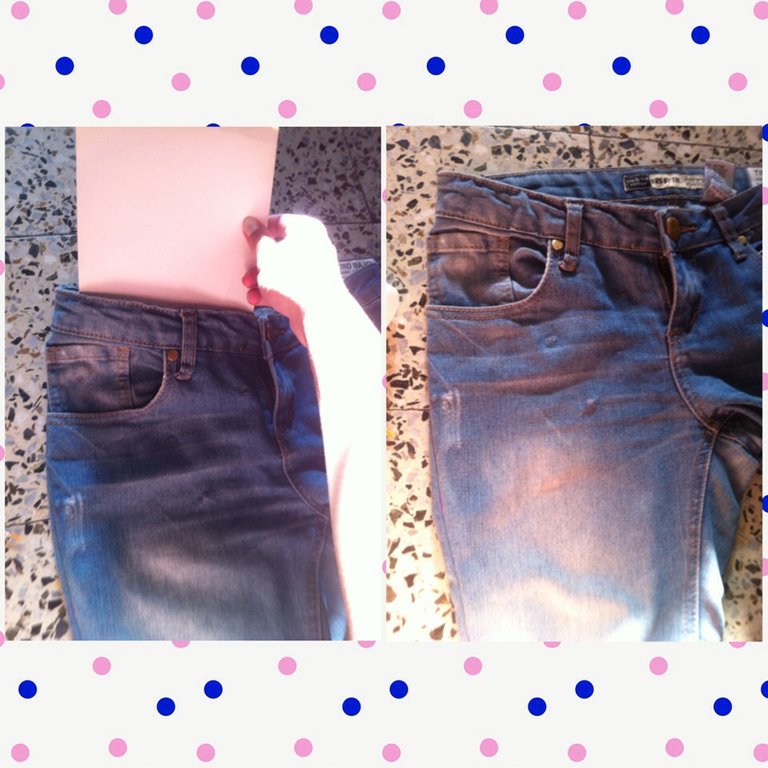
Para empezar, escogemos nuestro pantalón.
Antes de empezar a pintar, colocaremos un cartón fino adentro para que no manche la parte de atrás.
To start, we choose our pants.
Before we start painting, we will place a thin cardboard inside so that it doesn't stain the back.
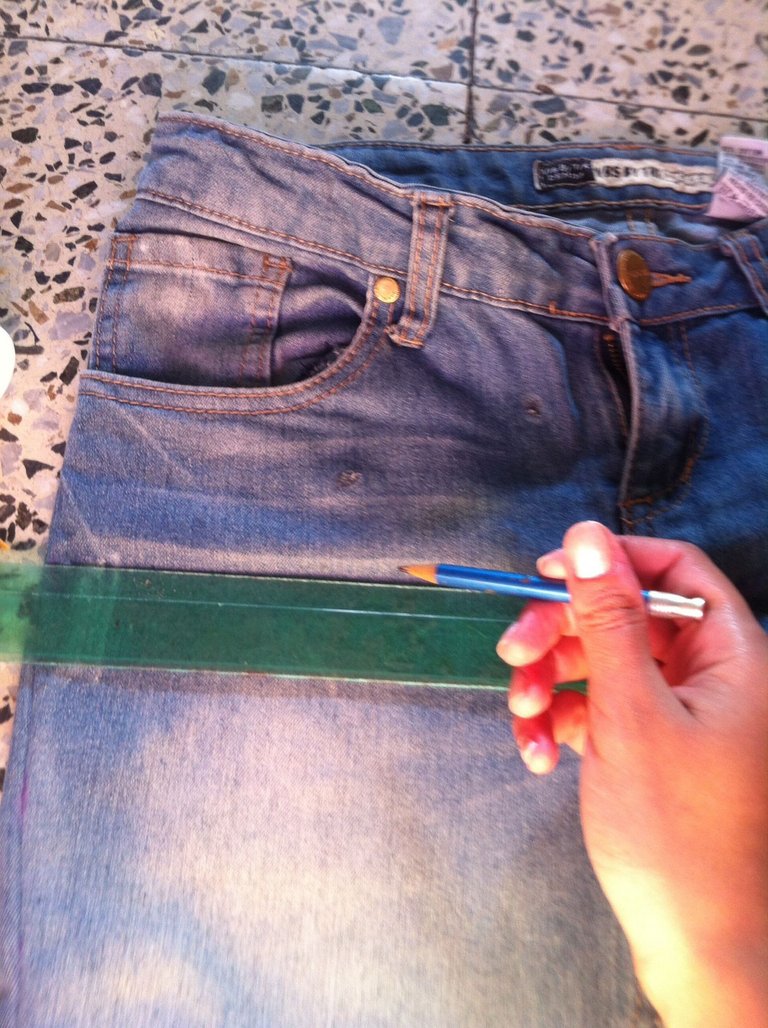
Con una regla, marcaremos la frase que queremos colocar para que no se vea torcido (pero si lo quieren inclinado, es cuestión de ustedes).
With a ruler, we will mark the phrase we want to place so that it does not look crooked (but if you want it embedded, it's up to you).
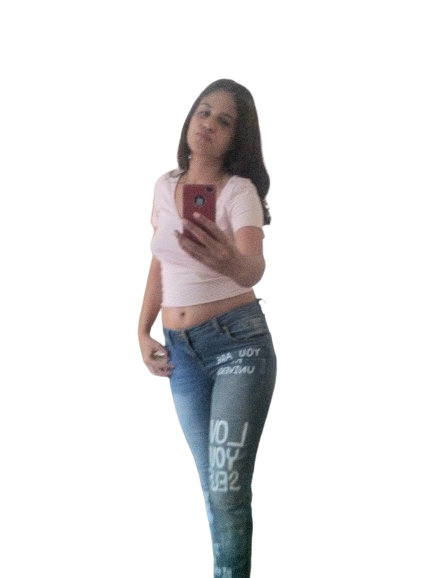
Fui colocando la frase "You are my universe" a la primera pasada poco a poco y a pulso.
I placed the phrase "You are my universe" on the first pass, little by little and by hand.
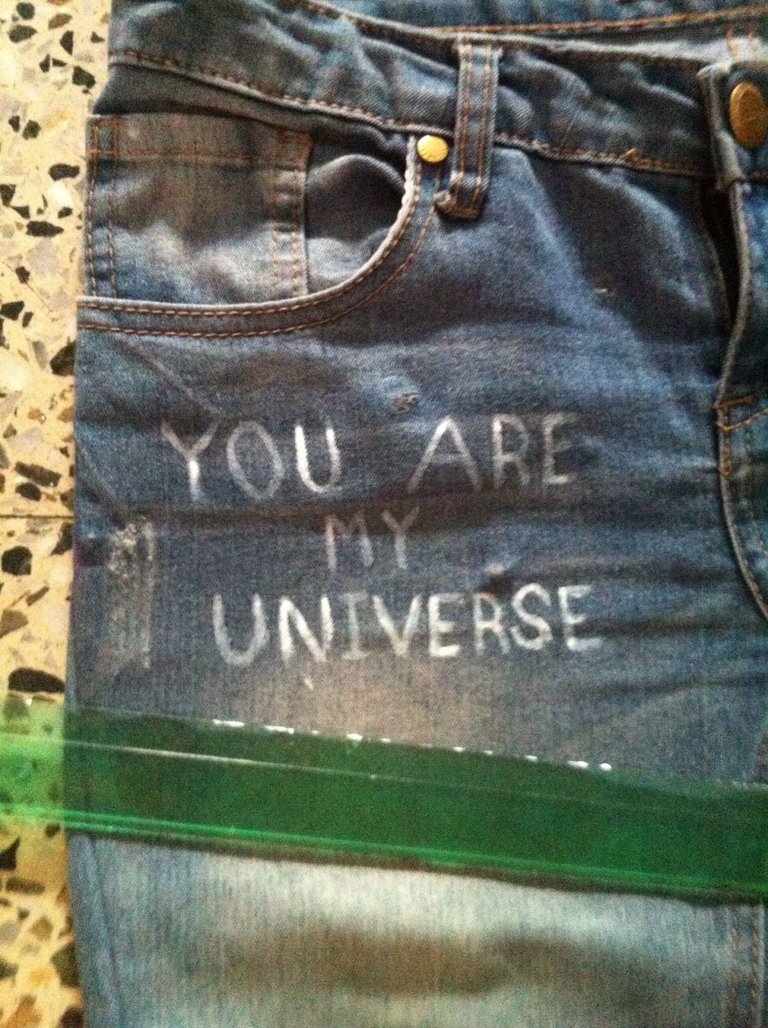
Por la parte de la rodilla, coloque un poco mas gruesa las letras "Love yourself".
On the knee area, place the letters "Love yourself" a little thicker.
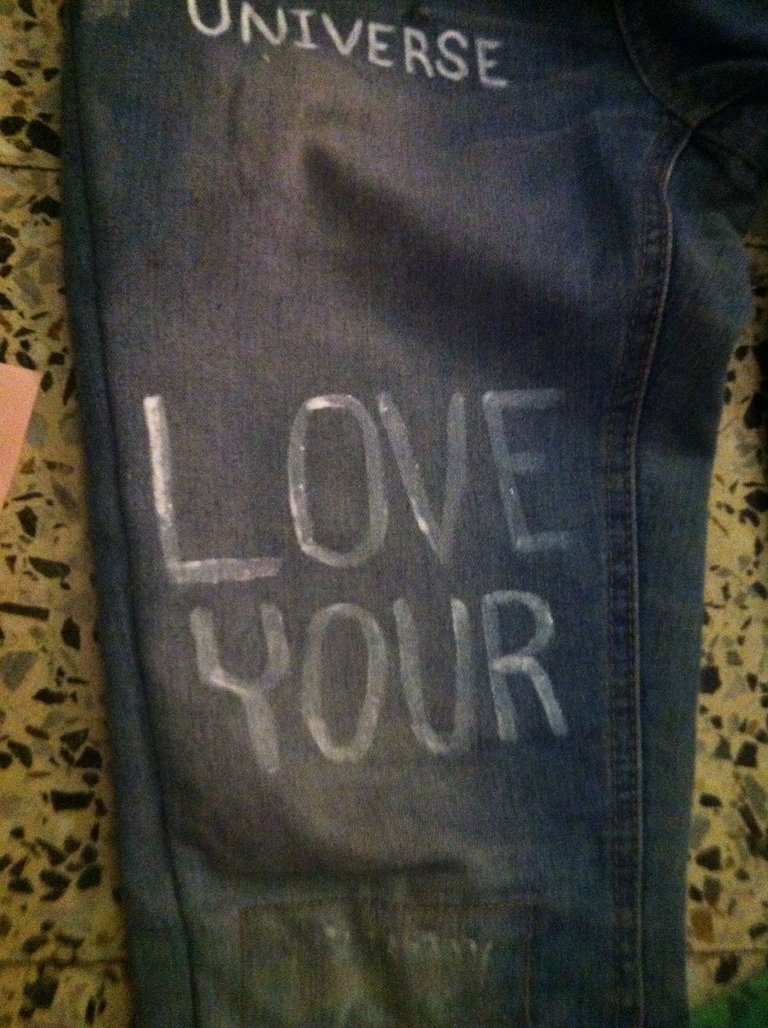
Por ultimo, termine de remarcar las letras mínimo 3 veces para que se vean de su color blanco y dejamos secar por unos minutos (se seca muy rápido).
Finally, finish glazing the letters at least 3 times so that they look white and let them dry for a few minutes (it dries very fast).
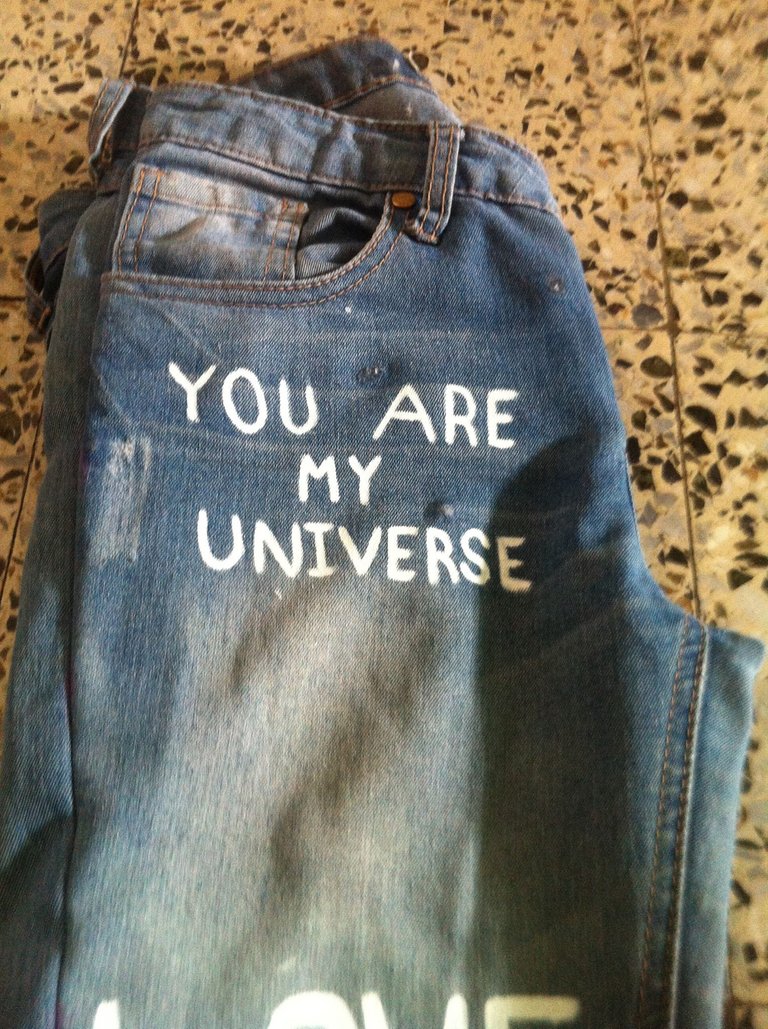
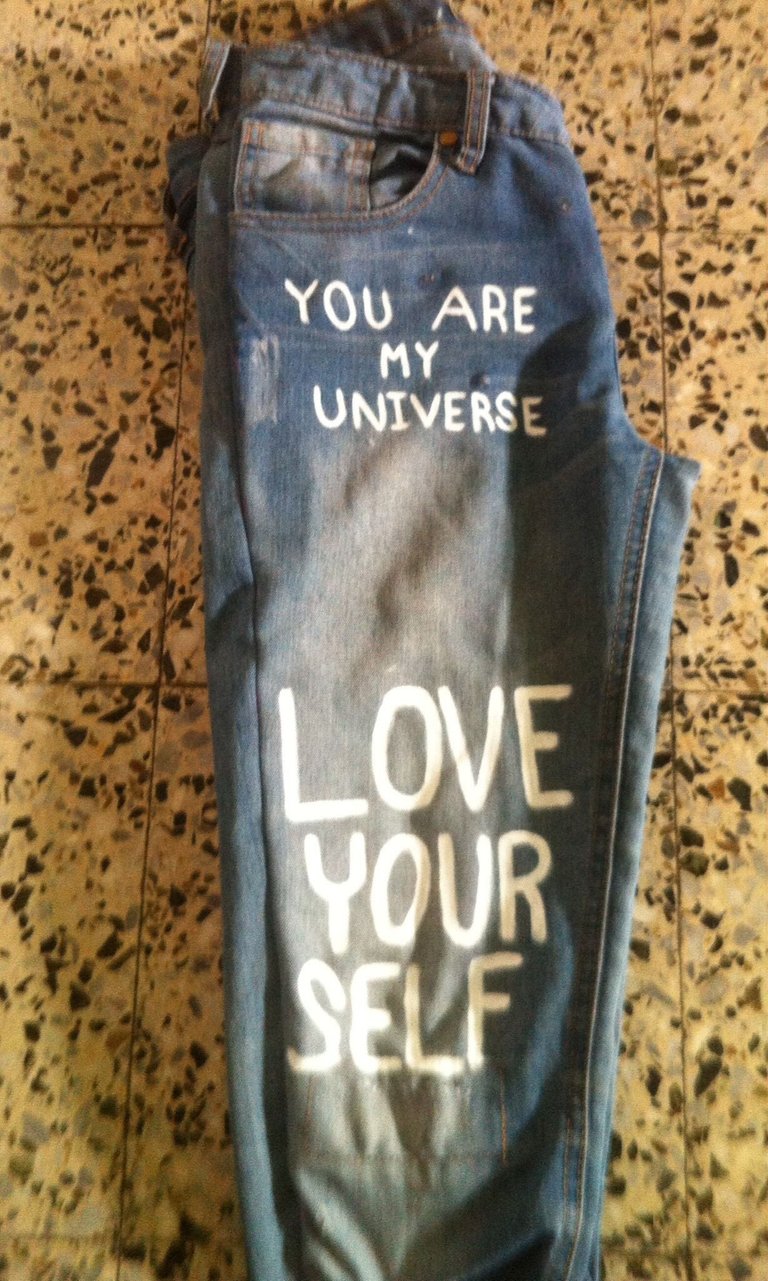
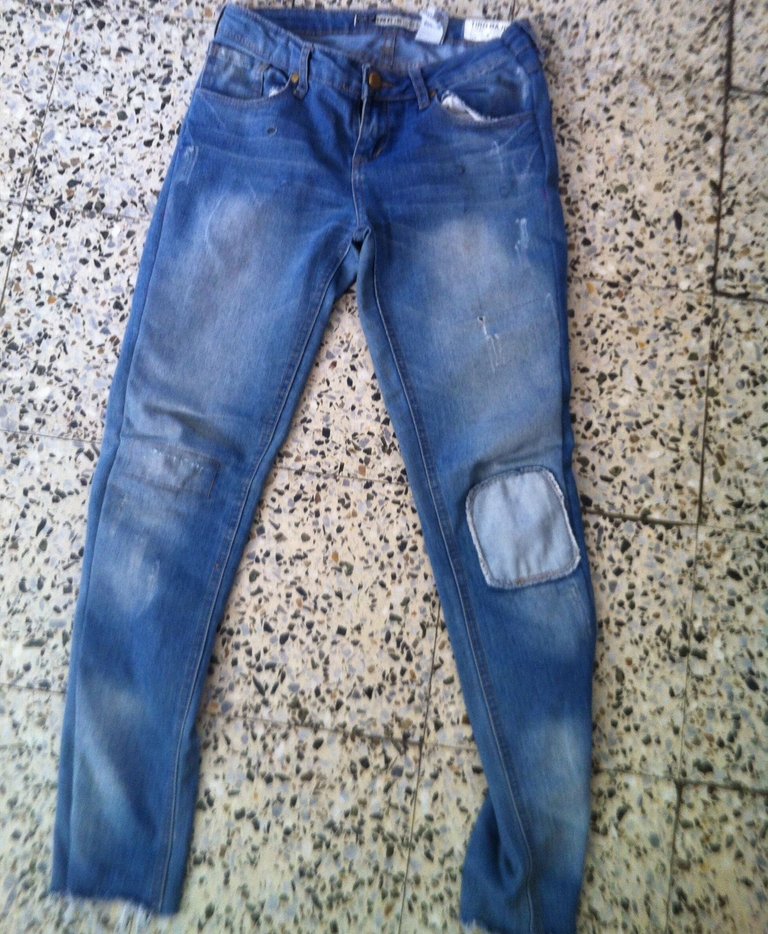
RESULTADO/ RESULT

Fotos de mi autoría tomadas por un iphone 6
Photos of my authorship taken by an iphone 6
Translate DeepL.
Contenido creado por mi.
Content created by me.
Separadores de texto gracias a Gstatic.
Text separators thanks to Gstatic.
Espero que les haya gustado. Saludos a todos.💗
I hope you liked. Greetings to all.💗
