How to make the 3D mosaic letter // Como Hacer la letra 3D Mosaico
Saludos amigos de esta gran comunidad
Greetings friends of this great Community
Today I will show you how to make 3D letter, with recyclable materials.
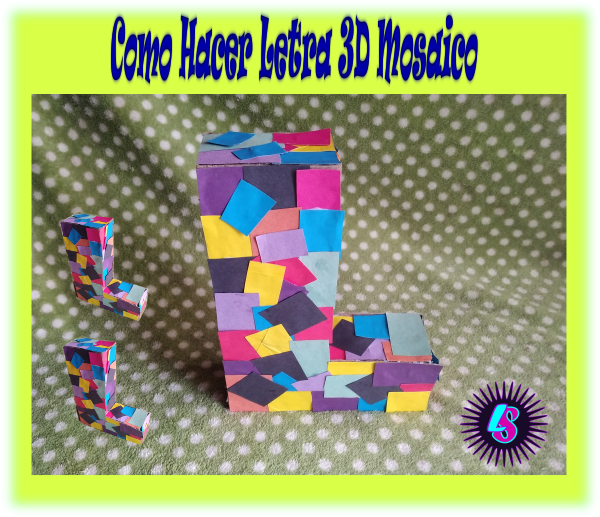
En esta oportunidad realice la letra L, ya que es la letra que empieza mi nombre. Con simples materiales podemos realizar grandes cosas. En mi caso utilice un caja donde venía las tortas que le dieron a mis hijos de regalo el día del niño.
Este tipo de letras 3D son muy buenas realizarlas para eventos o cumpleaños. La decoración la hice tipo mosaico muy colorido.
This time make the letter L, since it is the letter that begins my name. With simple materials we can do great things. In my case, I used a box that contained the cakes that my children were given as a gift on Children's Day.
These types of 3D letters are very good to make for events or birthdays. The decoration was made in a very colorful mosaic type.

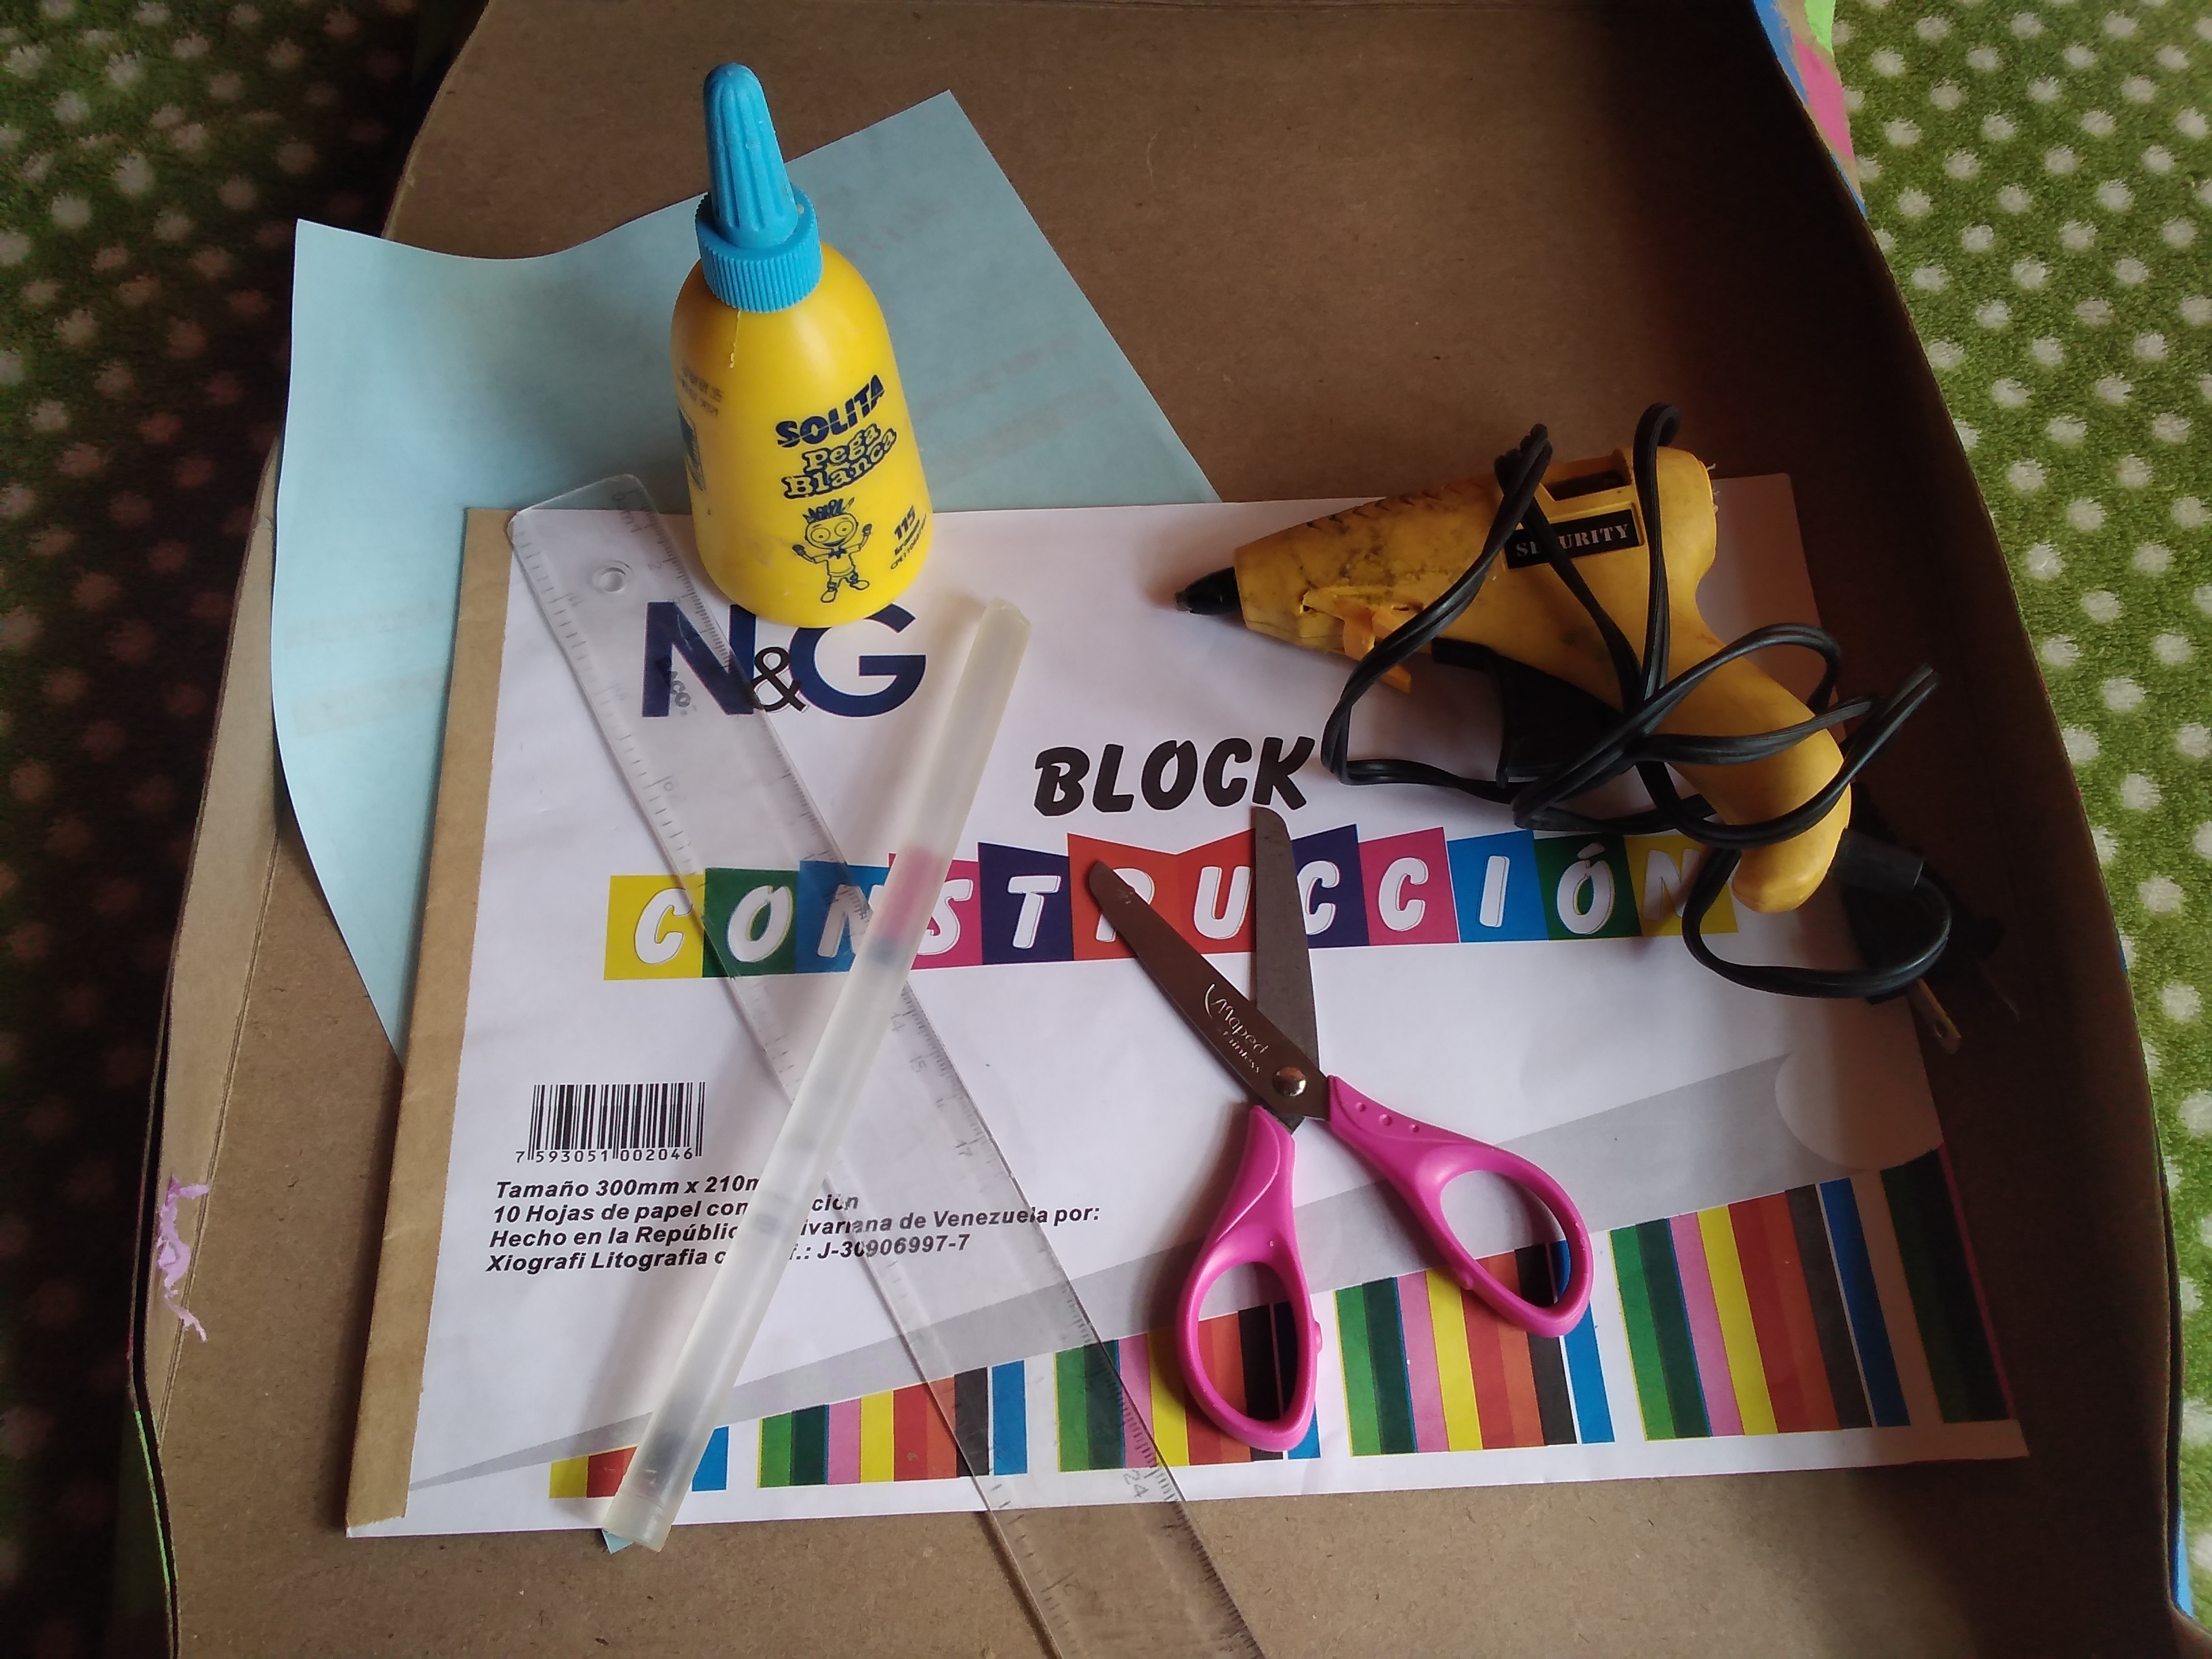
Aquí les muestro el proceso y que necesitas.
Here I show you the process and what you need
Materiales
- Cartón
- Tijera
- Hoja para realizar patrón de letra
- Cartulina de construcción
- Regla
- Pega
- Silicón
*Pistola de Silicón
materials
Paperboard
Scissors
Letter pattern sheet
Construction cardboard
Rule
Job
Silicone
Silicone gun
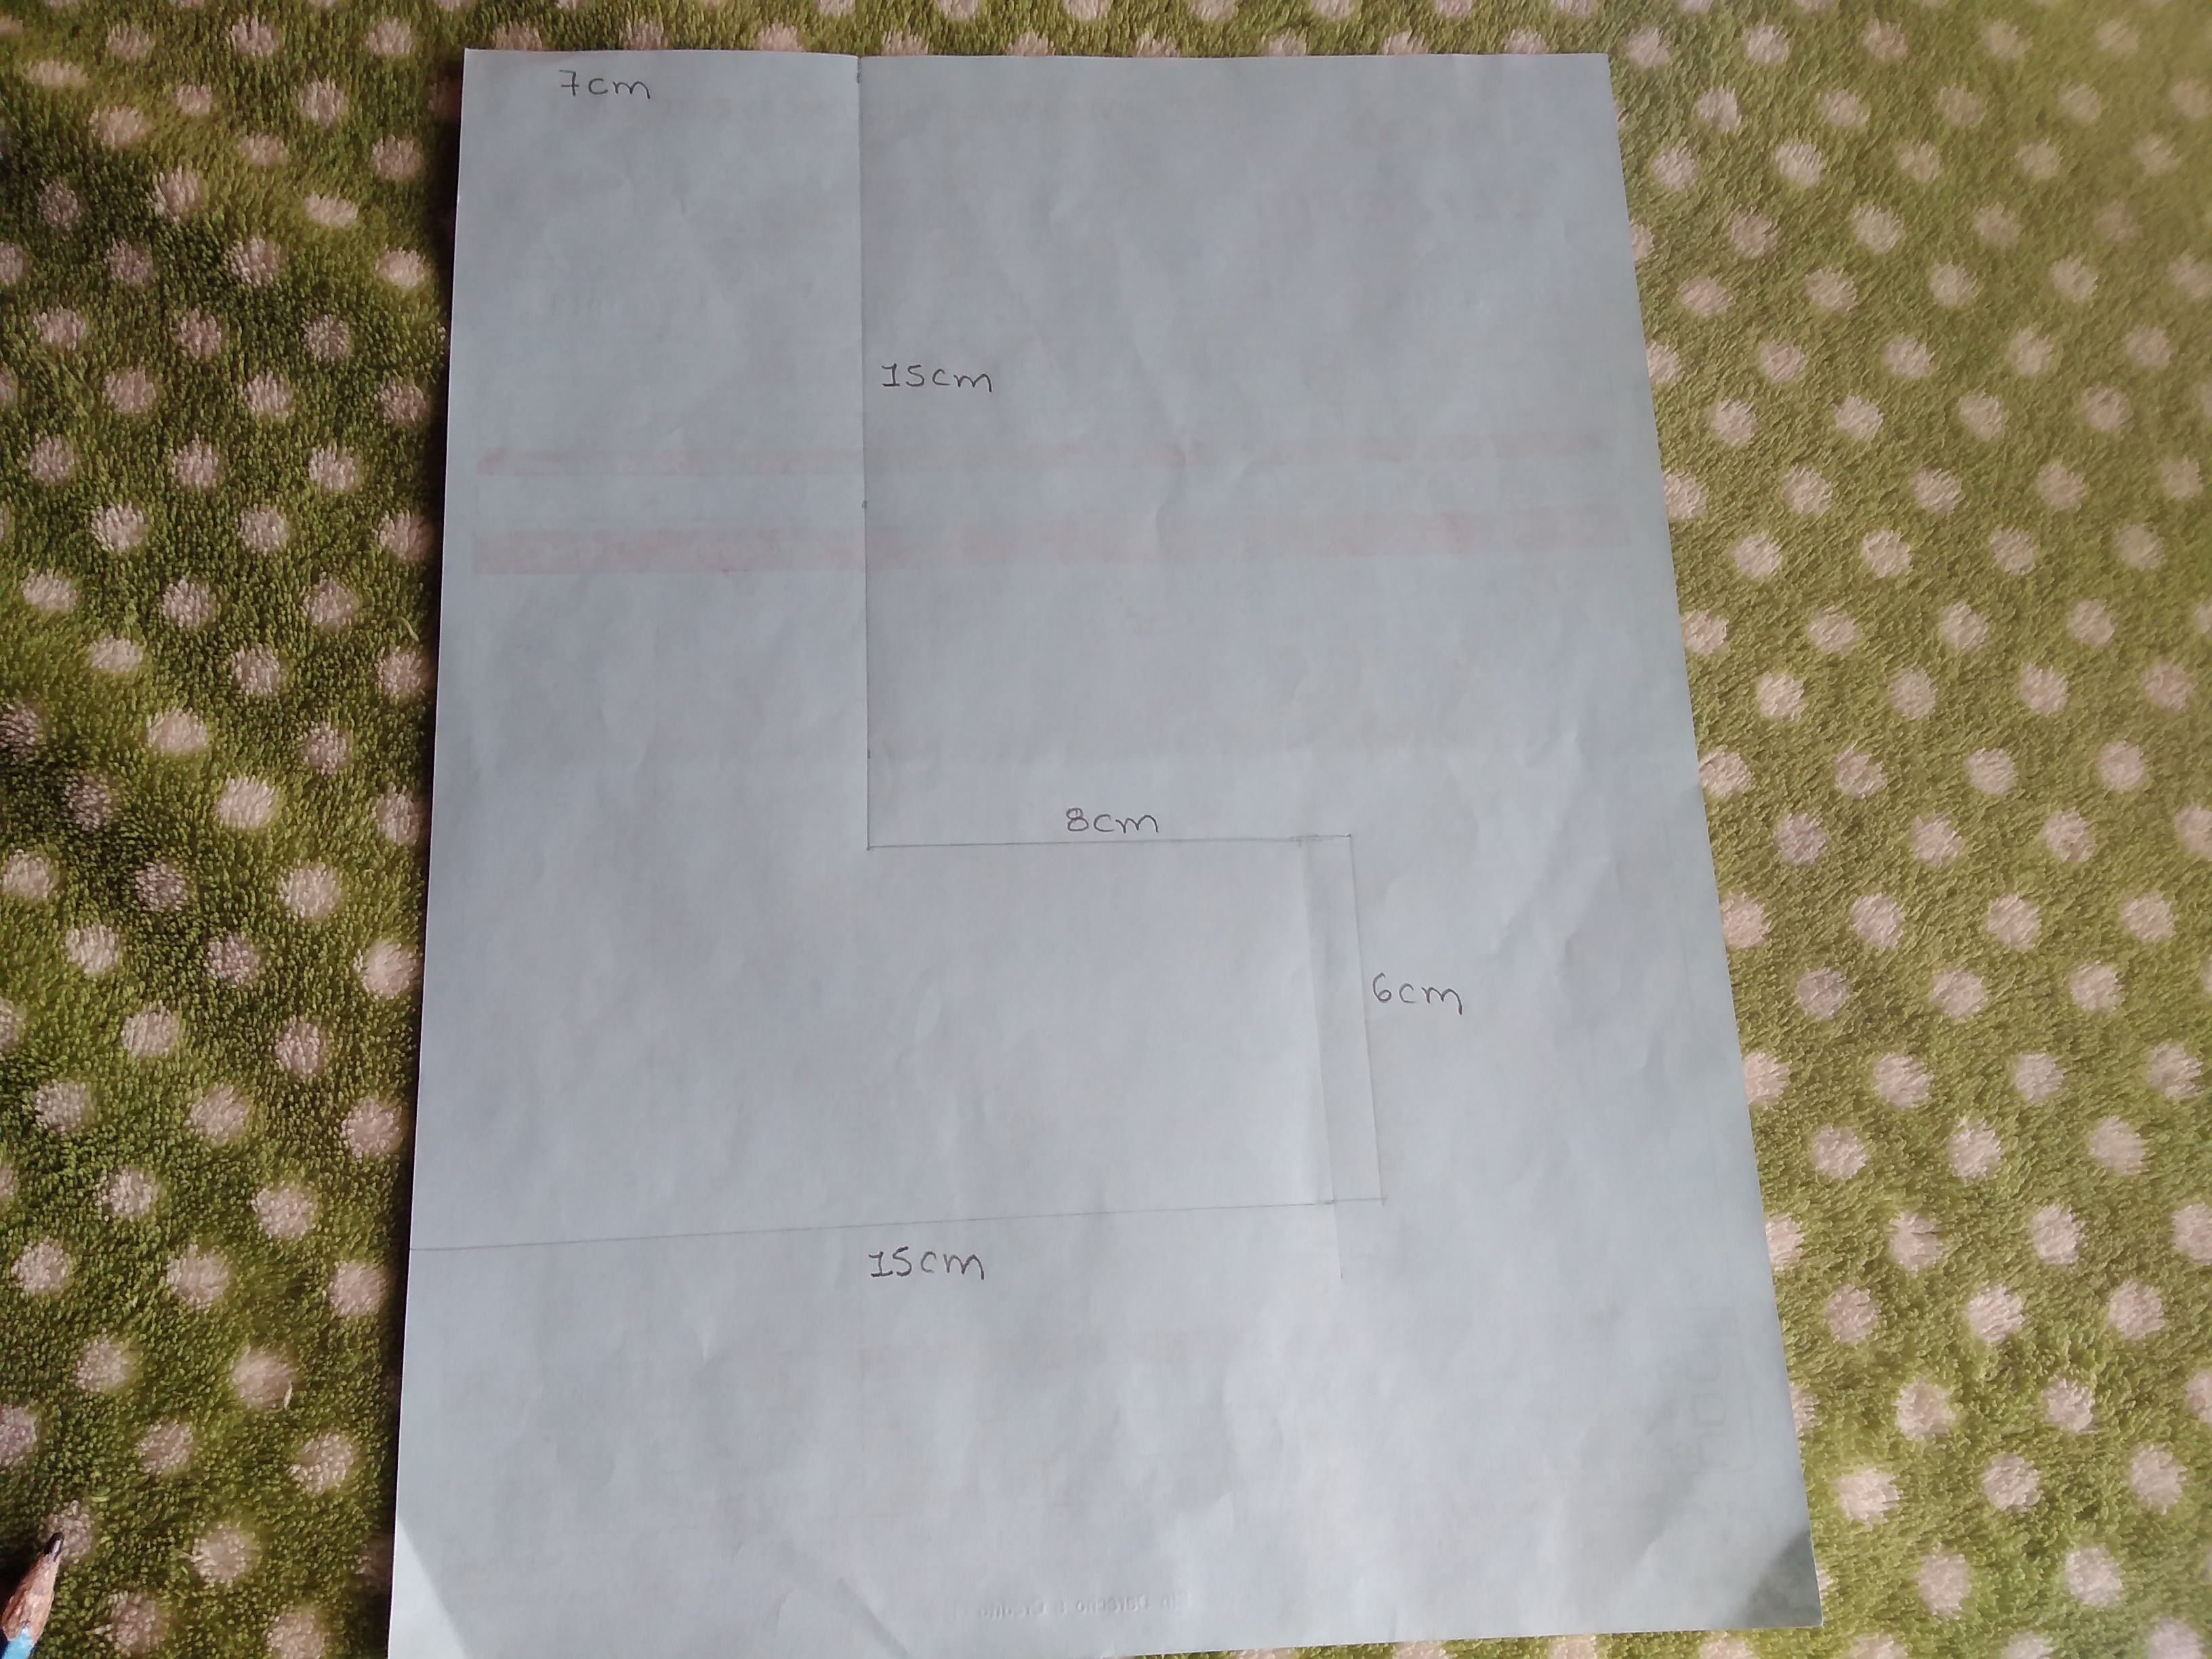
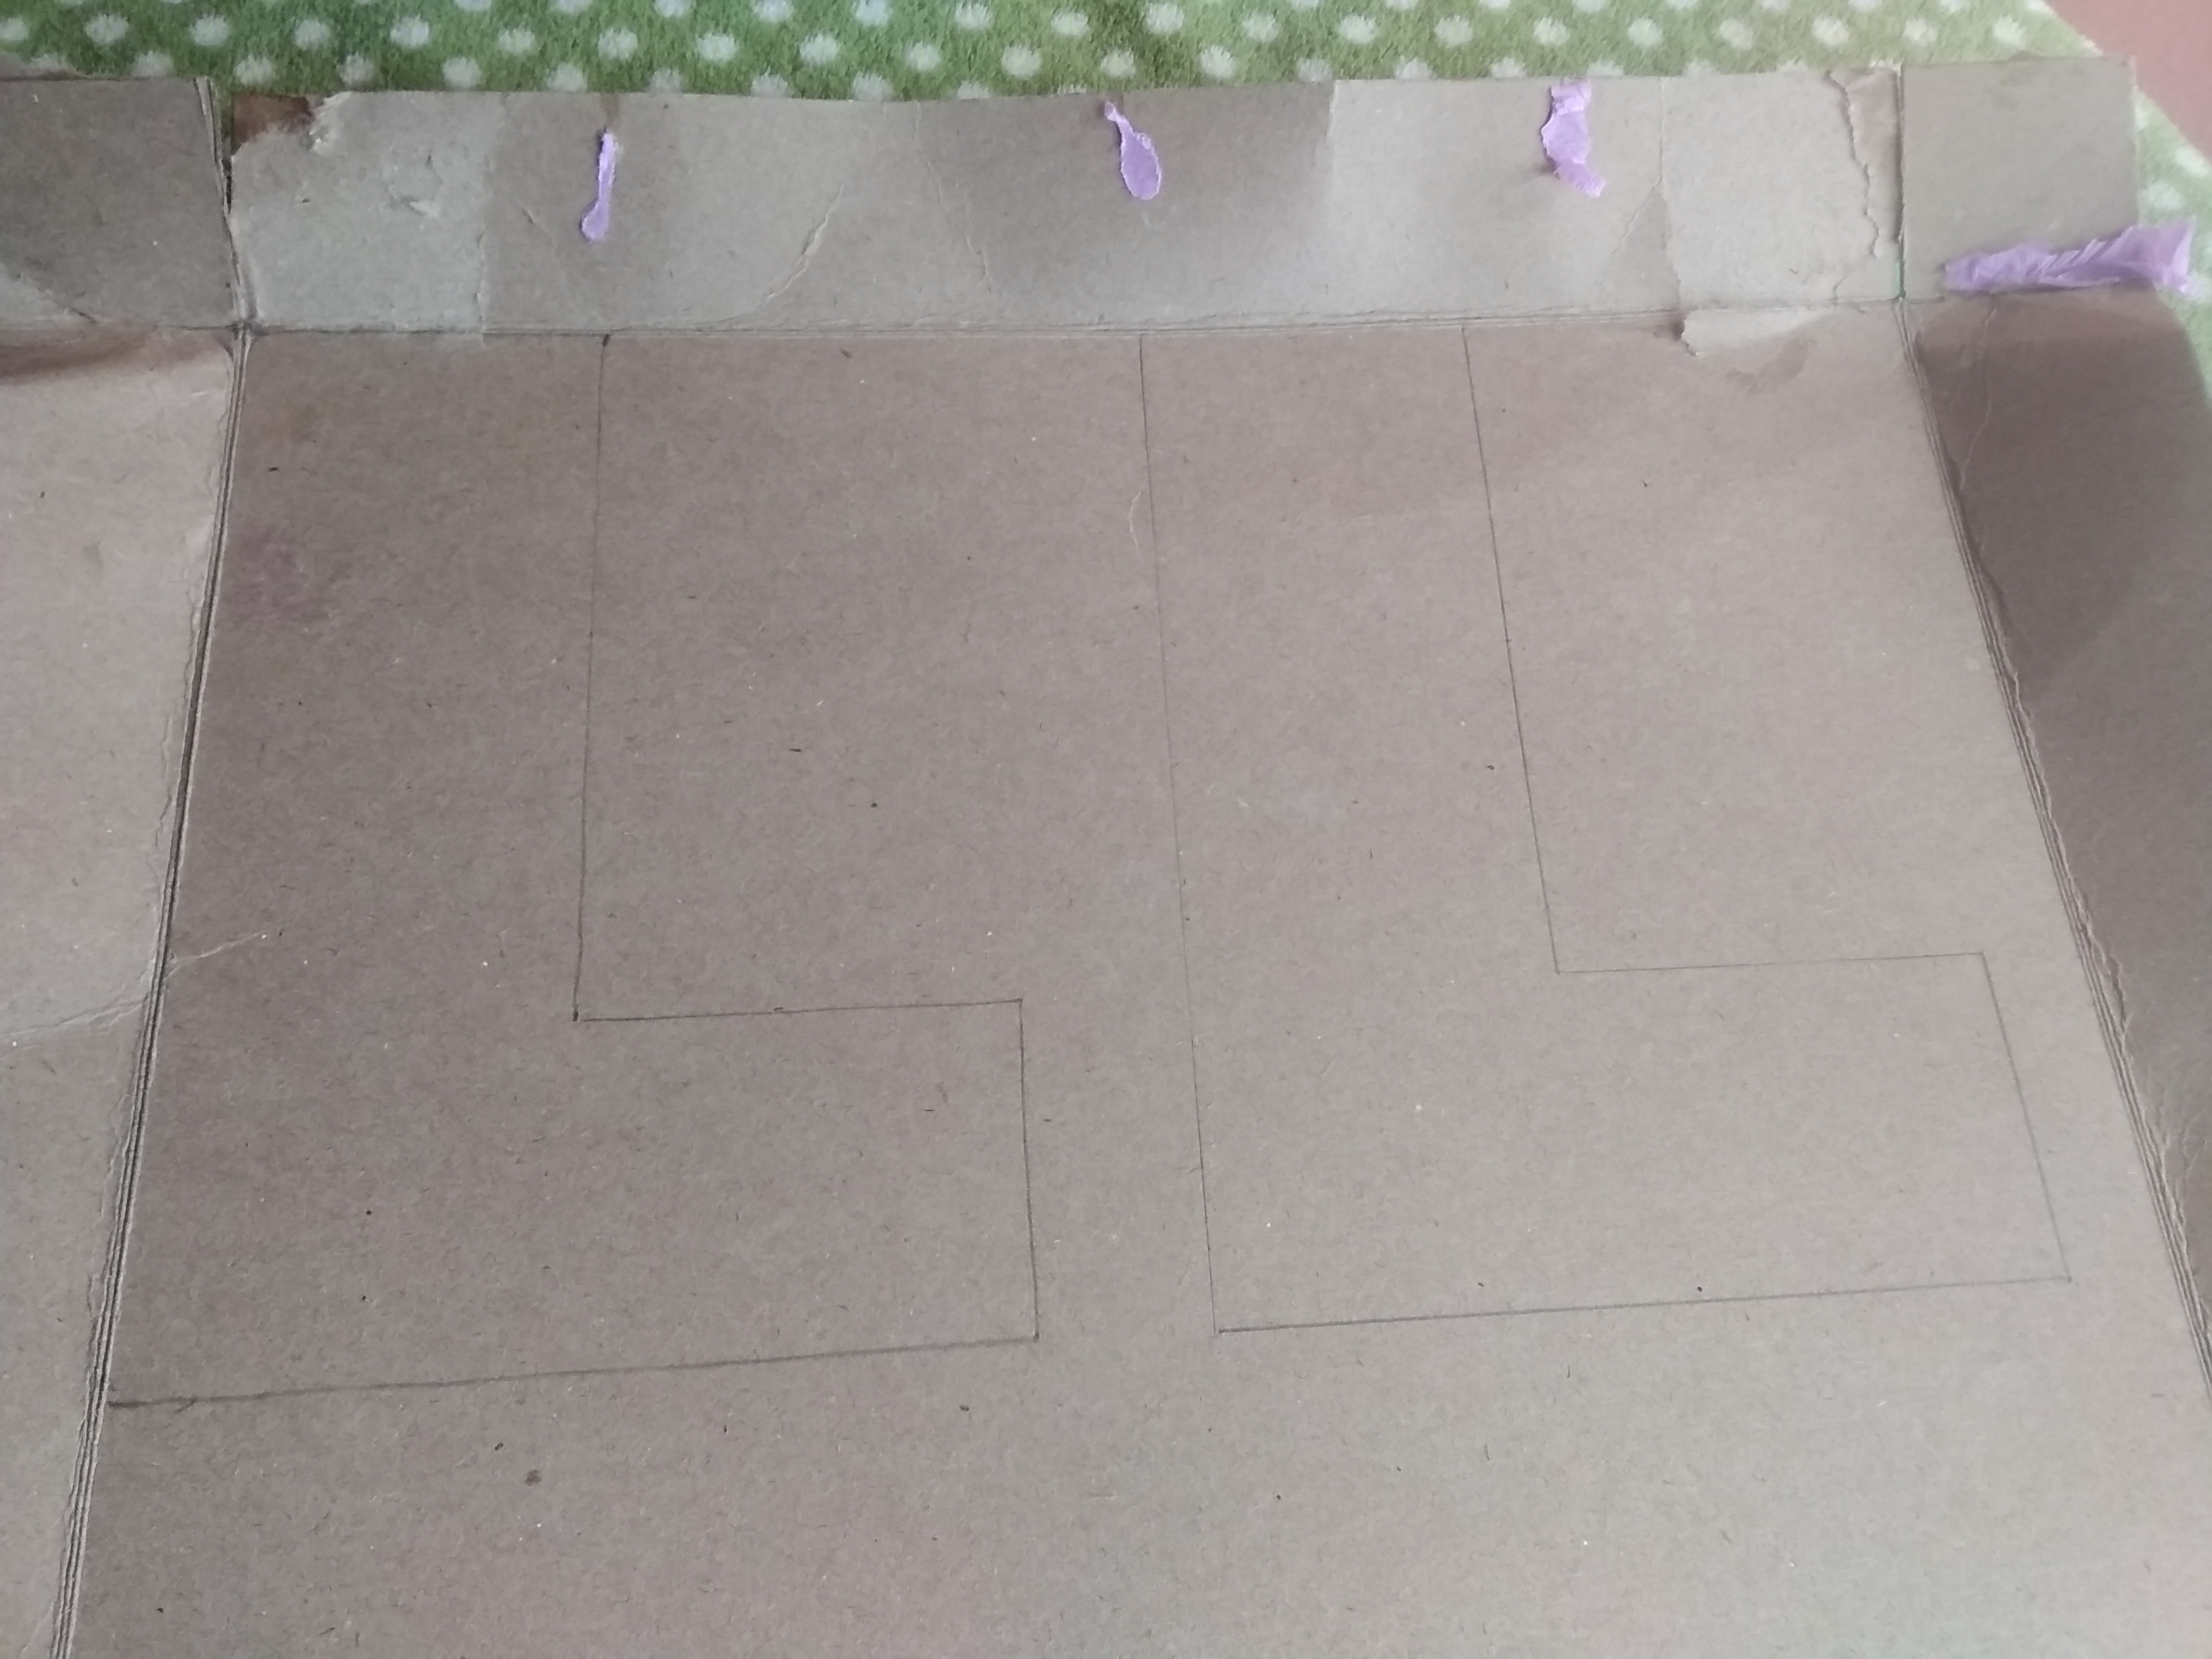
- Lo primero es hacer el patrón de la letra que en este caso tiene unas medidas específicas.
The first thing is to make the letter pattern, which in this case has specific measurements.
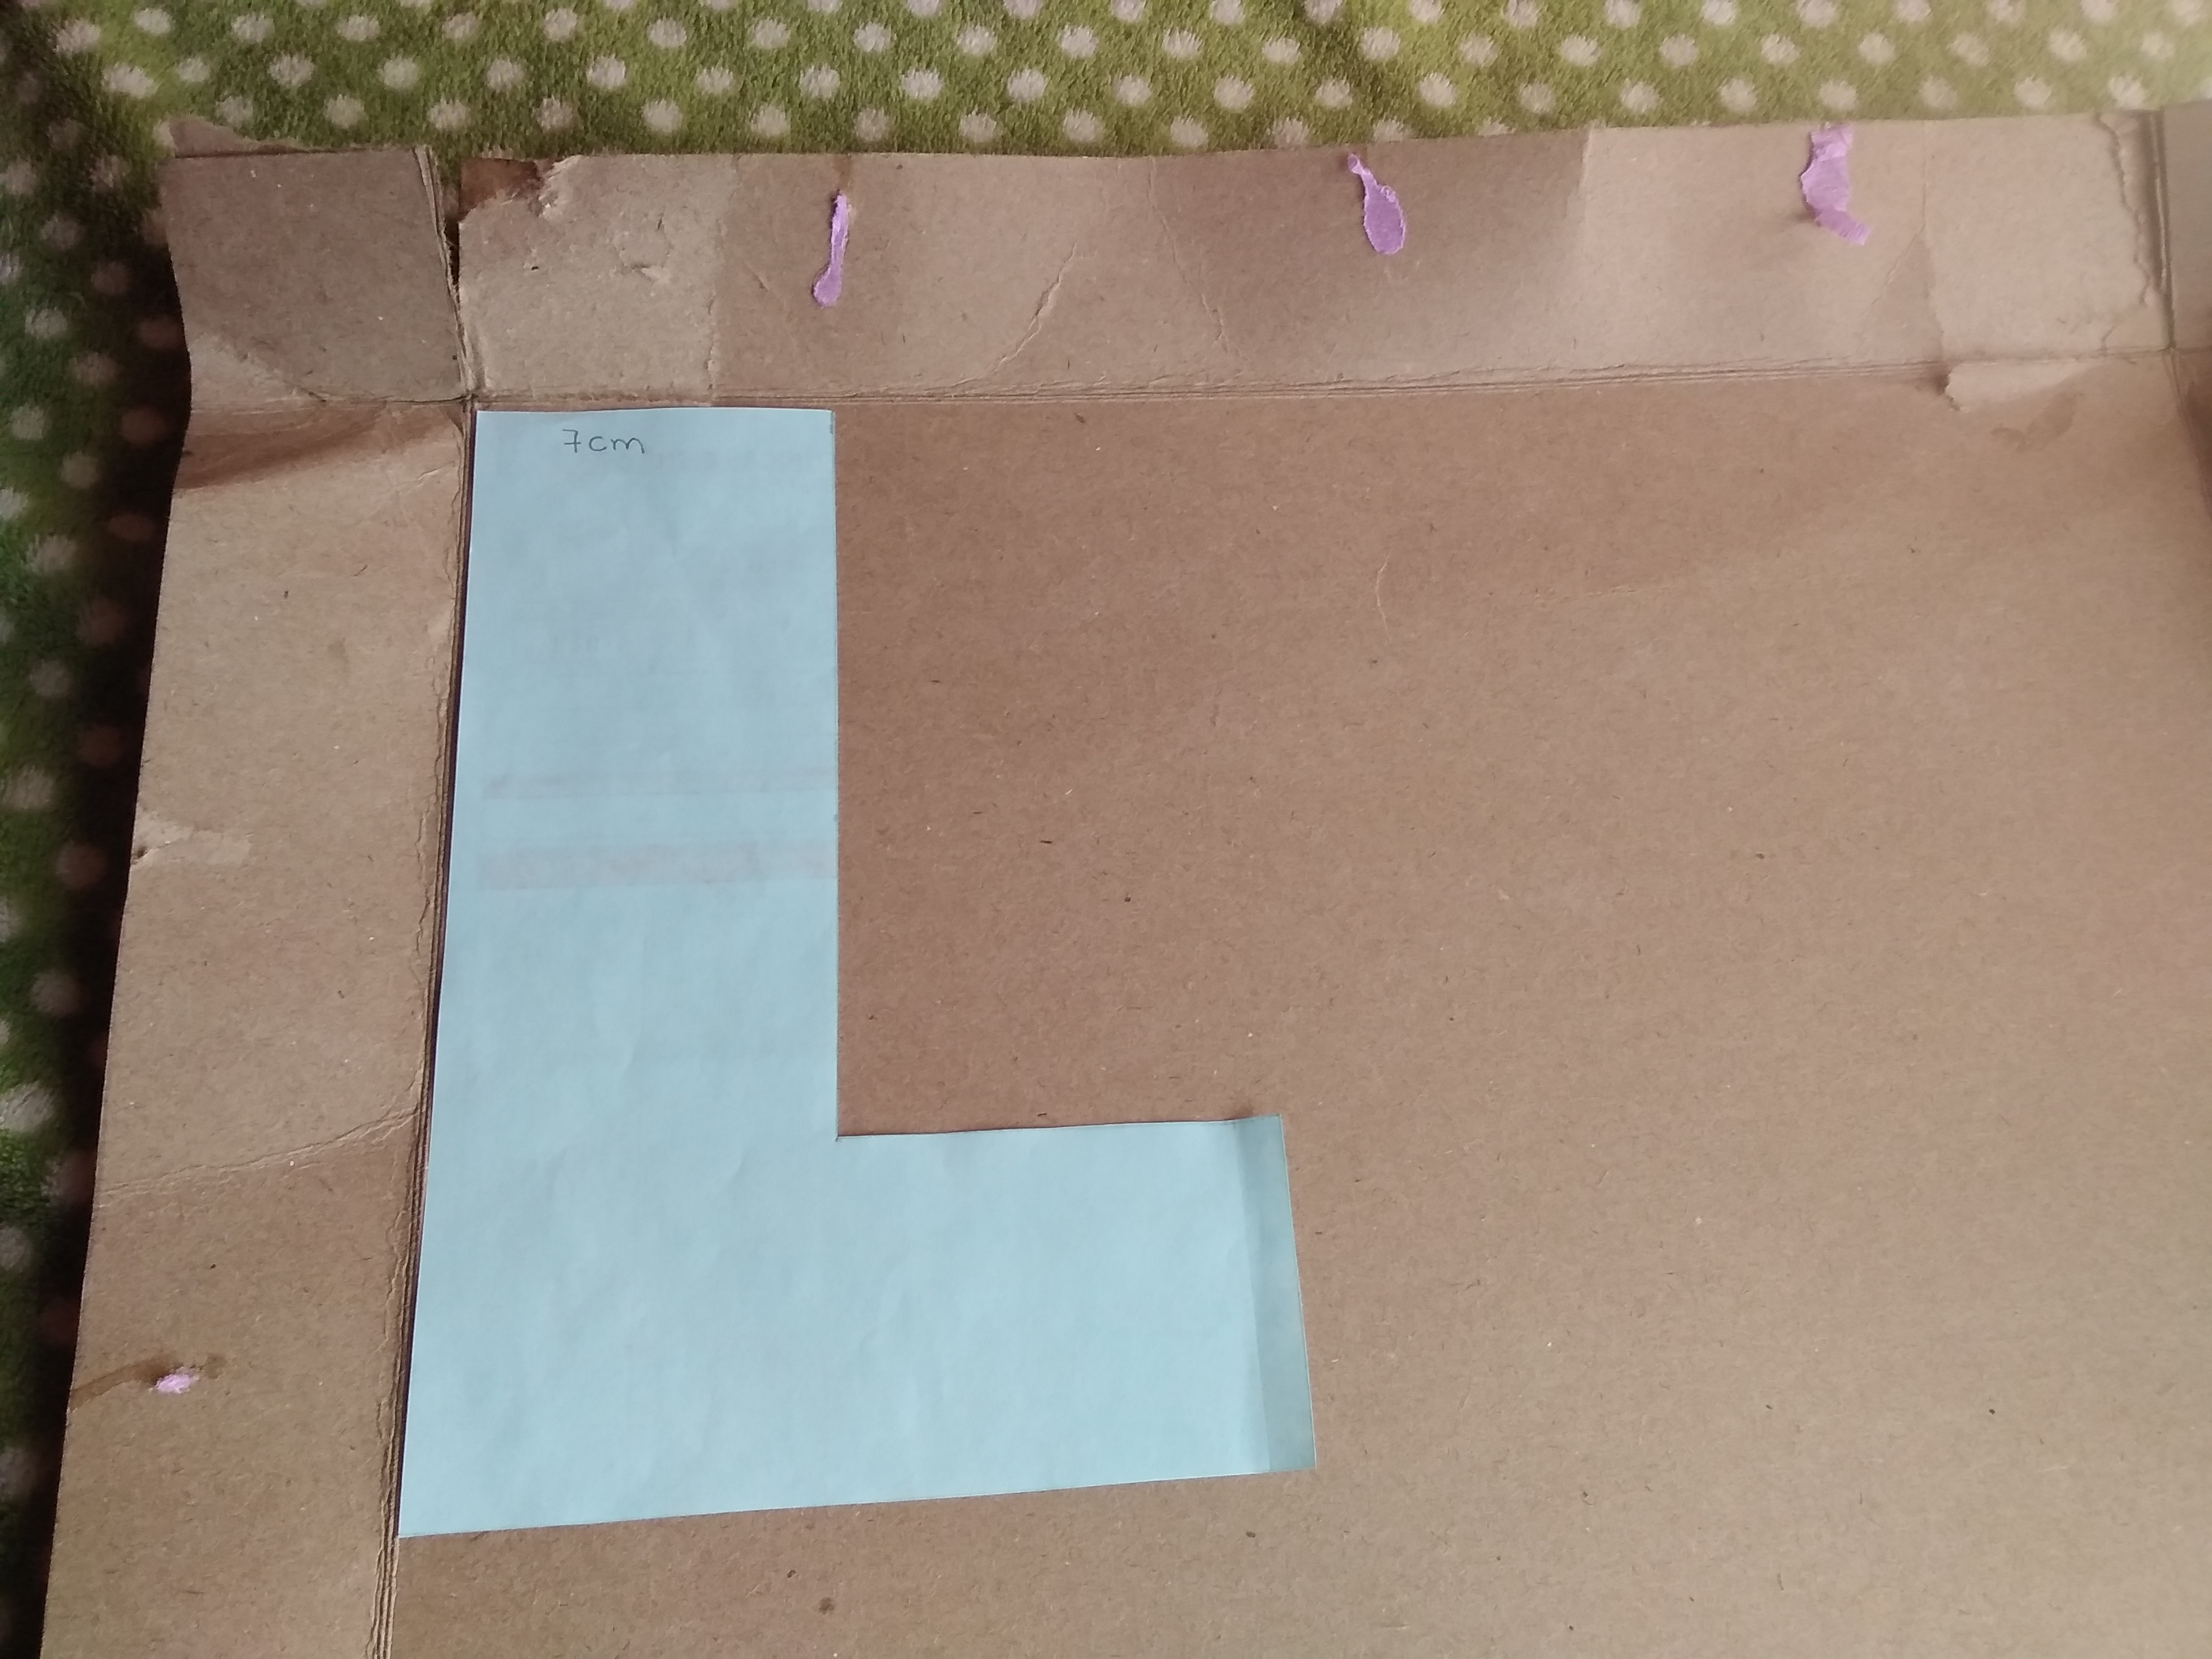
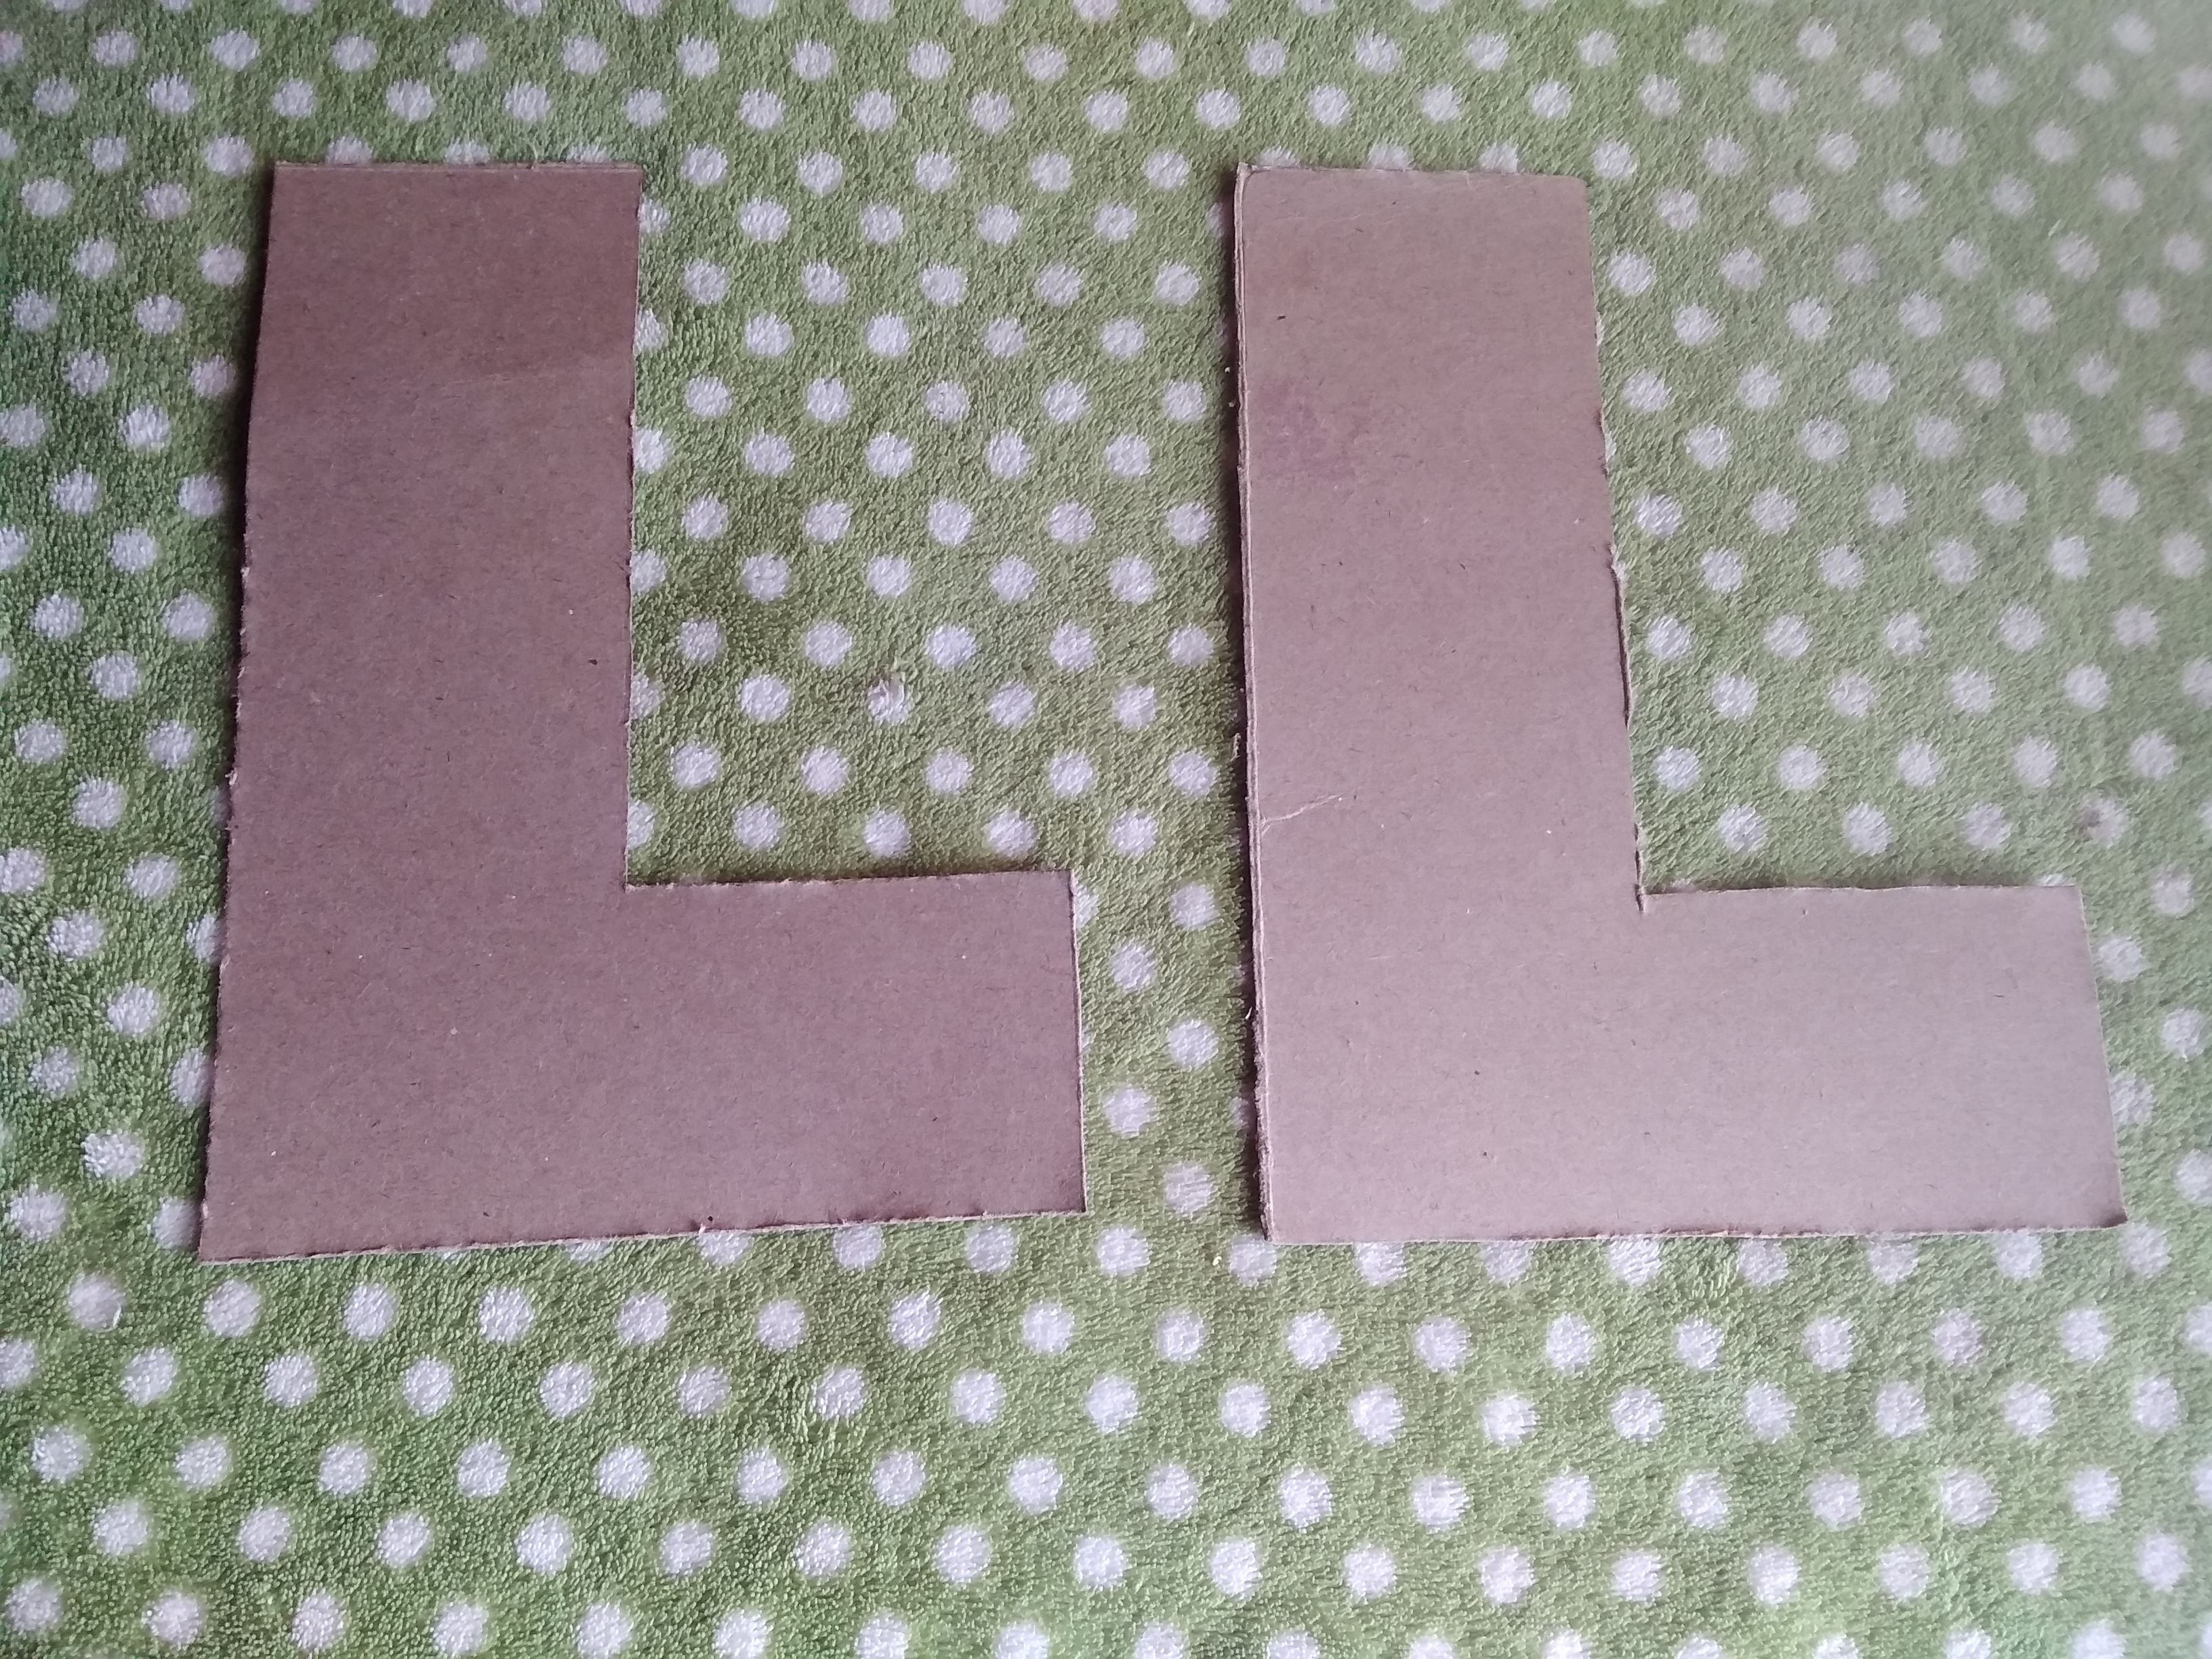
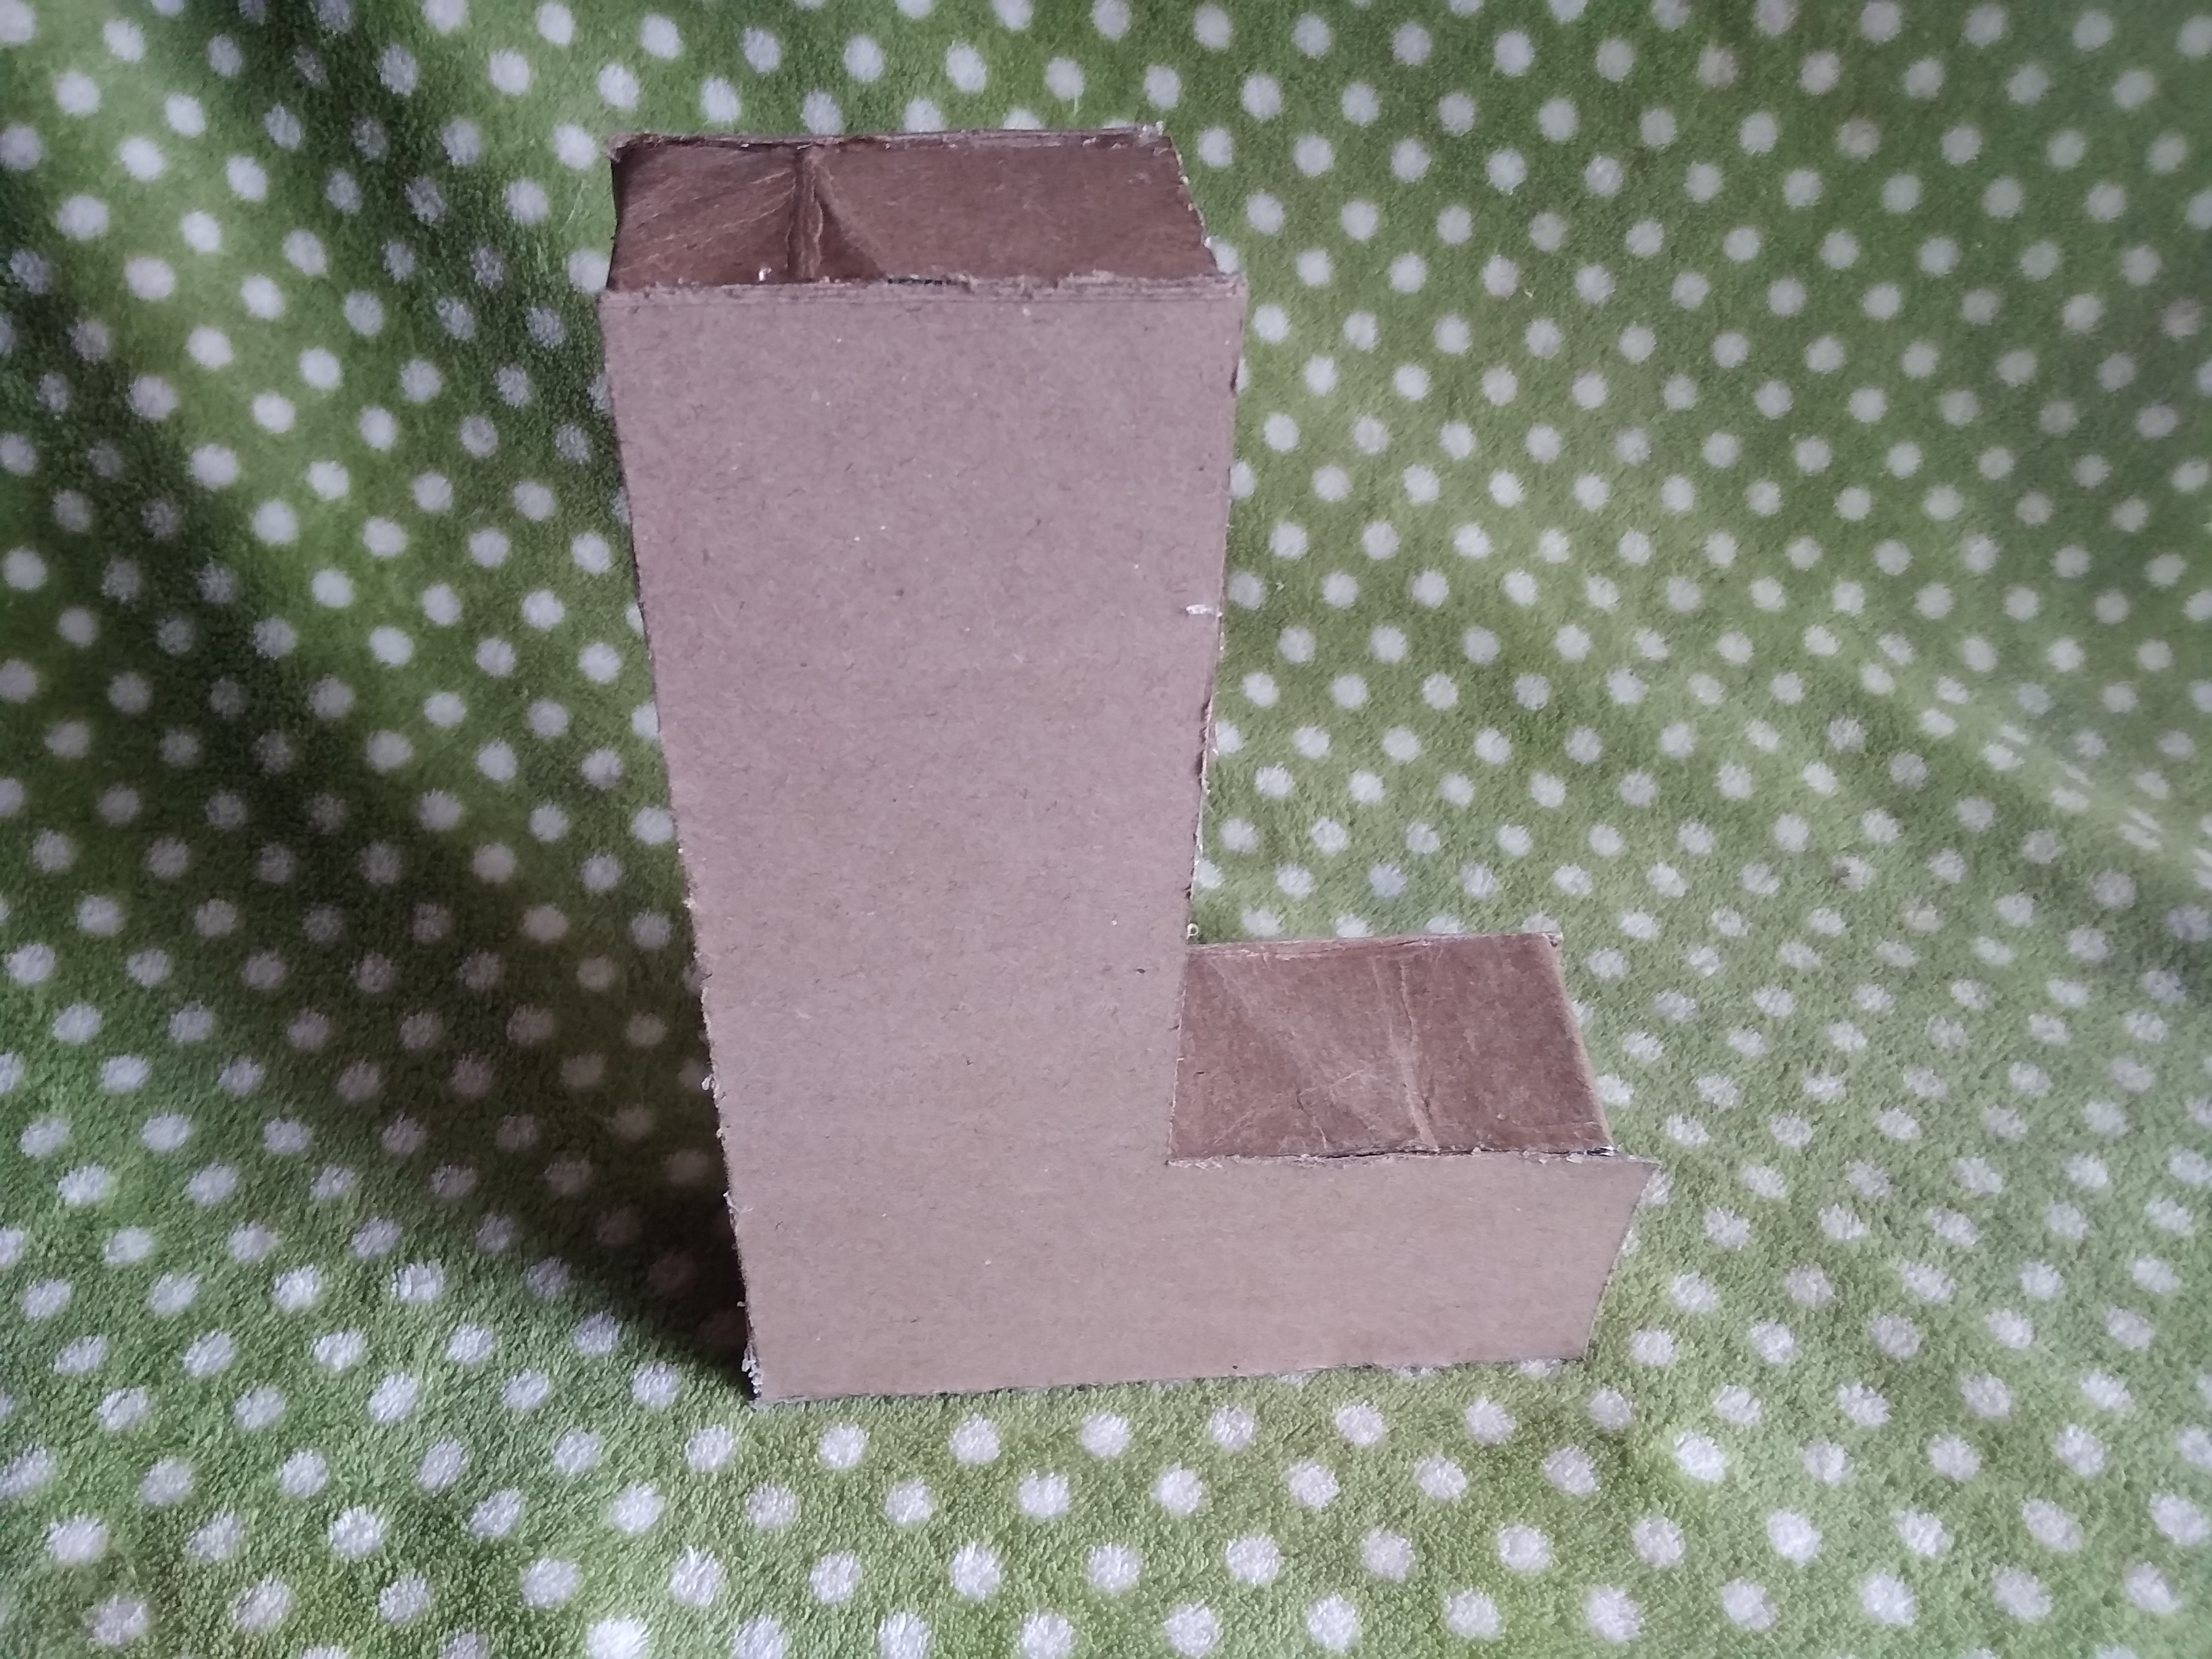
- Recortamos la letra y la transferimos al cartón y marcamos dos letras.
We cut out the letter and transfer it to the cardboard and mark two letters.
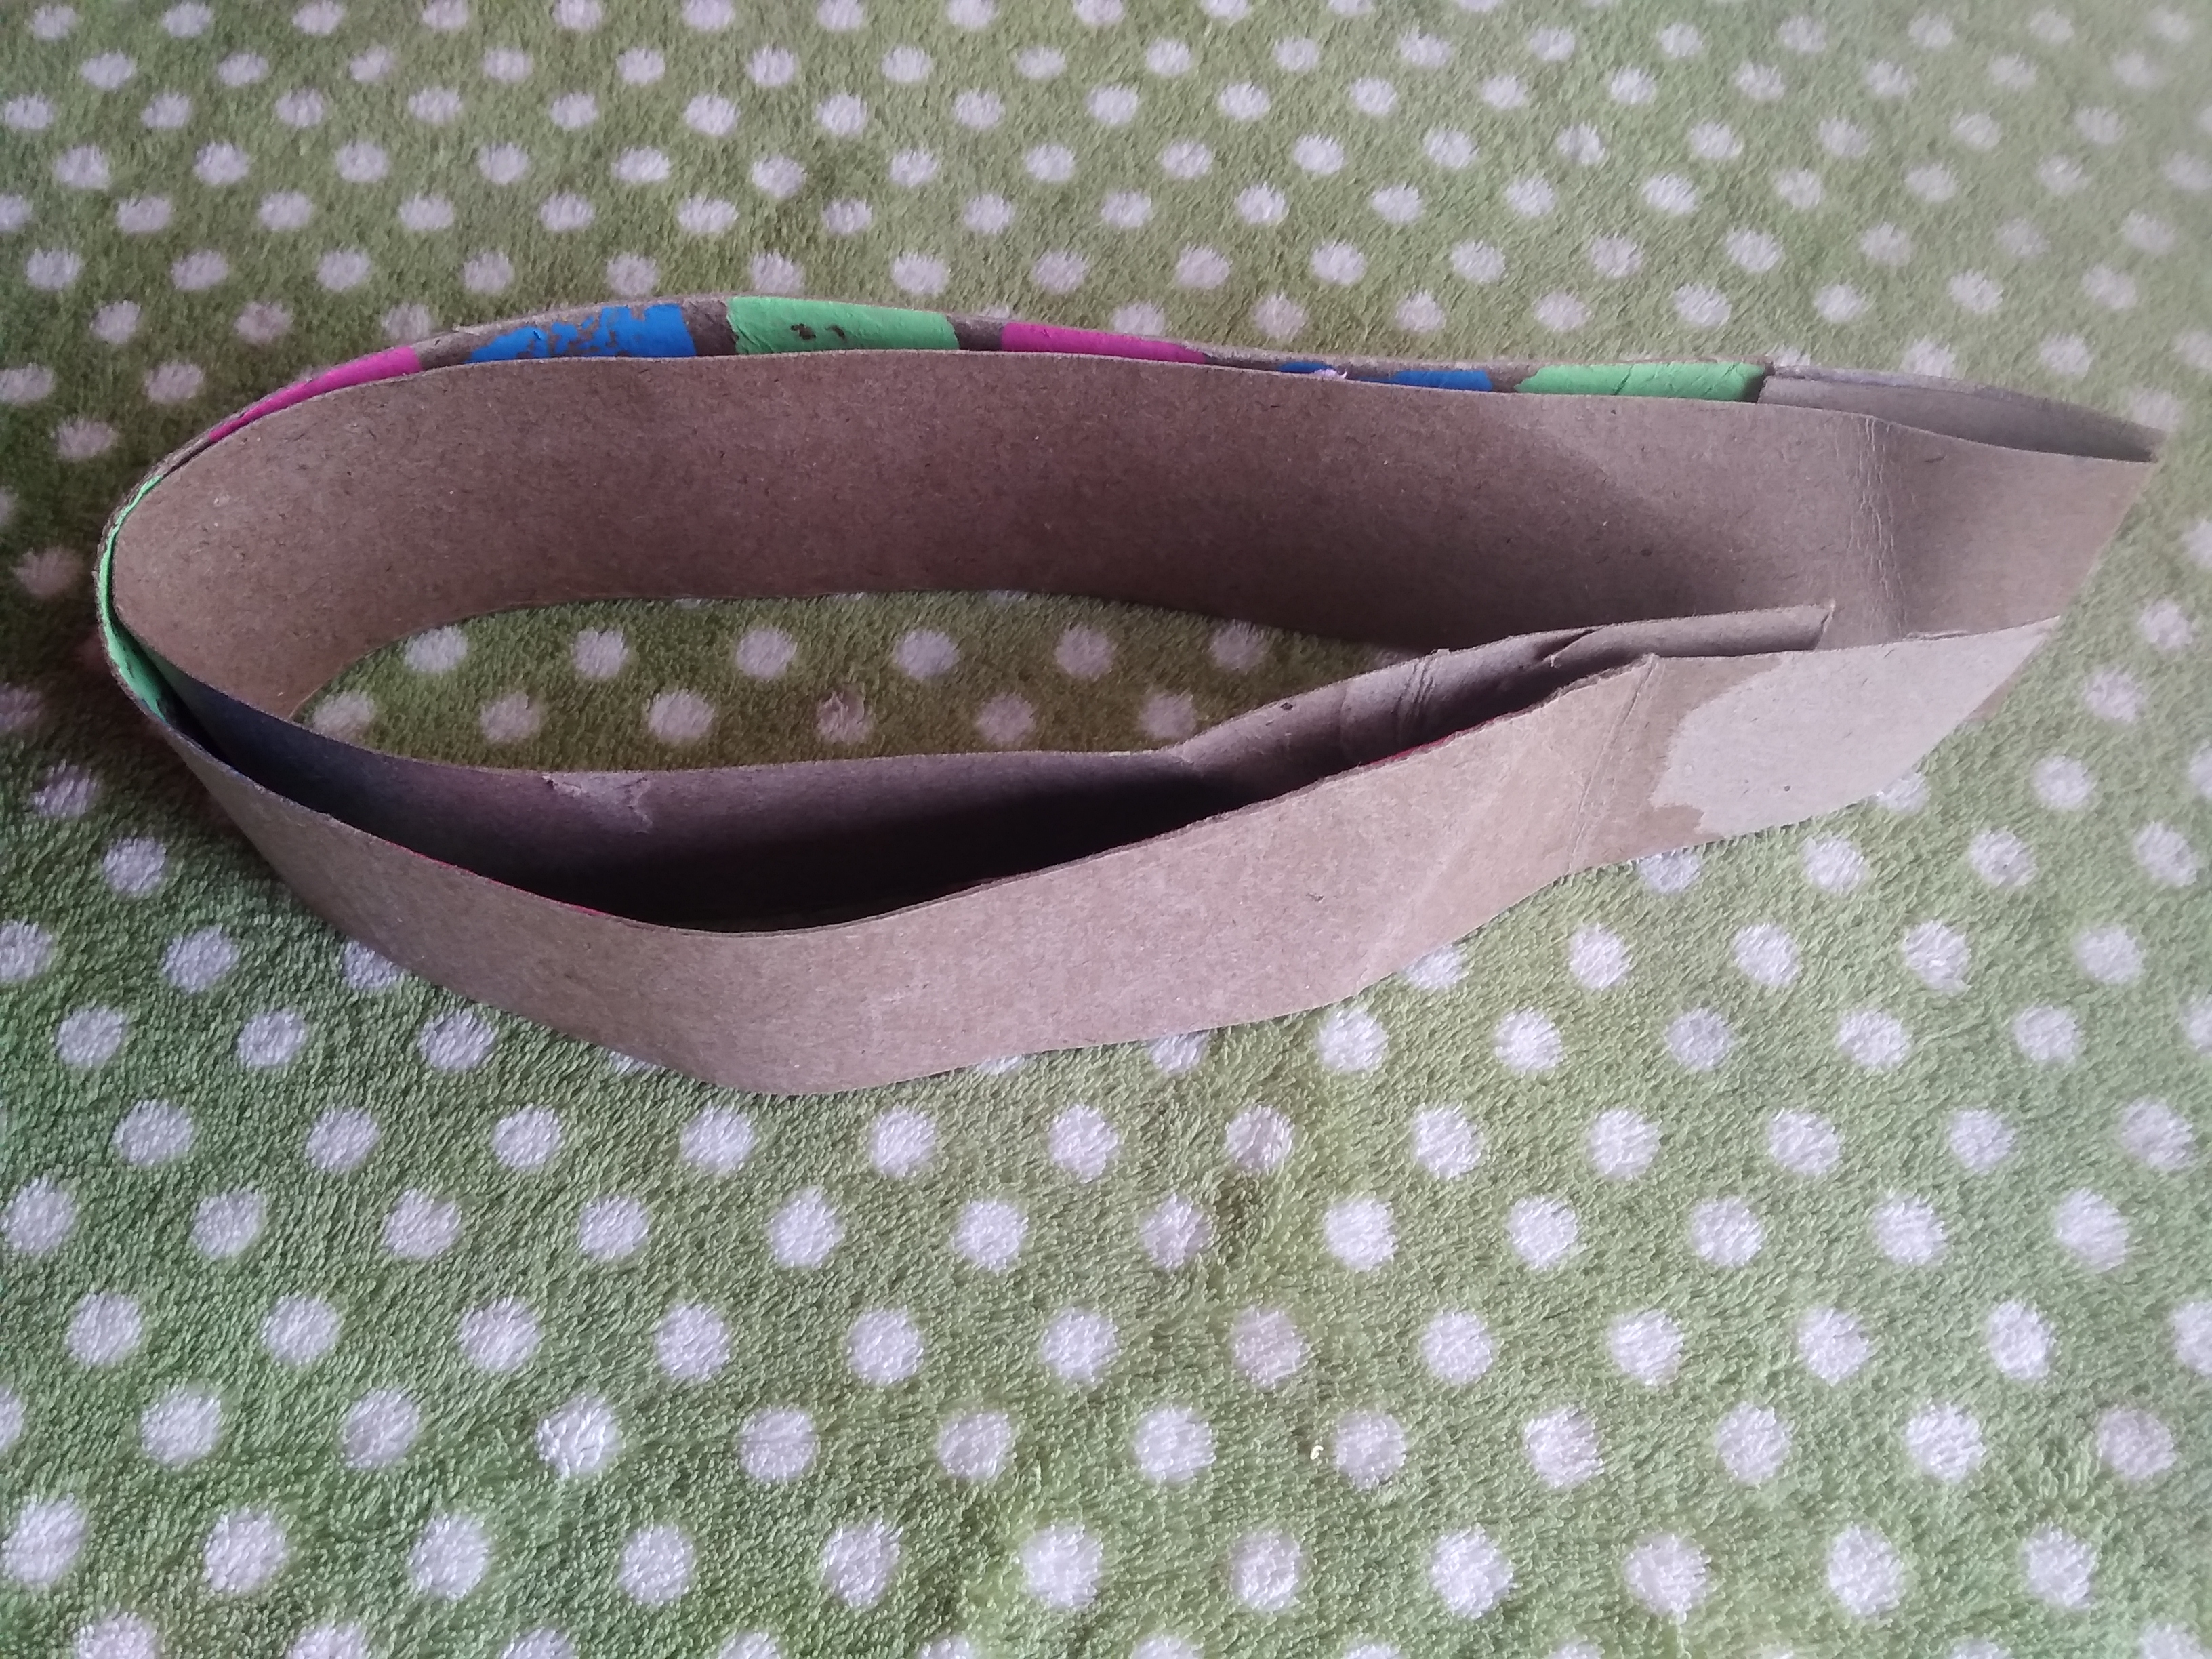
- Posteriormente necesitaremos una tira que será de 5cm de ancho y que sea larga ya esto nos dará la profundidad de 3D.
Later we will need a strip that will be 5cm wide and long and this will give us the depth of 3D.
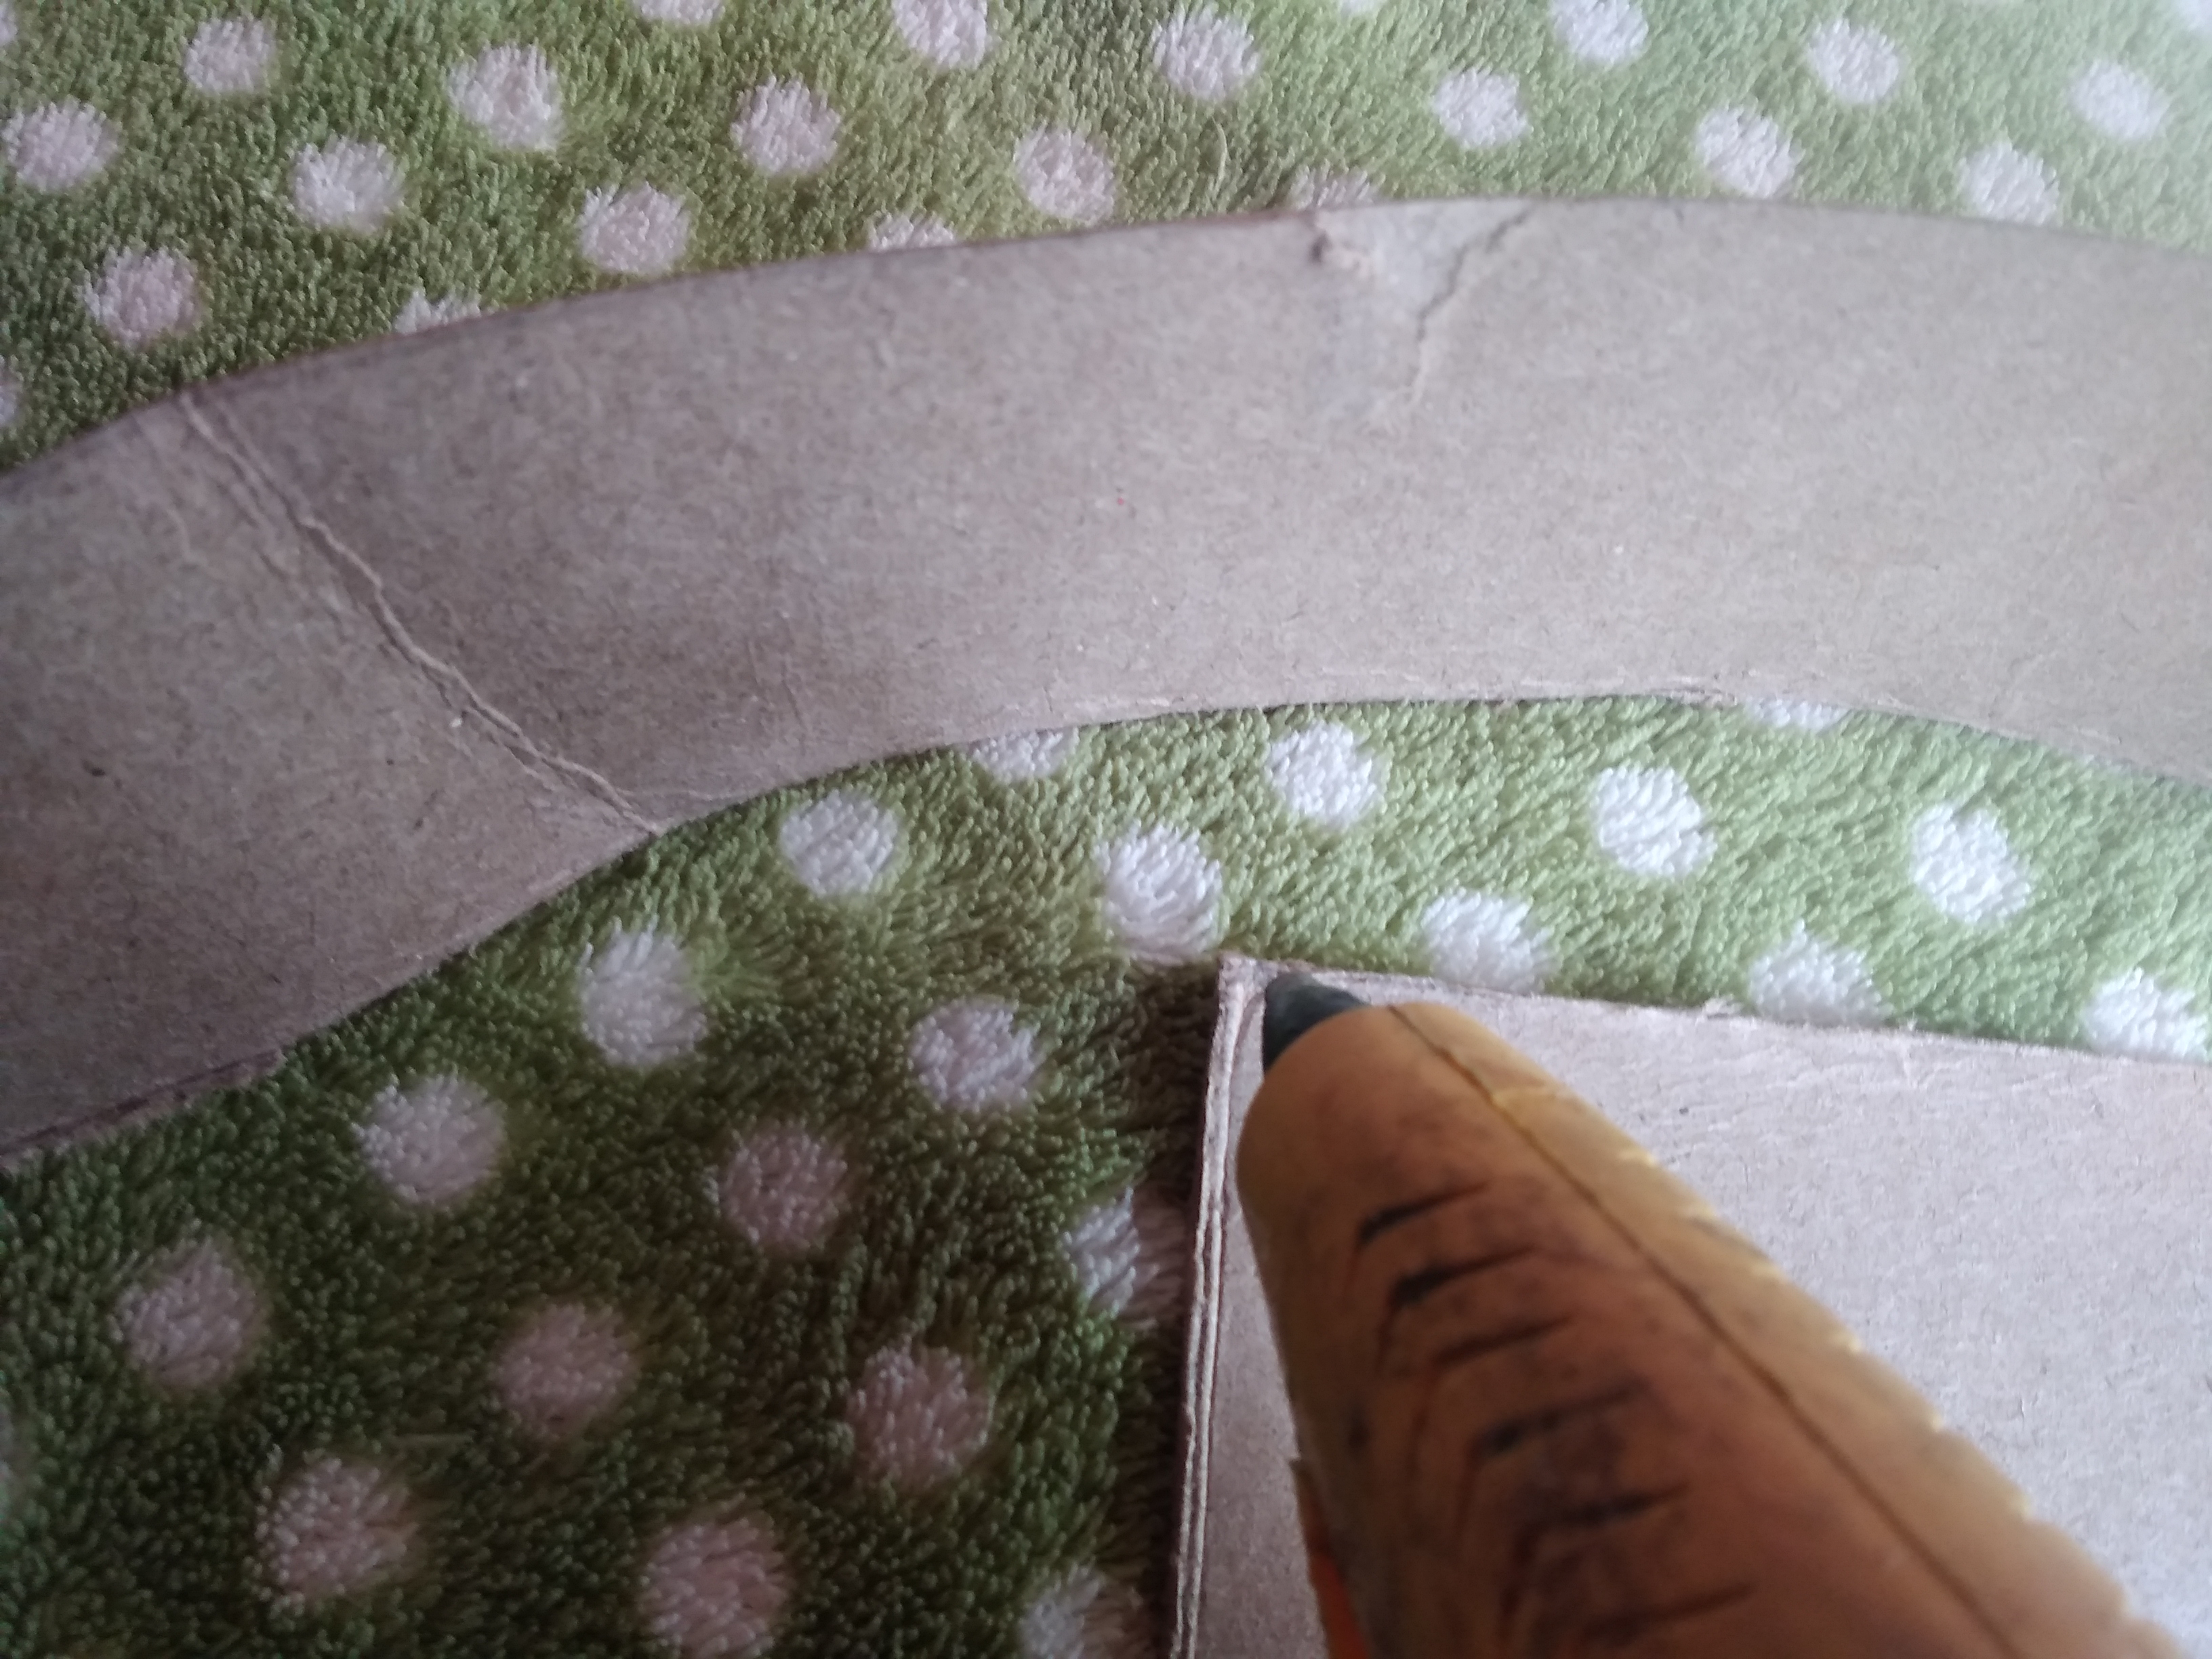
- Comenzamos a pegar con silicón alrededor de la primera base de la letra., hasta cubrirla por completo.
We begin to stick with silicone around the first base of the letter, until covering it completely.

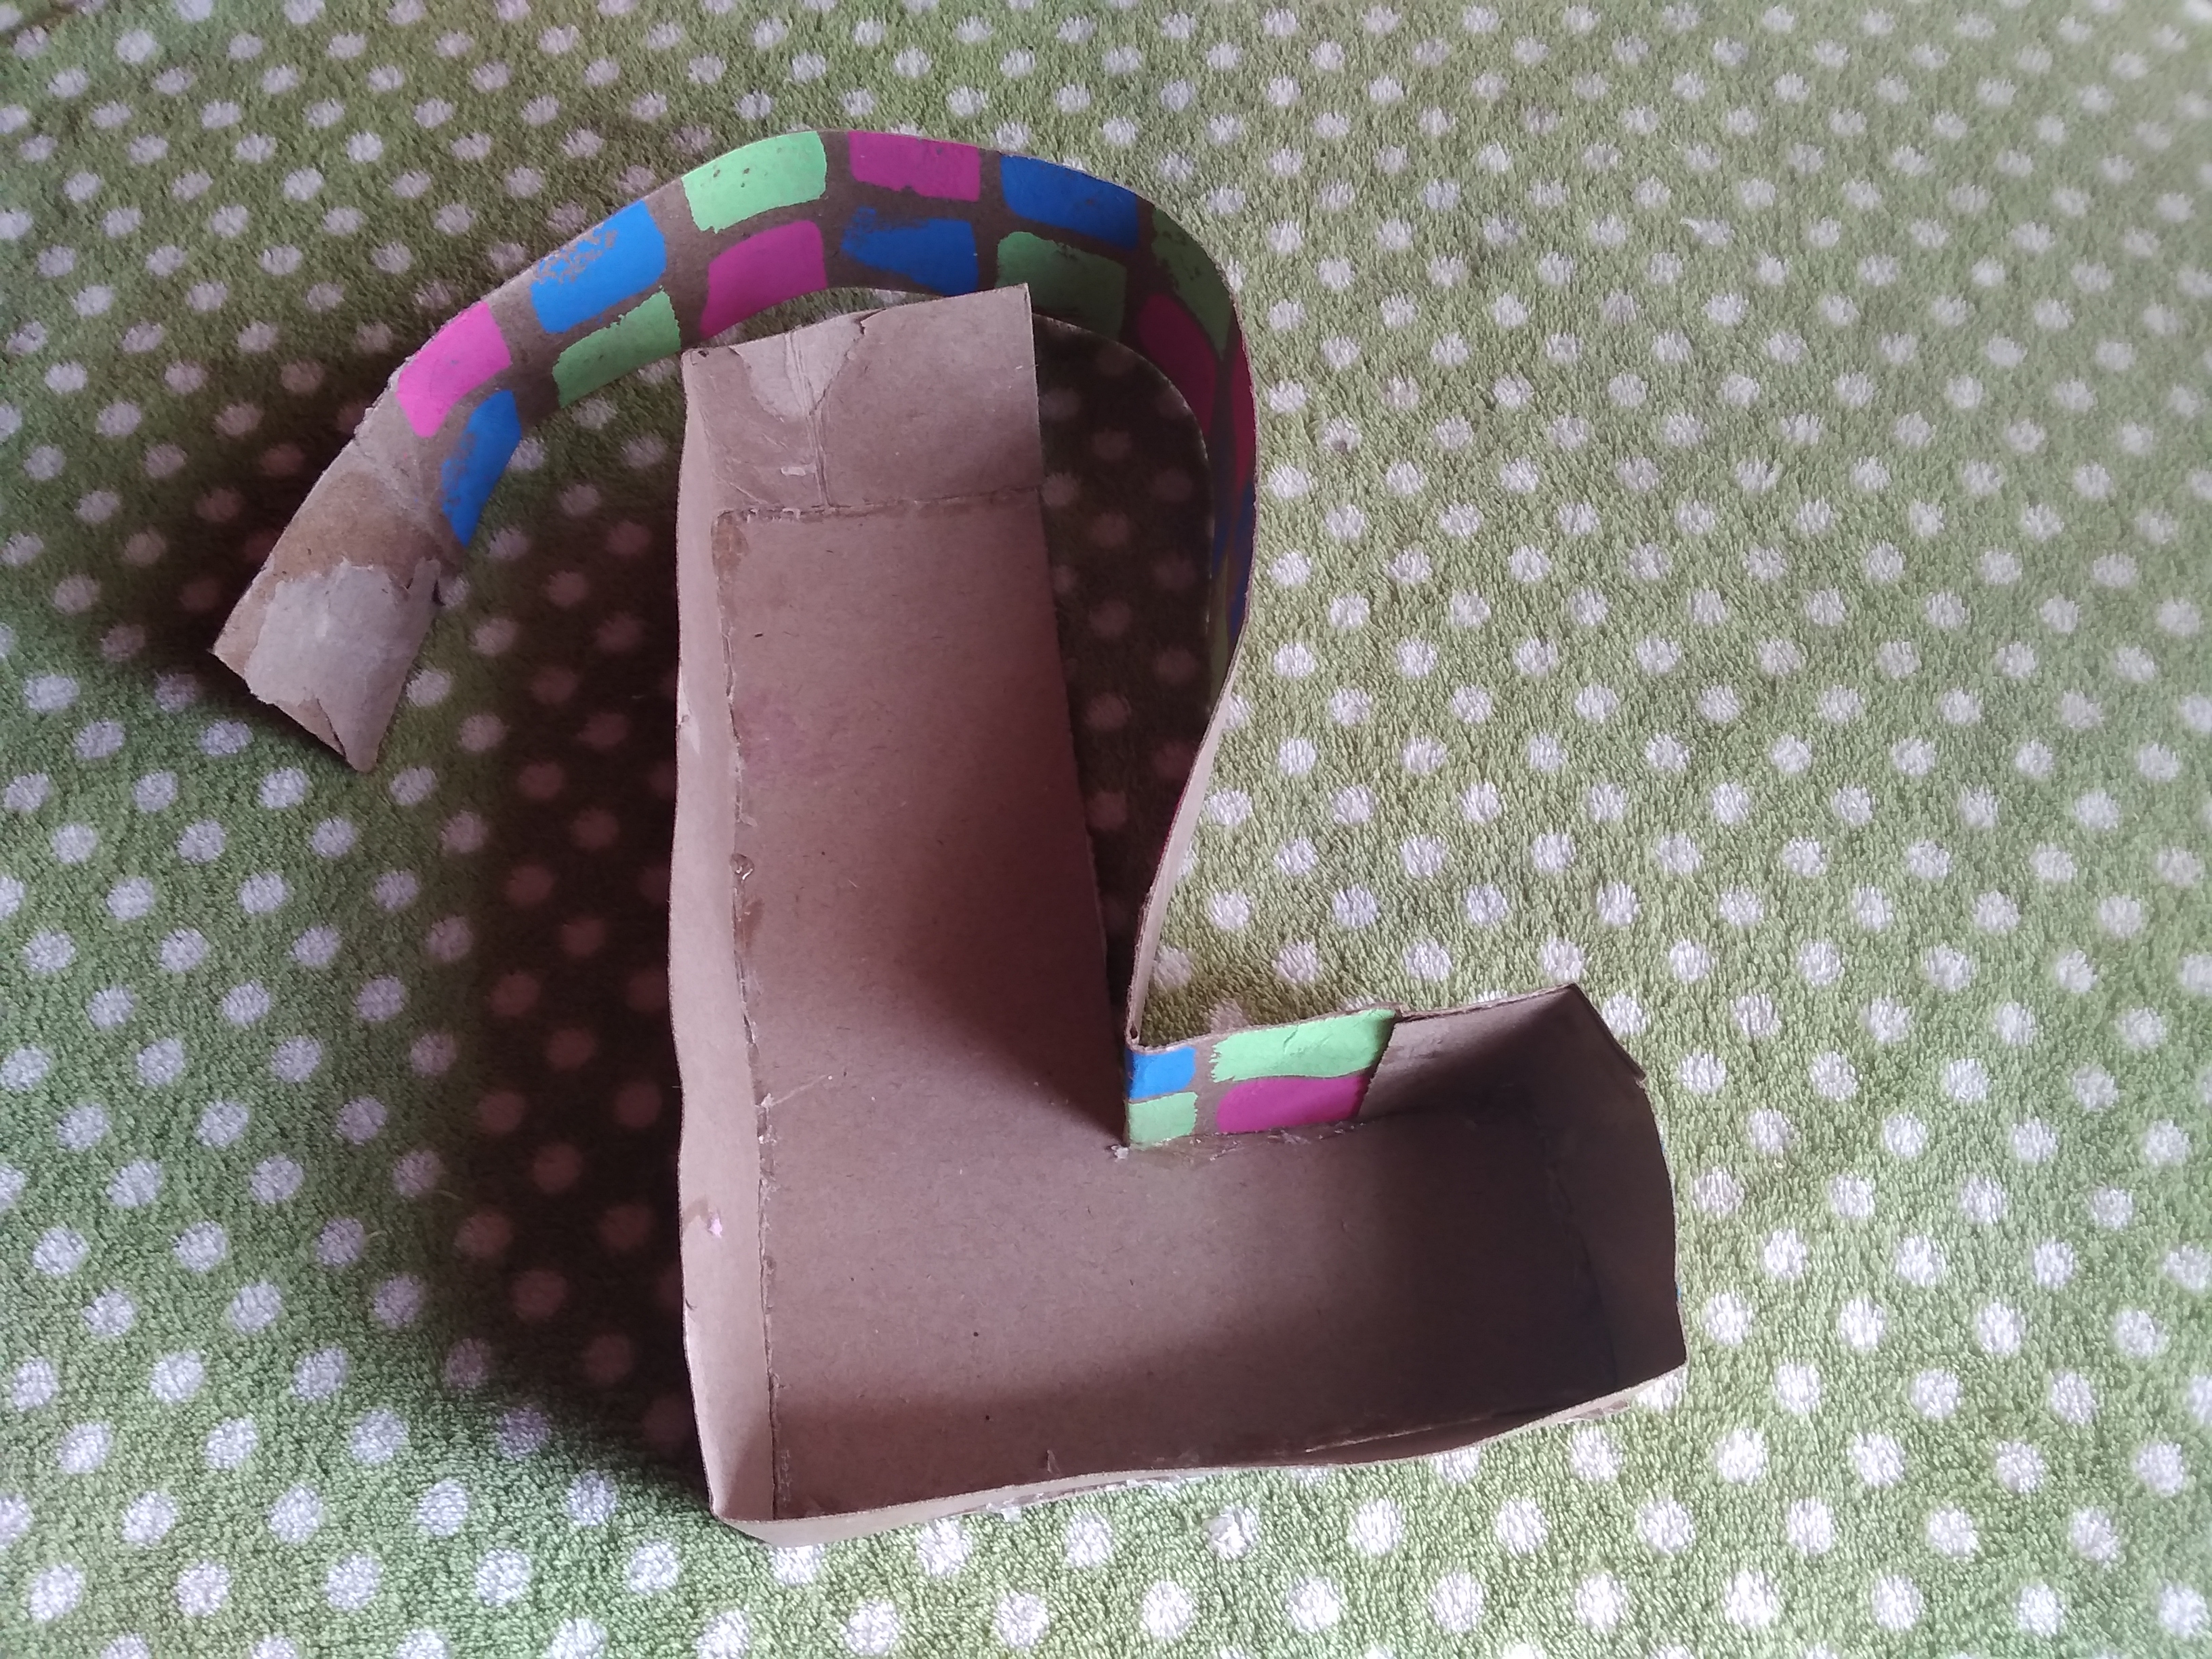
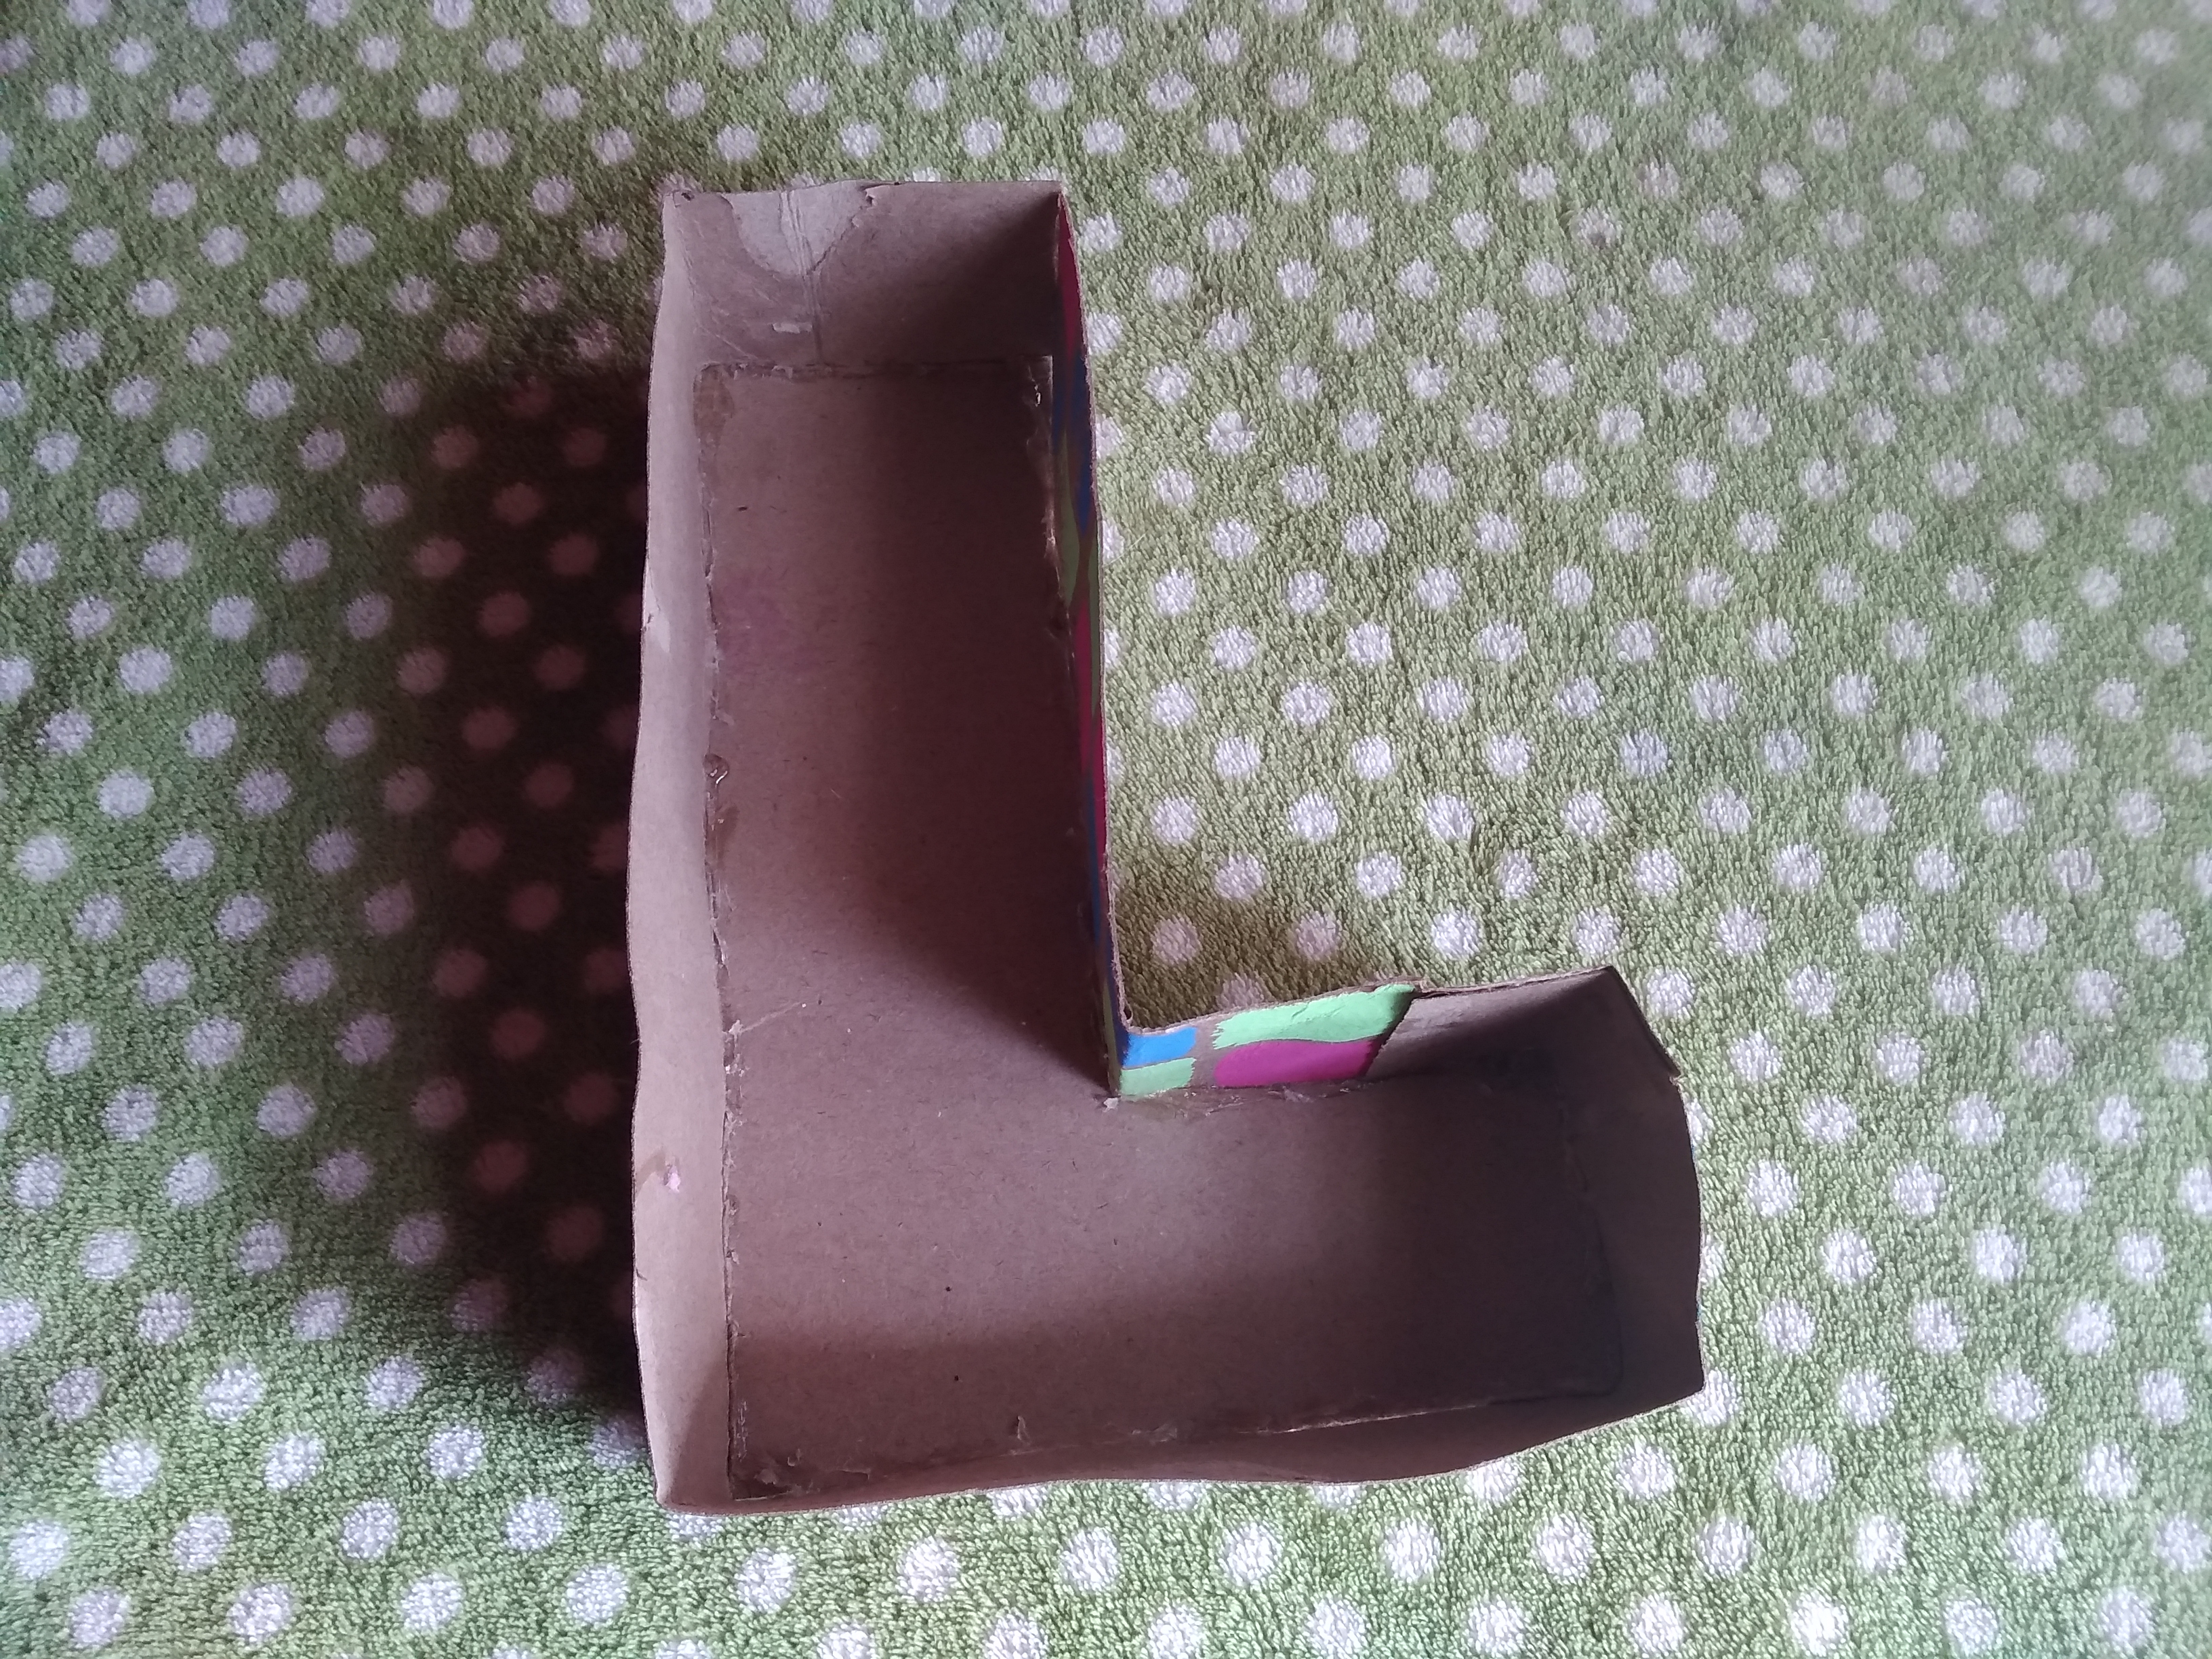
- Luego la otra parte de la letra la pegamos arriba, y así obtenemos la letra 3D.
Then we paste the other part of the letter on top, and thus we get the 3D letter
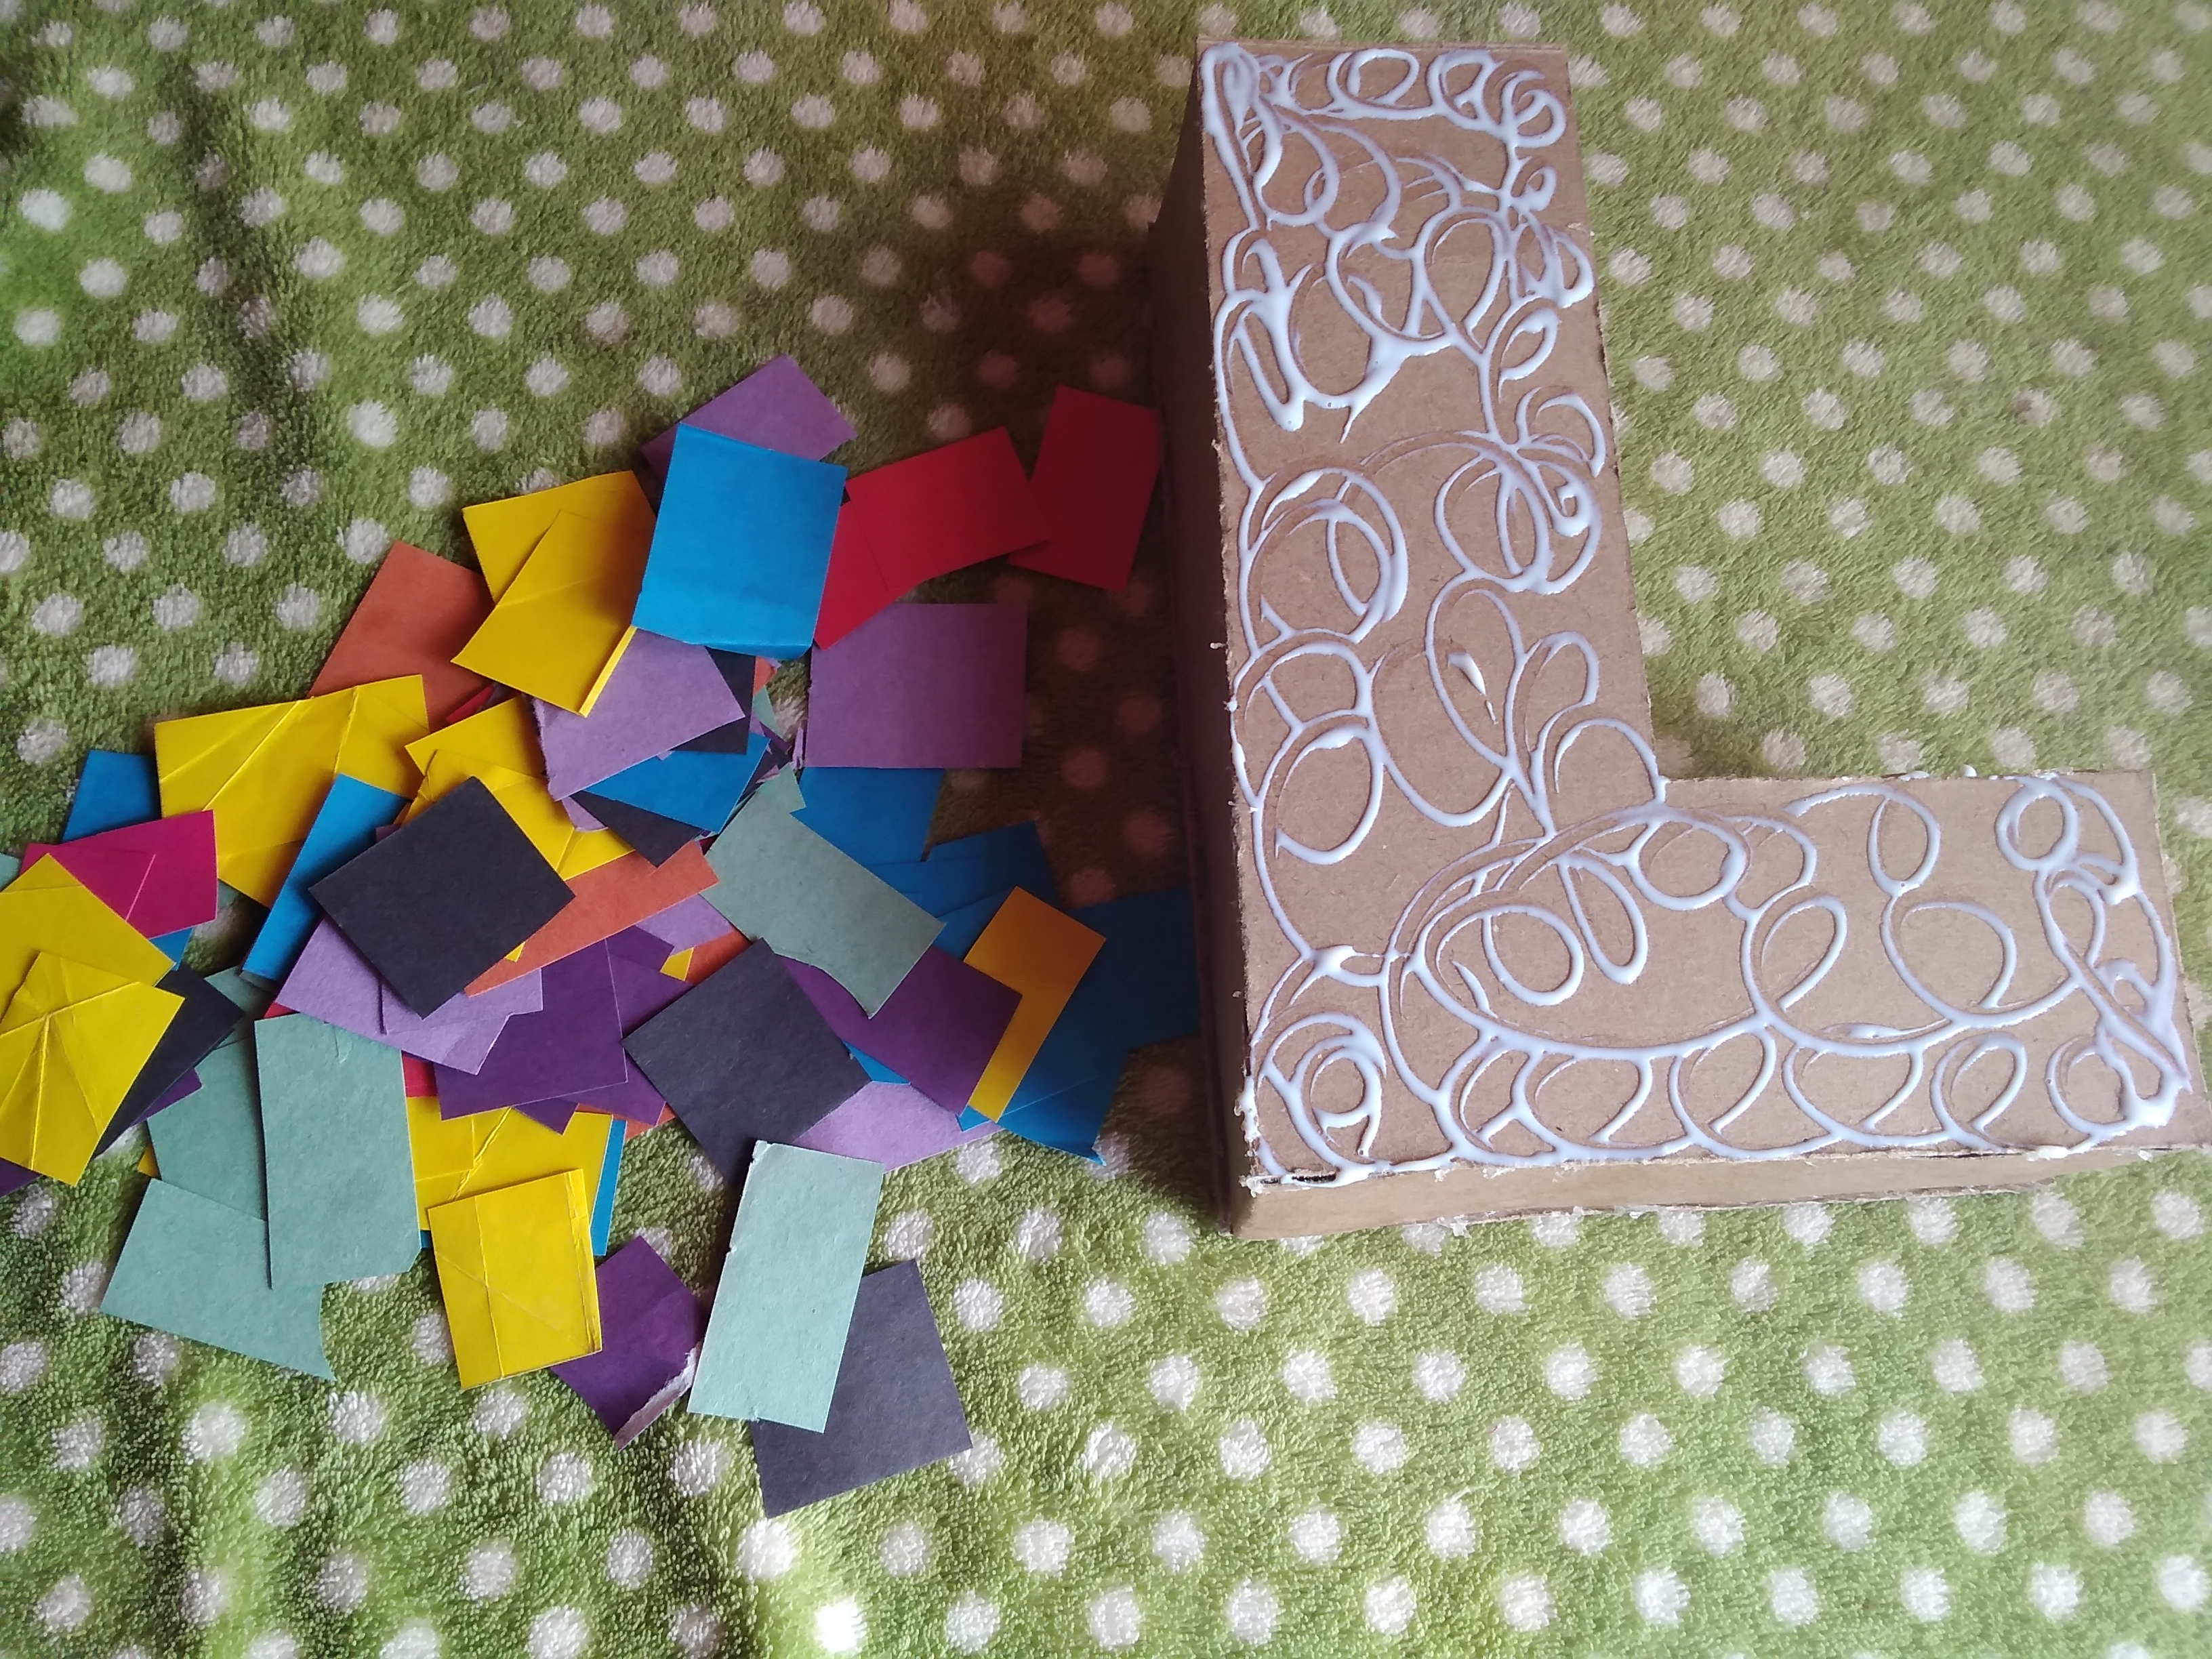
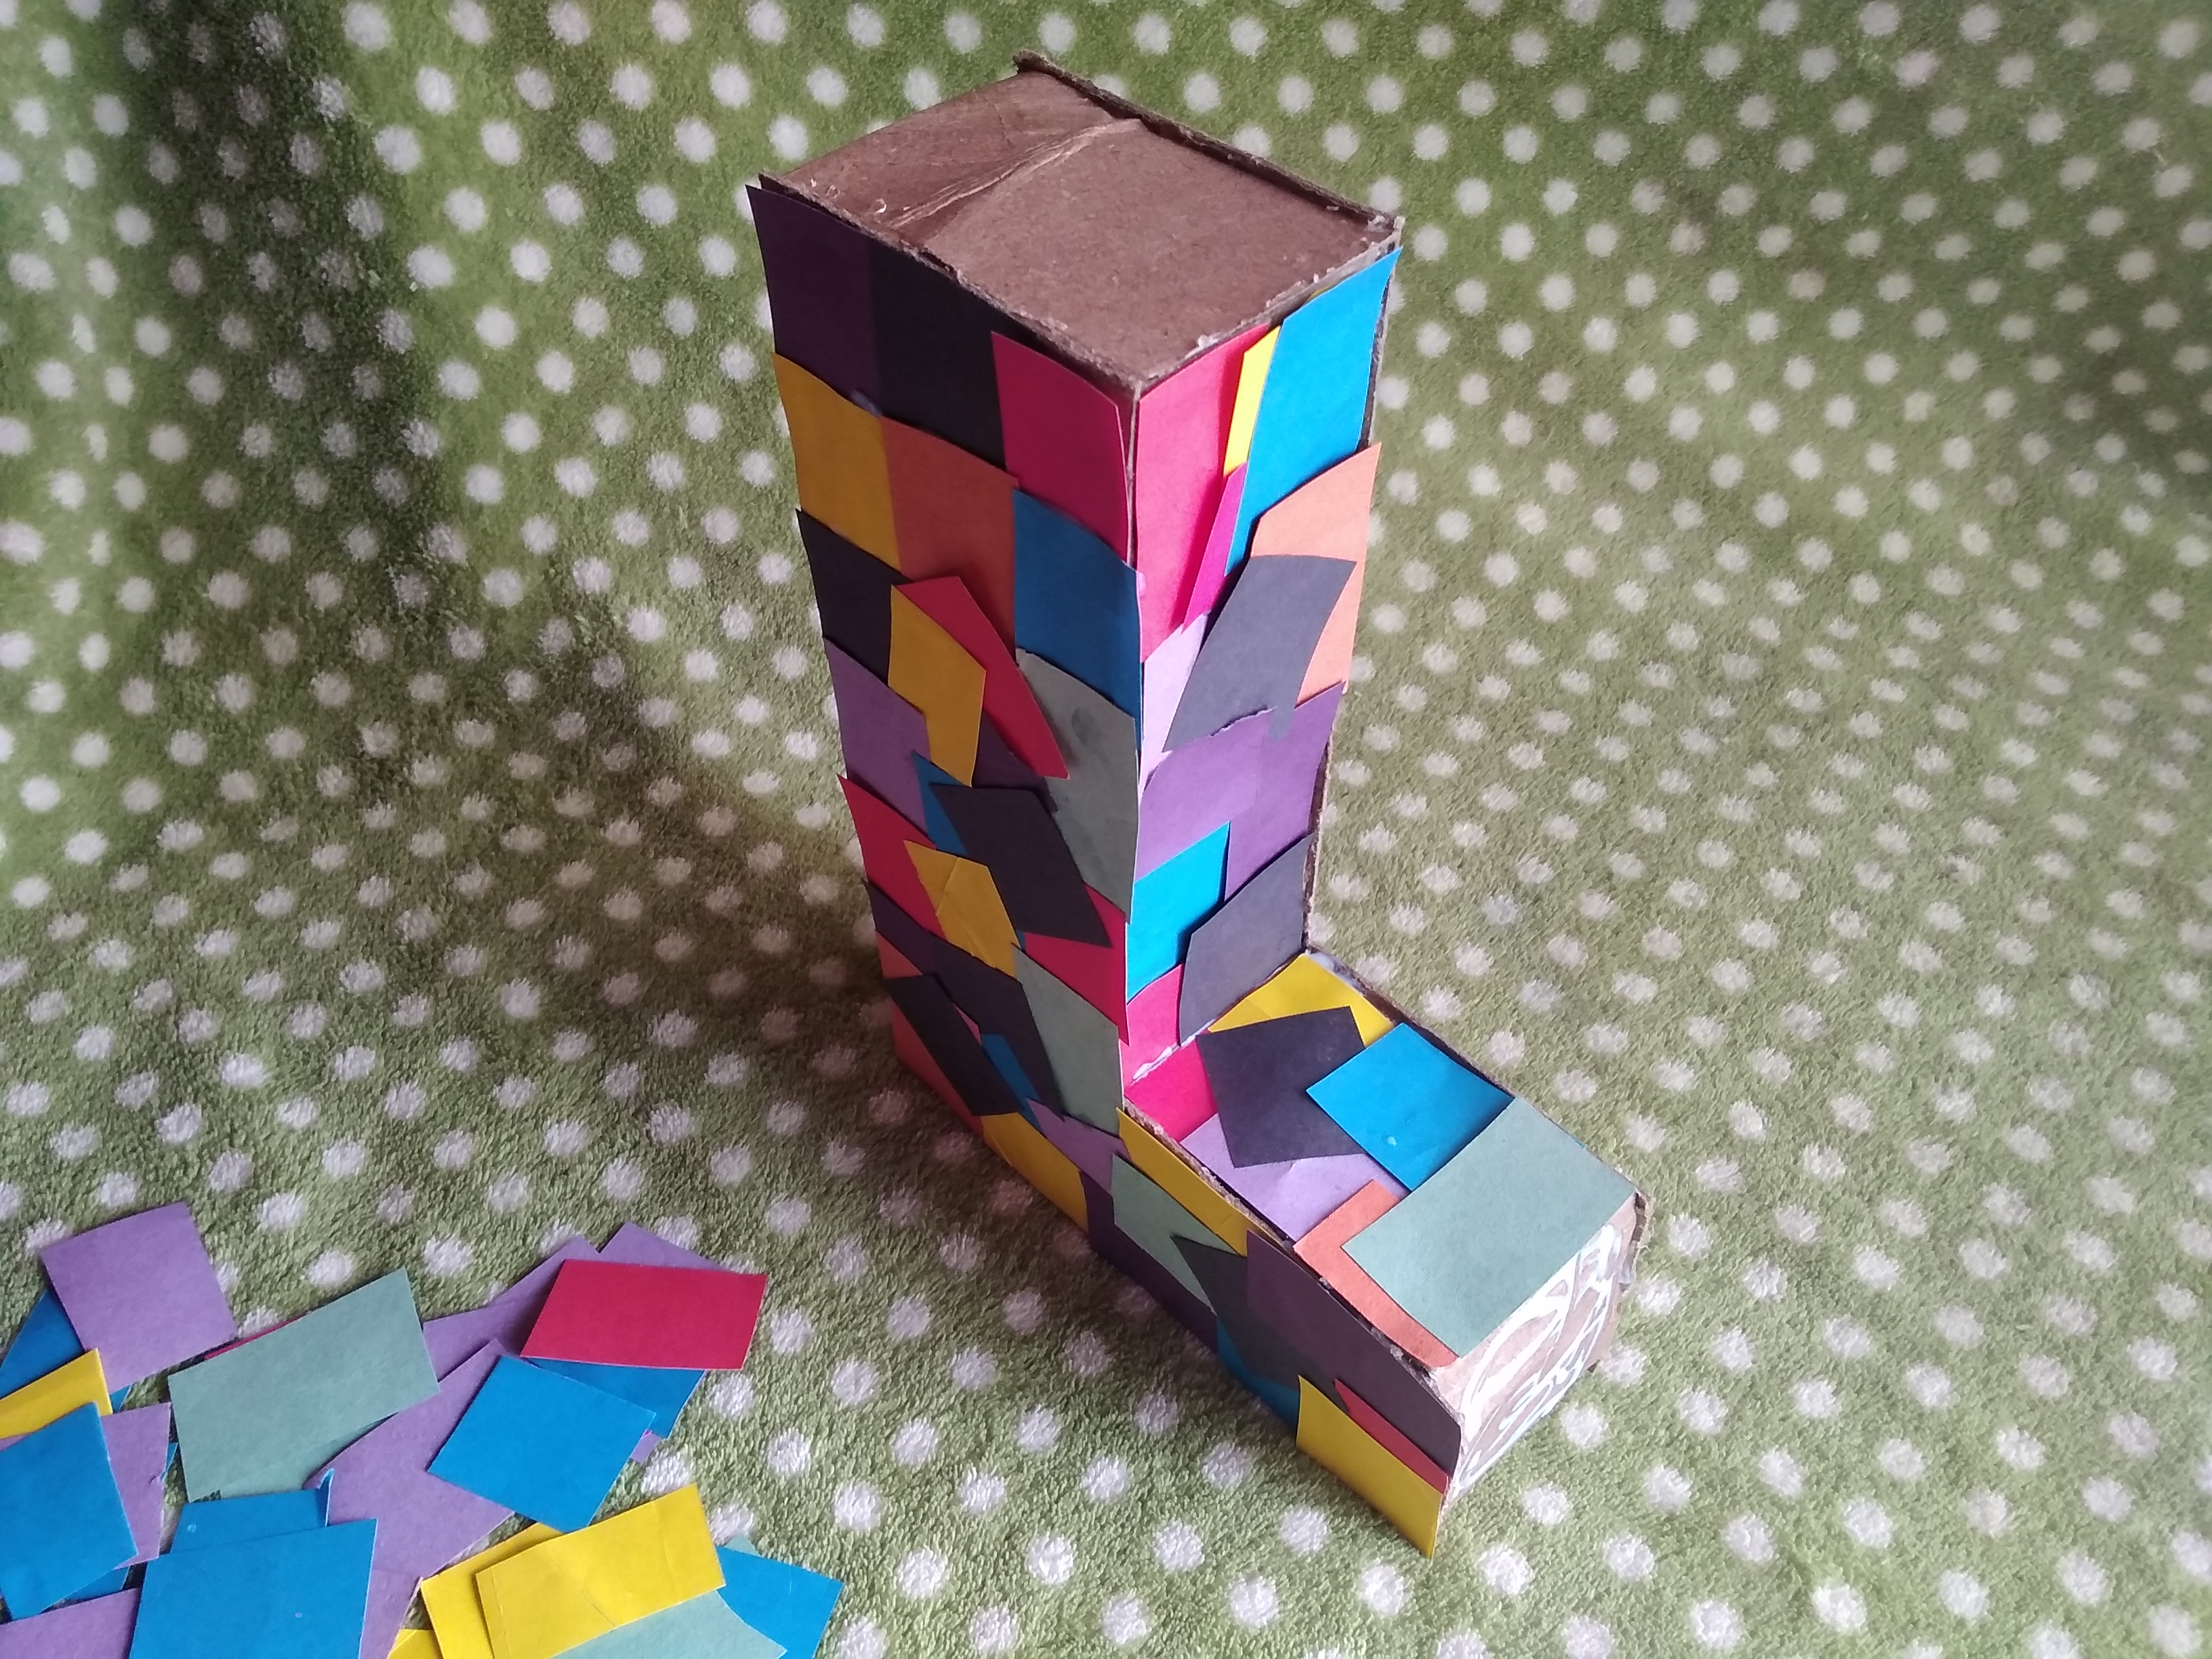
- Corte cuadrados de diferentes colores de cartulina, y comencé a pegar ya en nuestra letra.
I cut squares of different colors of cardboard, and I began to paste already in our letter.
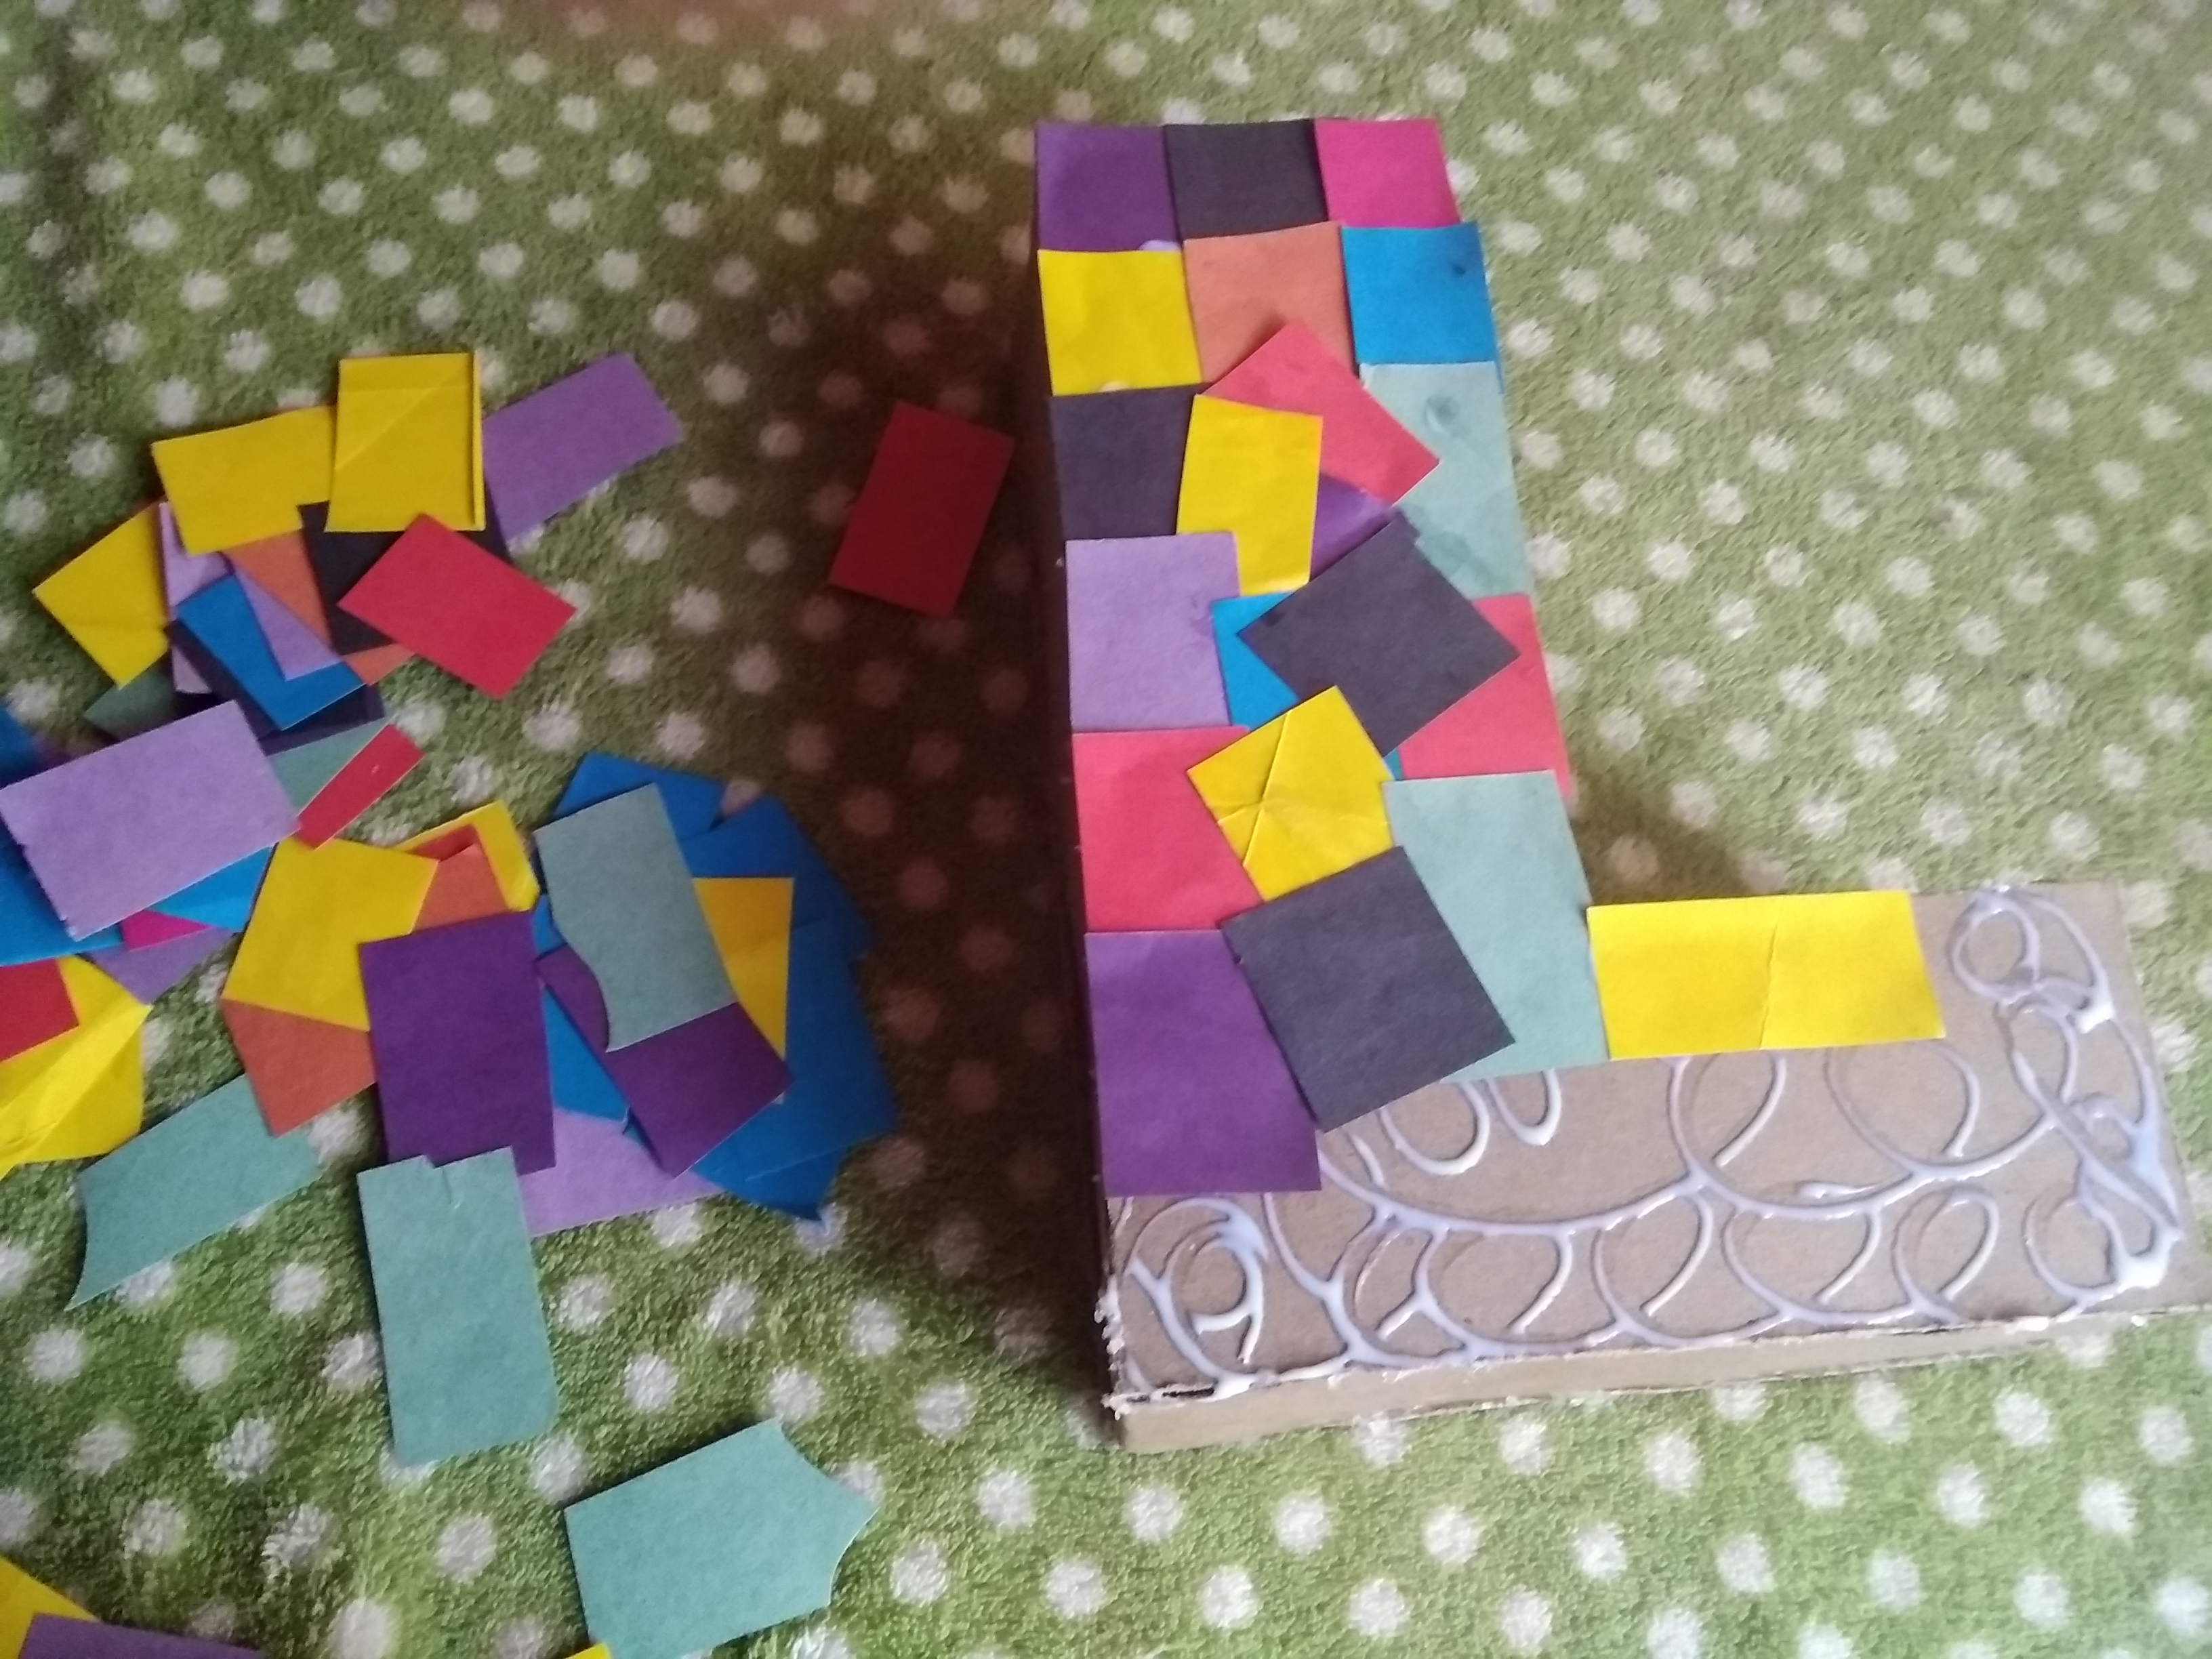
- Ya aquí podemos visualizar como va quedando
Here we can see how it is going
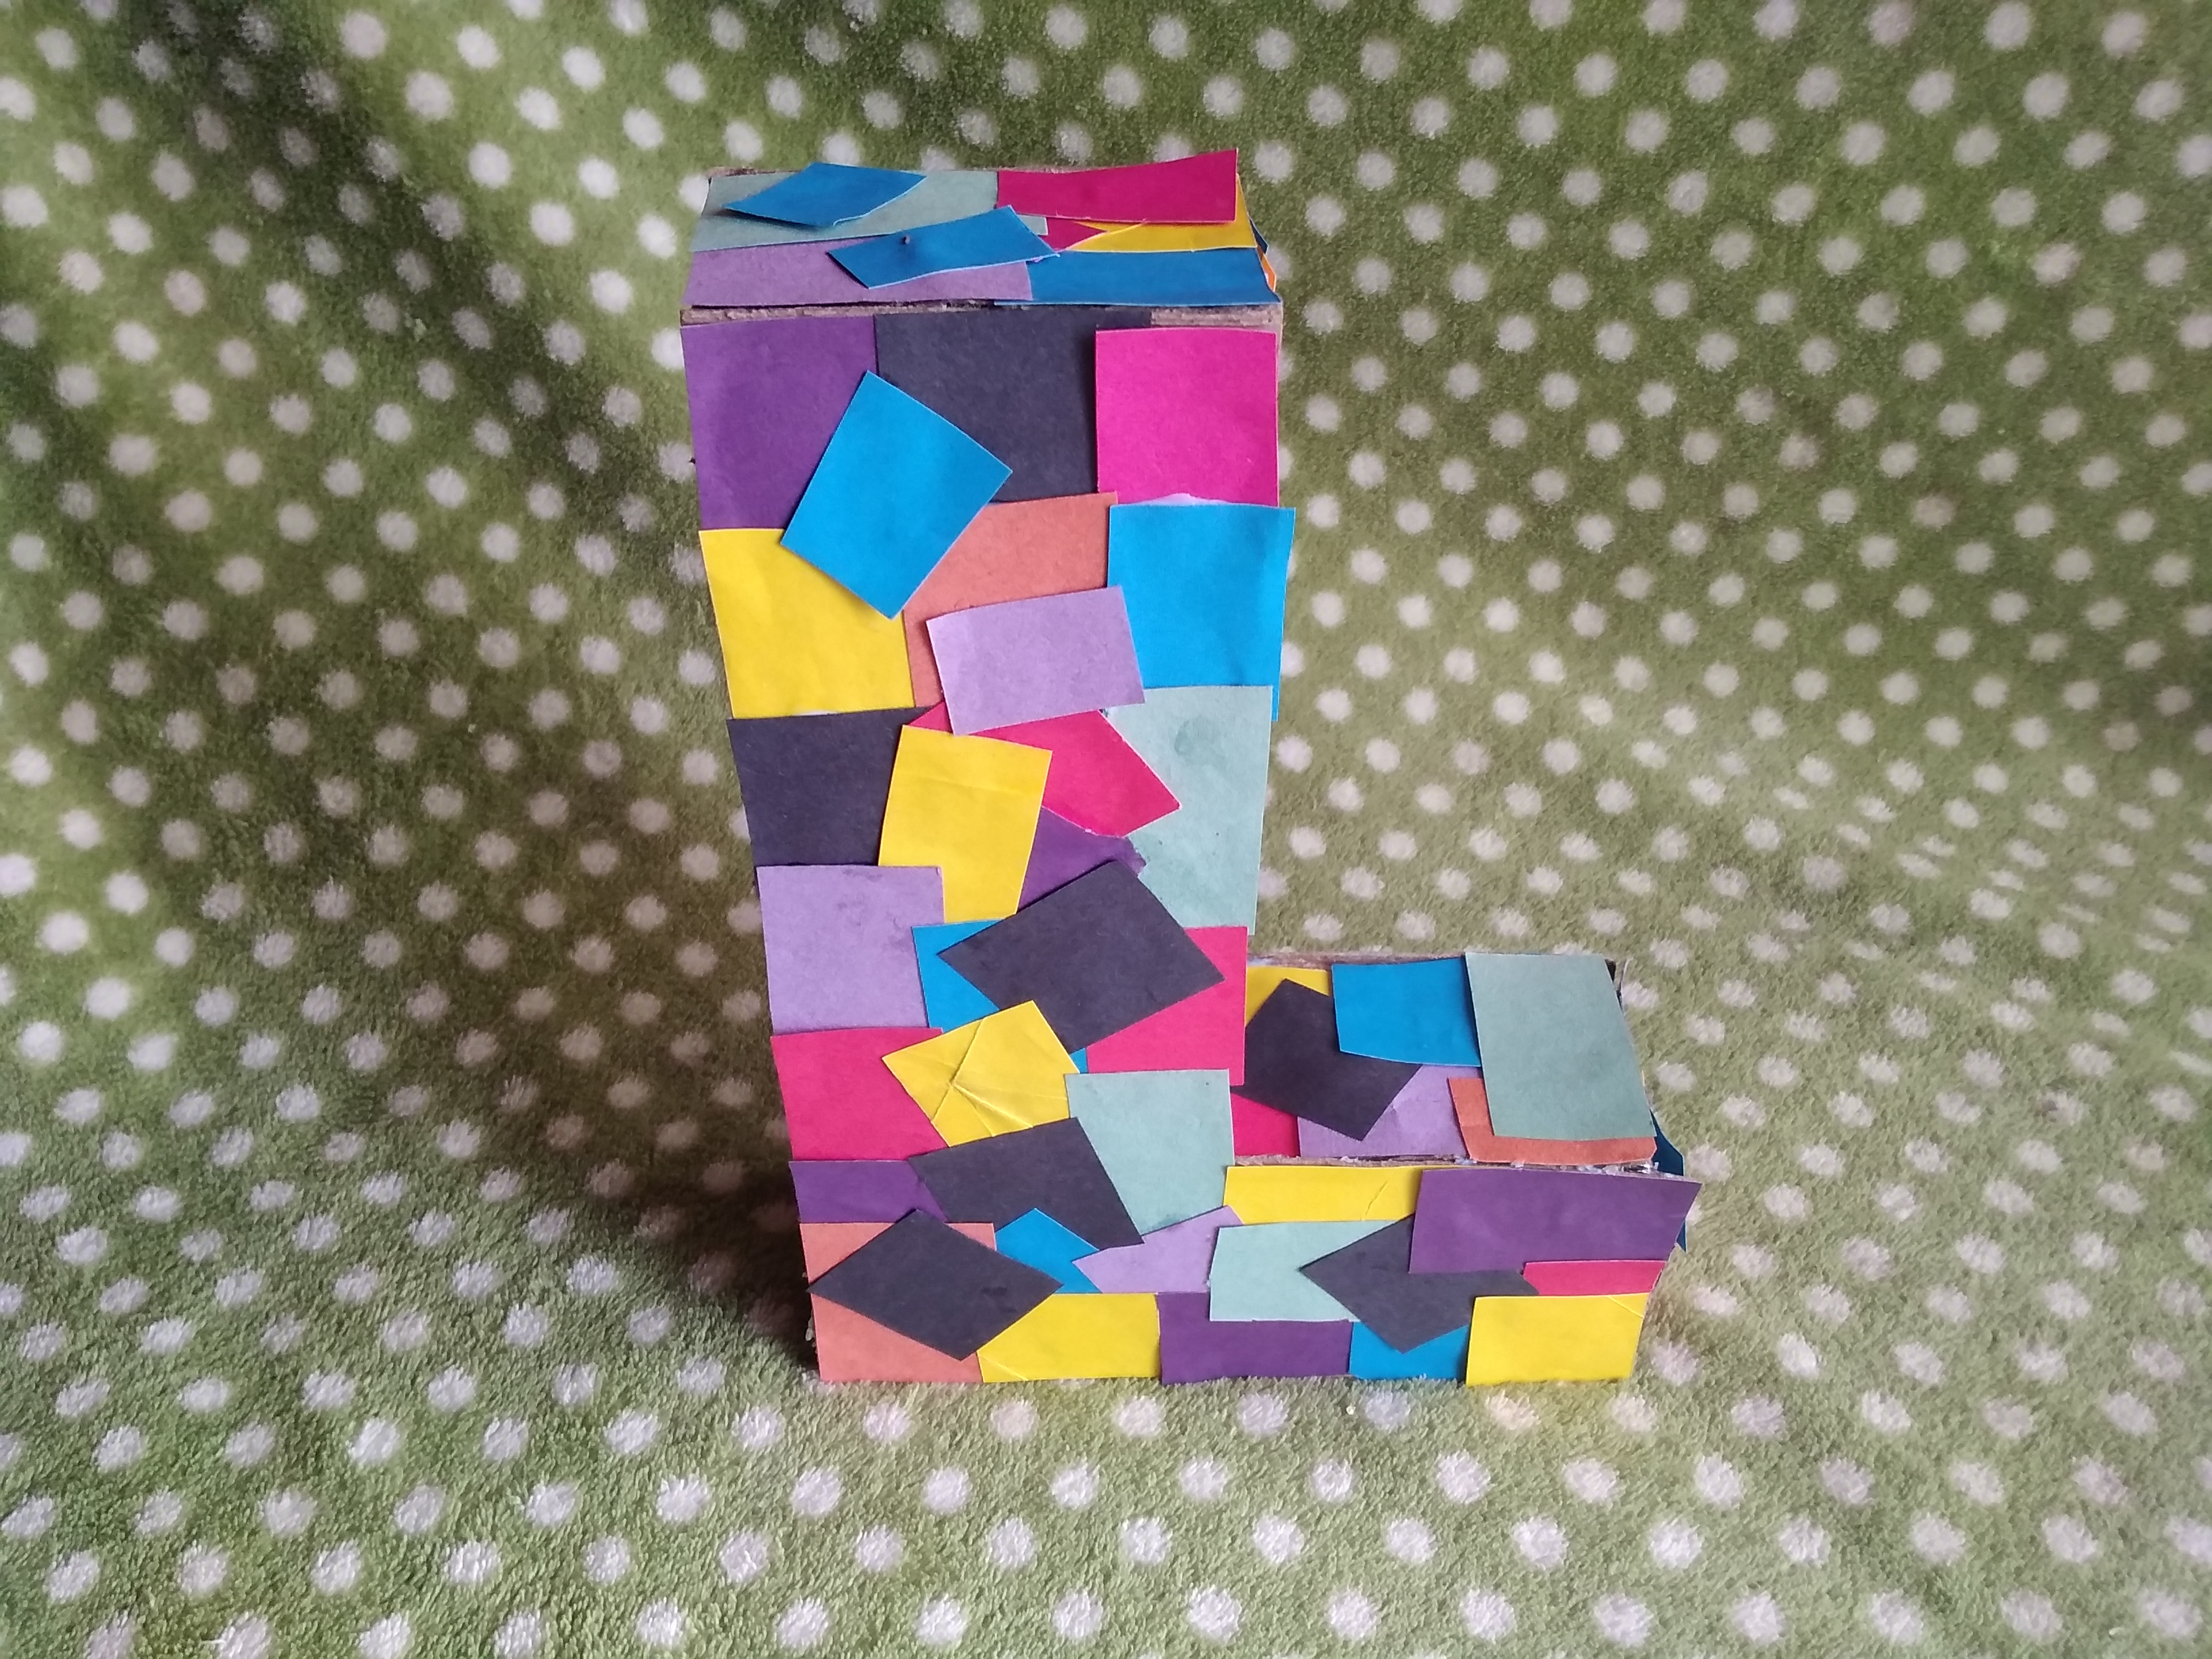
Letra 3D mosaico.
3D mosaic letter.
Espero les guste
Fotografías tomadas desde mi teléfono RedmiGo Xiaomi.
Gracias por Leerme
I hope you like it
Photographs taken from my RedmiGo Xiaomi phone.
Thanks for reading me
https://twitter.com/lisbeth6jas/status/1290070712485478400
Congratulations @lisbethseijas! You have completed the following achievement on the Hive blockchain and have been rewarded with new badge(s) :
You can view your badges on your board And compare to others on the Ranking
If you no longer want to receive notifications, reply to this comment with the word
STOPTo support your work, I also upvoted your post!
Do not miss the last post from @hivebuzz: