DIY| How to make a vase with CD.\ Bricolaje| Como elaborar un florero con CD.
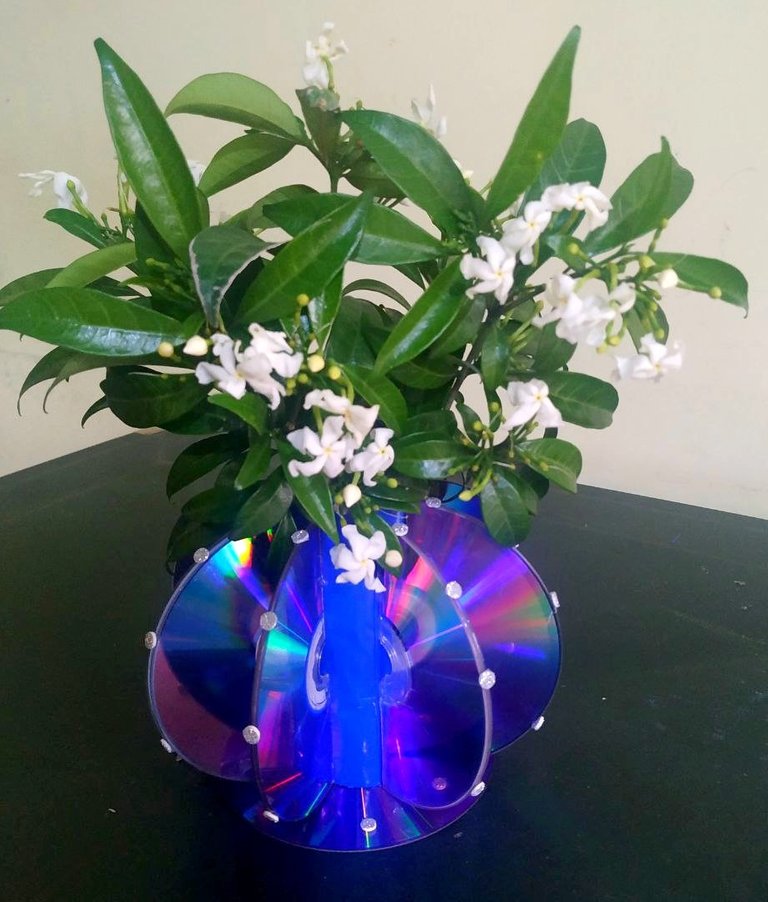
Hello my dear and dear friends, I hope you are very well. Here I bring you a nice and easy way to decorate our table or any space in the home, making a nice vase with CD. I know that we would like to place some detail on our table or somewhere in the home, which is very easy because we can do it ourselves and give it our best taste. I will show you the steps of how to do it.
Hola mis queridos y apreciados amigos, espero que se encuentren muy bien. Por aquí les traigo una linda y fácil forma para decorar nuestra mesa o cualquier espacio del hogar, haciendo un lindo florero con cd. Sé que desearíamos colocar algún detalle en nuestra mesa o en algún sitio del hogar, la cual es muy fácil porque nosotros mismos lo podemos realizar y darle nuestro mejor gusto. Le mostraré los pasos de cómo lo realice.
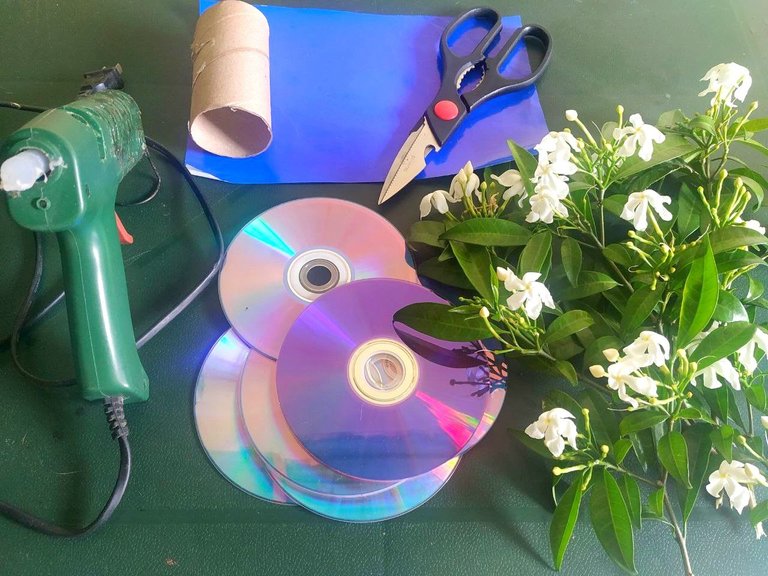
Materials:
• CD
• Natural flowers
• Silicon
• 1 roll of cardboard
• 1 piece of blue glossy paper
• Scissor
Materiales:
• CD
• Flores naturales
• Silicón
• 1 royo de cartón
• 1 retaso de papel lustrillo azul
• Tijera
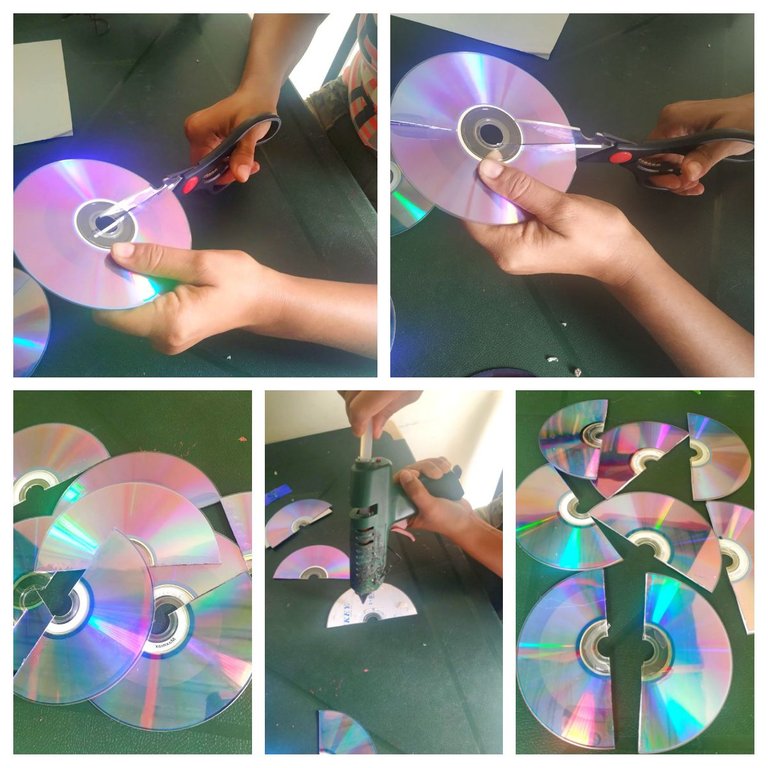
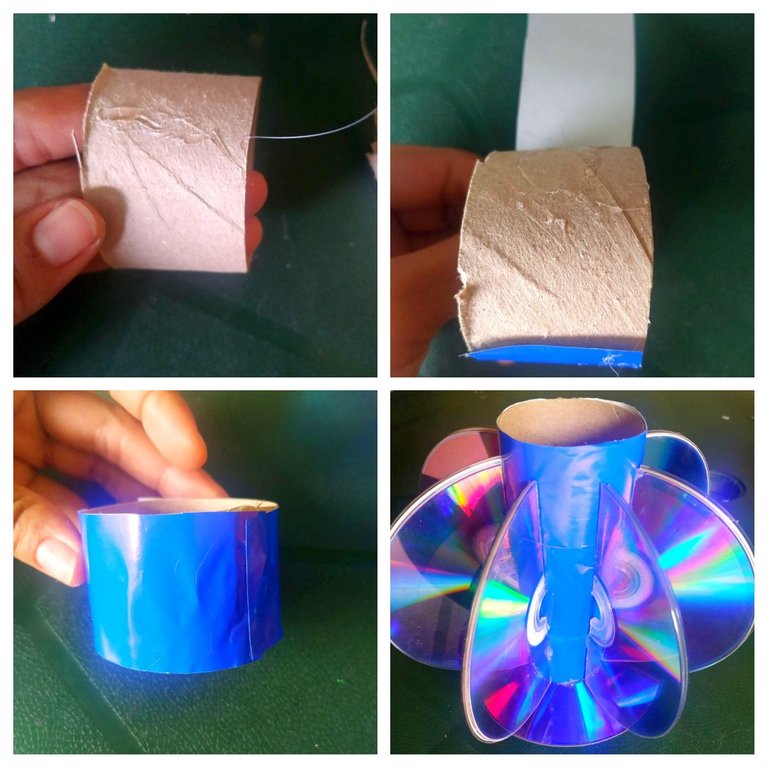
Step 1:
I left a CD for the base, and the rest were cut in half, then I joined them with silicone face to face, so that the shiny part was on the outside.
Paso 1:
Deje un CD para la base, y los demás los corte por la mitad, luego los uní con silicón frente con frente, de manera que la parte brillante quedara por fuera.
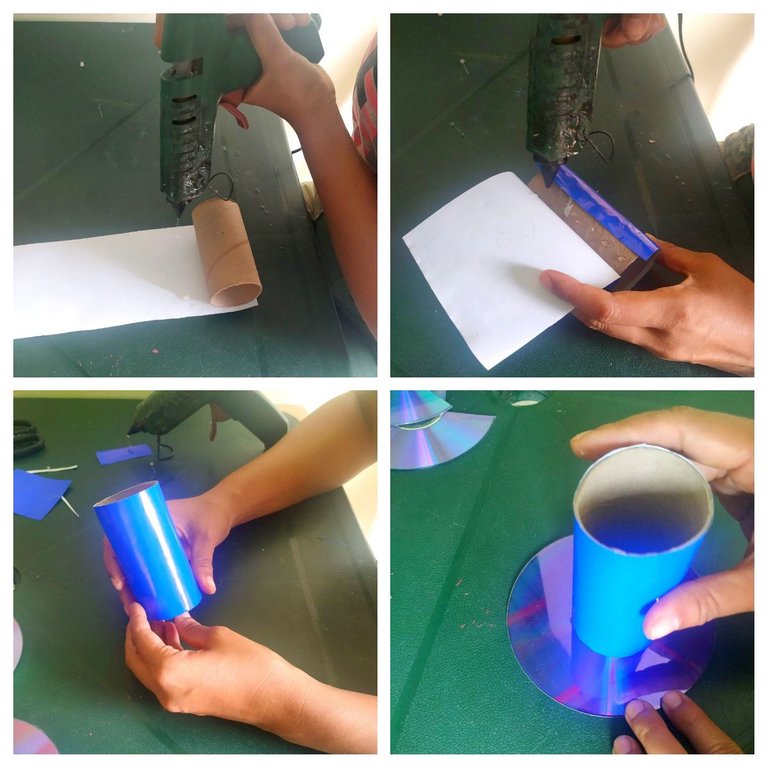
Step 2:
Line the cardboard roll with the glossy paper. And I glued it to the base of the CD, which I had already reserved.
Paso 2:
Forre el royo de cartón con el papel lustrillo. Y lo pegué a la base del CD, que ya había reservado.
Step 3:
With the base ready, I began to glue the CDs vertically, until they were all glued.
Paso 3:
Con la base lista, comencé a pegar los CD de forma vertical, hasta pegarlos todos.

Step 4:
But seeing that the rust did not cover the top, and it does not look good, I cut another piece of cardboard, lined it and glued it in the space that had been discovered.
Paso 4:
Pero viendo que el royo no cubrió la parte de arriba y no se ve bien, corté otro pedazo de cartón, lo forre y lo pegue en el espacio que había quedado descubierto.
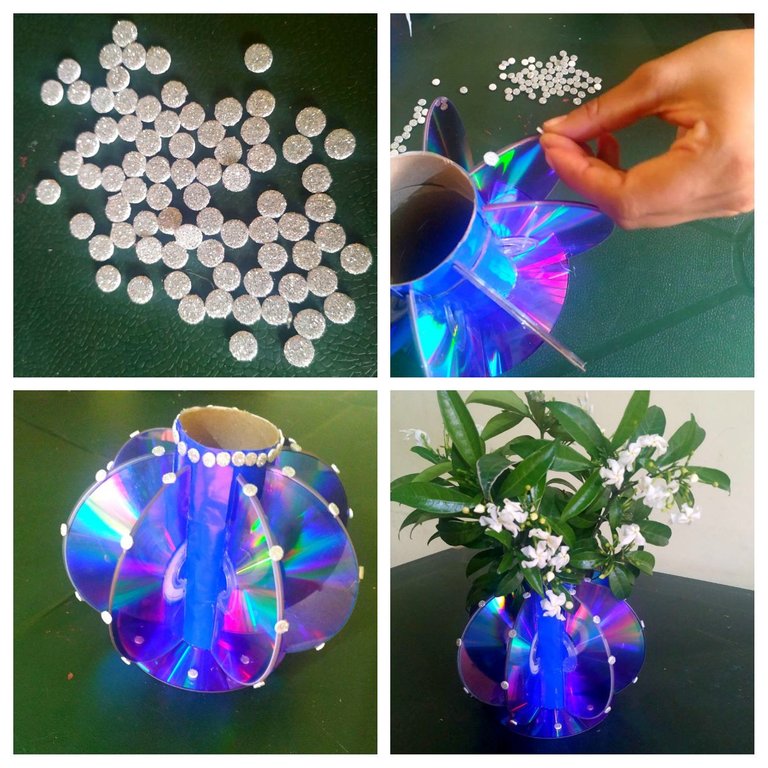
Step 5:
After having, it assembled, I for my part already had some small circles cut out of frosted silver foami, and I proceeded to paste it all around the vase, in order to make it a nice decoration, finally I placed the flowers, you can see how beautiful I am left with the vase, I hope it will be of great use to you and that you can make it in your homes, and thus you can design it to your liking without having to buy one.
Paso 5:
Luego teniéndolo armado, yo por mi parte ya tenía unos círculos pequeños cortados de foami escarchado plateado, y procedí a pegarle por todo alrededor del florero, con la finalidad de hacerle una bonita decoración, por último le coloque las flores, pueden observar que lindo me quedo el florero, espero que les sirva de gran utilidad y que lo puedan realizar en sus hogares, y así lo puedan diseñar a su gusto sin preciso de comprar uno.
Collage making program: Fotojet Link
Translated from google translator Link
Photo editing program: PhotoFiltre 7
Las fotos fueron tomadas desde un Xiaomi Mi A2..
Programa para hacer el collage: Fotojet Enlace
Traducido del traductor de Google Enlace
Programa para editar fotos: PhotoFiltre 7
I say goodbye until another opportunity.
Thanks for your support.
Me despido hasta otra oportunidad.
Gracias por su apoyo.
Copyright @imargasa. All rights reserved.