[ENG/ESP] DIY |product photography studio | Set para fotografías de productos
¡Holaaa gente! 🤗 Espero su día vaya de maravilla, en esta oportunidad les quise compartir como hice un estudio para fotografías de productos y que se vean profesionales. Lo mejor es que se utilizan materiales super económicos y fáciles de conseguir.
Hello, people!🤗 I hope your day goes well, this time I wanted to share with you how I made a studio for product photos and look professional. The best thing is that we use super cheap and easy to get materials
PASO A PASO / STEP BY STEP
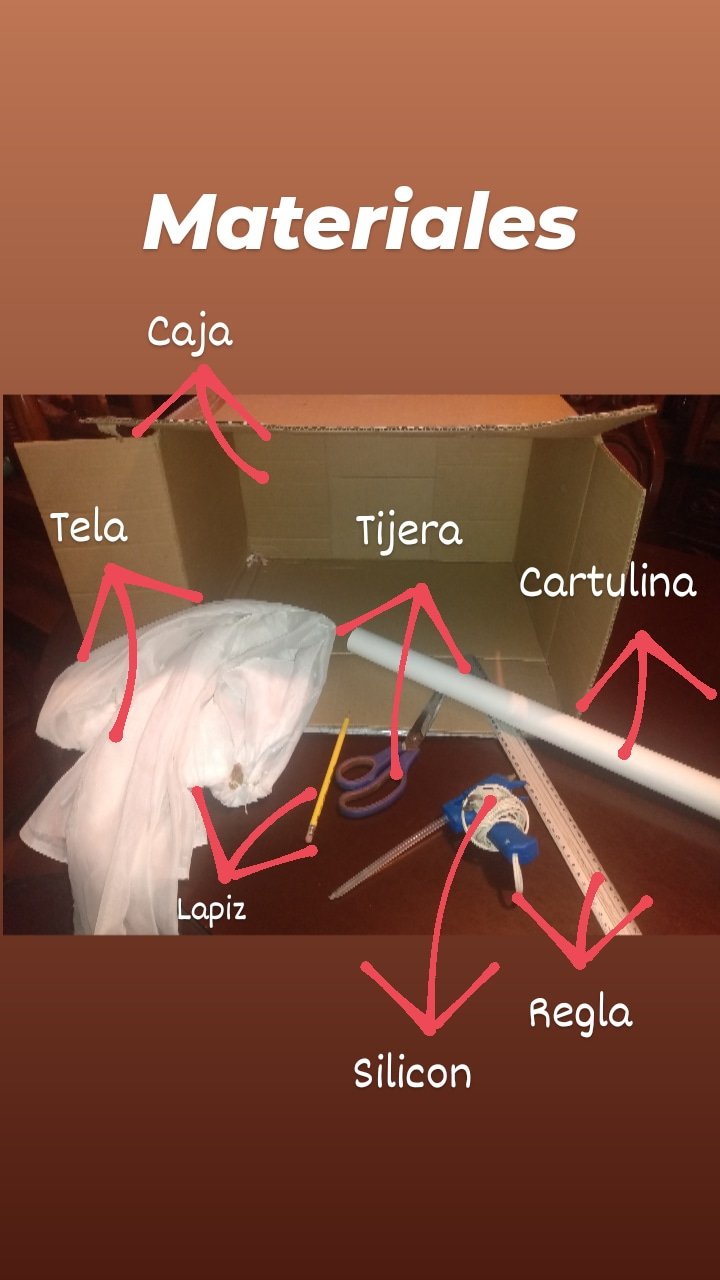
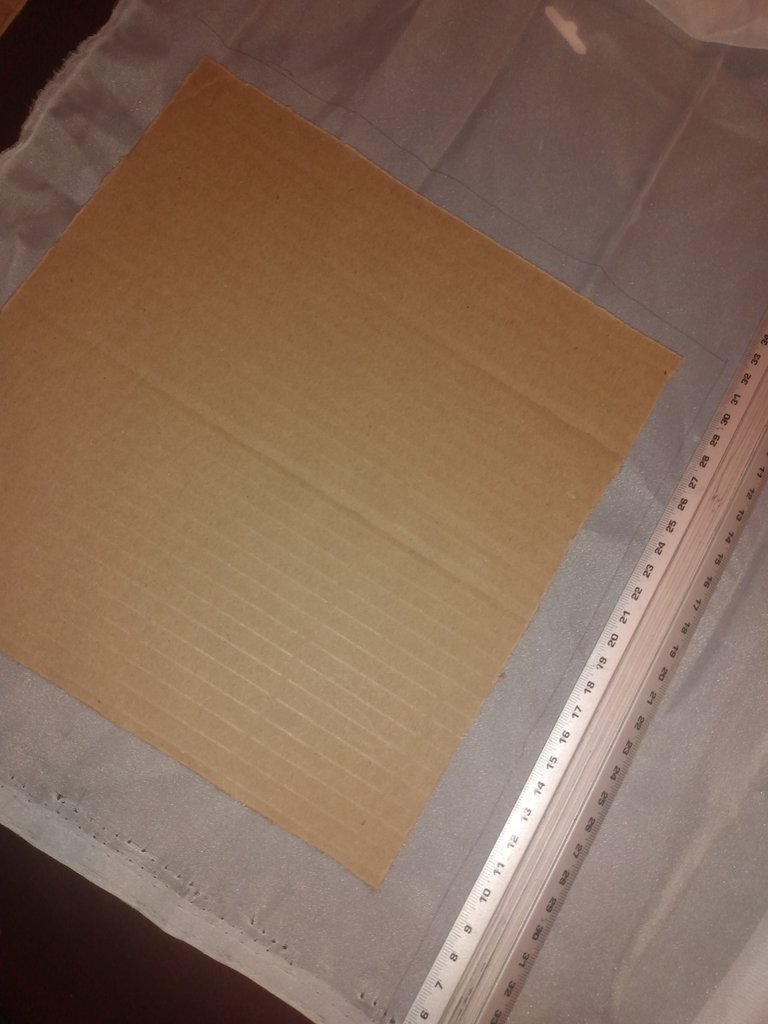
Estos son los materiales:
- Caja de cartón
- Regla (larga para mas comodidad)
- lápiz
- Tijera, cuter (exacto) o cuchillo de punta afilada
- silicon o cinta adhesiva
- tela blanca transparente
- cartulina blanca
These are the materials:
- Cardboard box
- Rule (long for comfort)
- pencil
- Scissors, cutter (exact) or sharp-point knife
- silicone or adhesive tape
- white transparent fabric
- white cardboard
✂️Lo primero que hice fue cortarle la tapa a la caja para trabajar con mas comodidad.
✂️The first thing I did was to cut the lid of the box to work more comfortably
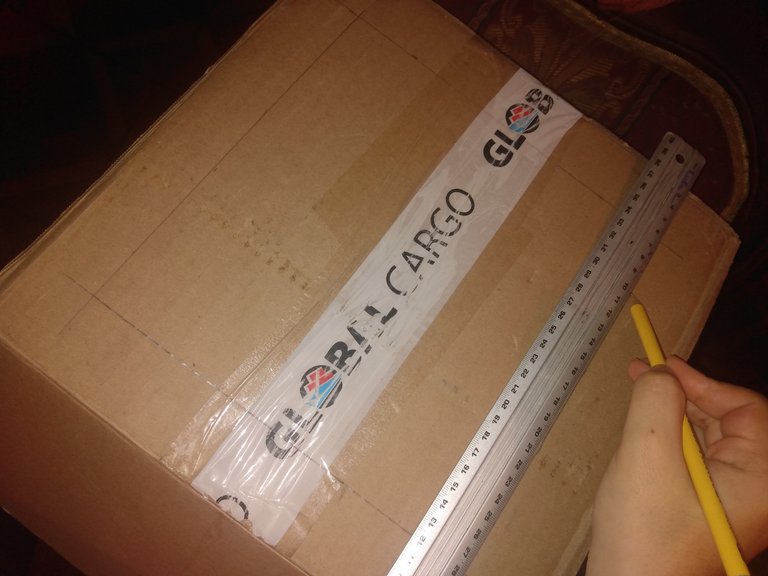
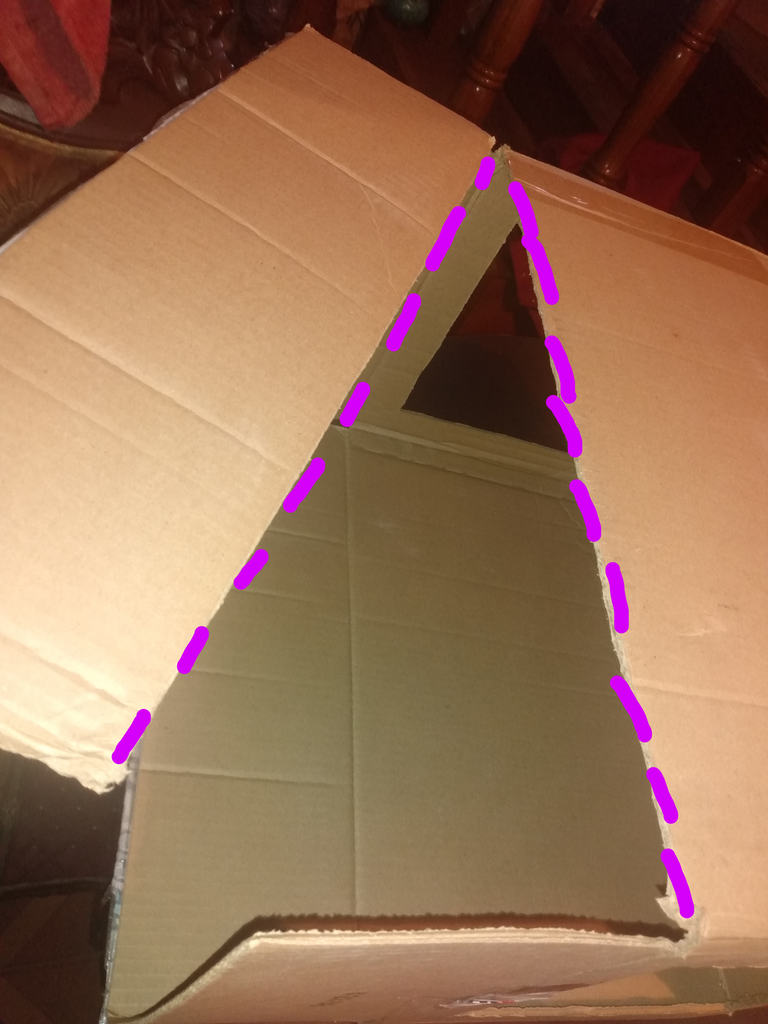
Luego en las lados de la caja (los de ancho mas pequeños) se va a recortar un cuadrado dejando de marco aproximadamente 5cm (depende del tamaño de caja que tengan) pero podrán guiarse cuando vean el resultado final.
Para esto utilice un cuchillo de punta fina ya que no tenia un cutter y fue muy sencillo y claro con delicadeza.
Then on the sides of the box (the smaller widths) a square will be cut out leaving the frame approximately 5cm (depending on the size of the box) but you can guide yourself when you see the final result.
For this I used a fine point knife because I did not have a cutter and it was very simple and clear with delicacy.
👏👏Les va a quedar algo asi, lo repiten en el otro lado de la caja y en la parte superior que sera el techo de la caja
they will have something like this, they repeat it on the other side of the box and on the top which will be the roof of the box
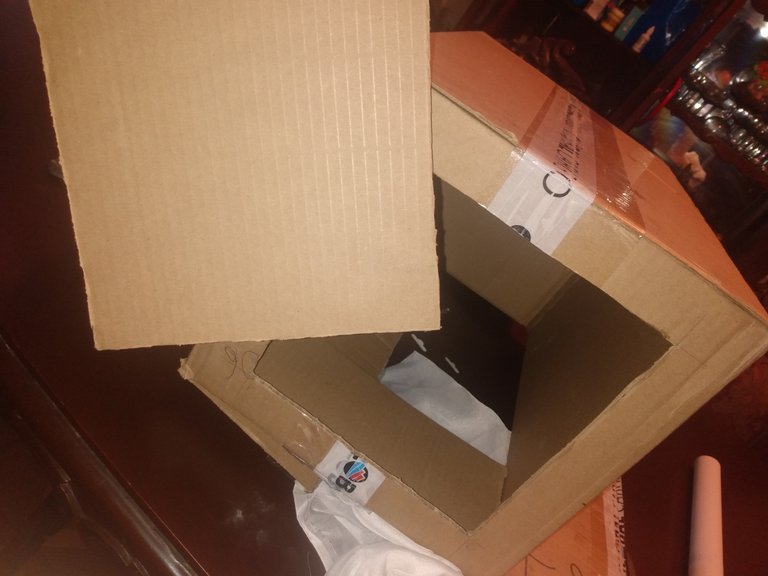
✂️📏Utilizando uno de los cuadrados de la caja que recortaron van a hacer un cuadrado de 2 centímetros mas grande en la tela o papel traslucido
✂️📏Using one of the squares from the box they cut out, they will make a 2 cm larger square on the fabric or translucent paper
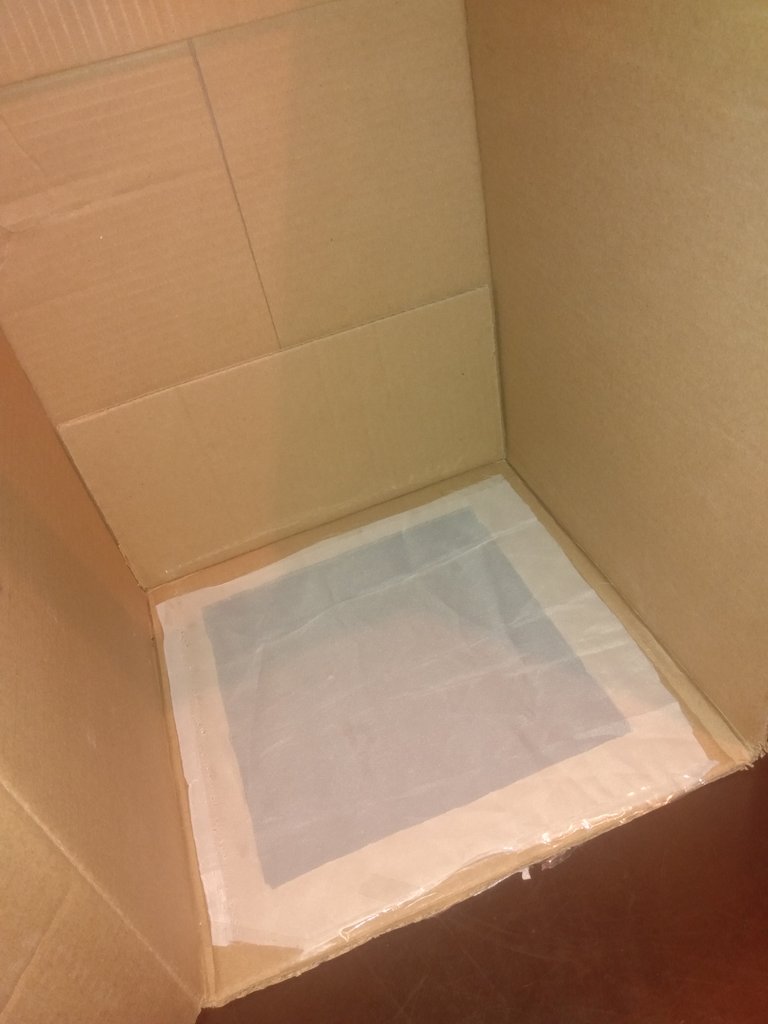
Luego si tienen pintura blanca pueden pintar por dentro solo en los lados de la caja y luego de dejar secar pueden pegar el recuadro de tela en el hueco como se ve en la fotografía, por ahí va a entrar la luz.
Then if they have white paint they can paint inside only on the sides of the box and after letting it dry they can stick the fabric frame in the hole as seen in the picture, that's where the light will come in.
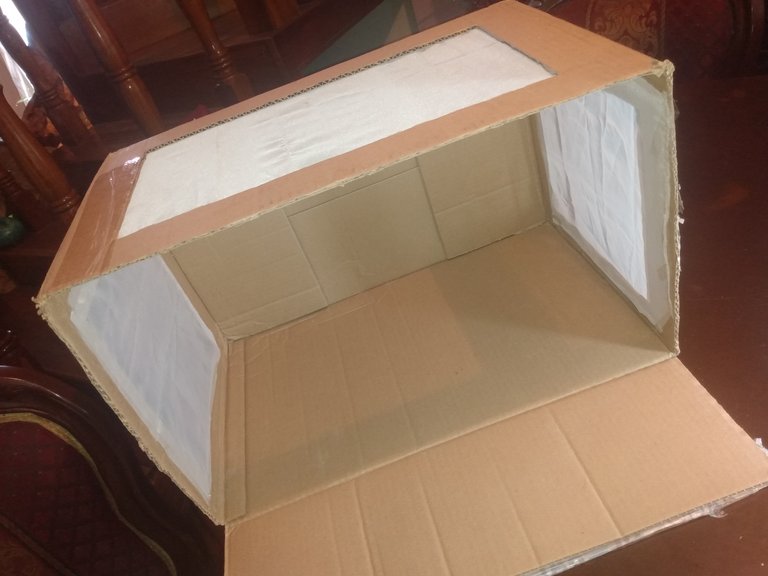
👏Finalmente que hagan el mismo procedimiento con el otro lado y el techo de la caja les quedara algo así.
👏Finally they do the same procedure with the other side and the roof of the box will look something like this.
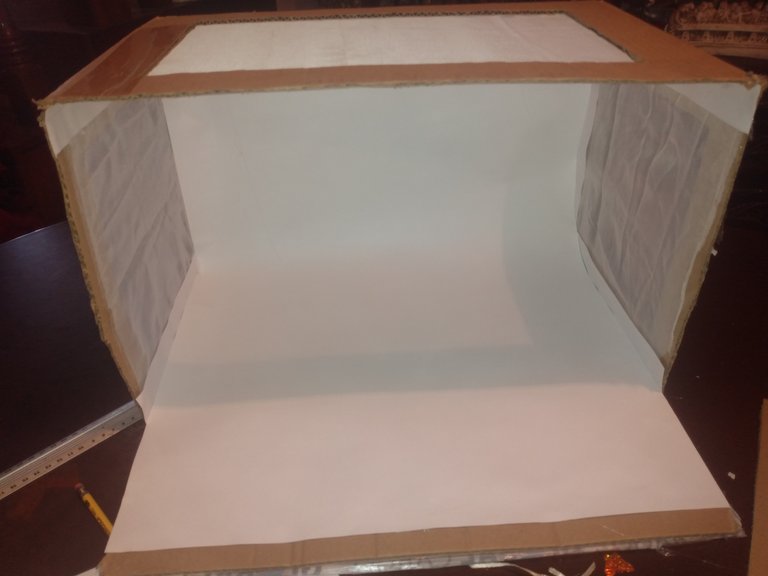
🎉😍Es momento de incorporar la Cartulina blanca con mucho cuidado y dejando una curbatura pequeña en el fondo, la pegan con silicon y LISTO!!!!
Solo faltaría colocar una lampara de mes o la que tengan de luz blanca a cada lado de la caja y en el techo.
🎉😍It is time to incorporate the White cardboard with great care and leaving a small curvature at the bottom, stick it with silicone and READY!!!!
The only thing missing is a lamp of the month or the one with white light on each side of the box and on the ceiling.
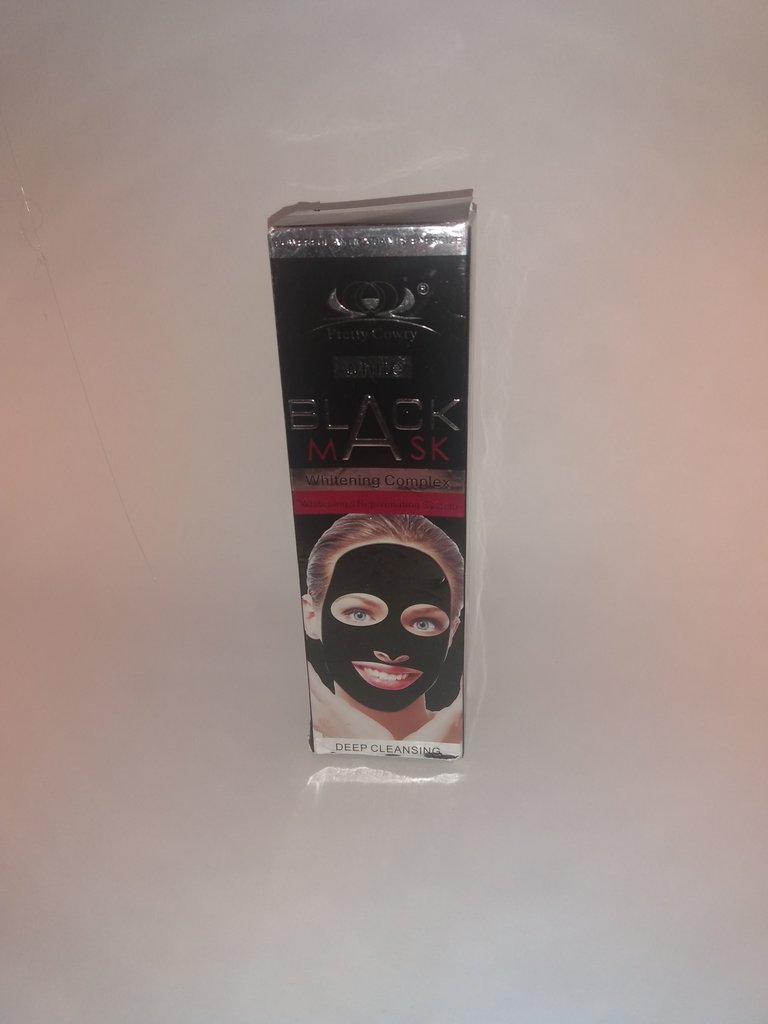
Este es un ejemplo de como quedaría la foto del producto.
This is an example of how the product photo would look.
¡MUCHAS gracias por visitar mi blog! Espero les haya gustado y que si tienen algún emprendimiento de productos les sea útil esto. / Thank you very much for visiting my blog! I hope you liked it and that if you have a product venture this will be useful to you.
FOLLOW ME IN INSTAGRAM

Es una muy buena idea :D Que fino!
Muchas gracias por tu comentario 🤗 si está sencillo y útil ✨
You put a big effort in this? Very creative!
Yes I do, thanks 🙌🏻
Congratulations, your post has been upvoted by @dsc-r2cornell, which is the curating account for @R2cornell's Discord Community.
Enhorabuena, su "post" ha sido "up-voted" por @dsc-r2cornell, que es la "cuenta curating" de la Comunidad de la Discordia de @R2cornell.
Congratulations @graace14! You have completed the following achievement on the Hive blockchain and have been rewarded with new badge(s) :
You can view your badges on your board and compare yourself to others in the Ranking
If you no longer want to receive notifications, reply to this comment with the word
STOP