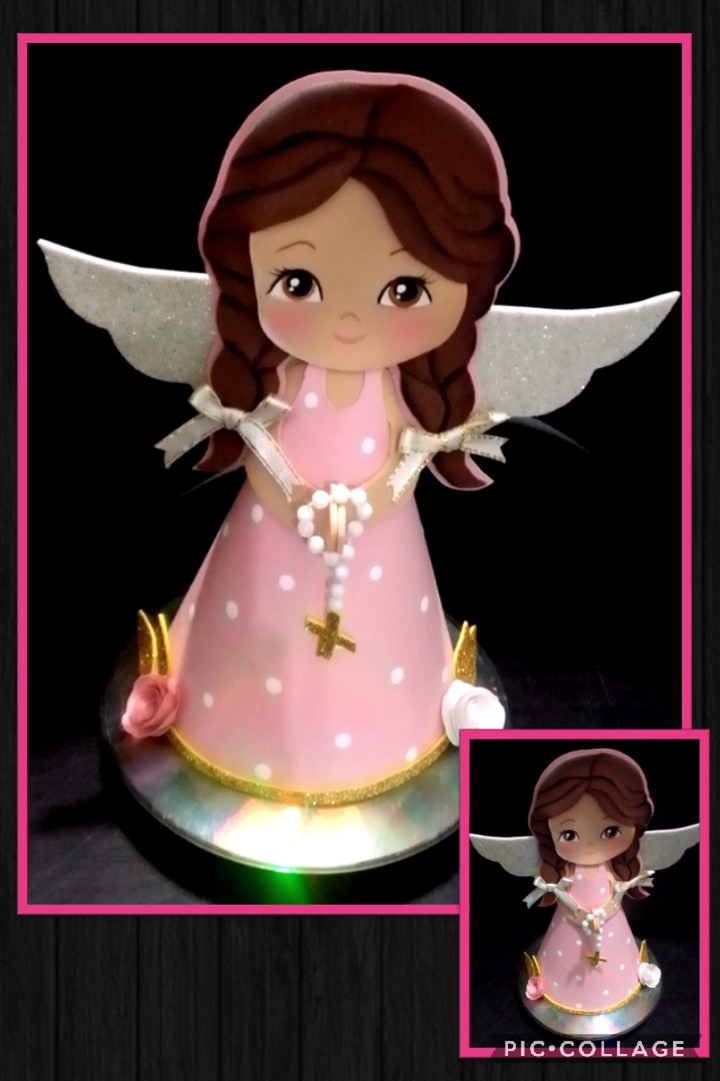
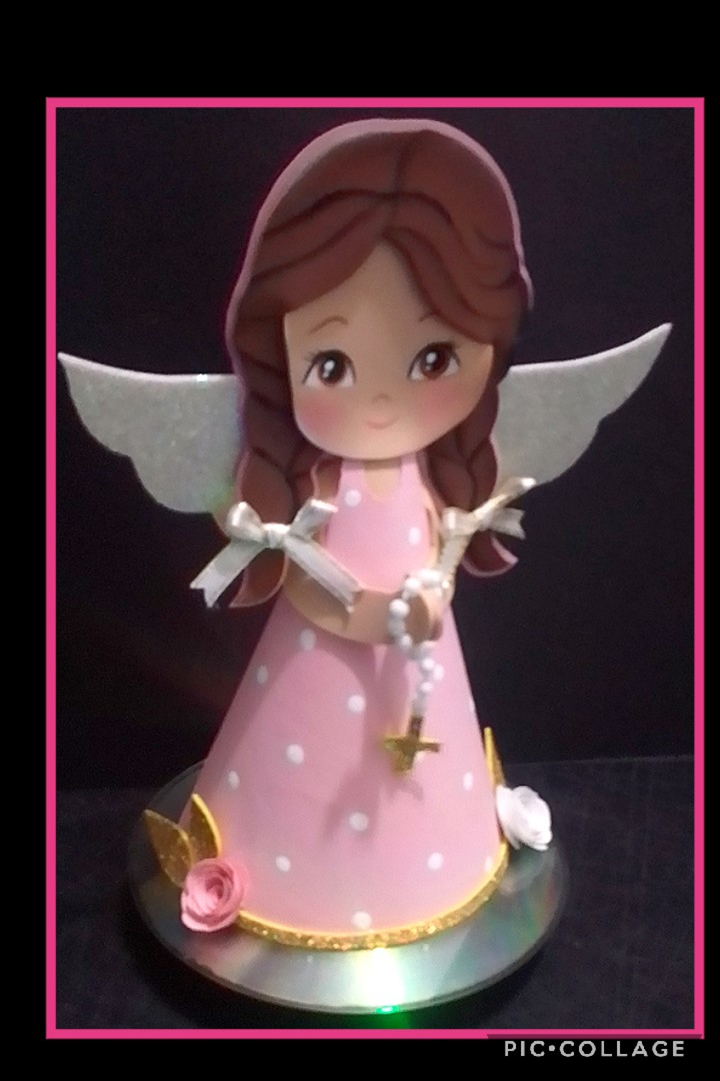
Angelito para comunión o bautizo.(Reciclaje) Angelito para comunión o bautizo. Reciclando
Buenas noches y saludos a todos los miembros de esta comunidad.
Les traigo hoy un paso a paso fácil de hacer y con materiales muy económicos.
Es un Angelito que te será útil para decorar en un bautizo o comunión.
Good evening and greetings to all members of this community
I bring you today a step by step easy to make and with very inexpensive materials.
It is an Angelito that will be useful to decorate at a baptism or communion.
Materiales:/Materials:
| Cartulina Rosada | Foami mate y escarchado |
|---|---|
| Pinturas al frío | Pinceles |
| Tijera | Silicón líquido |
| Lápiz | CD dañado |
| Tapa plástica | 20 cms de cinta de tela |
| Perla corrida | Cartulina blanca |
| Dibujo de angel | Palillo de madera |

| Pink cardboard | Matte and frosted Foami |
|---|---|
| Frosted paints | Brushes |
| Scissors | Liquid silicone |
| Pencil | damaged CD |
| Plastic lid | 20 cms of cloth tape |
| Pearl | White cardboard |
| Angel Drawing | Wooden stick |
Empecemos:
Let's start:
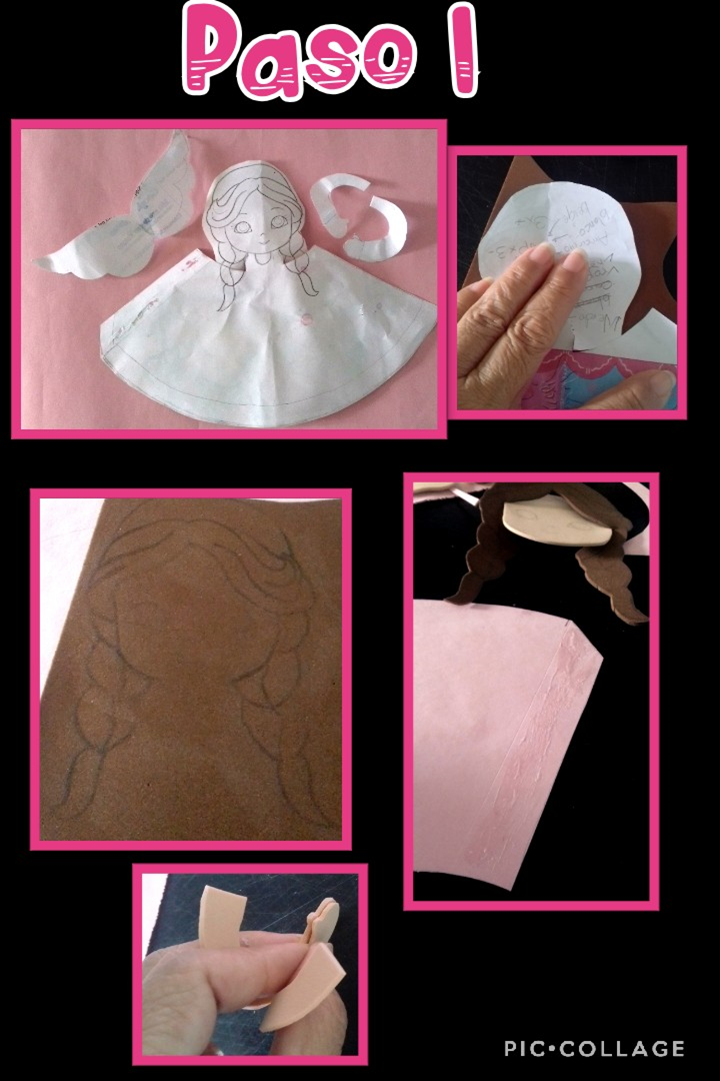
- Recortar el molde y desglosar.
- Colocar el molde sobre el foami y transferir cabello, cara, cuello, brazos y alas frotando con las orejas de la tijera.
- Recortar todas las piezas.
- Marcar el vestido en cartulina, recortar y unir el cono.
- Pegar las manitos.
- Cut out the mold and break it down.
- Place the mold on the foami and transfer hair, face, neck, arms and wings by rubbing with the ears of the scissors.
- Cut out all the pieces.
- Mark the dress on cardboard, cut out and attach the cone.
- Glue the little hands.
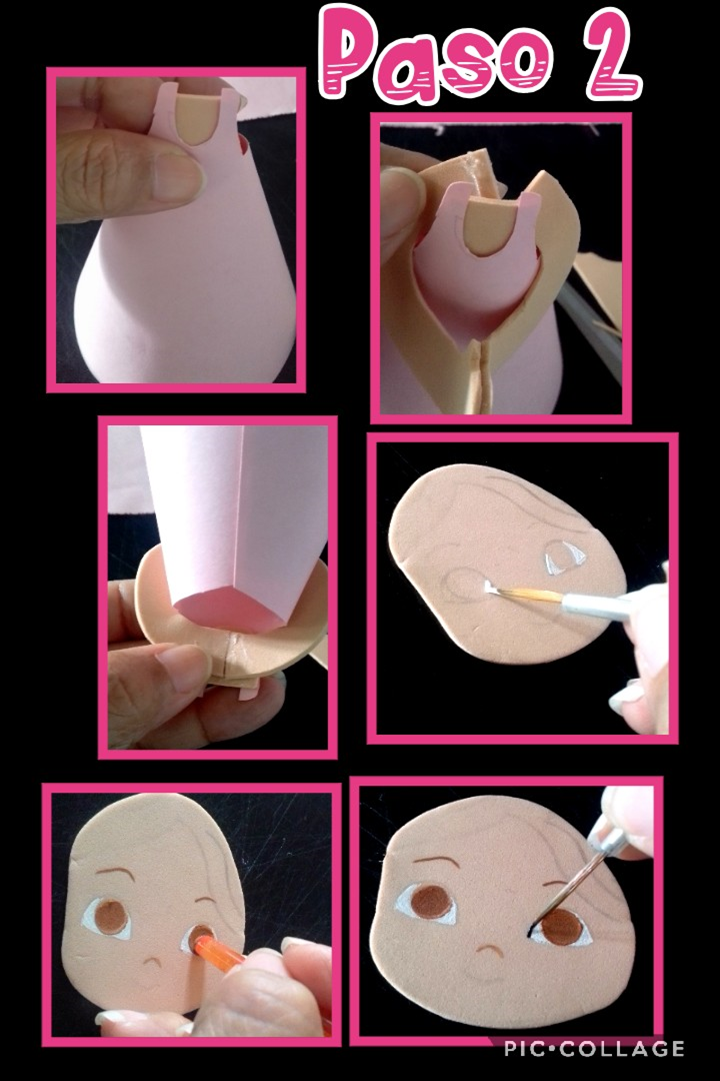
- Pegar el cuello al cono.
- Aplicar silicón en los extremos de los brazos y pegar detrás del cuello.
- Pintar la parte blanca de los ojos, dejar secar, luego con la parte de atrás del pincel pintar el centro del ojo con pintura marrón, pintar cejas y naríz también.
- Delinear con pincel o marcador el borde de los ojos.
- Glue the neck to the cone.
- Apply silicone on the ends of the arms and glue behind the neck.
- Paint the white part of the eyes, let dry, then with the back of the brush paint the center of the eye with brown paint, paint eyebrows and nose as well.
- Outline with a brush or marker the edge of the eyes.
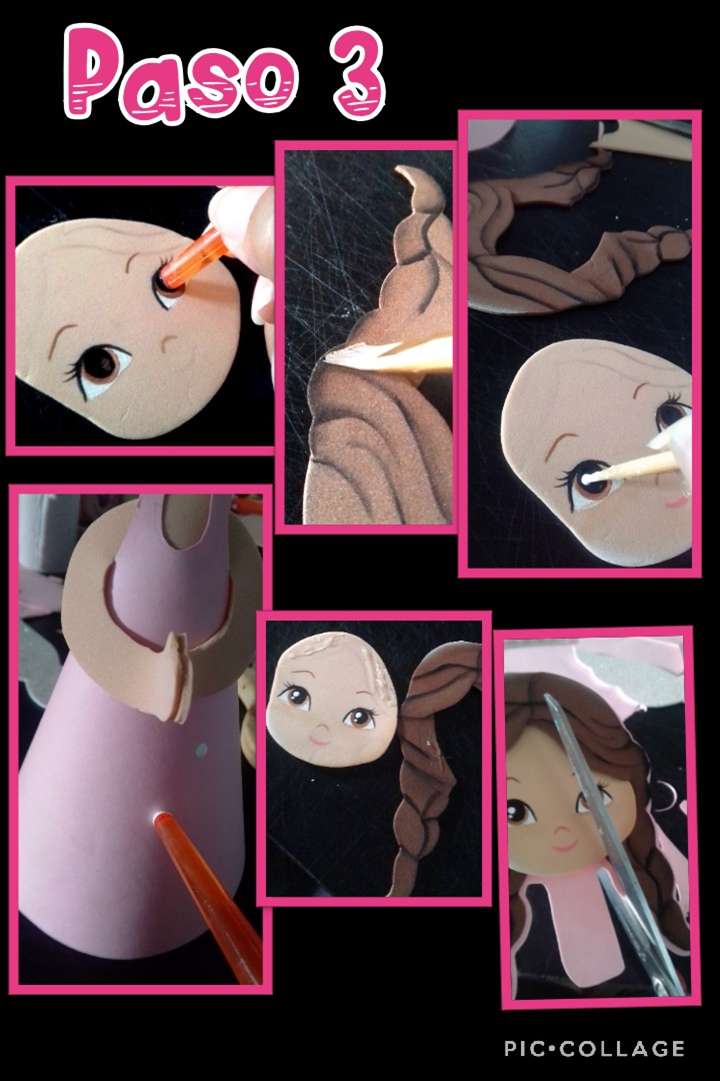
- Mojar el pincel y marcar con pintura negra el centro del ojo y delinear pestañas.
- Sombrear los cabellos y dejar secar.
- Con un palillo poner puntos de luz en los ojos y dejar secar.
- Pintar puntos en todo el vestido.
- Aplicar silicón en los bordes de la cara que van pegados al cabello y montar.
- Ahora aplicar silicón en toda la cabeza y pegar a la cartulina rosada y recortar dejando un cuello largo.
- Wet the brush and mark the center of the eye with black paint and outline the eyelashes.
- Shade the hair and let it dry.
- With a toothpick put light dots on the eyes and let dry.
- Paint dots all over the dress.
- Apply silicone on the edges of the face that are attached to the hair and mount.
- Now apply silicone all over the head and glue to the pink cardboard and cut out leaving a long neck.
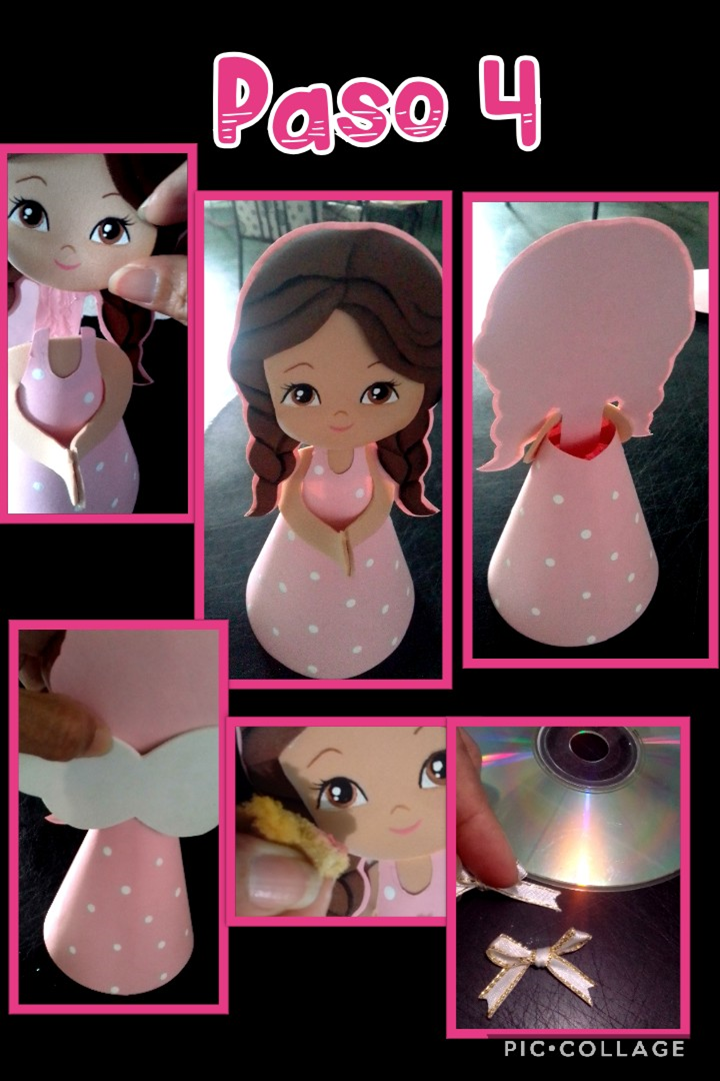
- Aplicar silicón en el cuello largo de la cabeza y pegar al cuello por la parte de atrás.
- Pegar las alas tapando el hueco detrás del angelito.
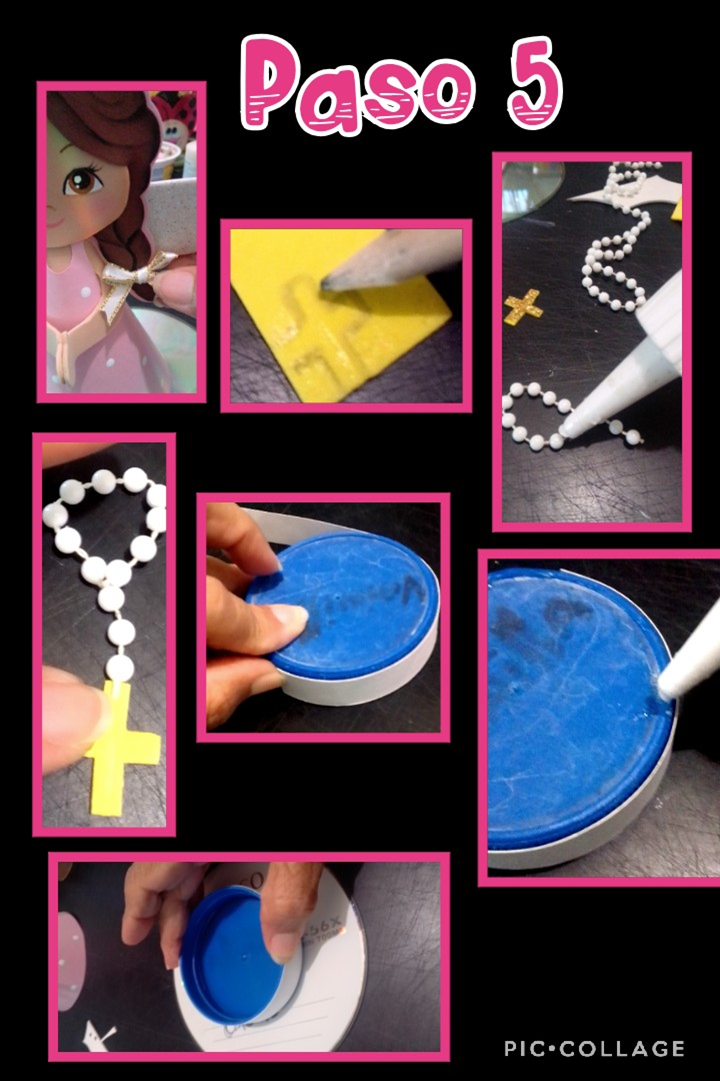
- Con un pedacito de esponja poner con tiza color a las mejillas.
- Hacer 2 lacitos pequeños.
- Apply silicone to the long neck of the head and glue to the back of the neck.
- Glue the wings covering the hole behind the angel.
- With a small piece of sponge put chalk color on the cheeks.
- Make 2 small bows.
- Pegar los lazos en la punta de los moños.
- Dibujar una cruz en foami dorado y recortar.
- Recortar un pedacito de collar de perlas y pegar haciendo un rosario.
- Recortar una tira de cartulina y pegar en el borde de la tapa, dejar secar y luego colocar silicón en la parte de arriba y pegar al CD en el centro.
- Glue the ribbons on the tip of the bows.
- Draw a cross in gold foami and cut it out.
- Cut out a small piece of pearl necklace and glue it to make a rosary.
- Cut out a strip of cardboard and glue it to the edge of the lid, let it dry and then put silicone on the top and glue it to the CD in the center.
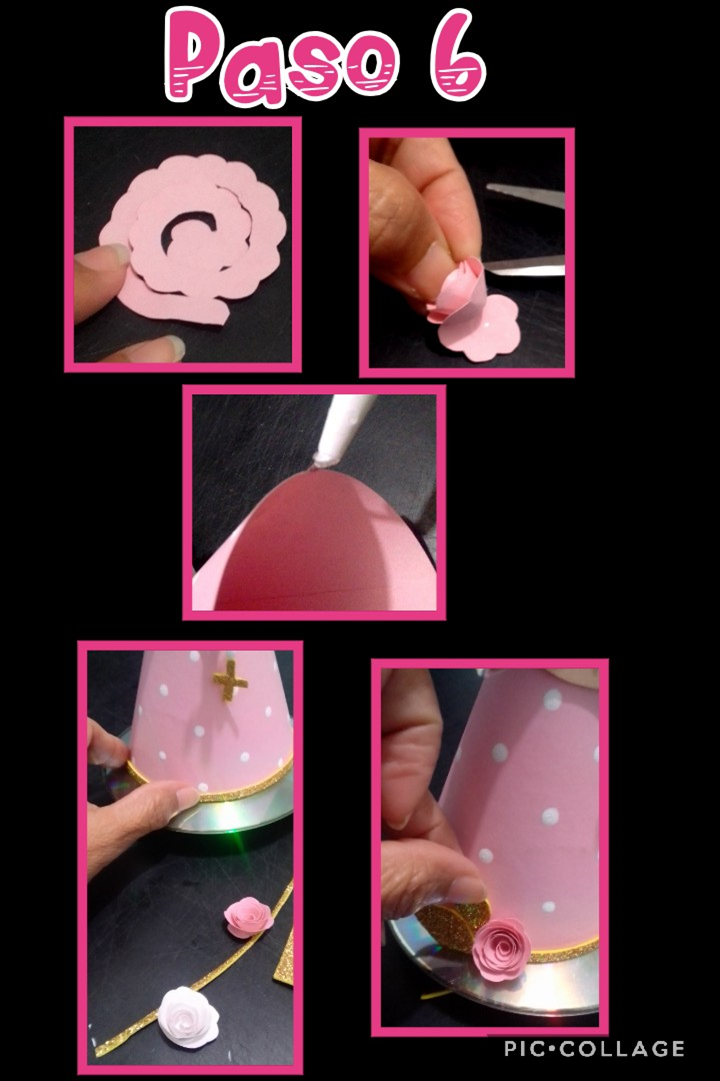
- Recortar dos círculos y sacar ondas haciendo un espiral, luego enrollar y pegar en el centro.
- Aplicar silicón en el borde del vestido y pegar al Cd.
- Recortar una tira y 4 hojas en foami dorado y pegar en la orilla del vestido.
- Terminar pegando las rosas, una en cada lado.
- Cut out two circles and make waves in a spiral, then roll and glue in the center.
- Apply silicone on the edge of the dress and glue to the CD.
- Cut a strip and 4 leaves in gold foami and glue on the edge of the dress.
- Finish by gluing the roses, one on each side.
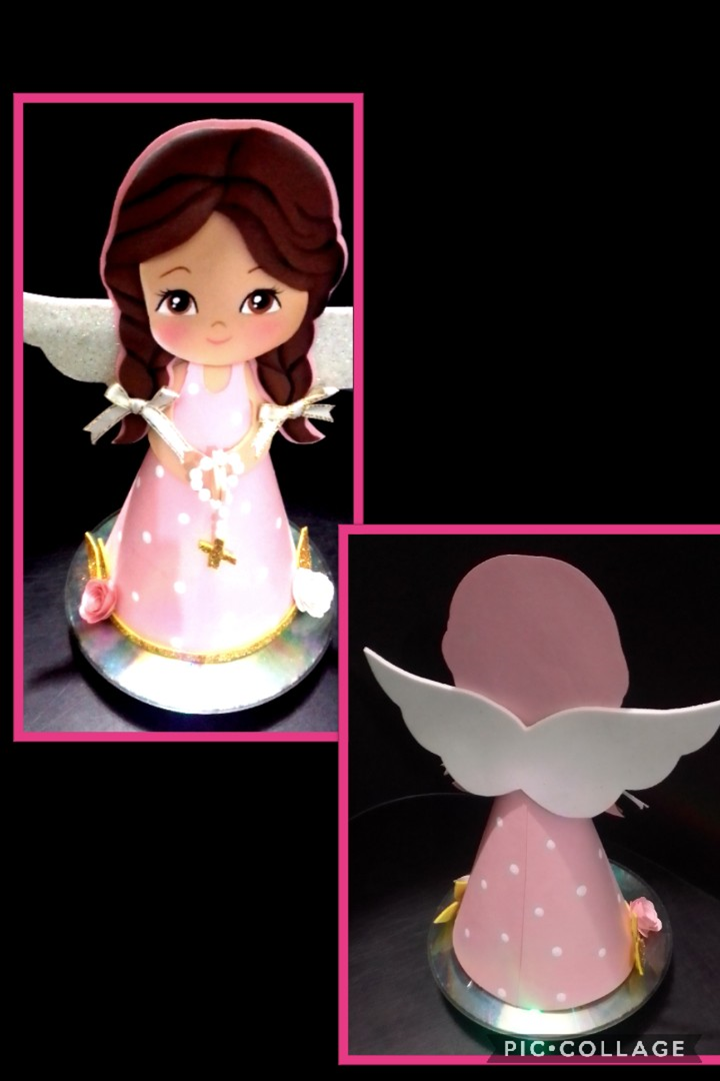
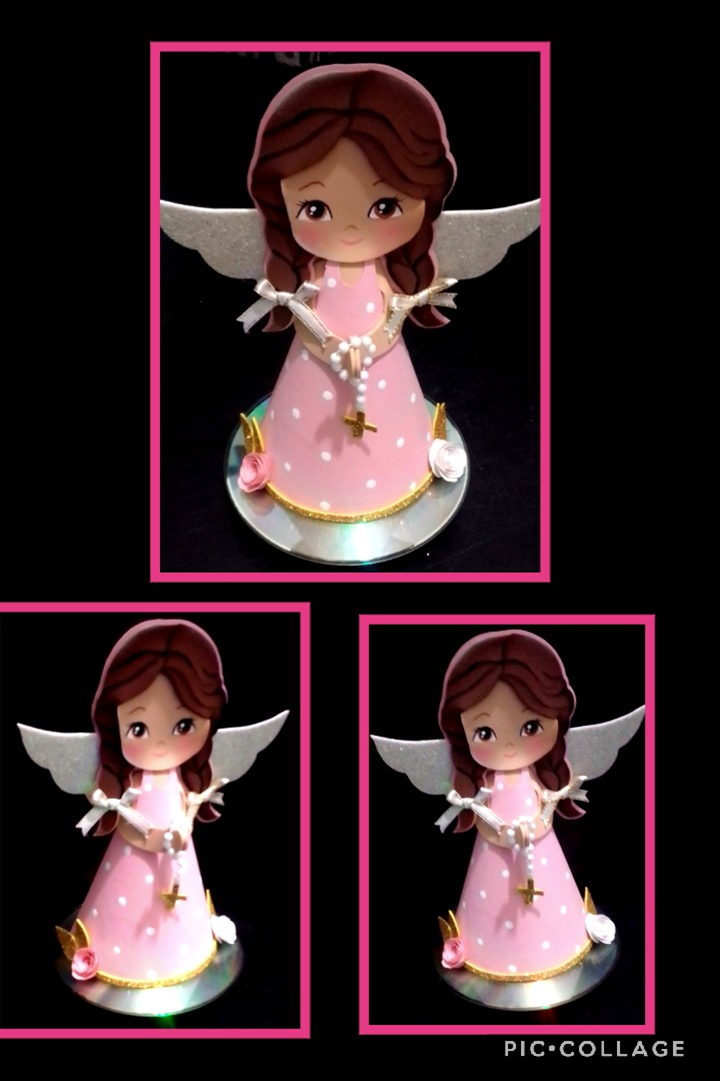
Aquí el Angel terminado, espero les guste!.
Esta publicación esta traducida por DeepL, fotos editadas por Pic collage, use HTLM y las fotos son tomadas por mi Blu G5.
Gracias por la visita.
0
0
0.000
0 comments