DİY Concept: Making a Decorative Hive Board
(EN) Hello Hive Family. I am with you again with DIY concept. You know that I have been interested in the diy concept for a long time. I prepared various objects with wooden sticks and toothpicks. Today I made Hive Board for you. So what are our ingredients?
(TR) Merhaba Hive Ailesi. Diy konsept ile tekrar sizler ile birlikteyim. Biliyorsunuz ki uzun zamandır, diy konsept ile ilgileniyorum. Tahta çubuk ve kürdanlar ile çeşitli objeler hazırladım. Bugün sizlere Hive Panosu yaptım. Peki, malzemelerimiz neler?

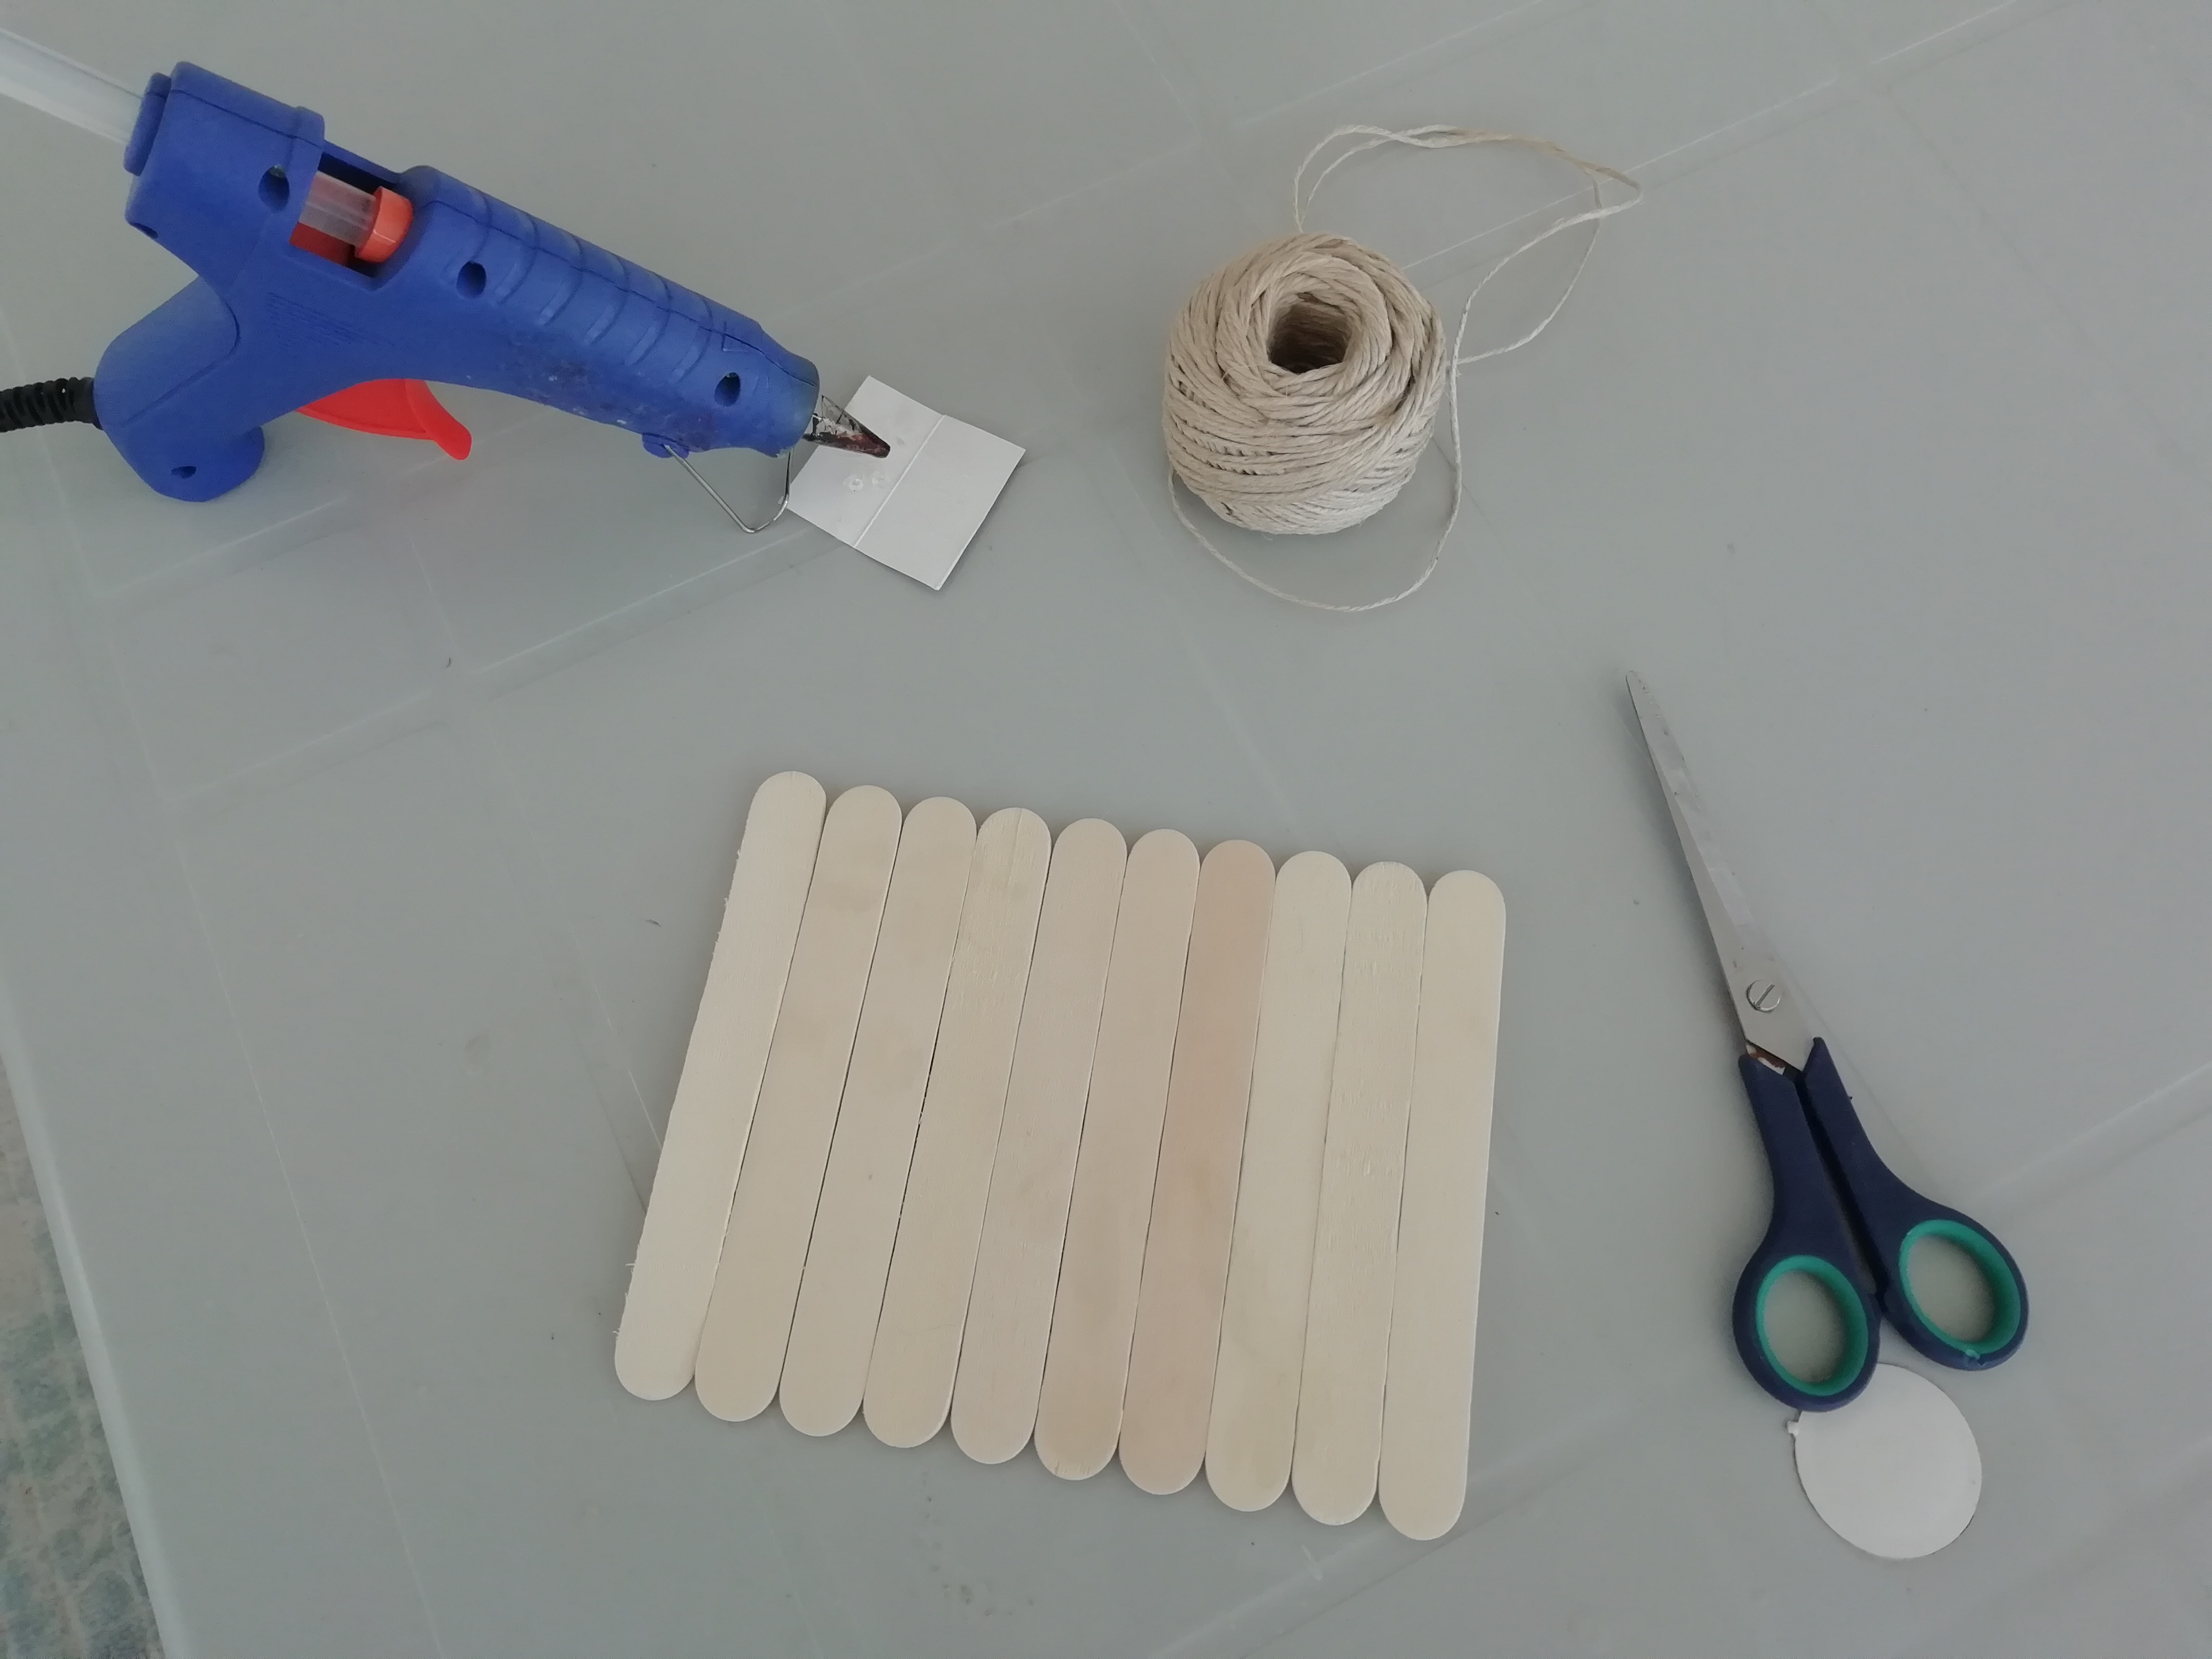
(EN) As a priority, our materials; hot silicone gun, rope, wooden sticks and scissors. Our materials are ok. So, how is the Hive Board made?
(TR) Öncelik olarak, malzemelerimiz; sıcak silikon tabancası, ip, tahta çubuklar ve makas. Malzemelerimiz tamam. Peki, Hive Panosu nasıl yapılıyor?
(EN) First, I glued the wooden sticks as you can see in the picture.
(TR) İlk olarak, tahta çubukları resimde gördüğünüz gibi yapıştırdım.
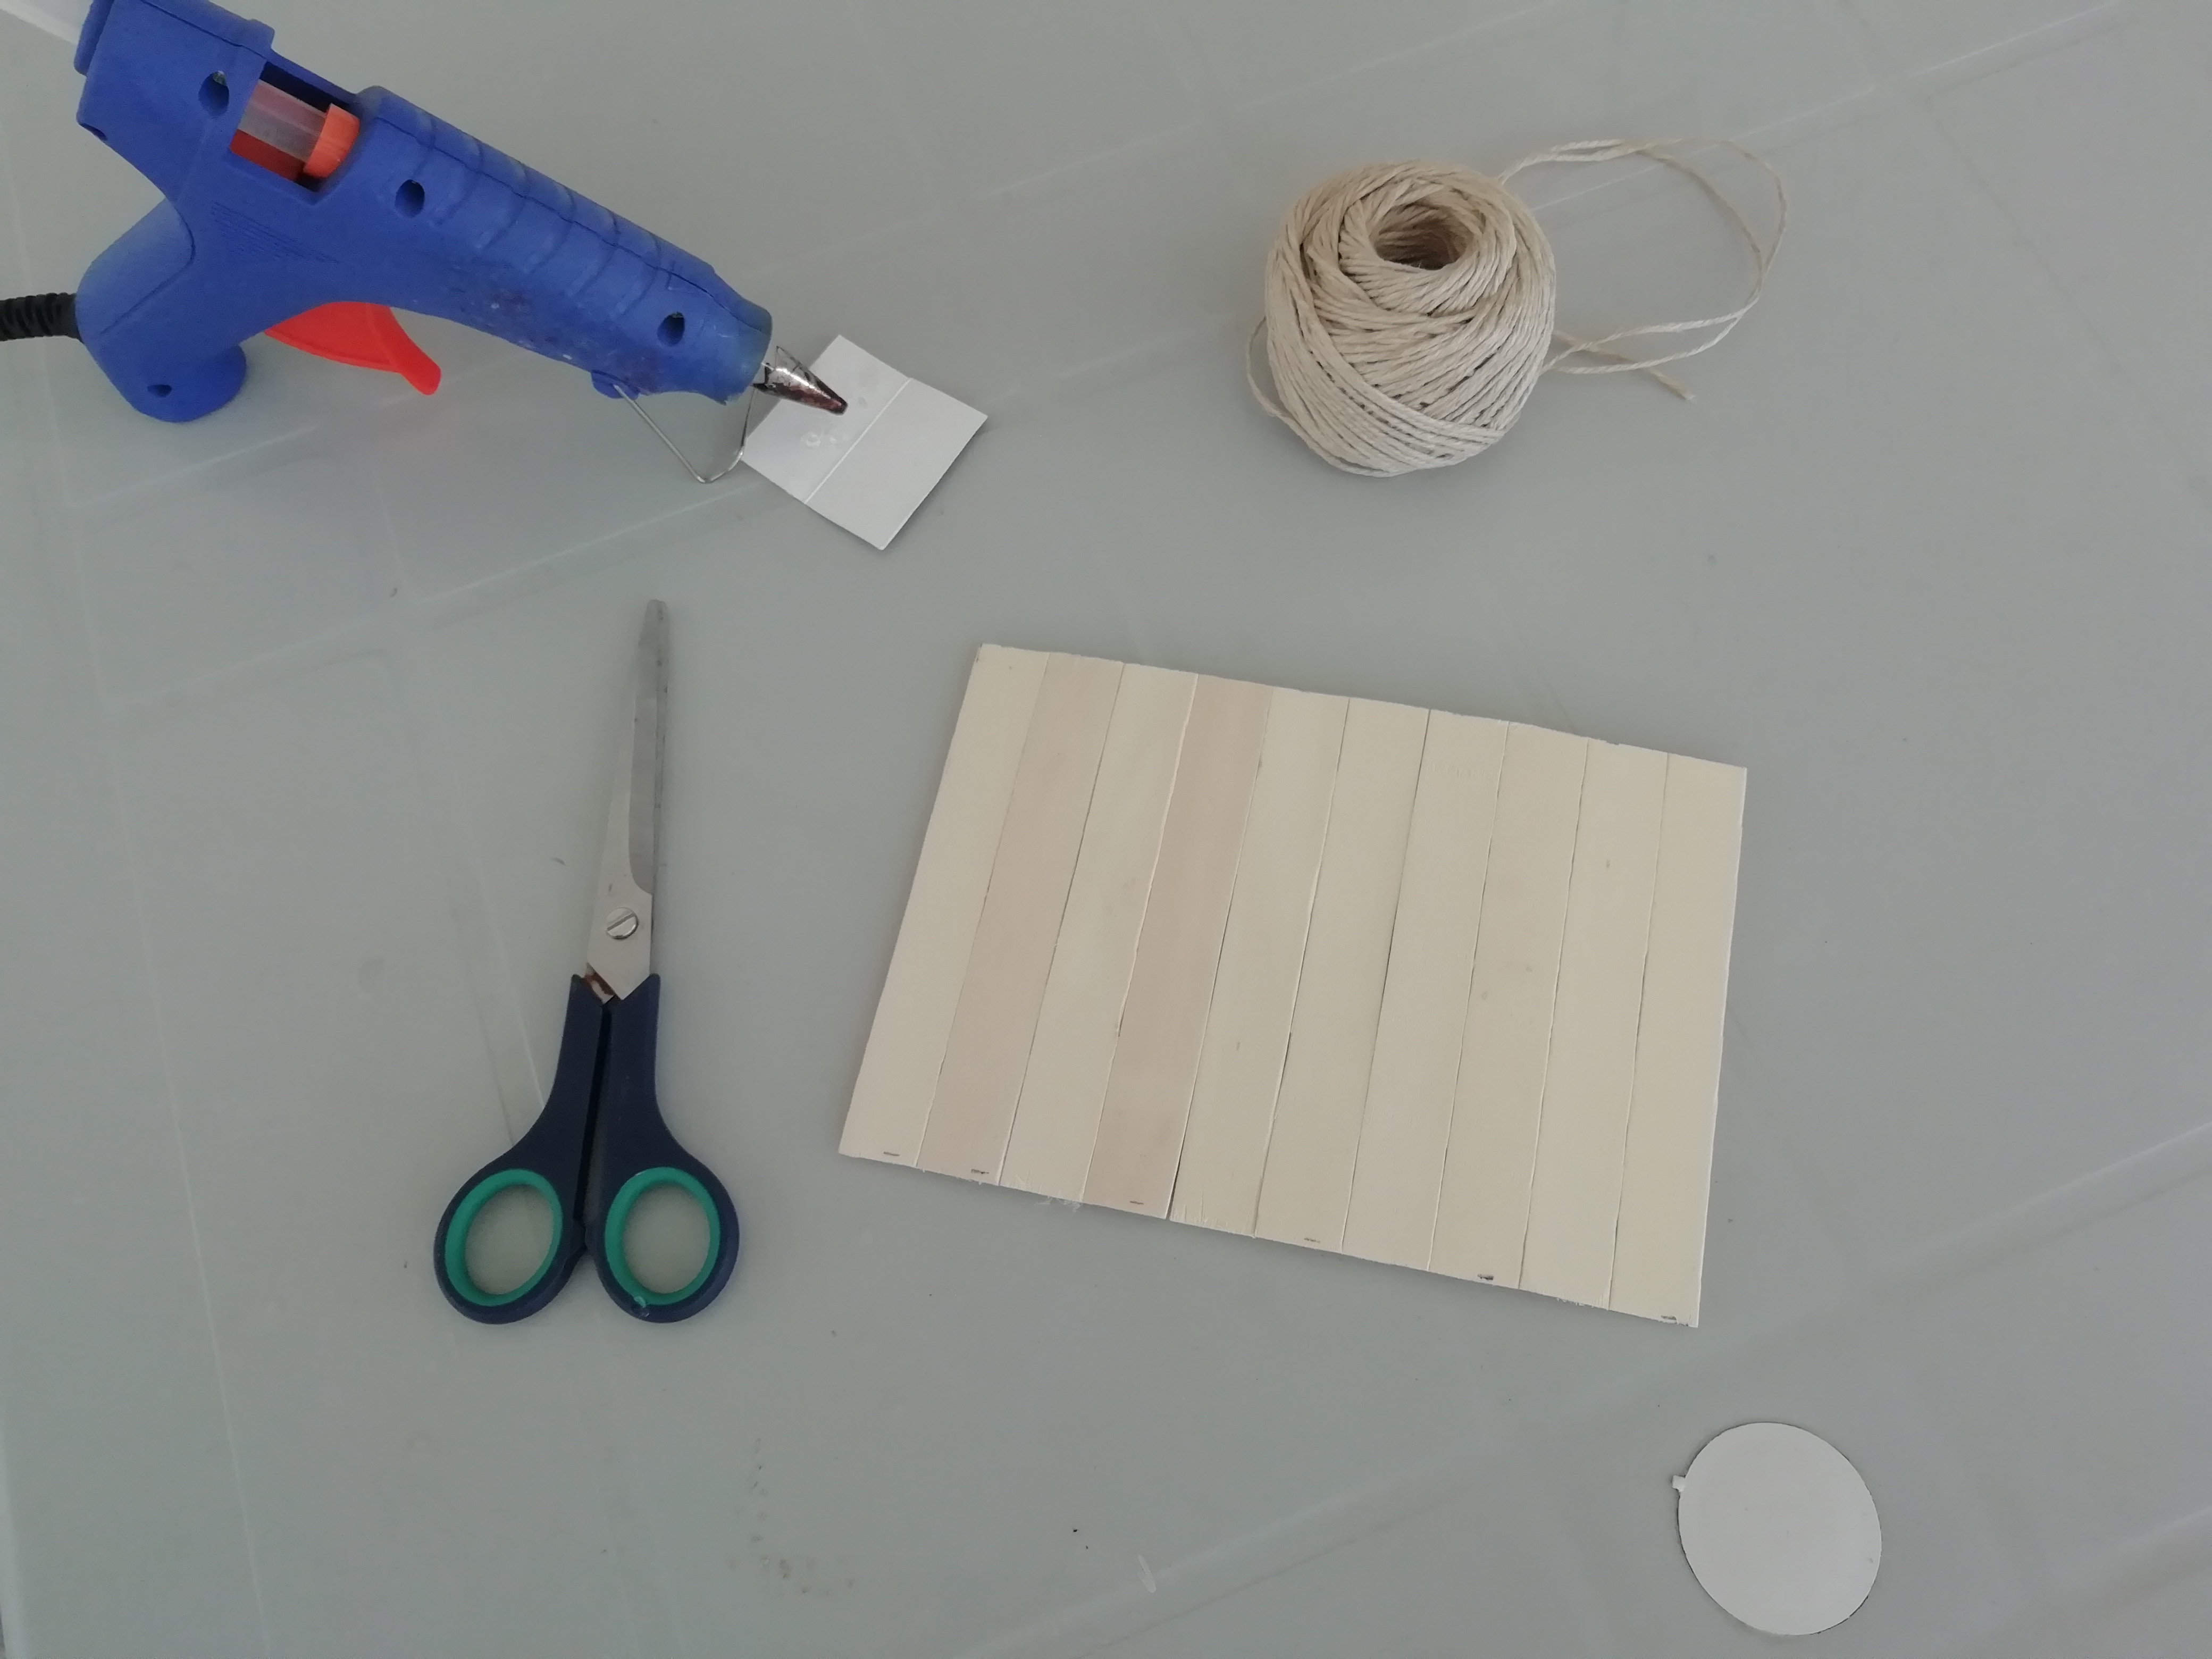
(EN) Then I cut the wooden sticks as you can see in the picture.
(TR) Sonra, tahta çubukları resimde gördüğünüz gibi kestim.
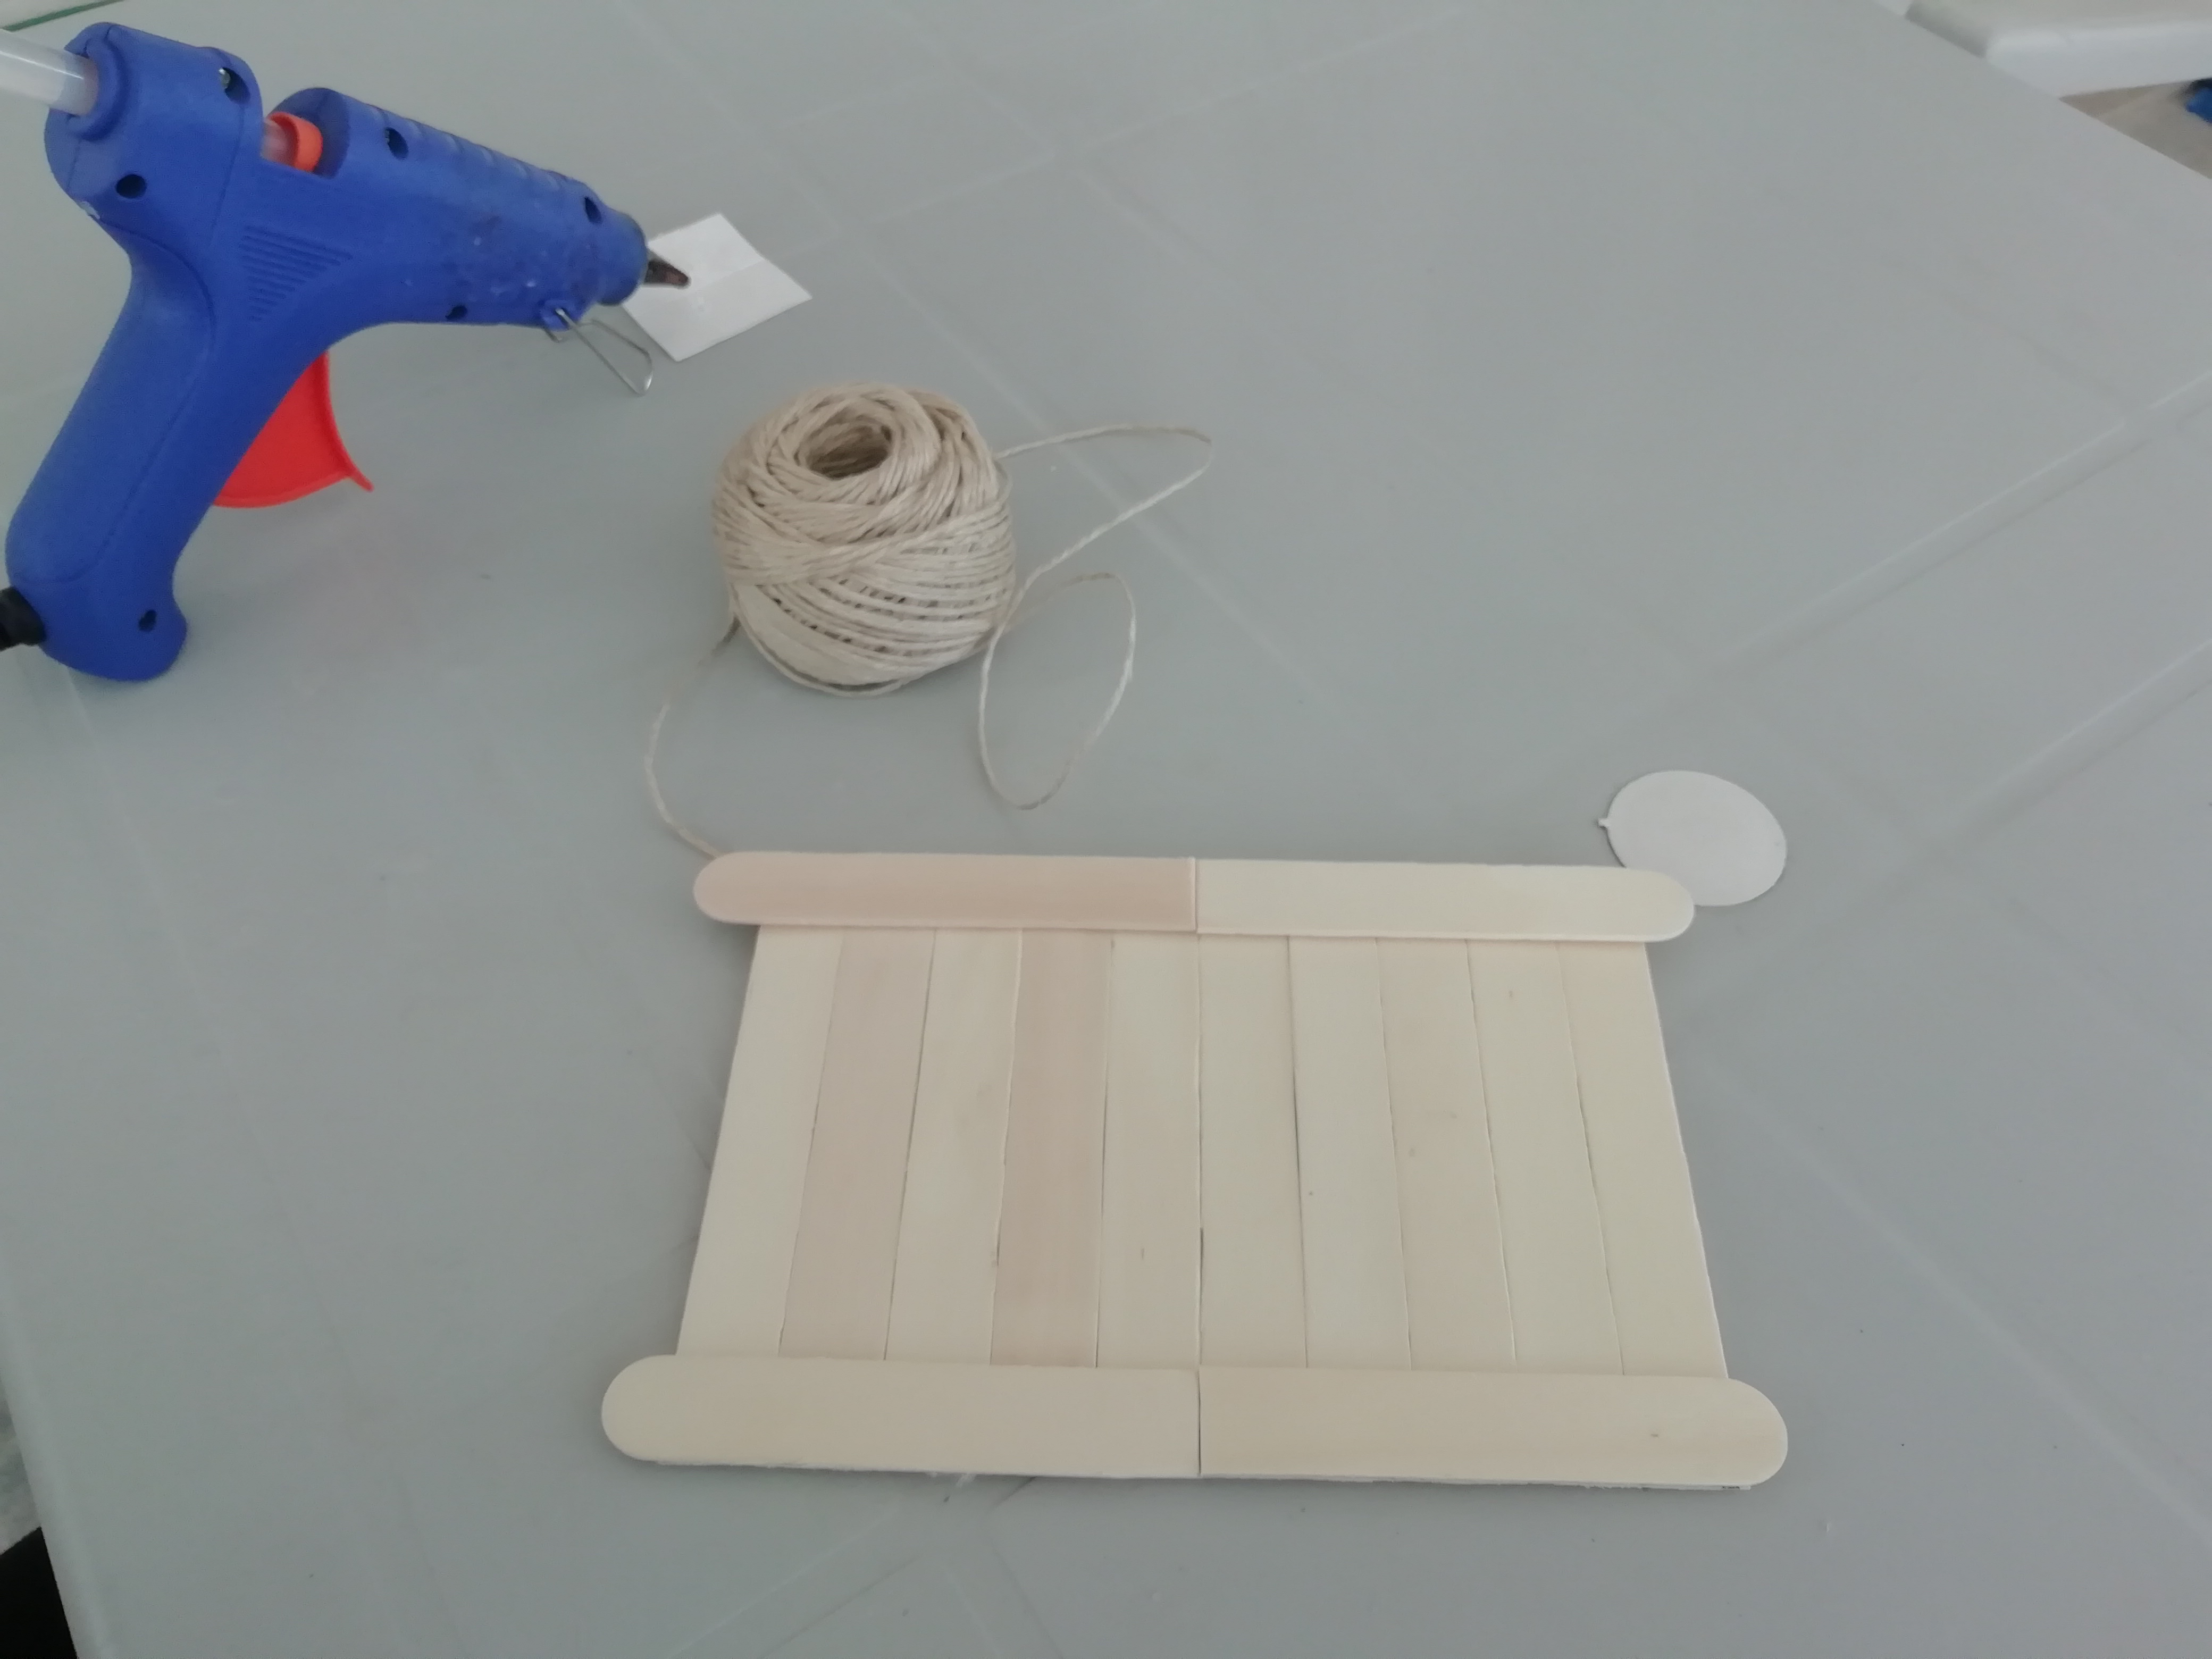
(EN) Then I glued wooden sticks to the top and bottom of the board as you can see in the picture.
(TR) Sonra, panonun alt ve üst tarafına resimde gördüğünüz gibi tahta çubuklar yapıştırdım.
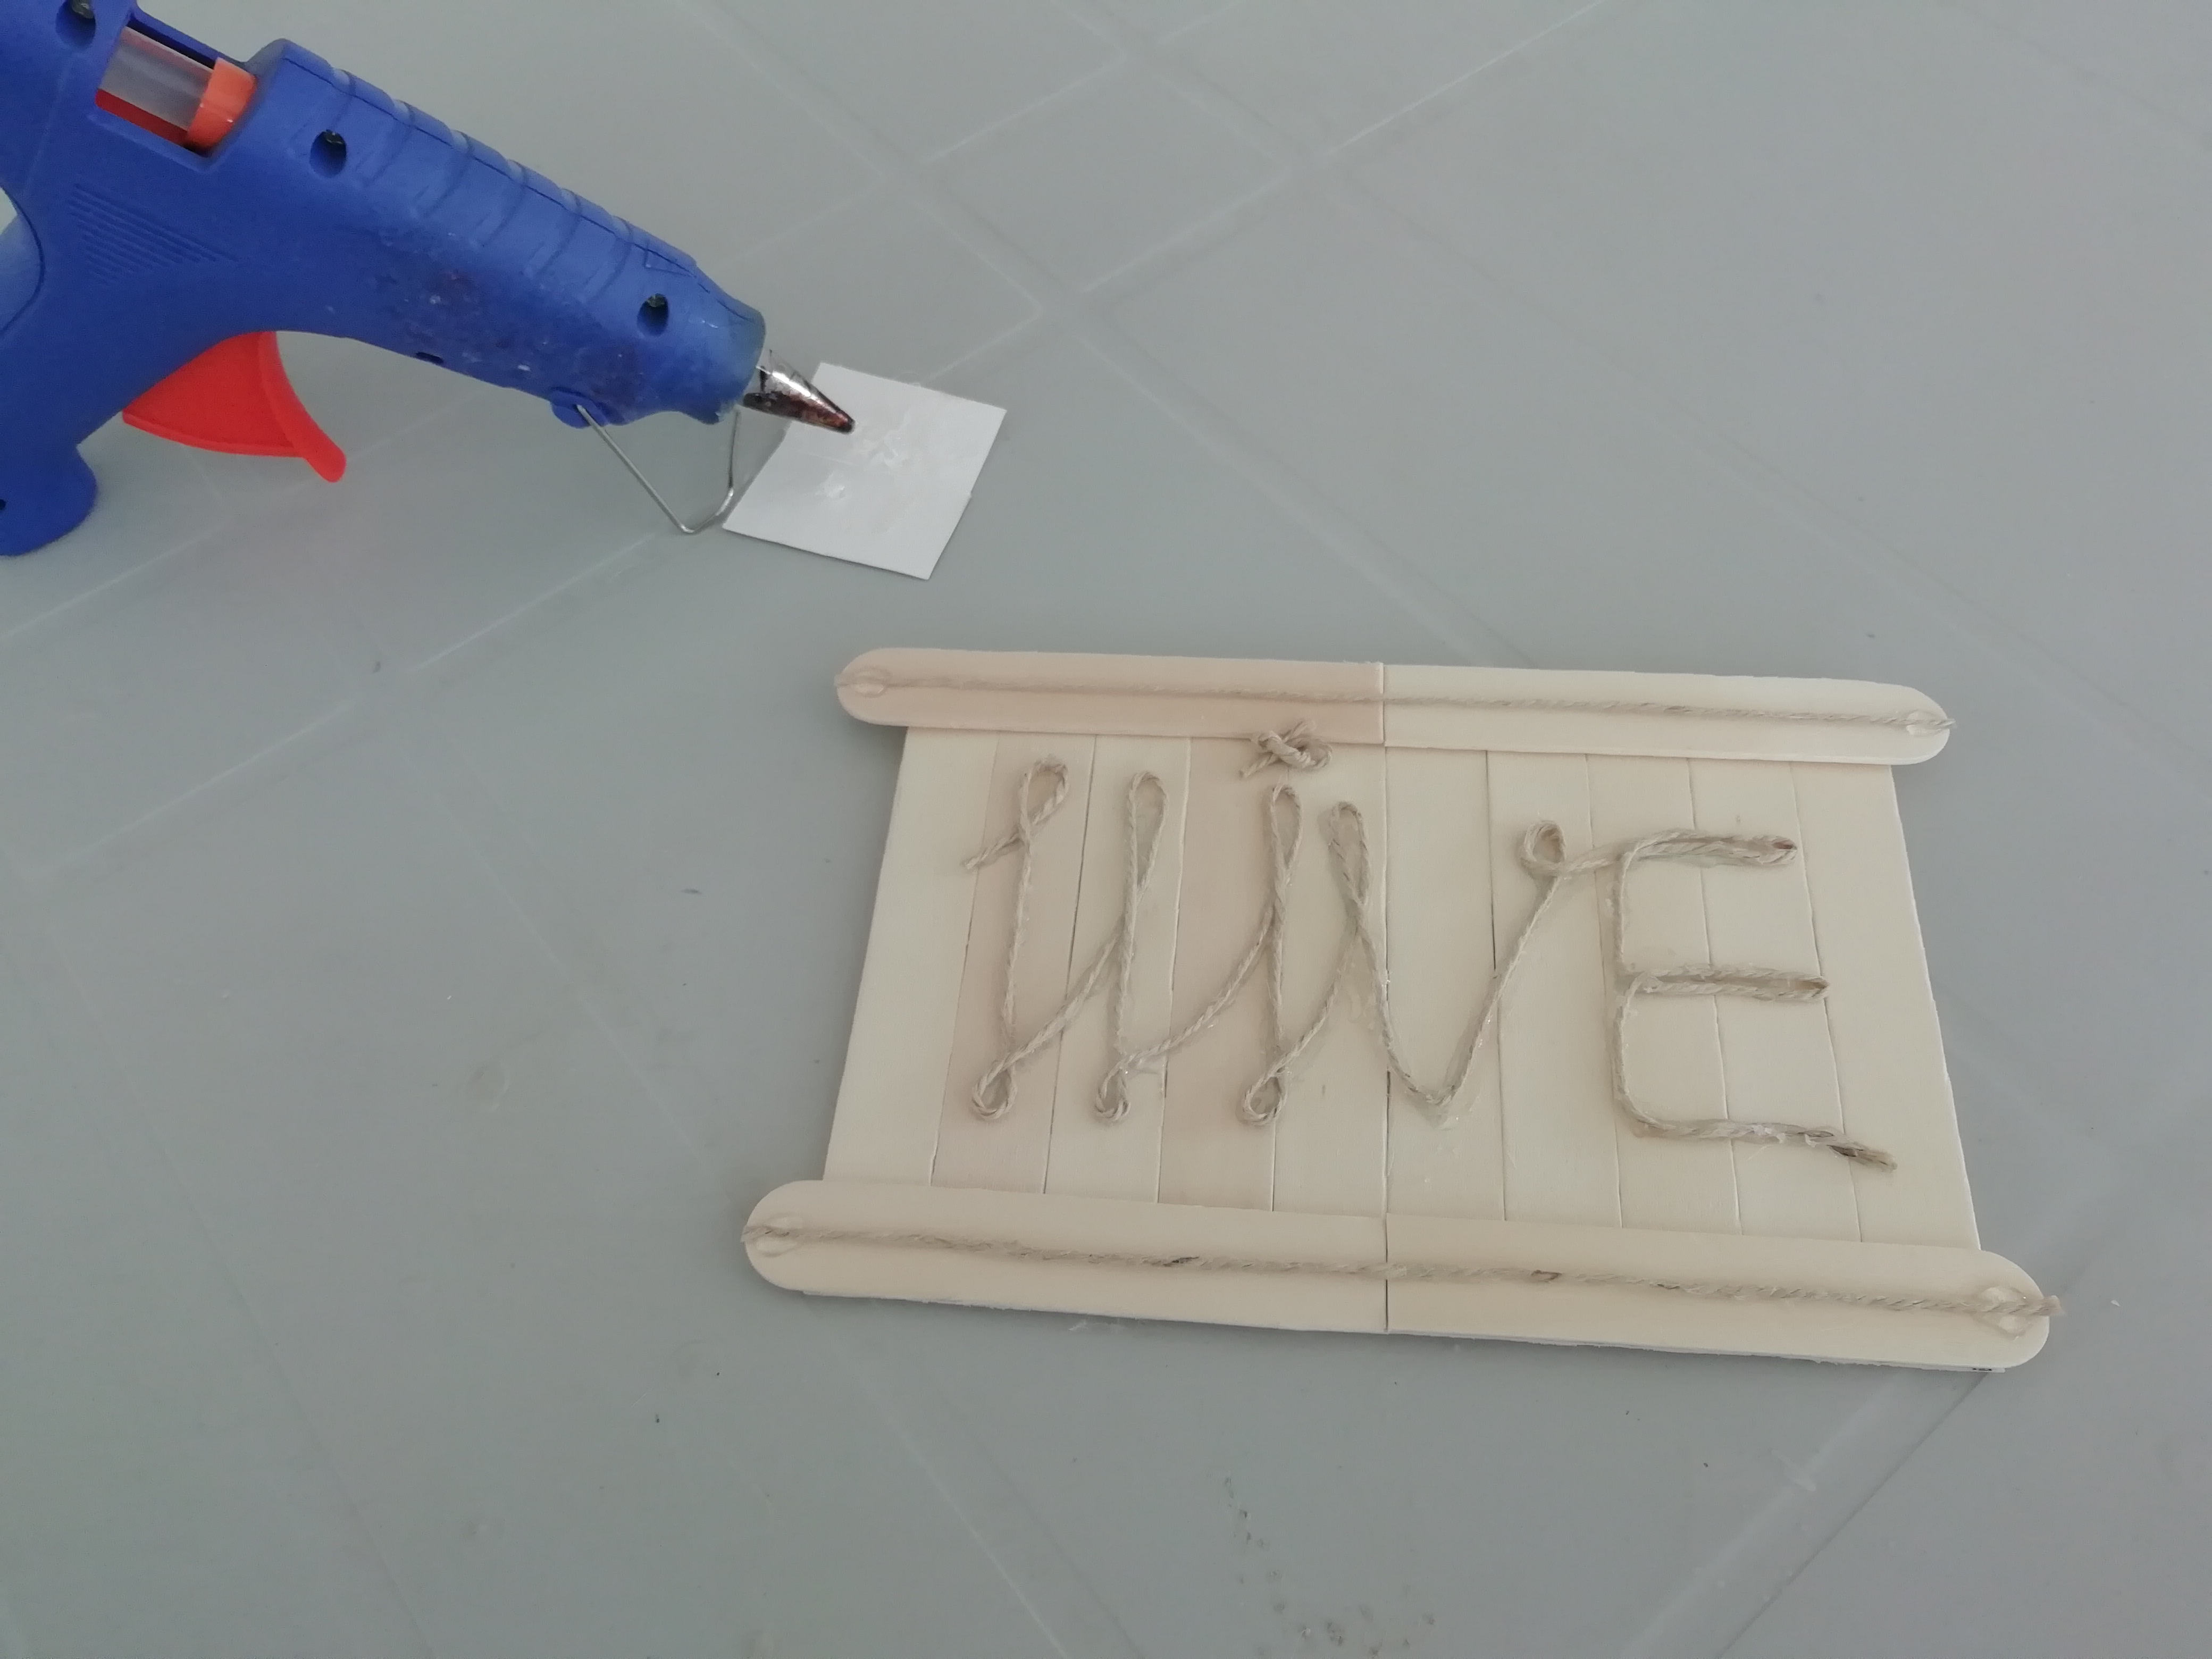
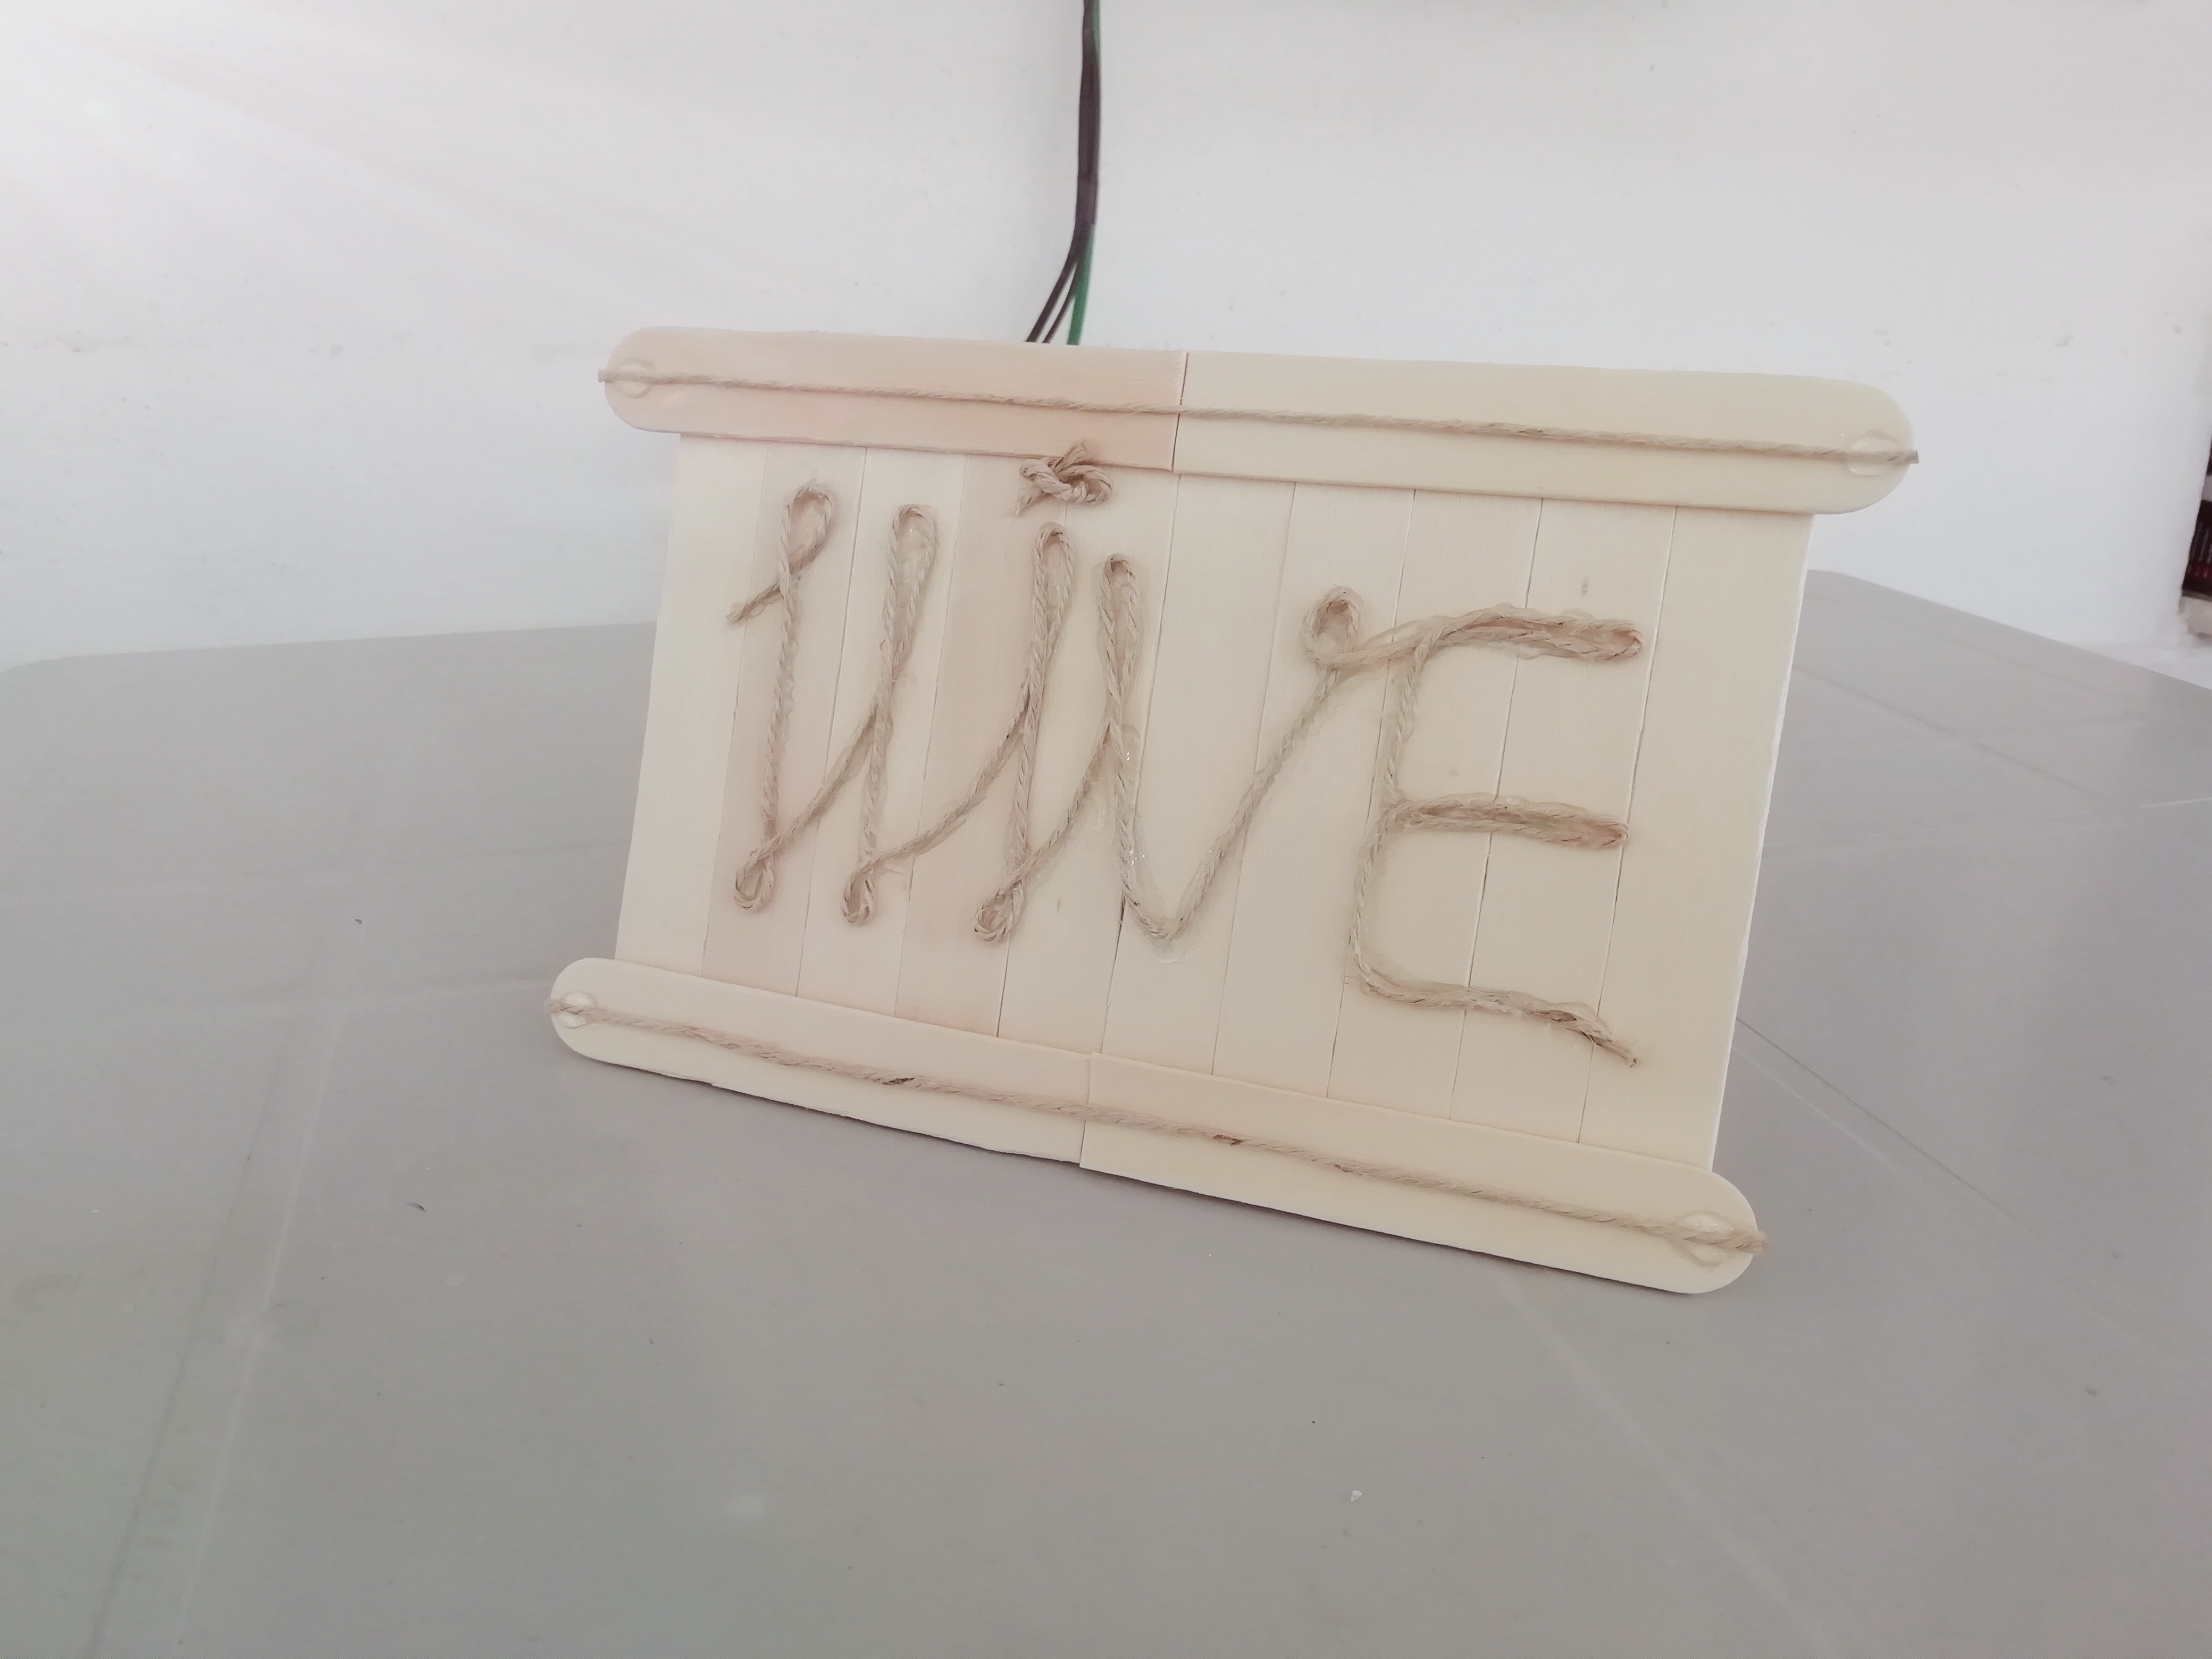
(EN) Then, I wrote the text Hive on the board with a rope.
(TR) Sonra, panonun üzerine Hive yazısını ip ile yazdım.
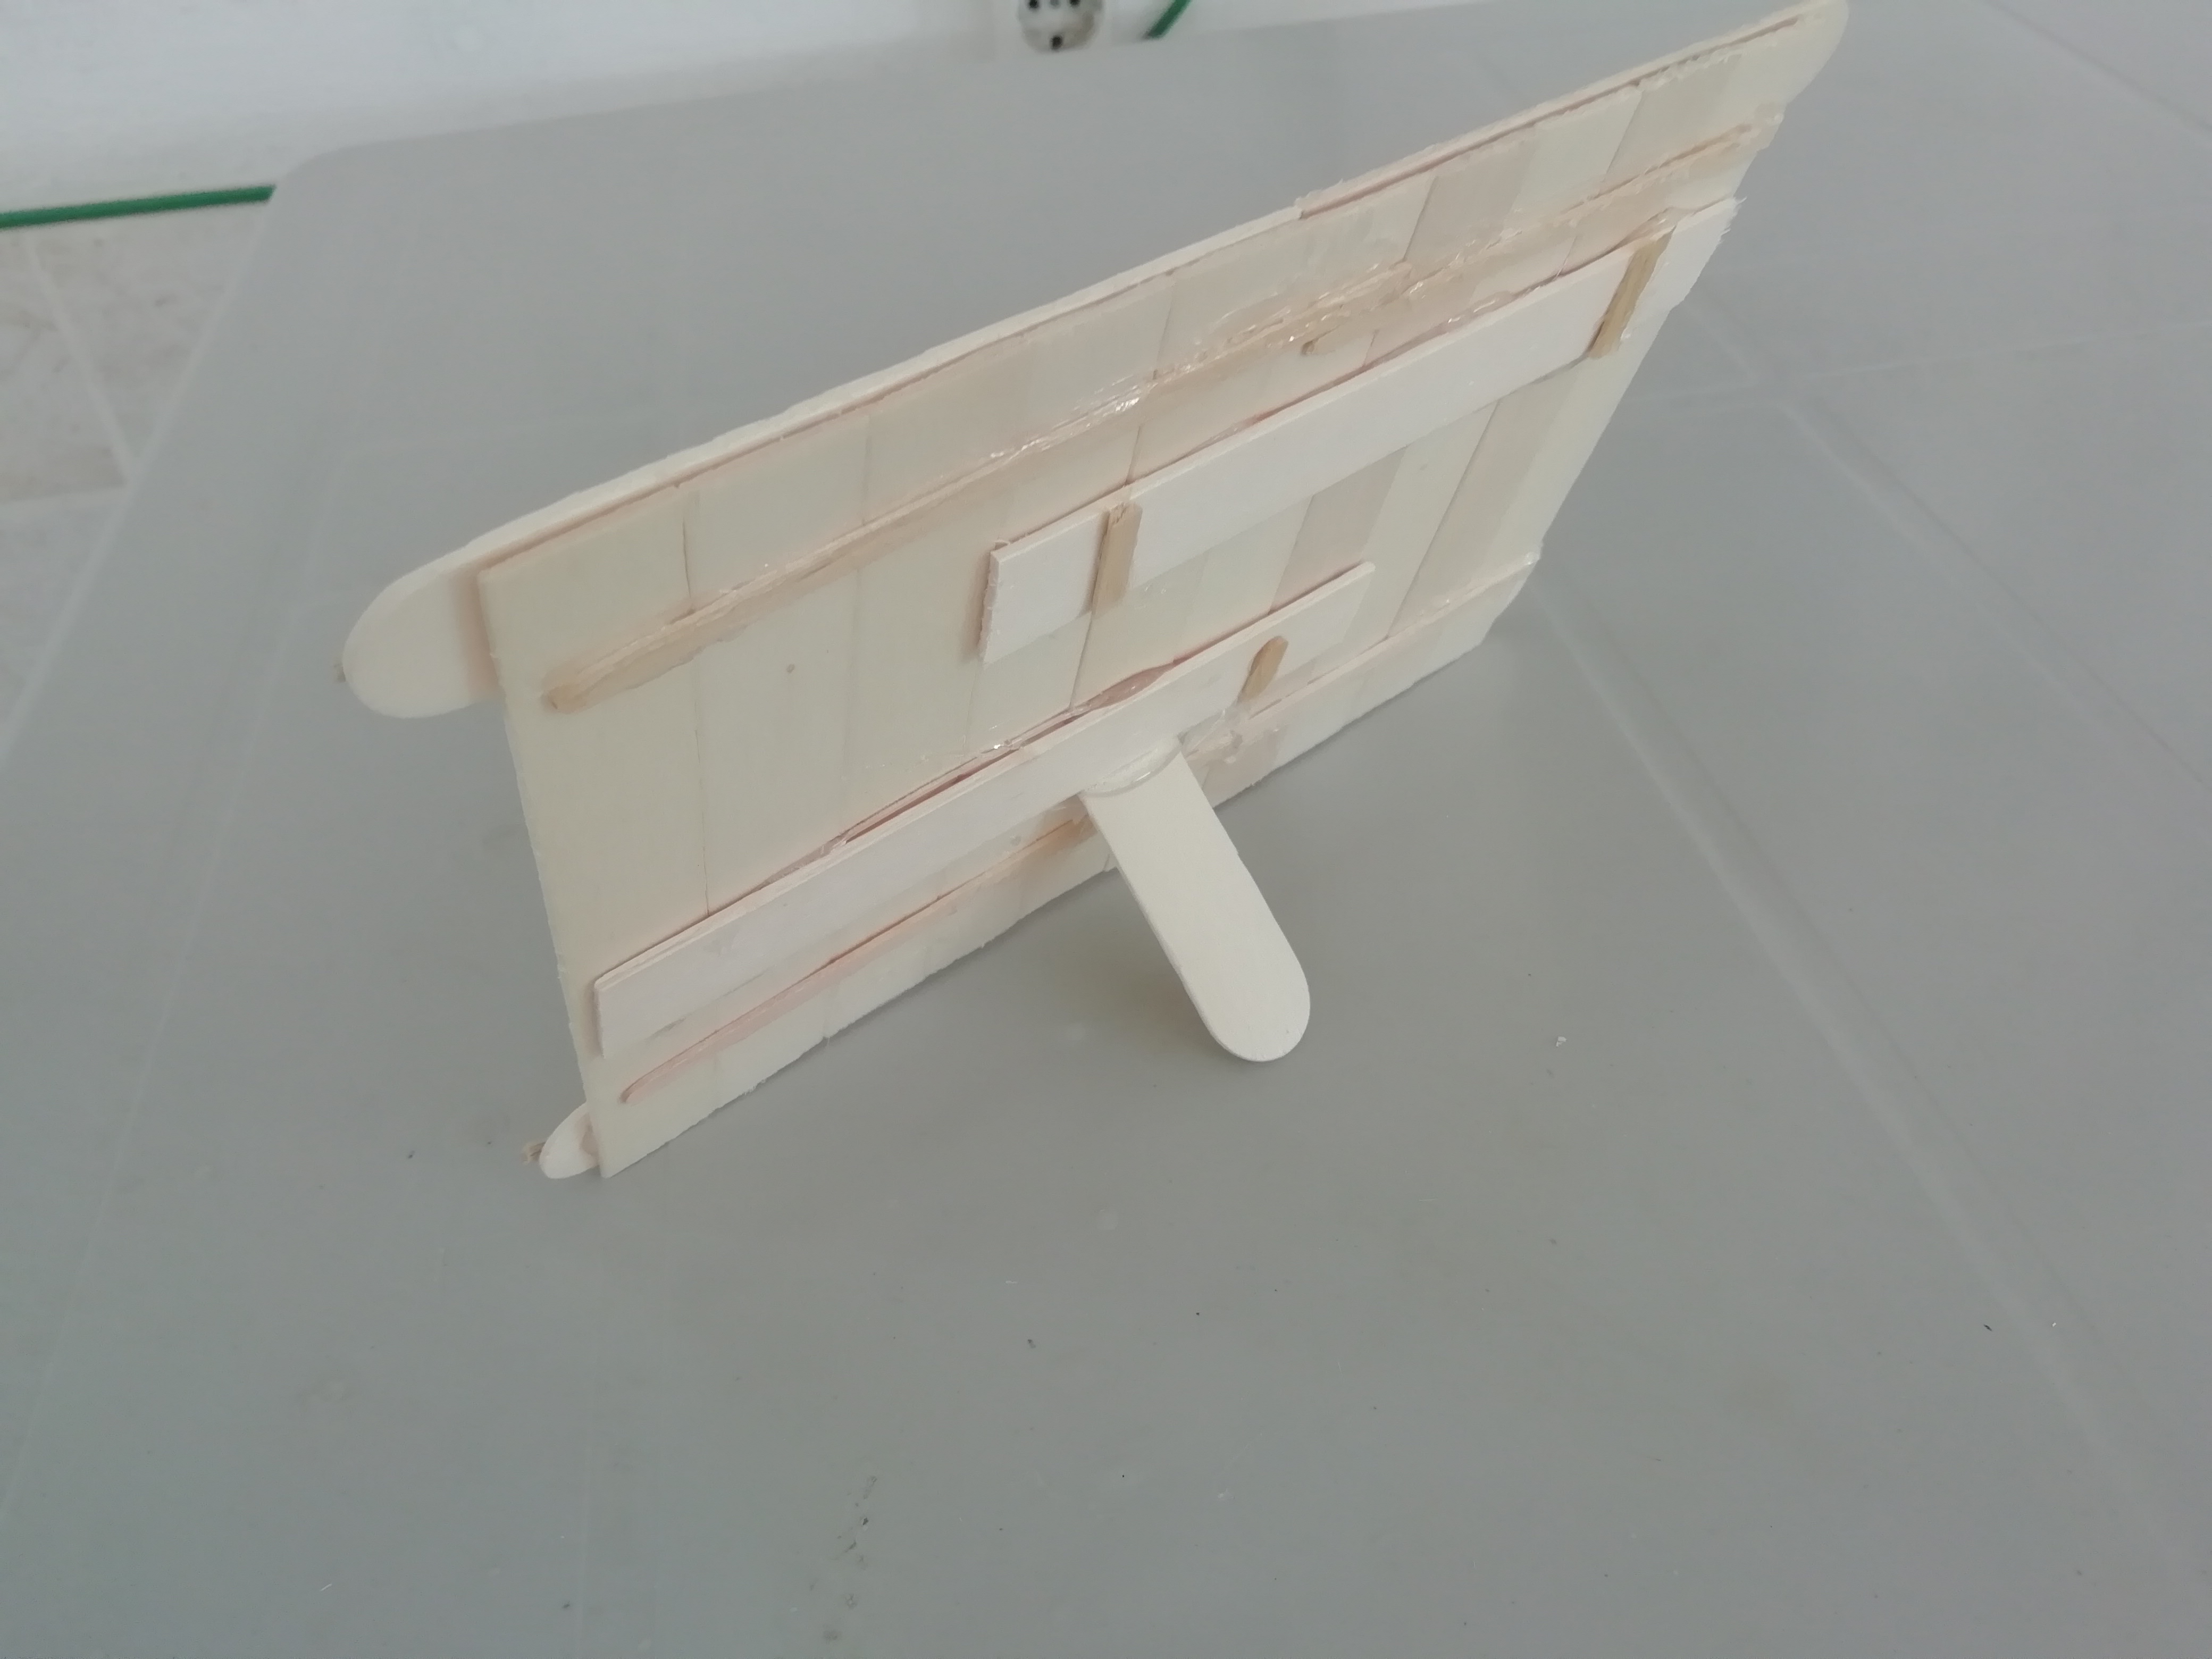
(EN) Finally, I glued a wooden stick to the back of the board for support.
(TR) Son olarak, panonun arka kısmına destek olması için tahta çubuk yapıştırdım.
(EN) Our Hive Board is ready. Have a nice Day. :))
(TR) Hive Panomuz Hazır. İyi günlerde kullanın. :)
(EN) Thanks for Reading and Thanks for Supports.
(TR) Okuduğunuz için teşekkür ederim. Destekleriniz için teşekkürler.
Congratulations, your post has been upvoted by @dsc-r2cornell, which is the curating account for @R2cornell's Discord Community.