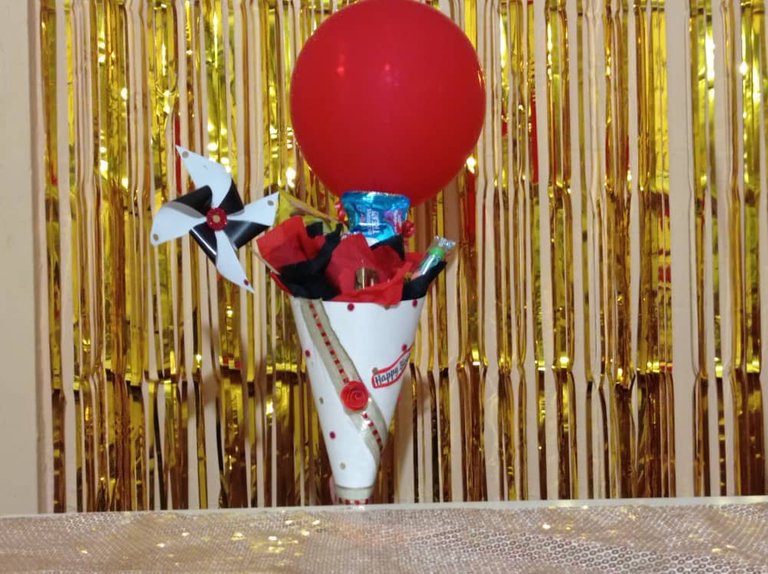
Cono decorado para golosinas(chucheria)👌
Hola amigos de hive, hoy quiero mostrarles como hice esta pequeña cajita de regalo que sirve para regalar cualquier cosa pequeña como unos zarcillos, anillo, pulsera, cadena o cualquier otro detalle que quieran obsequiar que sea que sea de un tamaño reducido, además que es muy sencillo de hacer y son pocos los materiales que se necesitan, en realidad es algo diferente a lo que se tiene acostumbrado y deberían intentar este modelo a ver si les gusta.
Hello friends of hive, today I want to show you how I made this little gift box that can be used to give any small thing like a pair of earrings, ring, bracelet, chain or any other detail that you want to give that is of a reduced size, besides that it is very simple to make and there are few materials that are needed, actually it is something different from what you are used to and you should try this model to see if you like it.
Hello friends of hive, today I want to show you how I made this little gift box that can be used to give any small thing like a pair of earrings, ring, bracelet, chain or any other detail that you want to give that is of a reduced size, besides that it is very simple to make and there are few materials that are needed, actually it is something different from what you are used to and you should try this model to see if you like it.
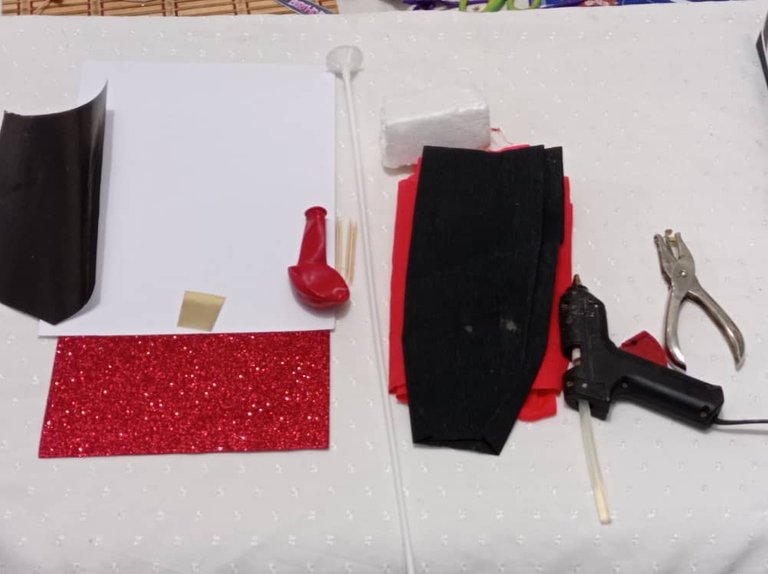
Materiales - Materials
- Cartulina
- Anime
- Globo
- Cinta
- Papel lustrillo
- Silicón
- Foami
- Palillos
- Perforadora
- Cardboard
- Encourage
- Balloon
- Tape
- Shine paper
- Silicone
- Foami
- Chopsticks
Paso a Paso - Step by step
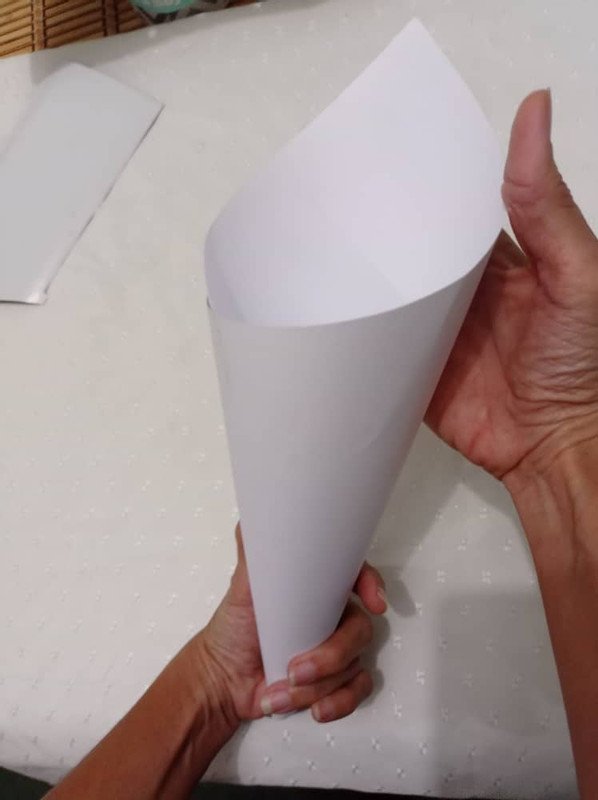
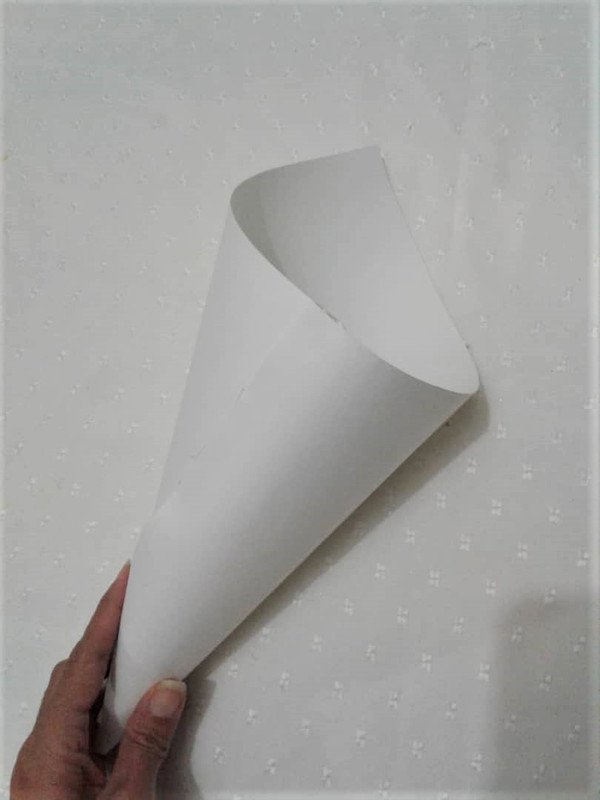
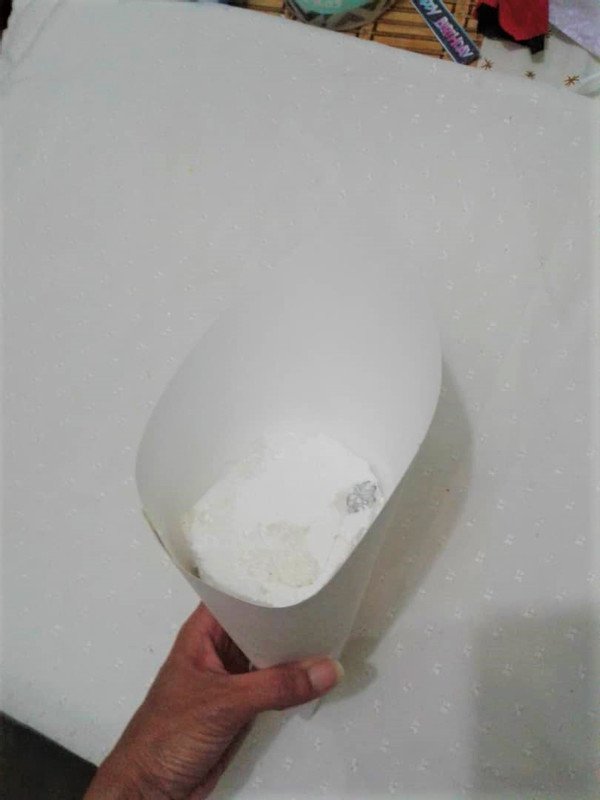
Primero con la cartulina agarramos dos esquinas contrarias las unimos para poder armar el cono y después pegamos la orilla con silicón.
First with the cardboard we take two opposite corners joined to assemble the cone and then glue the edge with silicone.
First with the cardboard we take two opposite corners joined to assemble the cone and then glue the edge with silicone.
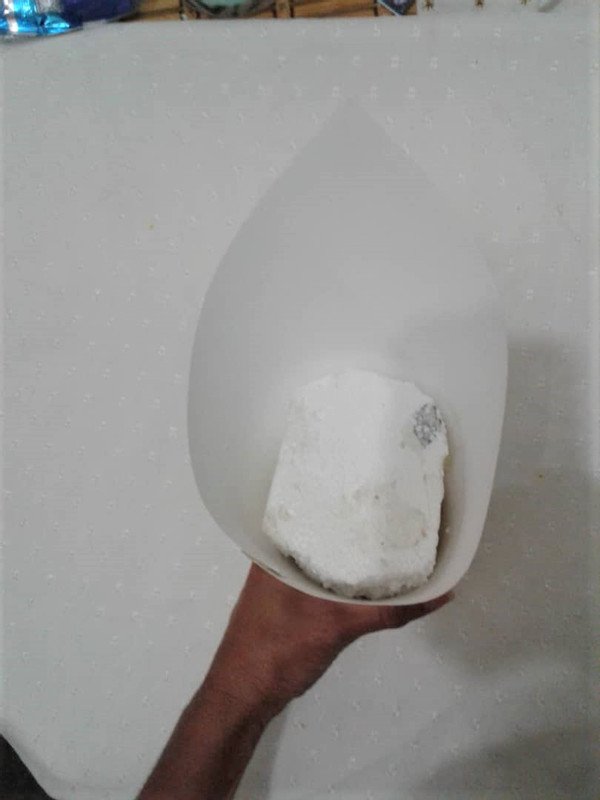
Luego metemos pedazos de anime dentro del cono para que se pueda poner lo que se quiera y quede en la parte de arriba, después forramos el anime con el papel de seda.
Then we put pieces of anime inside the cone so you can put whatever you want on top, then we line the anime with the tissue paper.
Then we put pieces of anime inside the cone so you can put whatever you want on top, then we line the anime with the tissue paper.
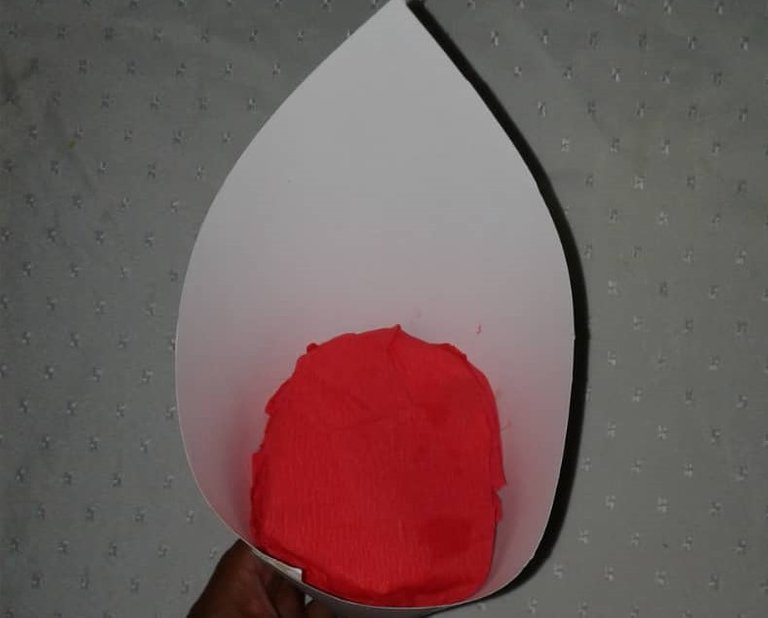
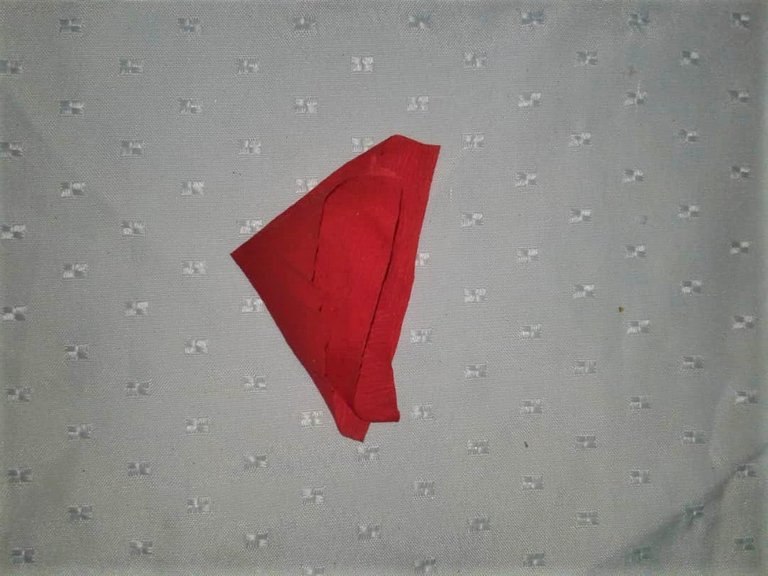
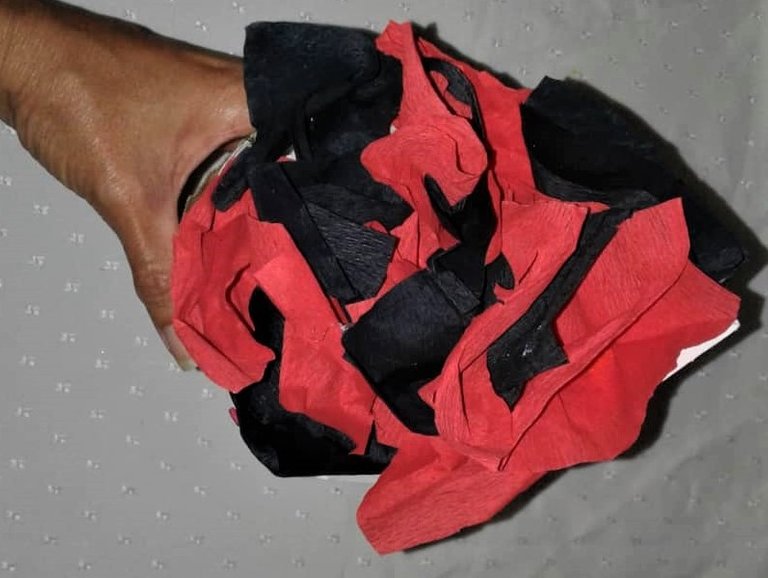
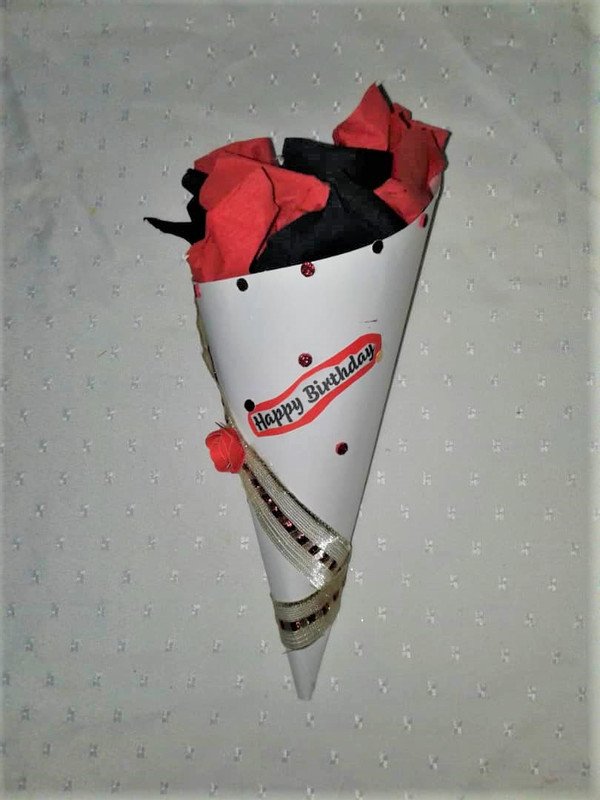
Ahora hacemos pañuelos cortando cuadrados y doblándolos para poder pegarlos uno por uno en todo el borde del cono.
We now make tissues by cutting out squares and folding them so that they can be glued one by one along the edge of the cone.
We now make tissues by cutting out squares and folding them so that they can be glued one by one along the edge of the cone.
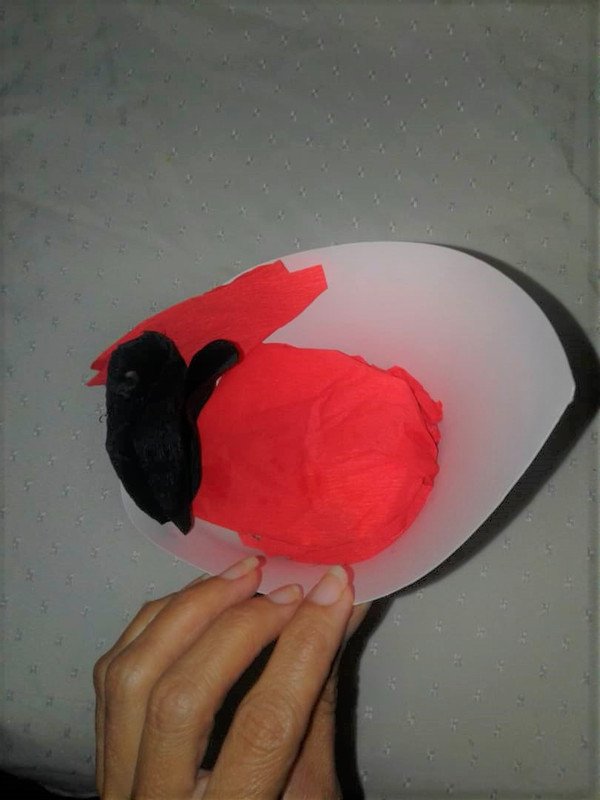
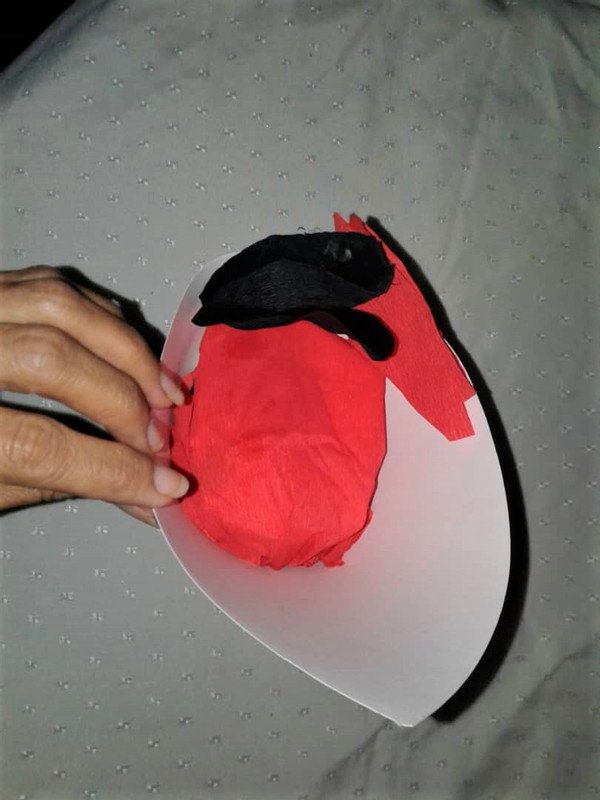
Después hacemos más pañuelos pañuelos y los pegamos a un palillo para colocarlos en el centro del cono hasta que llene por completo.
Then we make more tissues and stick them on a stick to place them in the center of the cone until it is completely filled.< /div>
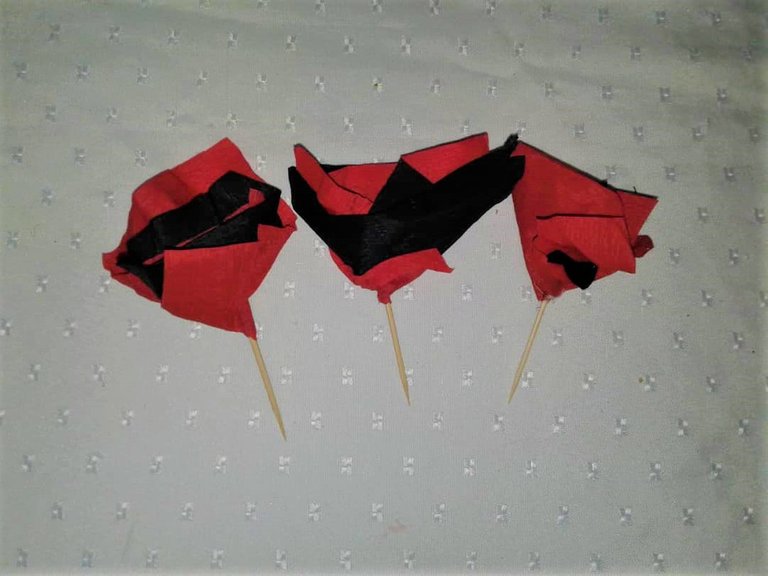

Then we make more tissues and stick them on a stick to place them in the center of the cone until it is completely filled.< /div>
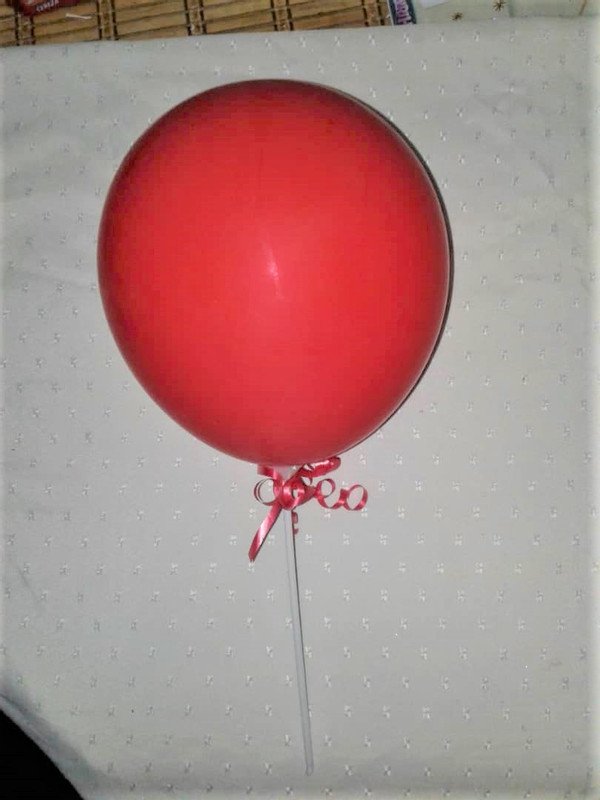
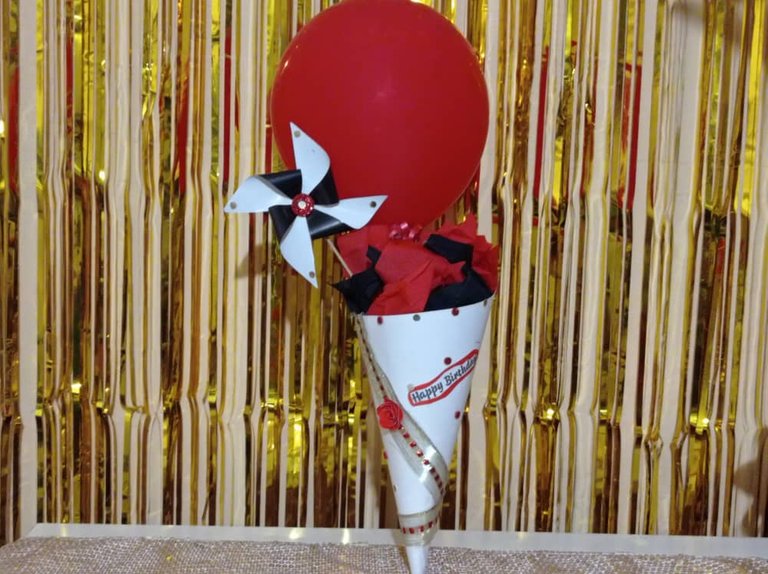
Ahora adornamos el cono como queramos yo utilice una cinta para colocarla alrededor del cono, con la perforadora saque circulo de foami escachado y como es con motivo de cumpleaños imprimí el feliz cumpleaños e infle un globo para colocarlo arriba del cono.
Now we decorate the cone as we want I used a tape to place it around the cone, with the perforator I took out a circle of frosted foami and as it is for a birthday I printed the happy birthday and inflated a balloon to place it on top of the cone.
Now we decorate the cone as we want I used a tape to place it around the cone, with the perforator I took out a circle of frosted foami and as it is for a birthday I printed the happy birthday and inflated a balloon to place it on top of the cone.
Por ultimo pegamos el palito del globo del cono para que quede fijo, después le podemos poner lo que queramos dentro del cono tanto como adornos como las golosinas que se colocan con palitos para que sea más cómodo y la cantidad que desee cada persona, así ya estará listo nuestro cono decorativo.
Finally we stick the balloon stick of the cone so that it is fixed, then we can put what we want inside the cone as much as decorations as the candies that are placed with sticks to make it more comfortable and the amount you want each person, so our decorative cone will be ready.
Finally we stick the balloon stick of the cone so that it is fixed, then we can put what we want inside the cone as much as decorations as the candies that are placed with sticks to make it more comfortable and the amount you want each person, so our decorative cone will be ready.
Gracias por Leer.
Thanks for reading
Fotos de mi propiedad.
Camara: Teléfono Xiaomi Redmi Note 9
0
0
0.000
Congratulations @anyelit! You have completed the following achievement on the Hive blockchain and have been rewarded with new badge(s) :
You can view your badges on your board and compare yourself to others in the Ranking
If you no longer want to receive notifications, reply to this comment with the word
STOPDo not miss the last post from @hivebuzz:
https://twitter.com/Anyelitfs/status/1312111328933277696