[En/Es] Repair of a controller I thought was lost🧐, Xbox S Controller🎮
English
🎮Caution with the soldering iron🔥
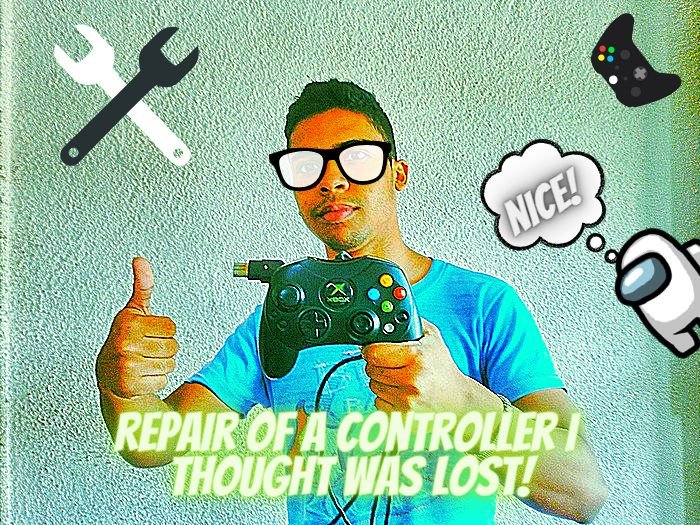
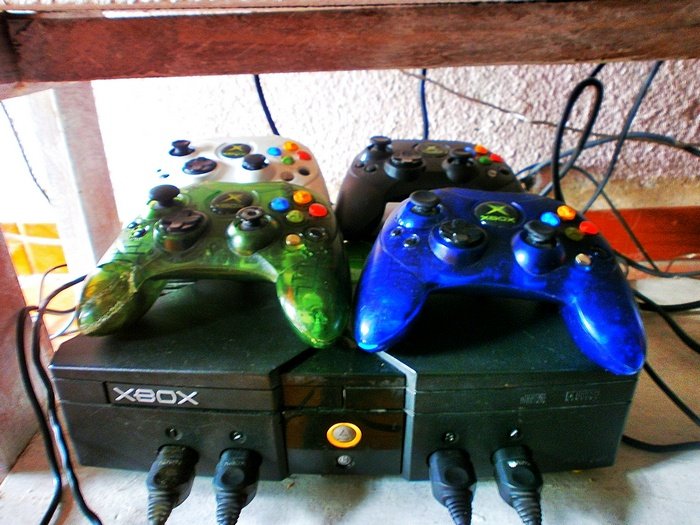
Hello Hive family and Gamers of the community, today we are starting an incredible week, but more incredible is the feeling of satisfaction that you get for repairing something that you thought was useless, months ago my best friend told me to check his classic Xbox controllers, he had 4 controllers, two worked fine and the other two were useless, many things happened, among them is that my uncle burned a card, but that's another story.
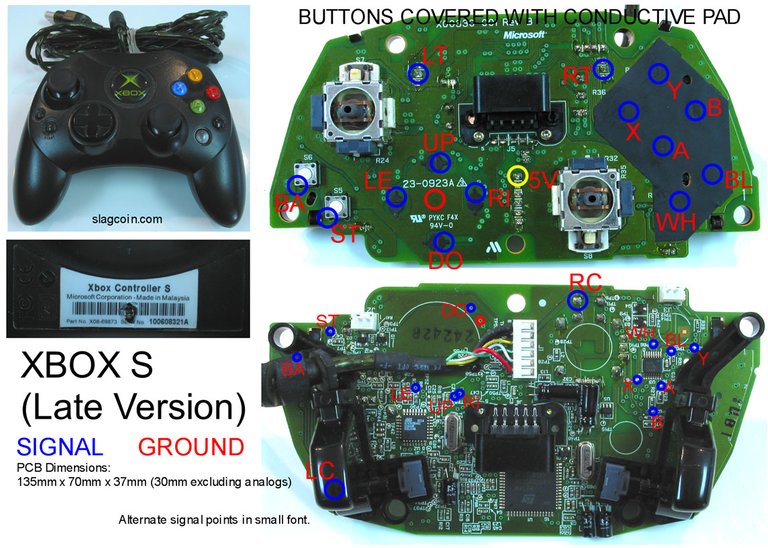
His first master (that is the first one) was internally different from the others, its card was different, it had different electronic paths and the points were positioned in different areas, with time I realized that this type of card is very delicate, one day that controller was dropped by accident and overnight the controller stopped responding in the same way, the left trigger stopped responding, the trigger did not react if you press it, if not alluded that the main lever moved the trigger did its function and that was quite annoying.
For a whole month, I tried to fix that controller, I was looking for millions of tutorials on the internet that told me that the best thing to do was to replace that trigger with another one that was not in use, so I managed to get a trigger from a card that was no longer useful and I moved it to the controller I wanted to repair, the trigger in question did not work.
So I concluded that the problem was the controller card, being of a different model card because I did not know how to make the trigger return to its normal state, it was then where I decided to look at the electronic paths to find the points of the card, I did this to do a trick I learned on the internet which is to scrape a little card where that point is located with a needle gently so that the copper of the card protrudes, this makes the tin solder adheres to the card to introduce a cable.

Unfortunately for my lack of experience I scraped much more than the account the card and well the tin could never adhere well to the controller and was left without the possibility of being fixed, I intended to make a bridge with a wire so that the circuit would return to circulate current from end to end so that the trigger returned to normal as I did with one of my controls.

Well, but today I didn't come to tell you about how lousy I was at fixing that controller. Until that moment I had not experimented with my friend's 4 controllers, he told me that the cable was fine, but the console did not identify it as connected, so he told me that it could not work anymore.

After resigning myself with the first controller I started to work to fix the controller that many people said was not going to work, although it had a long time without soldering, this controller had two serious problems, first, the cable that was completely broken on the board and two the lever, the stick was completely worn so much so that if someone moved to the left it moved to the right on the console and if you wanted to move to the right, it went down, it was a very strange thing.
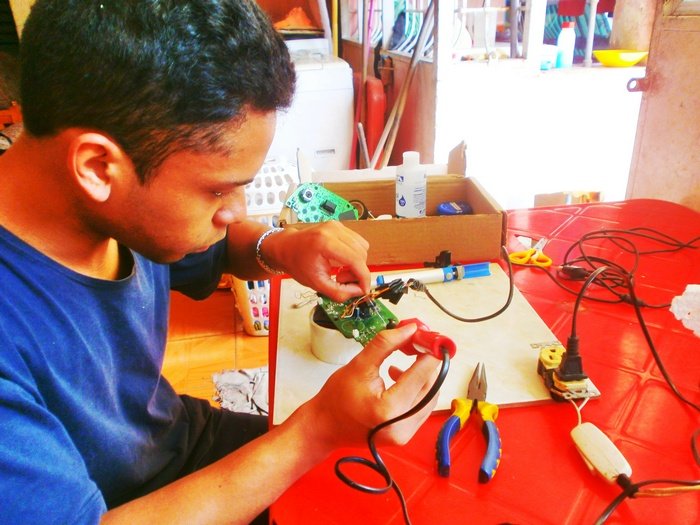
The tools I used for the repair were the following: a soldering iron, a solder sucker, a spare stick, unused copper wires, solder (obviously), rubbing alcohol, an unused toothbrush, and duct tape.
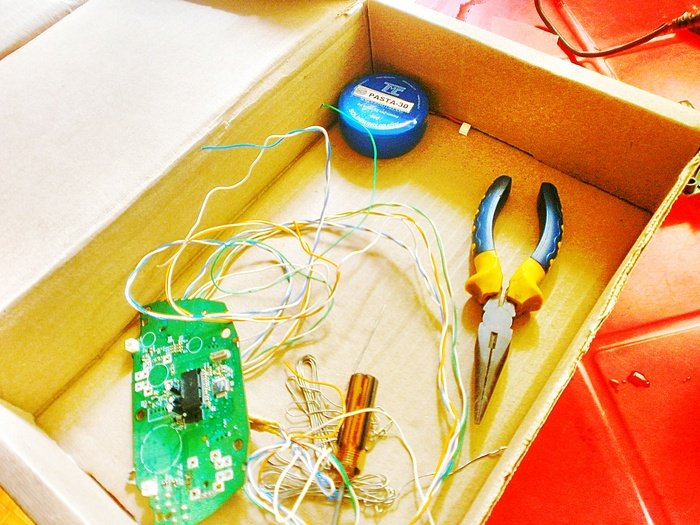
Ok, something I forgot to mention is that I did a total replacement of the cable for this controller, that is to say, I took out a controller that no longer had a fix and I gutted the cable to put it on the board that, if it worked, this cable had previously soldered it with some copper wires so that the cable was not so short compared to the other controllers.
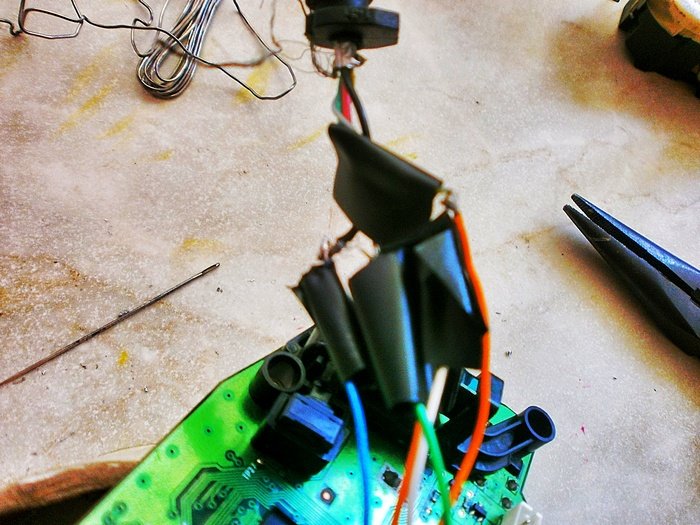
When I started to solder, I thought it would be easier to join wires with tin, but clearly, I was wrong, you have to be too precise for this job and that I am characterized by being a very rustic person with electronic devices, the hardest thing is to try to isolate the wires with tape so that the wires do not make contact with each other by tin.
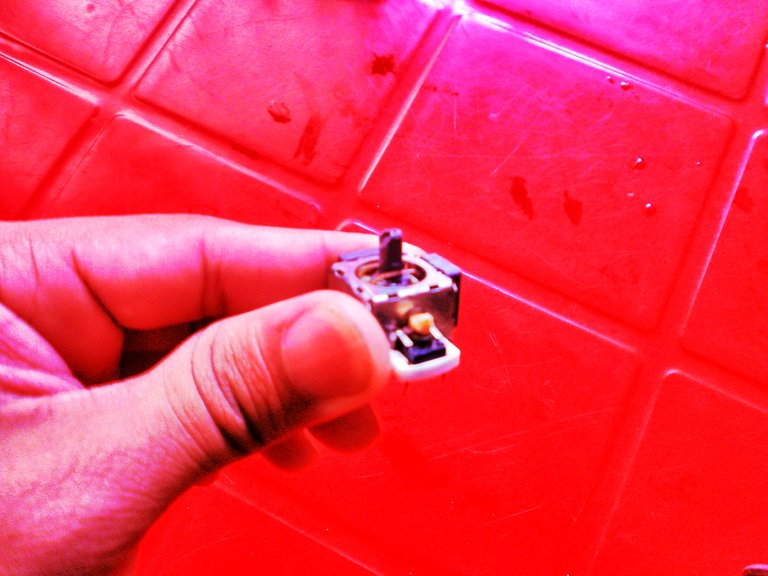
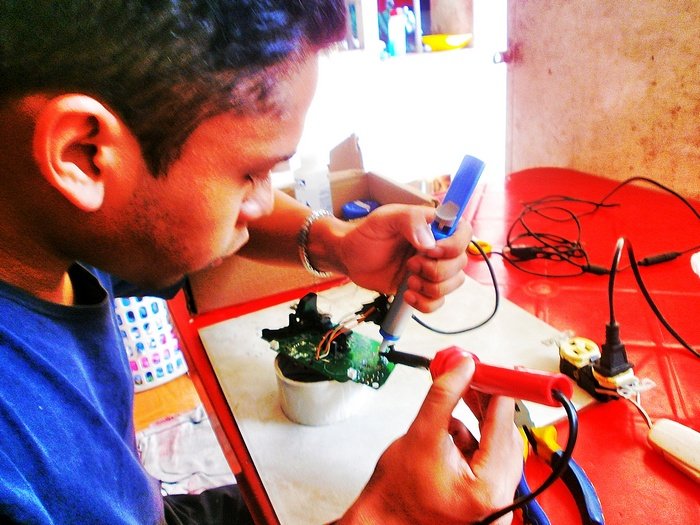
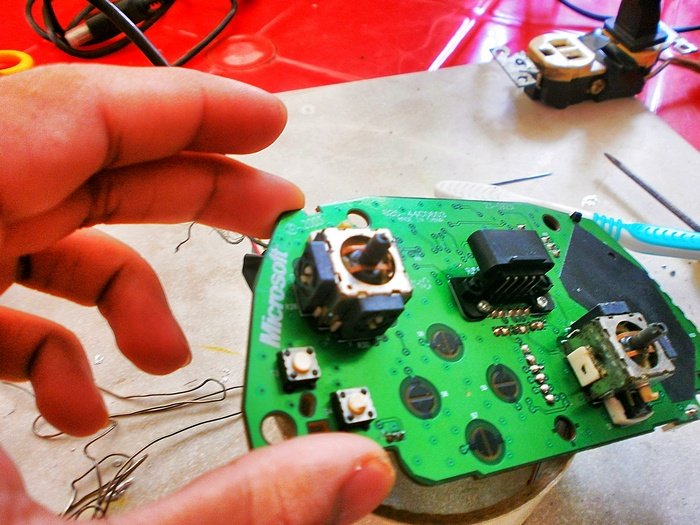
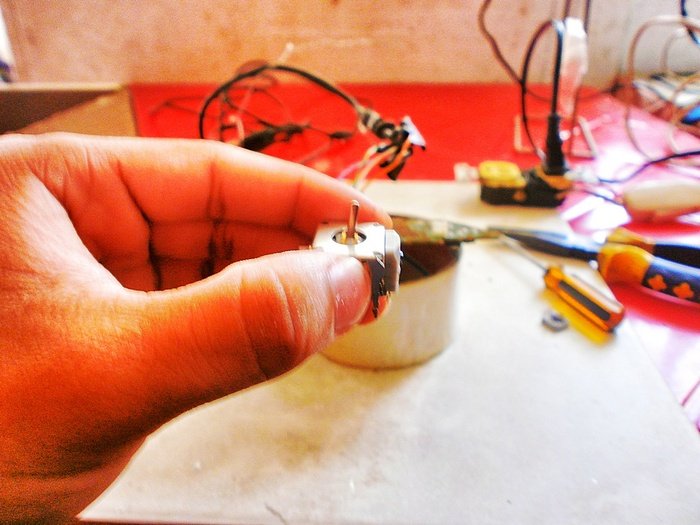
Another thing that I must connect this at the beginning I did not see myself able to remove a stick from a card of any control, with my learning in soldering I realized that it is easy but at the same time you can have a lot of loss if you do it wrong, In my case to get out the stick that I was going to replace in the controller I had to be extremely careful to remove it without breaking the sensors or pins and ultimately damage the stick, it is not easy because I had to use a screwdriver to apply pressure on the lever to get it out and even I had to use the soldering iron to heat the board and make it come out faster.
Well after giving you the context it is time to tell you how the repair went, first I removed the bad cable from the board, I thought it would be easy but a piece of copper got stuck in one of the slots where the tin is placed, I spent about an hour trying to remove that piece of copper that prevented the installation of the fourth cable to the board until I did it by pure luck using the soldering iron carefully so as not to burn the board.
After installing the cable and checking that it works, I decided to remove the left trigger to remove the lever, it took me a lot to remove the stick without the need that the sensors do not get out of the lever system, fortunately, I should not worry because if the lever is already damaged and needs replacement, I removed it as roughly as possible without touching the card too much so that the tracks do not rise.
Later removing the bad lever, I proceed to install the good lever on the board, it was a little difficult because of the tin residues that remained, caused by the separation of the previous lever, for that I used the alcohol with the brush to clean the board, that also helps in the performance of the circuit so that it works well.
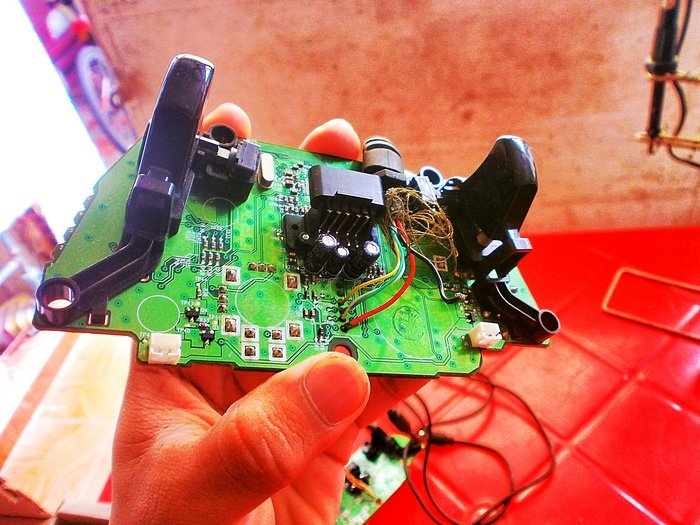
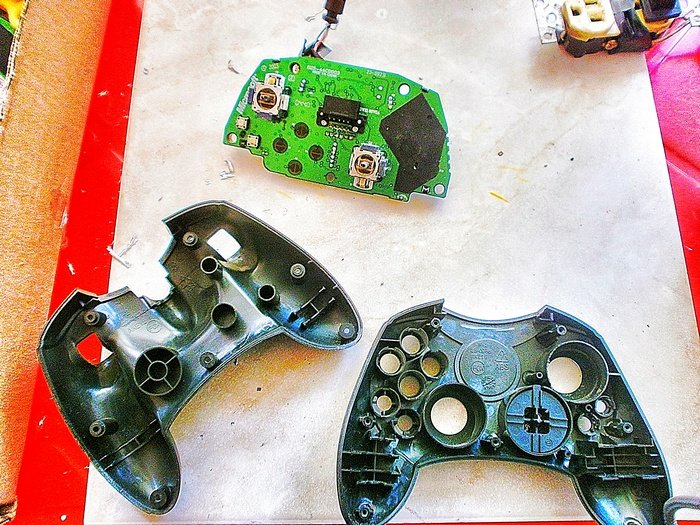
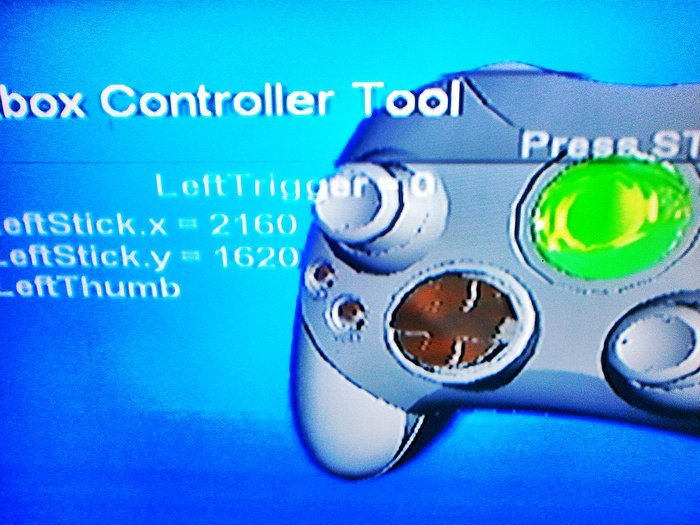
As you can see the lever worked and the best way to know it is that it is still, if it was with the other lever, it would be down without disappointment, from there on I installed the left trigger again and I started to build again the knob to finally finish with the repair.
Well, family is all for today, I hope you liked it, repairing knobs that I thought would no longer be useful is quite comforting.
🎮Thanks for watching, see you soon. 😃
Thank you very much!!

Translated with www.DeepL.com/Translator

🎮Cuidado con el cautín🔥
Hola familia de Hive y Gamers de la comunidad, hoy estamos comenzando una semana increíble, pero más increíble es la sensación de satisfacción que te dejas por reparar algo que creíste totalmente inservible, hace meses mi mejor amigo me dijo que revisará sus controles de Xbox clásico, el tenía 4 mandos, dos funcionaban bien y los otros dos no servían, pasaron muchas cosas, entre ellas es que mi tío quemó una tarjeta, pero esa es otra historia.
Su primer principal (es decir el primero) era internamente distinto a los demás, su tarjeta era diferente, tenía distintos caminos electrónicos y los puntos estaban posicionados en zonas diferentes, con el tiempo me di cuenta que este tipo de tarjetas son muy delicadas, en un día ese mando se me cayó por accidente y de la noche a la mañana el mando dejó de responder de la misma manera, el gatillo izquierdo dejó responder, el gatillo no reaccionaba si lo presionas, si no que aludida que se movía la palanca principal el gatillo hacia su función y eso fue bastante molesto.
Por un mes entero intenté arreglar ese mando, estuve buscando por internet millones de tutoriales que me decían que lo mejor era remplazar ese gatillo por otro que no estuviera en uso, así que logré sacar un gatillo de una tarjeta que ya no servía y lo trasladé al mando que quería reparar, el gatillo en cuestión no funcionó.
Así que llegue a la conclusión de que el problema era la tarjeta del mando, a ser de diferente modelo la tarjeta pues no supe cómo hacer para que el gatillo volviera a su estado normal, fue entonces donde decidí fijarme en los caminos electrónicos para dar con los puntos de la tarjeta, esto lo hice para hacer un truco que aprendí en internet que consiste en raspar un poco la tarjeta donde se ubica ese punto con una aguja suavemente para que el cobre de la tarjeta sobresalga, esto hace que la soldadura del estaño se adhiera a la tarjeta para introducir un cable.
Lastimosamente por mi falta de experiencia raspé mucho más de la cuenta la tarjeta y bueno el estaño jamás se pudo adherir bien a al mando y se quedó sin posibilidad de ser arreglado, mi intención era hacer un puente con un cable para que el circuito volviera a circular corriente de extremo a extremo para que el gatillo volviera a la normalidad como hice con uno de mis controles.
Bueno, pero hoy no vine a hablarles de lo pésimo que me fue arreglando ese mando. Hasta ese momento no había experimentado con el 4 control de mi amigo, él me dijo que el cable estaba bien, pero la consola no lo identificaba como conectado, así que me dijo que ya no podía servir más.
Después de resignarme con el primer mando puse manos a la obra para arreglar el control que mucha gente dijo que ya no iba a funcionar, a pesar que tenía muchísimo tiempo sin soldar, este mando tenía dos problemas graves, primero el cable que estaba completamente roto en la placa y dos la palanca, el stick estaba totalmente desgastado tanto así que si alguien movía hacia la izquierda se movía a la derecha en la consola y si quería mover a la derecha se iba hacía abajo, fue una cosa muy extraña.
Las herramientas que usé para la reparación fueron las siguientes: un cautín, un succionador de estaño, un stick de repuesto, cables de cobre que no tenga uso, estaño (obvio), alcohol para limpiar residuos, un cepillo de dientes sin uso y cinta adhesiva.
Ok la algo que se me olvidó mencionar es que hice un remplazo total del cable para este control, es decir, saqué un mando que ya no tenía arreglo y le destripé el cable para ponerlo en la placa que, si servía, este cable previamente lo había soldado con unos cables de cobre para que él cable no fuera tan corto a comparación de los demás controles.
Cuando comencé a soldar pensé que sería más fácil unir cables con estaño, pero claramente me equivoque, hay que ser demasiado preciso para este trabajo y eso que yo me caracterizo por ser una persona muy rustica con los artefactos electrónicos, lo más difícil es tratar de aislar los cables con cinta adhesiva para que los cables no tomen contacto entre sí por el estaño.
Otra cosa que debo conectar este al principio no me veía capaz de sacar un stick de una tarjeta de cualquier control, con mi aprendizaje en la soldadura me di cuenta que es fácil pero a la vez puedes tener mucha perdida si lo haces mal, en mi caso para lograr sacar el stick que iba a remplazar en el control tuve que tener extremo cuidado para sacarlo sin que los sensores ni los pines se rompieran y dañaran en definitiva el stick, no es cosa fácil porque tuve que usar un destornillador para aplicar presión en la palanca para que se saliera e incluso me tocó usar el cautín para calentar la placa y hacer que salga más rápido.
Bueno ya después de darles el contexto es hora de hablarles de cómo fue la reparación, primero retiré el cable malo de la placa, creí que sería fácil pero un pedazo de cobre se quedo trabado en una de las ranuras donde se coloca el estaño, estuve como una hora tratando de quitar ese pedazo de cobre que impedía la instalación del cuarto cable hacía la placa, hasta que lo logré de pura suerte usando el cautín con cuidado para no quemar la tarjeta.
Después de instalar el cable y comprobar que si funciona me dispuse a retirar el gatillo izquierdo para sacar la palanca, me costó mucho sacar el stick sin la necesidad de que los sensores no se salieran del sistema de la palanca, afortunadamente no debí preocuparme porque en si la palanca ya está dañada y necesita remplazo, la saqué con toda la rudeza posible sin tocar mucho la tarjeta para que las pistas no se levantaran.
Posteriormente saqué la palanca mala procedo a instalar la palanca buena a la tarjeta, fue un poco dificultoso por los residuos de estaño que quedaron, provocados por la separación de la palanca anterior, para eso usé el alcohol con el cepillo para limpiar la placa, eso también ayuda en el rendimiento del circuito para que funcione bien.
Como ven la palanca funcionó y la mejor forma de saberlo es que esta quieta, si estuviera con la otra palanca estaría hacia abajo sin decepciones, de ahí en más instalé de vuelta el gatillo izquierdo y me puse a construir nuevamente el mando para finalmente finalizar con la reparación.
Bueno familia es todo por hoy, espero que les haya gustado, reparar mandos que pensé que ya no serviría pues es bastante reconfortante.
🎮Gracias por ver, hasta pronto.😃
¡¡Muchas Gracias!!
Translated with www.DeepL.com/Translator
Your content has been voted as a part of Encouragement program. Keep up the good work!
Use Ecency daily to boost your growth on platform!
Support Ecency
Vote for Proposal
Delegate HP and earn more