Origami Eight-petals Flower - DIY |EN/ES|
I love paper-art it all its forms. Origami is one of my favorites, and I use it usually to give small giftss to friends and family. This time, I made an eight-petals yellow flower for a special lady. I placed all images of the process in stripes, so you just have to swipe to see each seciton of each step. It is not a simple flower as it requires quite some steps, but beauty is never simple.
Step 1: Basic guidelines
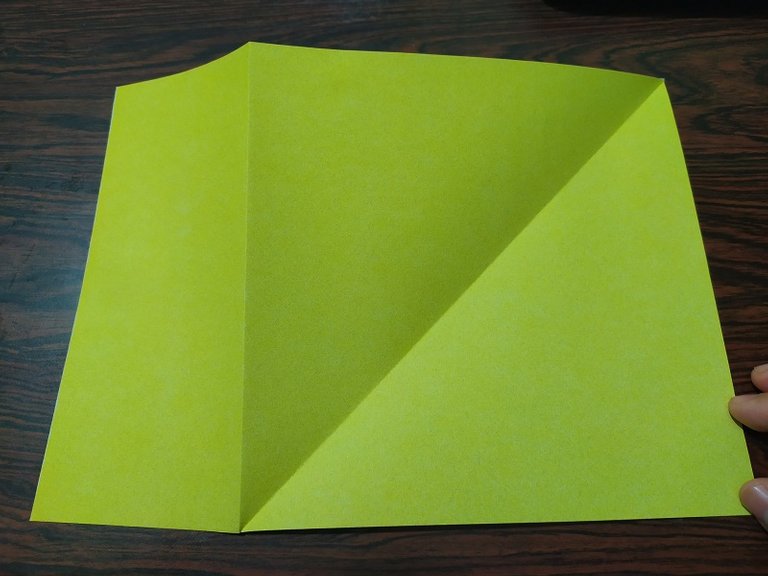
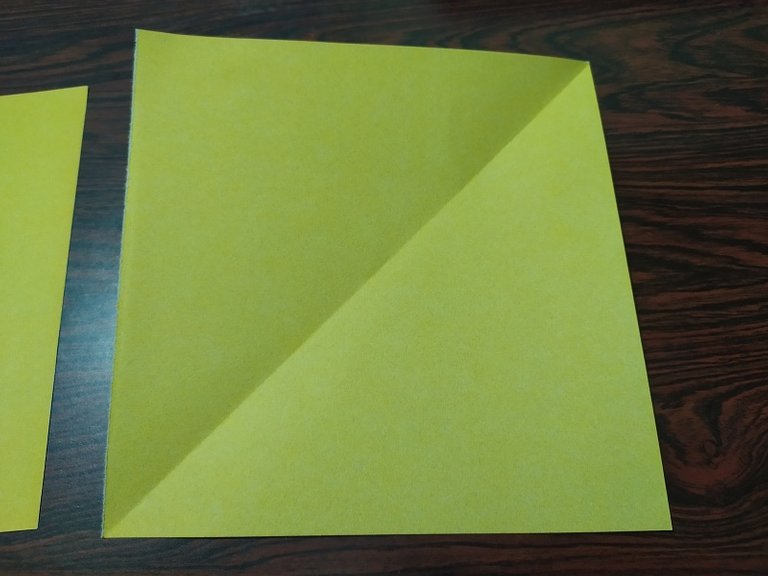

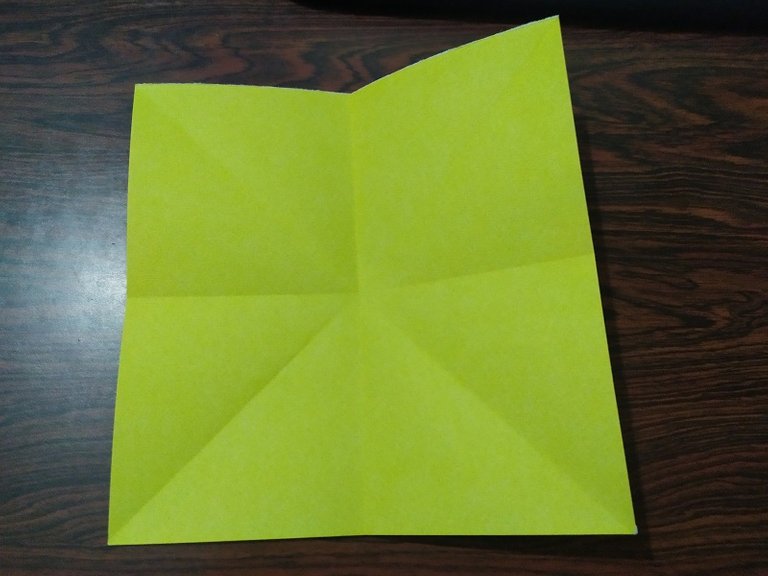
First, we need to make some lines that will serve as a guide for the entire construction of the flower. The paper should be square, so you have to eliminate any extra length. The square is folded from tip to tip and face to face obtaining three lines that intersect in the center.
Primero, necesitamos realizar unas lineas que servirán de guia para toda la contruccion de la flor. El papel debe ser cuadrado, asi que hay que eliminar cualquier longitud extra. Se dobla el cuadrado de punta a punta y de cara a cara obteniendo tres lineas que se cruzan en el centro.
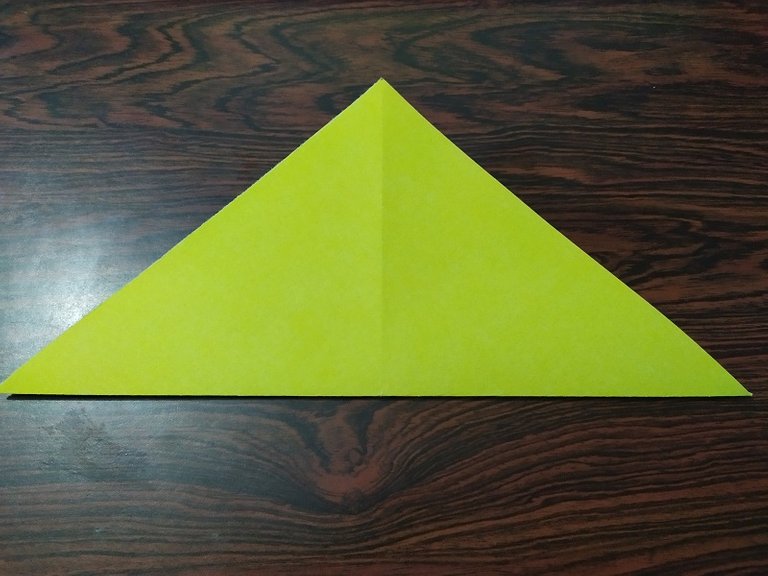
Step 2: Rhombus Phase
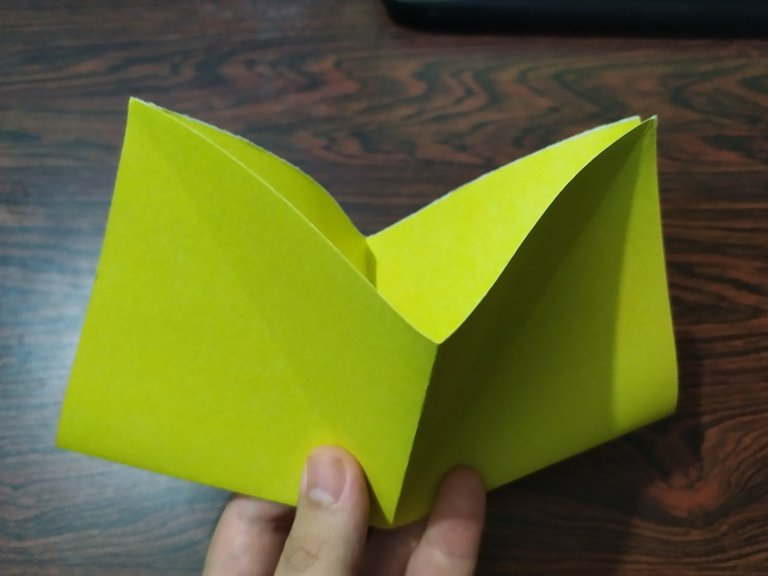
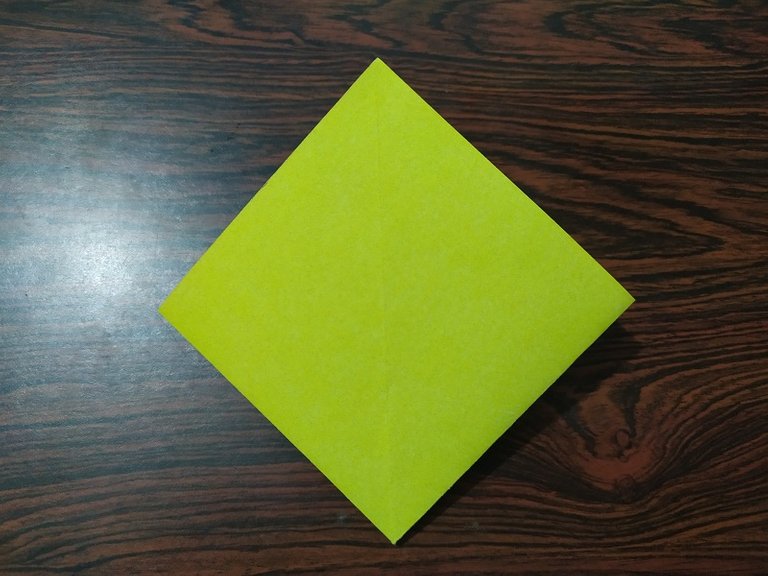

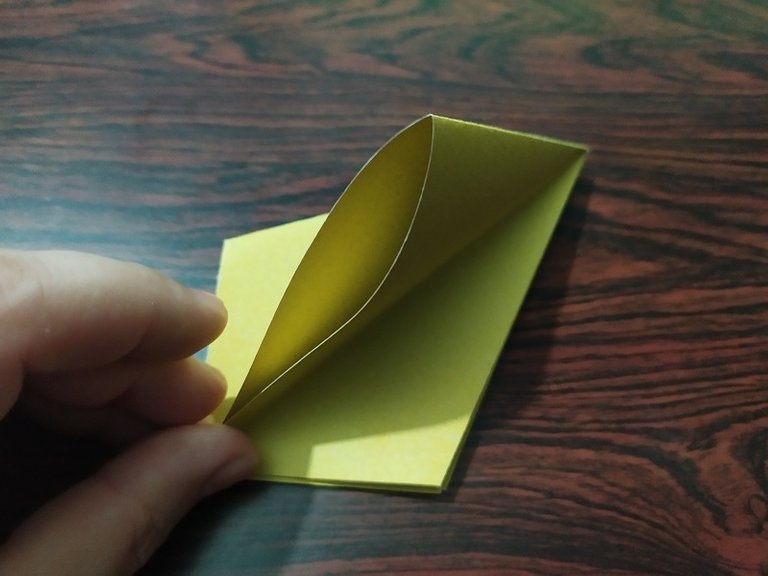
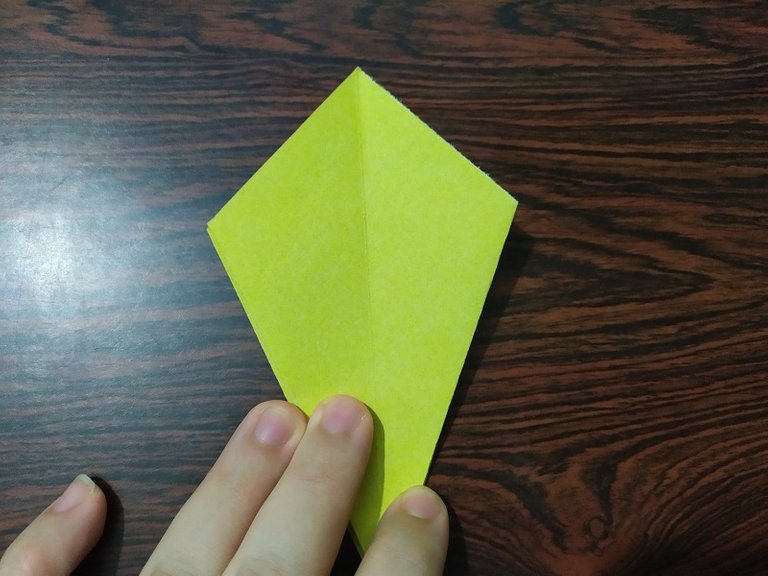
The lines previously marked on the paper are used to fold it into a diamond shape as shown in the first image. Then, we take each flap of the rhombus and fold it inward to obtain a smaller rhombus.
Las lineas marcadas anteriormente en el papel sirven para doblarlo en forma de rombo como se muestra en la primera iamgen. Luego, tomamos cada solapa del rombo y la plegamos hacia adentro para obtener un rombo mas pequeño.
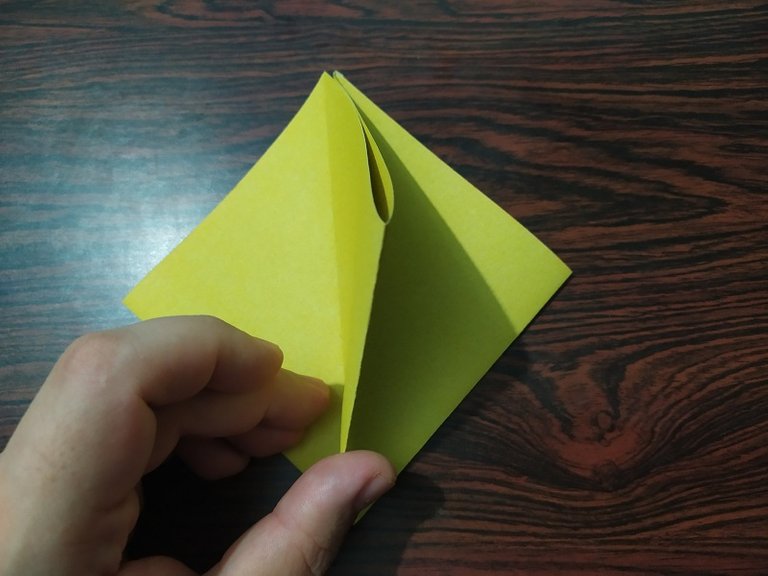
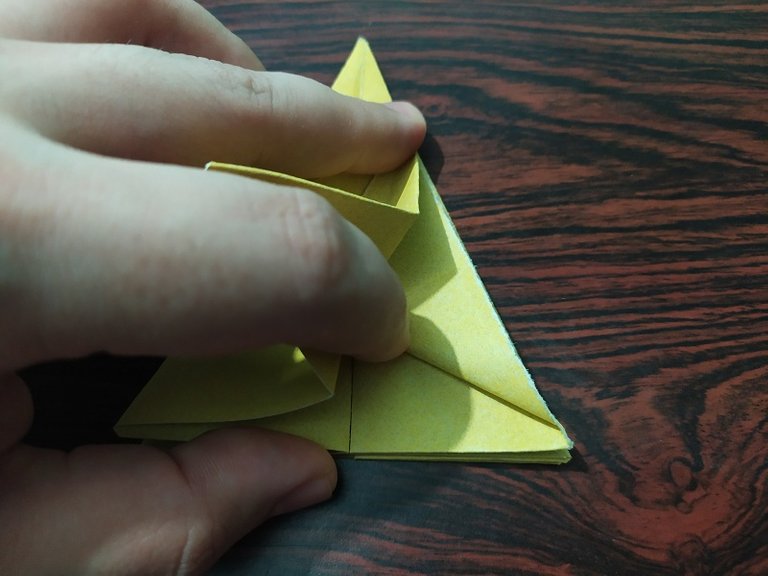
Step 3: Triangles and Folds
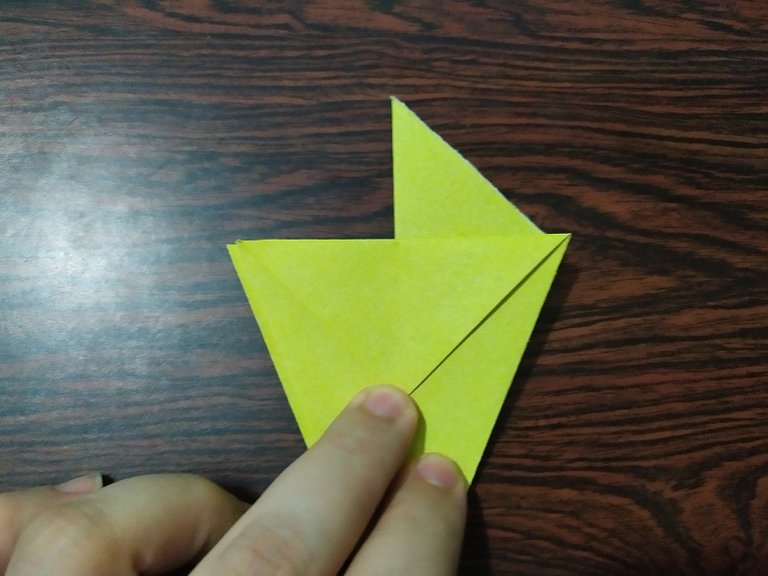

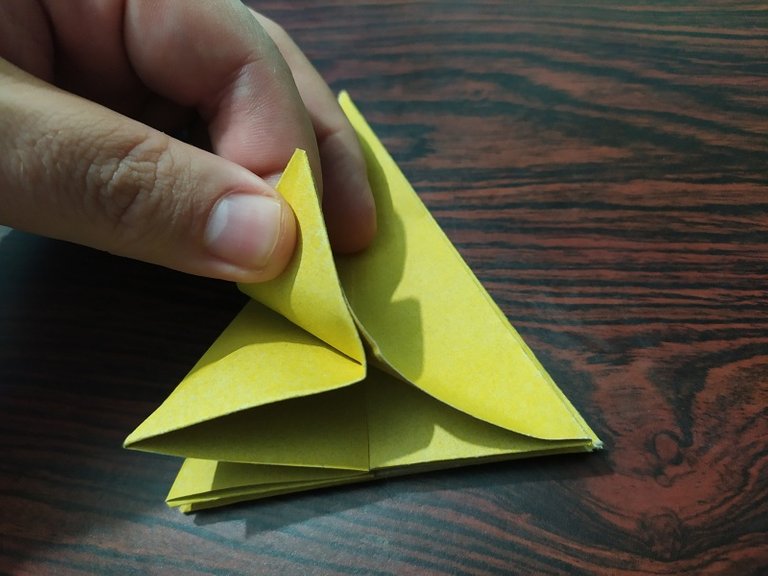
In this step we consider the rhombus as two triangles. We take the smallest triangle of the rhombus on the free faces and bend them down and out.
En este paso consideramos al rombo como dos triangulos. Tomamos el triangulo mas pequeño del rombo en las caras libres y los doblamos hacia abajo y hacia afuera.
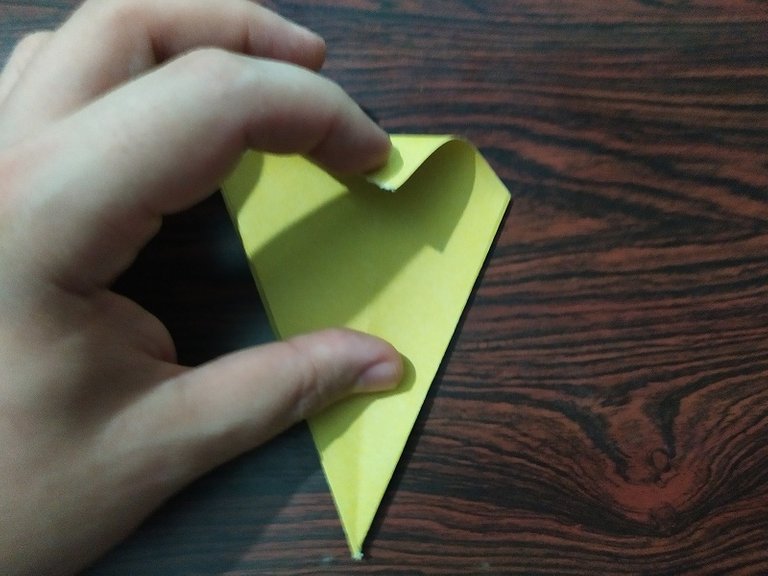
Step 4: Inner Folds
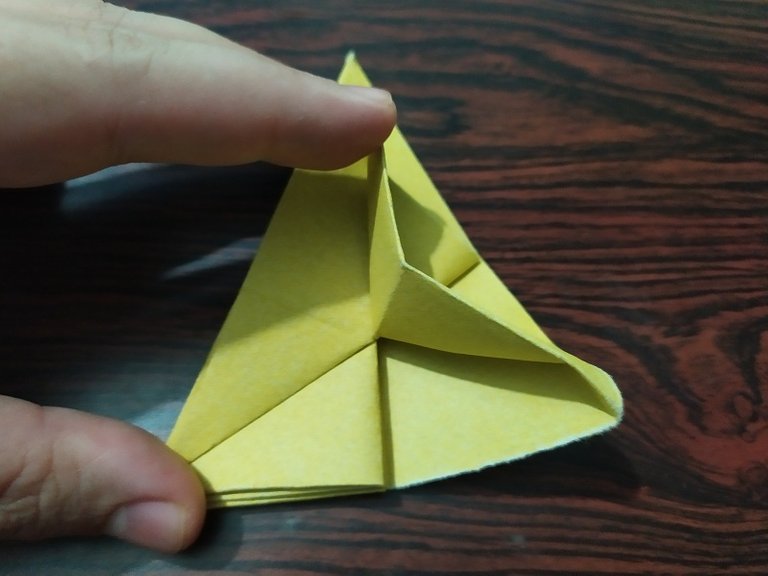
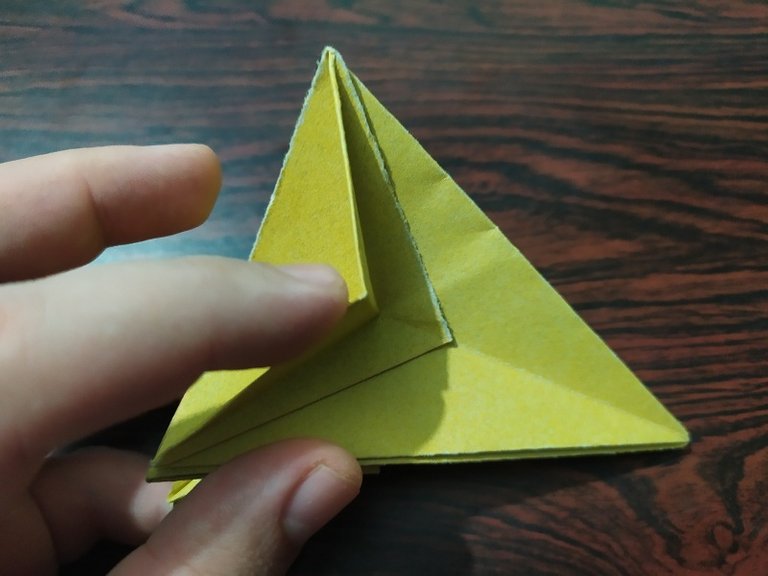

The rhombus, now a triangle, can be opened. In its internal part we need to make some diagonal folds that go from the tip of the triangle towards the center. For this, we must bend a little the small triangle of the previous rhombus. Then we need other diagonal folds but half the distance from the previous ones. We do this again by folding the small triangle outwards. Finally, we take the sharpest point of the larger triangle and bend it halfway towards its base. It does not matter which way you do it as long as it is marked well.
El rombo, ahora un triangulo, puede abrirse. En su parte interna necesitamos hacer unos dobleces diagonales que van desde la punta del triangulo hacia el centro. Para esto, debemos doblar un poco el triangulo pequeño del rombo anterior. Luego necesitamos otros dobleces diagonales pero a mitad de distancia de los anteriores. Esto lo hacemos nuevamente doblando el triangulo pequeño hacia abuera. finalmente, tomamos la punta mas aguda del triangulo mas grande y la doblamos a mitad de distancia hacia su base. No importa hacia que lado lo hagas siempre que se marque bien.
Step 5: Complete marked paper

If you have done everything correctly, when you open the triangle the paper should be seen with all these lines marked. From here, we use the lines to fold and create the base of the flower and its petals. We must create a fold from the inner octagon of this sheet. Then we sink the center to create a kind of glass or container. Finally we fold the edges.
Si has hecho todo correctamente, al abrir el triángulo el papel debe verse con todas estas líneas marcadas. A partir de aquí, utilizamos las líneas para doblar y crear la base de la flor y sus pétalos. Debemos crear un pliegue a partir del octágono interno de esta hoja. Luego hundimos el centro para crear una especie de vaso o recipiente. Finalmente doblamos los bordes.
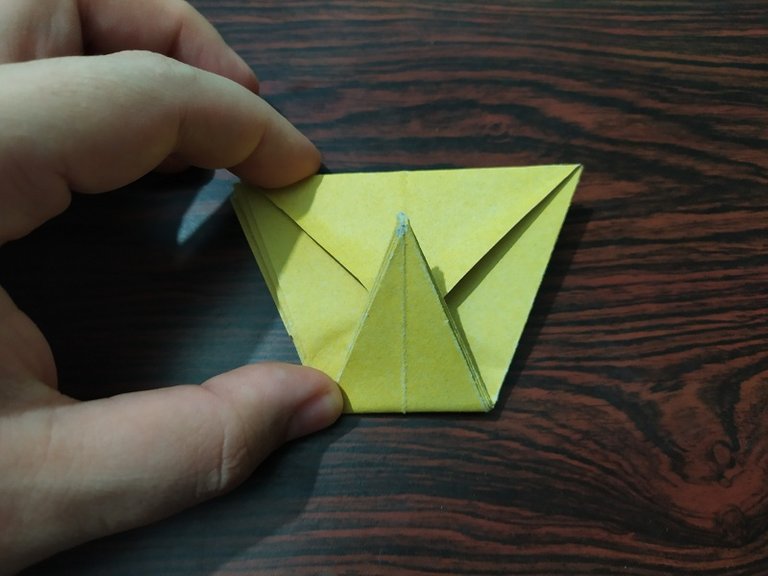
Step 6: Trapezoid
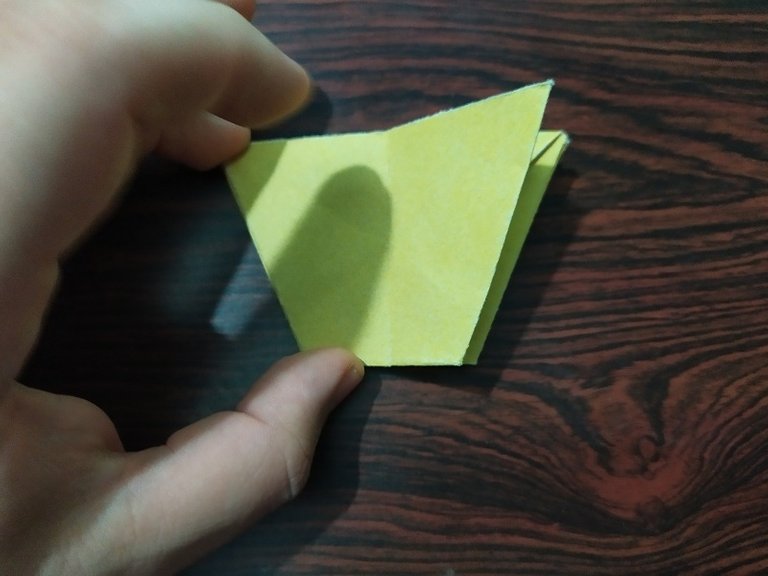
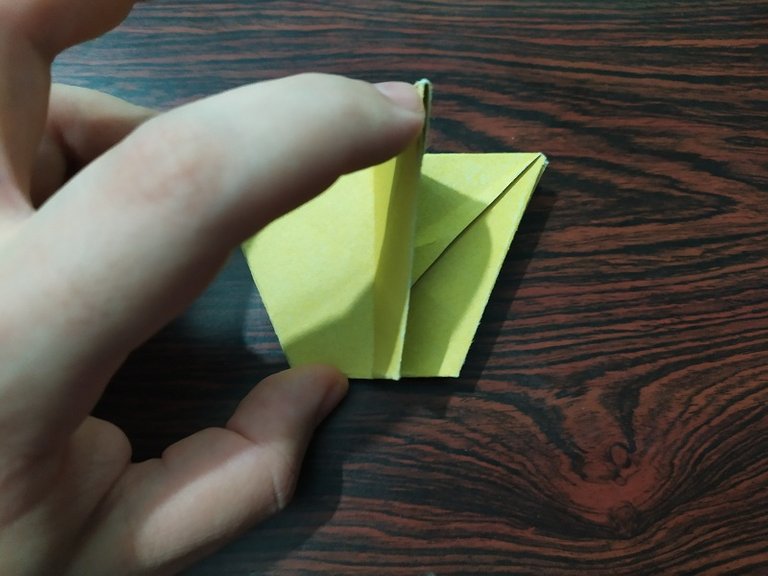
If we crush the container that we have just created we can obtain a trapezoid. We must make some diagonal folds that go from its base to the top and to the center using the free edges as ailerons.
Si aplastamos el recipiente que acabamos de crear podemos obtener un trapecio. Debemos hacer unos dobleces diagonales que van desde su base hasta arriba y al centro usando los bordes libres a modo de alerones.
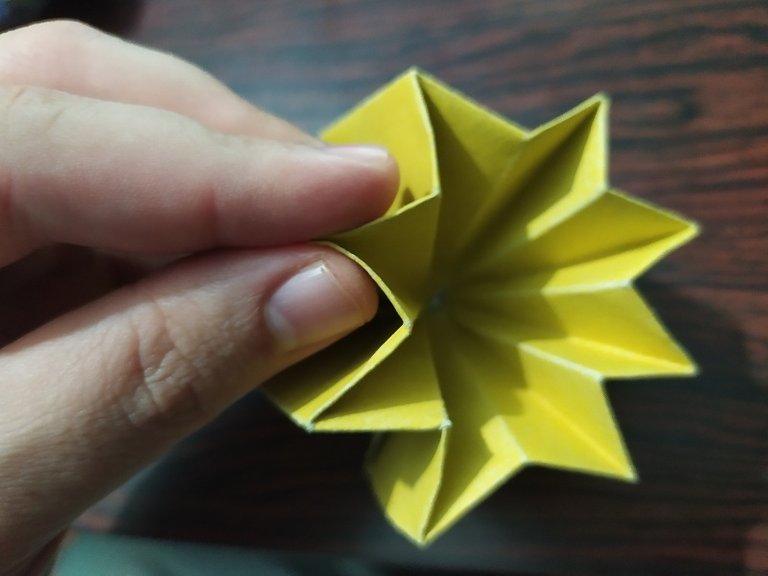
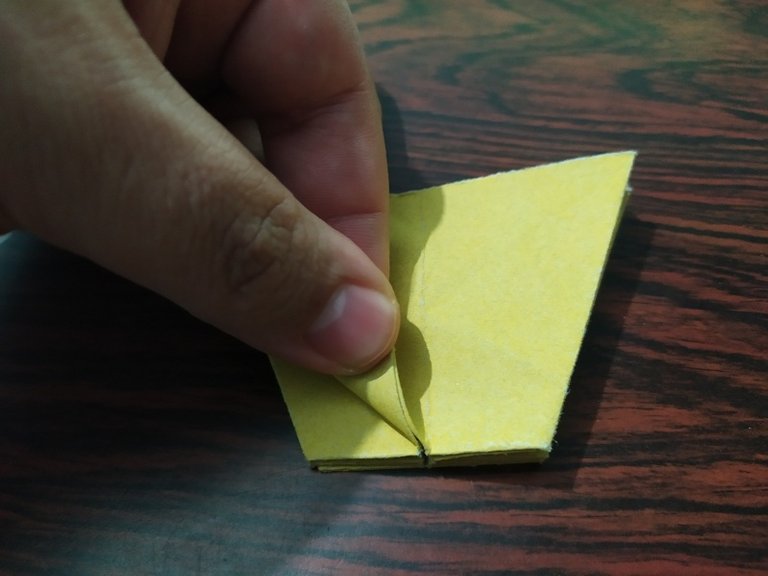
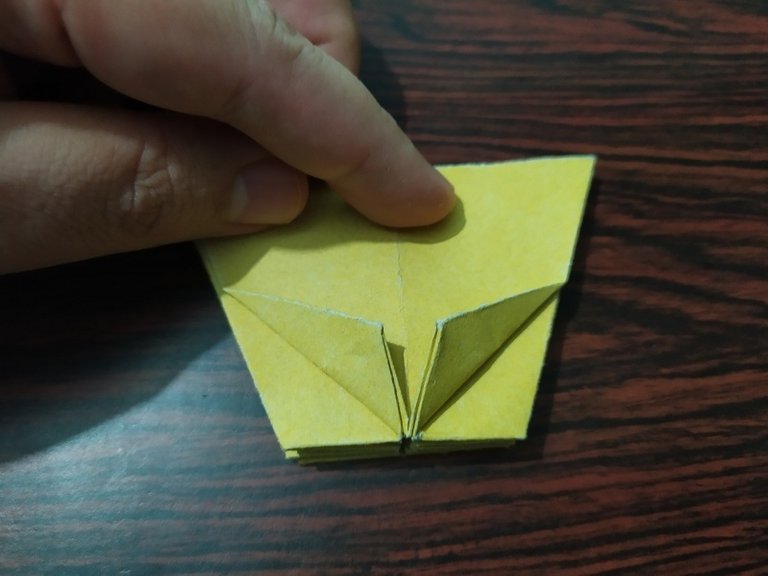
Step 7: Emerging Flower


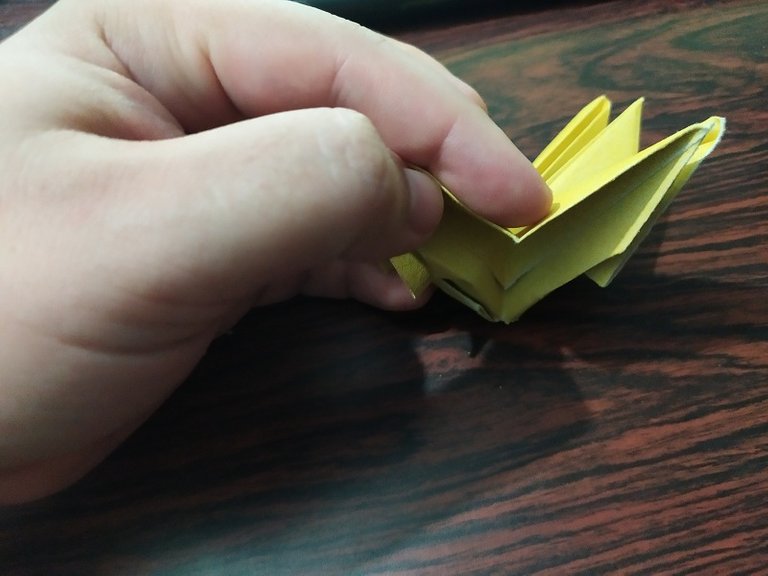
Once we do the previous step, we obtain a pentagonal shape with a different base. it looks like a small inverted dome. Here, we must open the figure from its center outwards and downwards to create the flower petals.
Una vez hacemos el paso previo obtenemos una forma pentagonal con base diferente. se parece a un pequeño domo invertido. Aquí, debemos abrir la figura desde su centro hacia afuera y hacia abajo para crear los pétalos de la flor.
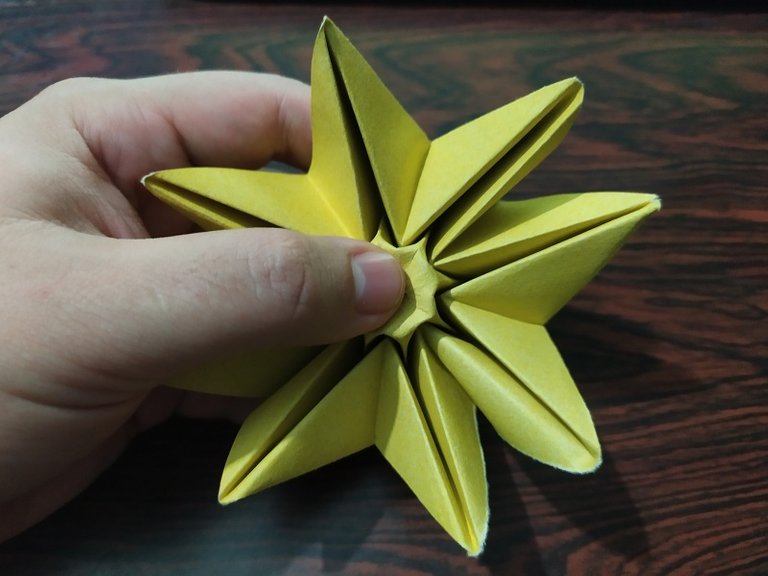
Final Step: Blomming Flower
|
|
|

|
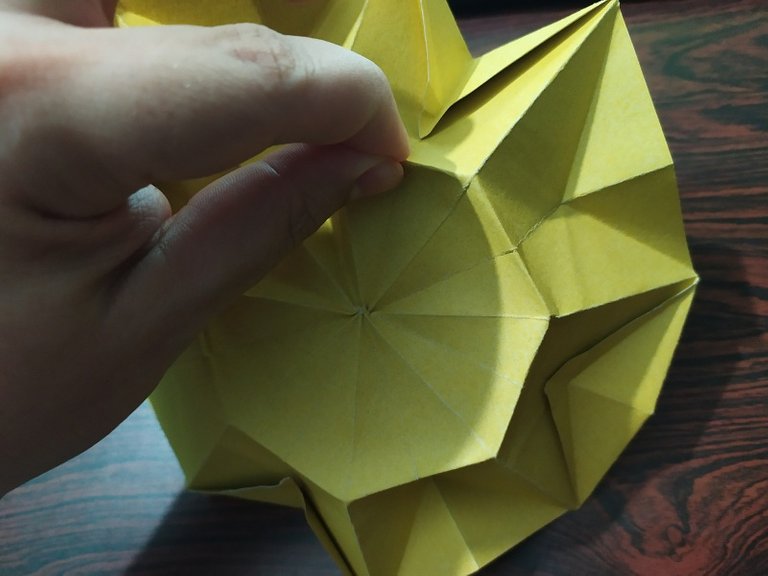
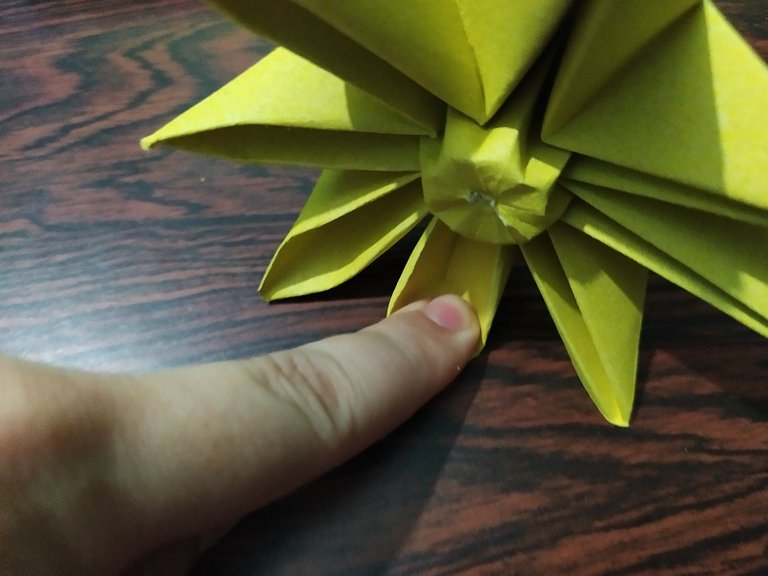
Now, we flatten the center of the flower and we must open the petals of the flower one by one. This part costs a bit, but we must mark the fold of each petal. One way to do this is by gently inserting a finger into the petal and using the table to move the finger in a circular fashion within the petal. This will help it take its shape. After that, we bend the tips of the petals outward and give it a curved shape with the use of a pencil.
Ahora, achatamos el centro de la flor y debemos abrir los petalos de la flor uno a uno. Esta parte cuesta un poco, pero debemos ir marcando el doblez de cada pétalo. Una forma de hacerlo es introduciendo un dedocon cuidado dentro del petalo y usar la mesa para mover el dedo de forma circular dentro del pétalo. Esto ayudará a que tome su forma. Luego de ello doblamos las puntas de los pétalos hacia afuera y le damos forma curva con el uso de un lapiz.
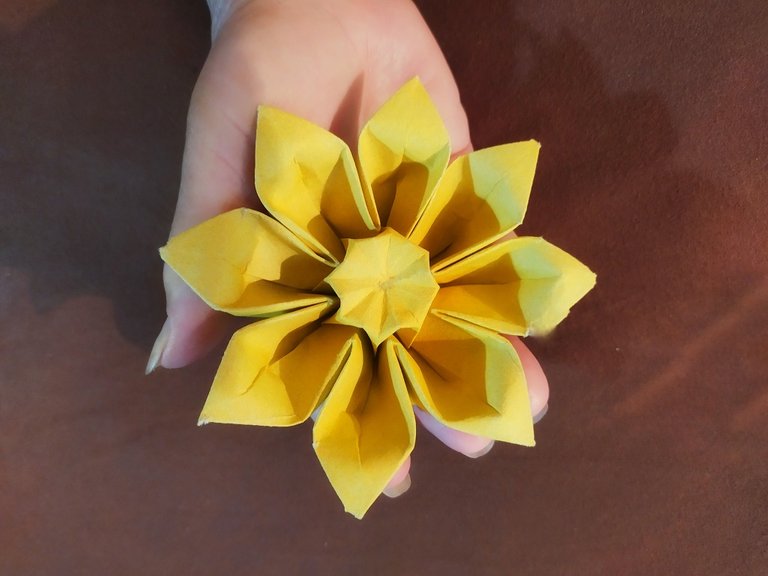
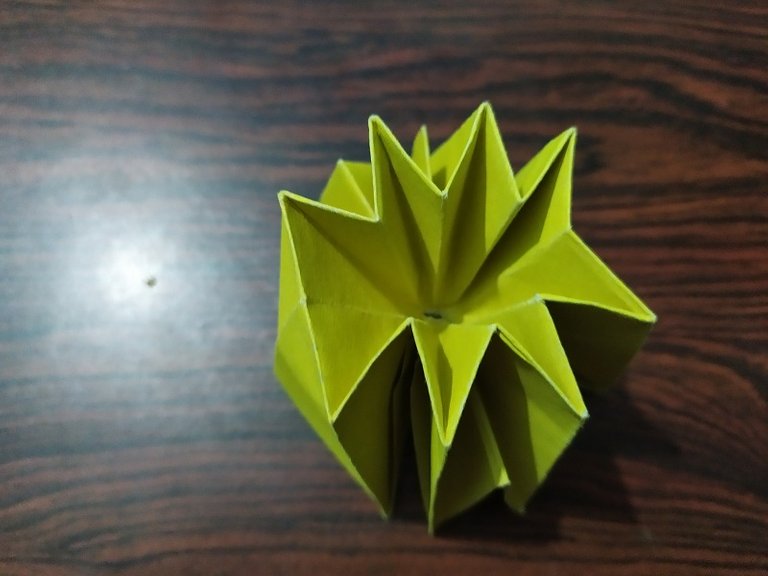
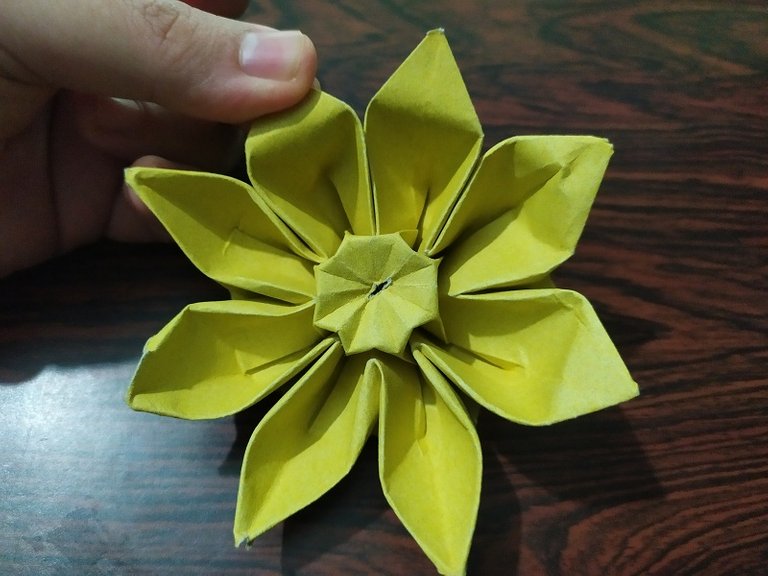
Our eight petal flower is ready. Here it is in the hand of its owner. I made it with yellow paper to the liking of the person who would receive it. It is a pleasure to have these little details with others and cause smiles.
Esta lista nuestra flor de ocho pétalos. Aquí esta en la mano de su poseedora. La hice con papel amarillo a gusto de la persona quien la recibiría. Es un placer tener estos pequeños detalles con otros y causar sonrisas.
@gaeljosser
Redmi Note 7 camera
Gerbera Flower design created by Makoto Yamaguchi
Reference video
https://twitter.com/GaelJosser/status/1419334052142800908
The rewards earned on this comment will go directly to the person sharing the post on Twitter as long as they are registered with @poshtoken. Sign up at https://hiveposh.com.