Crafting 4 Christmas | Part 3 | Christmas Card from cardboard and foam | DIY
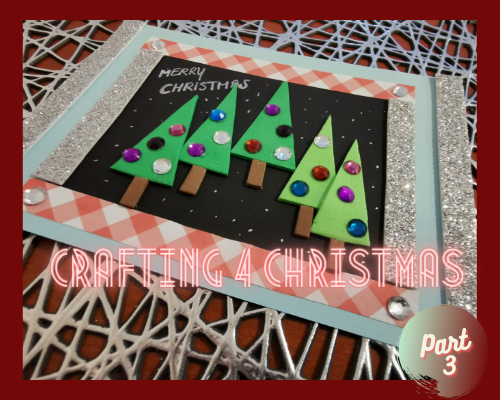
Today we are making a Christmas card in part 3 of Crafting 4 Christmas
This is part three of my series in Crafting 4 Christmas, and today we will be crafting a Christmas card using cardboard and foam mainly. Maybe you have some laying around, otherwise, you can buy it very cheap at different stores probably. This part is one that you can do together with a smaller child as well, just be careful with the rhinestones as these are small parts. From now on, I will link all previous parts of the series below in the posts.
Let's get started!
Here's what you need for this card:
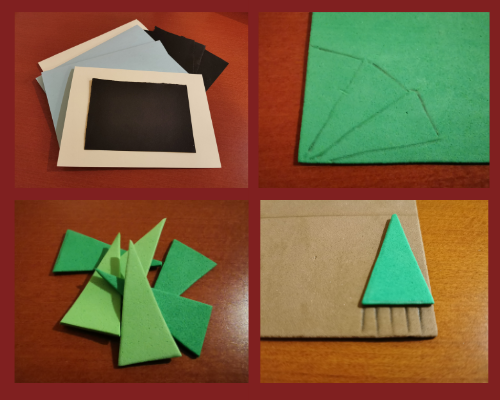
- I used cardboard that you can use for A6 sized cards but cut them in half for
this card. I picked a light blue color myself. - I had some black paper laying around with failed drawings at the back, so I cut
these in smaller pieces to give the card a "window" layer. You can use any
colour you like. - You need just a very small part of foam, I used 2 colors of green for this one.
- An even tinier piece of brown foam (see image) for the tree stems.
- Scissors
- Glue
- Ruler
- Pencil
- Rhinestones
- Glitterfoam
- Two strips of paper with a fun print
- Silver pen
First, cut the edges of the black paper as nicely as possible and glue this on the bigger cardboard you've chosen for the card. Then you use a ruler to create small triangles on the green foam. Measure the size of the background to see how big you want the trees to be and then create a few of each tint of green to your liking. I chose to make 5 trees. Then you create tree stems with the brown foam, see the image in the collage above, it's very easy! Glue these on the paper in a playful way.
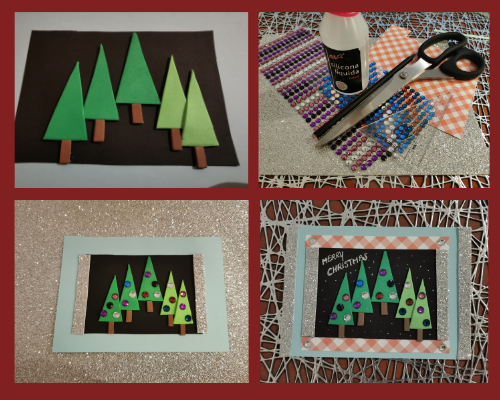
Now you can add the rhinestones as Christmas decorations in the trees. Measure the sides of the inner "window" and cut two strips of glitter foam to glue these on the sides as shown in picture three of the image above. Now you can add the two stripes of paper with fun print on the top and bottom of the window. Add a few rhinestones in the 4 corners, see image 4. Measure the exact size of the left/right part of the card and then cut the glitter foam stripes according to this size. If they fit the card, glue them on the sides as you can see in the last image.
Final touch: write "Merry Christmas" in the card and if you like you can add some "snow" using your silver pen, or real glitters.
And you're done!
One last picture of the end result, shown below:
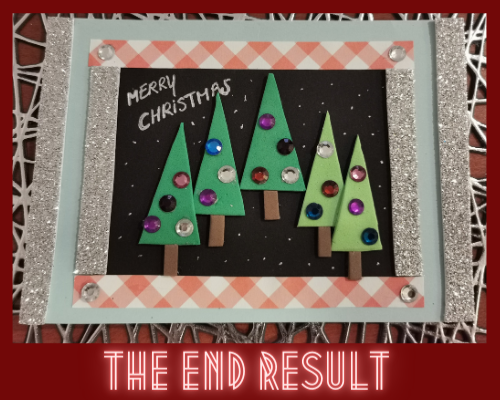
As you can see, you can have a nice custom made Christmas card with very few needed items to create it. You only need small parts of the cardboard and foam, therefore you could even use waste after you've crafted something else. I always save these parts in a separate box so that I don't have to cut up new bigger paper/cardboard/foam but use the waste first.
I hope you enjoyed this tutorial of a DIY Christmas card, and see you in the next part. Of course, I'd love to see some images of the crafts you've created, please leave a comment!
All Crafting 4 Christmas posts
Part 1: Christmas tree from cardboard
Part 2: Felt Christmas tree ornament
Thanks @qurator and @ackhoo :)
https://twitter.com/makehivethrive/status/1318463642787074049
I really like the trees and the cut out process must have been real fun. I guess you are in the christmas mood already, hehe. Nice work
Thanks, well we haven't had much Christmas decoration in the past years, due to moving places or simply not having the space for it in our previous home where we spent a few Christmasses. Now that our daughter isn't a baby anymore, we wanted to make it nice for her. I've learned not to delay things to last minute, so starting early with DIY crafts decoration but also cards so that she can give them at school for example. This way the house will look nice even if we have a bit of setback in the next months.
Thats brilliant. Planning ahead always solves a lot of unforseen challenges. I really like your stuff.
Thank you for sharing this amazing post on HIVE!
Your content got selected by our fellow curator @stevenson7 & you just received a little thank you via an upvote from our non-profit curation initiative!
You will be featured in one of our recurring curation compilations and on our pinterest boards! Both are aiming to offer you a stage to widen your audience within and outside of the DIY scene of hive.
Join the official DIYHub community on HIVE and show us more of your amazing work and feel free to connect with us and other DIYers via our discord server: https://discord.io/diyhub!
If you want to support our goal to motivate other DIY/art/music/homesteading/... creators just delegate to us and earn 100% of your curation rewards!
Stay creative & hive on!
Thanks @diyhub (and @stevenson7 :) )