How to make a Christmas Tree with the Kirigami technique - Step by step /// Como hacer Árbol de Navidad con la técnica Kirigami –Paso a paso
Saludos amigos de hivers
Greetings friends of hivers
Today I will share on my blog, how to make a Christmas tree with the Kirigami technique; This is a paper technique that is so named because the paper is cut. We know about Christmas and this that I will share with all of you can be used as decorations to hang on our Christmas tree.

Aquí les muestro lo que necesitas y el paso a paso.
Here I show you what you need and the step by step
Materiales
- Cartulina de Color
- Tijera
materials
Color Cardstock
Scissors
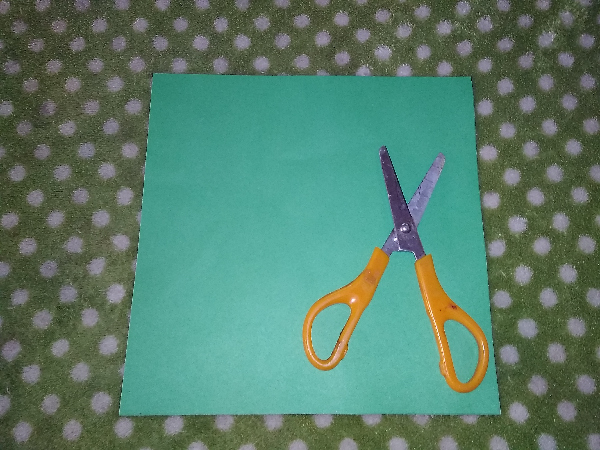
- Tomamos una cartulina de 18 cm, *18cm
We take a 18cm cardboard, * 18cm
- Luego comenzamos a realizar los dobles en X
Then we start to do the doubles in X
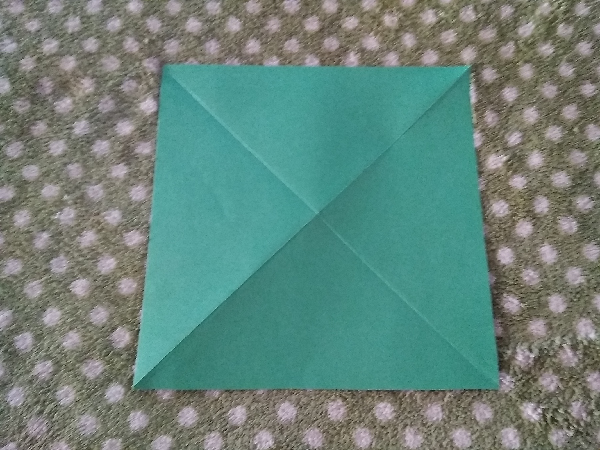
- Después de manera horizontal y vertical, quedando la cartulina con los dobles principales de la siguiente manera
Then horizontally and vertically, leaving the cardboard with the main doubles as follows
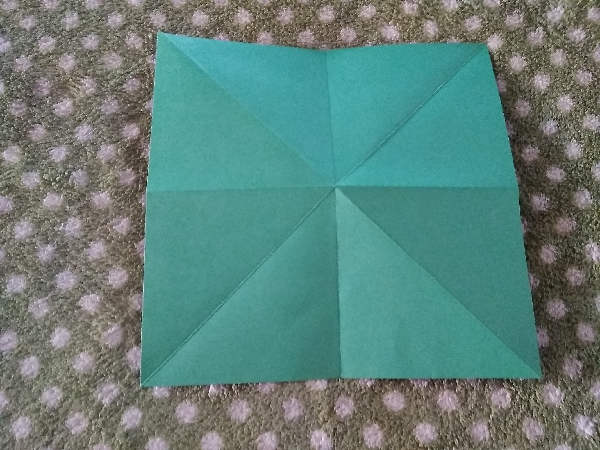
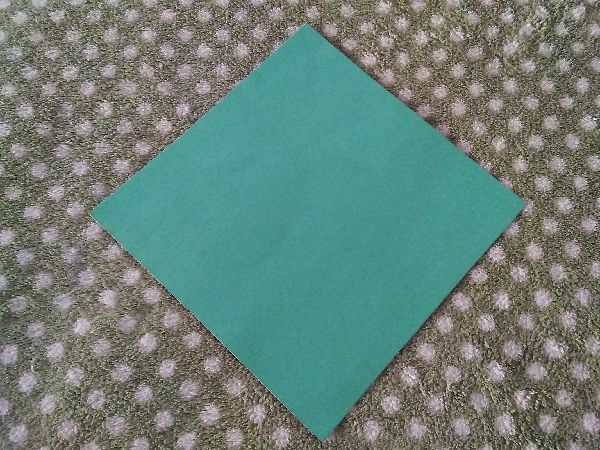
- Colocamos la cartulina en forma de rombo
We place the cardboard in the shape of a rhombus
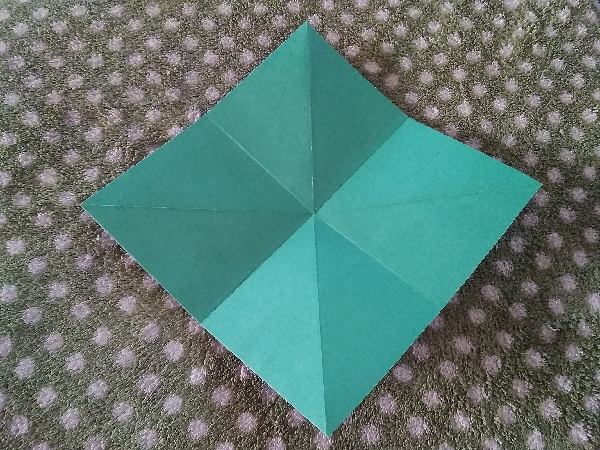
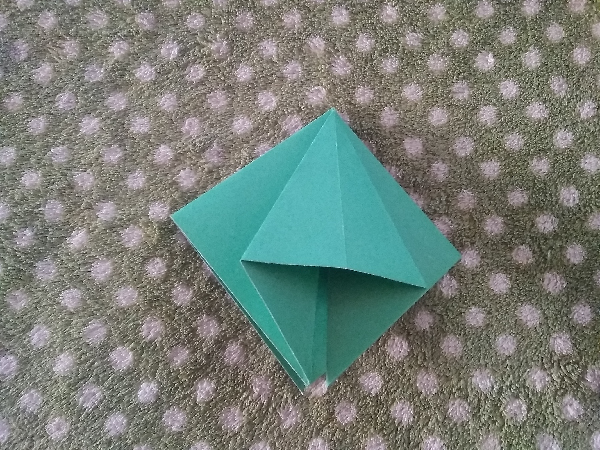
- Tomamos las dos puntas como muestra la fotografía y la unimos con la punta de abajo, quedando de la siguiente manera.
We take the two ends as shown in the photograph and we join it with the bottom end, remaining as follows.

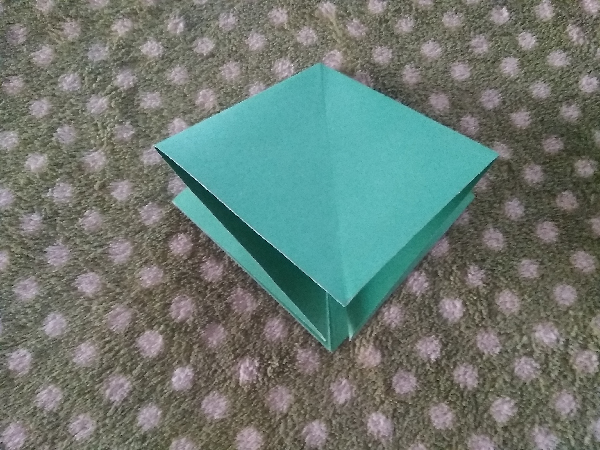
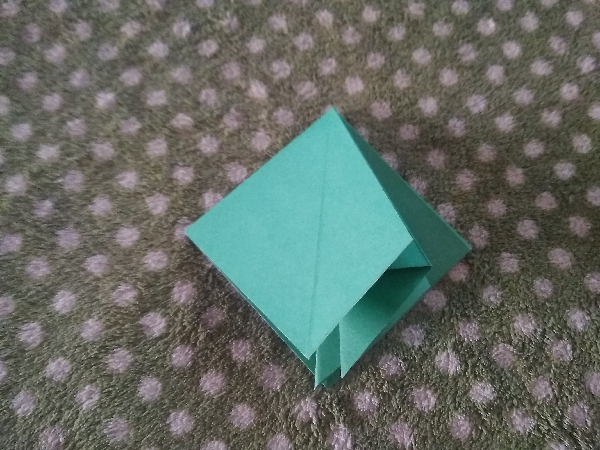
- Ahora levantamos una de las aristas y luego procedemos a extender la arista quedando así. Este procedimiento lo hacemos con las aristas del lado de arriba
Now we lift one of the edges and then we proceed to extend the edge thus remaining. We do this procedure with the edges of the top side
- Ahora volteamos, y realizamos el mismo procedimiento anterior.
Now we turn, and do the same procedure as above.
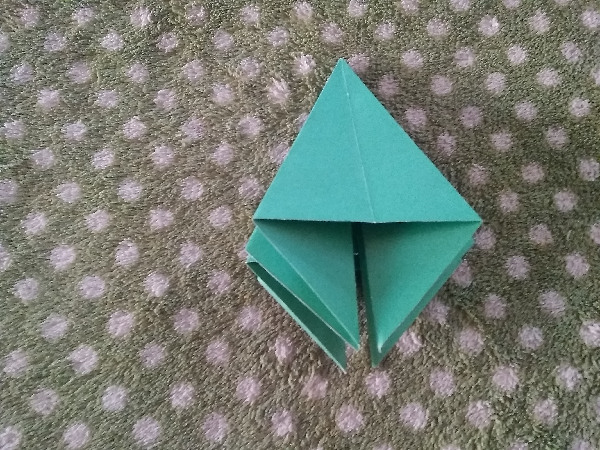
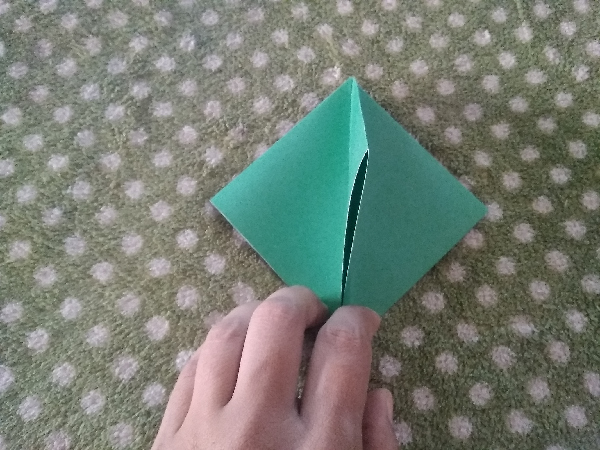
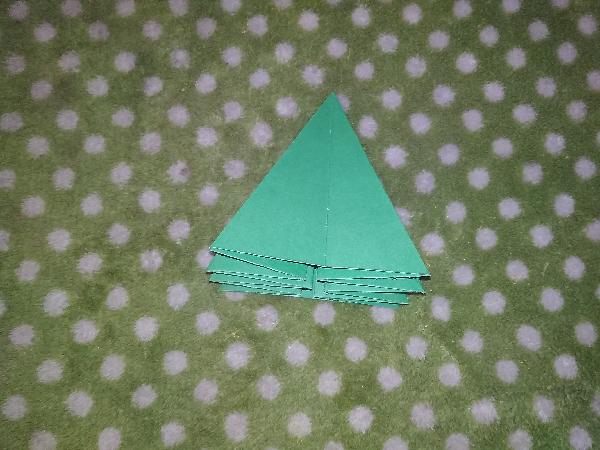
- Ahora la parte de abajo la cortamos; quedando así
Now we cut the bottom part; being that way
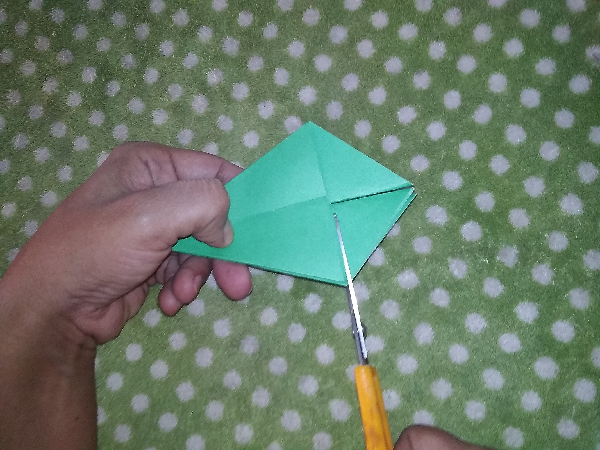
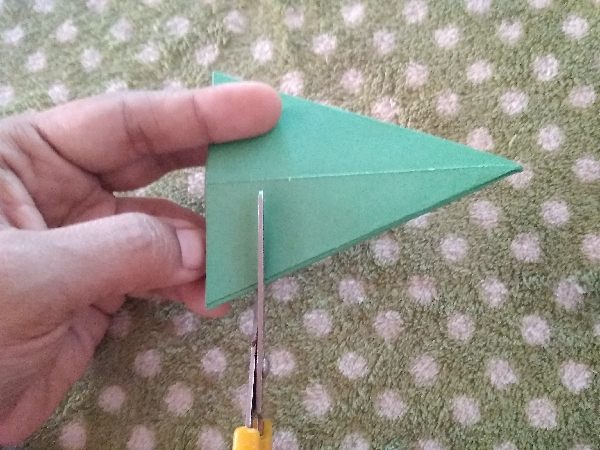
- Posteriormente, realizamos aberturas con la tijera en ambos lados del arbolito como lo muestra la fotografía.
Subsequently, we make openings with the scissors on both sides of the tree as shown in the photograph.

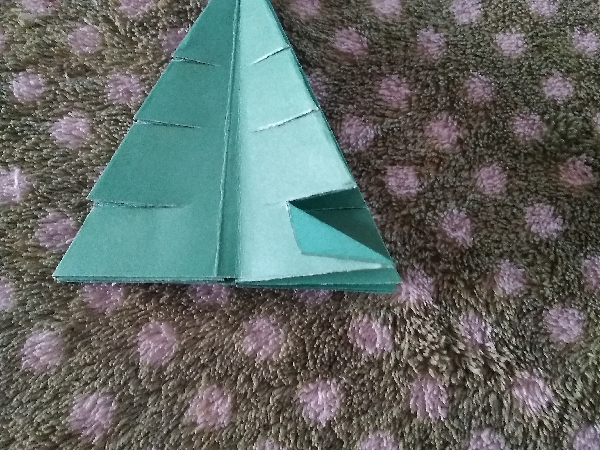
- Después abrimos y cada arista y así nos va quedando.
Then we open and each edge and that's how it remains.
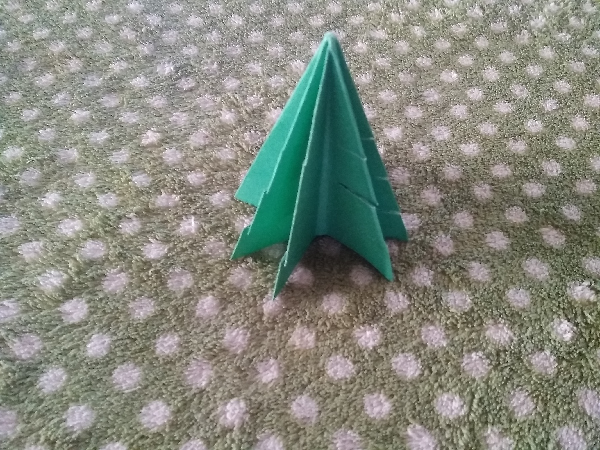
- Ahora debemos doblar cada punta como lo ven, este procedimiento lo realizamos en cada una de las puntas del arbolito.
Now we must bend each point as you see it, this procedure is carried out in each of the points of the tree.
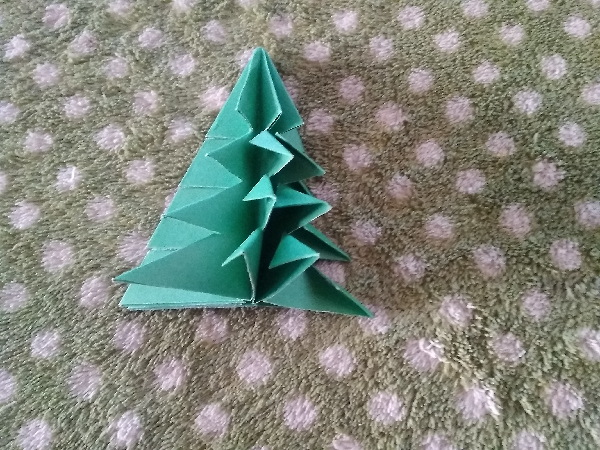
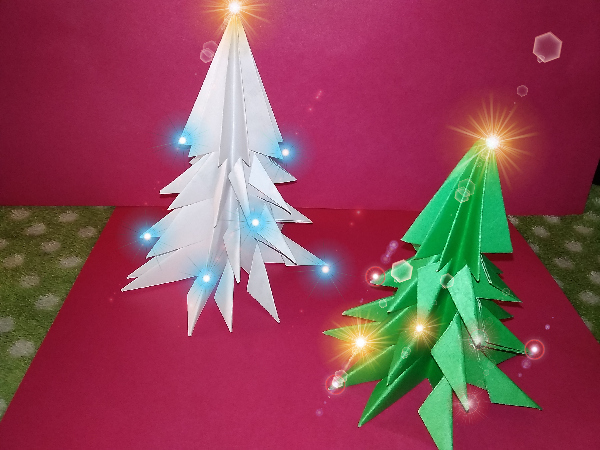
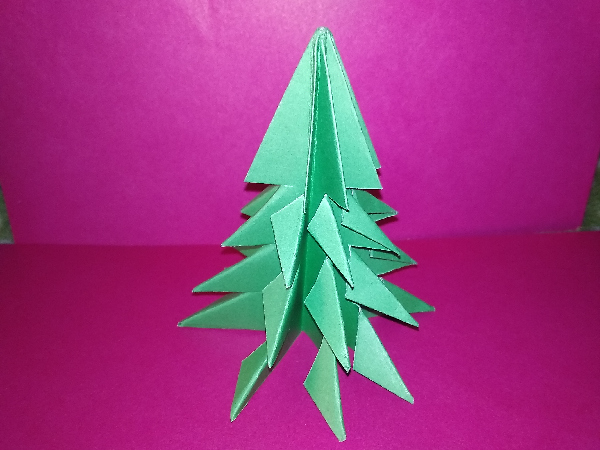
- De esta manera obtenemos el árbol de navidad, con la técnica del Kirigami. Realice además uno de color blanco.
In this way we obtain the Christmas tree, with the Kirigami technique. Also make a white one.
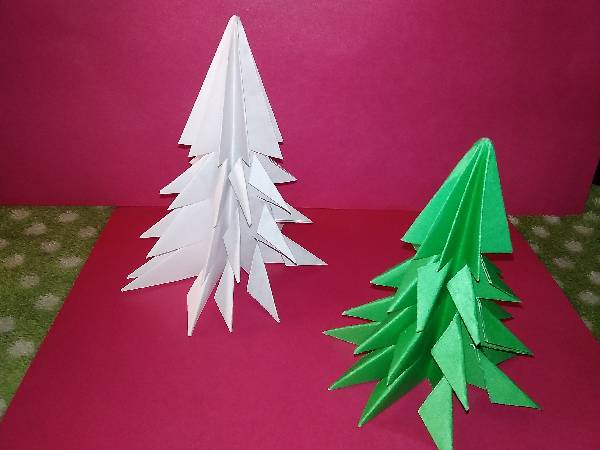
Con el programa GIMP 2.08, coloque destellos árbol , que simulan las luces de navidad.
With the GIMP 2.08 program, place tree sparkles, which simulate Christmas lights.
Espero les guste y sea de utilidad
Fotografías tomadas desde mi teléfono RedmiGO
Gracias por Leerme
I hope you like it and it is useful
Photographs taken from my RedmiGO phone
Thanks for reading me
https://twitter.com/lisbeth6jas/status/1320500007833948160
Congratulations @lisbethseijas! You have completed the following achievement on the Hive blockchain and have been rewarded with new badge(s) :
You can view your badges on your board and compare yourself to others in the Ranking
If you no longer want to receive notifications, reply to this comment with the word
STOPTo support your work, I also upvoted your post!
Do not miss the last post from @hivebuzz:
Me gusta esta idea se ven muy lindos.