[ESP-ENG] Un toque delicado sin complicaciones | A delicate touch without complications
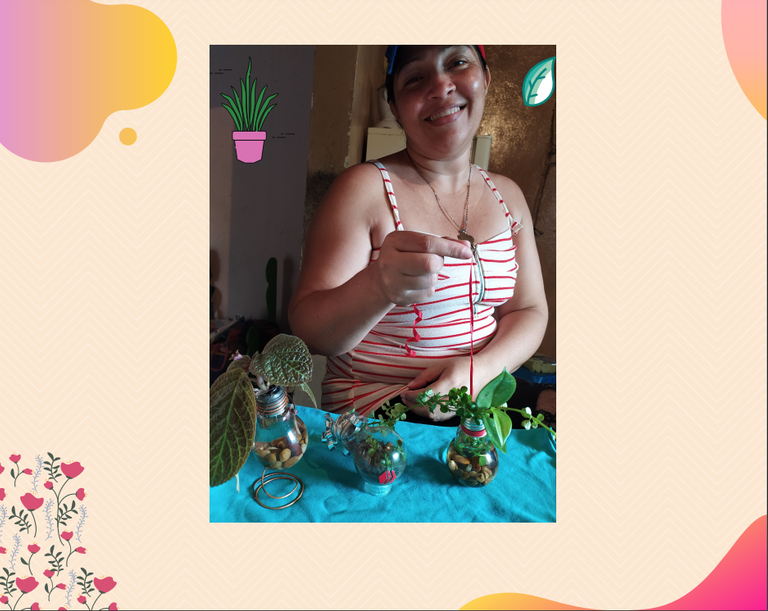
Greetings beautiful people! I want to share with you something easy and very simple. You can involve the little ones of the house so that they can learn to reuse materials or objects that we would normally throw away.
Se trata de unos pequeños maceteros que aportan un toque de belleza y delicadeza a tu hogar, hechos con bombillas dañanas. A continuación te dejaré los materiales a utilizar y el paso a paso.
These are small flower pots that bring a touch of beauty and delicacy to your home, made with damaged light bulbs. Here are the materials to use and the step by step.

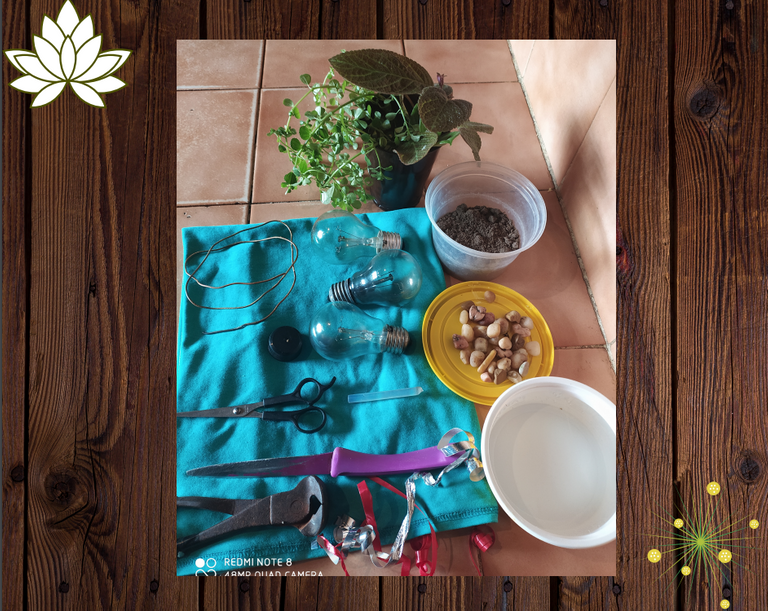
Materiales :...................................................................Materials:
Bombillas dañadas..................................... ..... Damaged light bulbs.
Alambre o cobre grueso................................... Thick wire or copper.
Tijera.................................................................. Scissors.
Silicón o pega.................................................... Silicone or glue.
Alicate o piqueta................................................ Pliers.
Tapita de refresco.............................................. Soda cap.
Cinta.................................................................... Tape.
Cuchillo............................................................... Knife.
Agua.................................................................... Water.
Tierra................................................................... Land.
Piedras pequeñas.............................................. Small stones.
Plantas............................................................... Plants.
Paso a Paso:
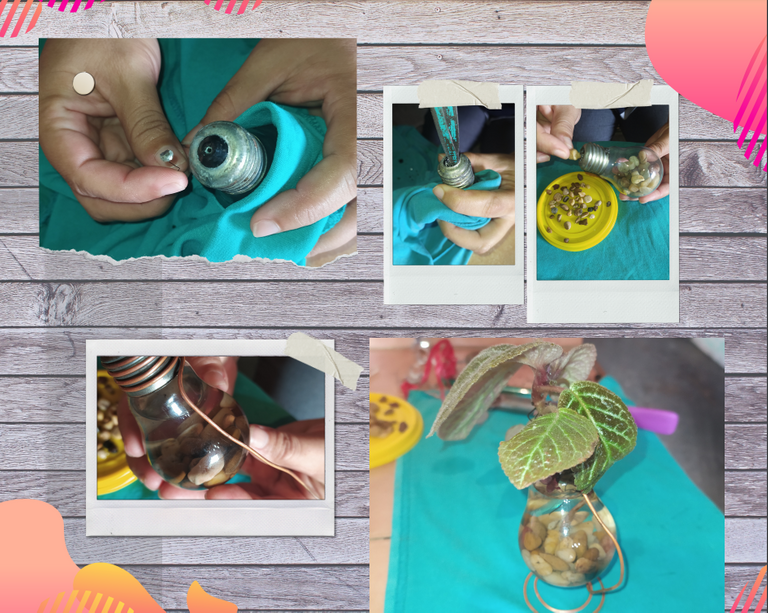
Con el cuchillo se extrae el metal pequeño que esta sobre una base oscura de la bombilla.
La base oscura debemos romperla con cuidado de no cortarnos ni tampoco dañar la bombilla, tomamos el cuchillo que tenga punta fina y en el orificio que quedó le damos con presión de un lado hacia el otro hasta que ceda. Retiramos los residuos, ahora con alguna herramienta de punta trataremos de romper la partecita interna y se botan los restos.
Procedemos a decorar las bombillas a nuestros gusto. Se introducen las piedritas poco a poco hasta llenar poco menos de la mitad de la bombilla, luego aplicamos el agua.
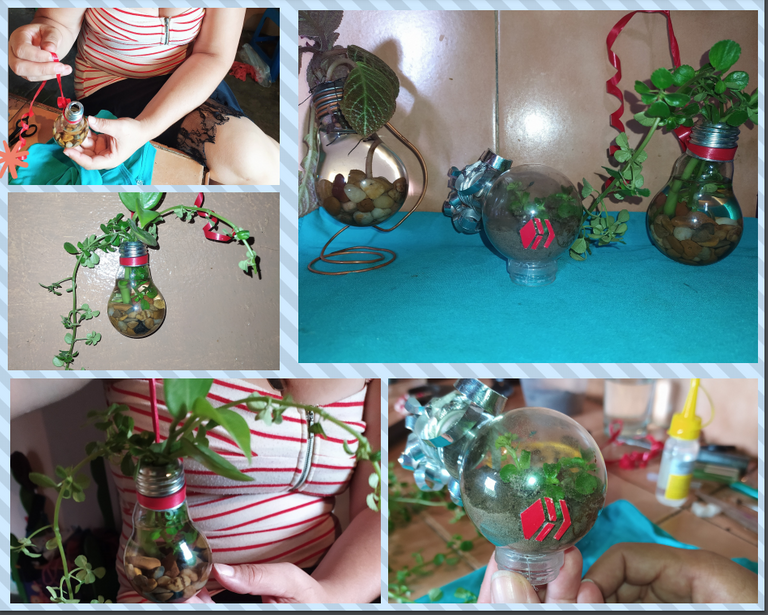
El alambre se enrosca en la cabeza de la bombilla y desde poco a poco le vas dando forma a la base que sostendrá el mini macetero. Si lo deseas colgante, simplemente atas la cinta en sustitución del alambre o cobre.
Introduce tu plantita. Te recomiendo plantas que requieran de poca luz solar.
Para el macetero con tierra: Con la mano vertemos con calma tierra dentro de la bombilla, no demos llenarla ya que debe mirarse como un siembra miniatura y la bombilla debe quedar inclinada.
Pegamos con silicon la tapa de refresco como base de la bombilla. Tomamos las plantitas y con una palillo de madera las vamos internando con delicadeza, una vez dentro aplicamos una mínima presión en su tallo para que la tierra lo cubra. Decoramos.
Recuerda siempre cambiarles el agua y humedecer la tierra de las otras plantitas.
Step by Step:
- With the knife, remove the small metal that is on a dark base of the bulb.
- We must break the dark base with care not to cut or damage the bulb, we take the knife with a fine tip and in the hole that was left we give pressure from one side to the other until it yields. We remove the residues, now with a pointed tool we will try to break the internal part and throw away the remains.
- We proceed to decorate the bulbs as we like. The stones are introduced little by little until they fill a little less than half of the bulb, then we apply the water.
- The wire is threaded into the head of the bulb and from little by little you shape the base that will hold the mini planter. If you want it hanging, simply tie the ribbon in place of the wire or copper.
- Introduce your plant. I recommend plants that require little sunlight.
- For the pot with land: With the hand we pour calmly land inside the bulb, we should not fill it since it should look like a miniature sowing and the bulb should be inclined.
- We glue with silicone the soda lid as the base of the bulb. We take the plants and with a wooden stick we delicately insert them, once inside we apply a minimum pressure on its stem so that the soil covers it. Decorate.
- Remember to always change the water and moisten the soil of the other plants.
Esto fué todo por hoy gente bella, espero les guste y lo realicen en familia. Nos leemos Pronto.
That's all for today beautiful people, I hope you like it and make it as a family. See you soon.