HERMOSA FLOR DE TELA [ESP/ENG] BEAUTIFUL FABRIC FLOWER
Hola amigos de esta creativa comunidad.
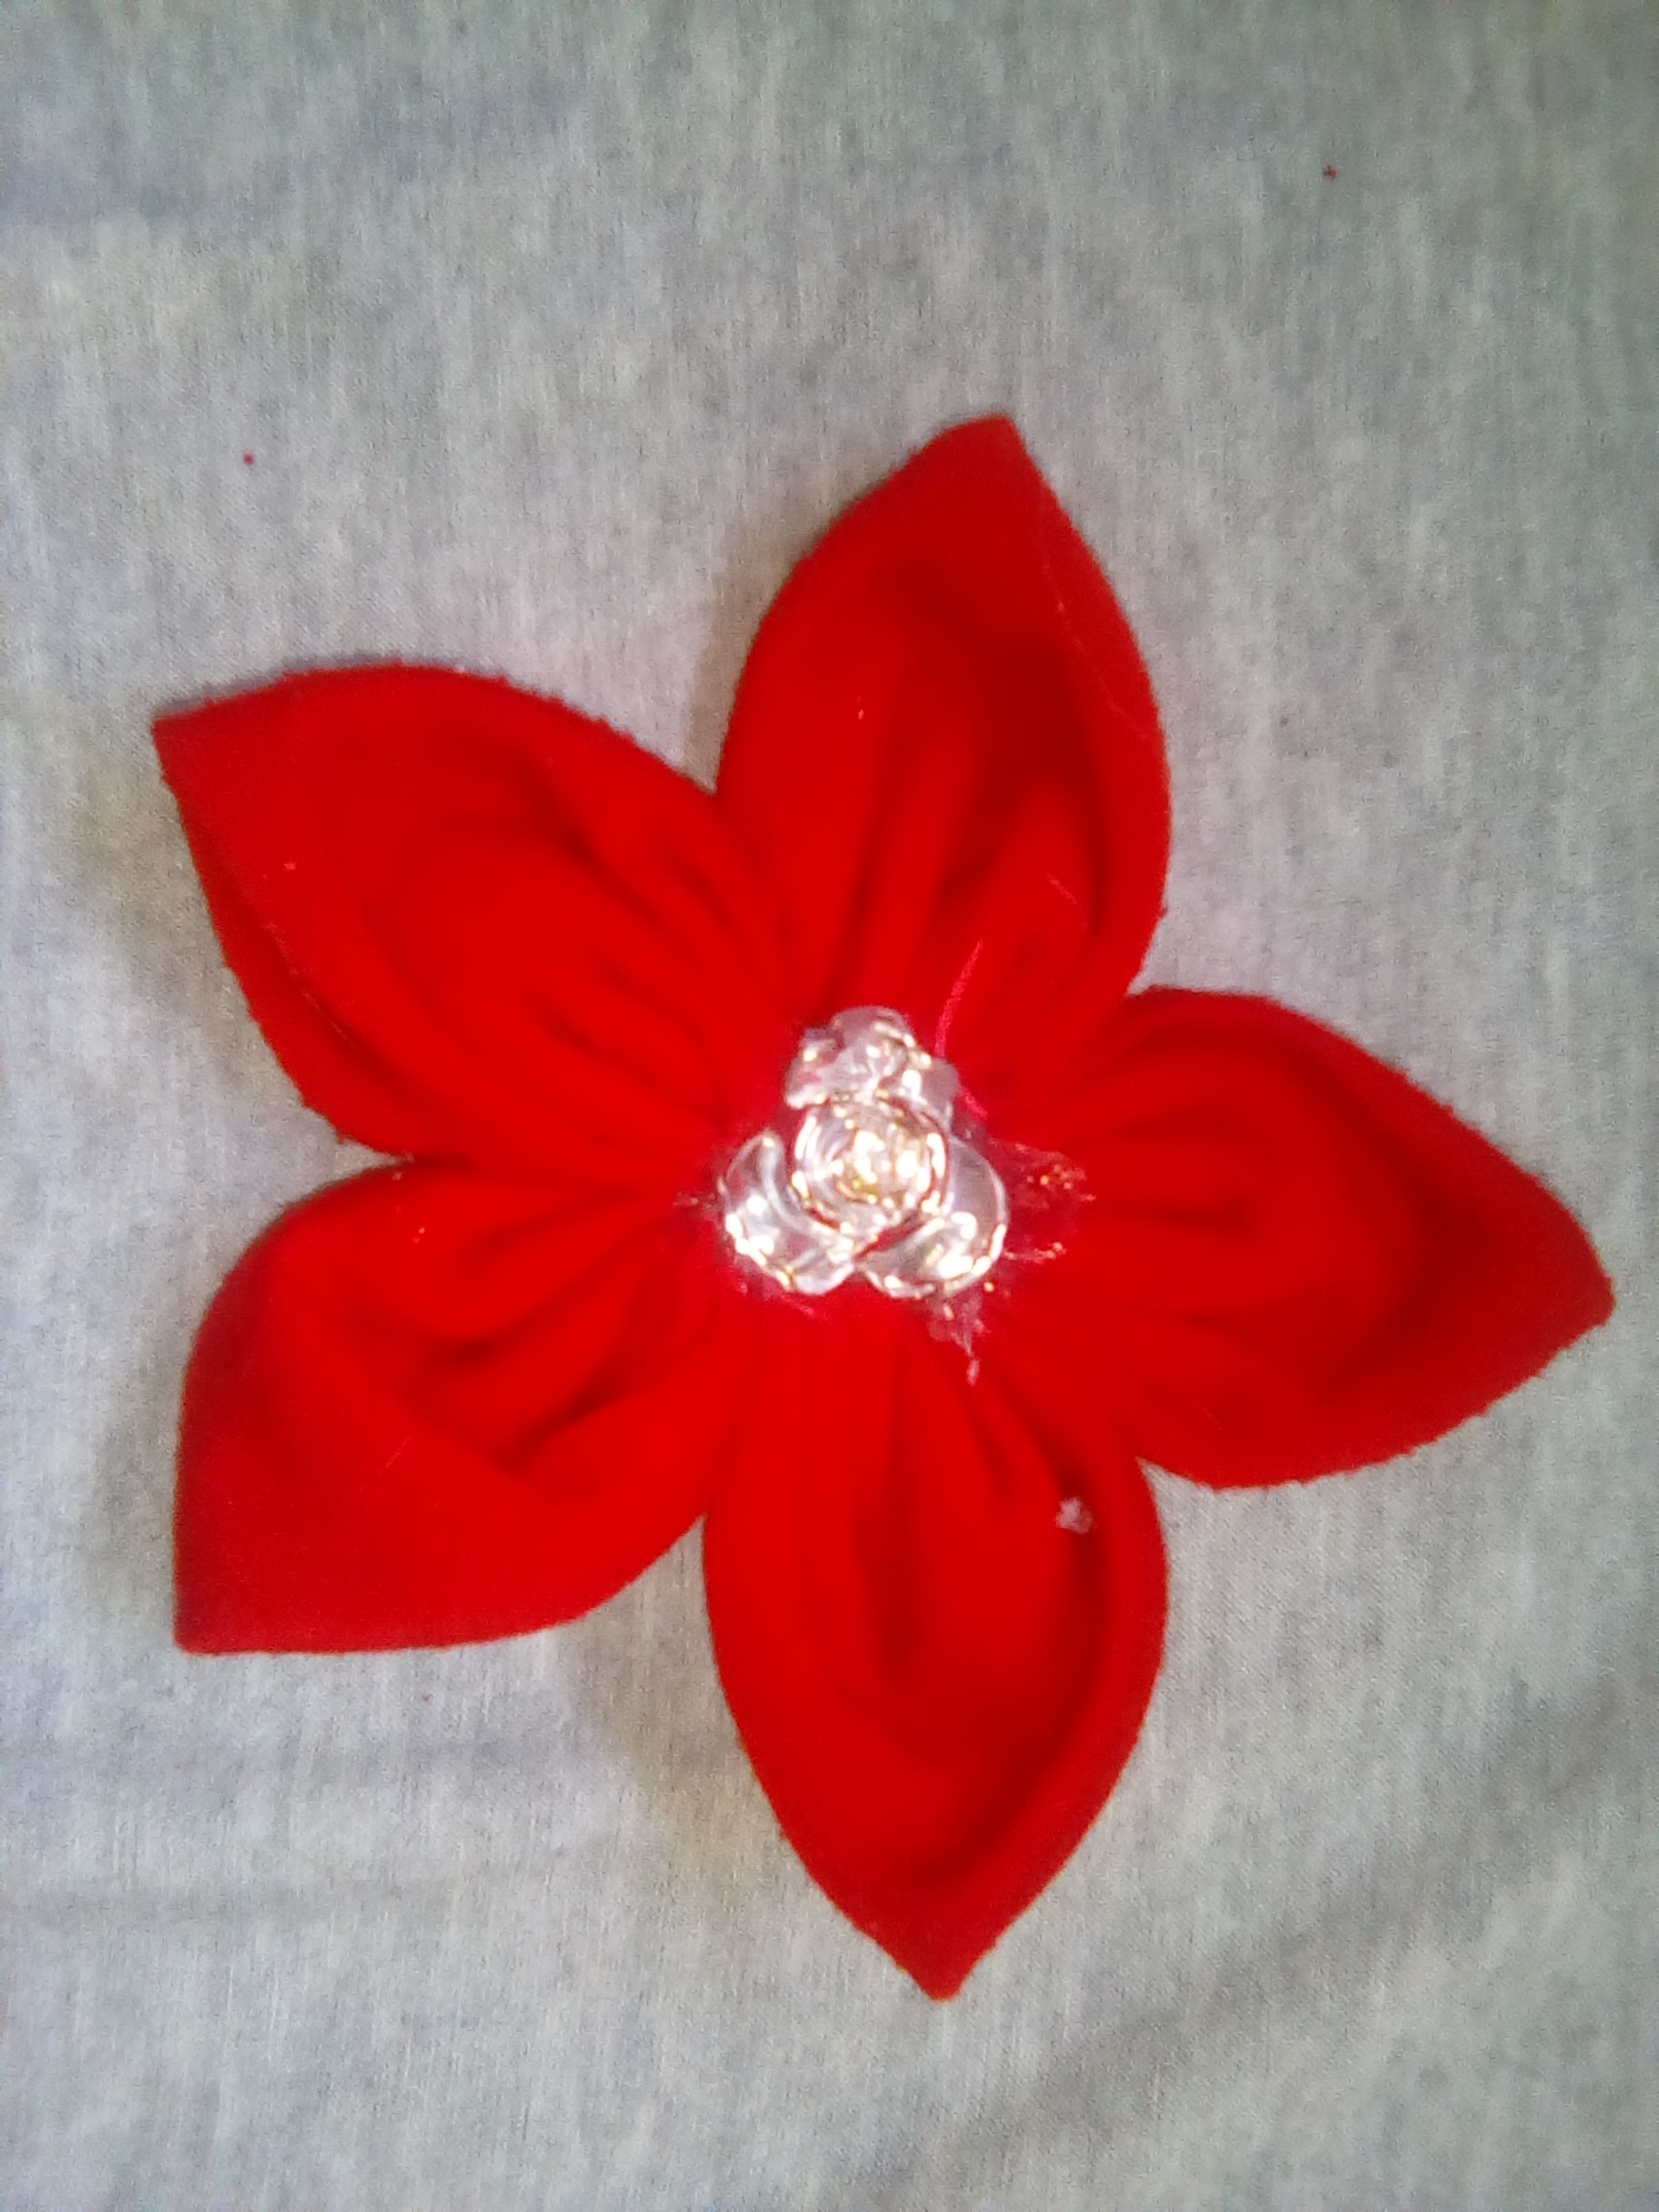
Hoy me complazco en compartir con ustedes una linda flor echa simplemente con tela y algo de hilo, la cual podemos usar como un ganchito para el cabello, o en una colita, o en cualquier otra cosa que sus mentes imaginen. Esta la aprendí a hacerla hace mucho tiempo, cuando era una niña y me encantaban este tipo de cosas para usarlas como accesorios. Espero les guste.
Hello friends of this creative community.
Today I am pleased to share with you a cute flower made simply with fabric and some yarn, which can be used as a hair clip, or a ponytail, or anything else you can imagine. I learned to make this one a long time ago, when I was a little girl and I loved this kind of things to use as accessories. I hope you like it.

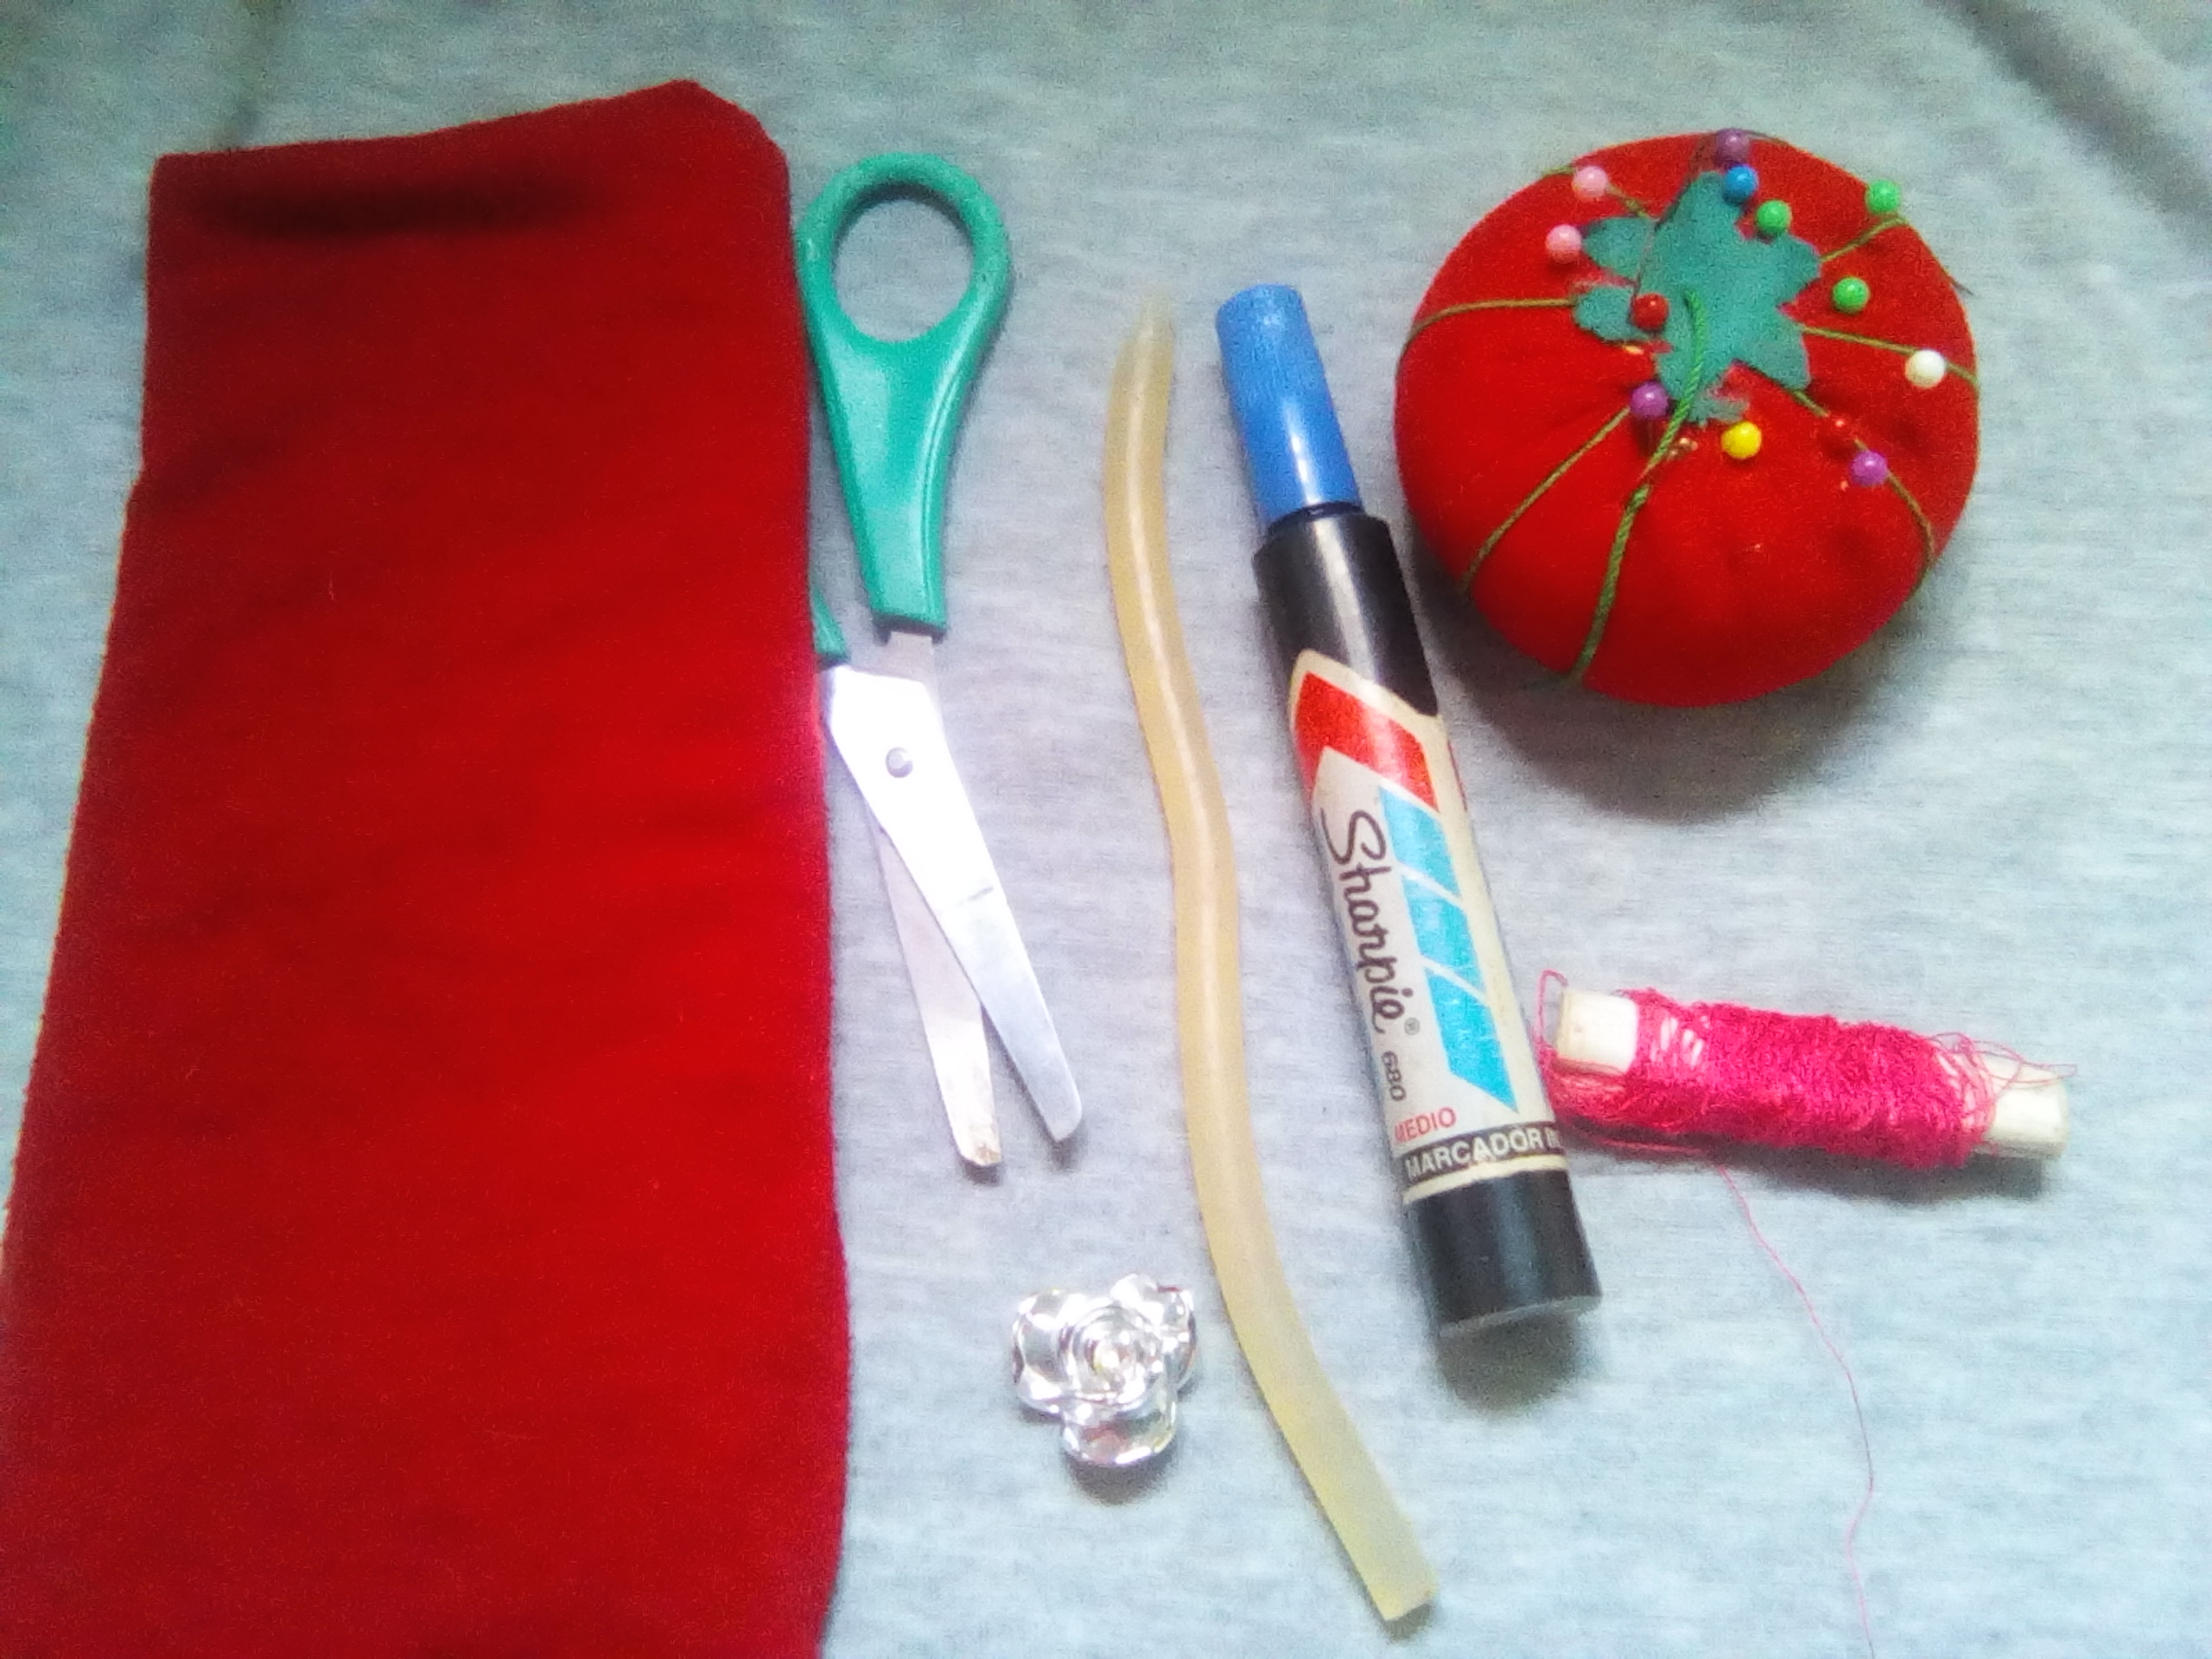
MATERIALES
Tela.
Un botón (o algo parecido).
Tijeras.
Agujas e hilo.
Un marcador.
Silicón.
MATERIALS
- Fabric.
- A button (or something similar).
- Scissors.
- Needles and thread.
- A marker.
- Silicone.
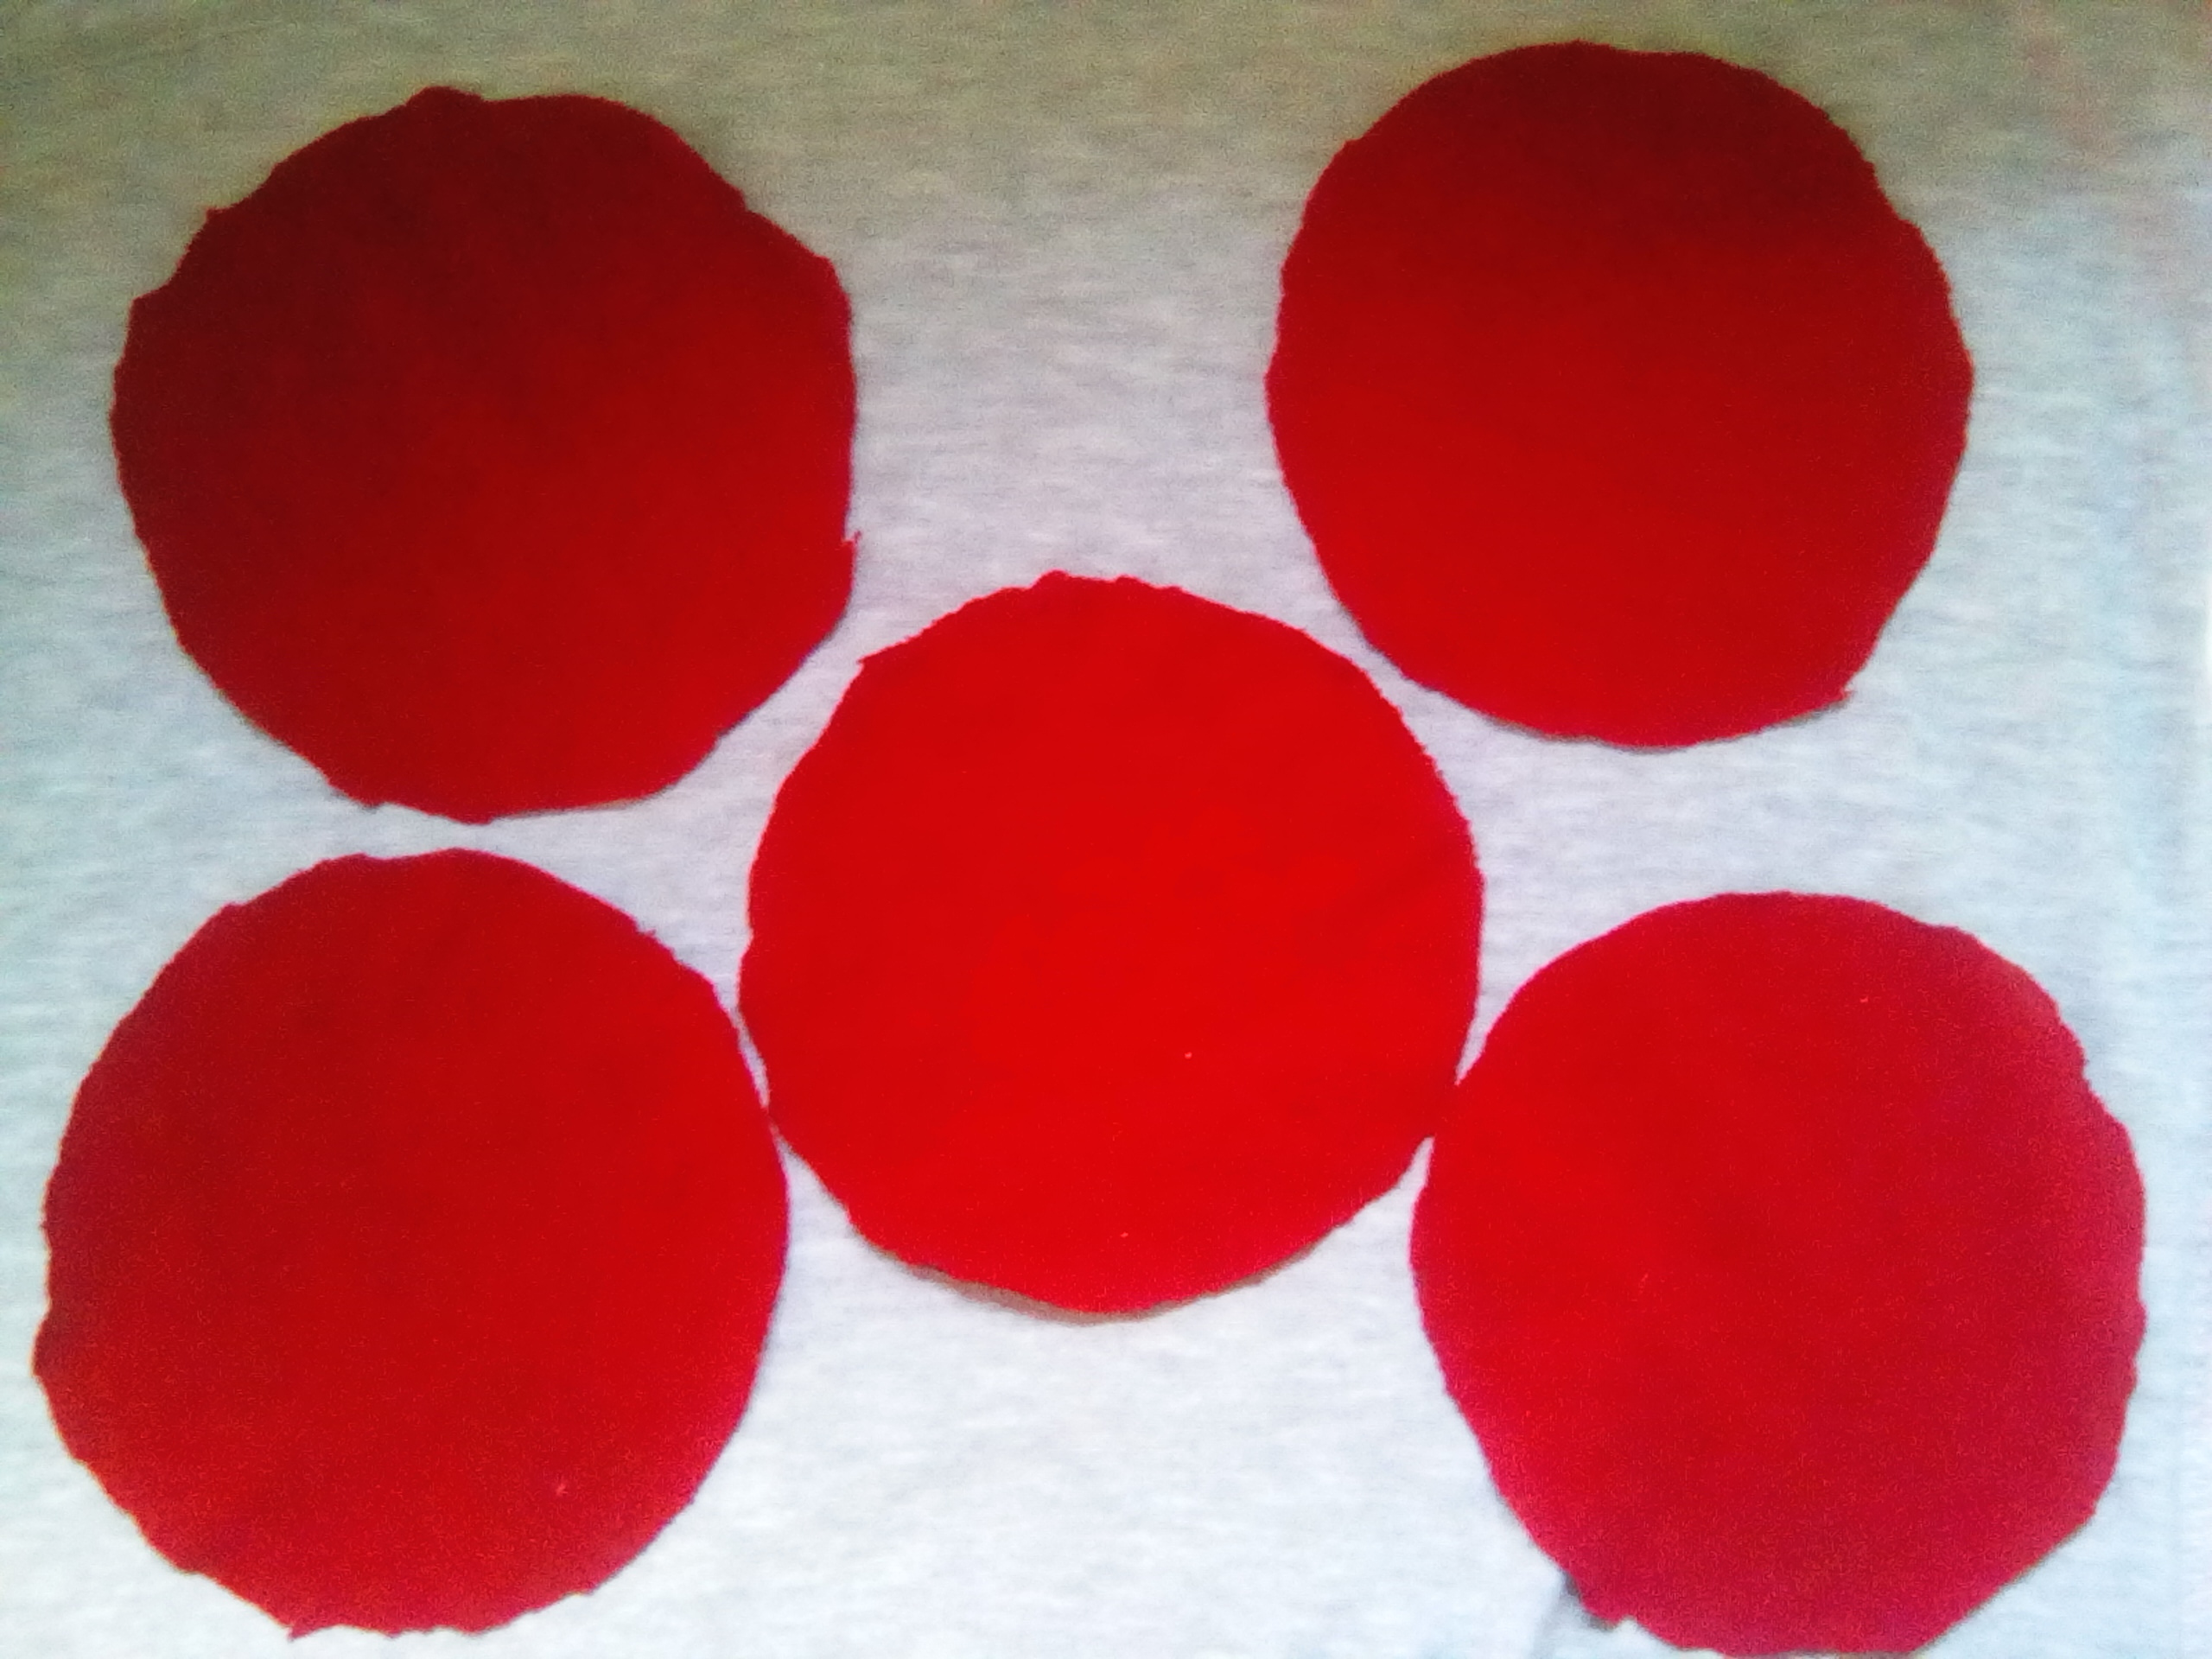
Una vez tengamos todos los materiales que vamos a necesitar, tomaremos la tela y la colocamos en un lugar plano, donde se nos haga cómodo para trabajar. Y marcamos círculos, todos exactamente iguales. Yo corté 5 círculos porque quería mi flor de 5 pétalos. Tú puedes hacerla con la cantidad de pétalos que desees.
Once we have all the materials we will need, we will take the fabric and place it in a flat place, where it is comfortable to work. And we mark circles, all exactly the same. I cut 5 circles because I wanted my flower with 5 petals. You can make it with as many petals as you want.
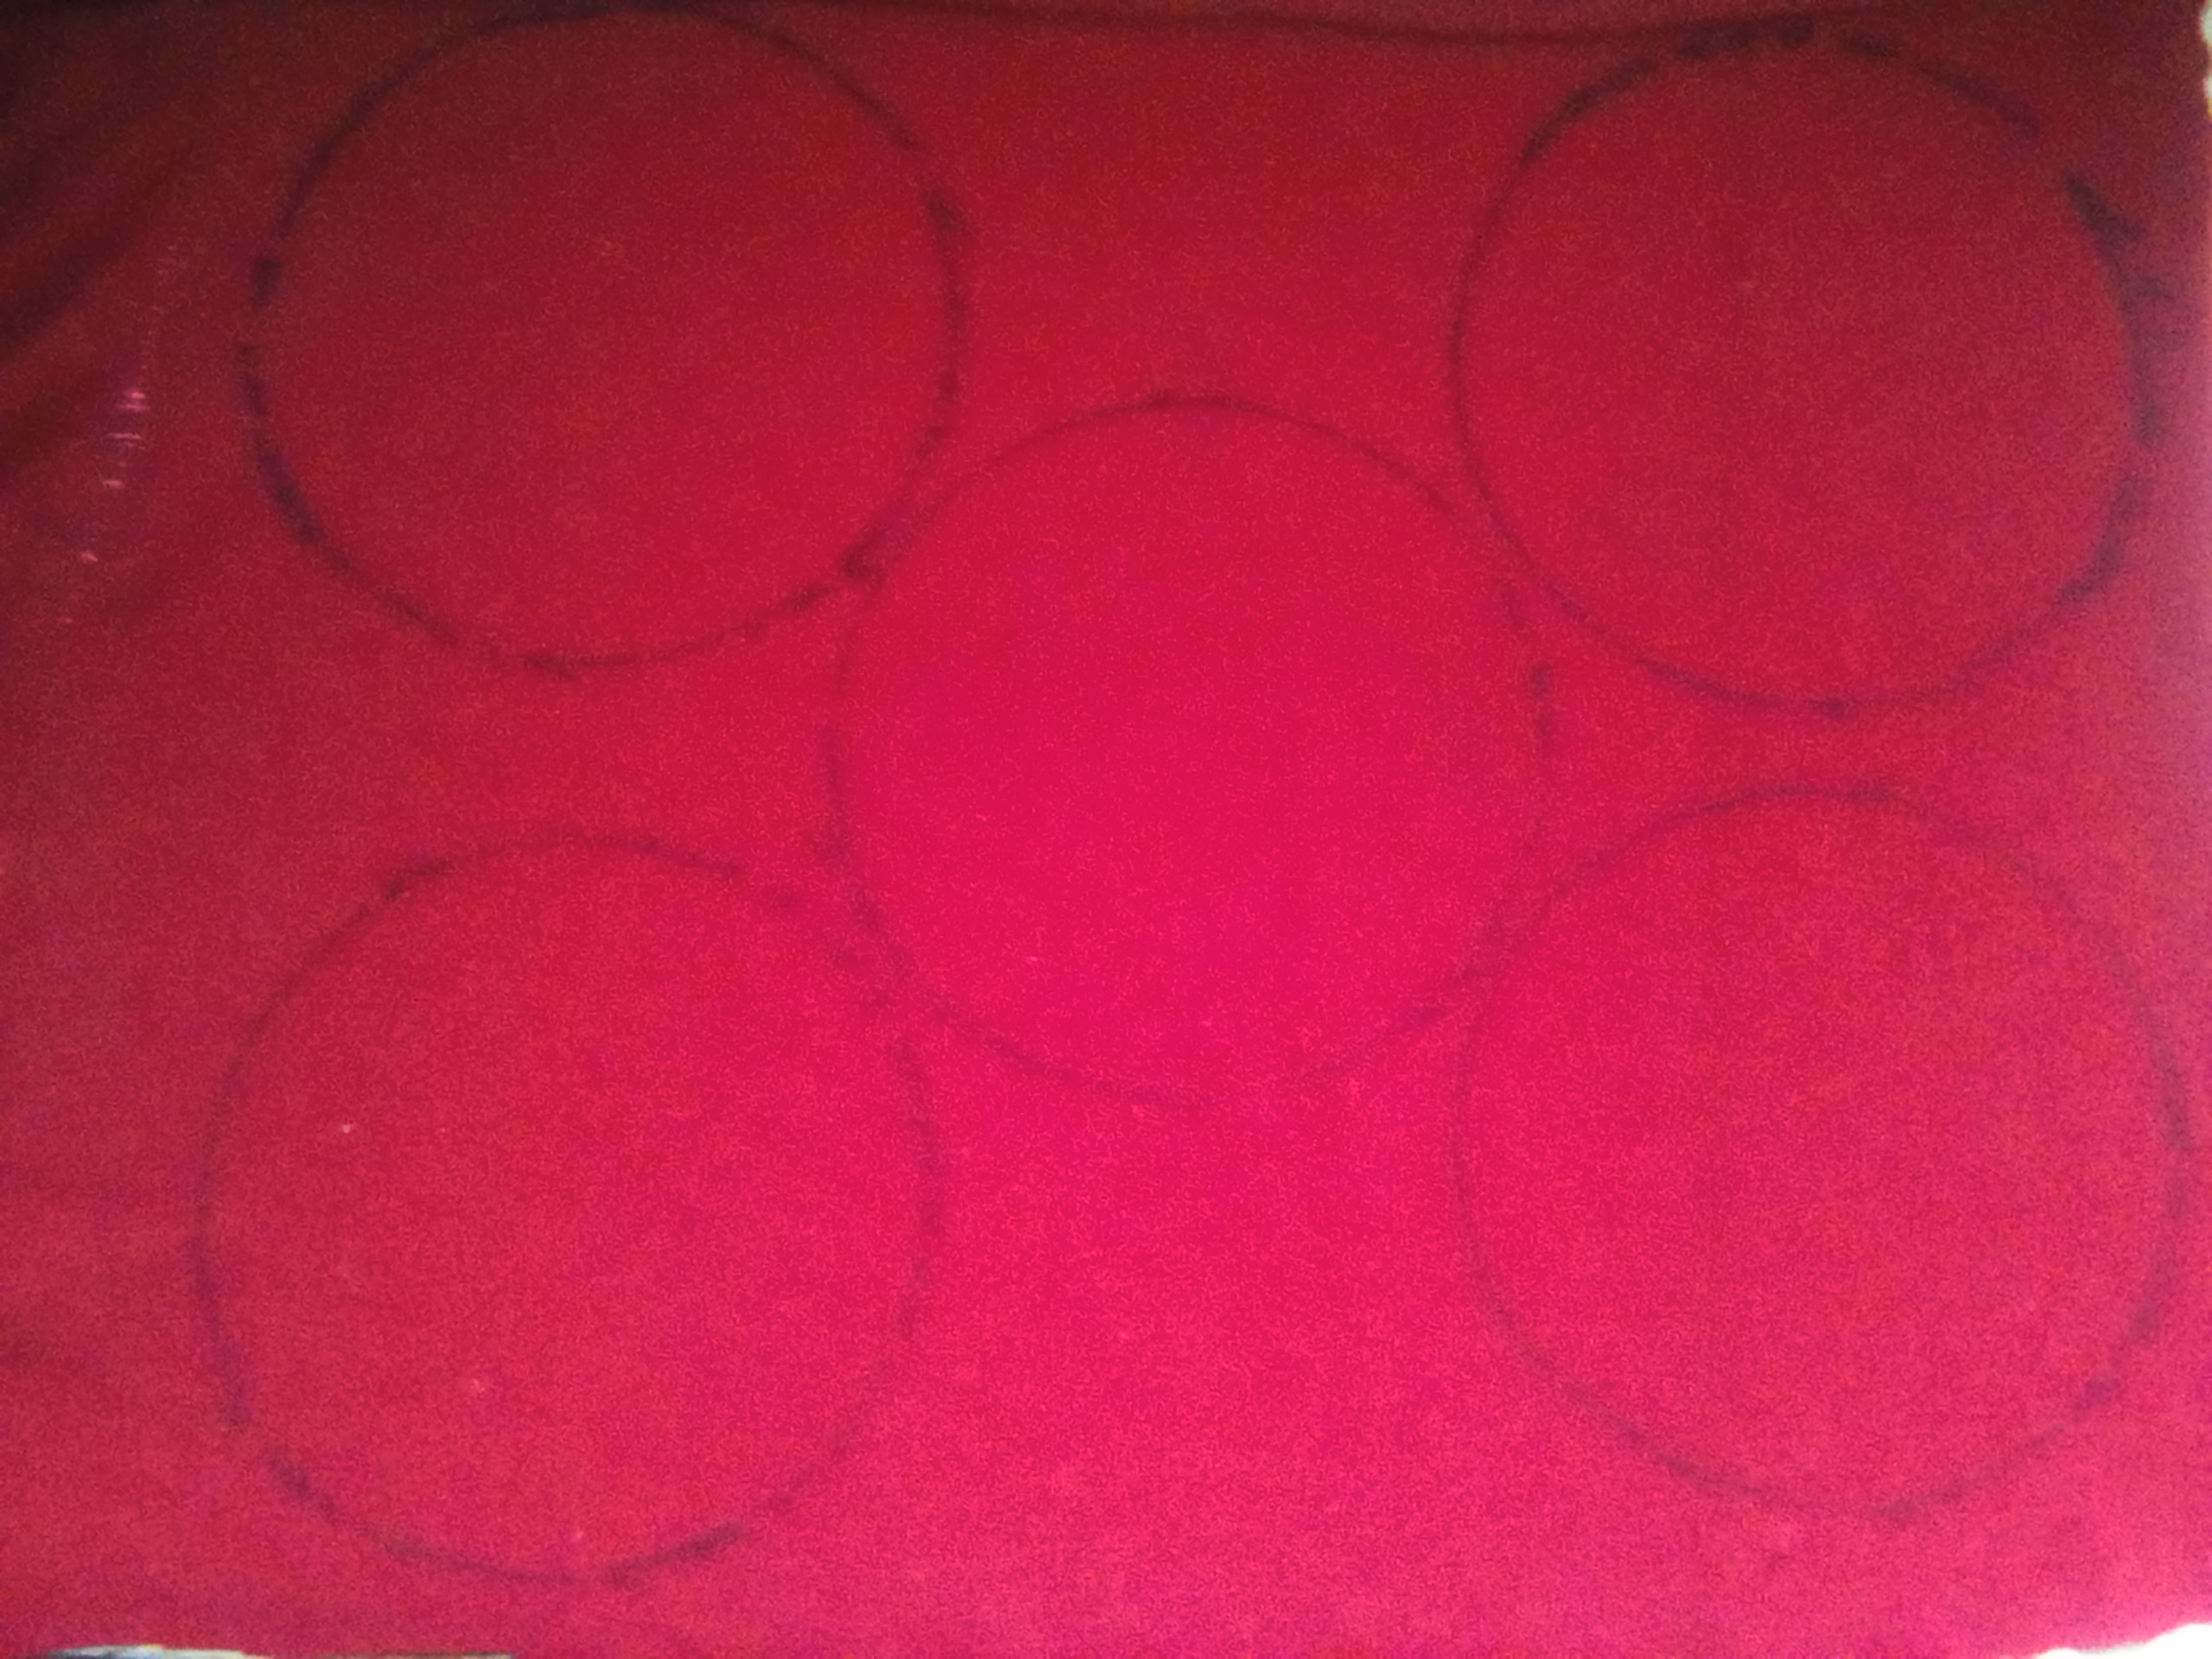
Cortamos los círculos.
Cut the circles.
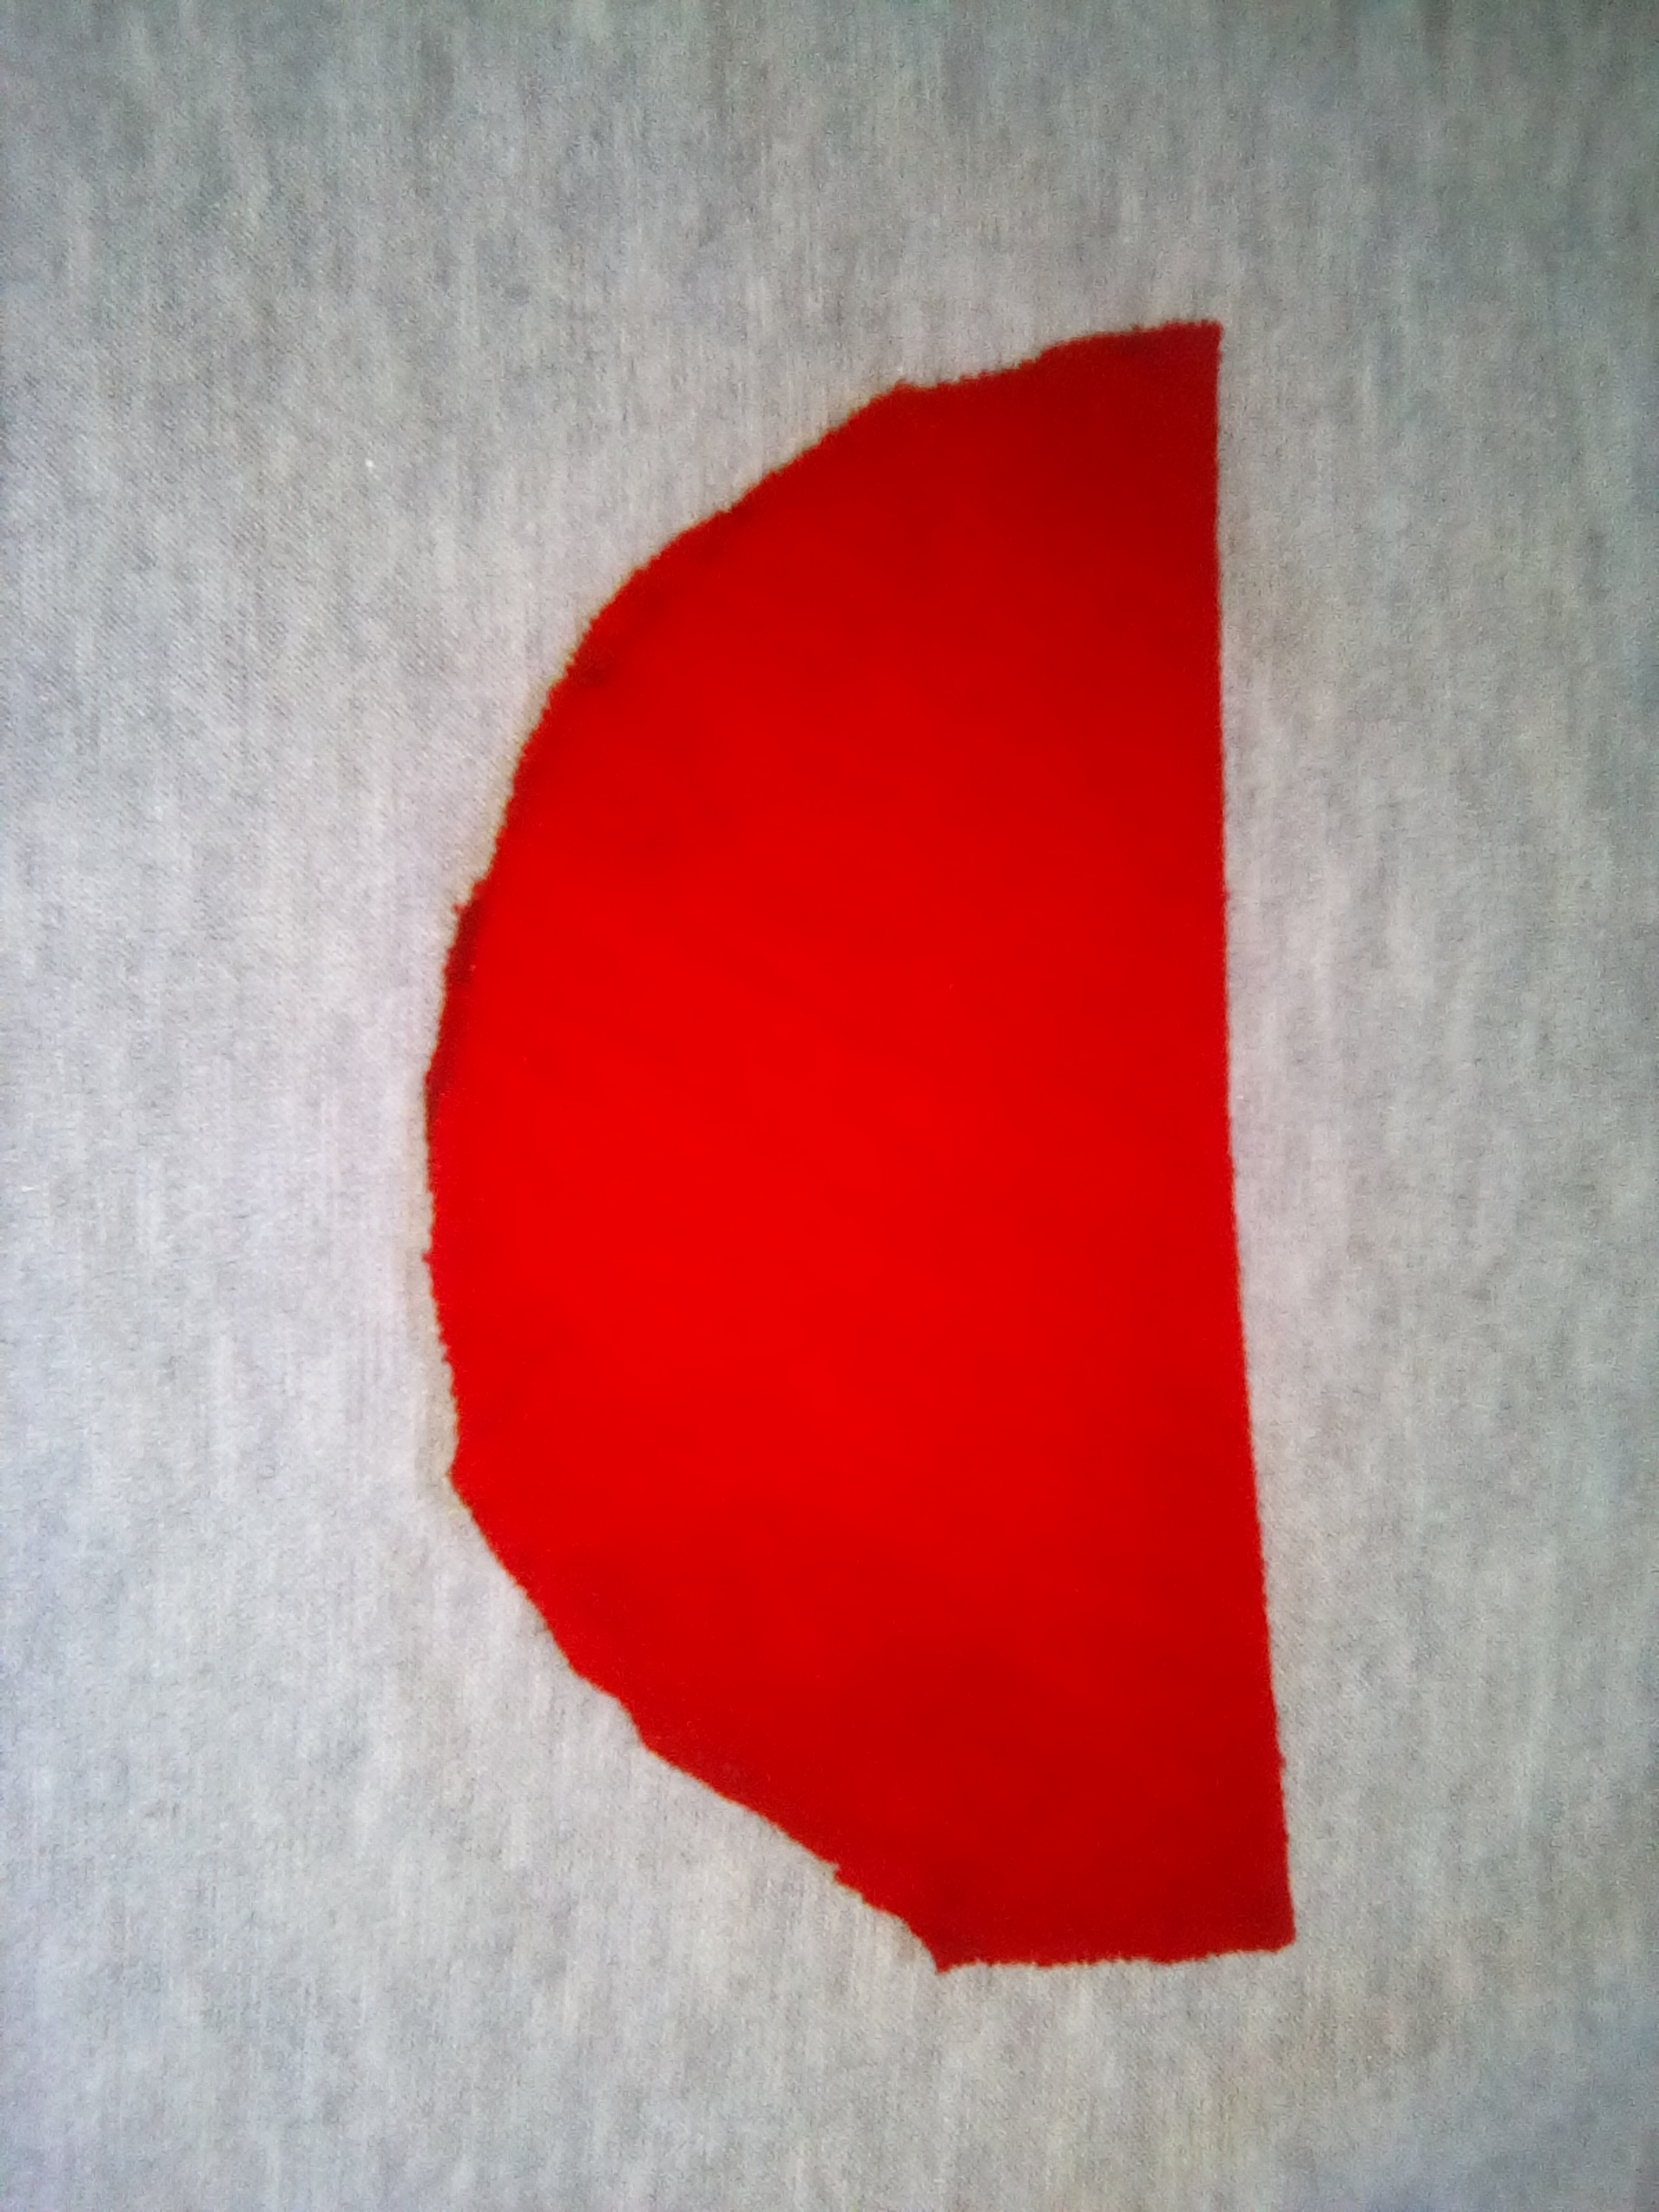
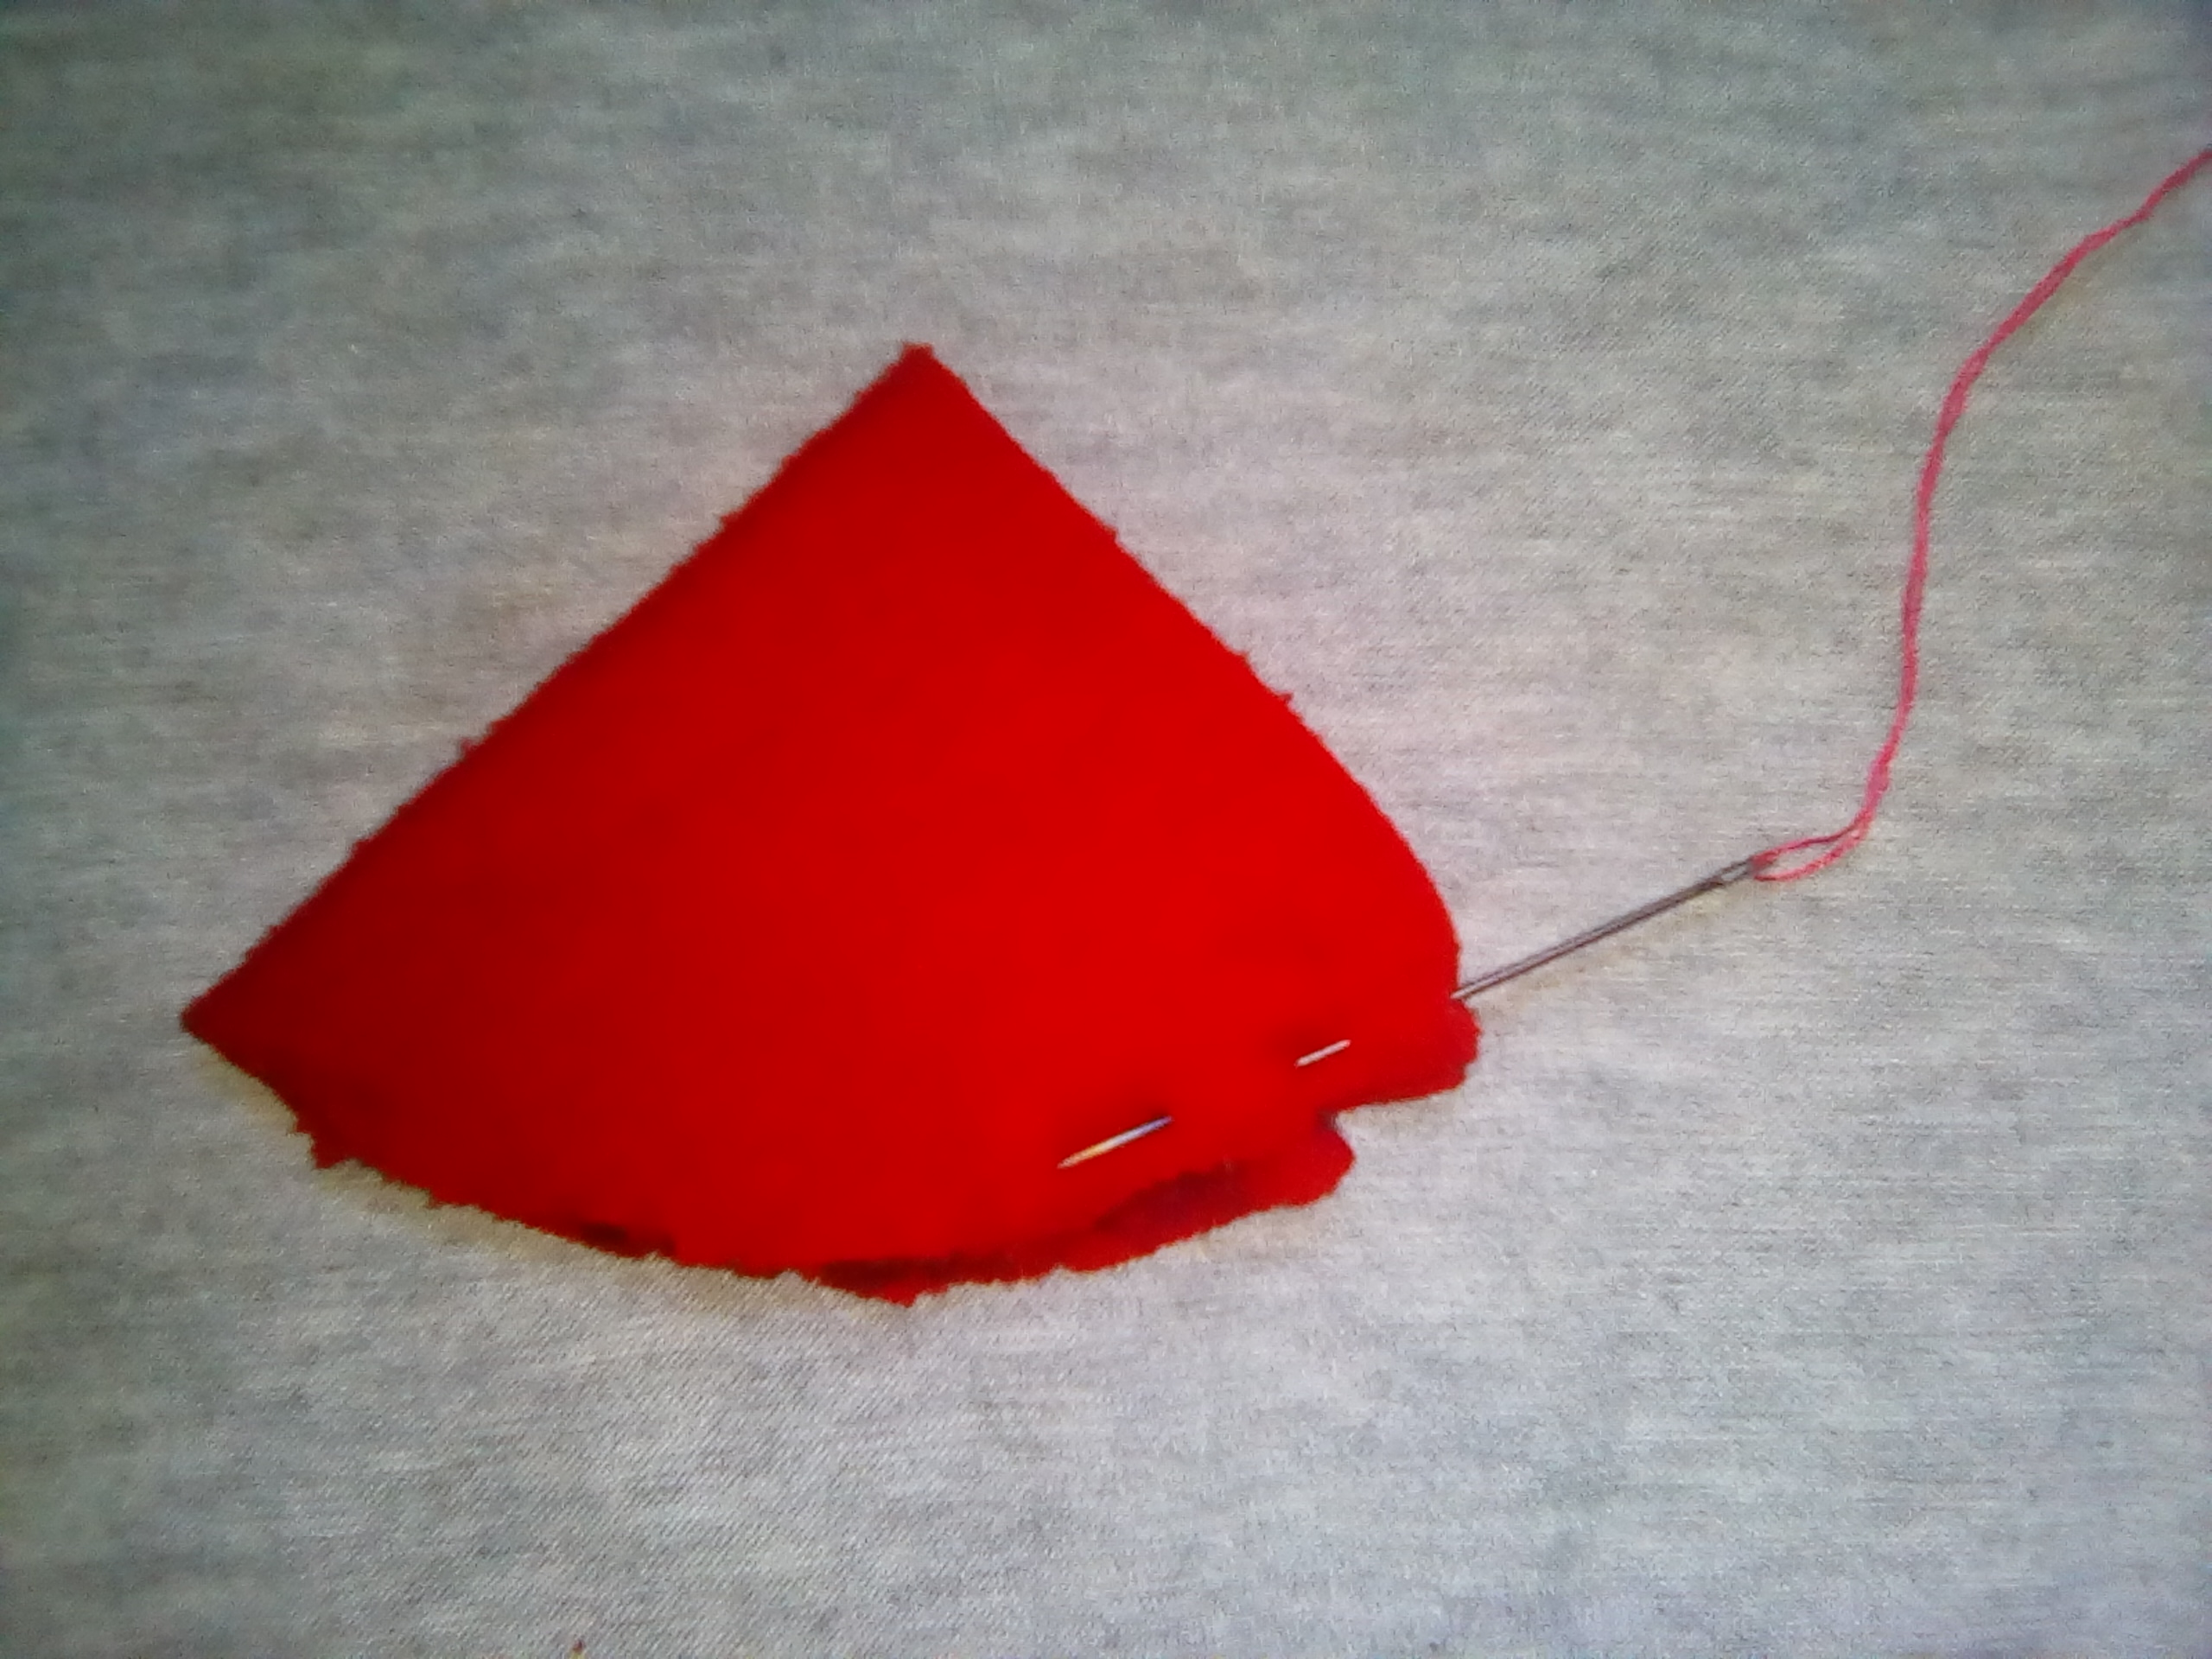
Ahora bien, empezamos a armar los pequeños pétalos de nuestra linda flor. Tomando un circulo de los que ya cortamos, lo doblamos justamente a la mistad. Como les muestro en la foto.
Now, we begin to assemble the small petals of our beautiful flower. Taking one of the circles that we have already cut, we fold it exactly to the mistad. As shown in the photo.
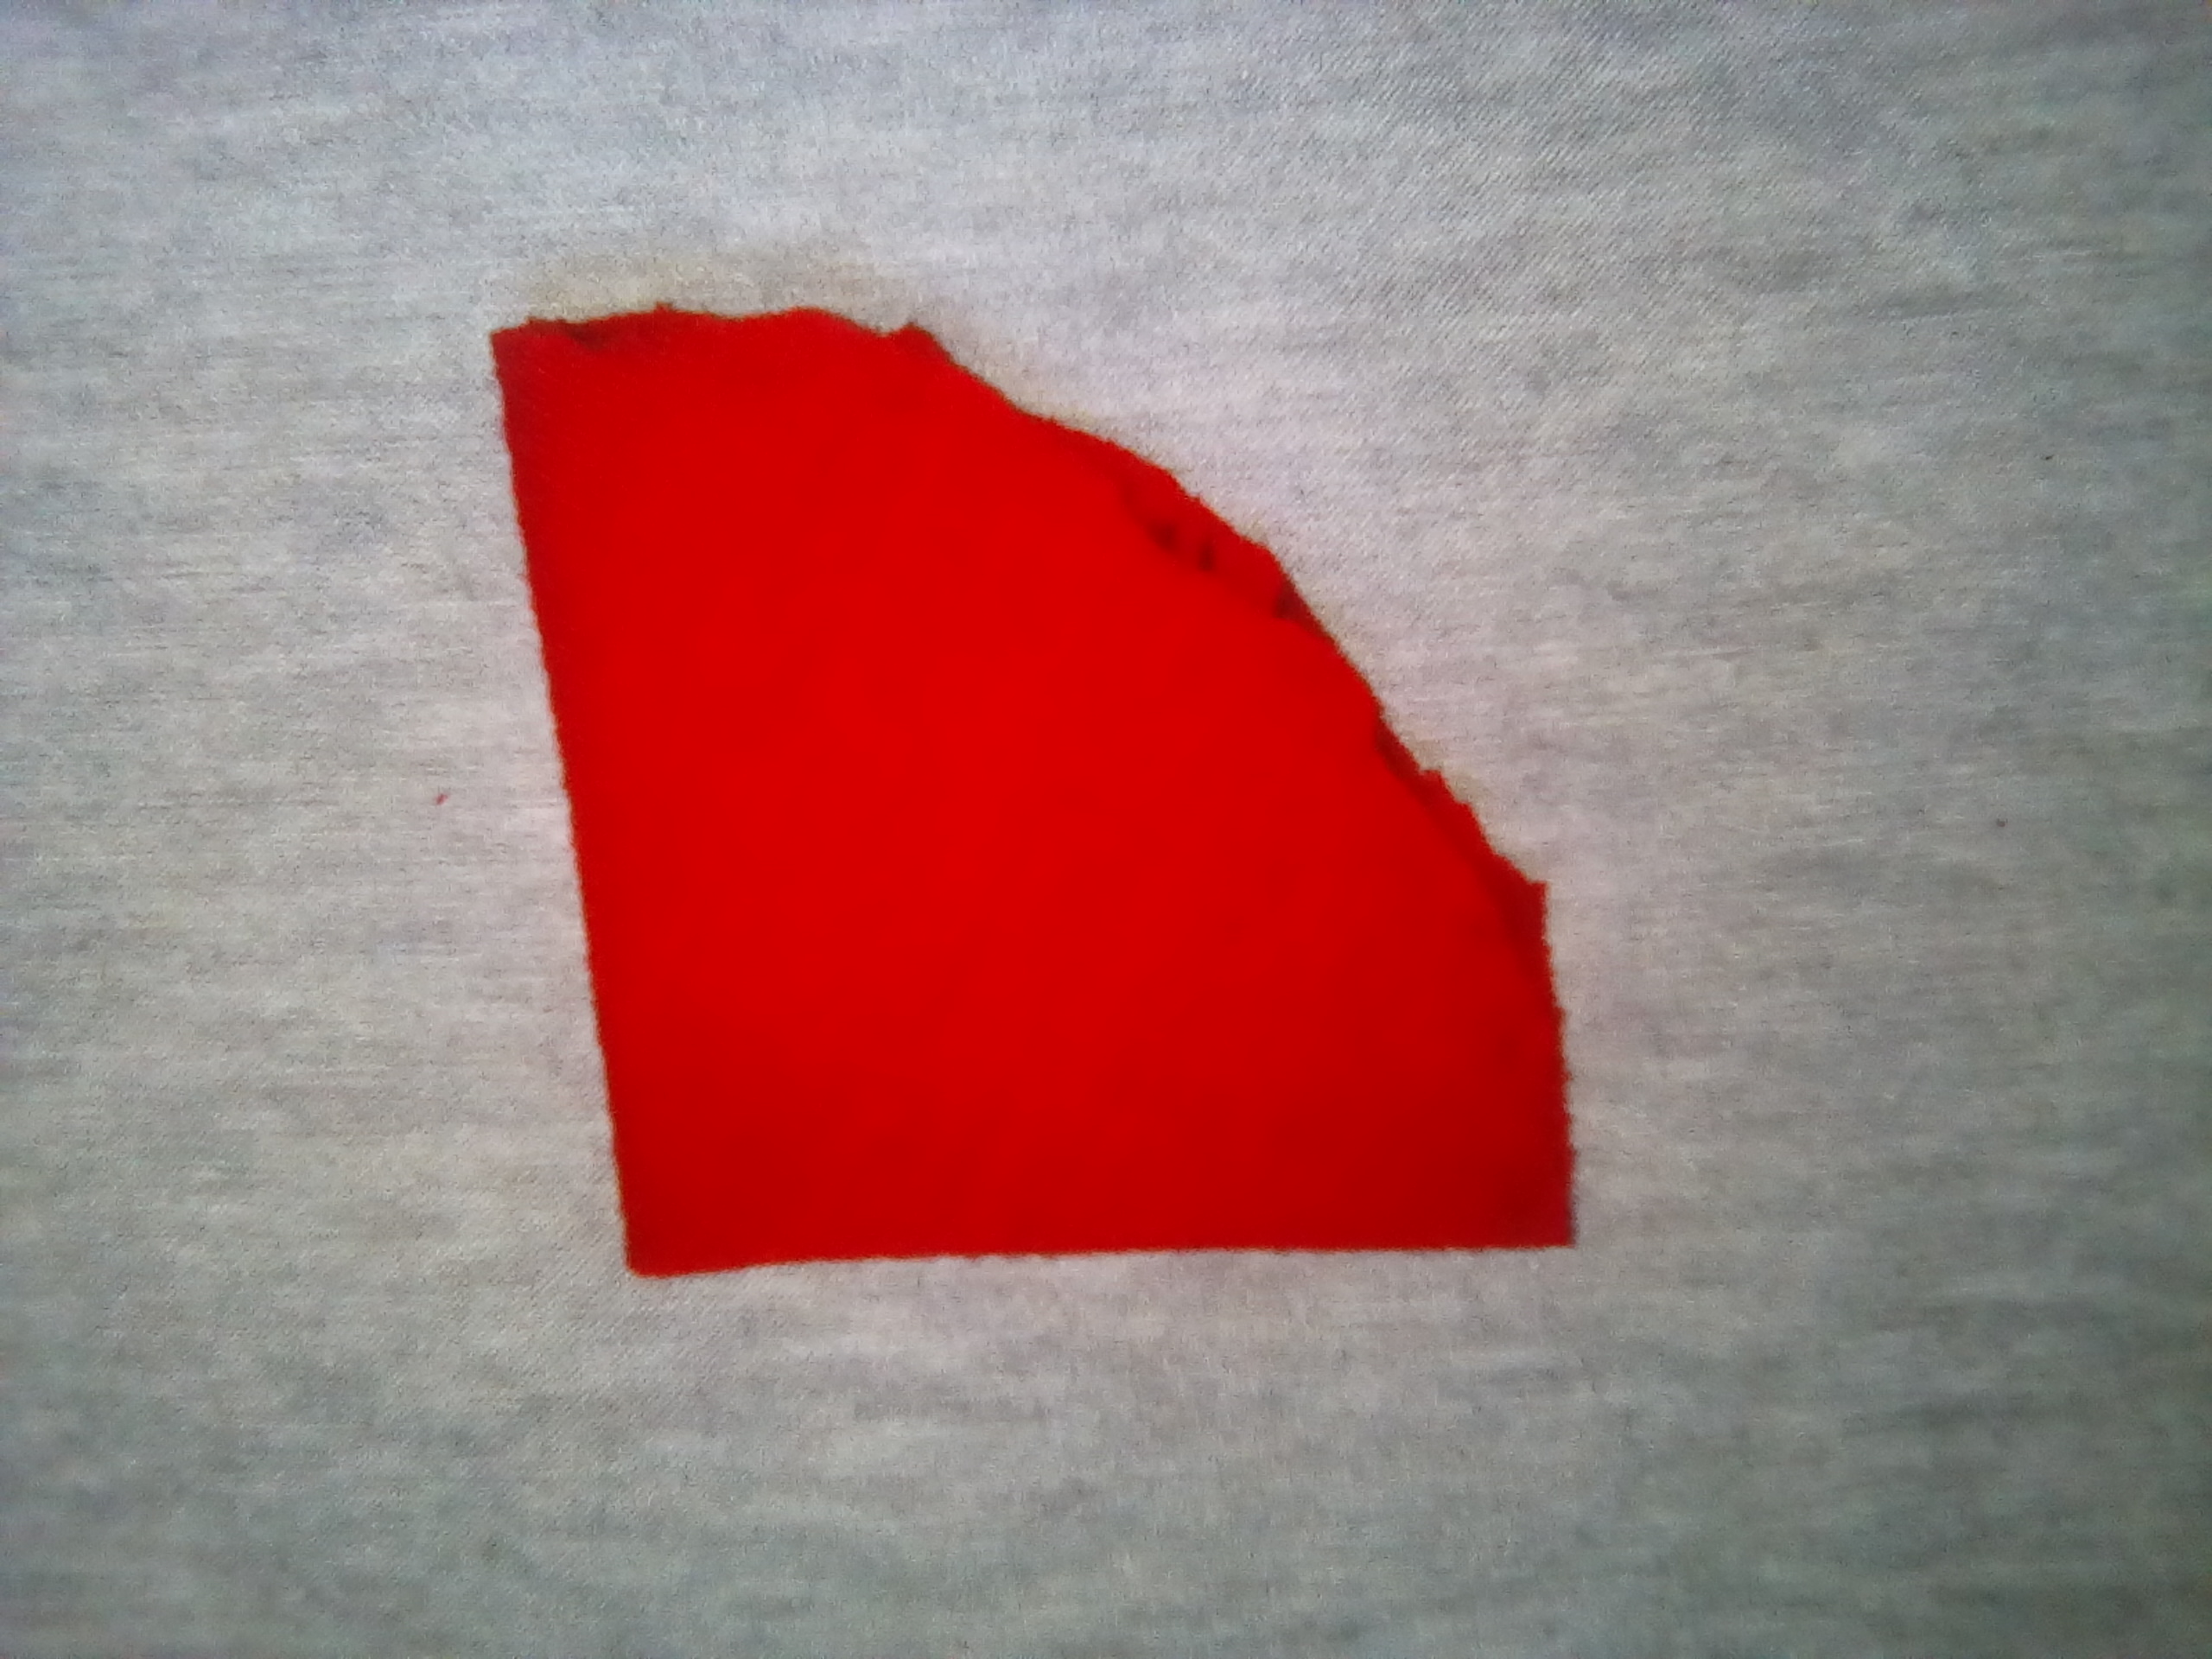
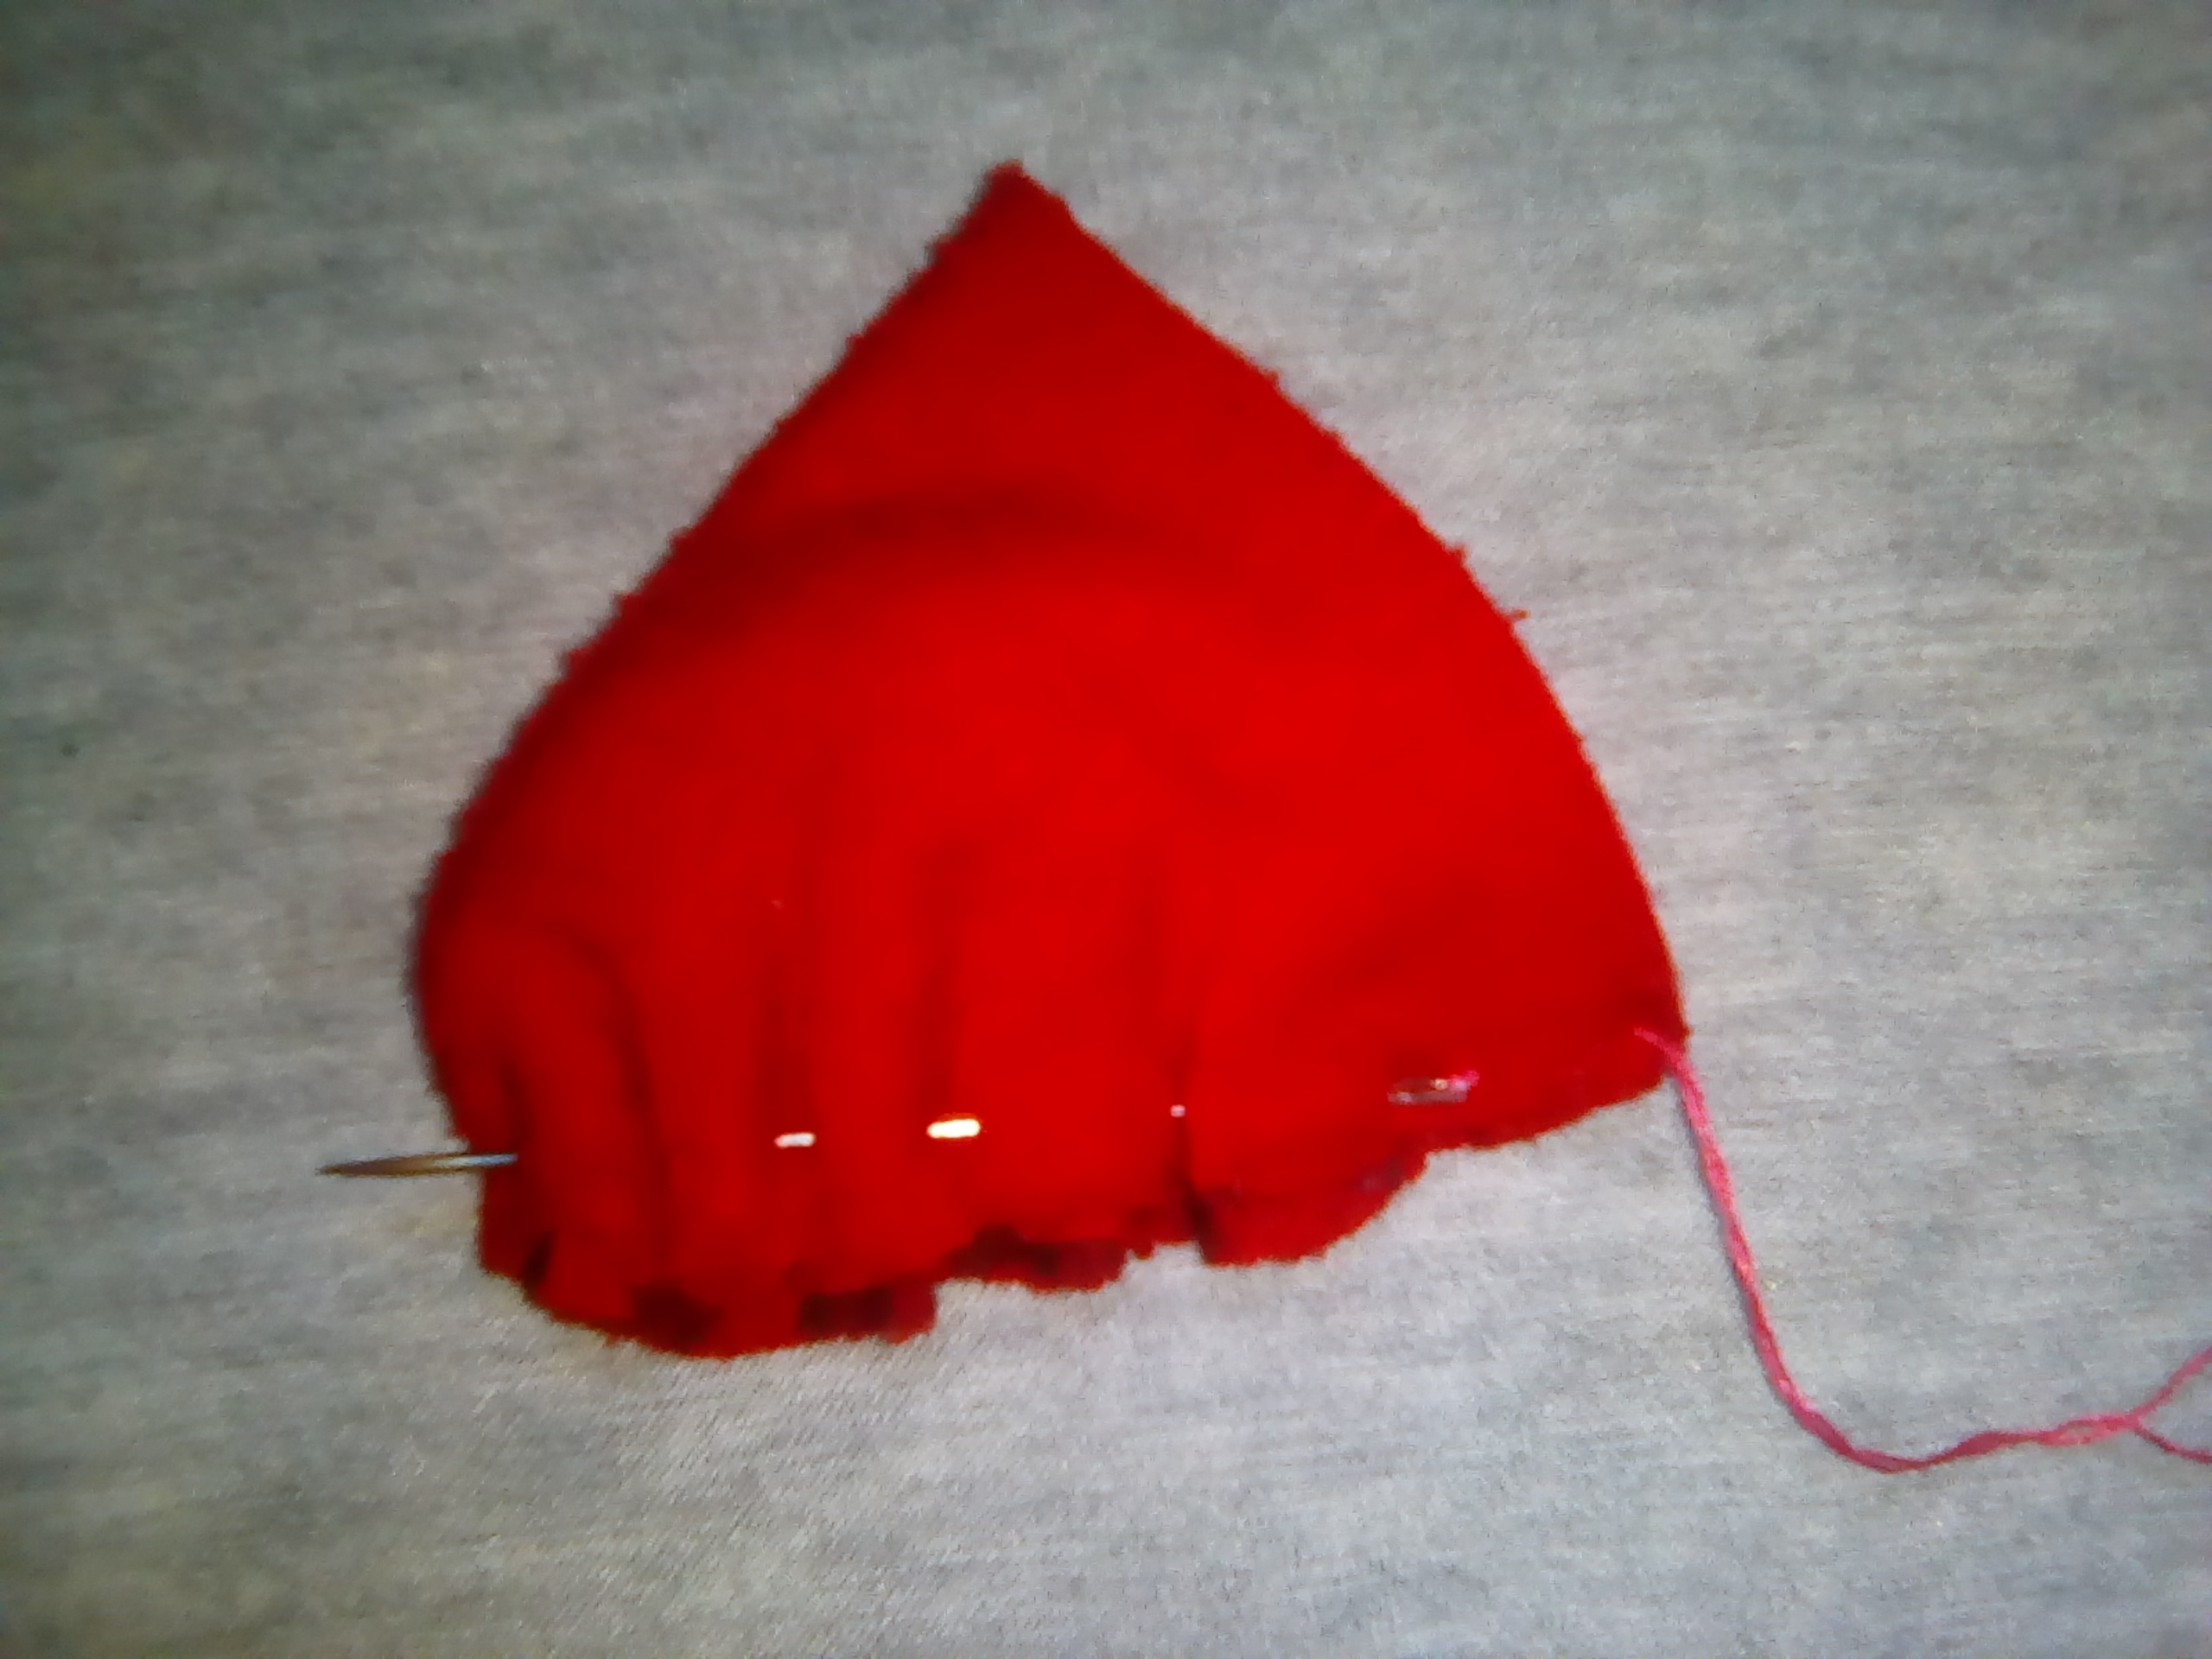
Y ahora los mismo, doblamos nuevamente a la mitad. Debe quedar así:
And now the same, we fold again in half. It should look like this:
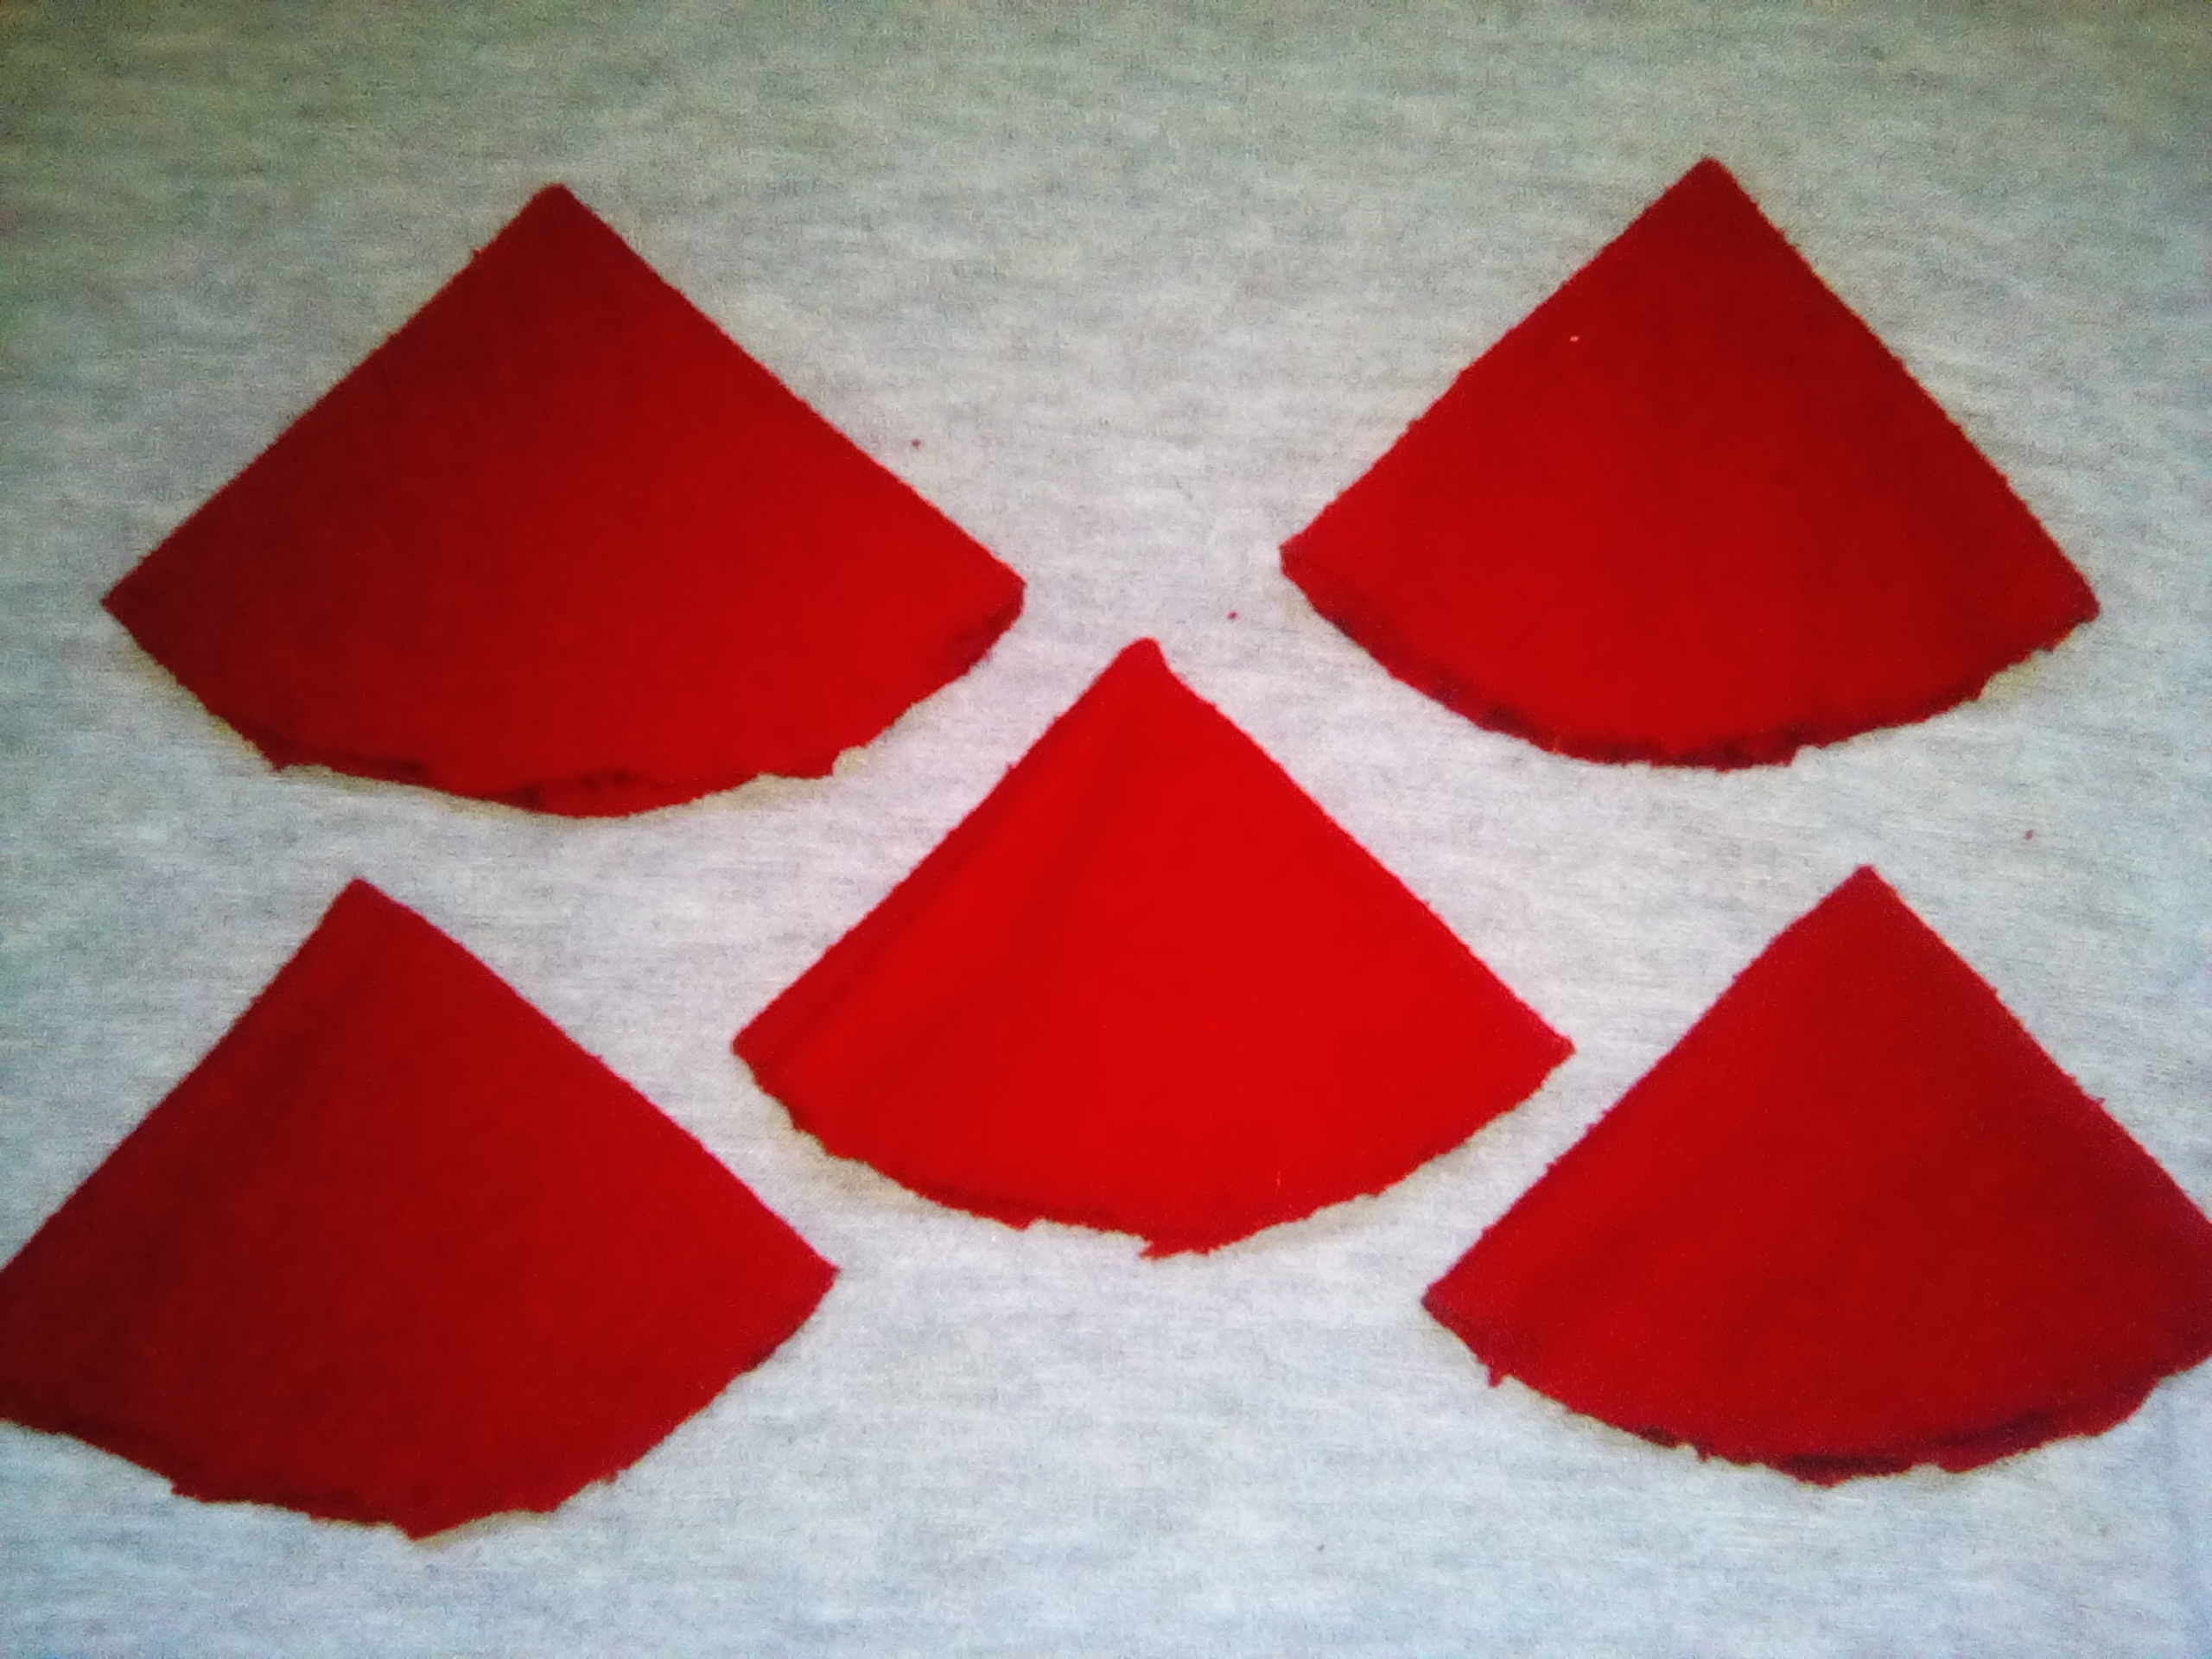
Lo hacemos con cada uno de los pétalos.
We do this with each of the petals.
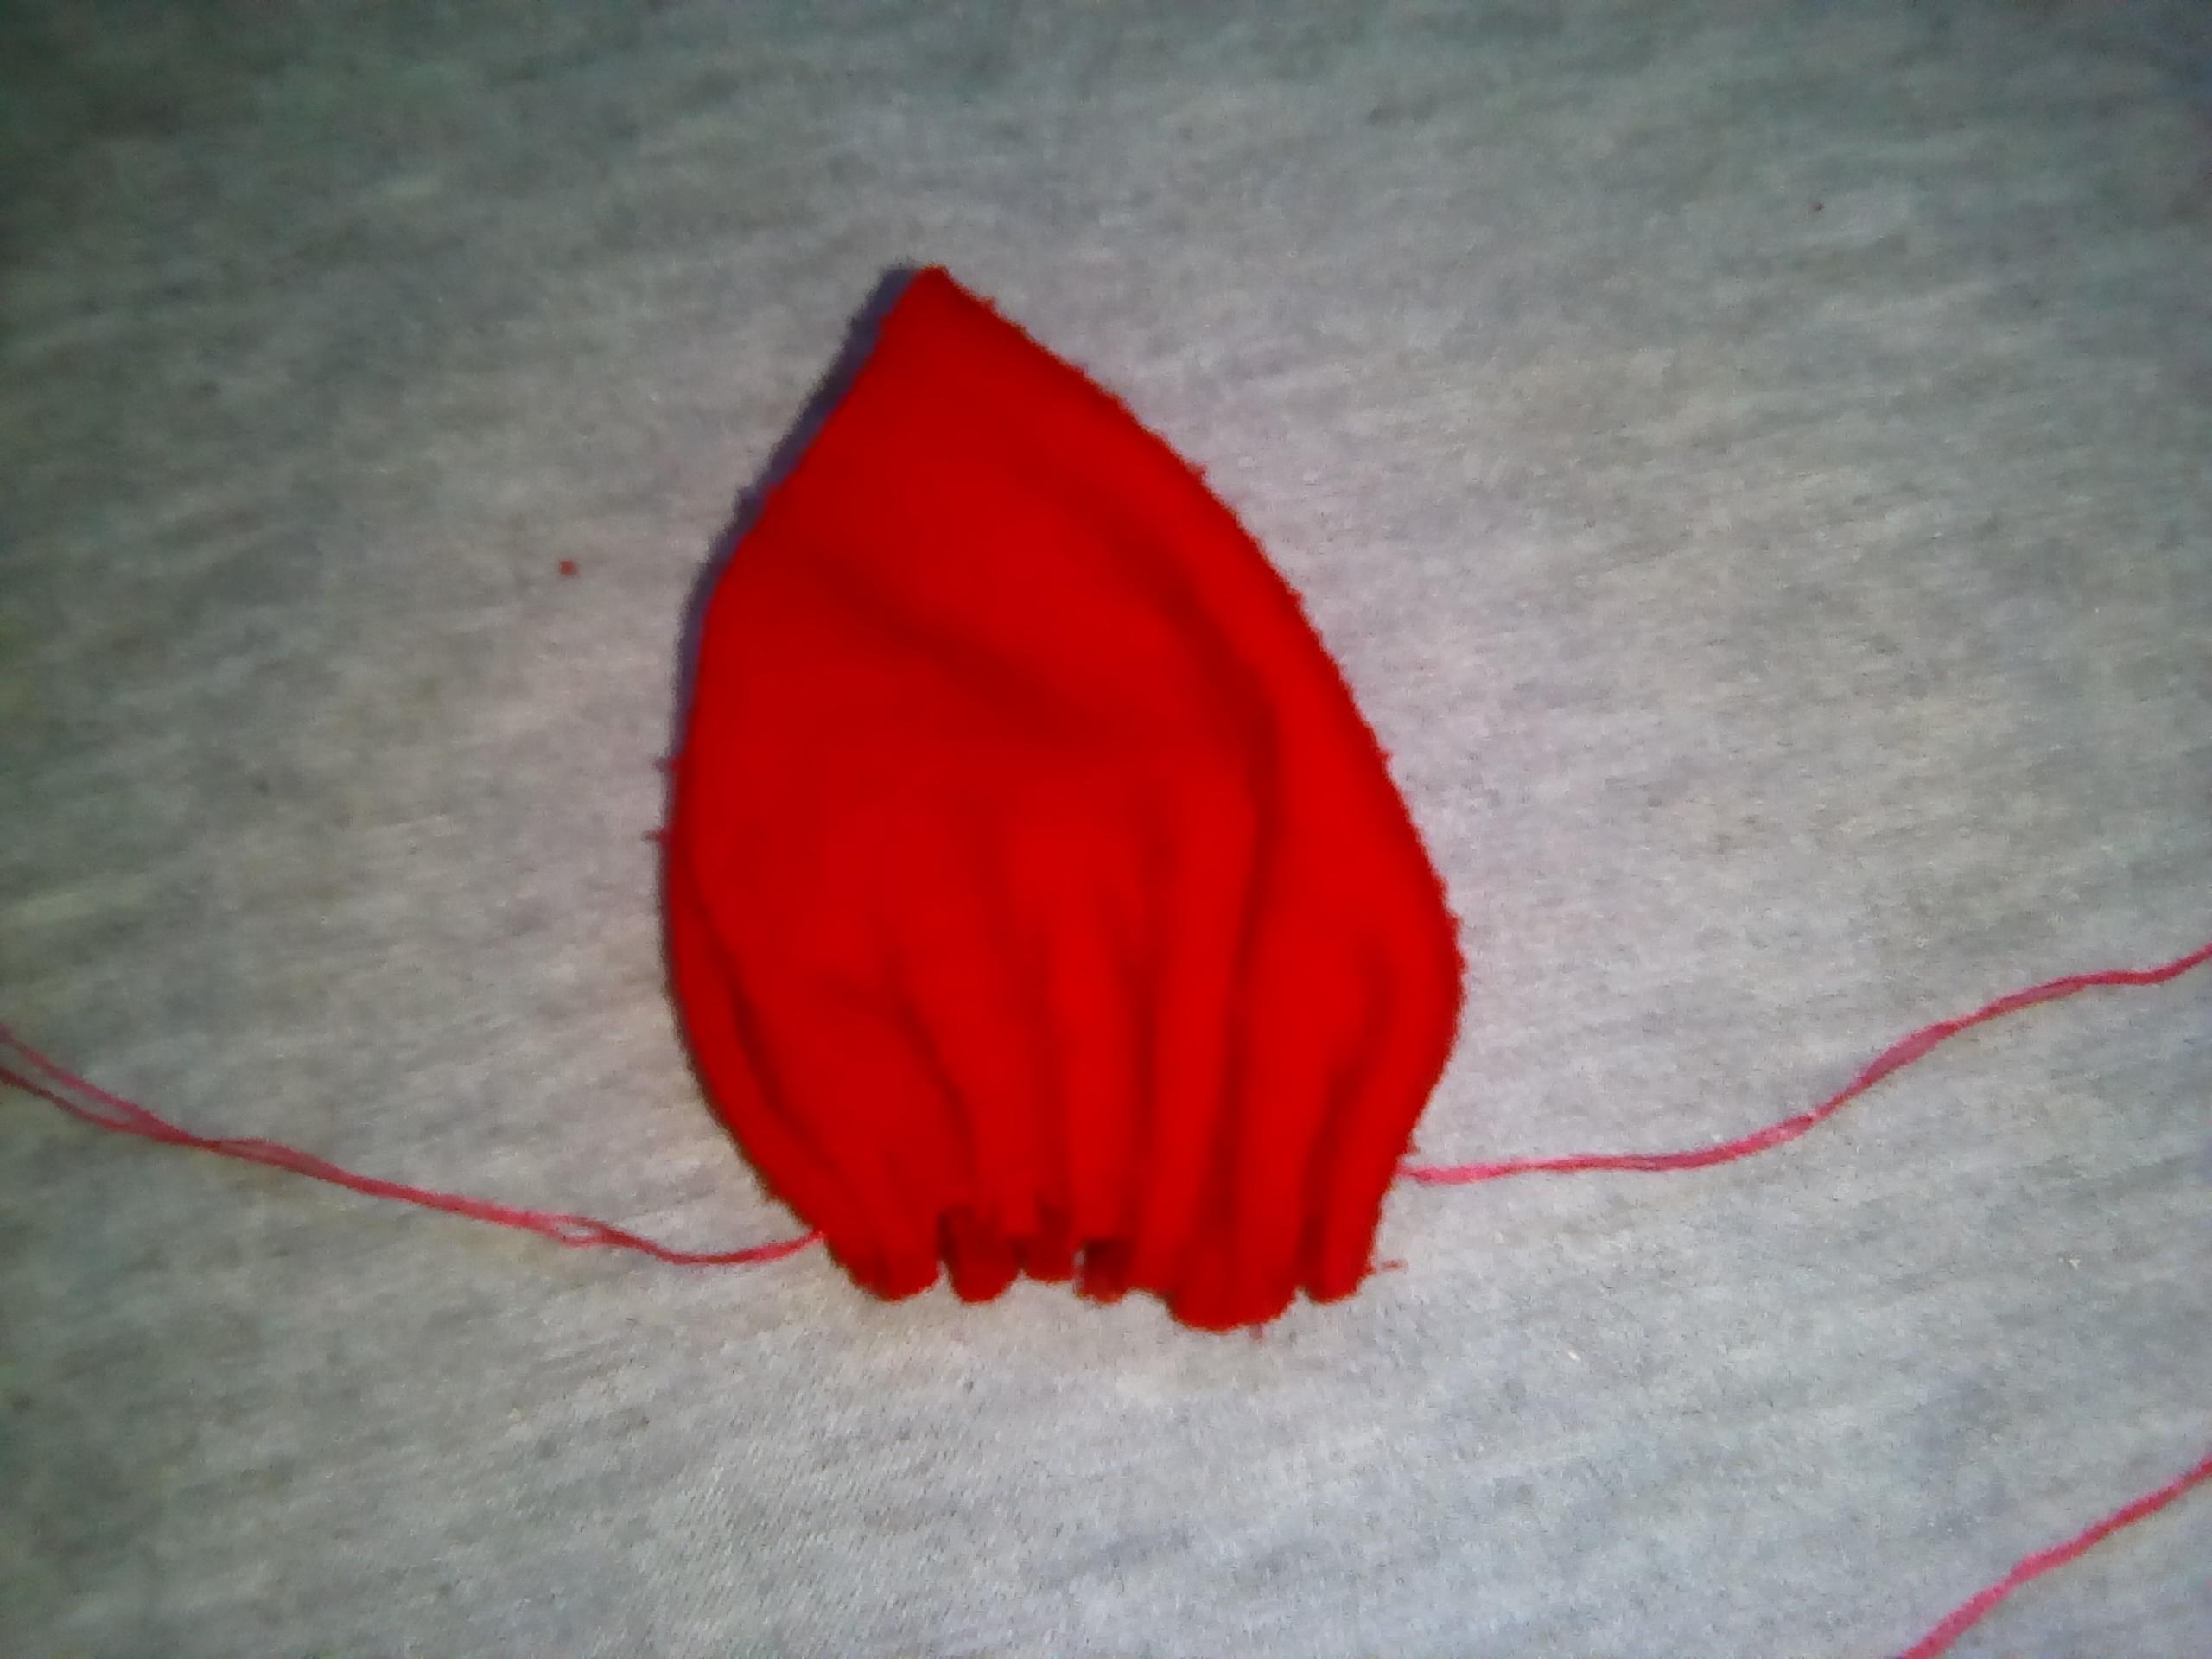
El siguiente paso es coserlos. Sé que hasta ahora no tienen mucha forma de pétalos, pero les aseguro que en este paso si empezarán a tomar la forma que necesitamos. Para esto necesitaremos suficiente hilo, pues no coseremos dejando los pétalos separados sino que los dejaremos en el mismo hilo. La forma de coserlos es muy sencilla, empezamos desde una punta, metemos y sacamos la aguja dejando siempre un pequeño espacio. Se lo muestro en la foto:
The next step is to sew them together. I know that so far they don't have much of a petal shape, but I assure you that in this step they will begin to take the shape we need. For this we will need enough thread, because we will not sew leaving the petals separated but we will leave them in the same thread. The way to sew them is very simple, we start from one end, we put in and take out the needle always leaving a small space. I show it in the photo:
Lo hacemos con todos.
We do it with everyone.
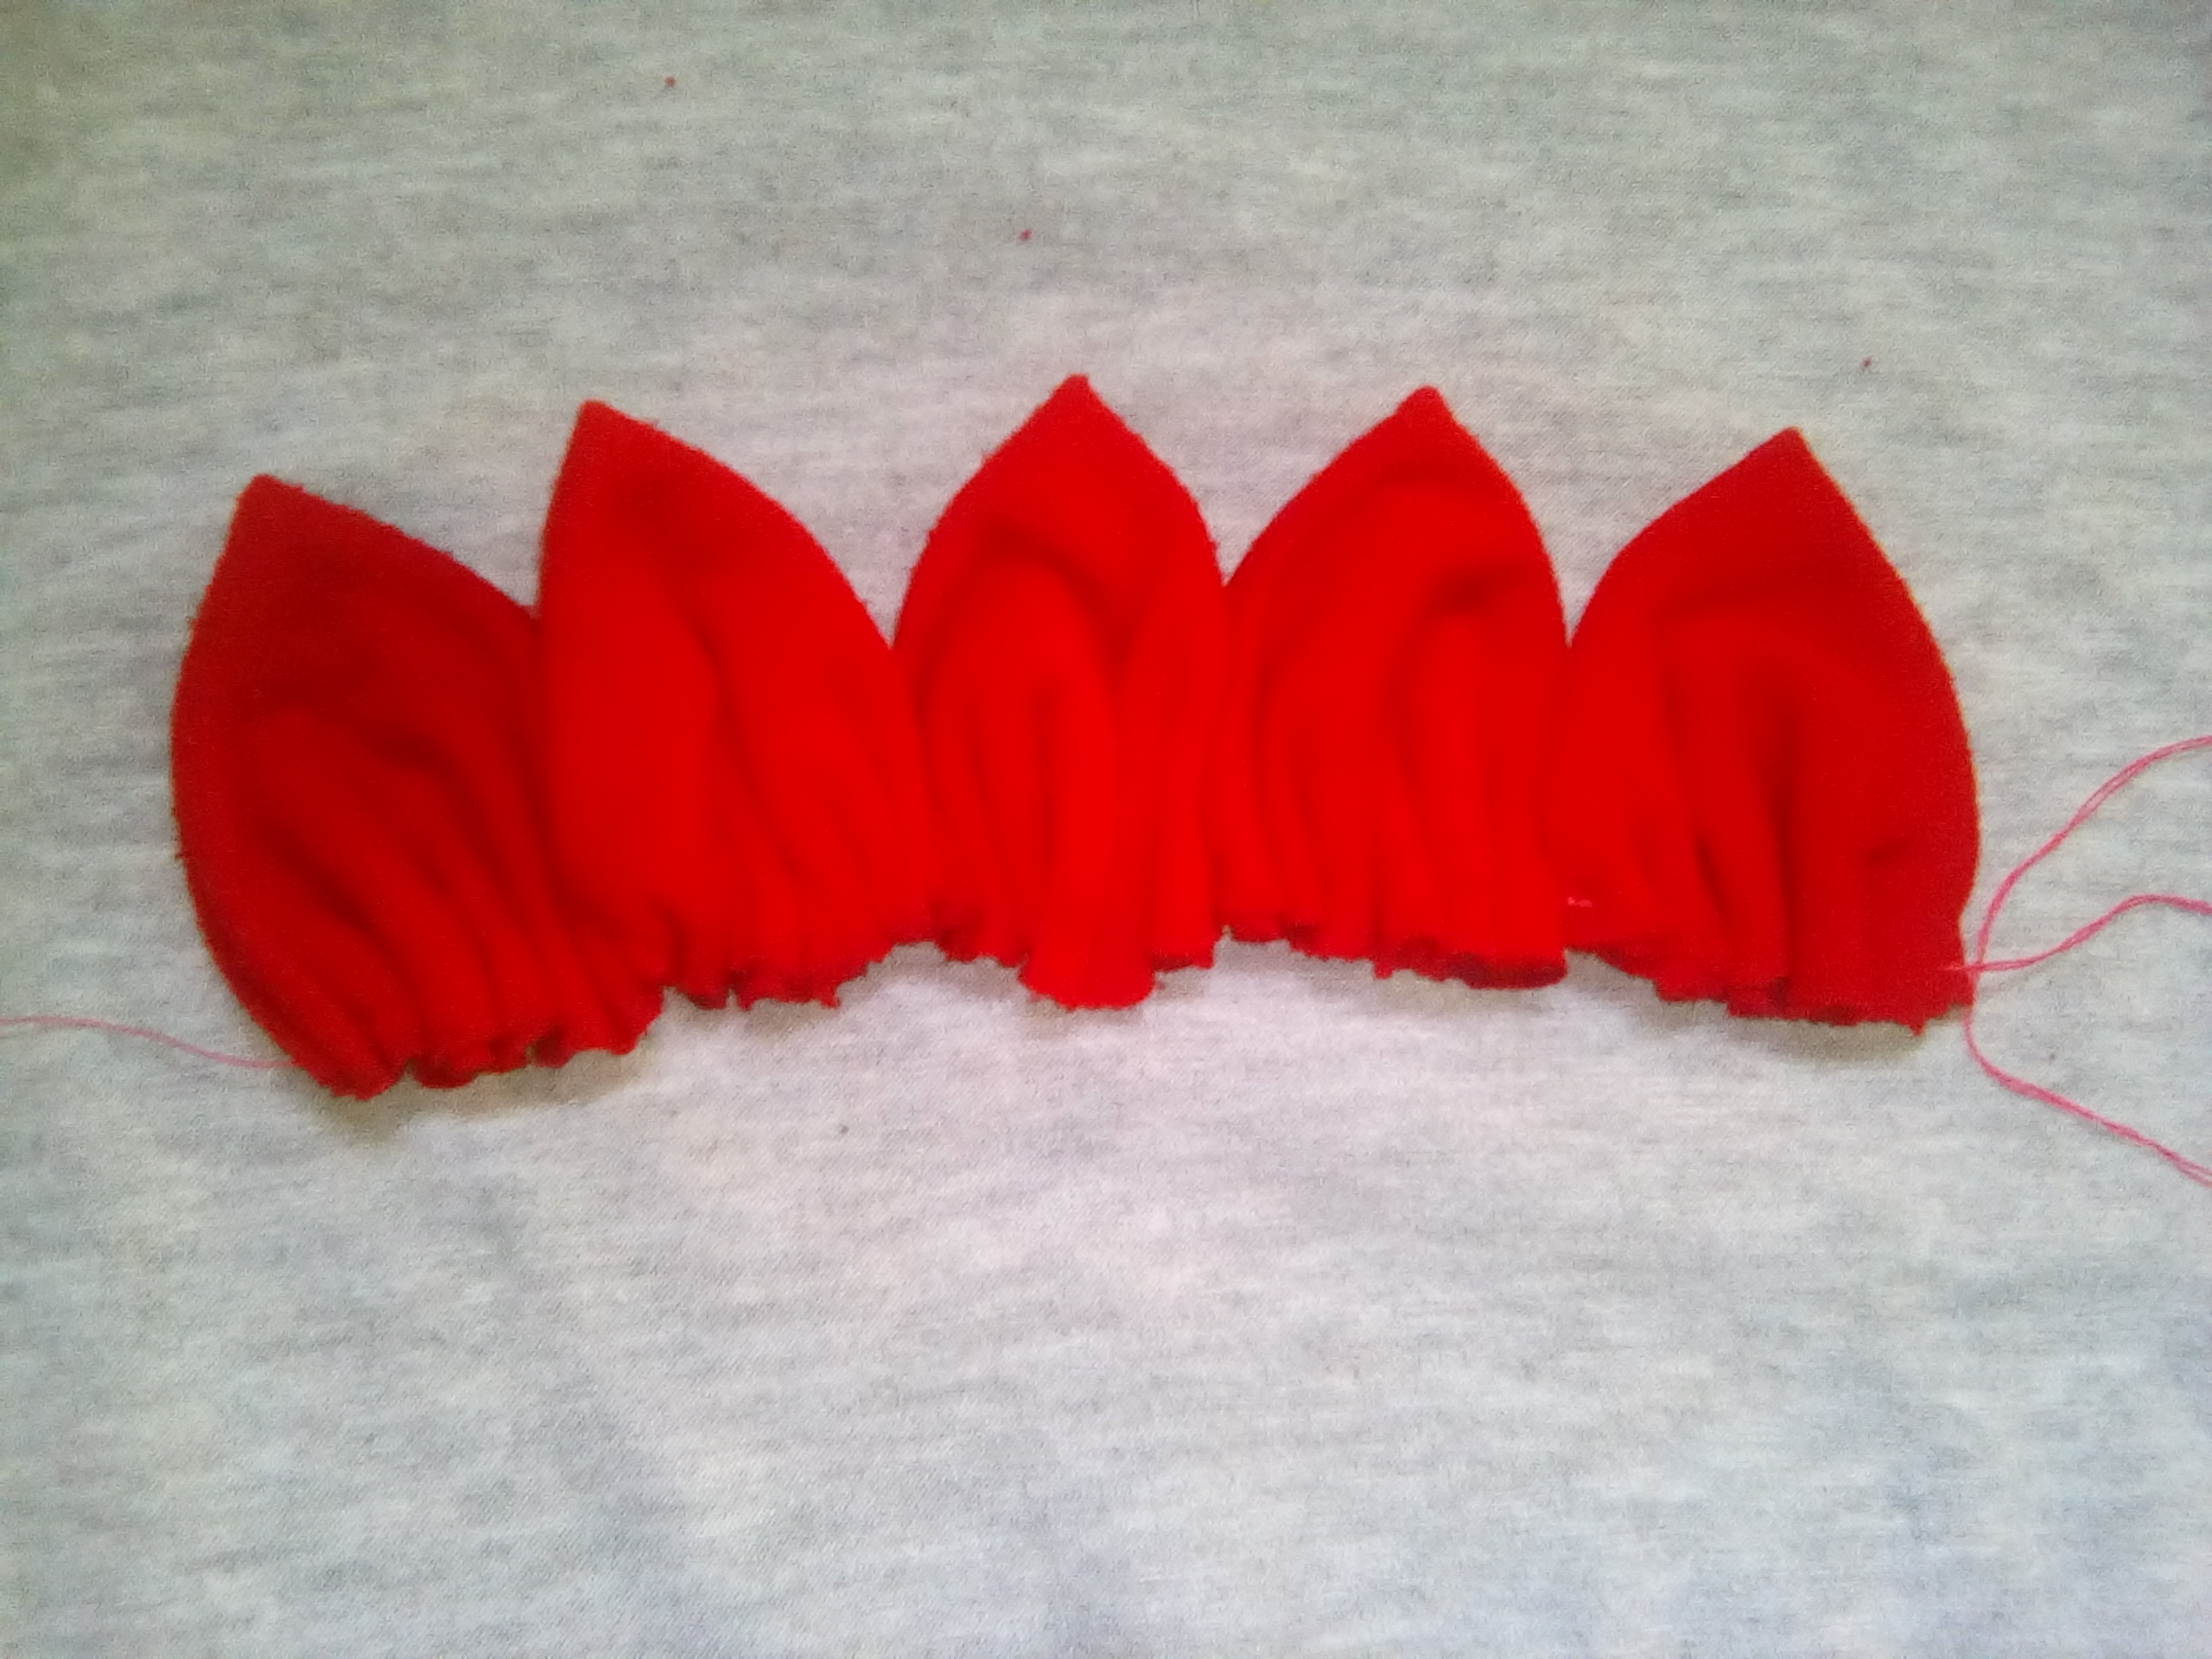
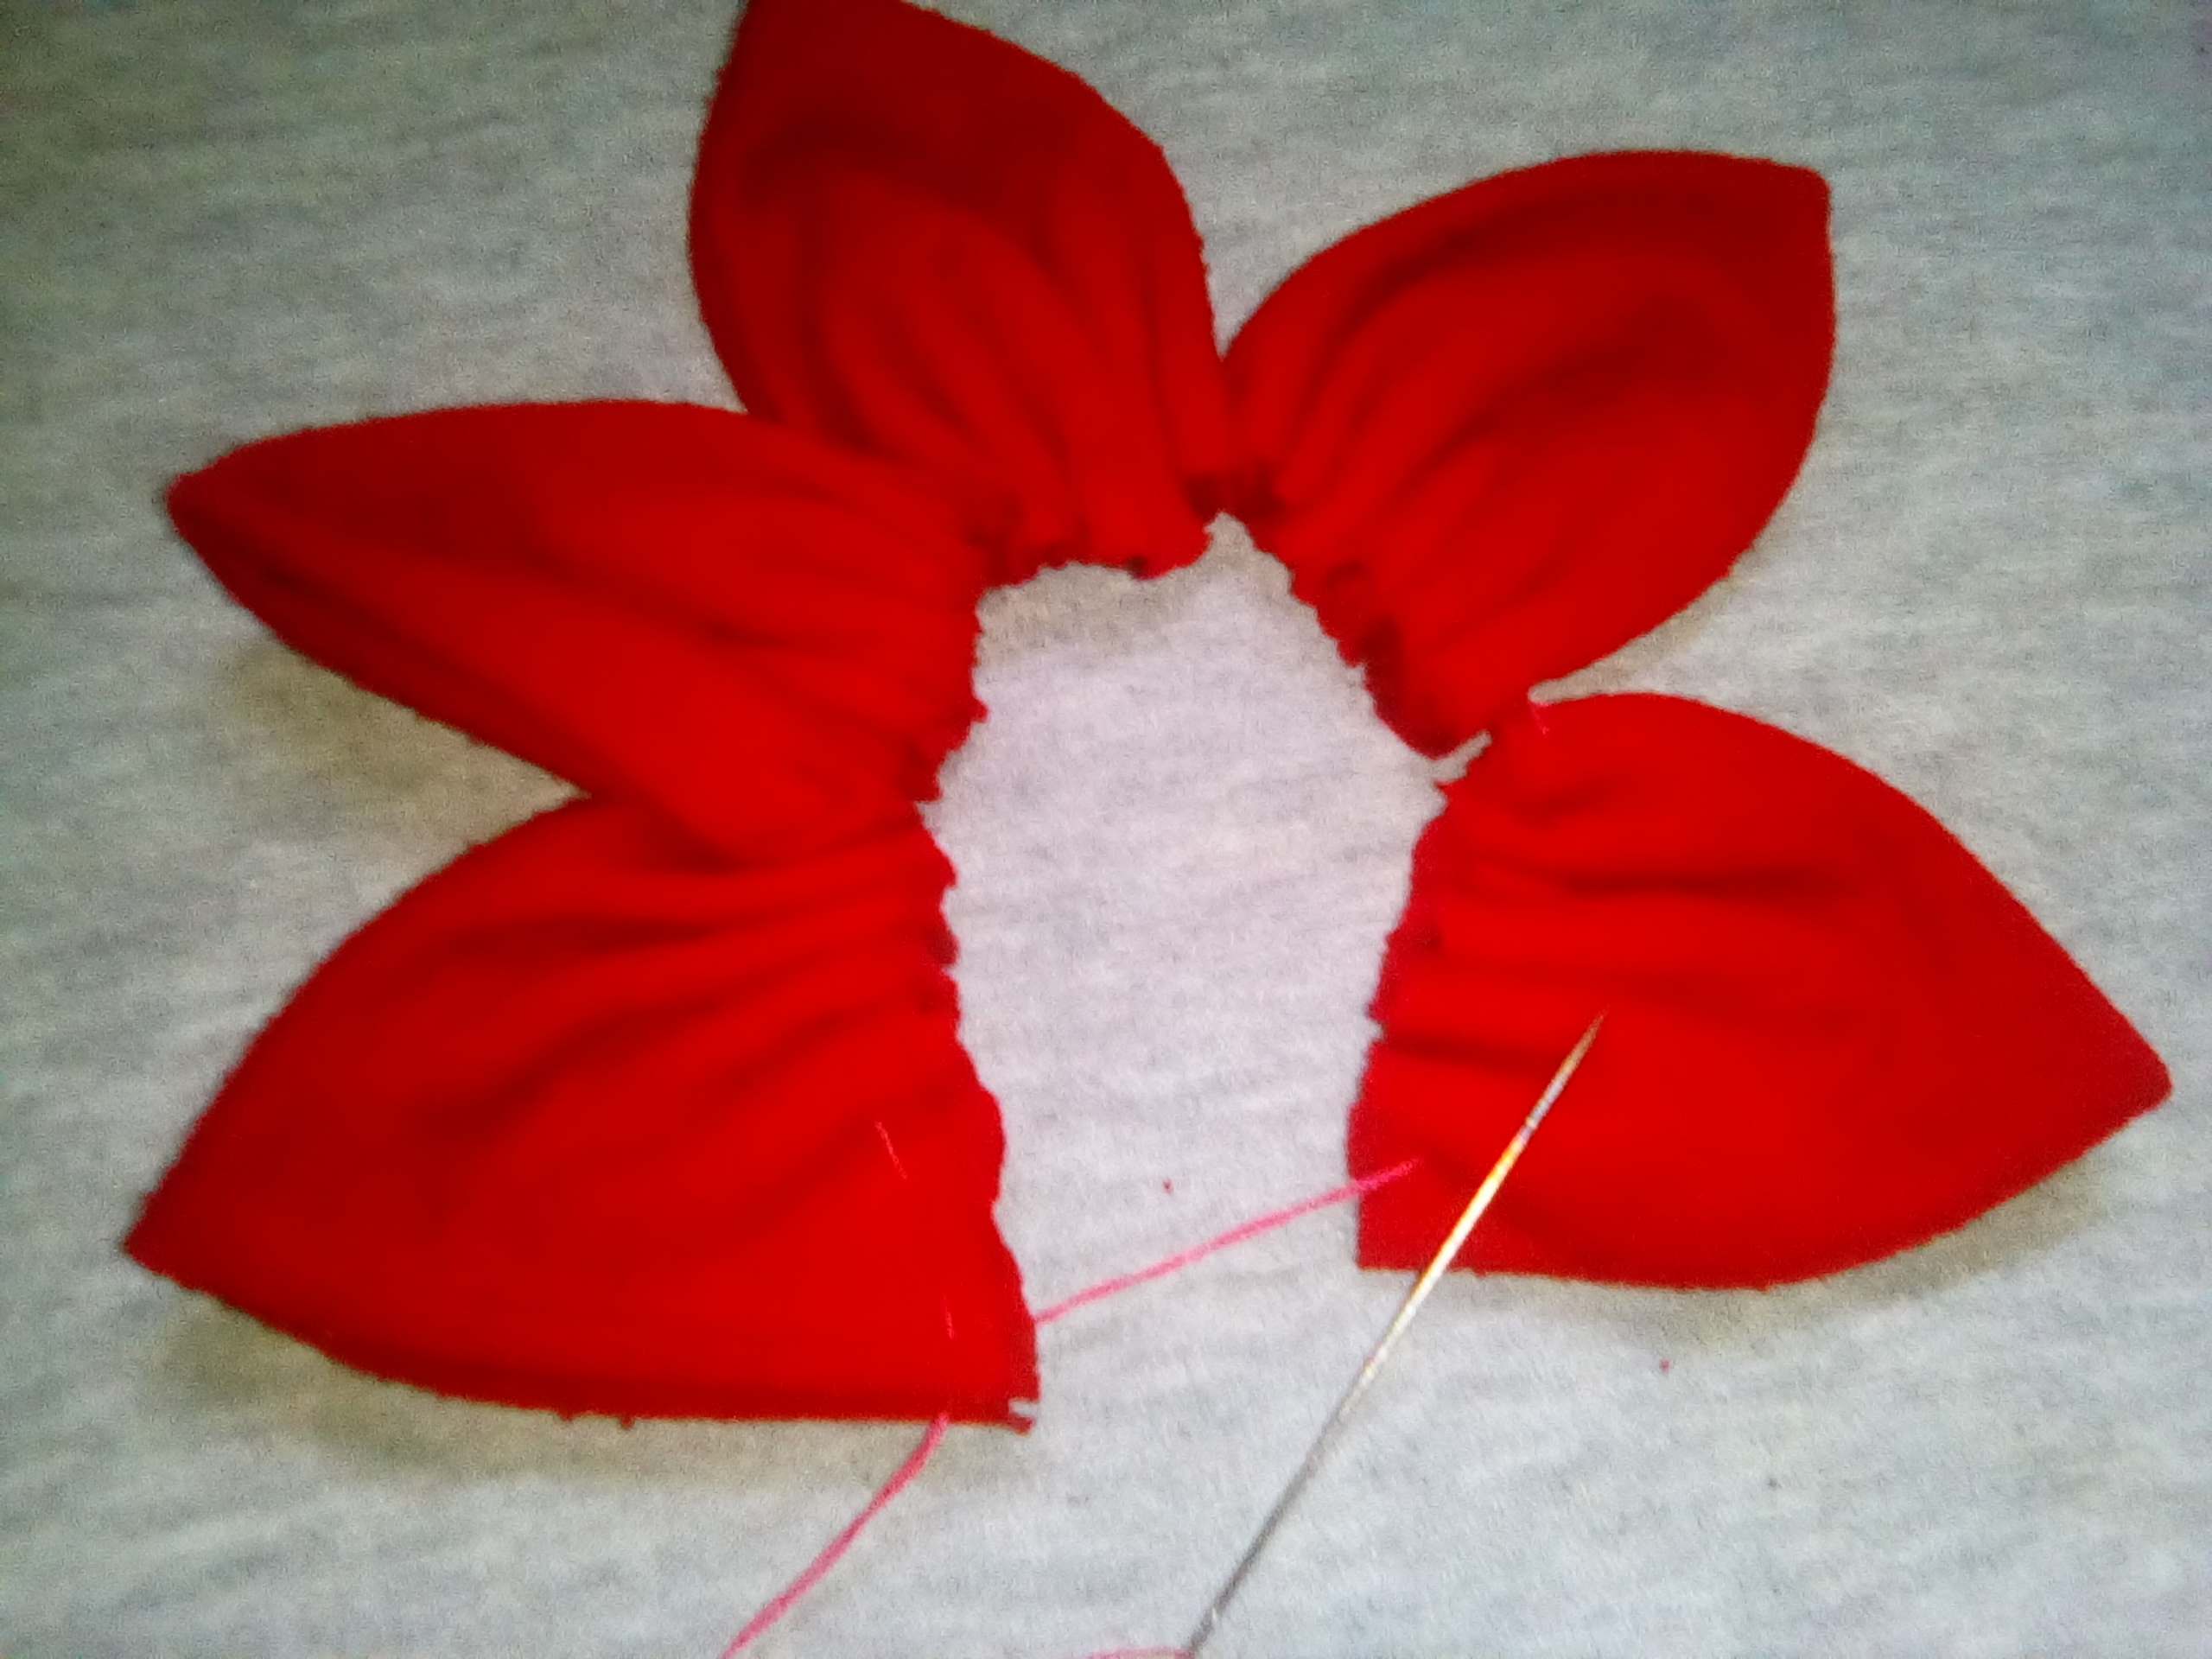
Una vez que los tenemos todo en fila solo falta unir el primero con el ultimo, apretando muy bien para que tome forma.
Once we have them all in a row, we only need to join the first one with the last one, pressing very well so that it takes shape.
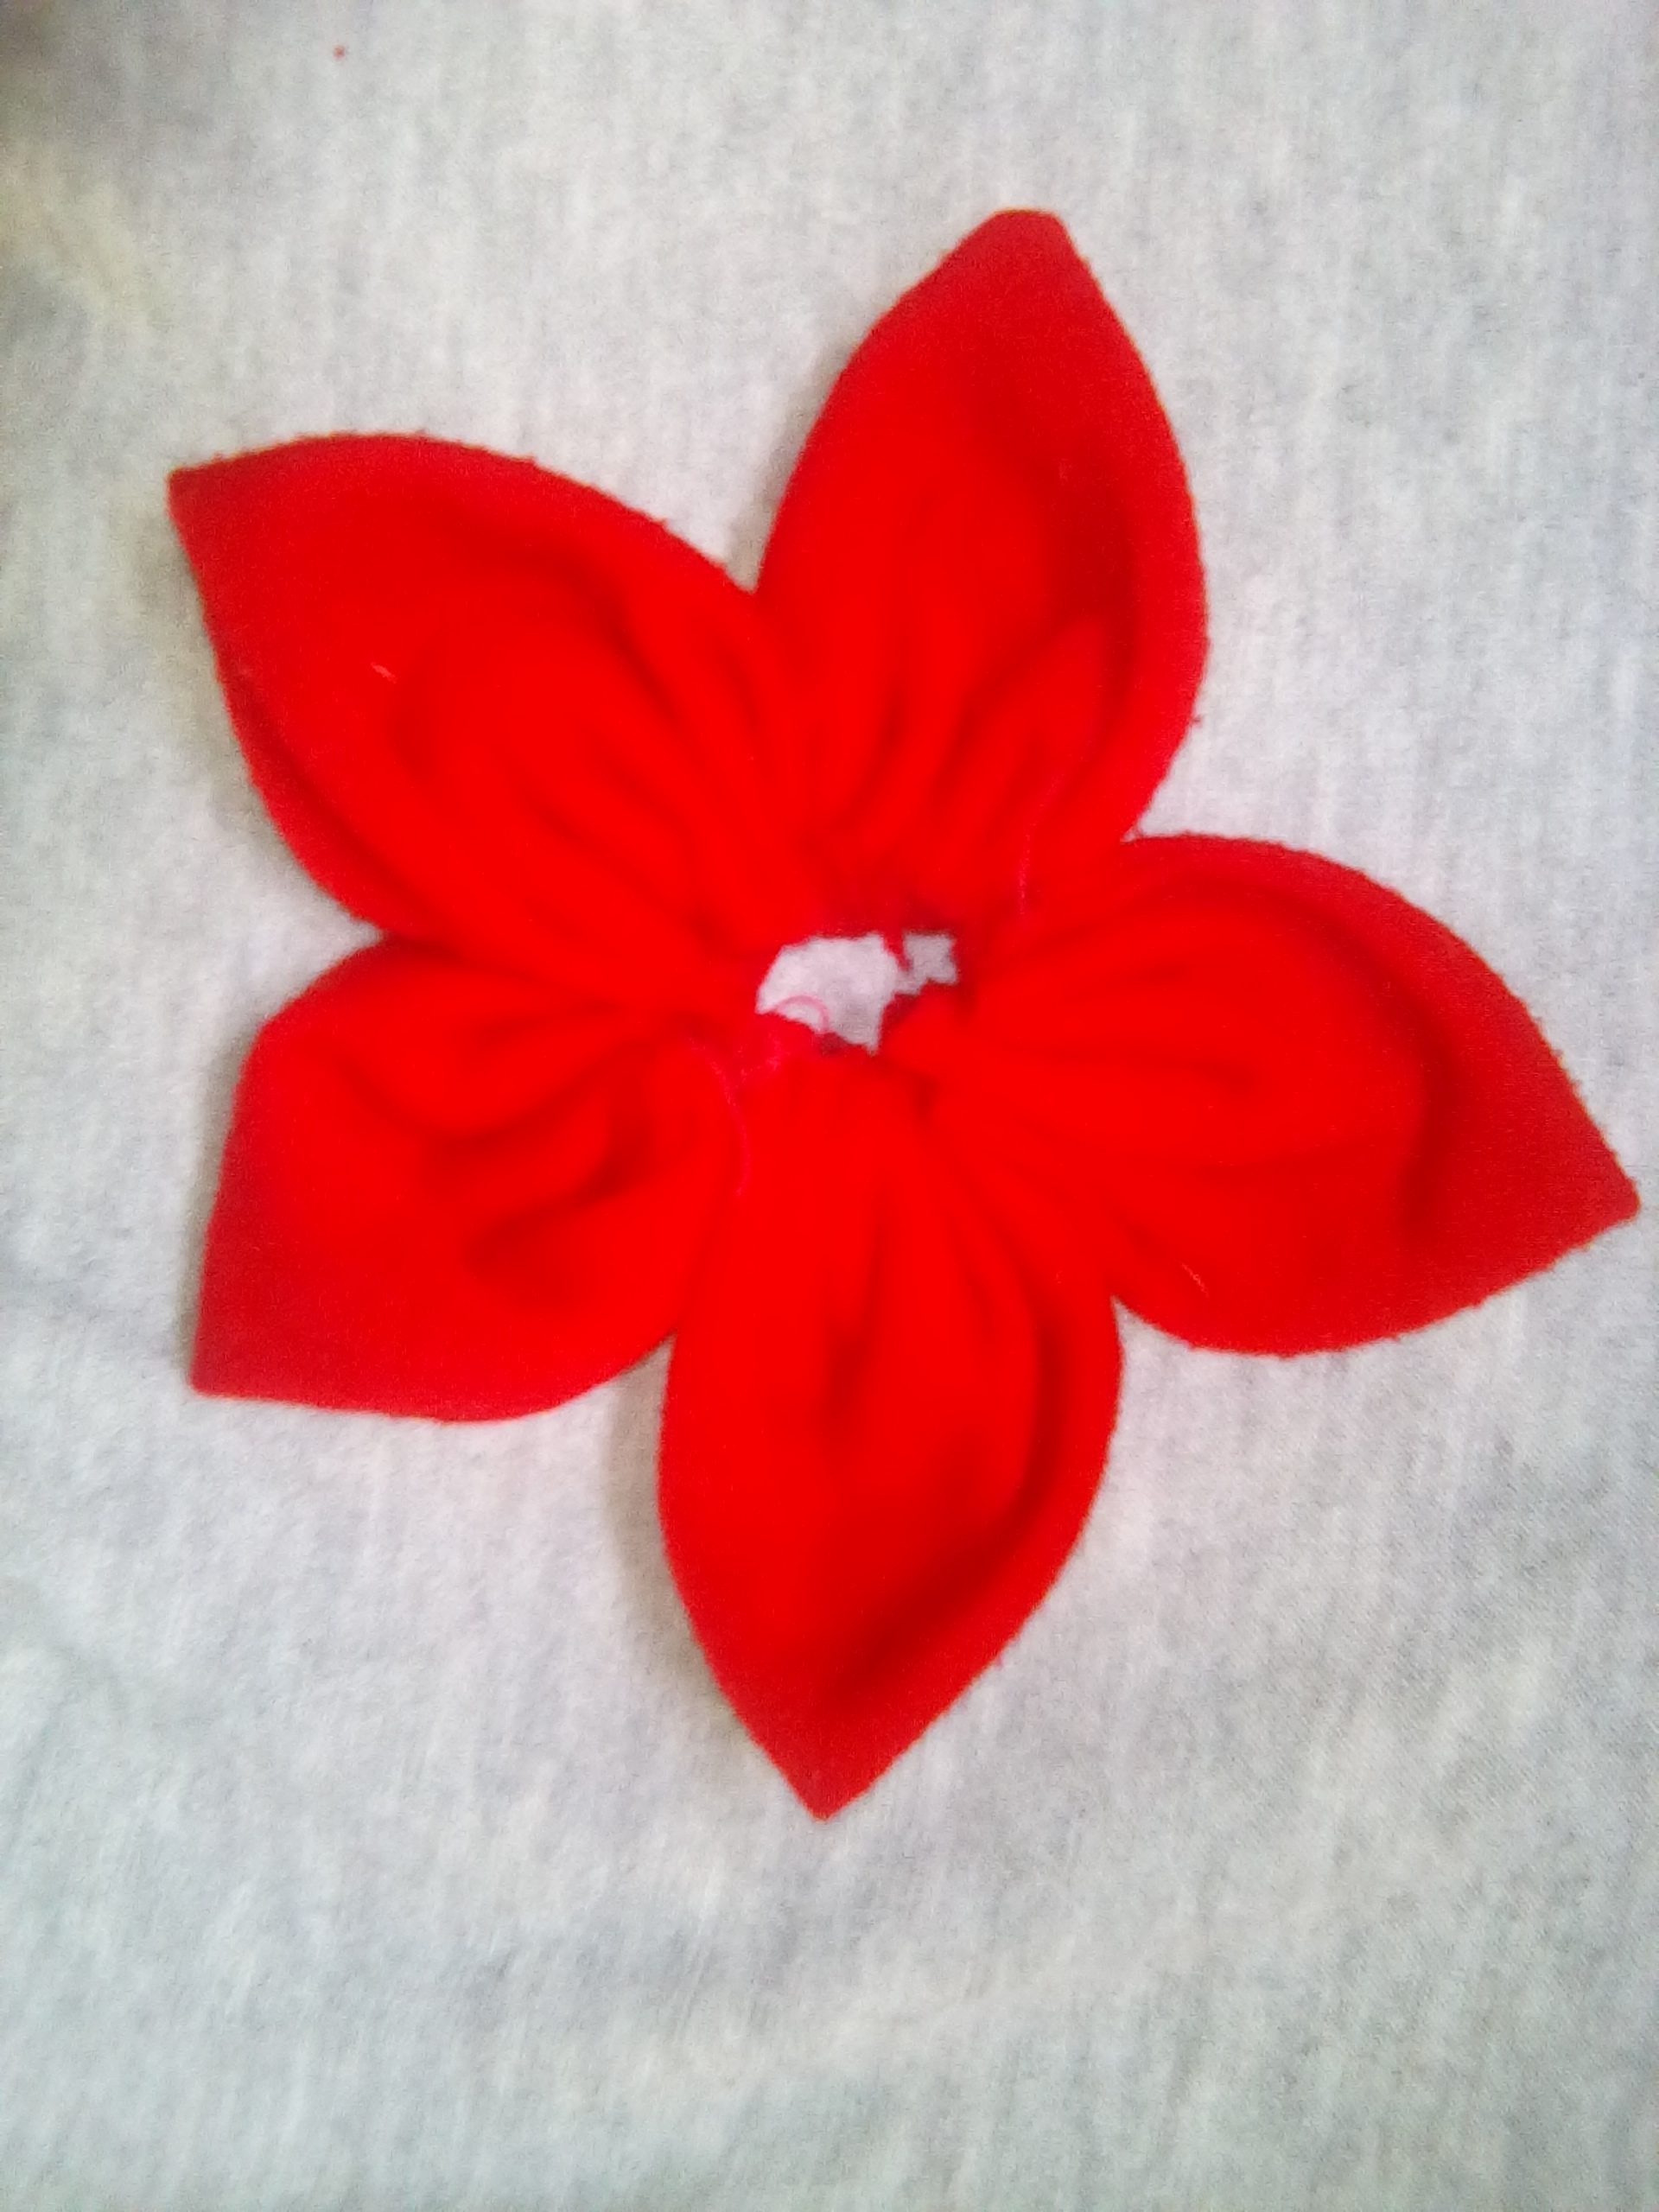
Lo siguiente que haremos será pegar, puede ser con silicón en barra, el botón o lo que hayamos elegido para el centro de nuestra flor. ¡Y listo!
The next thing to do is to glue the button or whatever we have chosen for the center of our flower with silicone stick, and that's it!