[ESP-ING] Pulseras de Hilo encerado // Waxed thread bracelets:

Hola amigos de Hivers ¿Cómo están? espero que muy bien hoy Vamos hacer unas lindas pulseras de Hilo encerado ¿Están listos? yo si así que manos a la obra.
Hello friends of Hivers How are you? I hope very well today We are going to make some nice Waxed Thread bracelets Are you ready?.
Materiales / Materials:
- Hilo encerado colores de su preferencia.
- Tijera.
- Yesquero.
- Waxed thread in the colors of your choice.
- Scissors.
- Plasterer.

Paso a Paso / Step by step:
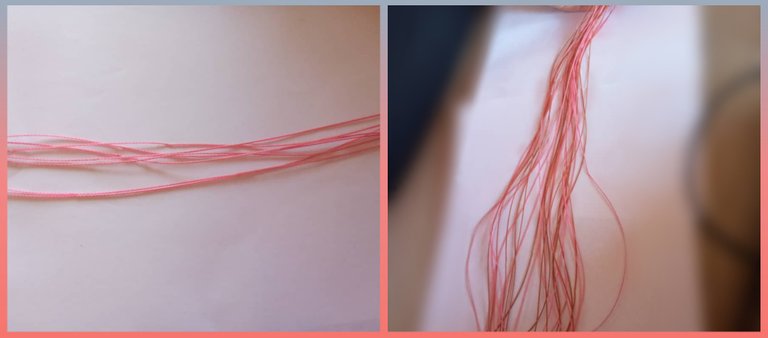
Vamos a cortar 12 Tiras de 1 metro de hilo encerado.
Let's cut 12 strips of 1 meter of waxed hilum.
Ya que hemos cortado nuestras 12 tiras, ahora las vamos a unir todas bien derechas de punta a punta, y ya cuando las tengamos todas unidas de punta a punta, Ahora le vamos hacer un nudo a nuestras tiras, como el ejemplo a continuación.
Since we have cut our 12 strips, now we are going to join them all upright from end to end, and when we have them all joined together from end to end, we are going to tie a knot in our strips, like the example below.
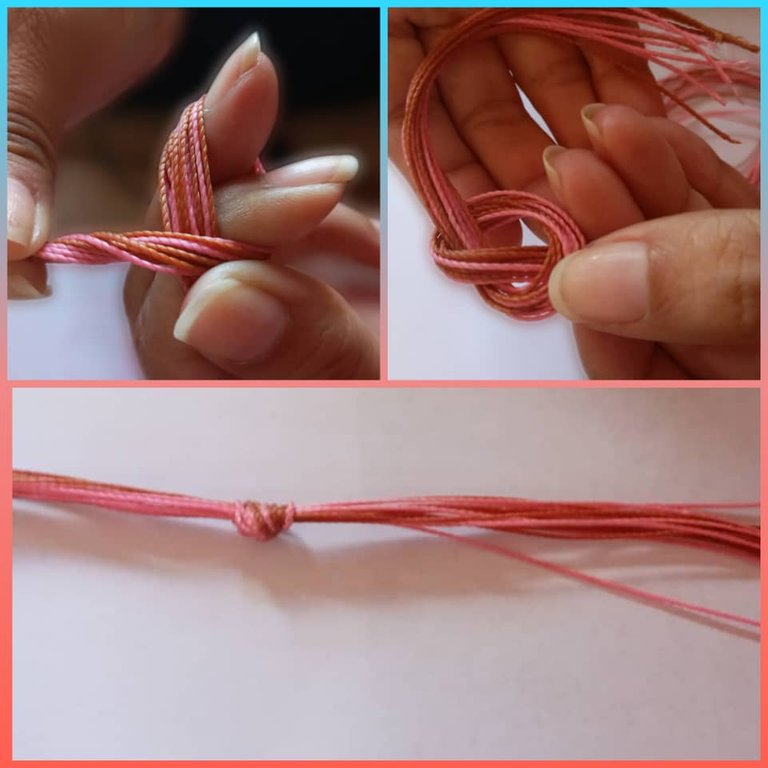
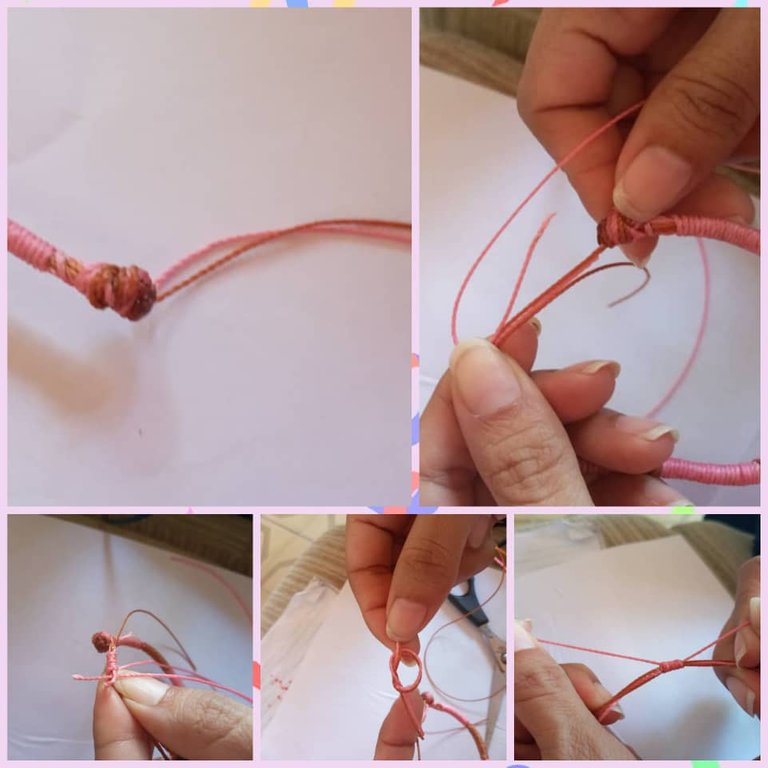
Ya que hicimos nuestro nudo ahora, vamos a darle vueltas a nuestros hilos uno por uno de esta manera como el ejemplo a continuación.
Since we made our knot now, let's spin our threads one by one in this way as the example below.
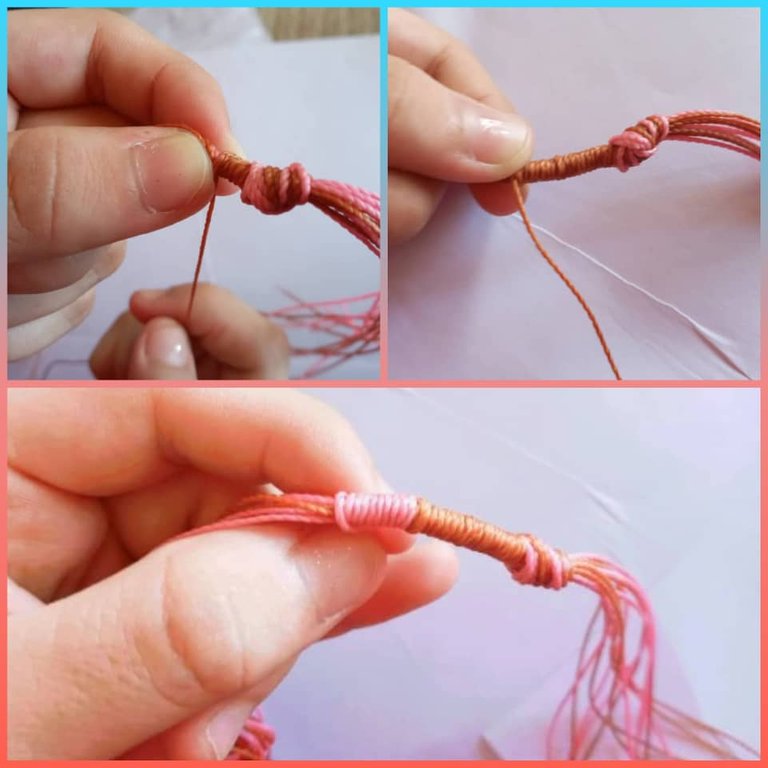
Y así sucesivamente, vamos tomando la medida de nuestra muñeca, hasta que nos quede de nuestra medida.
And so on, we are taking the measure of our wrist, until we are left with our measure.
Y ya que tengamos lista nuestra pulsera, ahora vamos hacerle otro nudo al final de nuestra pulsera como el 1 nudo que hicimos.
Now that we have our bracelet ready, let's make another knot at the end of our bracelet as the first knot we made.
Y ya que terminamos nuestro nudo, ahora vamos a cortar y quemar Todas las tiras restantes de nuestra pulsera menos 2 de cada lado, como el ejemplo a continuación.
And since we finished our knot, we will now cut and burn all remaining strips of our bracelet except 2 on each side, as the example below.
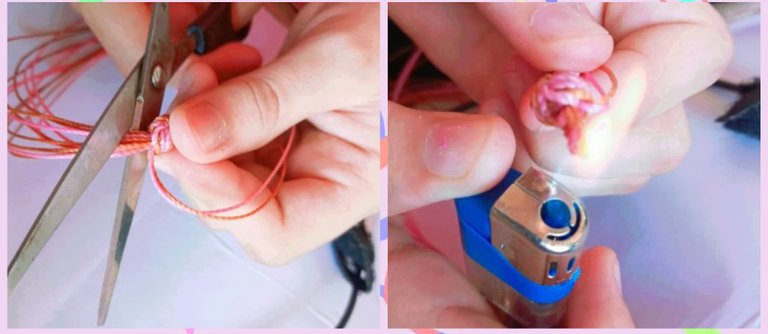
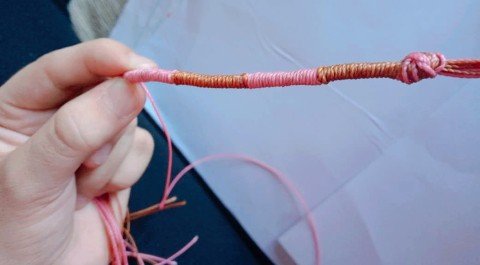
AhAhora realizamos un nudo franciscano, uniendo las 4 tiras uno hacia un lado y otro hacia otro, tomamos otro hilo encerado de 10 centímetros y lo Colocamos doblándolo un extremo hacia afuera y con el otro el extremo vamos a dar 7 vueltas hacia atrás y el orificio que nos ha quedo por allí introducimos el hilo y prensamos como lo se muestra en la foto, cortamos los extremos y quemamos sin dañar los hilos de abajo como lo muestra en la foto.
Now we make a Franciscan knot, joining the 4 strips one to one side and another to the other, we take another waxed thread of 10 centimeters and we place it bending one end outwards and with the other end we are going to give 7 turns backwards and the hole that has been left there we introduce the thread and press it as shown in the photo, we cut the ends and burn without damaging the threads below as shown in the photo.
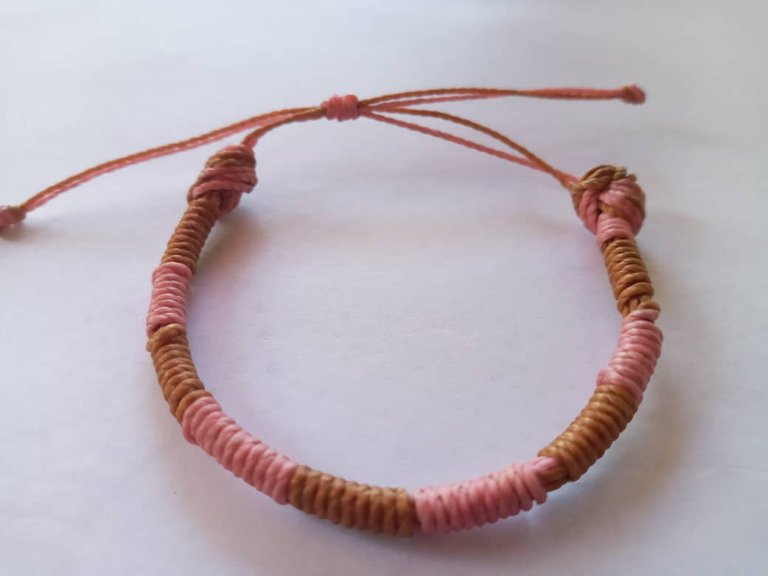
Y ya después de haber realizado todos estos pasos, estos son los resultados.
And already after having performed all these steps, these are the results.

Bueno y sin mas que decir espero que te gustara mucho esta manualidad, y espero que hagas muchas pulseras de hilo encerado, si tienes alguna duda dejala en los comentarios, hasta un proximo post.
Well and without more to say I hope you will like very much this craft, and I hope you will make many waxed thread bracelets, if you have any doubt leave it in the comments, until a next post.
Qué bonita pulsera, me gustó mucho. Yo aprendí hace poco a tejer pulseras en macramé y me encanta la técnica, los diseños son muy hermosos. Este que nos muestras no lo había visto, voy a intentar hacerla siguiendo tu paso a paso, se ve fácil. Gracias por compartirlo. Saludos.
Si es muy sencilla, yo también estoy aprendiendo, gracias espero que la hagas