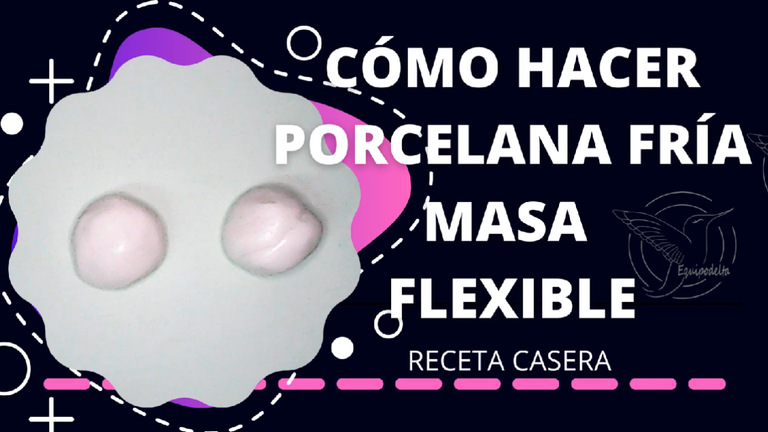
TUTORIAL Quick and easy homemade recipe. How to make cold porcelain dough or flexible dough (ESP/ENG)


Greetings my dear ones.
It's been a long time since we've seen each other with crafts...
Today I show you an easy and practical recipe with which you can make flexible dough or cold porcelain to make many crafts, I'm sure you have the materials at home.
This is a super relaxing and stimulating practice. Of course I recorded the process on video and I explain it in detail, I invite you to watch it at the end of the post, likewise, I present a brief summary of the step by step to achieve it. You won't believe how easy it is.
Join me.

Saludos mis queridos.
Hace mucho que no nos vemos con las manualidades...
Hoy te enseño una receta fácil y práctica con la que puedes hacer masa flexible o porcelana fría para hacer muchas manualidades, los materiales estoy segura los tienes en casa.
Esta es una práctica super relajante y estimulante. Por supuesto que grabé el proceso en vídeo y te explico con detalle, te invito a verlo al final del post, de igual manera, te presento un breve resumen del paso a paso para lograrlo. No creerás lo fácil que es.
Acompáñame.
Paso a paso. / Step by Step
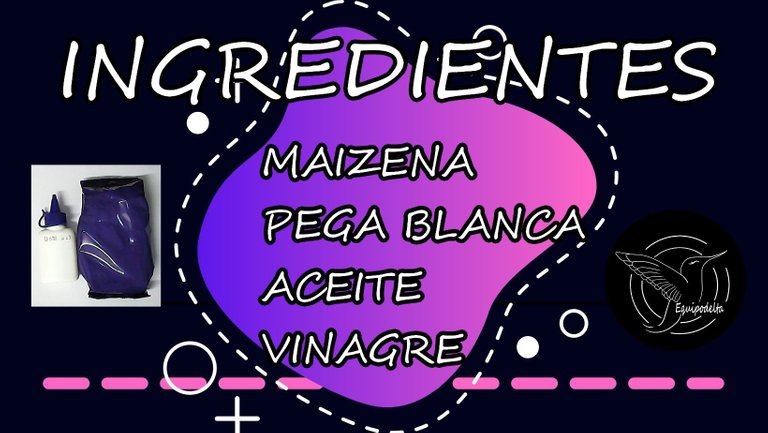
Materials or ingredients:
- Maizina o fécula de maiz.
- White handle.
- Aceite.
- Vinegar.
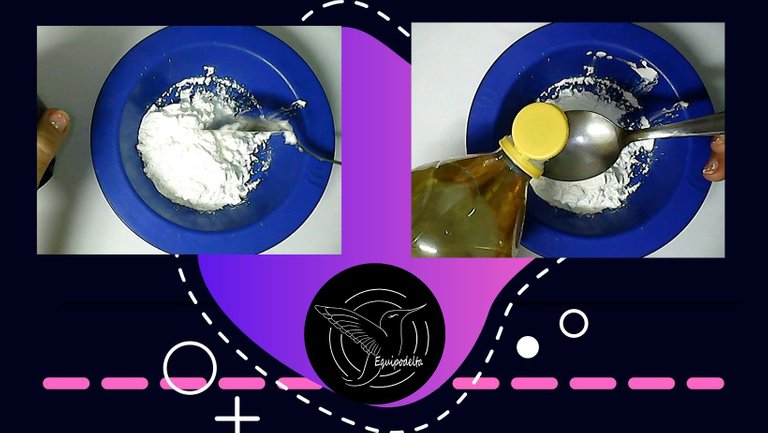
Step 1:
In a bowl place 2 tablespoons of Maizeina or cornstarch. Then add half a tablespoon of edible oil.
Paso 1:
En un recipiente colocamos 2 cucharadas de Maizeina o fécula de maíz. Luego agregamos media cucharada de aceite comestible.
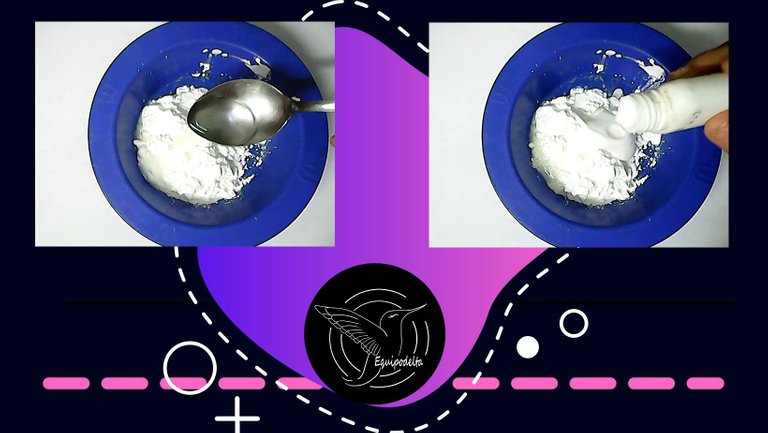
Step 2:
Add half a tablespoon of vinegar and for every 2 tablespoons you place of Maizina or cornstarch, add 3 to 4 tablespoons or so of white glue.
Paso 2:
Agrega media cucharada de vinagre y por cada 2 cucharadas que coloques de Maizina o fécula de maíz, agrega 3 a 4 cucharadas aproximadamente de pega blanca.
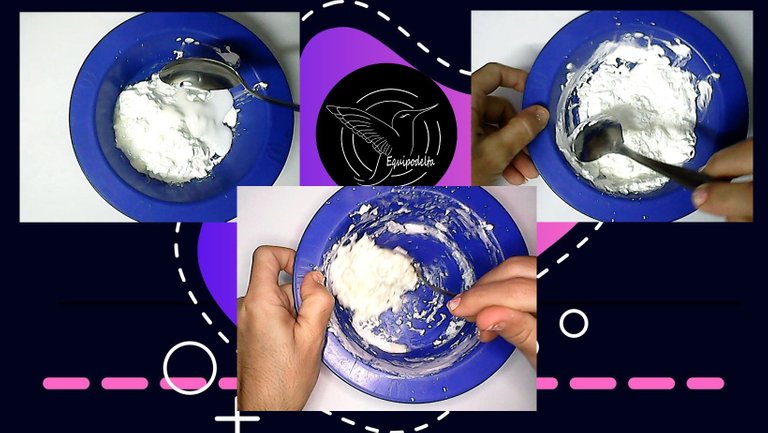
Step 3:
Use a mixer or in this case I used a spoon to mix the ingredients.
Paso 3:
Usa un removedor o en este caso yo usé una cuchara para mezclar los ingredientes.
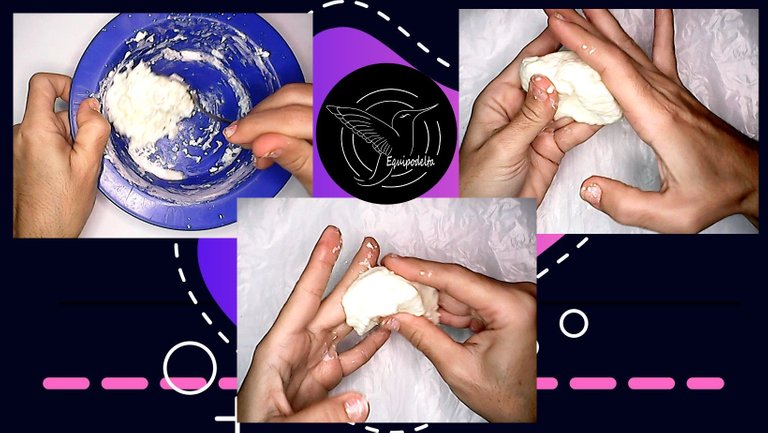
Step 4:
Once the mixture stops sticking in the bowl, you can now manipulate it with your hands to integrate the ingredients well and there are no lumps.
Use a bag or plastic wrap, or some material to protect your table, since the dough has a little oil and could stain.
Paso 4:
Una vez la mezcla deja de pegarse en el recipiente, ya puedes manipularla con las manos para integrar bien los ingredientes y no queden grumos.
Usa una bolsa o papel film, o algún material para proteger tu mesa, ya que la masa tiene un poco de aceite y podría manchar.
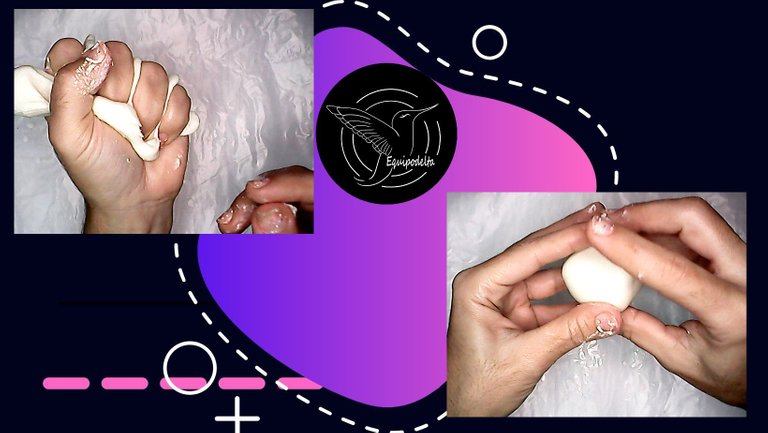
Mold and have fun mixing, this part is the one I enjoyed the most, as it ended up being very relaxing and stimulating for my hands.
Moldea y diviértete mezclando, esta parte es la que más disfruté, pues terminó siendo muy relajante y estimulante para mis manos.
The point at which the dough is ready is when you divide it and it stops stretching, that is, it breaks at once.
If you need to add more flour you can do it, if you need to add more glue too, it all depends on what is necessary to reach this point.
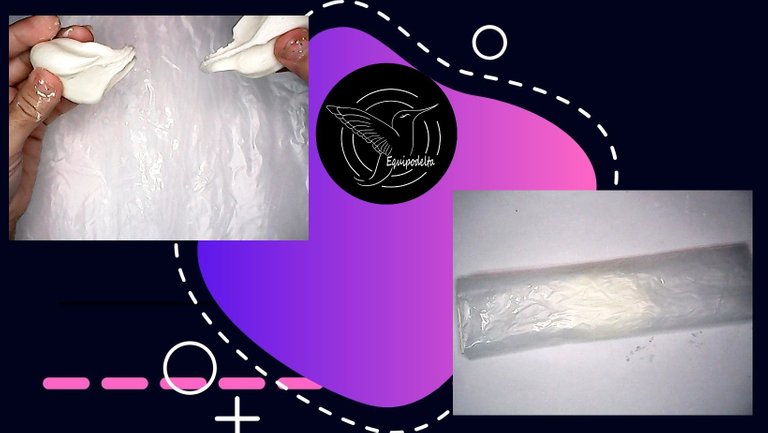
Just here you can add color to the dough, divide into several balls and add a drop of cold paint or edible paint, I left it white, because I like to paint it after I made my craft and it dried, to be able to see the colors well in the finish, because if you add it to the dough, you will not be sure if the colors will be darker or lighter.
In both cases they are beautiful and perfect.
Remember to let it rest for a few minutes in a bag or cling film.
I hope you like it and have fun making a lot of things, taking advantage of these dates.
Let's get to work!
El punto en que la masa está lista es cuando la divides y deja de estirarse, es decir, se rompe de una vez.
Si necesitas agregar más harina puedes hacerlo, si necesitas agregar más pega también, todo depende de lo necesario para llegar a este punto.
Justo aquí puedes agregar color a la masa, divide en varias bolitas y agrega una gota de pintura al frío o pintura comestible, yo lo dejé blanco, pues me gusta pintarlo después que hice mi manualidad y se secó, para poder ver bien los colores en la terminación, ya que si lo agregas a la masa, no tendrás certeza si los colores quedarán más oscuros o más claros.
En ambos casos quedan hermosos y perfectos.
Recuerda dejar reposar unos minutos dentro de una bolsita o film.
Espero te guste y te diviertas haciendo un montón de cosas, aprovechando estas fechas.
¡Manos a la obra!
Detalles Técnicos / Technical Details
Edition:
Program: MediBang Paint Pro.
Graphics tablet: Huion (Usb Pen Tablet). Model 420.
Used Medibang brushes:
- Candy.
- Pluma (gruesa).
- Aerógrafo.
Used Medibang tools:
- Ajuste entrecruzado.
Music Video:
––––––––––––––––––––––––––––––
Mango by Smith The Mister
Smith The Mister
Music promoted by Audio Library
––––––––––––––––––––––––––––––


Buenisimooo!!!! creo que tengo todos los ingredientes para preparar esta masa de porcelana fria, isabelita se va a emocionar pues ella lleva varios dias diciendome para hacer una manualidad diferente, tiene las acuarelas tambien asi que se va a divertir con esto. Gracias por compartirlo. Saludos
Hola amiga, saludos a mi tocaya seguro se divertirá un montón como yo, no he parado de reírme con esto, me puse hacer cosas, jajaja, es divertido.
Las acuarelas le va muy bien amiga. Ponla en la masa mientras mezclas.
Muy educativo amigos de @equipodelta, gracias por compartir.
Yo soy malísima con las manualidades, pero lo imaginé como terapia relajante, debe ser cool.