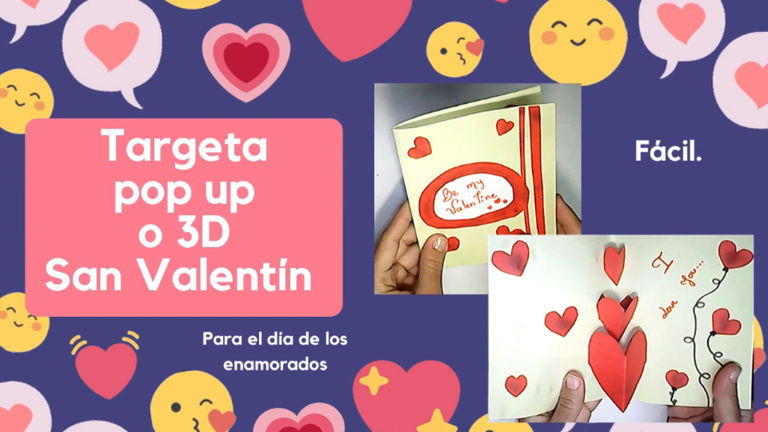
Pop up card 3d 💘 Valentine's Day, for the day of lovers. 💘 Easy. 💘 (ESP/ENG)


Greetings dear handicraft lovers.
Valentine's Day is coming and we know that, give something special made by yourself, give besides chocolates and chocolates that all women love, a personalized card, a POP UP or 3D card, little hearts that jump from inside the card.
Likewise, dear friends, in addition to those special details that we will give to our boyfriends, friends and husbands, let's surprise them with a beautiful detail made by ourselves.
From heart to heart for you, for your creativity, this beautiful project that I hope you like.
Happy Valentine's Day.

Saludos queridos amantes de las manualidades.
Se acerca el Día de San Valentín y eso lo sabemos, regala algo especial hecho por ti mismo, regala además de bombones y chocolates que les encanta a todas las mujeres, una tarjeta personalizada, una tarjeta POP UP o 3D, corazoncitos que saltan desde el interior de la tarjeta.
De igual manera queridas amigas, además de esos detalles especiales que obsequiaremos a nuestros novios, amigos y esposos, sorprendámos con un hermoso detalle elaborado por nosotras mismas.
De corazón a corazón para ti, para tu creatividad, este lindo proyecto que espero te guste.
Feliz día de San Valentin.
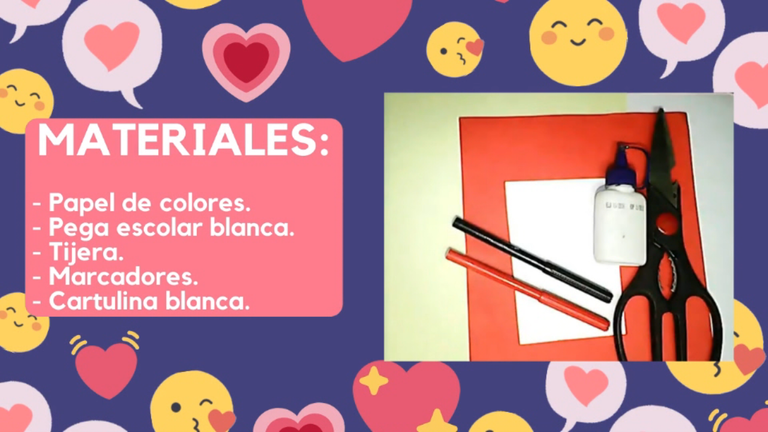
Materials:
- Colored paper.
- White school glue.
- Scissors.
- Markers.
- White cardboard.
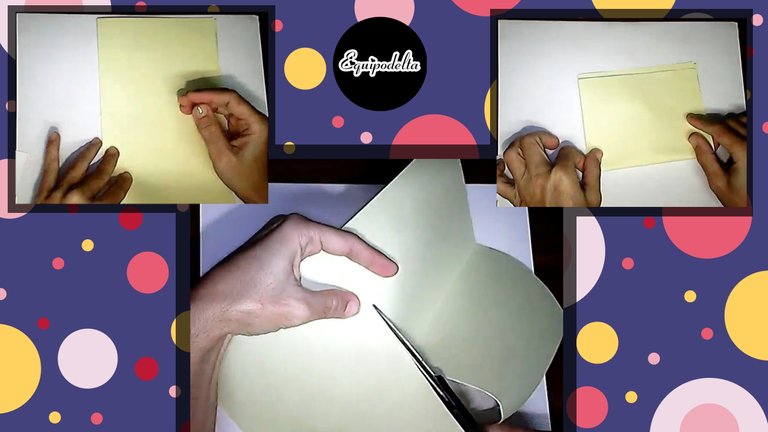
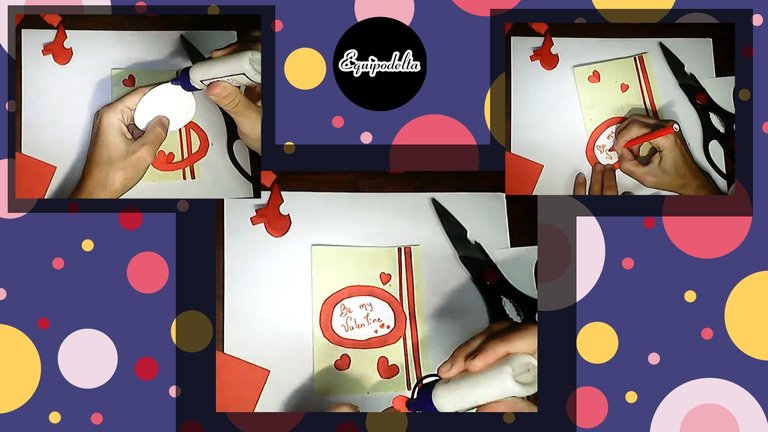
Fold in half a colored sheet of your choice, I used a soft yellow paper, then fold it in half again, we are only going to use half the size of a letter sheet. Cut the fold in half. If you like you can use the whole sheet.
Doblamos por la mitad una hoja de color de tu preferencia, yo usé un papel de color amarillo suave, luego vuelve a doblar por la mitad, solo vamos a usar la mitad del tamaño de una hoja carta. Recorta por el dobles a la mitad. Si gustas puedes usar toda la hoja.
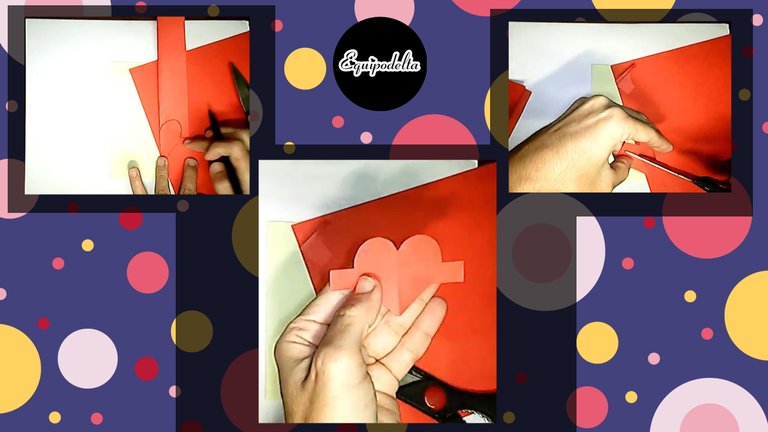
In a small strip of approximately 7 centimeters we fold in half and draw half of a heart but just in the center of it we leave a small ribbon, we will need it to stick it to the card, then cut it out, repeat this step several times with hearts of different sizes, I cut three according to the size of my card.
En una pequeña tira de 7 Centímetros aproximadamente doblamos por la mitad y dibujamos la mitad de un corazón pero justo al centro de este dejamos una pequeña cinta, la necesitaremos para pegarla a la tarjeta, luego recorta, repite este paso varias veces con corazones de diferentes tamaños, yo corté tres de acuerdo al tamaño de mi tarjeta.
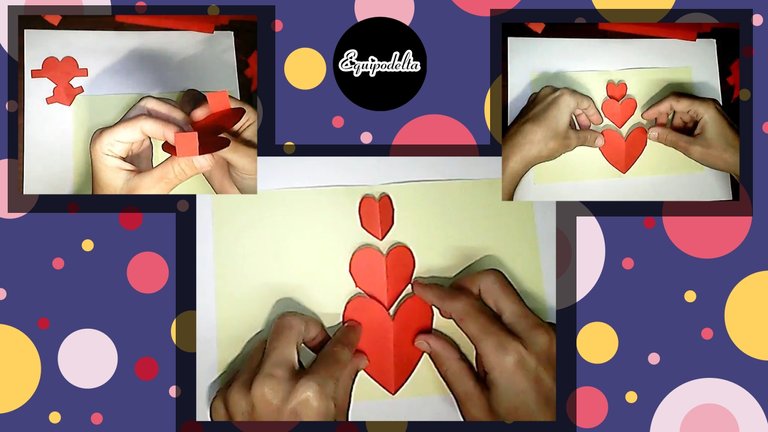
Proceed to fold the tabs that we left on the hearts inwards and then we place each one so that each half coincides with the middle of the card, where we folded, then we glue the tabs to the card, try not to stretch the hearts, they should be semi-folded in the center of the card.
Procedemos a doblar las pestañas que dejamos en los corazones hacia adentro y luego colocamos cada uno que cada medio coincida con la mitad de la tarjeta, por donde doblamos, seguidamente pegamos las pestañas a la tarjeta, procura no estirar los corazones, estos deben estar semi doblados en el centro de la misma.
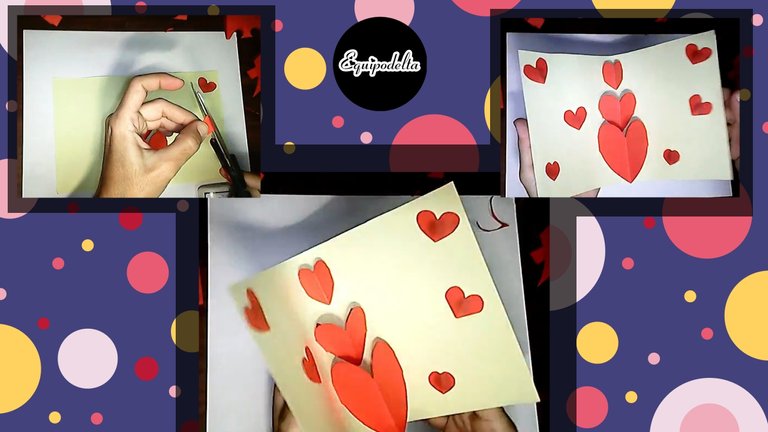
Cut out several hearts of different sizes to decorate, then glue them with the school glue in the spaces of your choice. Let it dry a little and proceed to carefully fold our card, making sure that the hearts inside are well.
Recorta varios corazones de diferentes tamaños para decorar, luego lo pegamos con la pega escolar en los espacios de nuestra preferencia. Dejamos secar un poco y procedemos a doblar con cuidado nuestra tarjeta, observando que los corazones dentro estén bien.

After folding the card, we continue with the internal decoration, write your dedication with colored marker and draw laces on the hearts to make them look like balloons.
Luego de doblar la tarjeta, seguimos con la decoración interna, escribe tu dedicatoria con marcador de colores y a los corazones dibuja cordones para que parezcan globos.
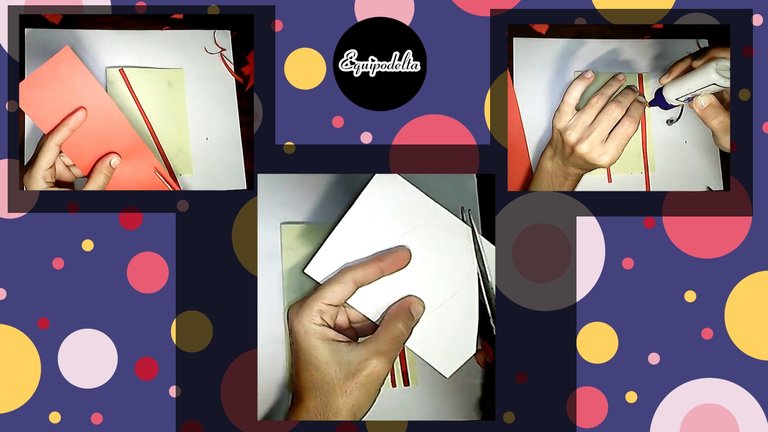
Cut two long strips one thinner than the other, proceed to decorate the outside of our card. Glue the strips on the left side of the card.
Draw an oval on the cardboard, sized to fit the card, then cut it out.
Recorta dos tiras largas una más delgada de la otra, procedemos a decorar la parte externa de nuestra tarjeta. Pega las tiras del lado izquierdo de la tarjeta.
Dibuja un óvalo en la cartulina, de un tamaño adecuado a la tarjeta, luego recorta.
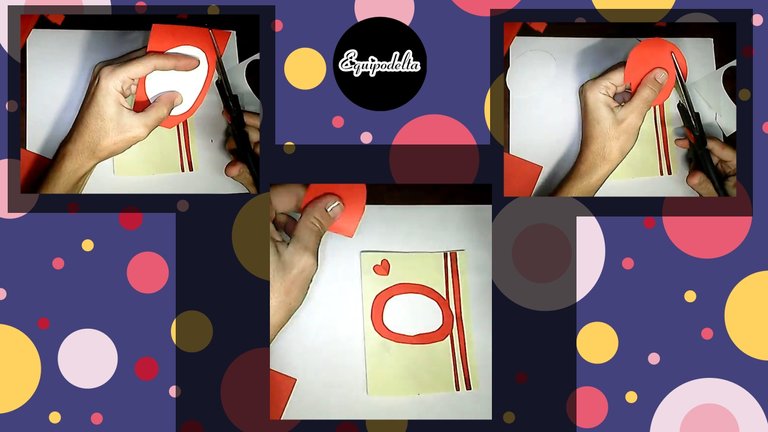
We take the sample of the size of the oval and cut out a piece of paper leaving edges outwards, then we make a small cut in the center, we will make a frame for the oval, we cut out the center leaving an internal margin. Glue the frame to the oval.
Finally, we glue the oval to the card and write our main message with markers.
That's it, you now have an idea to personalize or make a nice Pop Up or 3D card, a simple and economical solution to give as a gift, made by yourself.
Tomamos la muestra del tamaño del óvalo y recortamos un papel dejando bordes hacia afuera, luego hacemos un pequeño corte en el centro, haremos un marco para el óvalo, recortamos el centro dejando un margen interno. Pegamos el marco al óvalo.
Para finalizar, pegamos el óvalo a la tarjeta y escribimos nuestro mensaje principal con marcadores.
Listo, ya tienes una idea para personalizar o hacer una linda tarjeta Pop Up o 3D, una solución sencilla y económica para regalar, hecho por ti mismo.
Detalles Técnicos / Technical Details
Program: MediBang Paint Pro.
Graphics tablet: Huion (Usb Pen Tablet).
Pictures and vídeo of my own. Web Cam Omega.
Designs and images courtesy of Canva
Music Vídeo:
––––––––––––––––––––––––––––––
Freedom by Roa
Creative Commons — Attribution 3.0 Unported — CC BY 3.0
Music promoted by Audio Library
––––––––––––––––––––––––––––––


https://twitter.com/EquipodeltaS/status/1353684074708217856
Está espectacular y súper fácil de hacer! Genial, mi flaca bella! 20 puntos!
Gracias amiga, ando practicando mucho con eso, de verdad me gusta inventando cositas <3 me alegra que te guste.
Es una idea genial, y además muy bonita 💜 creo que muchos te la van a comprar porque me imagino lo caras que deben estar esas tarjeta en vzla. Feliz semana amiga?🤗
Amiga feliz día! pues por mi zona no he visto tarjetas, y supongo que si las vemos están por las nubes como dices. De niña siempre me gustaron esas cosas y esos libros pop ups o 3D espero que poco a poco pueda subir de nivel y hacer cosas más complejas para compartir con todos.
Congratulations @equipodelta! You have completed the following achievement on the Hive blockchain and have been rewarded with new badge(s) :
You can view your badges on your board and compare yourself to others in the Ranking
If you no longer want to receive notifications, reply to this comment with the word
STOPSuper linda!! te quedo genial amiga!! y se ve bien facil de hacer, creo que intentare hacer una para mi amado 😍 Saludos!
Ains amiga qué felicidad! muchas gracias, Creo que mejor quedan en cartulina la parte de la tarjeta, lo demas si es bueno usar papel es más maleable.
Congratulations, your post has been upvoted by @dsc-r2cornell, which is the curating account for @R2cornell's Discord Community.
Enhorabuena, su "post" ha sido "up-voted" por @dsc-r2cornell, que es la "cuenta curating" de la Comunidad de la Discordia de @R2cornell.
Hola amiga @equipodelta te quedaron bellas las tarjetas.
Hola querido, muchas gracias, vamos a practicar mucho ese estilo, la verdad es super divertido.