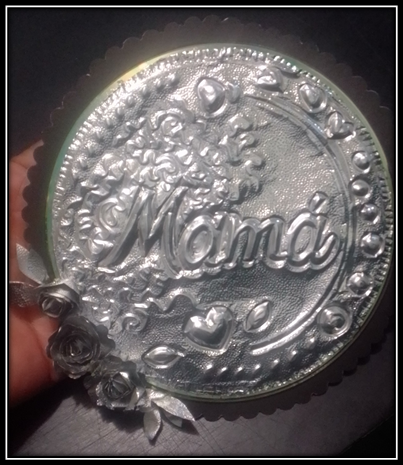
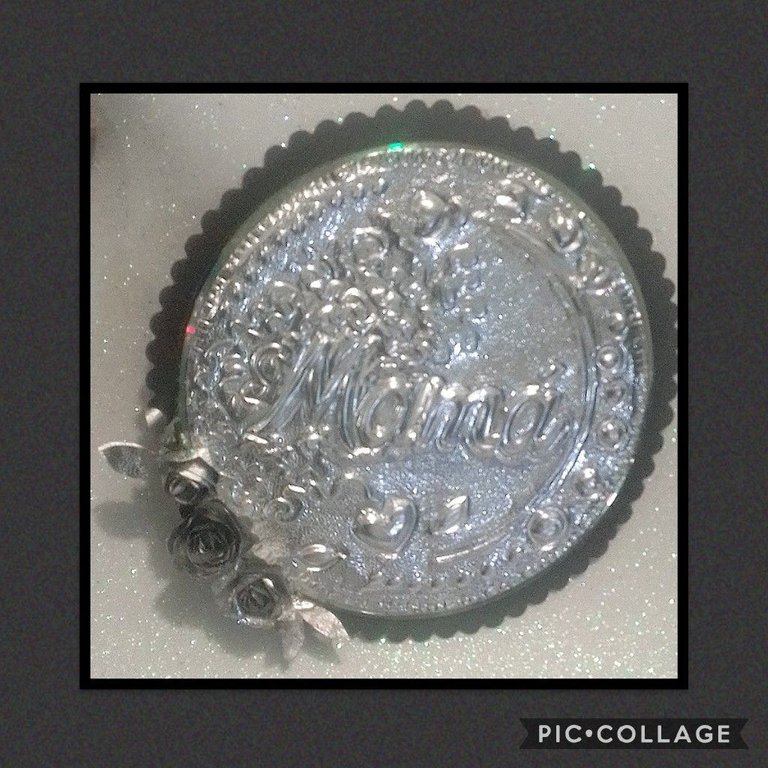
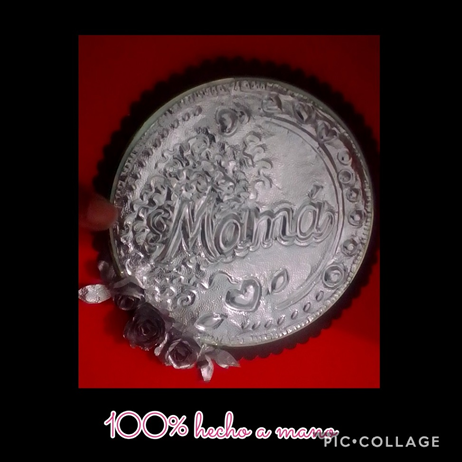
Medallón Repujado (Reciclado). Embossed Medallion (Recycled).
Hoy les quiero mostrar un paso a paso hecho con materiales económicos y de reciclaje.
Es un Medallón hecho con el papel de aluminio que trae la mantequilla, y cd dañado, ya verán que solo con un poco de creatividad podemos hacer cosas muy lindas y como me comentó el amigo @joheredia21 en mi publicación anterior, reutilizando materiales podemos cuidar nuestro medio ambiente.
Especial para regalar el día de las madres.
Y ahora manos a la obra!
Today I want to show you a step by step made with inexpensive and recycled materials.
It is a Medallion made with the aluminum foil that brings the butter, and damaged cd, you will see that only with a little creativity we can make very nice things and as my friend @joheredia21 commented me in my previous post, reusing materials we can take care of our environment.
Special to give as a gift on Mother's Day.
And now let's get to work!
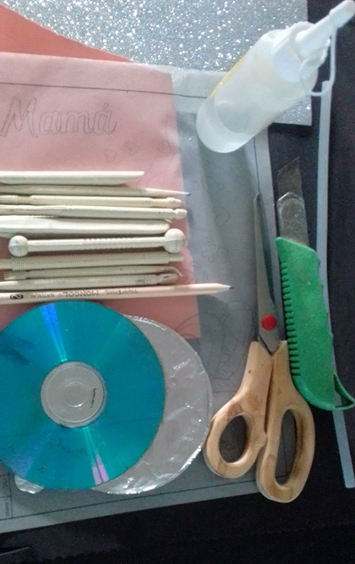
| Materiales: | Materials: |
|---|---|
| Papel de aluminio(tapa de mantequilla). | Aluminum foil (butter cap). |
| Cartulina negra. | Black cardboard. |
| Silicón líquido y en barra. | Liquid and stick silicone. |
| Tijeras | Scissors |
| Cd - DVD | Cd -DVD |
| Foami (Goma eva) | Foami (eva rubber) |
| Buriles acocadores | Burrils acocadores |
| Palo de madera | Wooden stick |
| Dibujo, lápiz y cinta. | Drawing, pencil and tape. |
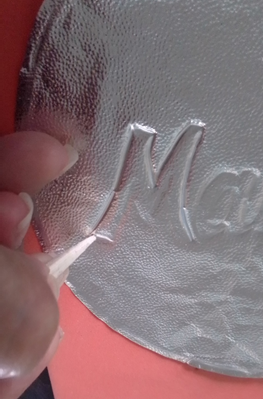
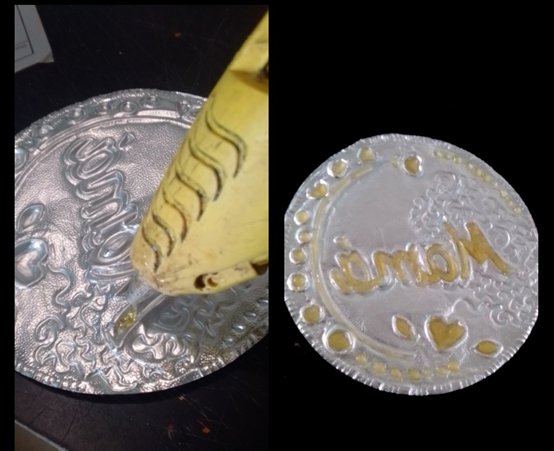
Paso 1/Step 1:
- Colocar el papel aluminio sobre un pedazo de foami y transferir el dibujo con un palito de madera o bolígrafo sin tinta, haciendo presión para que marque.
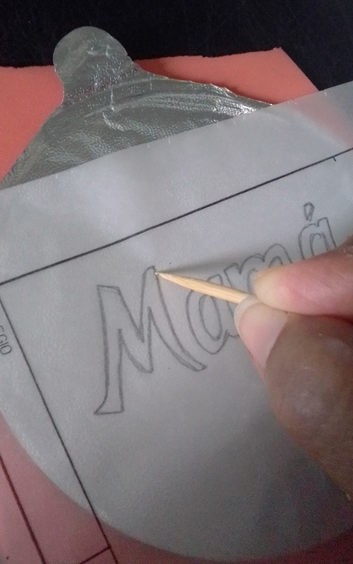
- Place the aluminum foil on a piece of foami and transfer the drawing with a wooden stick or a pen without ink, applying pressure to mark it.
Paso 2:/Step 2:
- Revisar que se haya transferido correctamente la imagen.

- Check that the image has been transferred correctly.
Paso 3:/Step 3:
- Remarcar toda la orilla de las letras por el lado derecho.
- Outline the entire edge of the letters on the right side.
Paso 4:/Step 4:
- Remarcar con el buril la zona del medio, por el lado de atrás.(ver foto).
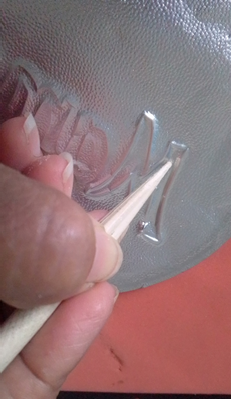
- Mark with the burin the middle area, on the back side (see photo).
Paso 5:/Step 5:
- Hacer los dibujos que quieras o te guías por un dibujo, siempre remarcando con cuidado para no romper el papel, siguiendo los mismos primeros pasos marcar por el frente con buril y rellenar por detrás con el acocador para dar más volumen.
- Make the drawings you want or follow a drawing, always marking carefully so as not to tear the paper, following the same first steps, mark on the front with a burin and fill in the back with an engraving tool to give more volume.
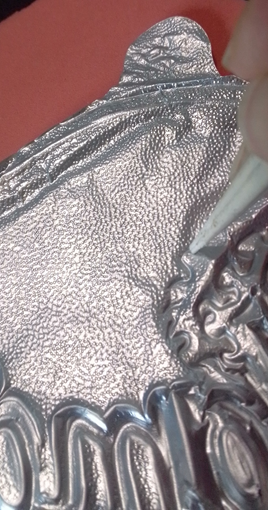
Paso 6:/Step 6:
- Al terminar el diseño en el papel aluminio, rellenar con silicón caliente todas las partes hondas. Esto para que no pierda la forma.
- When you finish the design on the aluminum foil, fill with hot silicone all the hollow parts. This is so that it does not lose its shape.
Paso 7:/Step 7:
- Marcar el borde del Cd, sobre la cartulina negra, y recortar con tijera de forma dejando hacia afuera 4 ó 5 milímetros.
Aplicar silicón líquido sobre el Cd y pegar el círculo de aluminio repujado.

- Mark the edge of the CD, on the black cardboard, and cut with scissors leaving 4 or 5 millimeters outside.
Apply liquid silicone on the CD and glue the embossed aluminum circle.
Paso 8:/Step 8:
- Pegar el cd a la cartulina haciendo presión por la orilla.
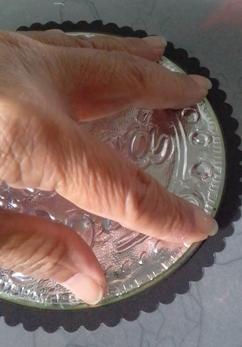
- Glue the CD to the cardboard by pressing on the edge.
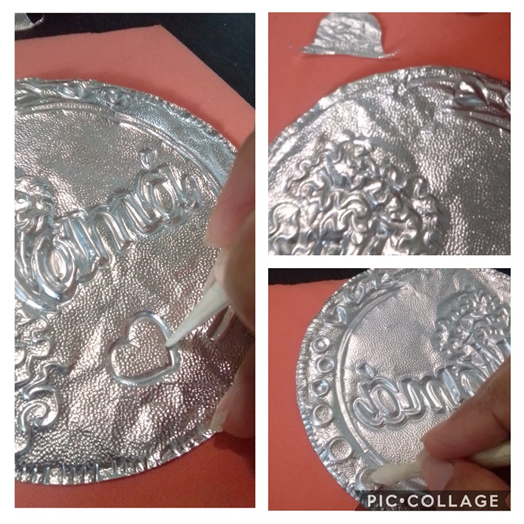
Paso 9:/Step 9:
- Recortar un círculo con tijera de ondas en otro papel de aluminio, darle forma de caracol, colocar pega en la punta enrollando hasta formar la flor y pegar a un lado del borde del repujado.
- Recortar hojas y también pegar.
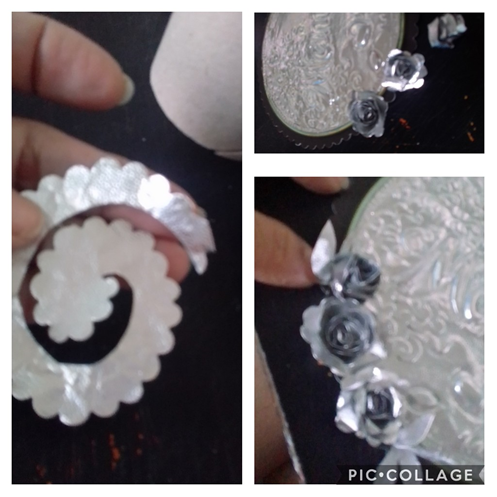
- Cut out a circle with wave scissors from another piece of aluminum foil, shape it into a snail, place glue on the tip, roll it up to form the flower and glue it to one side of the edge of the embossing.
- Cut out leaves and also glue.
Paso 10:/Step 10:
- Ya casi está terminado, falta centrar la parte de arriba en le lado revés.- Ya casi está terminado, falta centrar la parte de arriba en le lado revés.
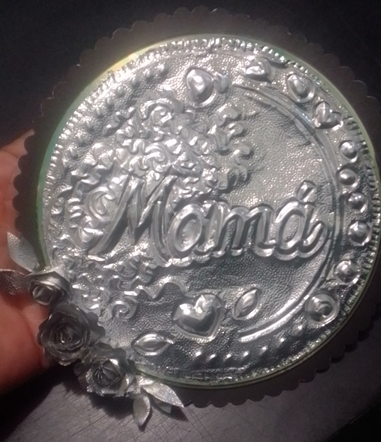
- Almost finished, just need to center the top part on the reverse side.
Paso 11:/Step 11:
- Recortar un círculo en cartulina negra y un pedazo de cinta para realizar una argolla, pegar en el lugar centrado, dejar secar y colgar.
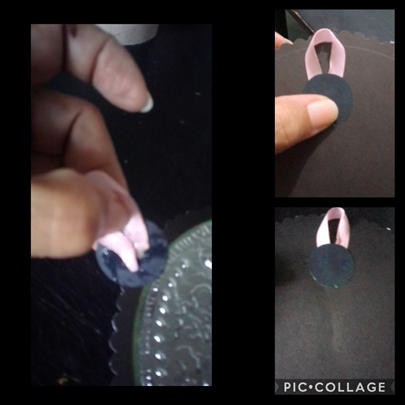
- Cut out a circle in black cardboard and a piece of ribbon to make a ring, glue in the centered place, let dry and hang.
Y así quedó este lindo Medallón!
Ahora quiero agradecer a todas las personas que de una u otra forma me ayudaron con sugerencias, recomendaciones y comentarios para que hiciera mis nuevas publicaciones son ellos: @eddiespino del proyecto @aliento, @vikvitnik, @germanandradeg, @Francia, @joheredia.
Utilicé:el traductor https://www.deepl.com/es/translator, Etiquetas de HTLM y separadores.
Las fotos son tomadas de mi teléfono Blu G5.
Me despido esperando te guste mi publicación y agradeciendo tu visita.
Now I want to thank all the people who in one way or another helped me with suggestions, recommendations and comments to make my new publications: @eddiespino from @aliento project, @vikvitnik, @germanandradeg, @Francia, @joheredia.
I used: https://www.deepl.com/es/translator translator, HTLM tags and separators.
The photos are taken from my Blu G5 phone.
I say goodbye hoping you like my post and thanking you for your visit.
Translated with www.DeepL.com/Translator (free version)
Definitivamente el don de la creatividad esta en ti.
Me he quedado sorprendido porque veo que usando tan pocos materiales logras hacer arte.
Me contenta mucho tu trabajo y estoy pendiente de él.
Total todos aprendemos en esta comunidad que es HIVE, unos con otros.
Deseo que sigas adelante, no olvides leer a otros, fijarte en los detalles que te harán mejorar.
Preguntar, socializar, hacer panas.
Solo así llegaras al éxito.
Espero nos encontremos allá.
Dios te colme de bendiciones y te desarrolle mucho más ese don que tienes.
Felicidades.
Agradecida por tus palabras.
Así es, cada día aprendemos unos de otros.
Como dices, haciendo panas!
Bueno por lo menos ya sé que eres uno de ellos...
Igualmente que Dios te bendiga siempre.
Dios mío pero que belleza!!!! Tengo de estos papeles de aluminio y no sabía que podía hacer algo tan hermoso!!! felicitaciones!!! increíble post!! 😍😍😍😍😍😍😍💖💖💖💖💖💖💖💖
Hola suezoe cómo estás?
Que bueno que te haya gustado mi trabajo!
Y sí puedes realizar muchas cosas con ese papel así que te invito a poner tu creatividad a volar..
Gracias por comentar y saludos.
Congratulations @elmundodebetty! You have completed the following achievement on the Hive blockchain and have been rewarded with new badge(s) :
Your next target is to reach 700 upvotes.
You can view your badges on your board and compare yourself to others in the Ranking
If you no longer want to receive notifications, reply to this comment with the word
STOPCheck out the last post from @hivebuzz:
Support the HiveBuzz project. Vote for our proposal!