Hermosa Cancha de Voleibol.. Beautiful Volleyball Court ..
Buenas noches mis panitas de hive, en esta oportunidad les traigo una actividad deportiva cómo es la creación de una cancha de voleibol elaborada con material de reciclaje espero que les guste la idea.

Good evening my hive panitas, this time I bring you a sporting activity like creating a volleyball court made with recycled material. I hope you like the idea.
Materiales:
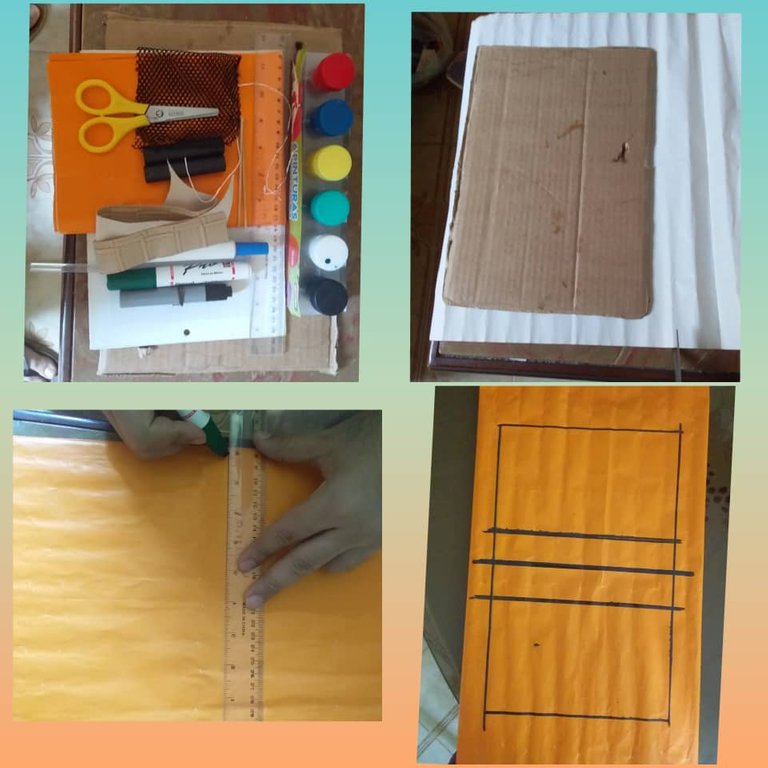
Cartón, papel lustrillo, cartulina, recordé foami, tela de malla, cuerina, palito de altura, tubos de plástico, silicón, tijera, lápiz, hilo y cinta adhesiva.
Materials:
Cardboard, glossy paper, cardboard, I remembered foam, mesh cloth, leather, height stick, plastic tubes, silicone, scissors, pencil, thread and adhesive tape.
Procedimientos:
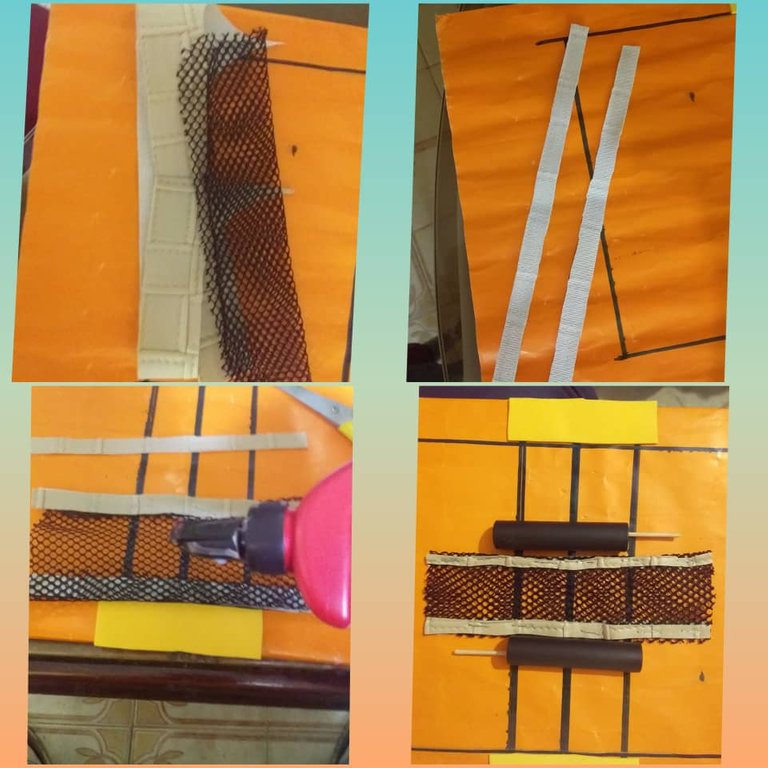
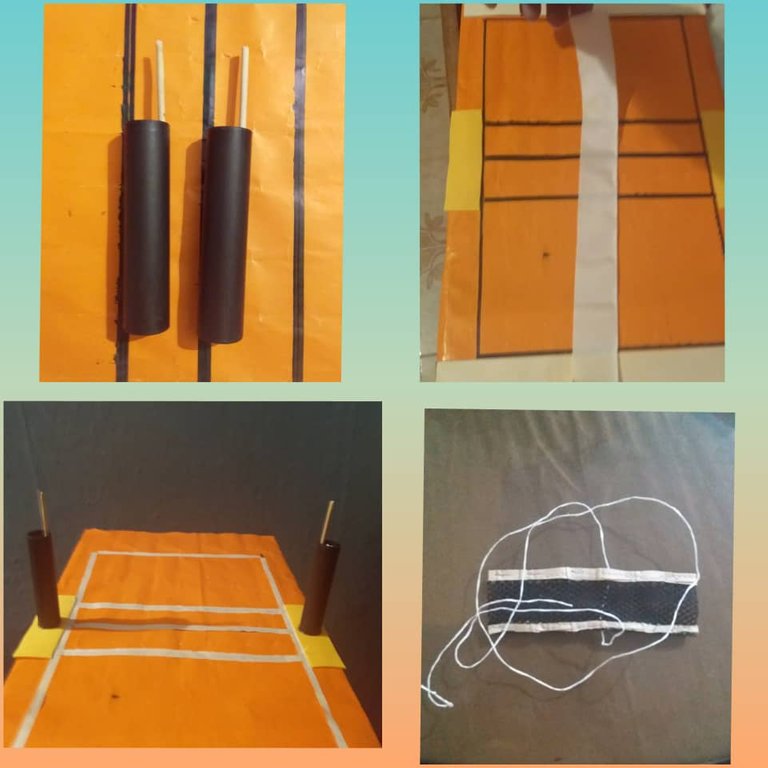
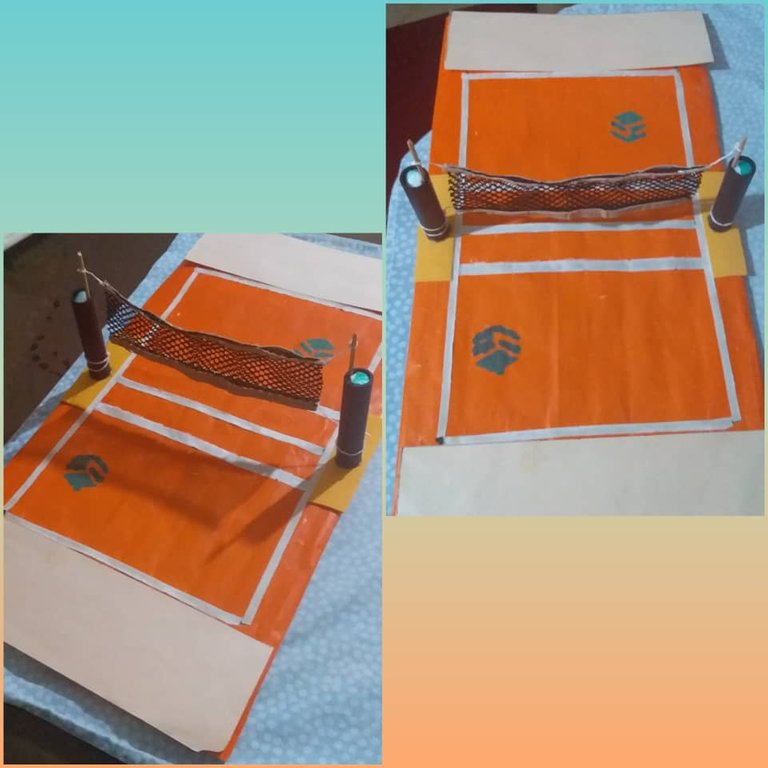
Estamos recordando un rectángulo de cartón de 50 * 30 cm seguidamente lo forramos con el papel lustrillo en los extremos laterales le colocamos un pedazo de cartulina para irle dando forma a la cancha de voleibol luego con la cinta adhesiva comenzamos a recortar tiras o listones y empezamos a demarcar las medidas de la cancha seguidamente recortamos dos rectángulos o al foami amarillo que lo vamos a pegar en cada extremo superior e inferior de la cancha luego se le va a colocar encima de los mismos los tubos de plástico y a su vez colocamos en cada uno de los tubitos un palito de altura después para construir la red agarramos la tela de malla el extremo superior e inferior vamos a pegarle la cuerina también vamos a sujetar el hilo a la malla que la misma va a ir amarrada en cada uno de los extremos en los tubos de plástico quedando así como muestran las fotos.
Procedures:
We are remembering a cardboard rectangle of 50 * 30 cm, then we cover it with lustrillo paper on the side ends we put a piece of cardboard to give shape to the volleyball court then with the adhesive tape we begin to cut strips or ribbons and we begin To demarcate the measurements of the court, then we cut out two rectangles or the yellow foami that we are going to glue on each upper and lower end of the court, then the plastic tubes are going to be placed on top of them and in turn we place in each one of the tubes a stick of height later to build the net we grab the mesh fabric the upper and lower end we are going to glue the leather to it we are also going to attach the thread to the mesh that it is going to be tied at each of the ends in the plastic tubes remaining as shown in the photos.
Gracias por leerme y su valioso apoyo, será hasta otra oportunidad.
Thank you for reading me and your valuable support, I'll see you another time.
Fotos de mi autoría @elgatoshawua.
Photos by me @elgatoshawua.
Translated with www.DeepL.com/Translator (free version)