Cómo Elaborar Linda Pulsera paso a paso [Esp-Eng] How to Make a Cute Bracelet Step by Step

Versión Español
Cómo Elaborar Linda Pulsera paso a paso
¿ Quieres aprender el paso a paso para elaborar estás lindas pulseras?
Pues abriste el post indicado donde NO te ocultamos ningún paso.
Buenas noches queridos amigos de Hive quiero compartir con ustedes los pasos para realizar lindas pulseras con hilo de Paracord.
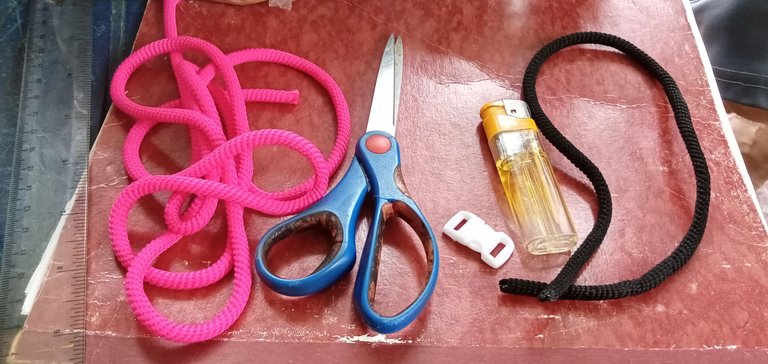
Los materiales a usar son los siguientes:
- 1.5 mtr de hilo Paracord color rosado
- 45 cm de hilo Paracord color negro
- Tijera
- Yesquero
- Broche para cerrar
- Regla
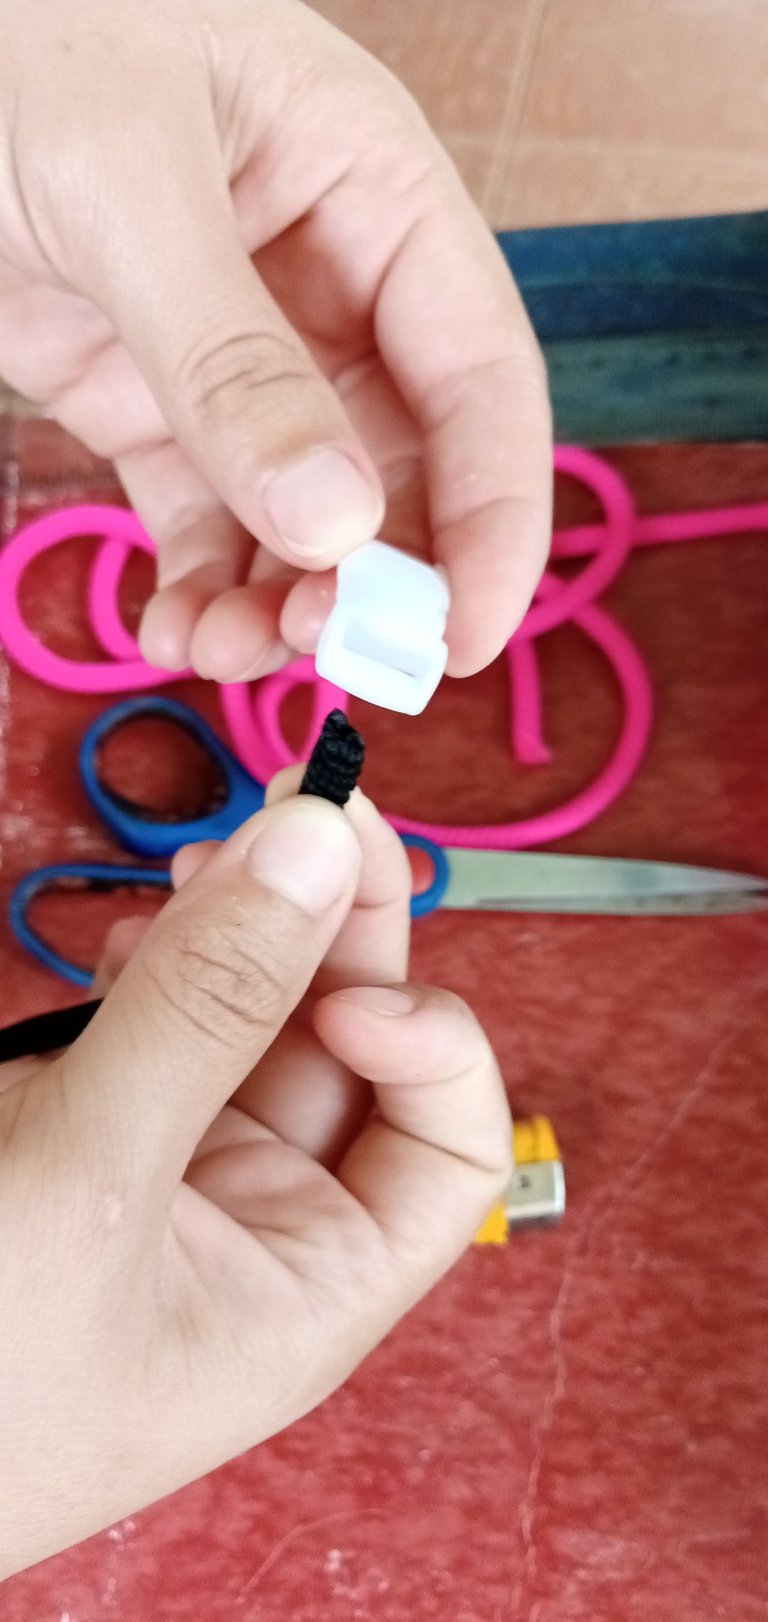
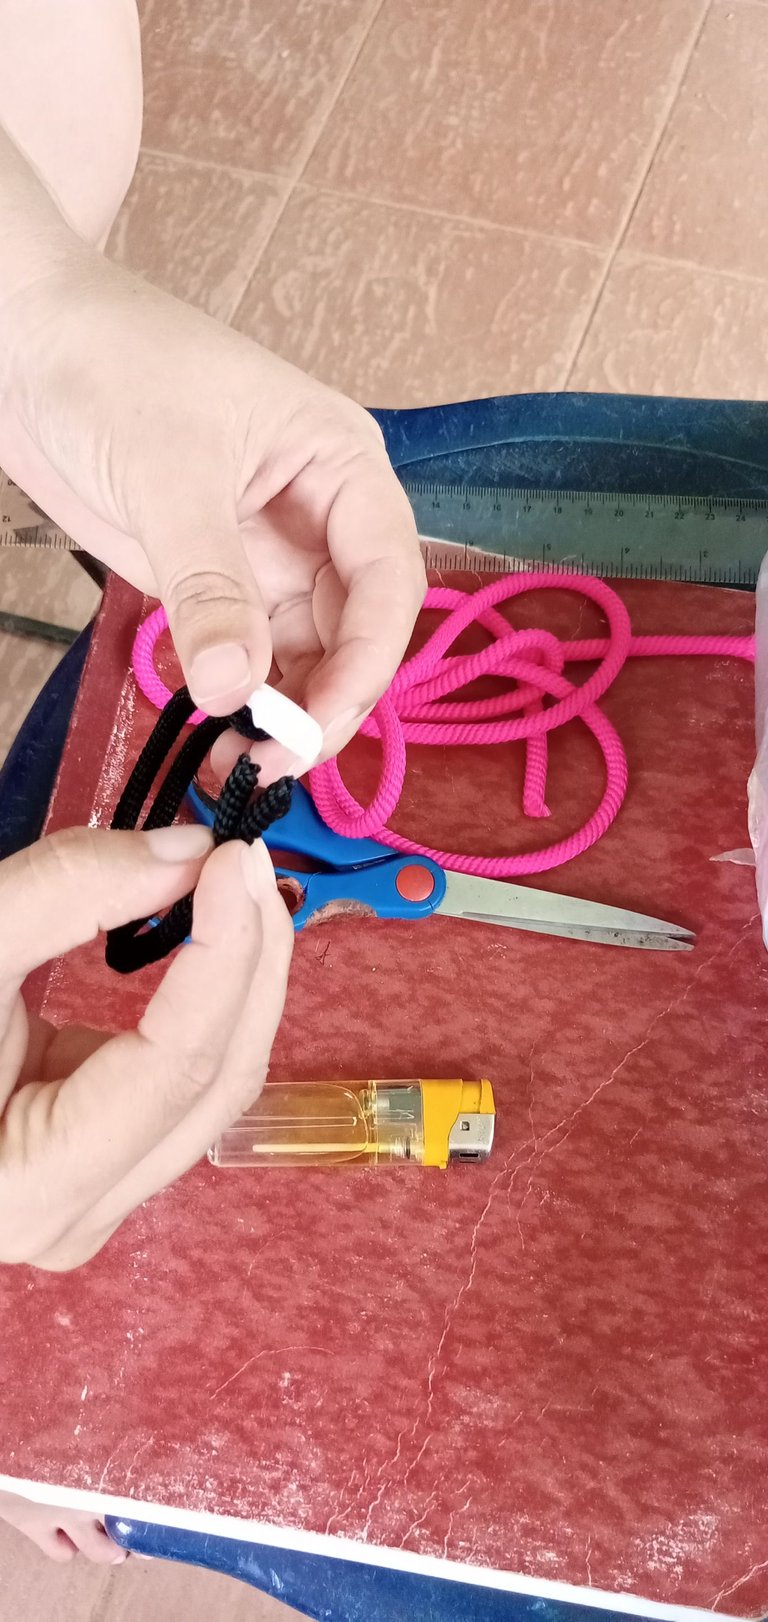
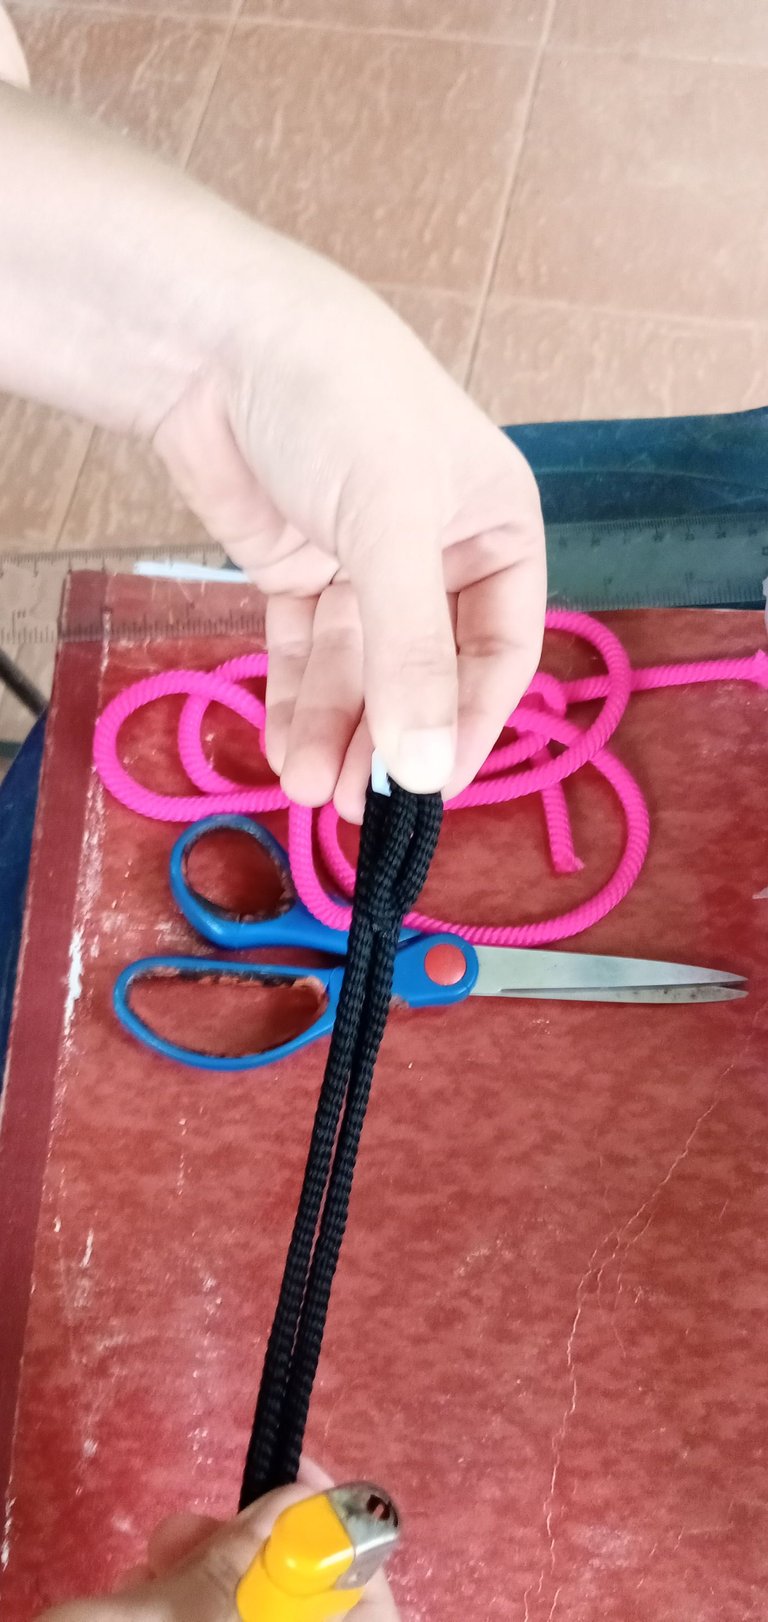
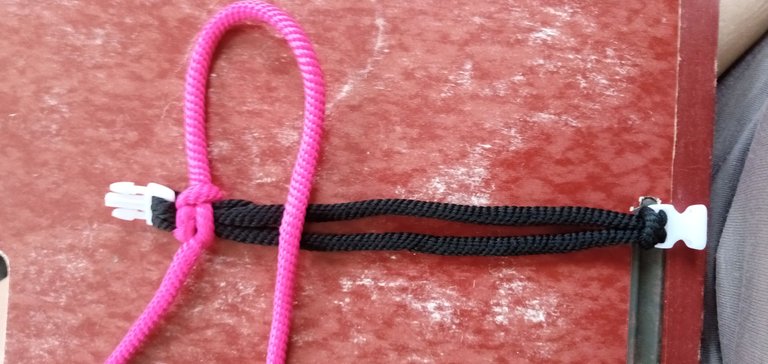
Paso 1:
La punta del hilo negro la vamos a introducir por el agujero que trae el broche de la pulsera.
Paso 2:
Luego lo vamos a regresar por ese mismo agujero
Paso 3:
Se va hacer como un círculo
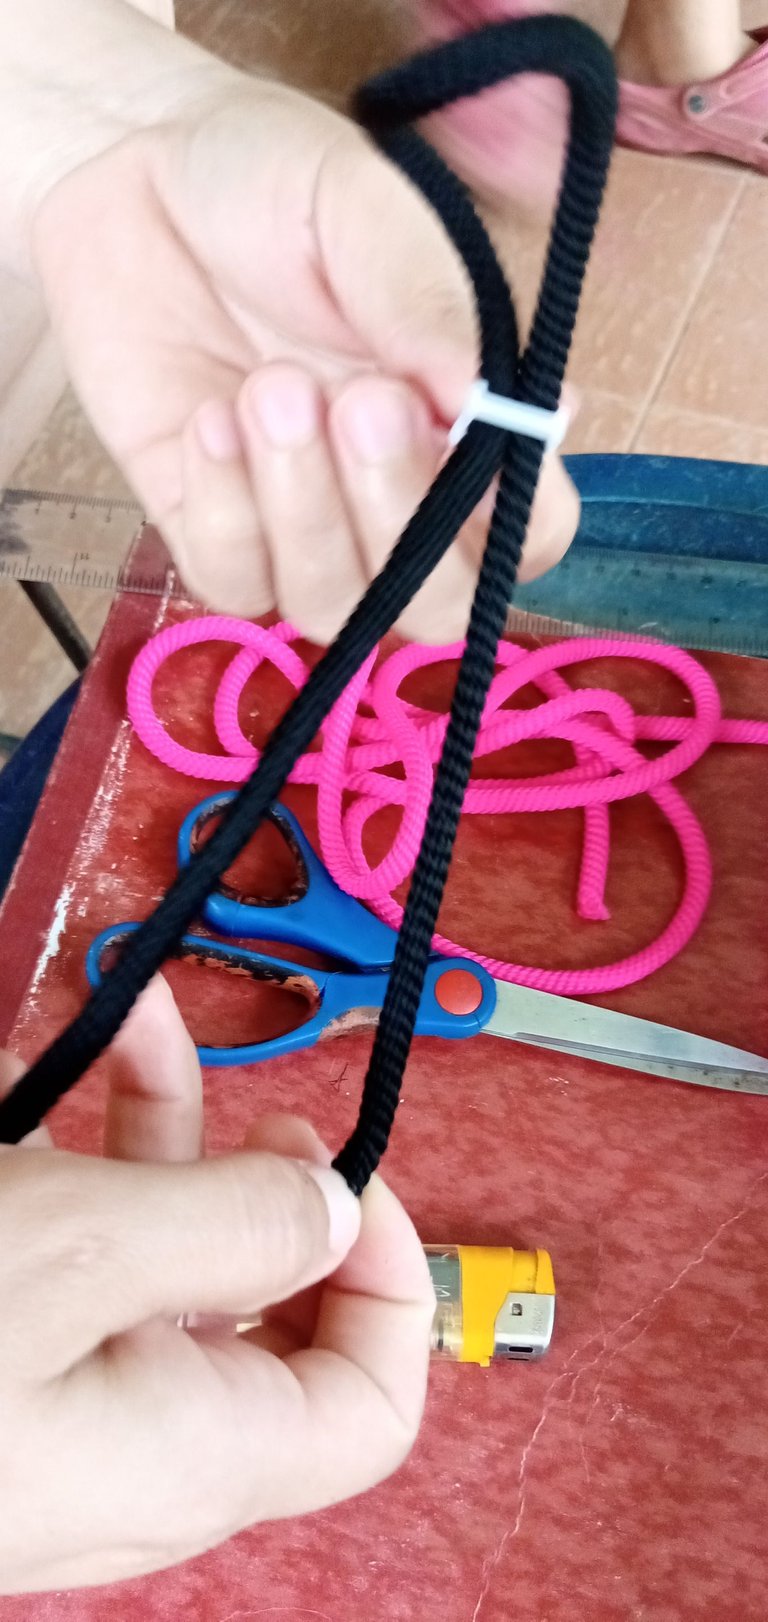
Paso 4:
Regresamos las dos puntas del hilo negro por ese agujero
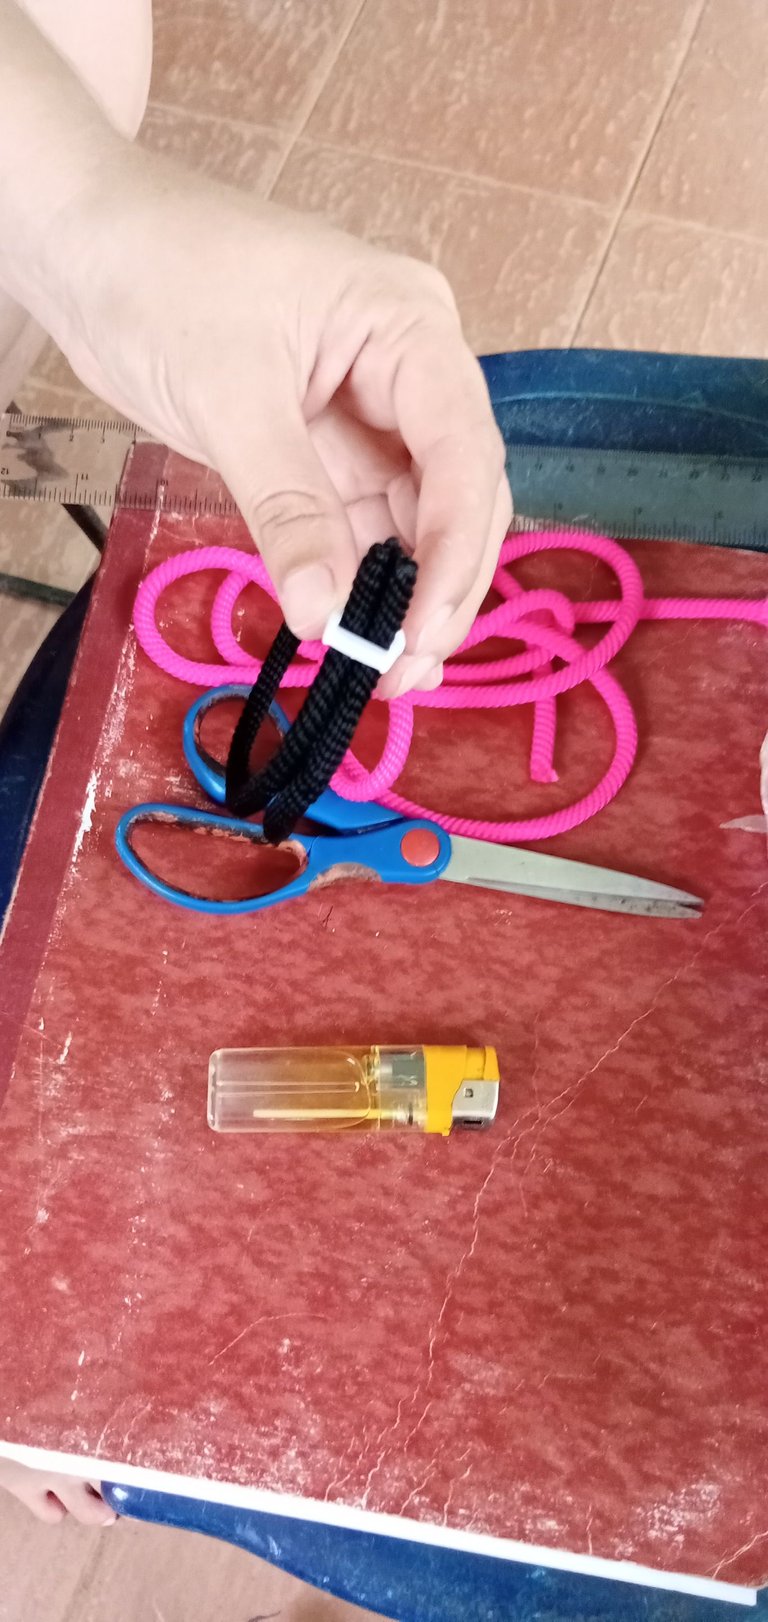
 )
)
Nos va a quedar asi
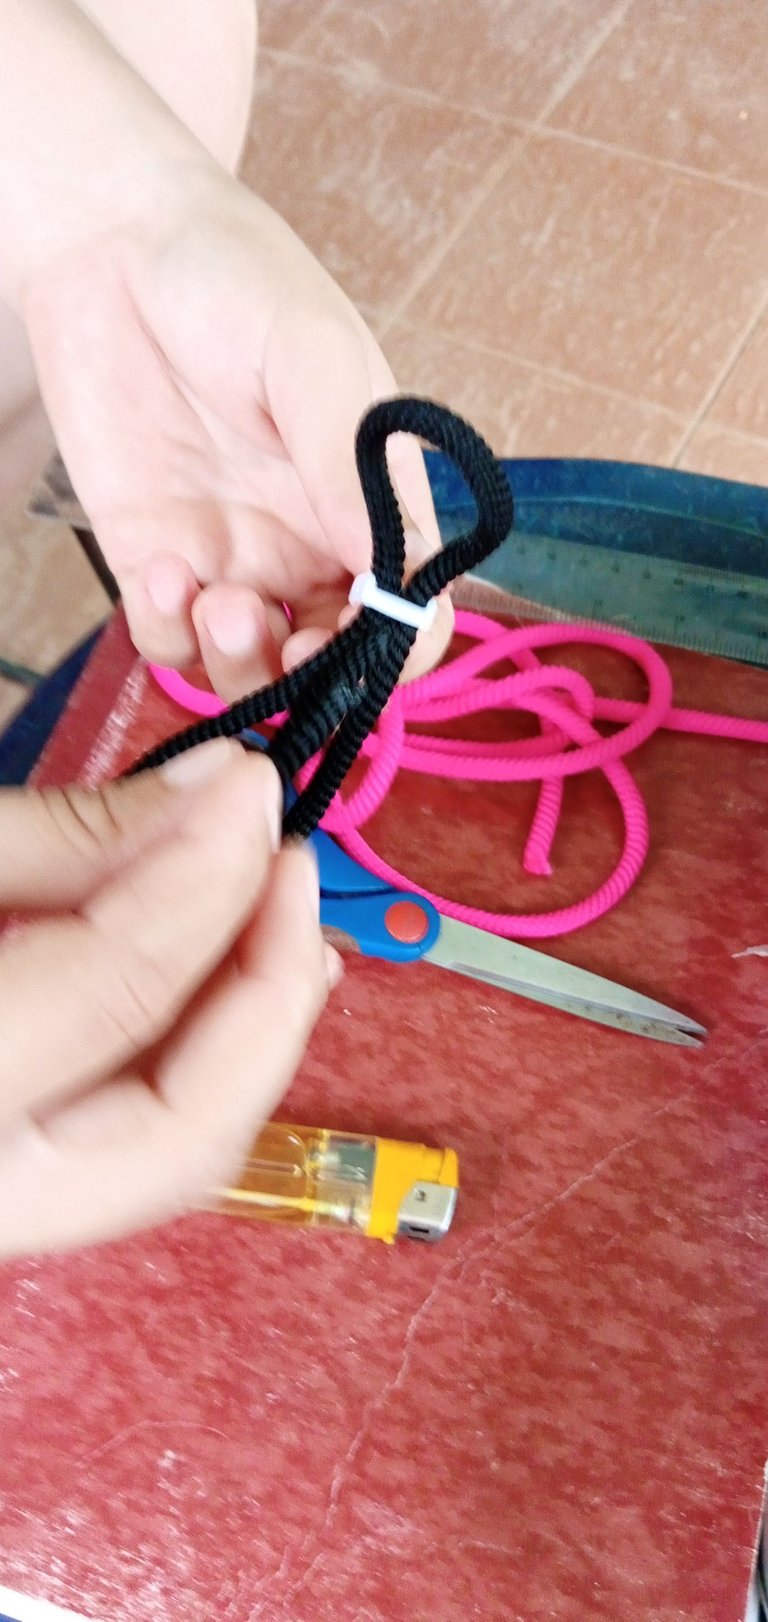
Paso 5:
Las dos puntas del hilo negro se introduce del otro extremo del broche
Paso 6:
Se hala para colocar el hilo a la medida de tu muñeca.
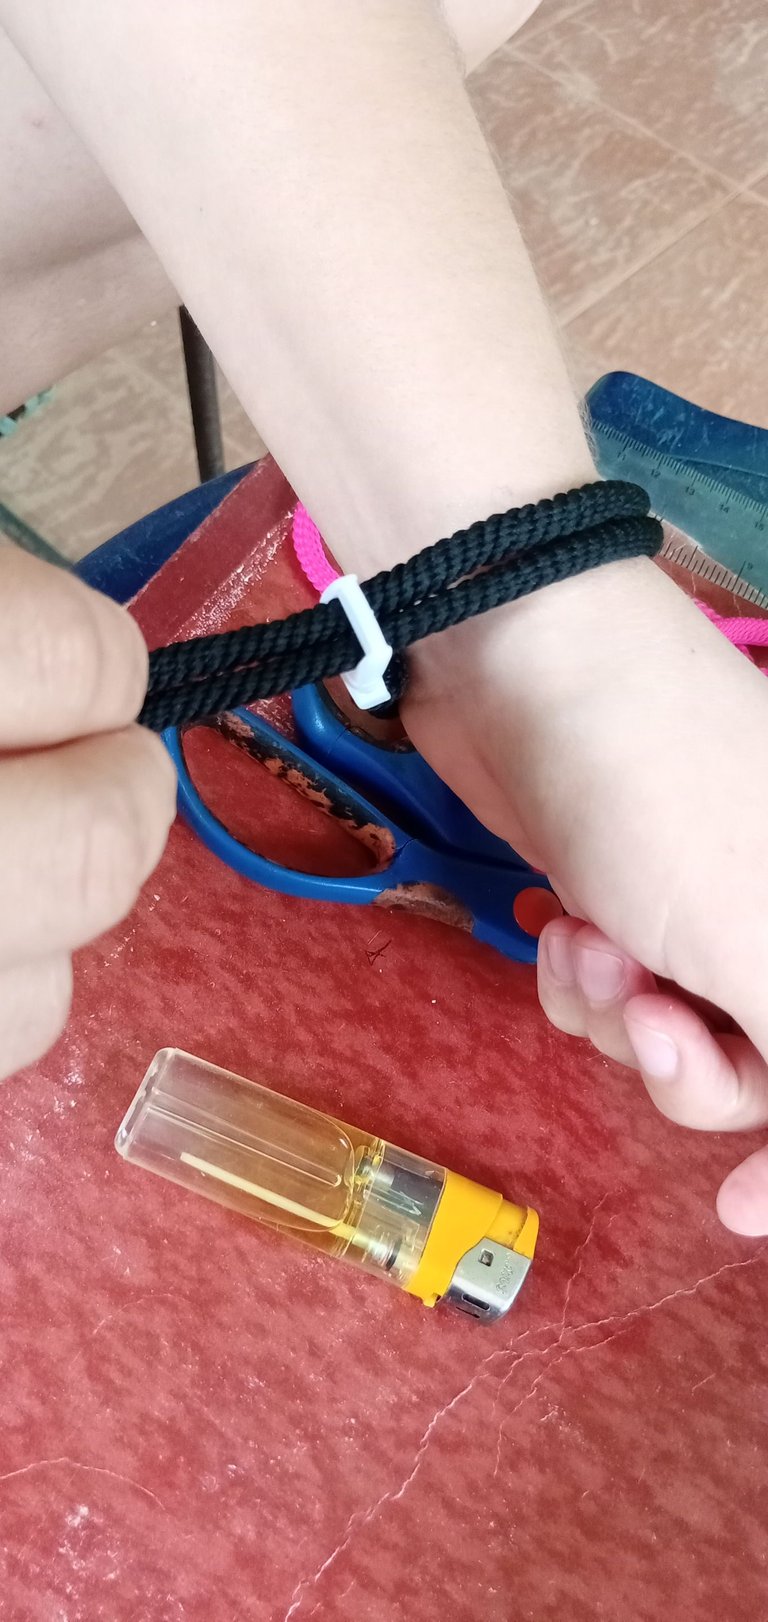
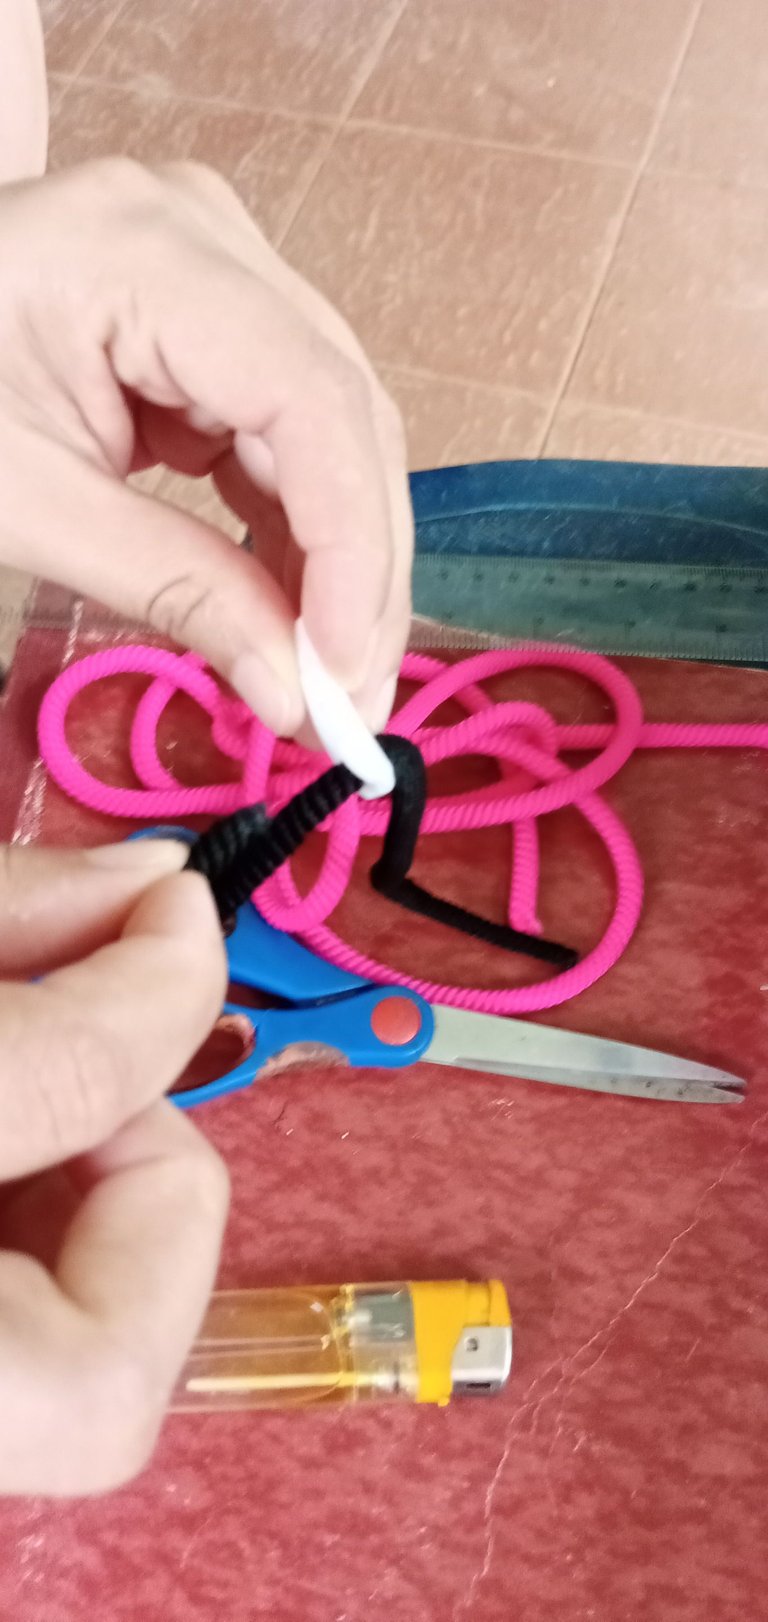
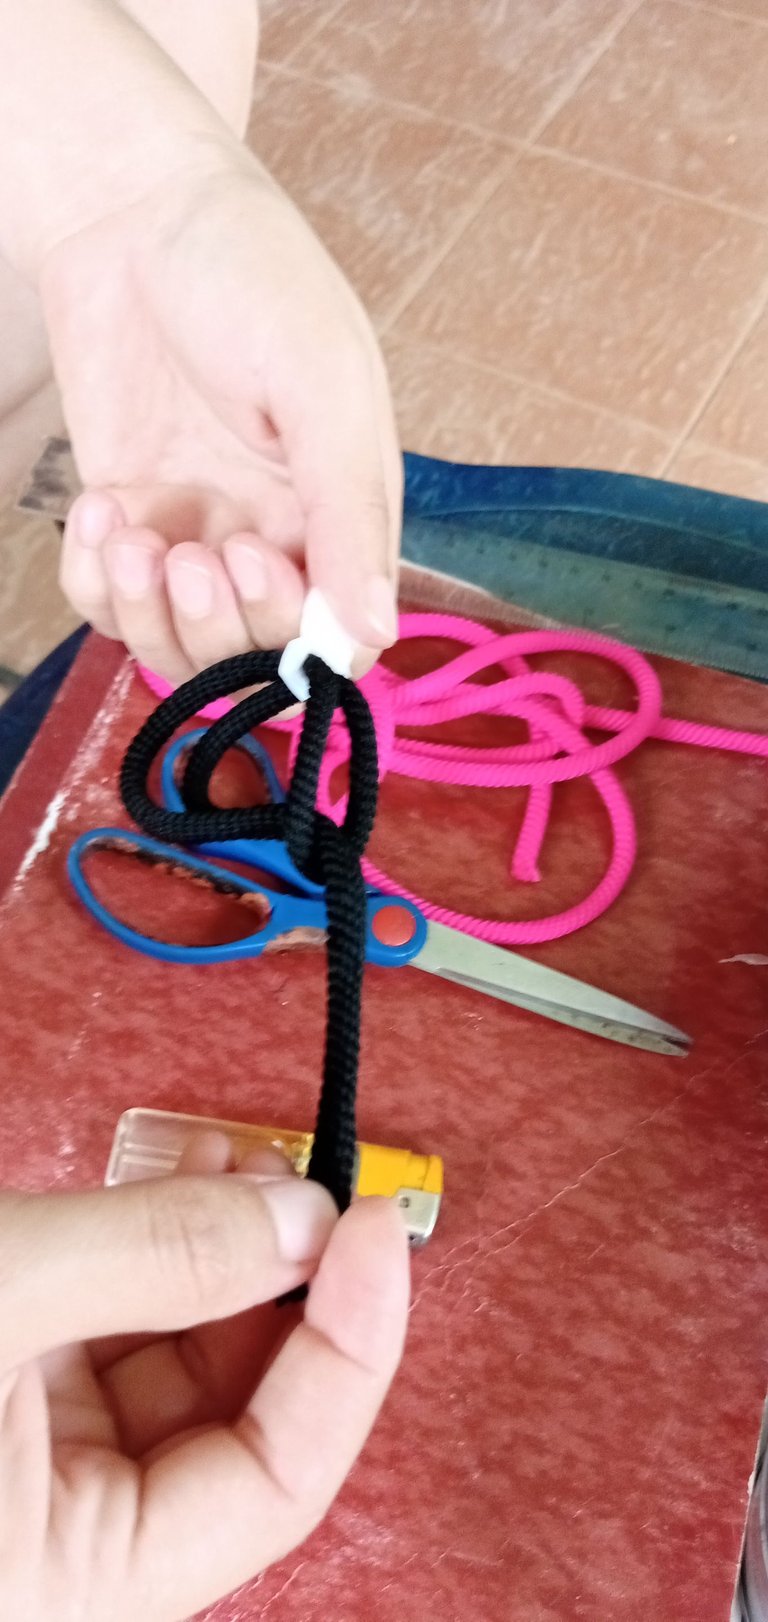
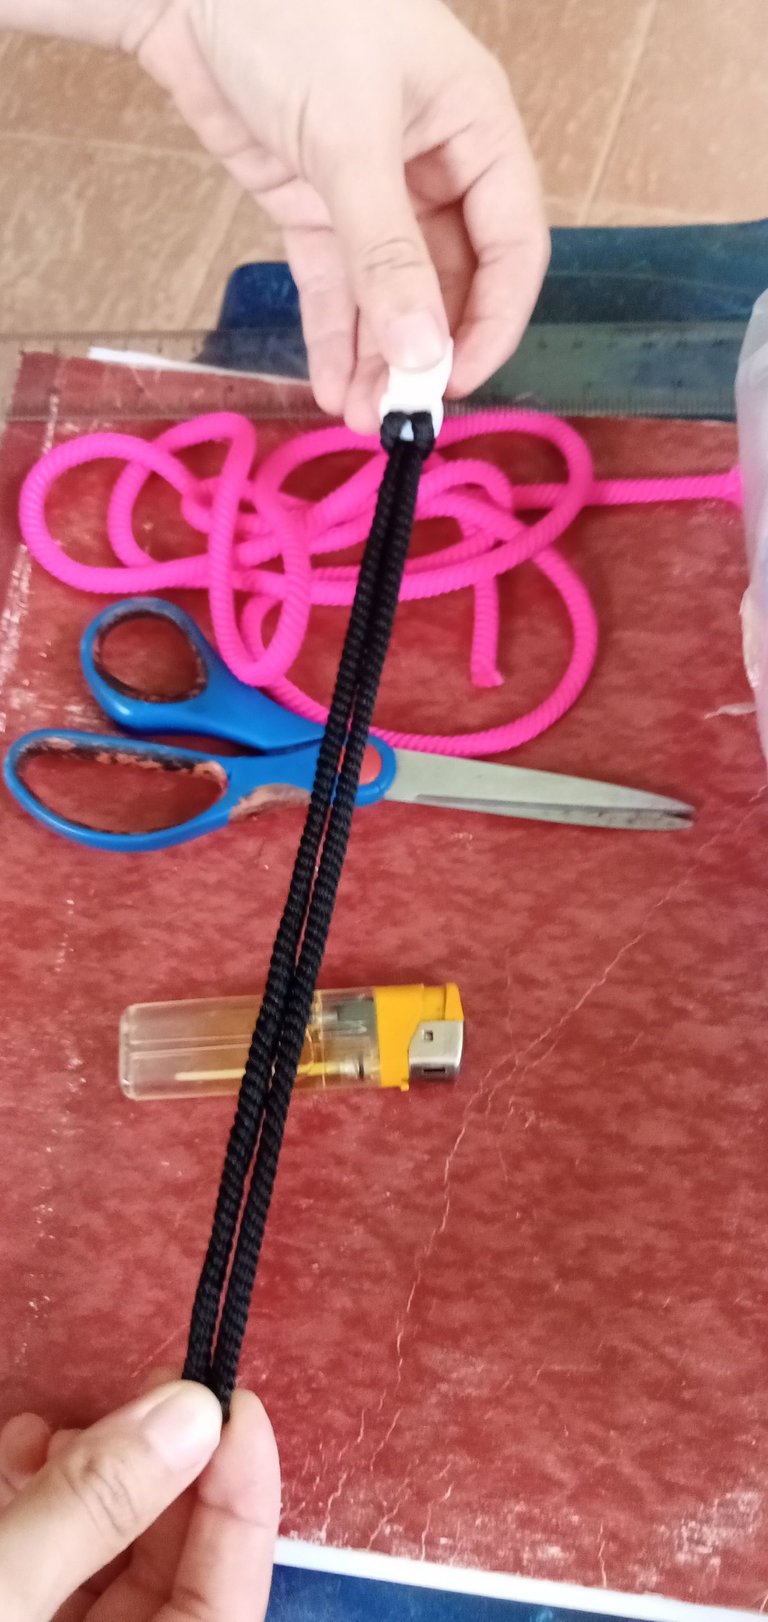
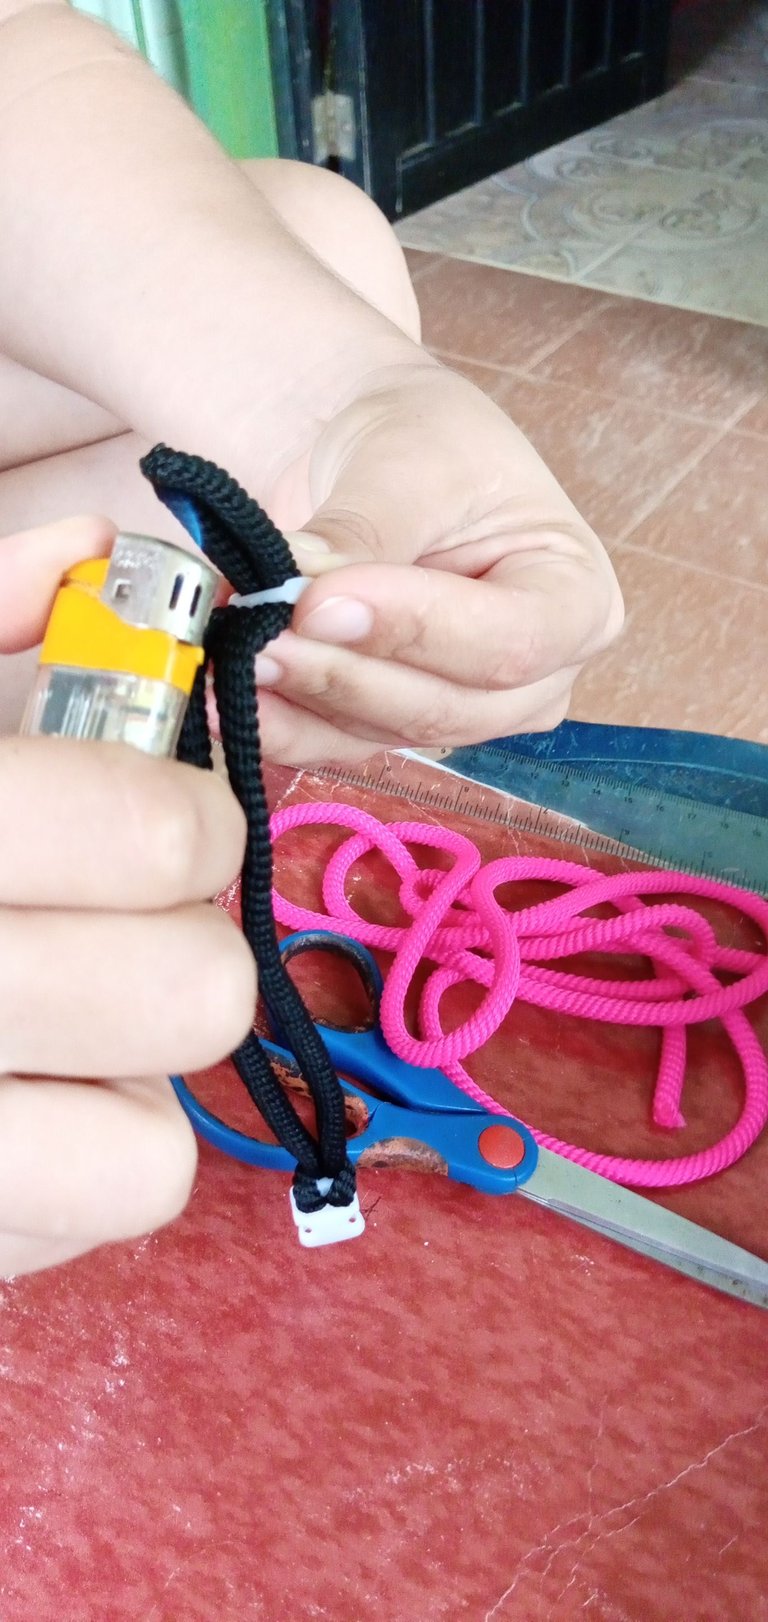
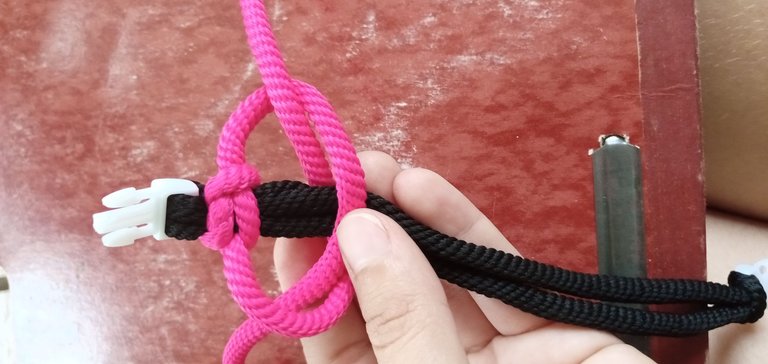
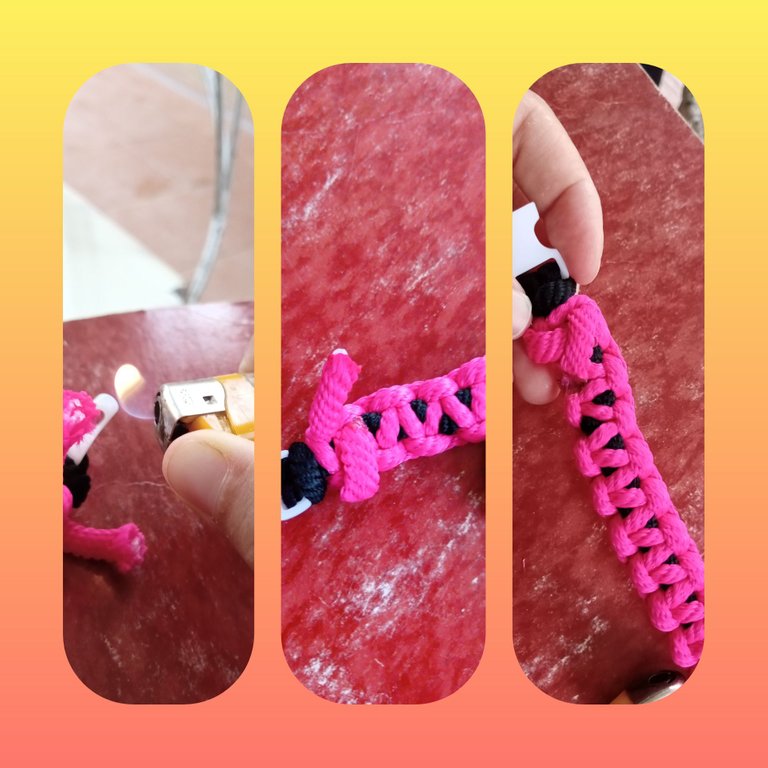
Paso 7:
Se queman las dos puntas y de inmediato se coloca del hilo que está a lo largo para que peguen y poder trabajar con el hilo rosado.
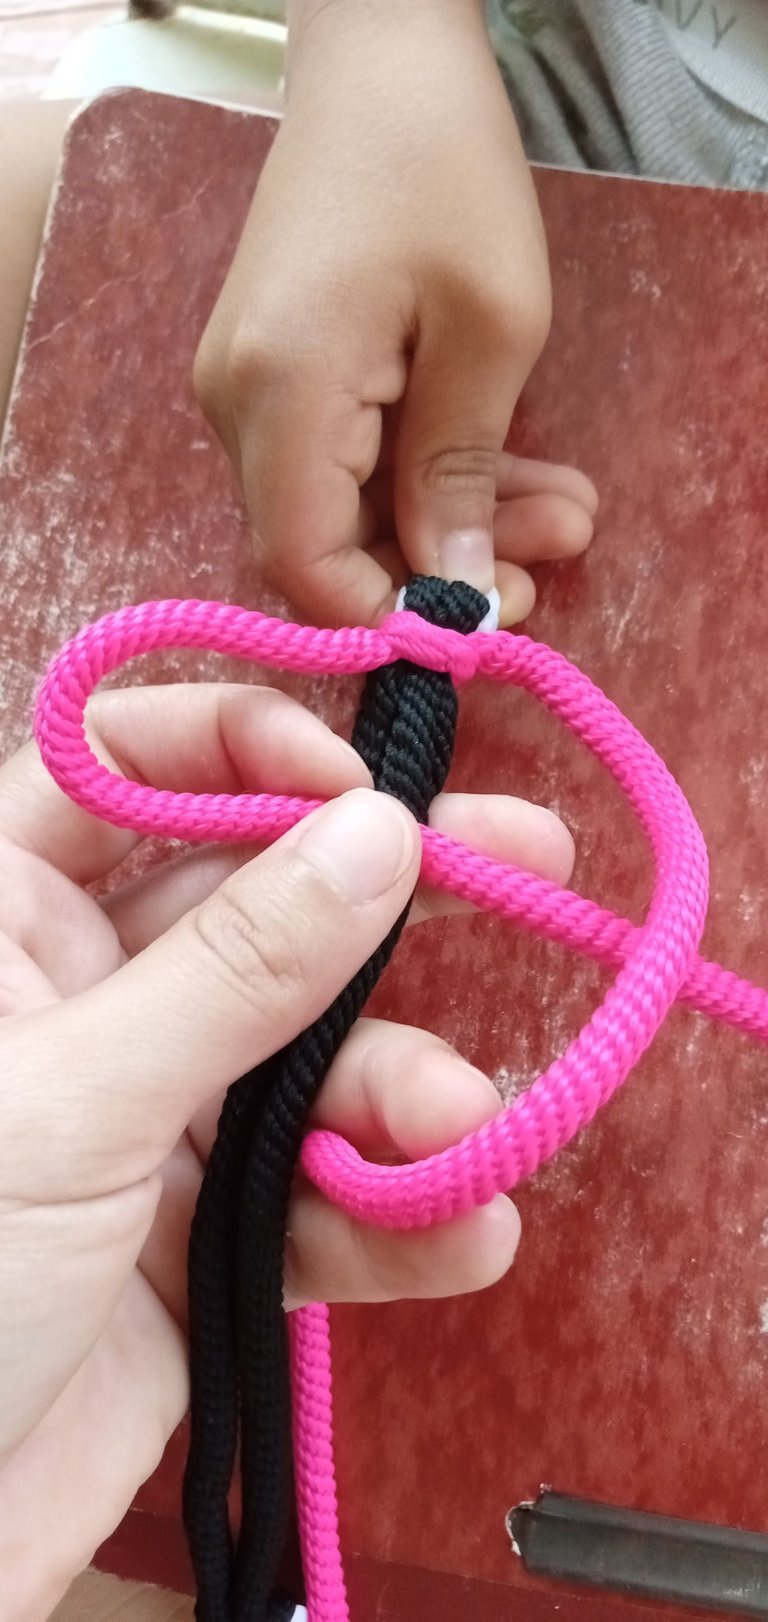
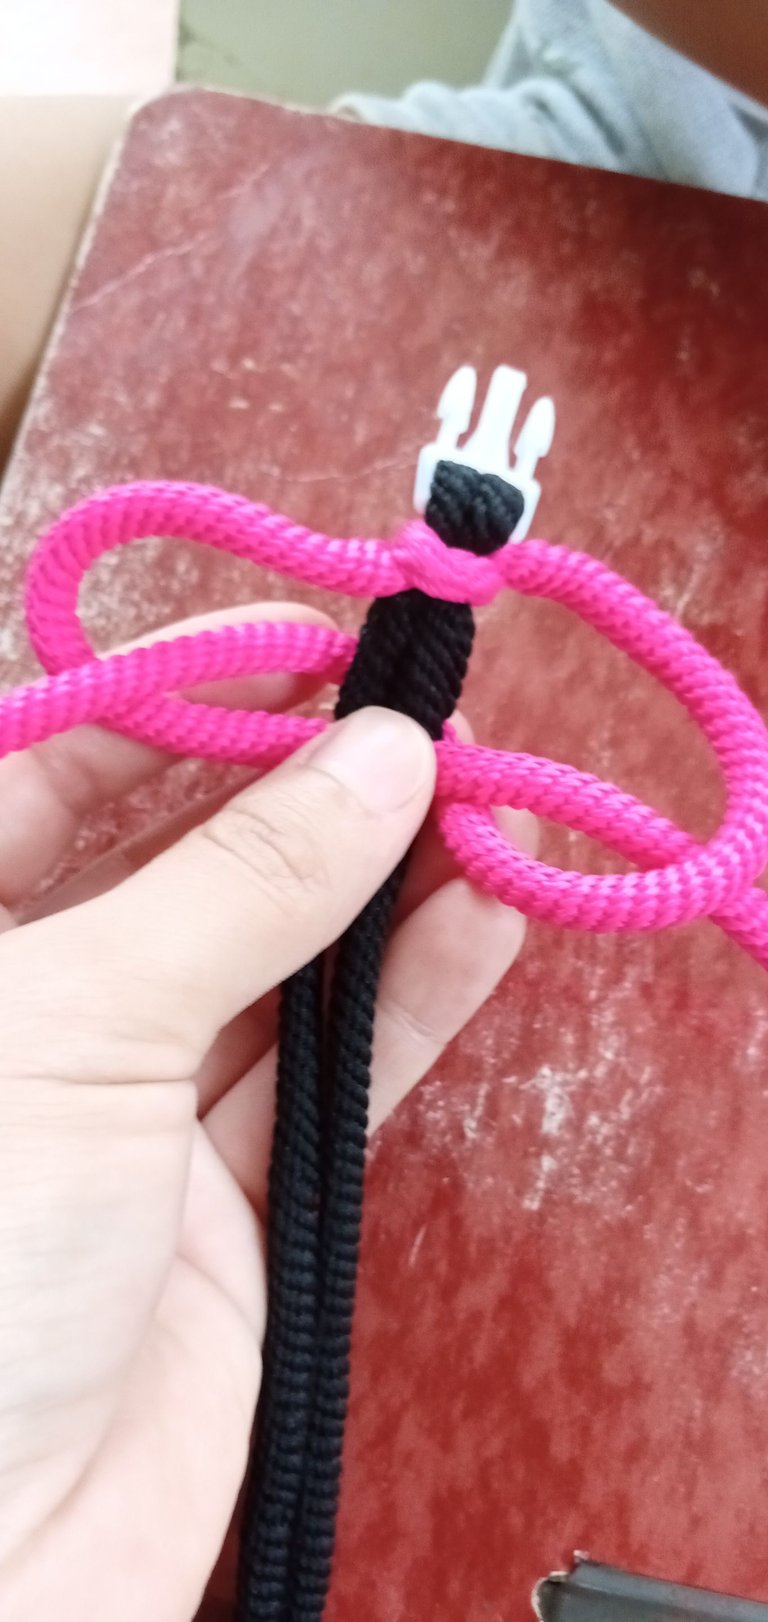
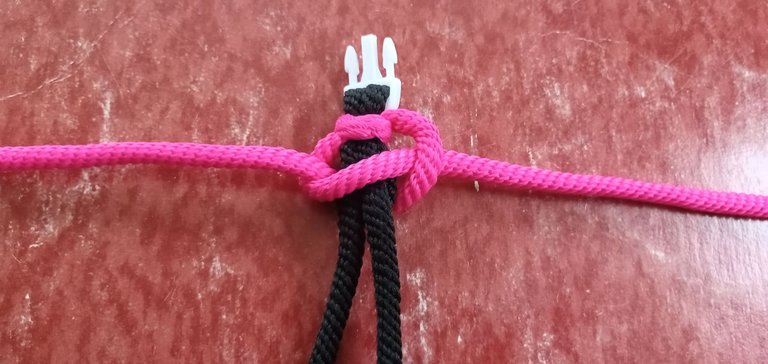
Paso 8:
Encima del hilo negro hacemos un nudo con el hilo rosado que quede el mismo largo hacia los dos lados.

Paso 9:
Con el hilo que quedó a mano izquierda lo doblamos hacia la derecha que pase por encima del hilo negro. Formando como una orejita.

Paso 10:
Con el hilo que está a tu derecha lo vamos a pasar por encima del hilo izquierdo.
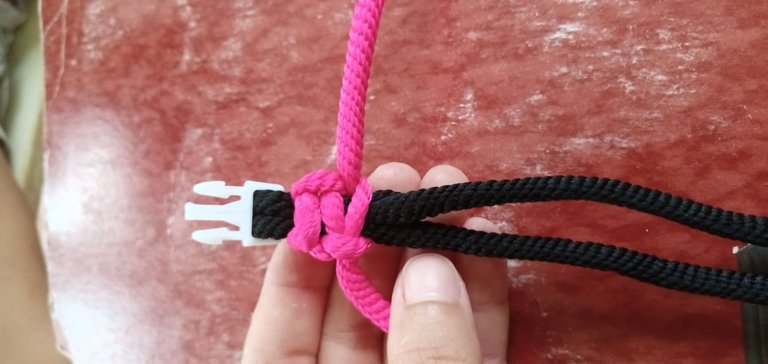
Paso 11:
Luego que pase por debajo del hilo negro saliendo éste hilo rosado por la orejita que dejamos del lado izquierdo.
Paso 12:
Halamos los dos hilos y apretamos
Paso 13:
Repetimos el mismo procedimiento pero ahora del lado derecho. Doblamos el hilo derecho hacia la izquierda y lo pasamos por encima del hilo negro.
Paso 14:
El hilo del lado izquierdo lo pasamos por encima del hilo derecho y luego lo pasamos por debajo del hilo negro saliendo éste hilo rosado por la orejita que quedó a mano derecha.
Así vamos repitiendo el mismo paso. Hasta llegar al final del hilo negro.
Nos va a quedar así
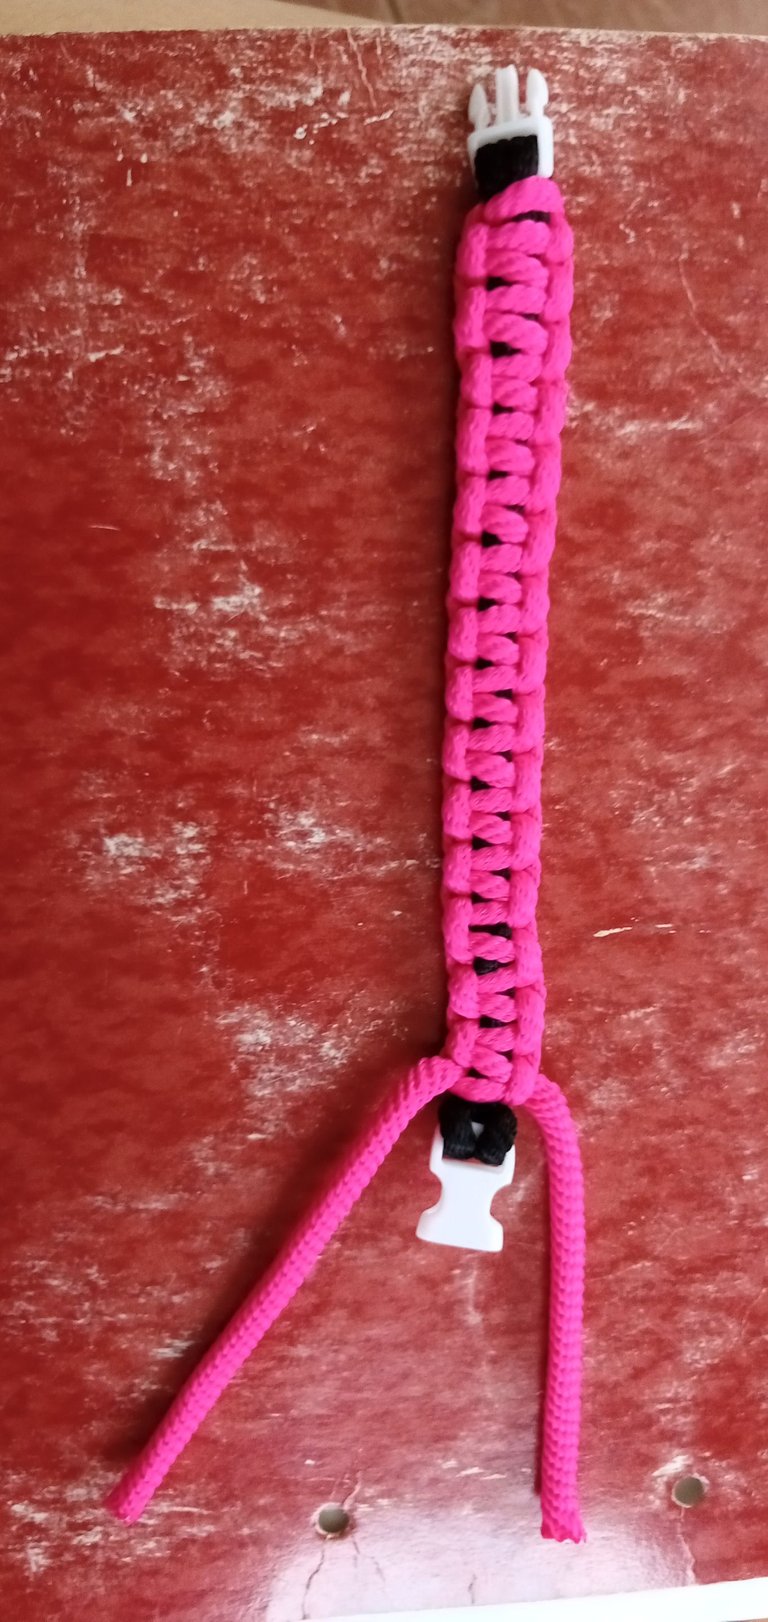
Paso 15:
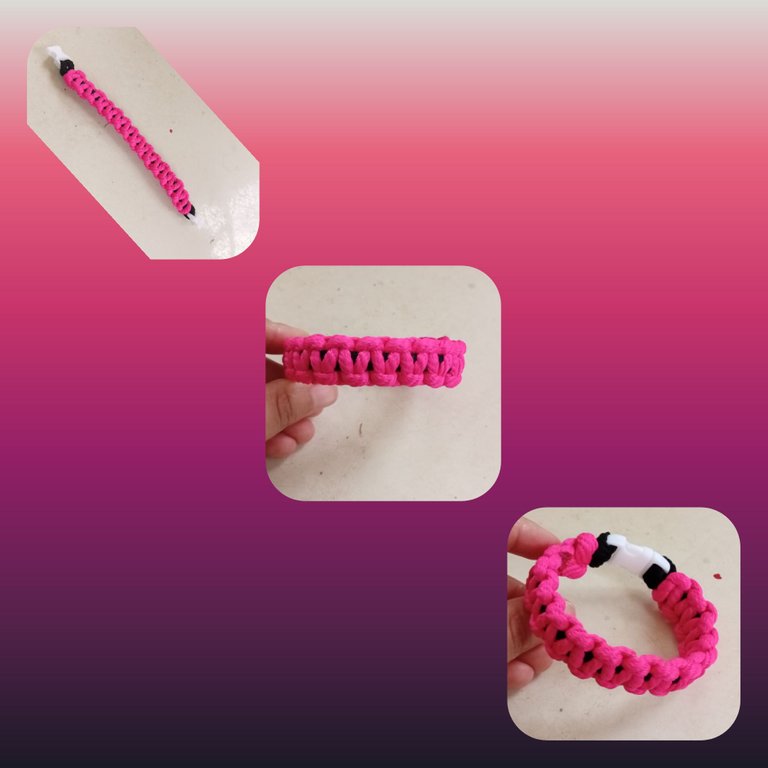
Cortamos el sobrante del hilo rosado y quemamos las dos puntas e inmediatamente la Pegamos del otro extremo para cerrar.
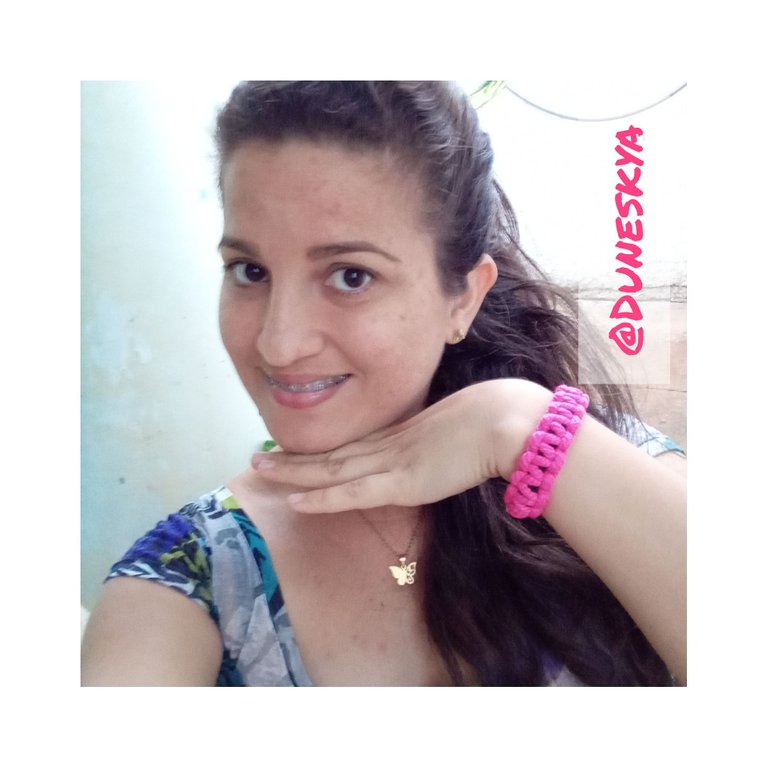
Así luce nuestra pulsera hecha con hilo de Paracord, pueden utilizar el mismo procedimiento y elaborarla con cualquier otro hilo.
Gracias por leerme hasta un nuevo post.!
Fotos y Banner de mi propiedad
English Versión
How to Make a Cute Bracelet Step by Step
Do you want to learn the step by step to make these beautiful bracelets?
Well, you have opened the right post where we will NOT hide any step from you.
Good evening dear friends of Hive I want to share with you the steps to make beautiful bracelets with Paracord thread.
The materials to use are the following:
- 1.5 mtr of pink Paracord yarn
- 45 cm of black Paracord thread
- Scissors
- Tinder
- Clasp to close
- Ruler
Step 1:
The tip of the black thread we are going to introduce it through the hole that brings the clasp of the bracelet.
Step 2:
Then we are going to put it back through the same hole
Step 3:
It is going to be made as a circle
Step 4:
We return the two ends of the black thread through that hole.
)
It will look like this
Step 5:
The two ends of the black thread is inserted from the other end of the brooch.
Step 6:
You pull to position the thread to the size of your wrist.
Step 7:
The two ends are burned and immediately placed on the yarn lengthwise so that they will stick together and you can work with the pink yarn.
Step 8:
On top of the black yarn we tie a knot with the pink yarn that is the same length towards both sides.
Step 9:
With the yarn left on the left hand side we fold it to the right passing over the black yarn. Forming like a little ear.
Step 10:
With the yarn on your right we are going to pass it over the left yarn.
Step 11:
Then pass it underneath the black yarn coming out this pink yarn through the little ear that we left on the left side.
Step 12:
Pull the two threads together and tighten
Step 13:
Repeat the same procedure but now on the right side. Fold the right yarn to the left and pass it over the black yarn.
Step 14:
We pass the left side yarn over the right yarn and then pass it under the black yarn, leaving the pink yarn through the little ear on the right hand side.
So we repeat the same step. Until we reach the end of the black thread.
It will look like this
Step 15:
We cut the excess pink thread and burn the two ends and immediately glue the other end to close.
So looks our bracelet made with Paracord thread, you can use the same procedure and make it with any other thread.
InShot_20210516_121459161.jpg]()
Thanks for reading me until a new post!
Photos and Banner of my property
Translated with www.DeepL.com/Translator (free version)