[ESP-ENG] Mi bolsa hive para regalo. || My hive gift bag.
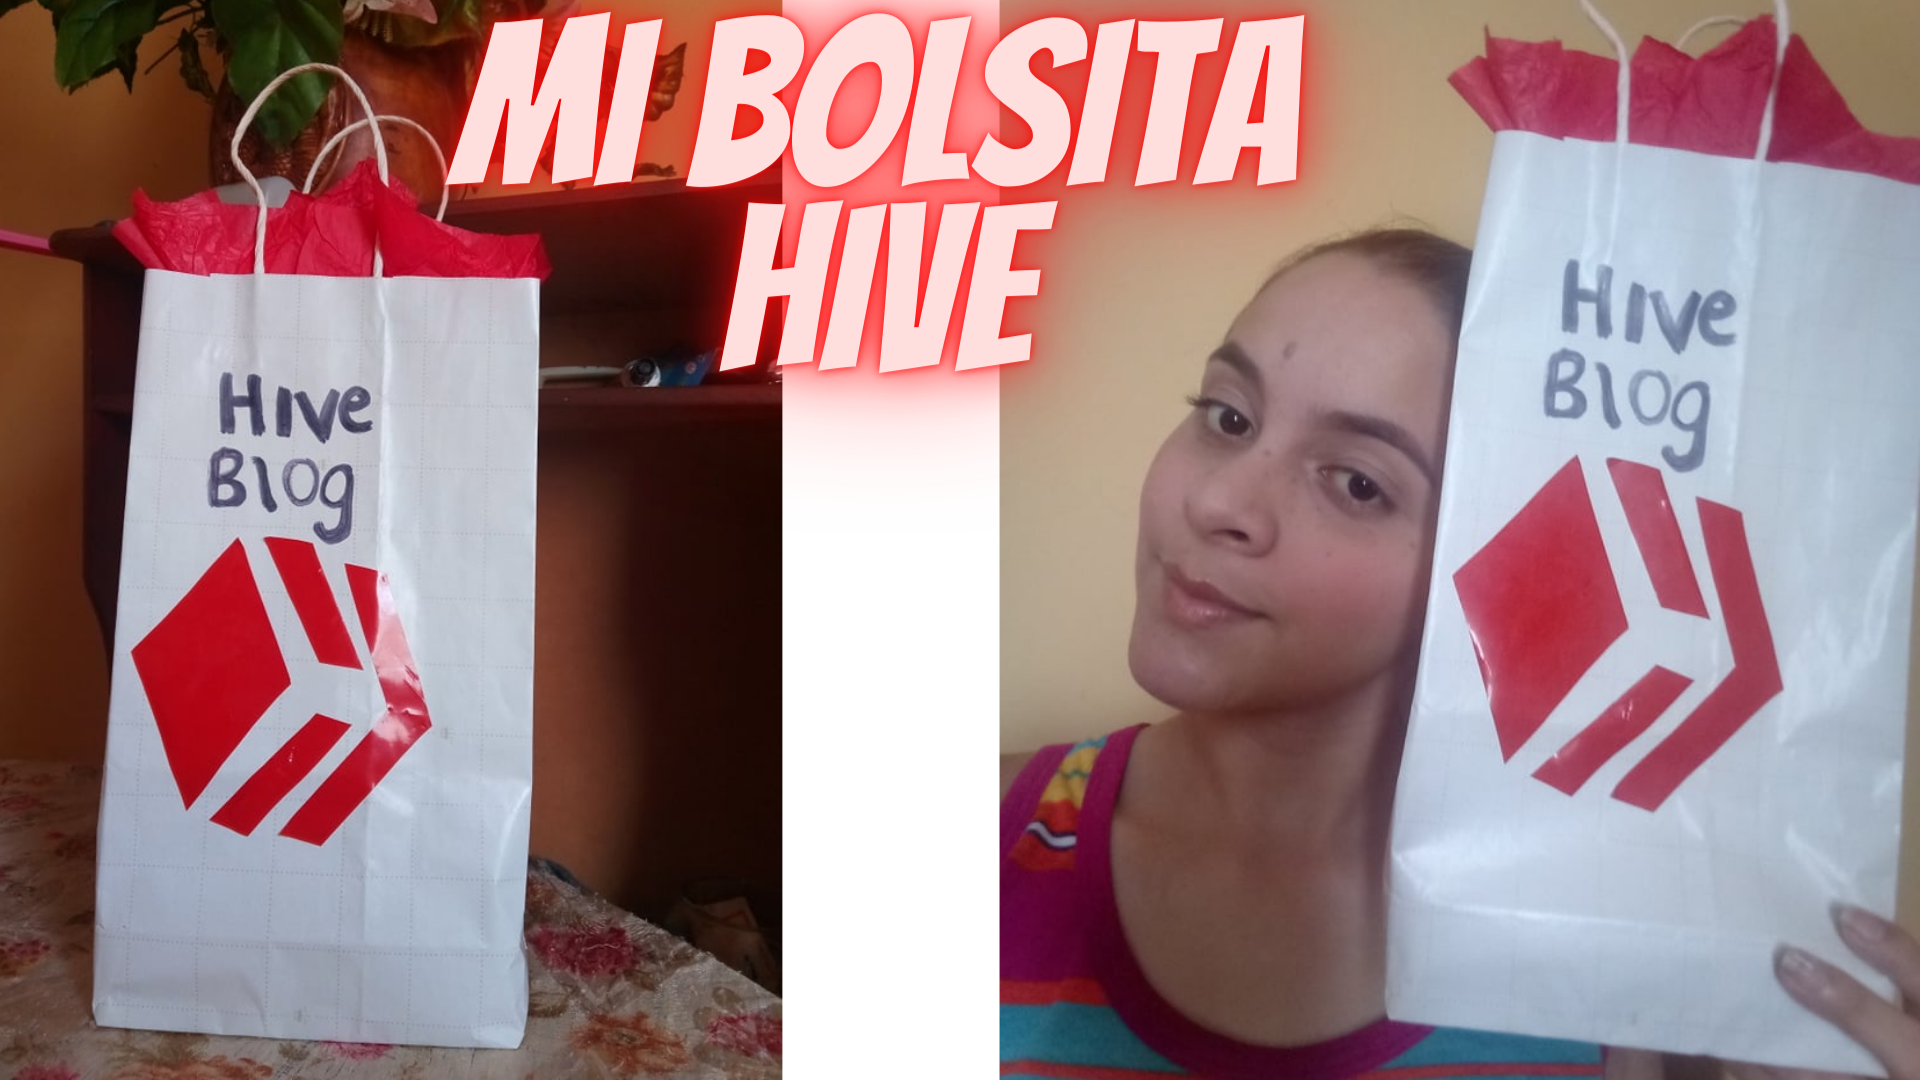
Hello dear hive family, I am excited to present my new creation, a few days ago I was looking for a gift bag to make a gift to a cousin but I couldn't find one and so I decided to make my own hive bag with few materials.
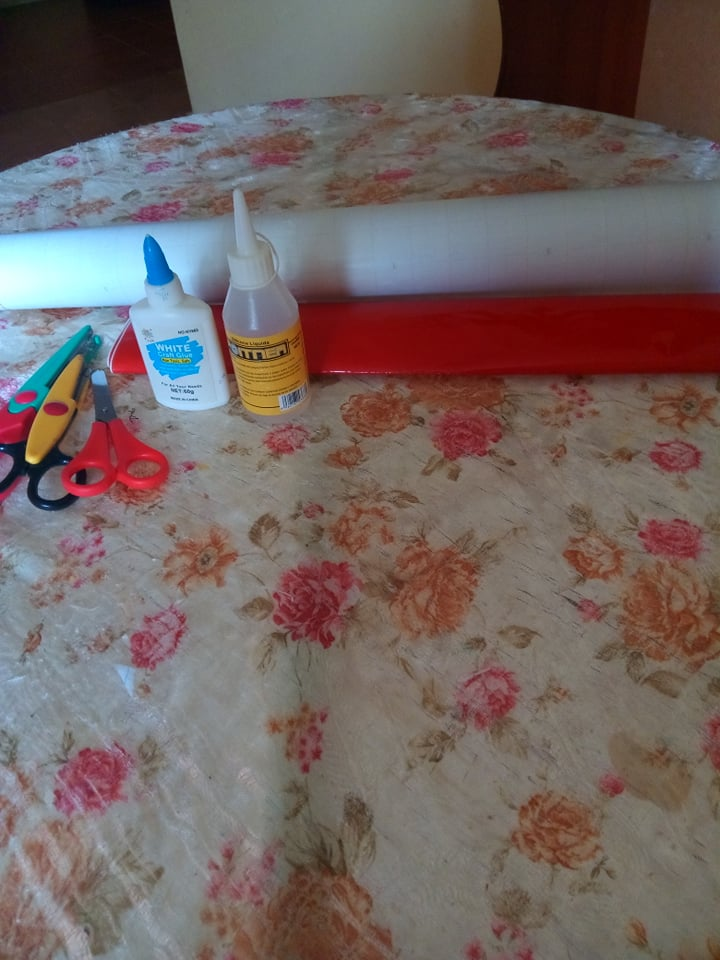
Materiales:
- Papel de regalo blanco
- Tijeras.
- Papel contac.
- Pega o silicon.
- Marcador.
- Cintas.
Materials:
- White wrapping paper
- Scissors.
- Contact paper.
- Glue or silicon.
- Marker.
- Ribbons
Pasos:
Steps:
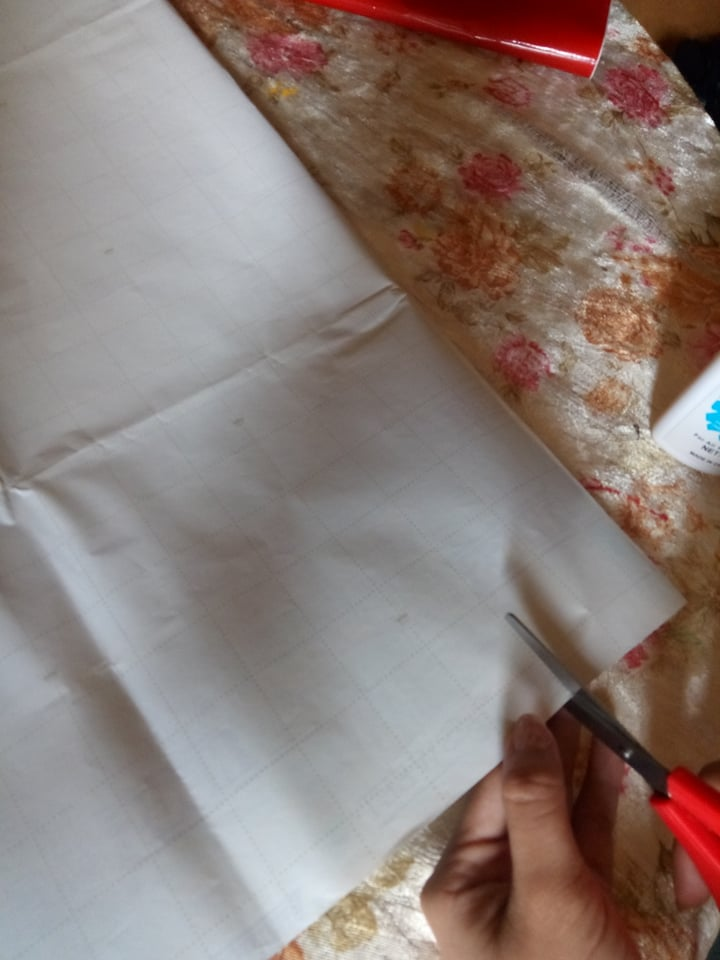
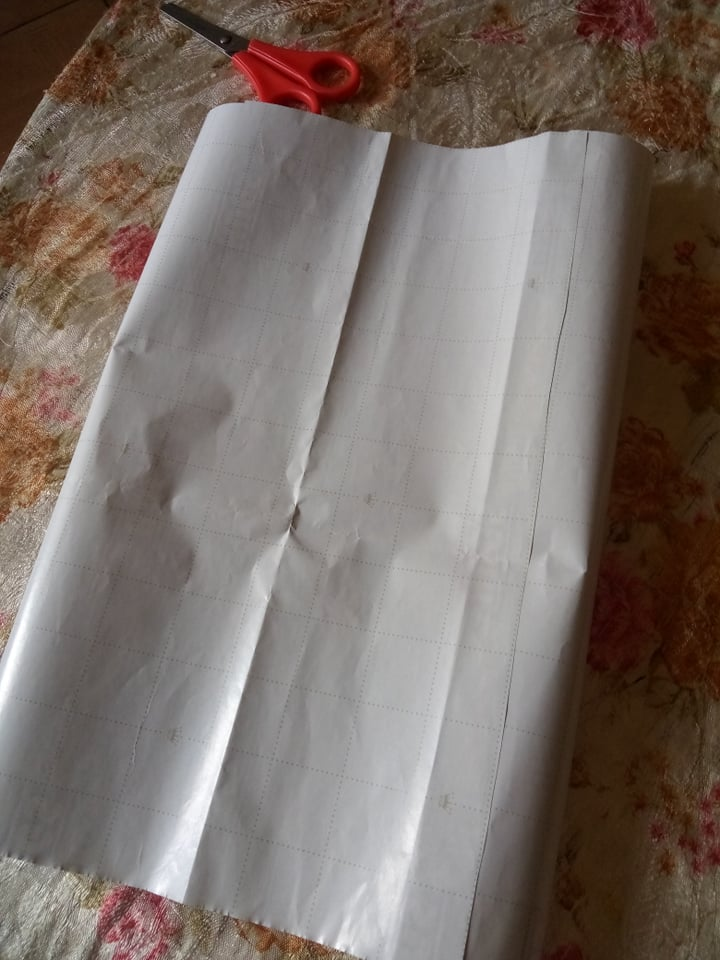
1- Cortamos un buen pedazo de papel.
2- Con la pega pegamos el papel de un lado uniendo los dos lados.
3- En la parte de bajo doblamos y tambien doblamos en los lados.
1- Cut a good piece of paper.
2- With the glue we glue the paper on one side joining the two sides
3- At the bottom we fold and also fold on the sides.
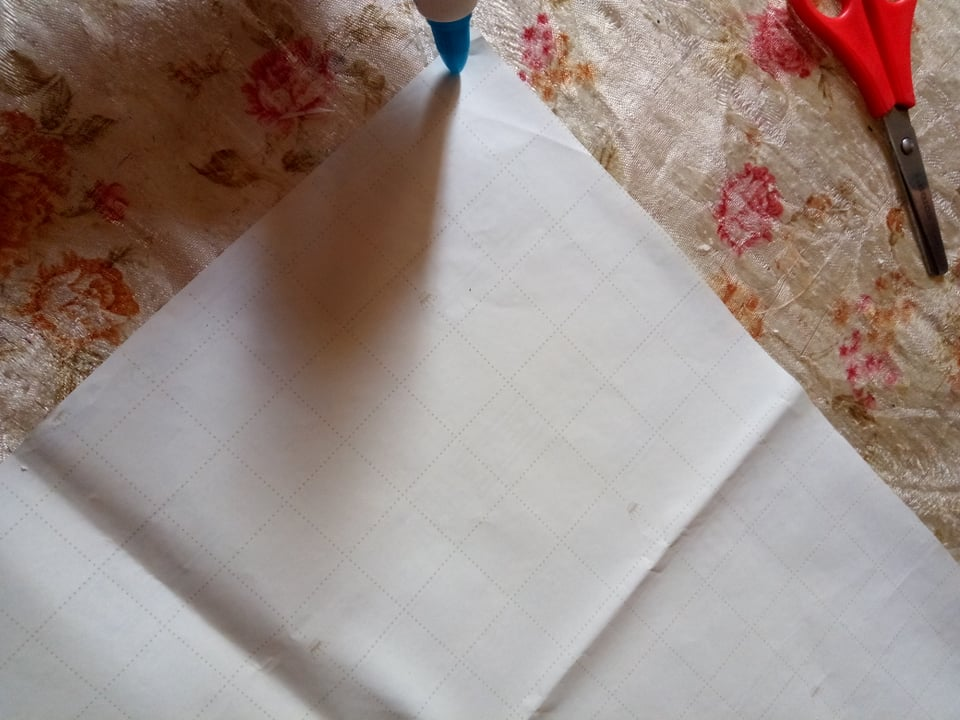


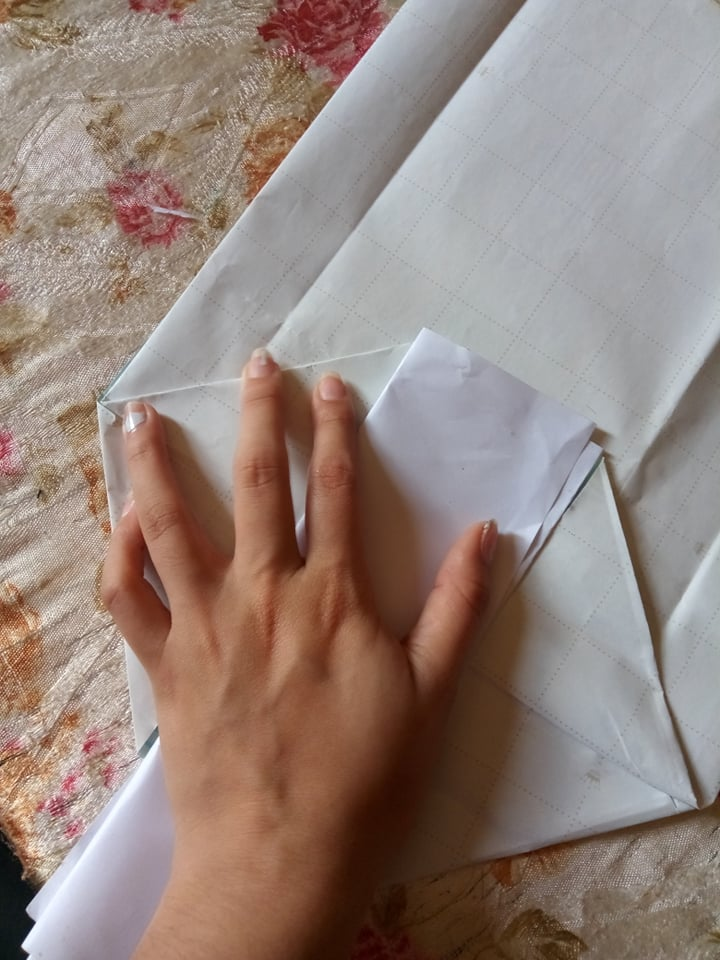
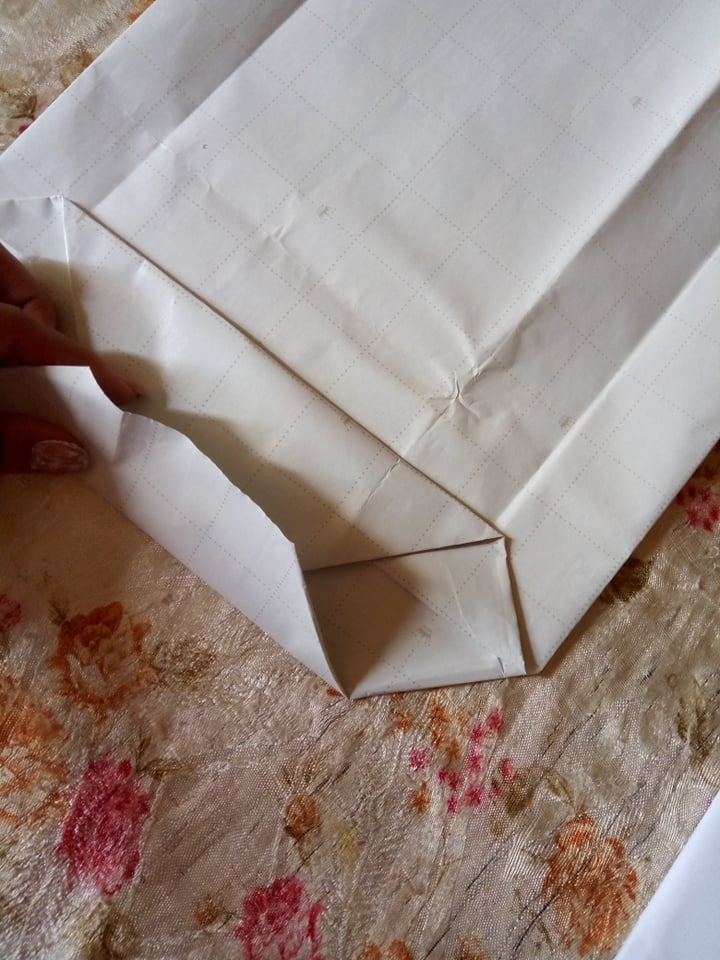
4- Procedemos a doblar en la parte de abajo y luego en esa misma parte hacemos otro doble.
5- Aplicamos pega.
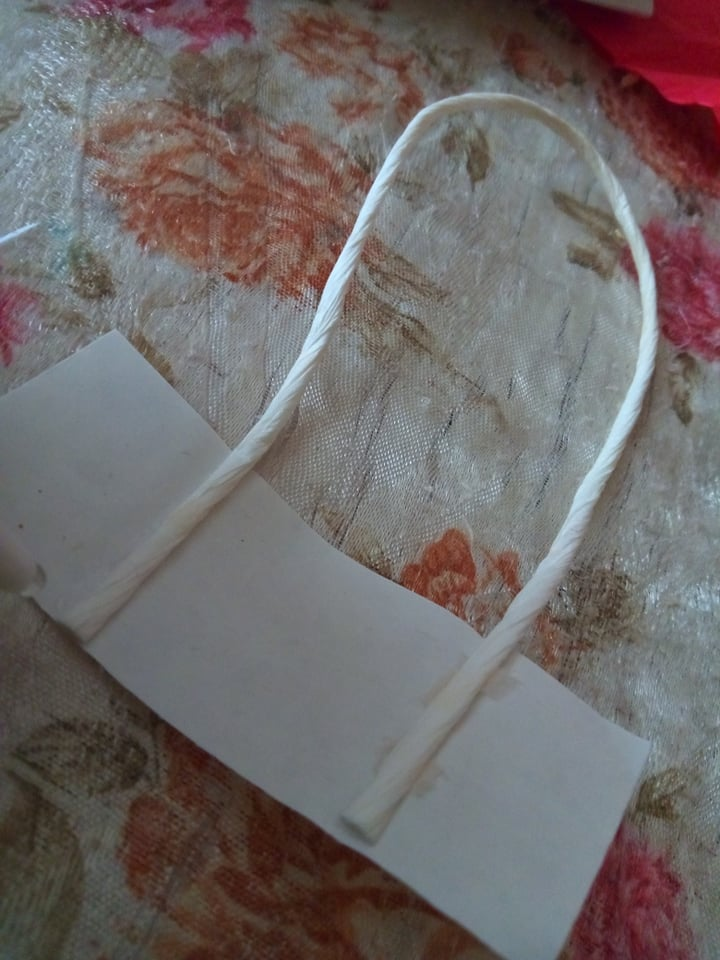
6- Abrimos la bolsa y entro parte en una hoja pegamos las cinta para luego pegarlas a la bolsa.
4- Procedemos a doblar en la parte de abajo y luego en esa misma parte hacemos otro doble.
5- Aplicamos pega.
6- Abrimos la bolsa y entro parte en una hoja pegamos las cinta para luego pegarlas a la bolsa.
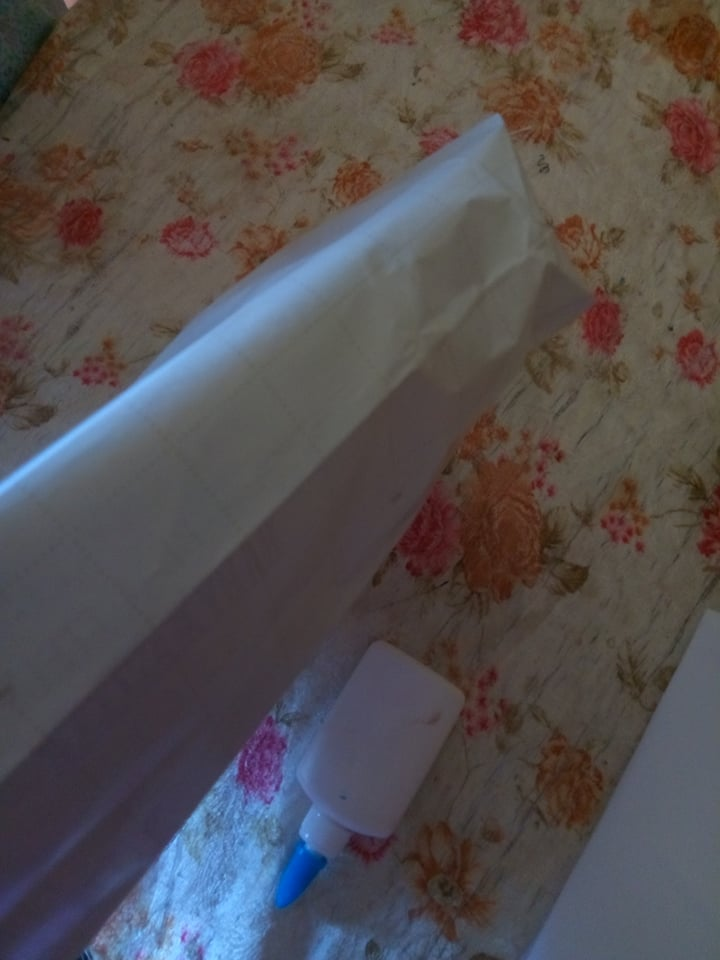

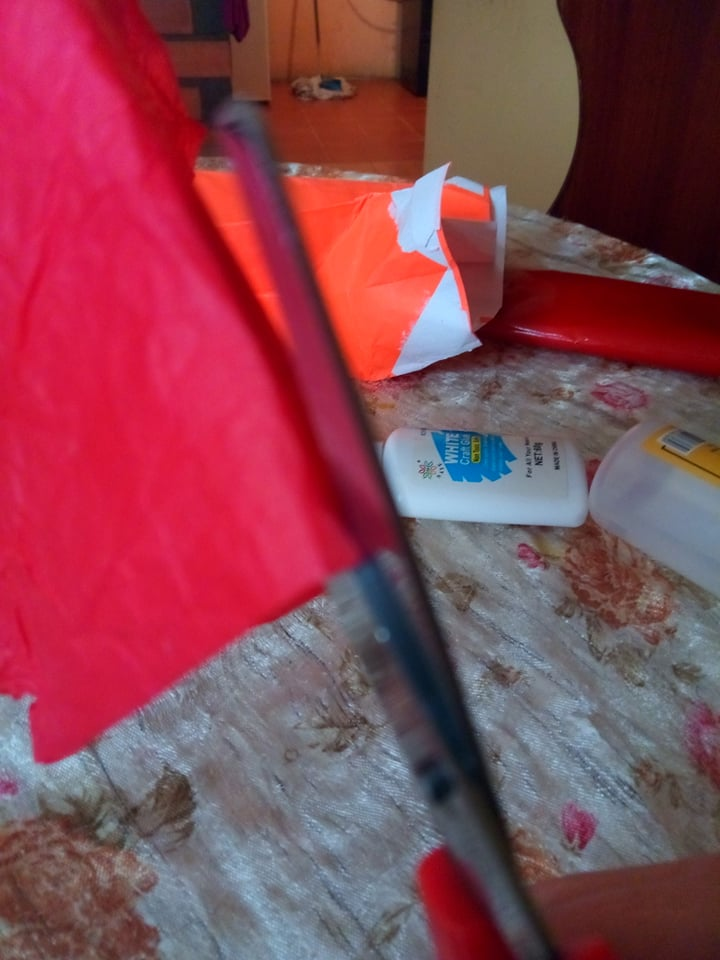
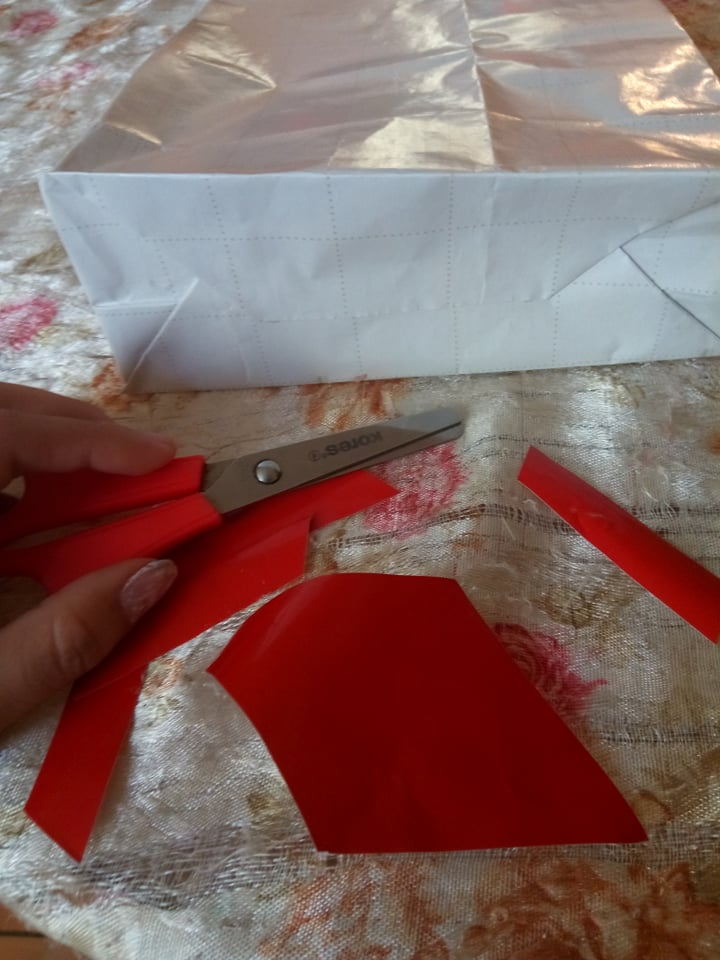
7- Con ayuda de una tijera cortamos papelitos y se lo pegamos a la bolsa en la parte de adentro.
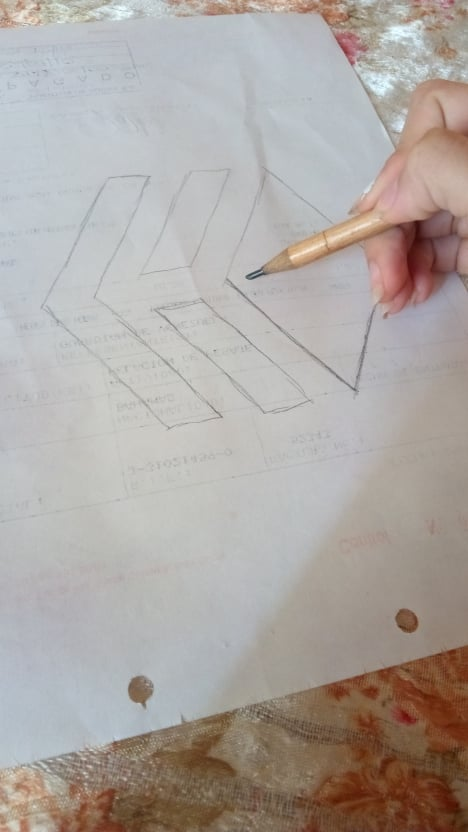
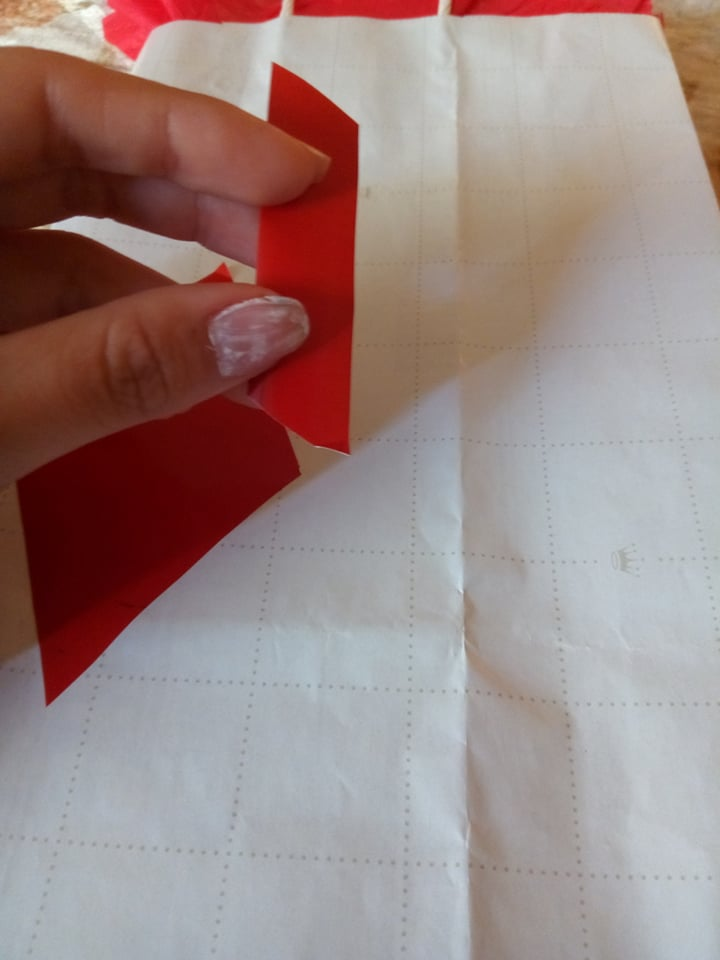
8- Con un lápiz y una hoja hacemos el logo de hive y luego lo pasamos en el papel contac y cortamos.
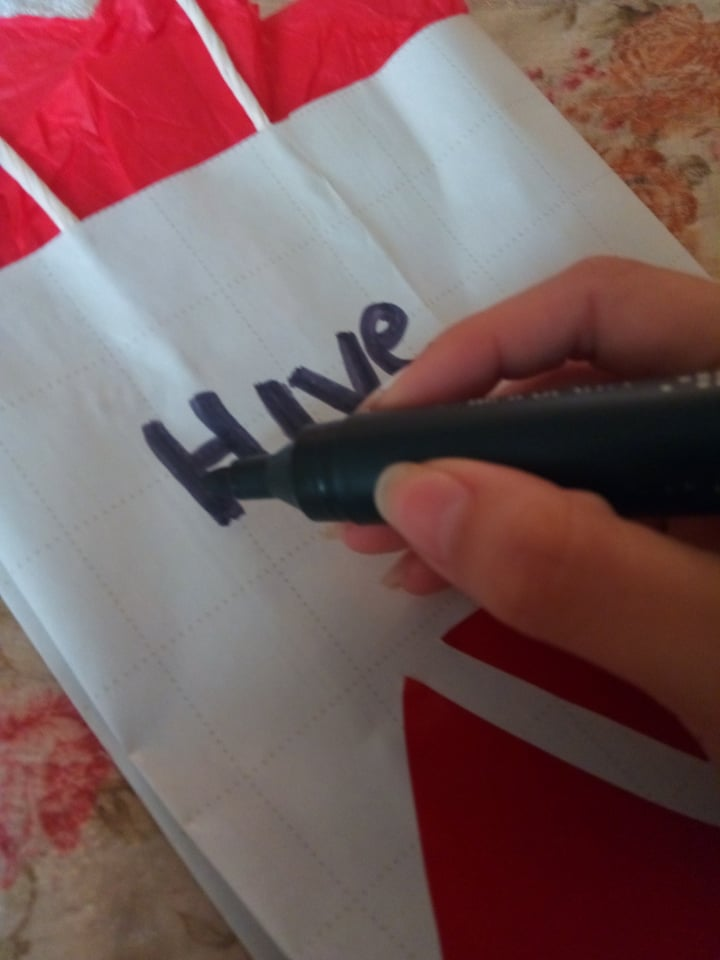
9- Pegamos las parte del logo y con un marcador pntamos las letras.
10- Por ultimo colocamos los detalles que queramos regalar a esa persona especial.
7- With the help of a scissors we cut small pieces of paper and glue them to the inside of the bag.
8- With a pencil and a sheet of paper we make the hive logo and then we put it on the contac paper and cut it.
9- Glue the parts of the logo and with a marker we put the letters.
10- Finally we place the details that we want to give to that special person.
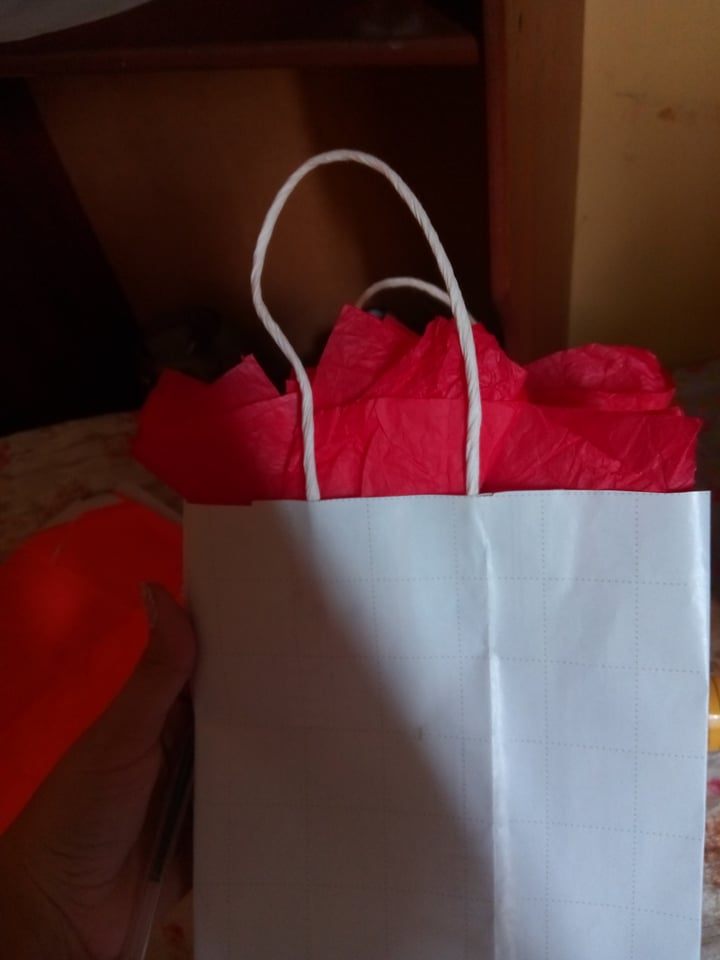
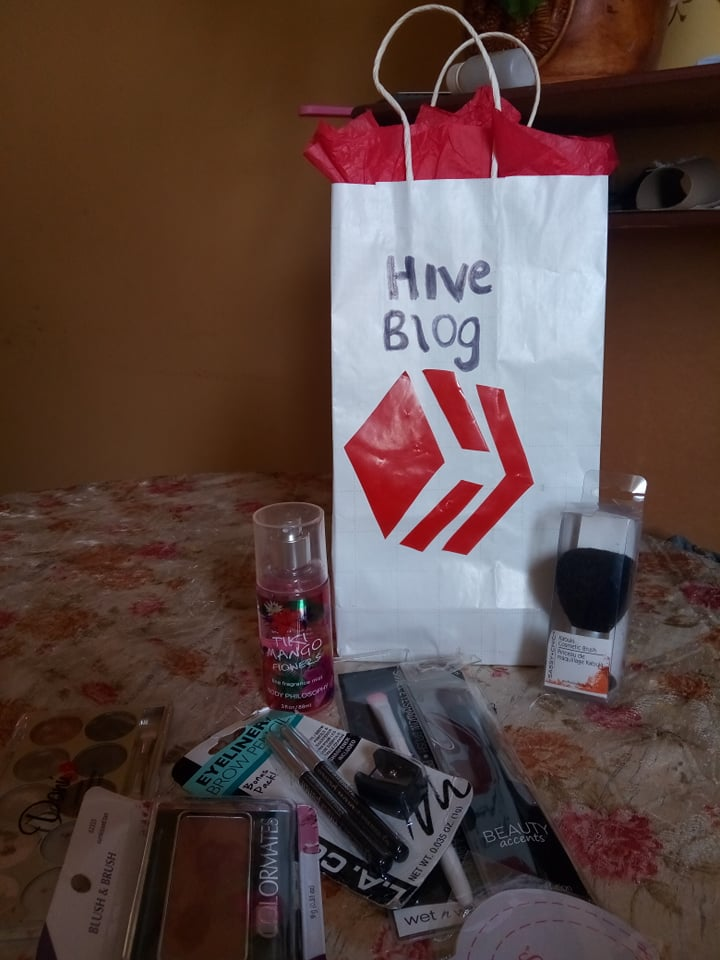
This was the final result, I am very proud that every day I am learning to do new things and I love to show you what I make, this time I wanted to make a beautiful gift to a friend hive @iamarianneth, I hope you liked it and well my beautiful people thanks for the support and see you in another blog.


Todas las fotos son de mi autoría.
All photos are by me.
Muy bonita y creativa 👍
Congratulations @antonella085! You have completed the following achievement on the Hive blockchain and have been rewarded with new badge(s) :
Your next target is to reach 50 upvotes.
You can view your badges on your board and compare yourself to others in the Ranking
If you no longer want to receive notifications, reply to this comment with the word
STOPCheck out the last post from @hivebuzz:
Support the HiveBuzz project. Vote for our proposal!