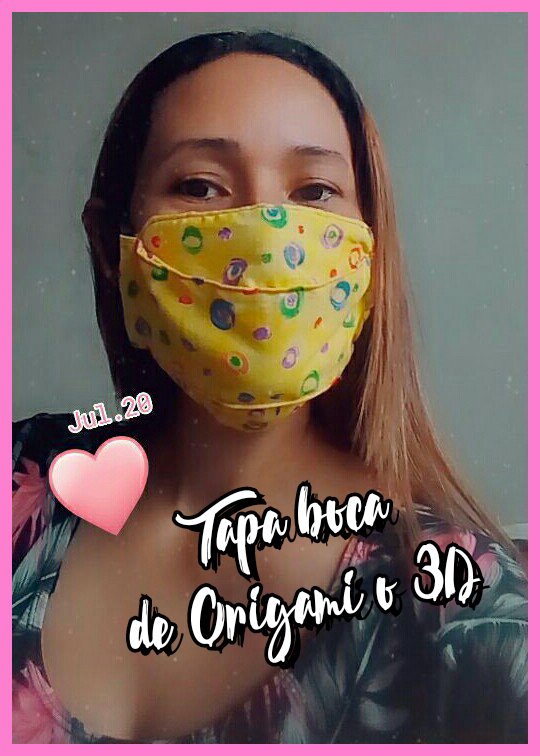
[ING-ESP] Learn how to create an Origami Mouth Cap or 3D / Aprende a crear un tapa boca de origami o 3D
Materials / Materiales:
- Fabric
- Sewing machine
- Pins
- Scissors
- Elastic
- Tela
- Maquina de coser
- Alfileres
- Tijera
- Elástica
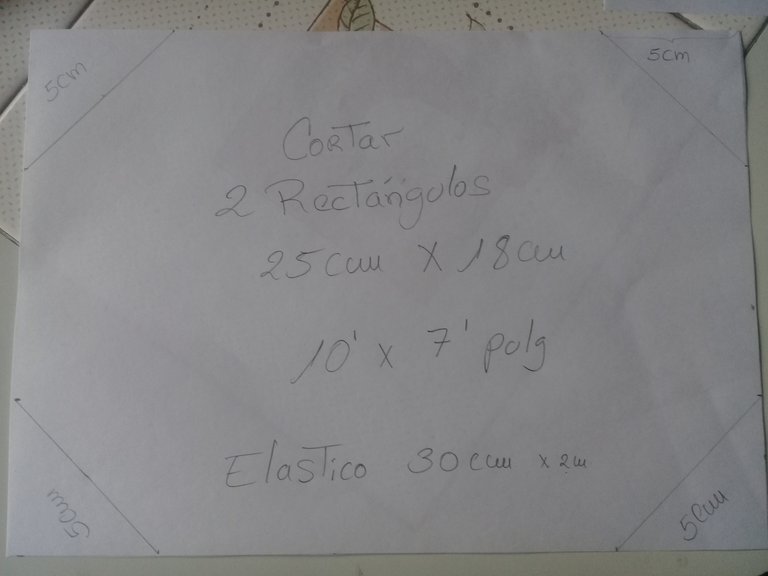
The first thing is to give them the pattern 2 rectangles of 25cm long x 18cm wide; at the sides measure 5 cm from each of the sides and pass a straight line .
Lo primero es darles el patrón 2 rectangulos de 25cm de largo x 18cm de ancho; a los lados medir 5 cm de cada uno de los lados y pasar una linea recta .
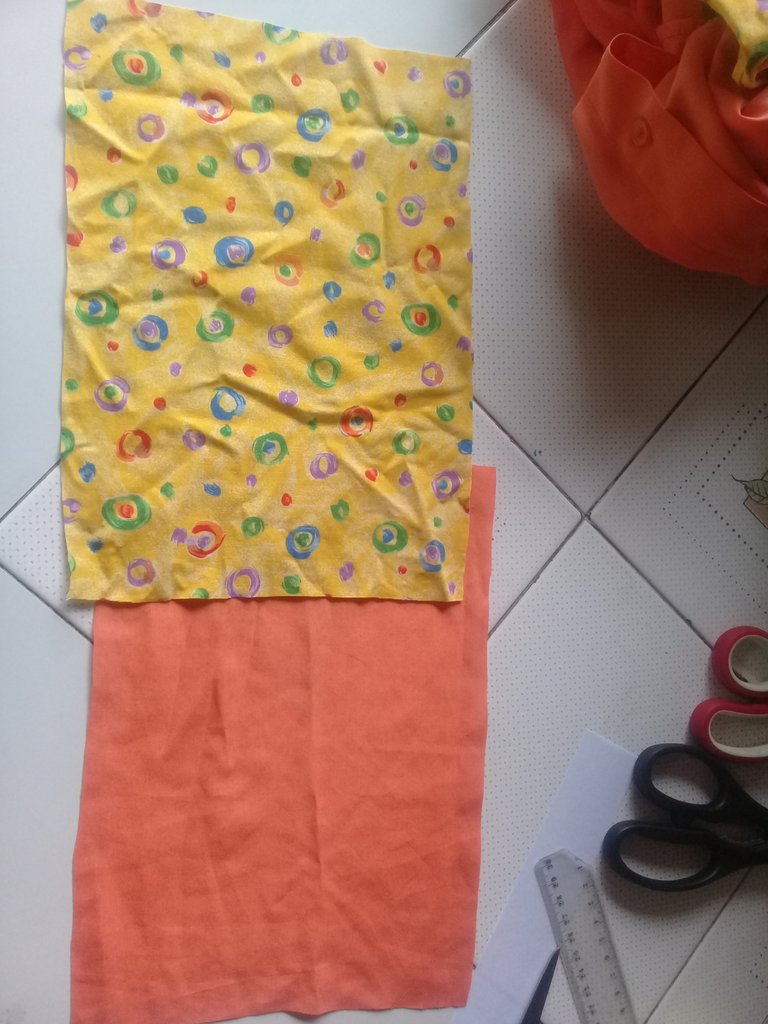
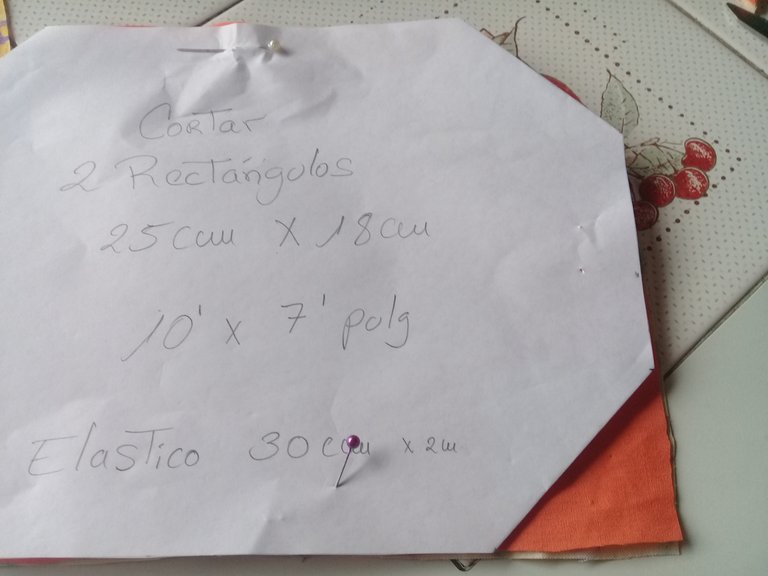
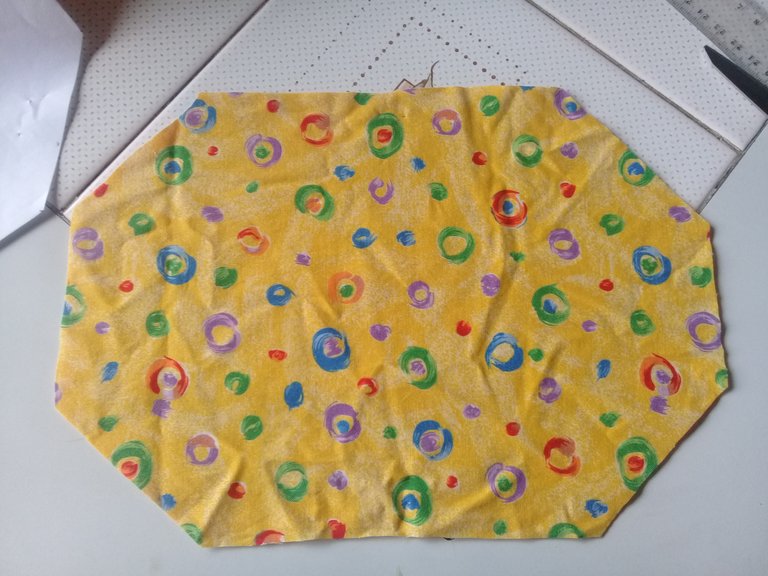
We proceed to cut our fabric according to the measures indicated in our pattern. First the 25cm x 18cm and then the corners. Two equal patterns are cut, i.e. a pair.
Procedemos a cortar nuestra tela según las medidas indicadas en nuestro patrón. primero los 25cm x 18cm y luego las esquinas. Se cortan 2 patrones iguales, es decir un par.

Now let's place the front parts of both fabrics inwards to start sewing.
Ahora vamos a colocar las partes delanteras de ambas telas hacia adentro para comenzar a coser.
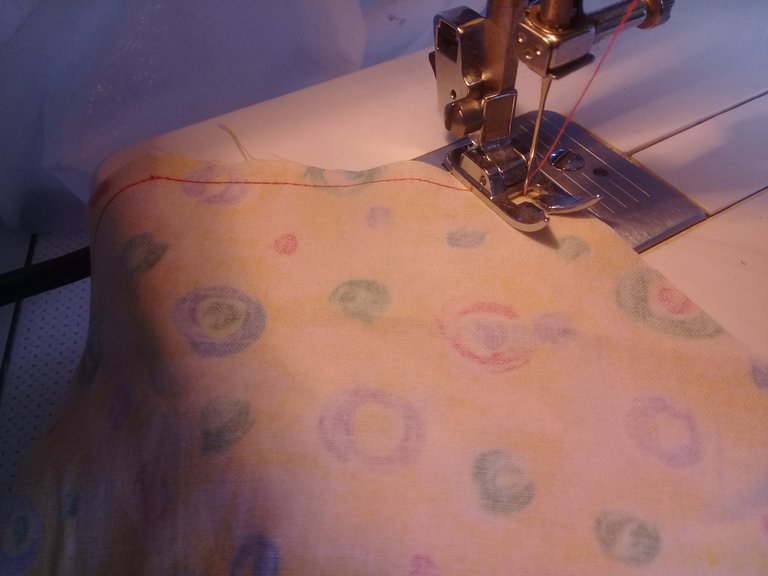
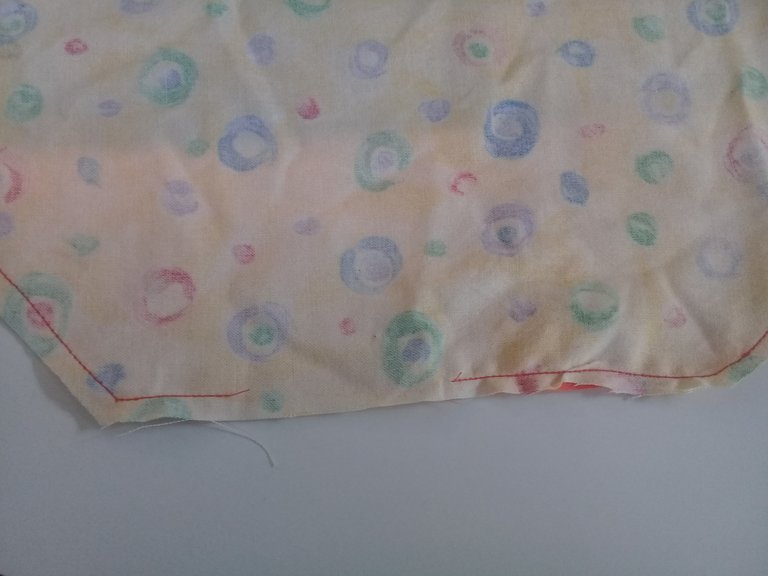
We sew on our machine with a straight line at half a centimeter, leaving a part of the bottom without sewing as 3 cm to be able to turn the fabric
Cosemos en nuestra maquina con linea recta a medio centímetro dejando una parte de abajo sin coser como 3 cm para poder voltear la tela.
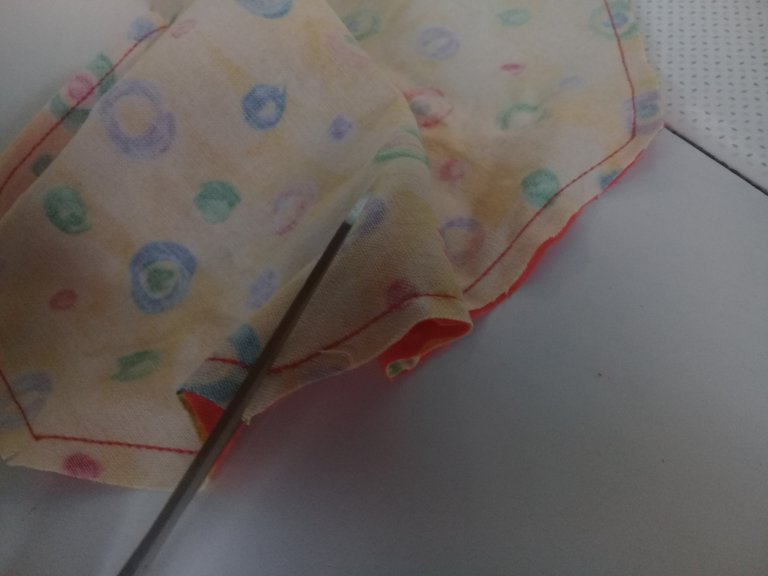
With our scissors we are going to give small pickets in all the corners, this so that when turning it all the ends are well shaped.
Con nuestra tijera vamos a dar piquetes pequeños en todas las esquinas, esto a fin de que al voltearlo queden bien todos los extremos con forma.
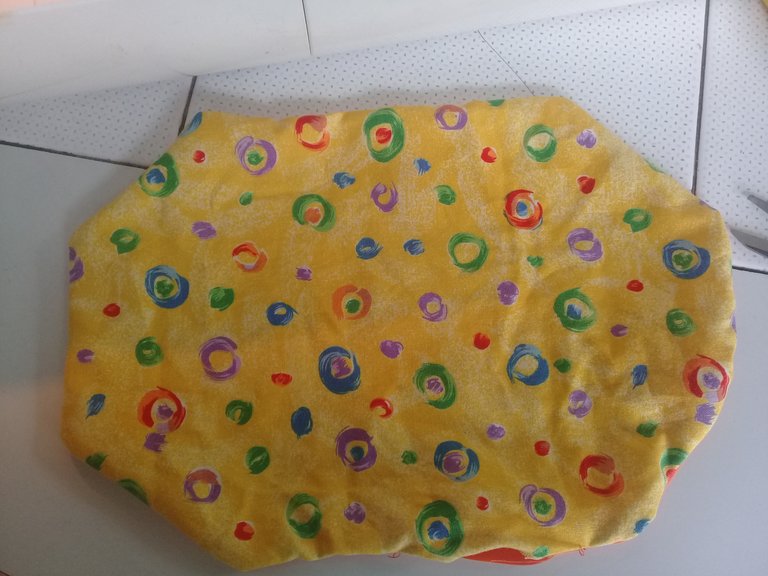
Now we proceed to flip the piece and we can help ourselves with the tip of the scissors to shape the corners.
Ahora procedemos a voltear la pieza y nos podemos ayudar con la punta de la tijera para darle forma a las esquinas.
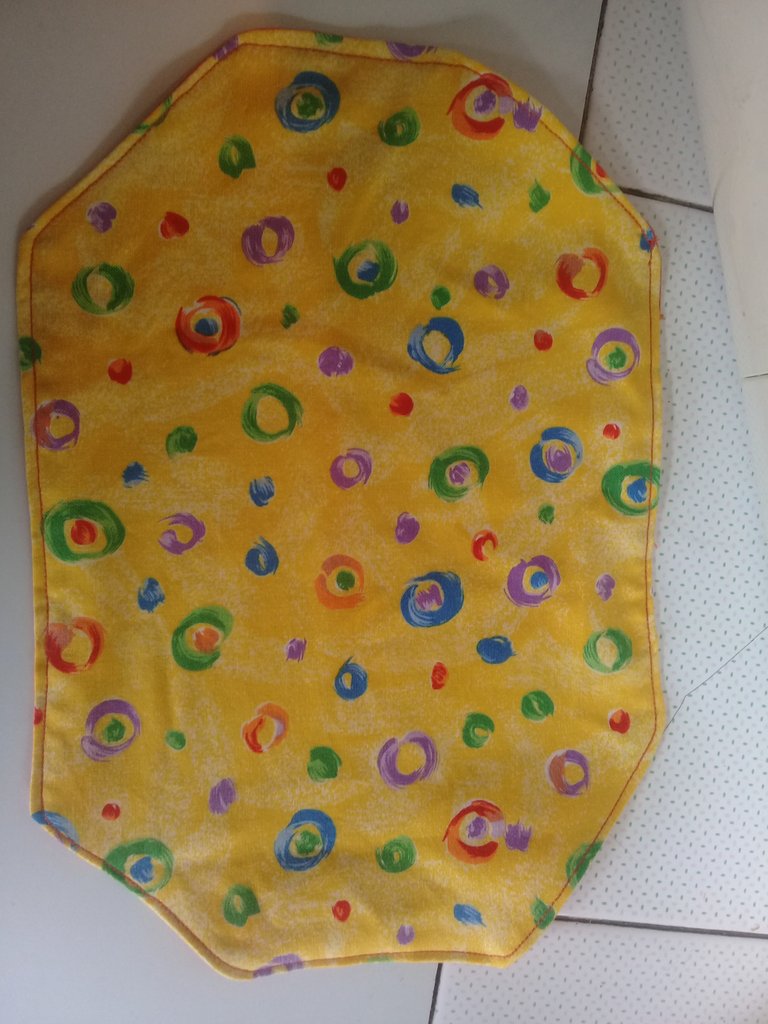
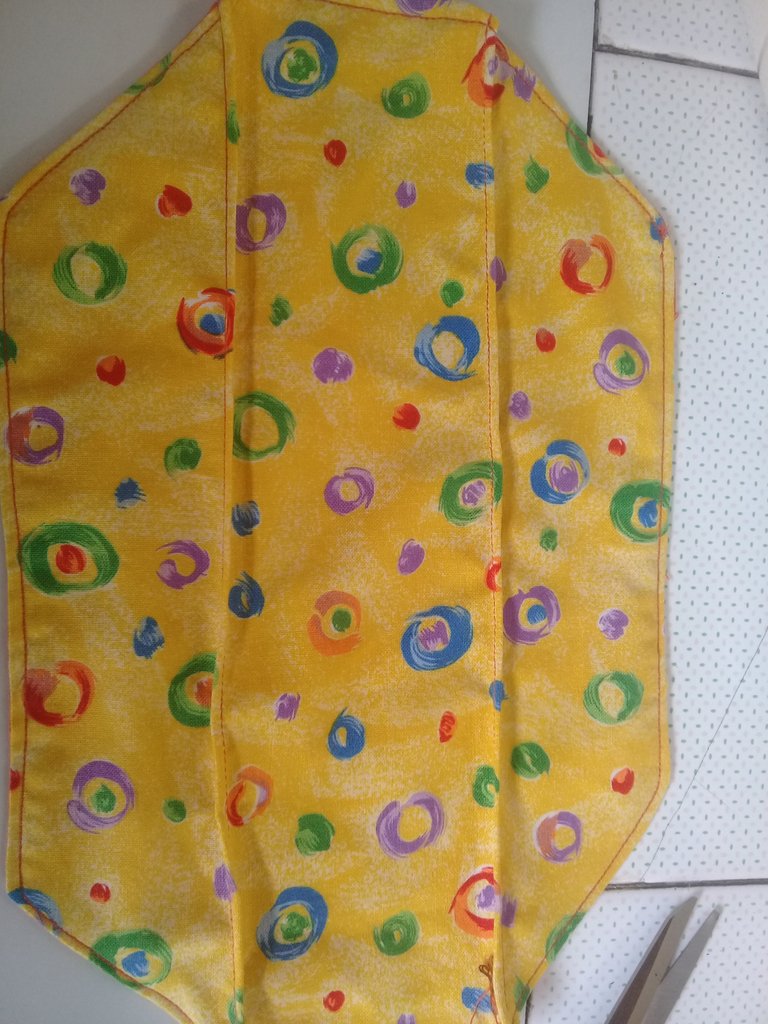
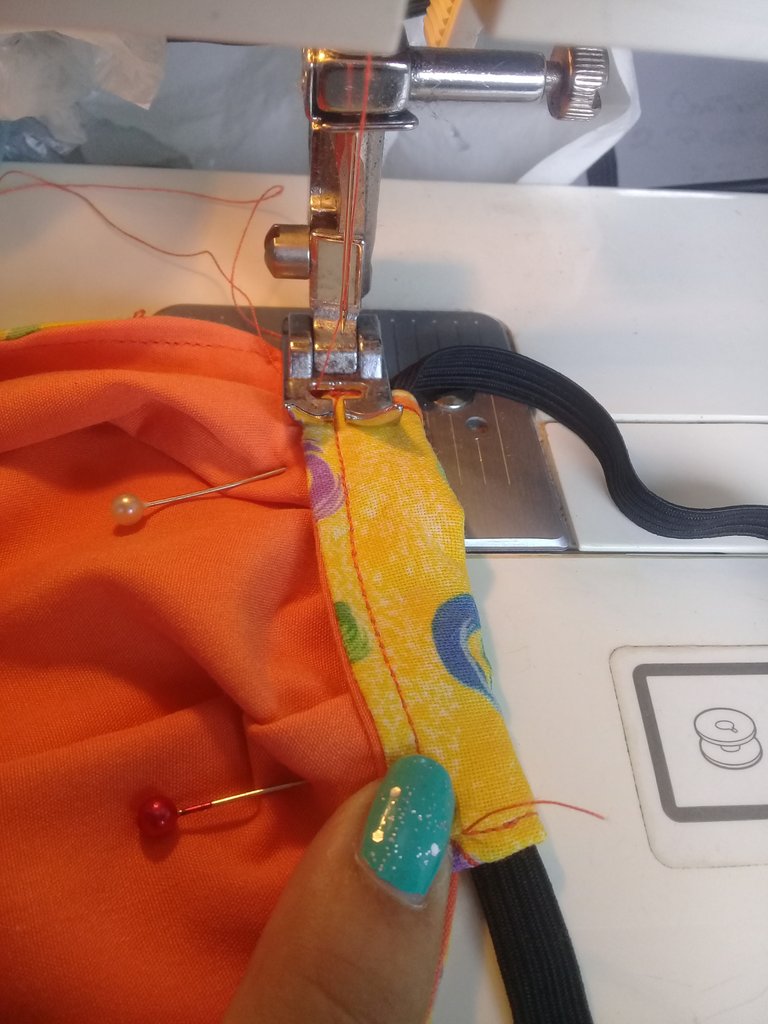
We are going to sew again on the front side and now if uniformly, we sew at half a centimeter.
Vamos a coser nuevamente por el lado delantero y ahora si de manera uniforme, cosemos a medio centímetro.
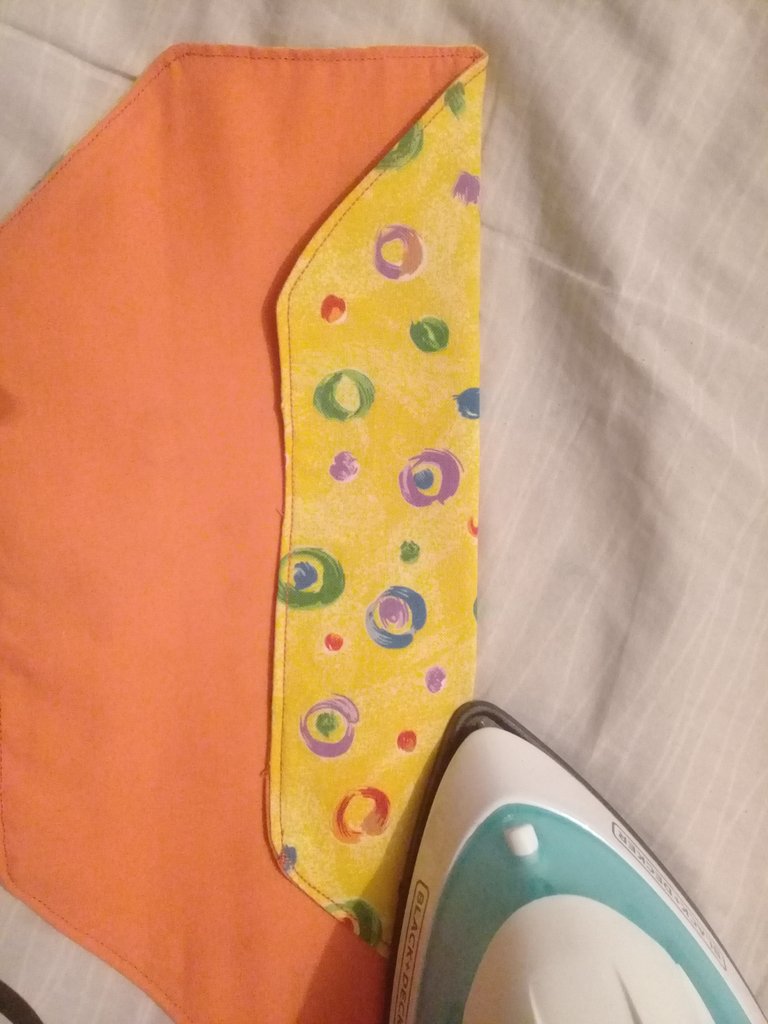
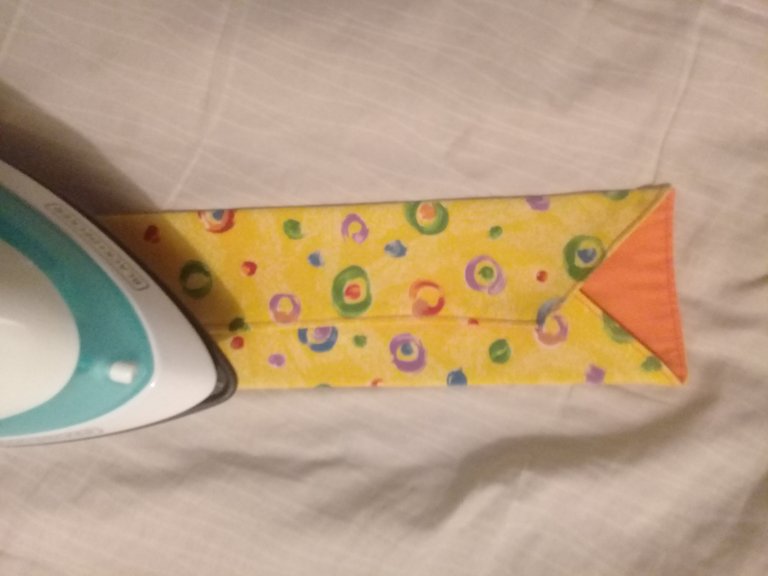
Now we will bend from end to end lengthwise and pass the plate from one side to the other, as shown in the picture.
Ahora vamos a doblar de extremo a extremo a lo largo y pasamos la plancha de un lado y luego del otro, como se muestra en la imagen.
With the lines we have formed, we will sew them as shown in the picture,leaving a small edge.
Con las lineas que hemos formado, las vamos a coser como se muestra en la imagen,quedando un borde pequeño.
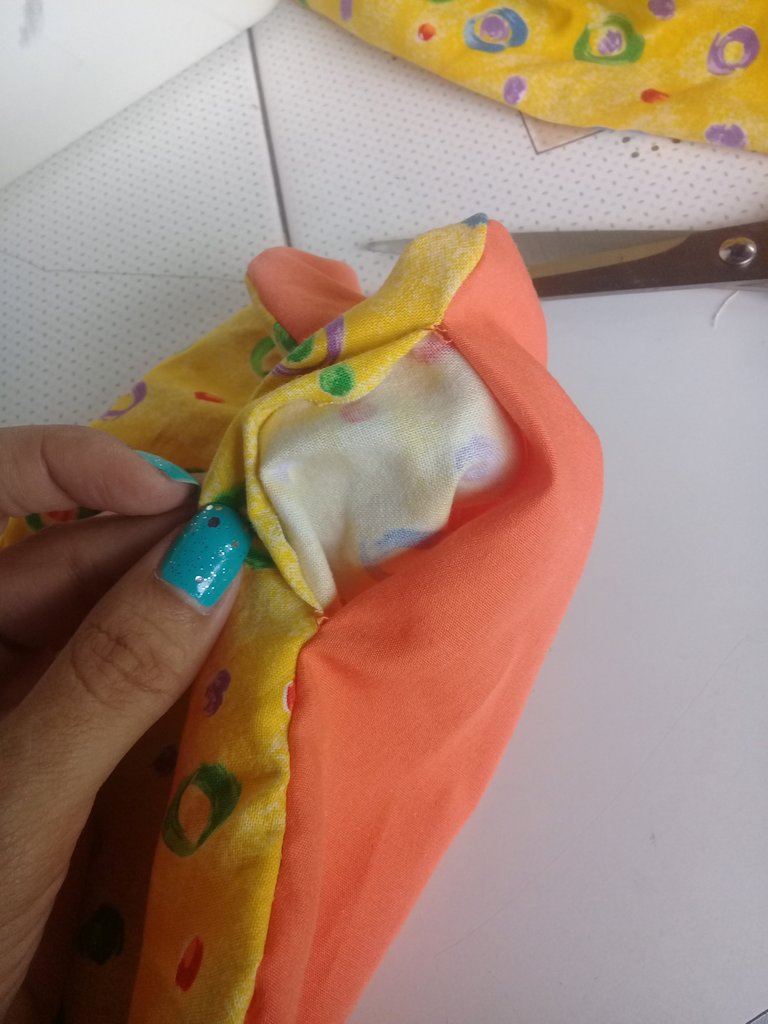
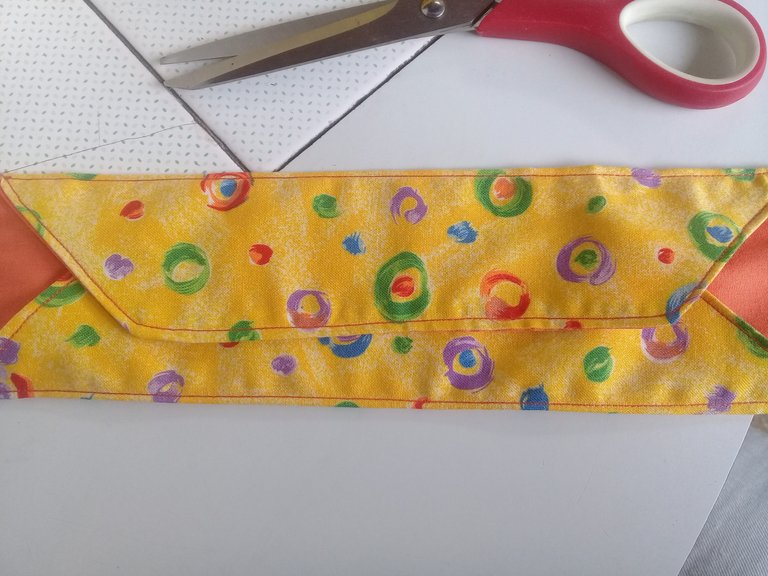
For this step we will help with some pins and we will form at the ends a small triangle as you can see in the image, this triangle should coincide in a straight line with the side. We will do this from both sides, no matter if you wrinkle a little in the middle.
Para este paso nos vamos ayudar con unos alfileres y vamos a formar en los extremos un triangulo pequeño como se puede observar en la imagen, ese triangulo debe coincidir en una linea recta con el de al lado. Esto lo haremos de ambos lados, no importa si se te arruga un poco en el medio.


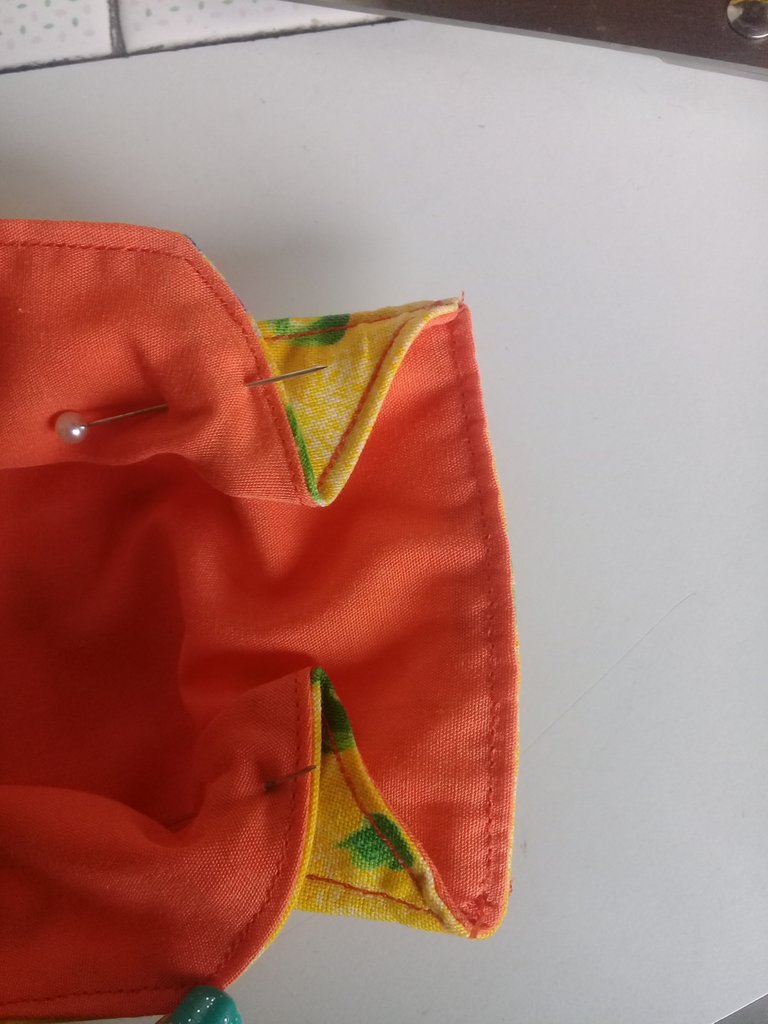
We will cut our 30cm or 26cm elastic depending on the width of the face. After cutting it we will put it in the space before the triangles we formed and we will sew it very carefully without sewing the elastic.
Vamos a cortar nuestra elástica de 30cm o de 26cm dependerá del ancho del rostro. luego de cortadas la vamos a poner en el espacio que queda antes de los triángulos que formamos y vamos a coser con mucho cuidado sin coser la elástica.
We do the above procedure at both ends and it should look like this.
El procedimiento anterior lo hacemos en ambos extremos y debe verse así.
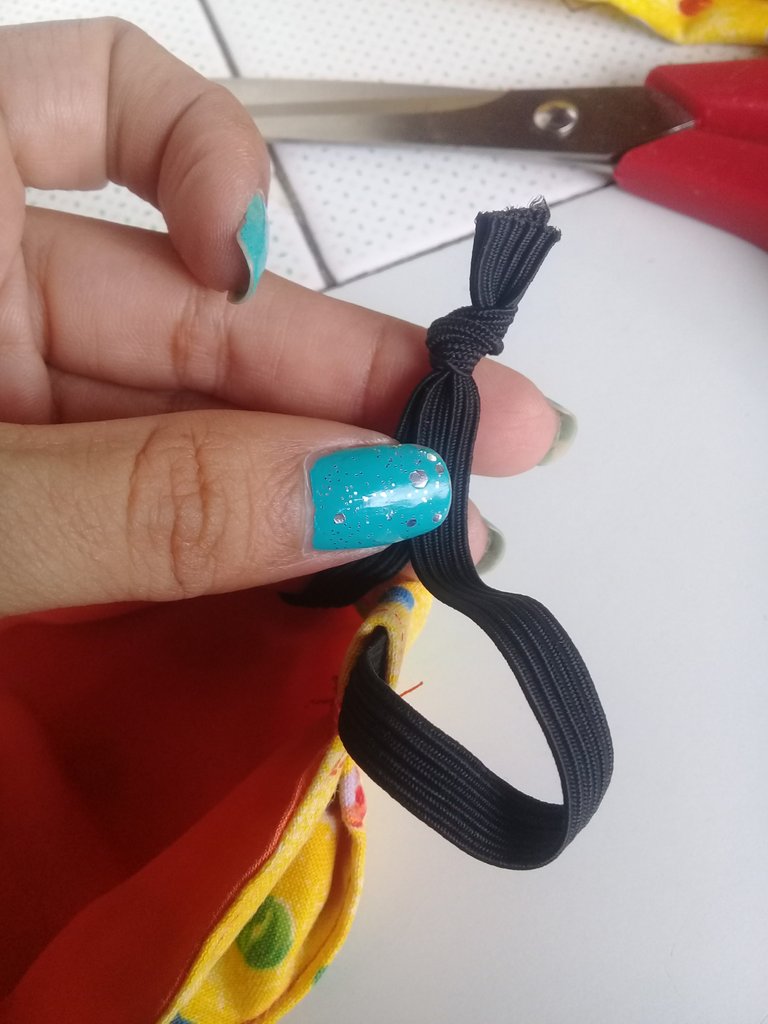
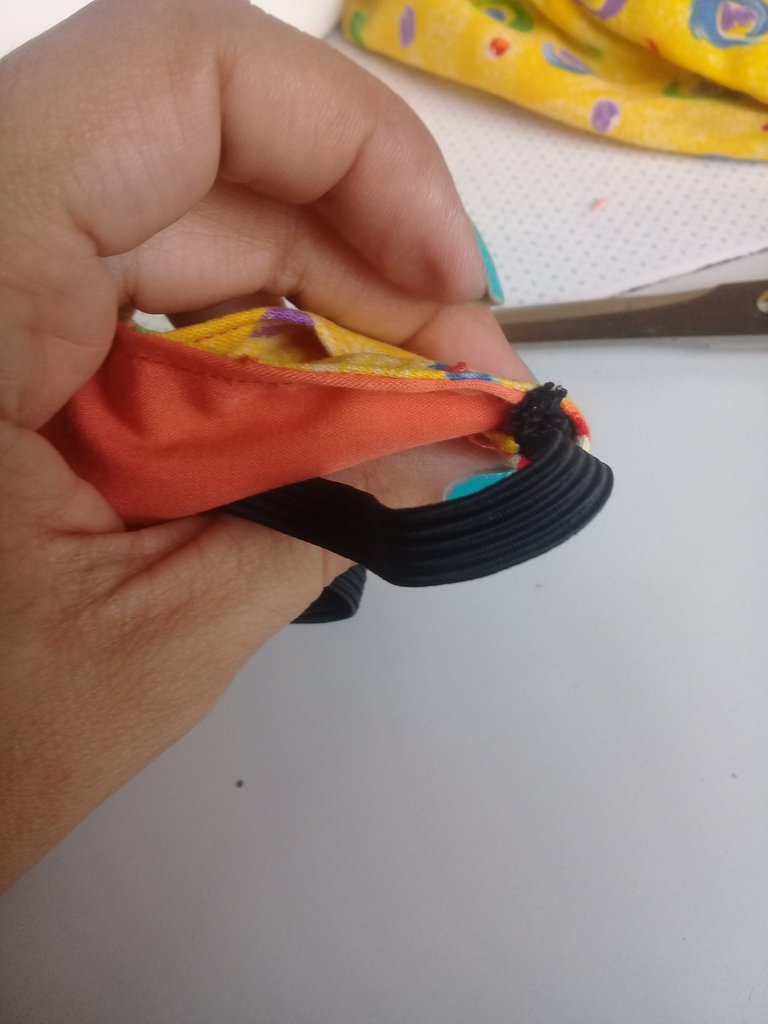
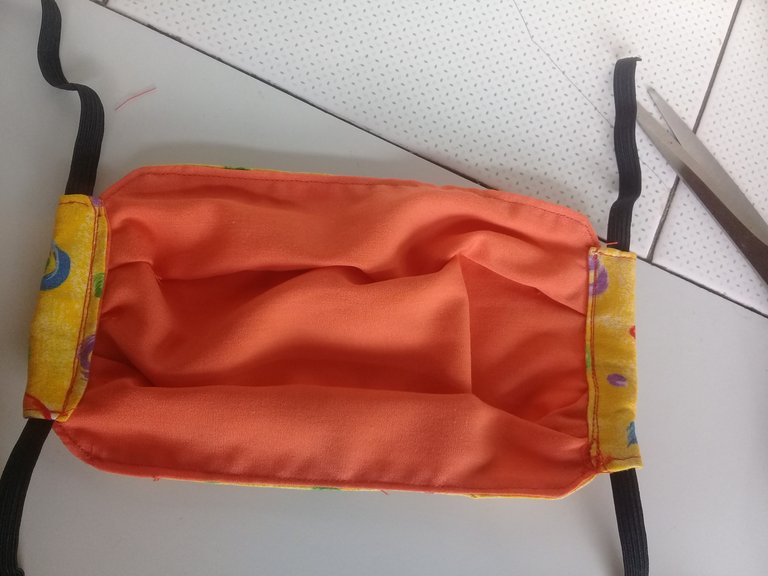
Now we will make a knot at each end of the garters and introduce it inside the hole in the fabric to hide it, and thus we finish our mouth cap.
Ahora haremos un nudo en cada extremo de las ligas y lo introducimos por dentro del orificio de la tela para esconderlo, y así terminamos nuestro tapa boca.

I hope you liked this project, see you in a next post ❤️ Blessings
Espero que les gustara este proyecto, nos vemos en un próximo post ❤️ Bendiciones
Esto es impresionante. mantenerse a salvo, mantenerse saludable.
Si nuestro cuidado lo primordial, saludos 😉
I use a similar design, I love how simple it is.
But my last step is different: after folding the top + bottom to the middle and make the seam, I simply fold the sides twice to the middle to make tunnel. That is fixed with a seam and the mask is finished!
On top the finished mask 'in use', left bottom the tunnel for the band or elastic, right bottom the mask waiting to be used.
Have a !BEER
If it looks the same, waoo is like your step is easier.
It remains the same
View or trade
BEER.Hey @yolimarag, here is a little bit of
BEERfrom @muscara for you. Enjoy it!Learn how to earn FREE BEER each day by staking your
BEER.Te invito también a unirte a nuestra comunidad aquí. Un grupo que se dedica a estudiar las palabras de Dios a través de las enseñanzas del hermano Eli Soriano.
¡Pregúntele al hermano Eli, la Biblia responderá!Consulte el siguiente enlace👇👇👇
https://peakd.com/c/hive-182074/created
gracias ya estoy suscrita
Dios le bendiga hermana
Amén
Muy detallado tu paso a paso @yolimarag
Gracias por compartir
Gracias muy amable ❤
#posh https://twitter.com/yolimarag/status/1287818132065783808?s=20
Congratulations @yolimarag! You have completed the following achievement on the Hive blockchain and have been rewarded with new badge(s) :
You can view your badges on your board And compare to others on the Ranking
If you no longer want to receive notifications, reply to this comment with the word
STOPTo support your work, I also upvoted your post!
Do not miss the last post from @hivebuzz:
Support the HiveBuzz project. Vote for our proposal!
Thanks for sharing your creative and inspirational post on HIVE!
This post got curated by our fellow curator @stevenson7 and you received a 100% upvote from our non-profit curation service!
Join the official DIYHub community on HIVE and show us more of your amazing work!
muchas gracias
Que bueno, ¡nunca había visto un molde con esa forma!
gracias por leerme y por tu comentario, un abrazo
Muy meticuloso el procedimiento, realmente laborioso. Felicidades por tu arte.
Muchas gracias por apreciarlo🤗🤗