[ESP-ENG] Mi hermoso porta botella | My beautiful bottle holder
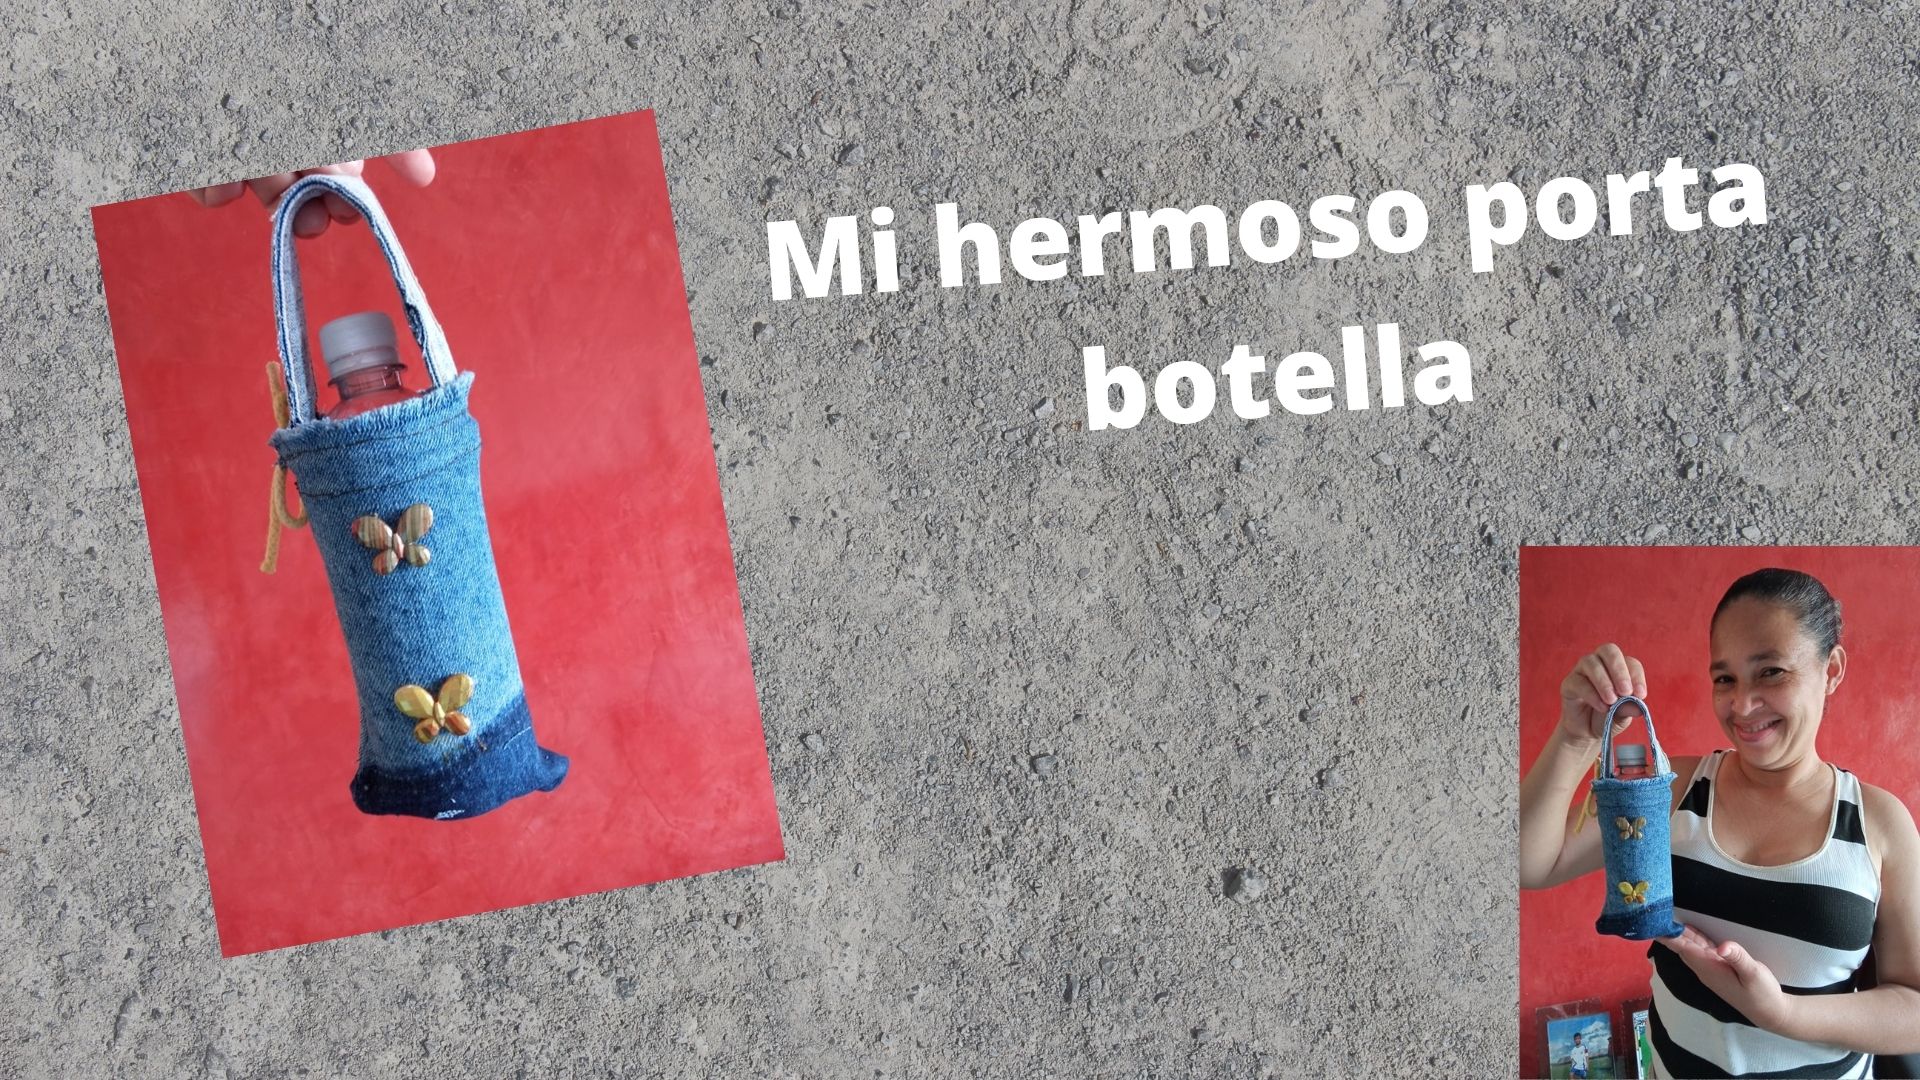
A big hug for everyone, always happy and grateful to be able to share with you once again, today I will show you a beautiful bottle holder made with scraps of jean fabric, they are ideal to carry water anywhere, in my case I work almost all day, and I have lunch there, it is very useful to carry my juice, it is also ideal for the little ones in the house. Here is the step by step.
.jpg)
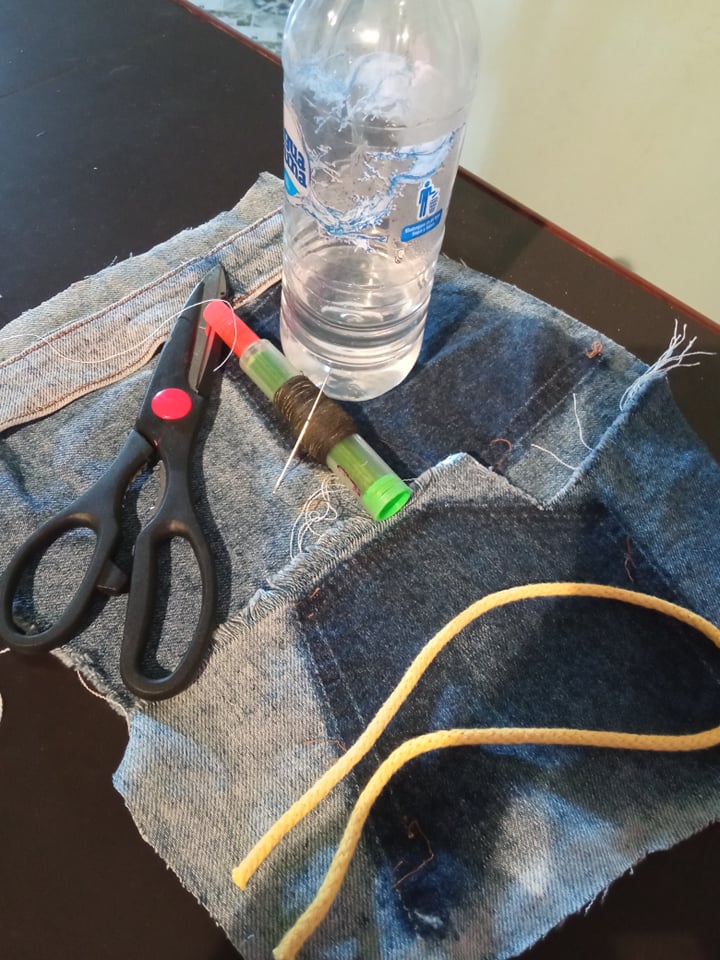
- Los materiales a utilizar son:
- Retazos de tela de jean.
- Hilo de coser.
- Aguja.
- Botella de agua pequeña.
- Cordón de cualquier color.
- Tijera.
- Pretina de pantalón de jean.
- The materials to be used are:
- Denim fabric scraps.
- Sewing thread.
- Needle.
- Small water bottle.
- Cord of any color.
- Scissors.
- Jeans trouser waistband.
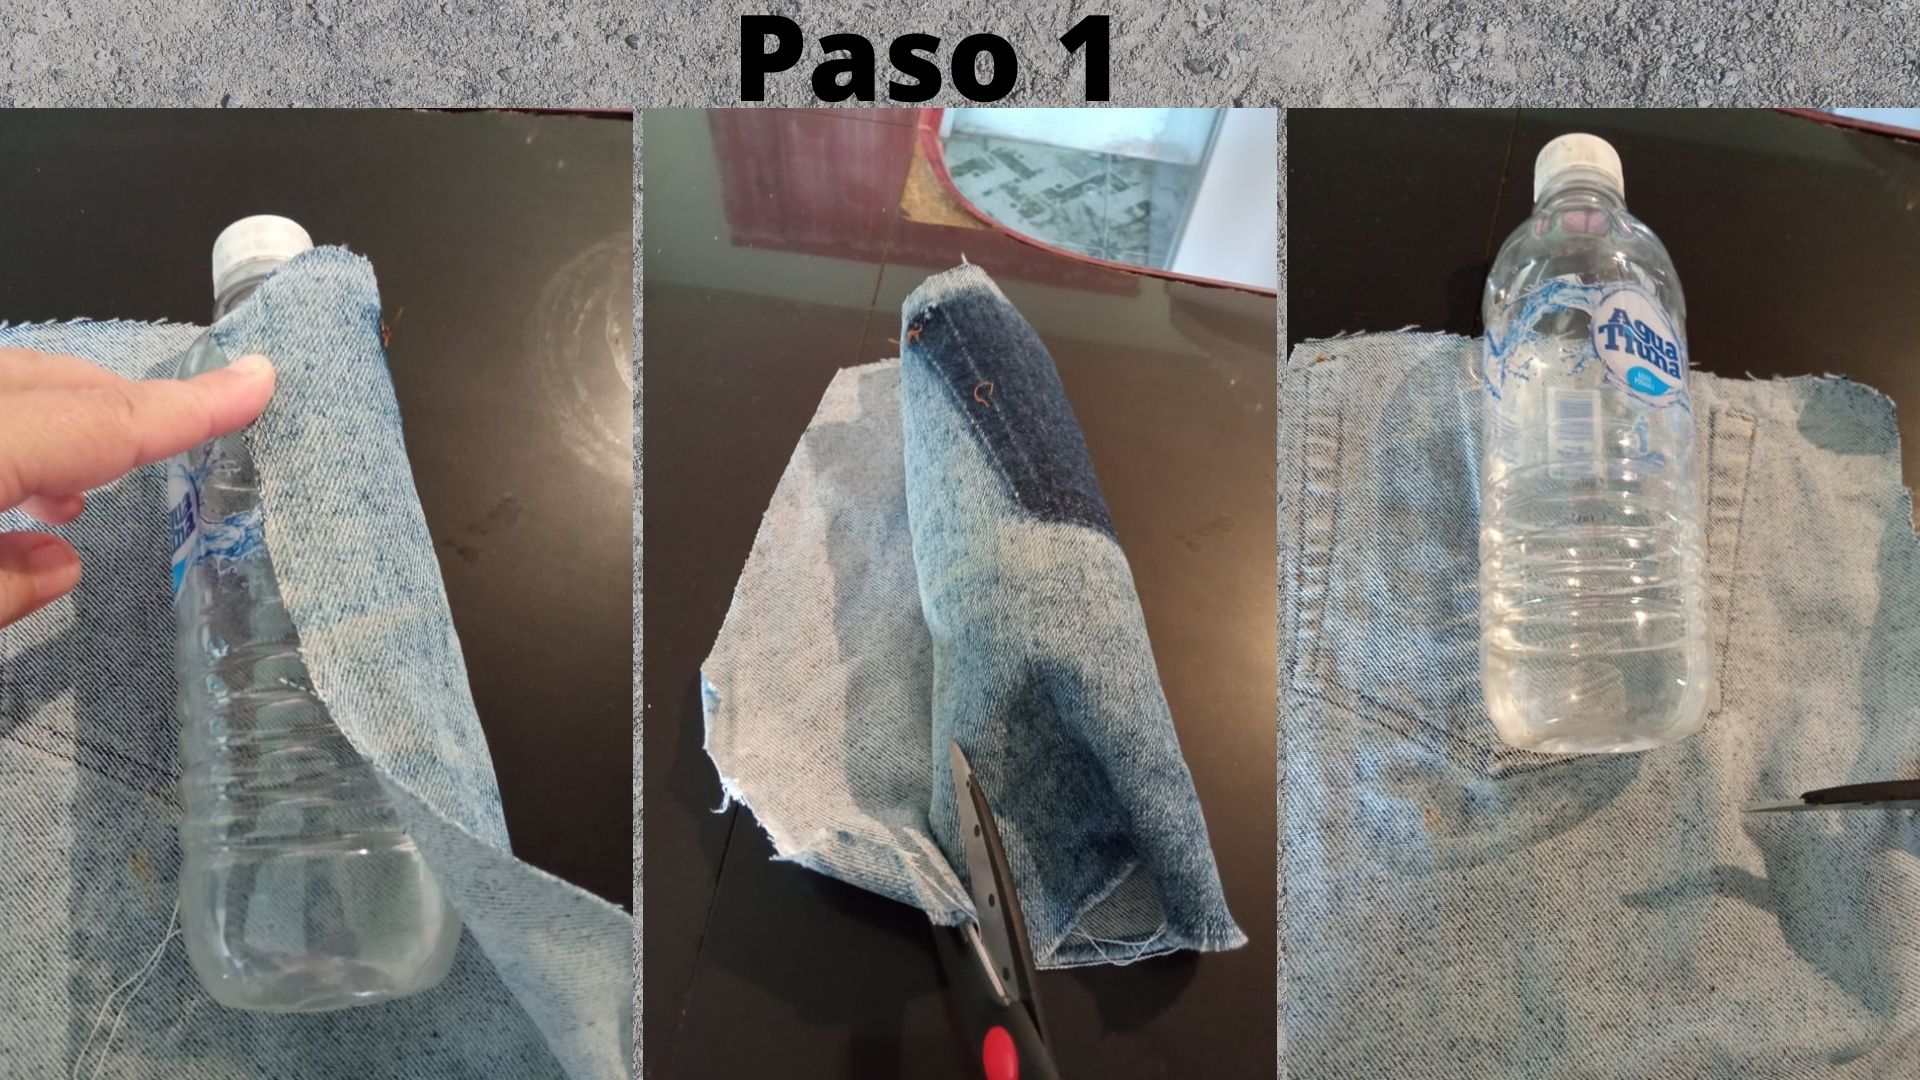
- Paso 1: Lo primero que debemos hacer es medir la tela, envolviendo toda la botella para luego recortar, luego dejamos 2cm hacía abajo de la botella y recortamos.
- Step 1: The first thing to do is to measure the fabric, wrapping the whole bottle and then cut it out, then leave 2cm down the bottle and cut it out.
.jpg)
- Paso 2: Luego que recortamos la medida de la tela con la botella, cortamos otro retazo de tela de jean de 2cm apróximadamente de forma recta, luego la colocamos sobre la tela en la parte superior estando ésta al revés, y procedemos a coserla dejando un espacio minimo. Se debe coser el retazo pequeño sobre la tela, justamente por las orillas ( arriba y abajo) sin coser el centro para que podamos introducir el cordón.
- Step 2: After we cut the size of the fabric with the bottle, we cut another piece of jean fabric of about 2cm straight, then we place it on top of the fabric being this one upside down, and we proceed to sew it leaving a minimum space. The small piece should be sewn on the fabric, just on the edges (top and bottom) without sewing the center so that we can insert the cord.
.jpg)
- Paso 3: Una vez que hemos cosido la parte de arriba, procedemos a introducir el cordón de un extremo a otro, hasta quedar tal cual como se muestra en la imágen.
- Step 3: Once we have sewn the top part, we proceed to introduce the cord from one end to the other, until it is as shown in the image.
.jpg)
- Paso 4: Introducido el cordón, doblamos la tela por el lado al revés y comenzamos a coser de abajo hacía arriba, cuando lleguemos a la parte donde está el cordón debemos dejar medio centimetro sin coser.
- Step 4: Once the cord is inserted, we fold the fabric on the wrong side and start sewing from the bottom upwards, when we get to the part where the cord is, we must leave half a centimeter without sewing.
.jpg)
- Paso 5: Una vez que hemos cosido toda la tela, la volteamos para ver como va quedando nuestro porta botella, y procedemos a introducir la pretina de pantalón por la parte de adentro y procedemos a coser un extremo y luego el otro.
- Step 5: Once we have sewn all the fabric, we turn it over to see how our bottle holder will look like, and we proceed to introduce the waistband of the pants on the inside and proceed to sew one end and then the other.
.jpg)
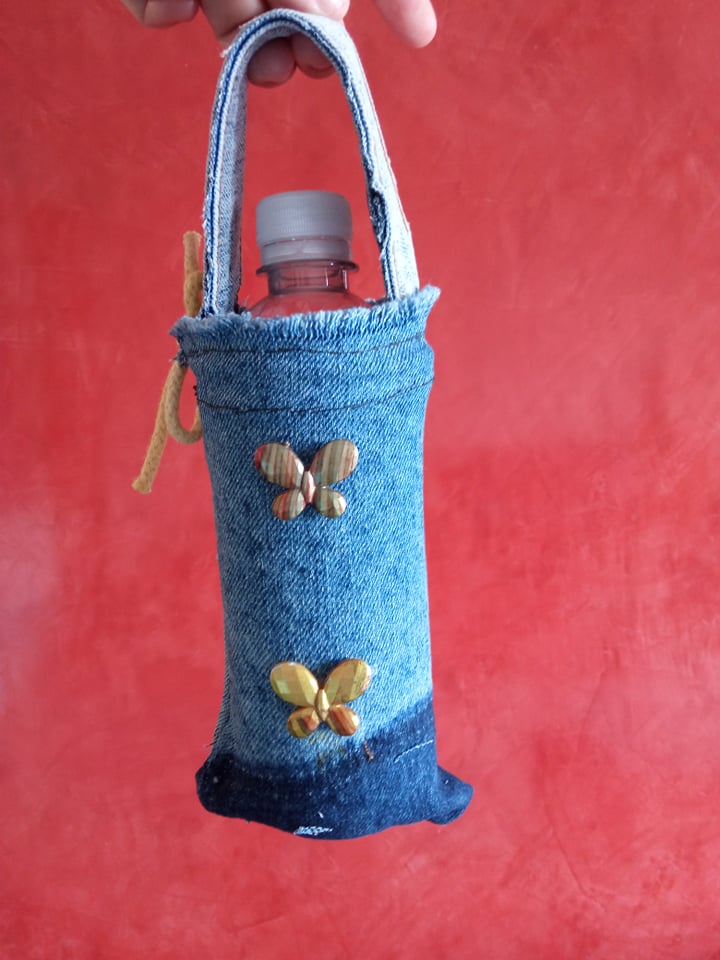
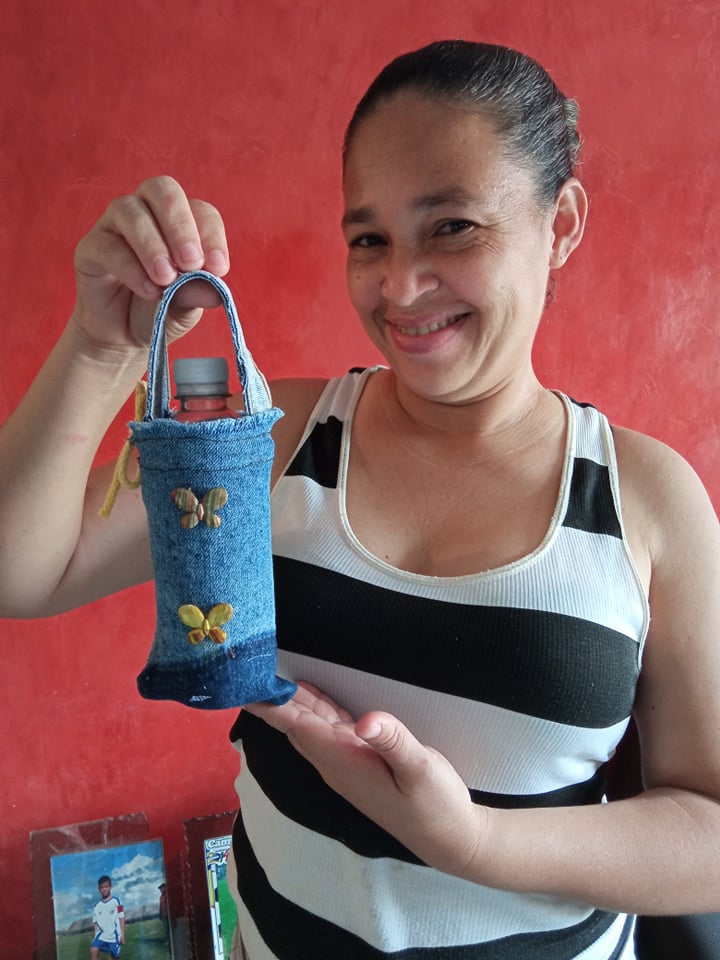
- Paso 6: Una vez que ya hemos pegado la pretina del jean a la tela, lo cual servirá para poder agarrar el porta botella, procedemos a introducir la botella dentro del mismo, y con el cordón ajustamos y amarramos, cabe destacar que la podemos adornar con cualquier detalle que queramos para que se vea más hermoso.
- Step 6: Once we have already glued the waistband of the jean to the fabric, which will serve to hold the bottle holder, we proceed to insert the bottle inside it, and with the cord we adjust and tie, it should be noted that we can decorate it with any detail we want to make it look more beautiful.

0
0
0.000
Hola @yannet80, me encanta que siempre sacas provecho del material que tienes a mano para elaborar proyectos prácticos y útiles.
Hola kattycrochet, para mí siempre será un placer compartir ideas y creaciones con todos ustedes, he aprendido mucho de esta gran familia. Bendiciones.
¡Hola!, se ve práctico y resistente como para llevarlo a todo lados. ¡Buenas vibras!.
Hola inici-arte, sí es muy práctico y sencillo, es grandioso lo que se puede hacer con cosas que creemos son desechables, un abrazo.
Congratulations, your post has been upvoted by @dsc-r2cornell, which is the curating account for @R2cornell's Discord Community.
Enhorabuena, su "post" ha sido "up-voted" por @dsc-r2cornell, que es la "cuenta curating" de la Comunidad de la Discordia de @R2cornell.
Thank you very much.
Congratulations @yannet80! You have completed the following achievement on the Hive blockchain and have been rewarded with new badge(s) :
Your next target is to reach 200 comments.
You can view your badges on your board and compare yourself to others in the Ranking
If you no longer want to receive notifications, reply to this comment with the word
STOPThank you very much.
Muchas gracias.