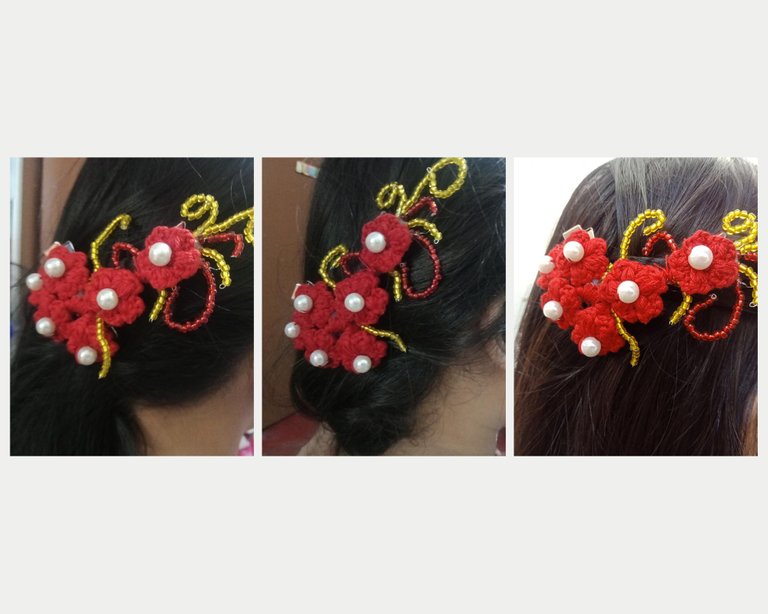
Needleworkmonday: Crochet Headpiece
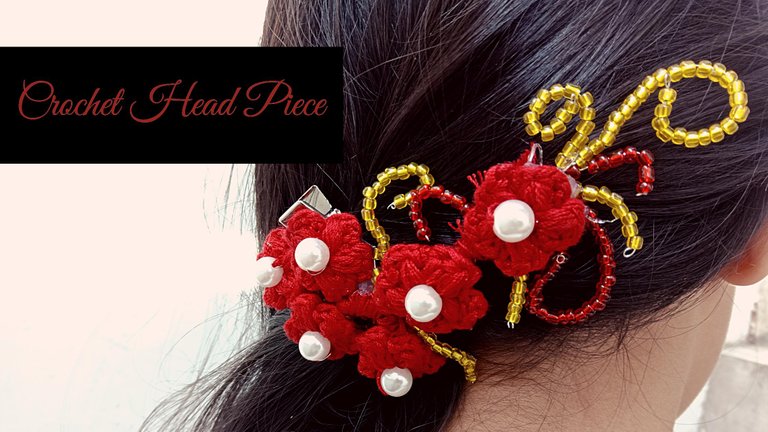
If you're aiming at improving your craft, one of the things you will need to do is stepping outside of your comfort zone. Today, let me share how I made this elegant crochet headpiece.
Make a plan, stick with the plan, always deliver -Storks
This line from a kiddie cartoon movie seems easy to follow. On my end though, I just make a plan, try to stick with it, and push further so that I can deliver. The only two steps I need to make sure that is set in stone is that I start with a plan or a vision and that I finish the project. Though the part about finishing the project is actually set a bit later than the estimated time of completion. Especially on commissioned work - it is imperative to make sure that we deliver on or before the agreed time so we would want to give ourselves a bit of breathing room on that aspect.
The in-between of the vision and the actualization is kind of a blur to me. Even with a plan in place, I still let the process lead me towards completion. Meaning there are instances when the actual project deviates a little bit from the plan. If you would come to think of it, you would realize that sometimes our lives are like that. What we actually do now may be far from what we had dreamt of. While it is not what we originally intended, it would somehow still turn out to be a lot better.
Anyways, what I was trying to say is that this particular design for the crochet headpiece was not really what I had in mind when I began working on it. It just started to take form right in front of my eyes as I was creating it.
Materials:
- 8 ply Polyester yarn
- 1.9 mm crochet hook
- 1.6 mm crochet hook
- pearls
- beads (red and gold)
- Double prong alligator hair clip
- jewelry wire
- glue gun and glue stick
Process
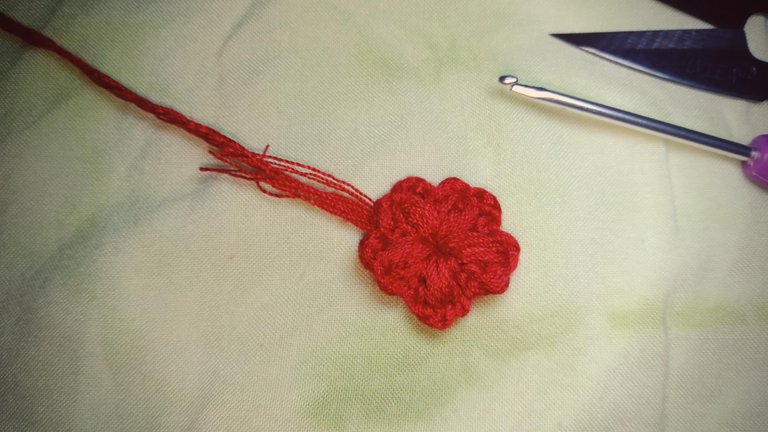
Make 6 flower puffs. Follow the instructions on this video.
Attach pearls to the center of the flowers. You can do this by inserting the yarns from the crochet flowers into the pearl. This is when you weave in all the ends. Make sure there are about 2 inches of yarn ends, you'll be needing those later.
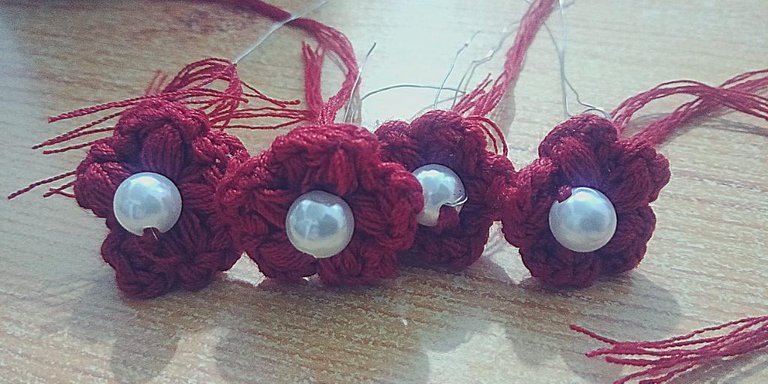
Attach the wires into the flowers. I could have made my life a lot easier if inserted the wires into the pearls just insert the wired pearls into the center of the flowers but the first process is still good.
Coil the wires to each other to join the flowers together. Wrap the wires with the tail ends of the flowers.
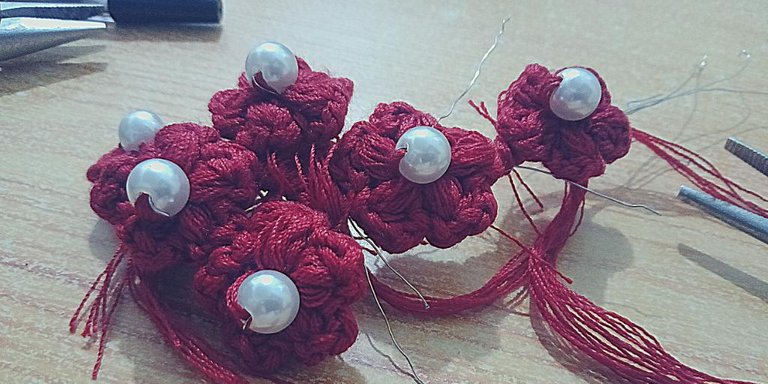
Reinforce the entire piece by using a glue gun and gluing the back part of the headpiece. This also locks the yarn wrapping the wires in place.
Attach the alligator clip.
One of the good things about having my nieces here in our place is that I now have three willing models for my creations.
¨ðº°˜¨ ¨˜°ºð¨

@romeskie is a full-time stay at home mom juggling homeschooling, crocheting, and homemaking. A Business Administration graduate with a major in Marketing who ended up in the contact center industry, on the frontlines, climbing her way up to Workforce Management where she found her passion in real-time analysis and management. A once self-proclaimed careerwoman who soon realized homemaking was her real calling. Her passion varies from reading, writing, photography, and most of all, crocheting.
Connect with her through her Facebook Page: The Leftie Crocheter and on Instagram. Feel free to subscribe to her Youtube Channel: The Leftie Crocheter

https://twitter.com/romeskie_/status/1305535990375743488
Ang galing nung puffs! Hindi pa ako umaabot sa level na yan. By and by, makakarating din. haha
youtube is our friend. hahaha. tsaka maraming pasensiya lalo na kapag paulit ulit ulit ulit ang pagtastas. Juicecolored! haha
Nasa tabi ba kita kanina? Bakit nakita mo na ilang beses akong nagtastas? 😁😂😂😂😂
Mukhang tandem tayo sa pagtatastas kanina ah. hahaha. May inaaral kasi akong stitch, nakailang tastas muna ako bago ko nagets nang bongga. hahaha
I look very nice, I liked it, I congratulate you @romeskie
thank you @yiobri! :)