Preparando un regalo para el día de las madres [ESP] / Preparing a gift for Mother's Day [ENG]
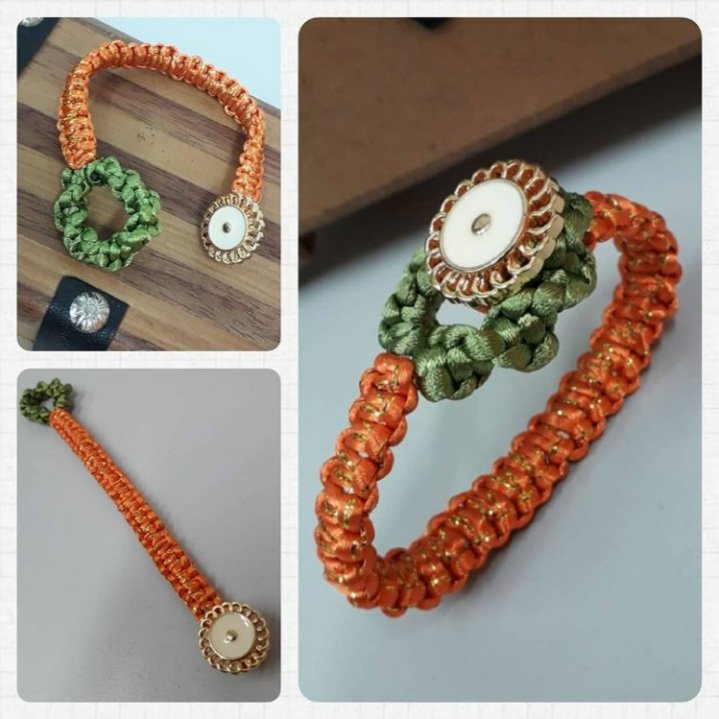
Como se acerca el Día de las madres, he comenzando a preparar algunos regalos para una madres muy especiales, comencé por el regalo de una vecina, ella es muy coqueta y le encantan las pulseras, así que le tejeré una pulsera en la técnica macramé con una variante del punto plano. En una publicación anterior mostré cómo hacer el punto plano, ver publicación.
As Mother's Day is approaching, I have started to prepare some gifts for a very special mother, I started with a gift for a neighbor, she is very coquettish and loves bracelets, so I will knit her a bracelet in the macrame technique with a variation of the flat stitch. In a previous post I showed how to make the flat stitch, see post.
Estas pulsera con el detalle del botón son elegantes, pueden resaltar cualquier outfit, son económicas de hacer, ya que el material no es costoso.
These bracelets with the button detail are elegant, can enhance any outfit, are inexpensive to make, as the material is not expensive.
Materiales / Materials
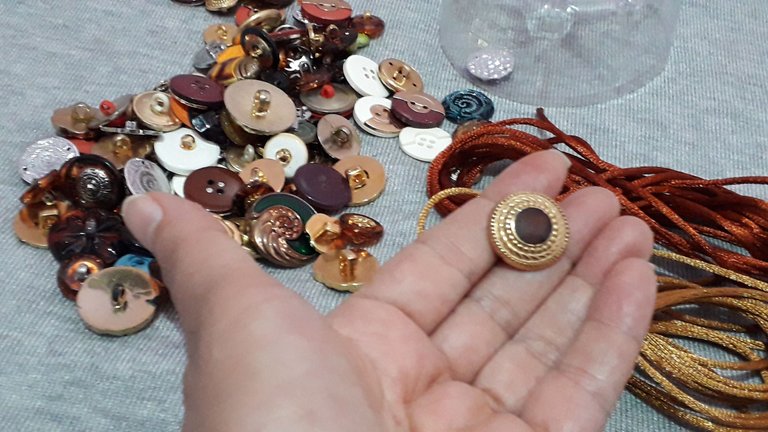
Como les he comentado en publicaciones anteriores, me encantan los botones, siempre son una buena opción para decorar alguna creación de manualidades. Los tengo clasificados por tipo, en la imagen pueden ver los de tipo lujoso, dan elegancia en donde sean colocado, Cada vez que tengo un proyectos en los que voy a decorar con botones, vacío mi contenedor que los almacena con el fin de seleccionar el que combine con lo que voy a realizar. En algunos casos luego de terminar la pieza, puede ocurrir que desee cambiar de botón, lo que hago es ir nuevamente a ellos y seleccionar otro botón.
No solo compro botones, guardo los de repuestos que traen las ropas que se compran o los de una ropa que se deteriore.
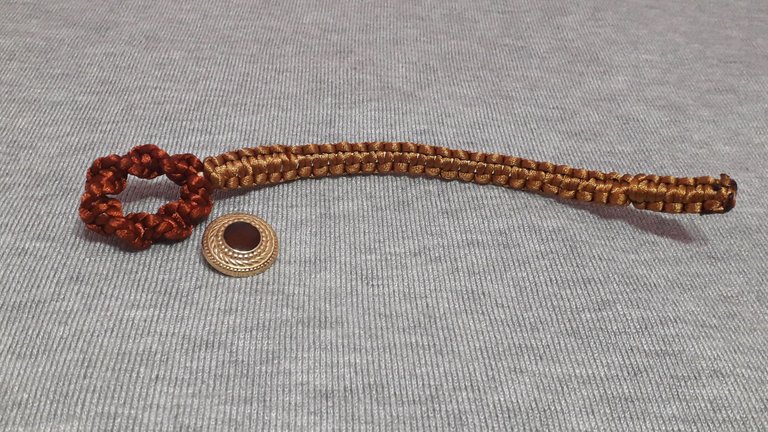
Para este proyecto se requiere de un botón.
As I have told you in previous posts, I love buttons, they are always a good option to decorate any craft creation. I have them classified by type, in the image you can see the luxurious type, they give elegance where they are placed, Every time I have a project in which I am going to decorate with buttons, I empty my container that store them in order to select the one that matches with what I am going to do. In some cases after finishing the piece, it may happen that I want to change buttons, what I do is go back to them and select another button,
I don't just buy buttons, I keep the spare buttons that come with the clothes that are purchased or from a garment that deteriorates.
A button is required for this project.
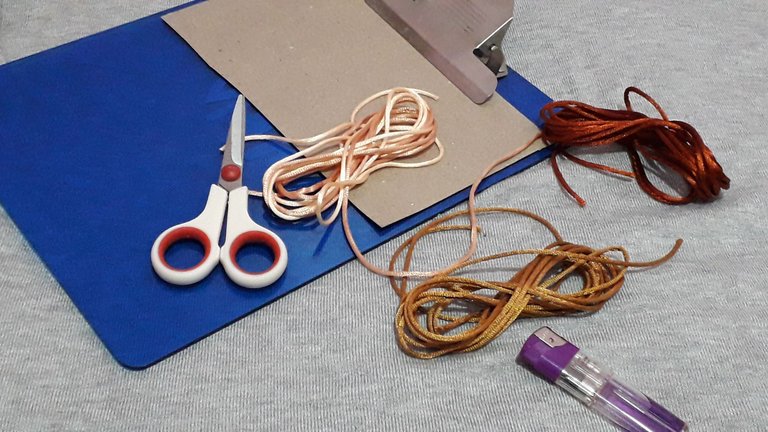
Lo otro que se requiere es la cola de ratón, se pueden hacer de un solo color o de dos colores, a mí me gustan de dos colores, ya que resalta la parte del ojal del botón y el cuerpo de la pulsera.
Para la parte del centro de requiere 75 cms de, para el ojal 100 cms y para el cuerpo de la pulsera 150 cms.
The other thing that is required is the Satin Rat Tail Cord, it can be made in one color or two colors, I like two colors, since it highlights the buttonhole part of the button and the body of the bracelet.
For the center part of the bracelet requires 75 cms, for the buttonhole 100 cms and for the body of the bracelet 150 cms.

También se requiere una carpeta clip, tijeras y un yesquero.
A clipboard, scissors and a tinderbox are also required.
A tejer la pulsera / To weave the bracelet
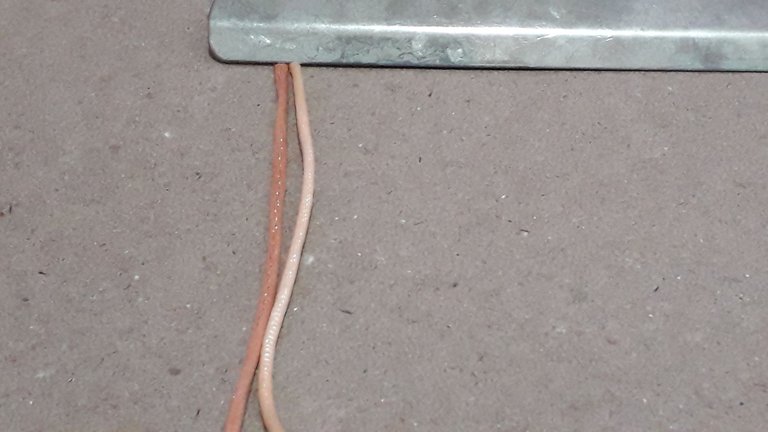
Tomar dos cordones de cola de ratón, cada una de 75 cms, como es la parte central, tomé dos cordones de colores diferentes, para agotar estos cordones, dicha selección no afecta el resultado. Los cordones se sostienen con la carpeta de clip, dejar unos cinco centimetros de cada cordón sin tejer.
Take two strands of the Satin Rat Tail Cord, each of 75 cms, as it is the central part, I took two strands of different colors, to use up these strands, this selection does not affect the result. The cords are held with the clip binder, leaving about five centimeters of each cord unwoven.
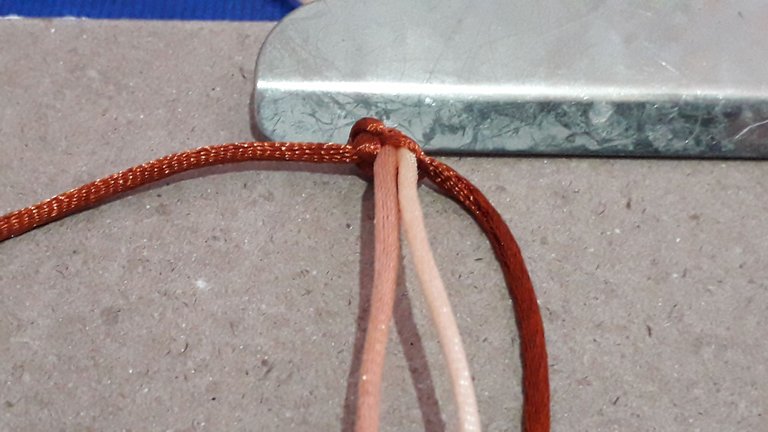
Comenzar haciendo el ojal de la pulsera, para ello tomar el cordón de 100 cms y doblar a la mitad, colocar debajo de los dos cordones.
To start making the eyelet of the bracelet, take the 100 cm cord and fold it in half, place it under the two cords.
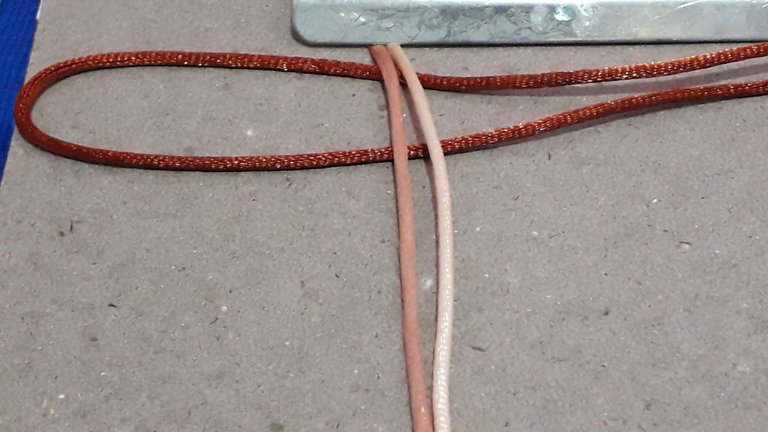
Seguidamente, pasar la parte del cordón de arriba, debajo del cordón que está ubicado en la parte de abajo.
Next, pass the top part of the cord under the cord located at the bottom.
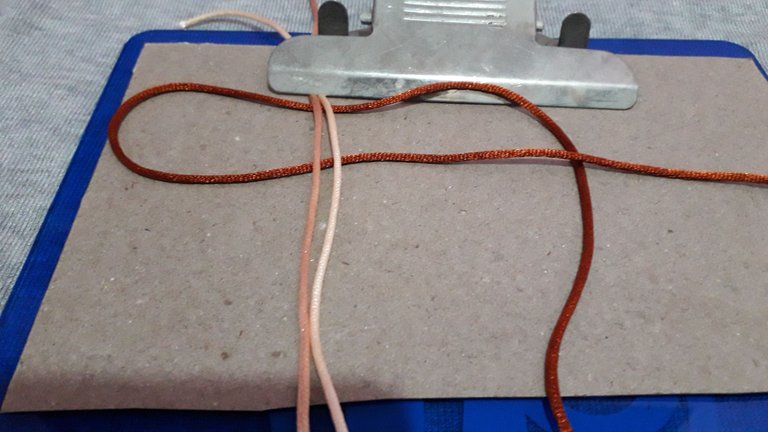
Luego el condón que se pasó por el cordón de abajo, llevarlo al bucle que de formó en la parte izquierda, de tal forma se pueda formar el primer nudo.
Then the condom that was passed through the bottom cord, bring it to the loop that was formed on the left side, so that the first knot can be formed.
Ajustar el nudo bien fuerte para que quede bien asegurado.
Tighten the knot well so that it is well secured.
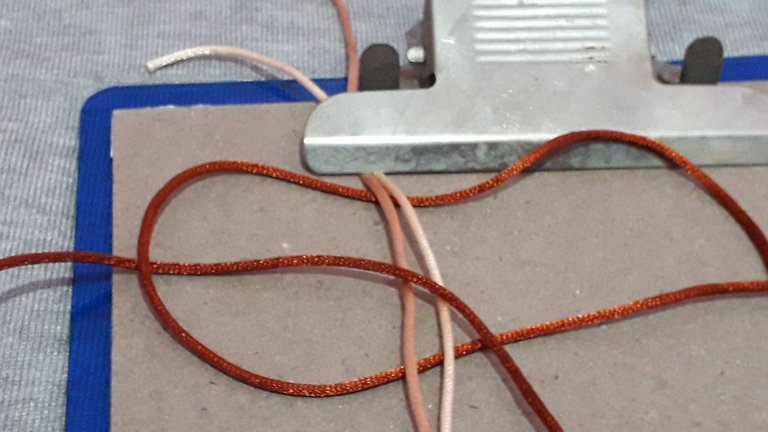
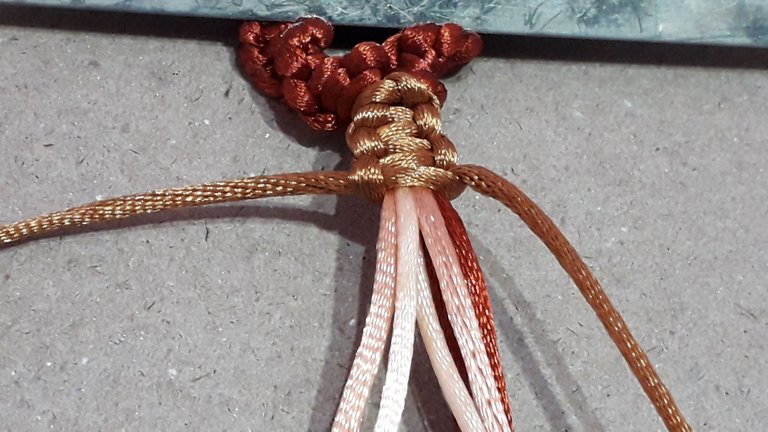
Repetir la secuencia hasta observar que el botón seleccionado pase por el ojal. Notar en la imagen que se va torciendo el tejido, lo cual es hermoso, para lograr este resultado, solo se teje el nudo siempre iniciando por el mismo lado.
Repeat the sequence until the selected button passes through the buttonhole. Notice in the image that the weave is twisting, which is beautiful, to achieve this result, just weave the knot always starting on the same side.
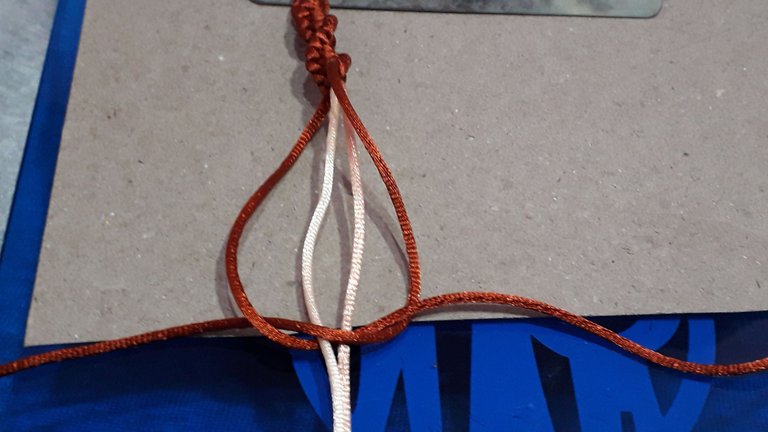
Es importante ir probando el tamaño del ojal con respecto al botón, para que no quede grande ni pequeño.
It is important to test the size of the buttonhole with respect to the button, so that it is neither too large nor too small.
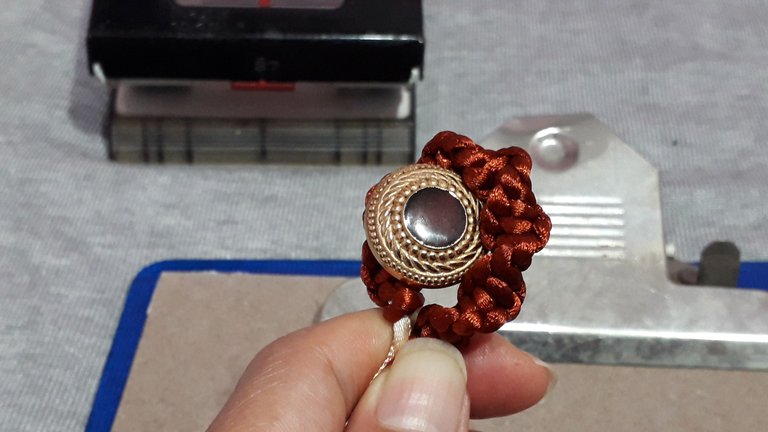
Luego de haber obtenido el tamaño requerido para el ojal, se hace un nudo plano con el cordón que será el cuerpo de la pulsera. Es fundamental, que los cordones restantes internos del ojal pasen a formar parte de los cordones internos del cuerpo de la pulsera.
After having obtained the required size for the eyelet, a flat knot is made with the cord that will be the body of the bracelet. It is essential that the remaining internal cords of the eyelet become part of the internal cords of the bracelet body.
Tejer nudo plano hasta el ancho de la muñeca requerido. Recordar ajustar fuertemente cada nudo.
Weave a flat knot to the required wrist width. Remember to tighten each knot.
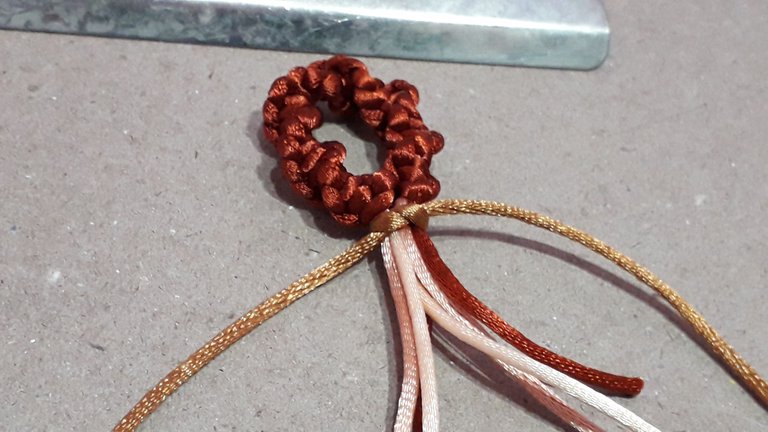
Cortar los cordones sobrantes y con el yesquero quemar las puntas.
Cut the excess cords and burn the ends with tinder.
Coser el botón sobre la pulsera.
Sew the button onto the bracelet.

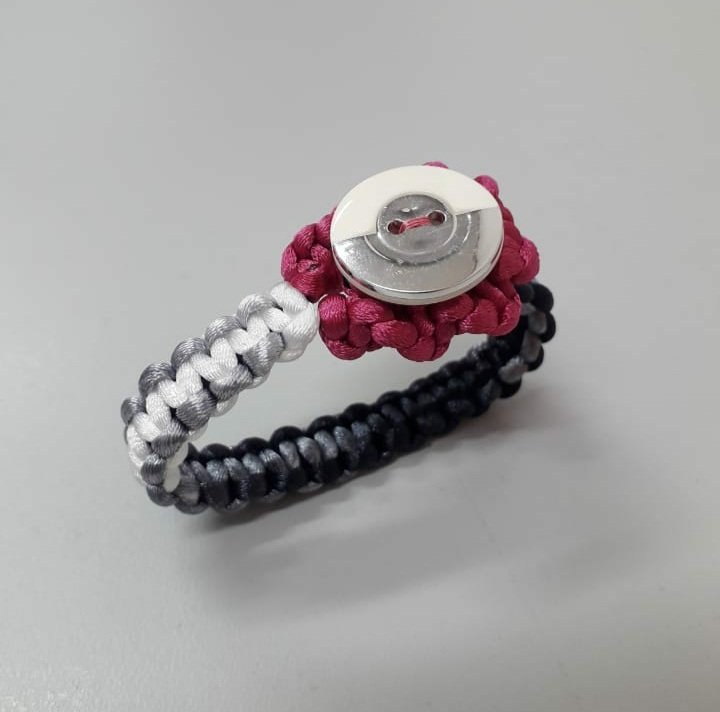
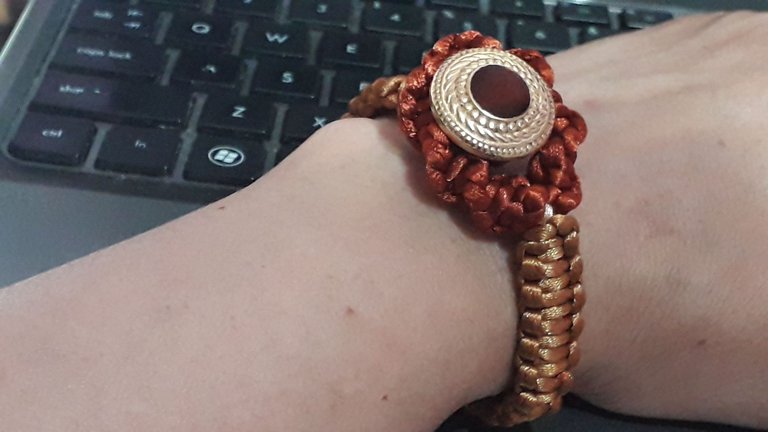
Project completed / Proyecto completado
After following the corresponding steps I have finished the bracelet, I am very happy with the result, I think that the bracelet is quite elegant, and I think that my neighbor will like her gift.
Luego de haber seguido los pasos correspondientes he terminado la pulsera, estoy muy contenta con el resultado, me parece que la pulsera quedó bastante elegante, y pienso, que a mi vecina le va gustar su regalo.
Gracias por dedicar un espacio de su tiempo para leer la publicación. Si hay alguna pregunta, por favor pregúntame en la sección de comentarios a continuación.
Thank you for taking the time to read this publication. If there are any questions, please ask me in the comments section below.
Texto e imágenes: Por @jicrochet
Text and images: By @jicrochet
Very nice bracelet and good instructions
gluten free pizza
Hi, I'm glad you like it. Thanks for commenting. Regards
económico, hermoso y elegante :) <3
Hola @suezoe, así es. Gracias por comentar. Saludos
Precioso...me encanta.