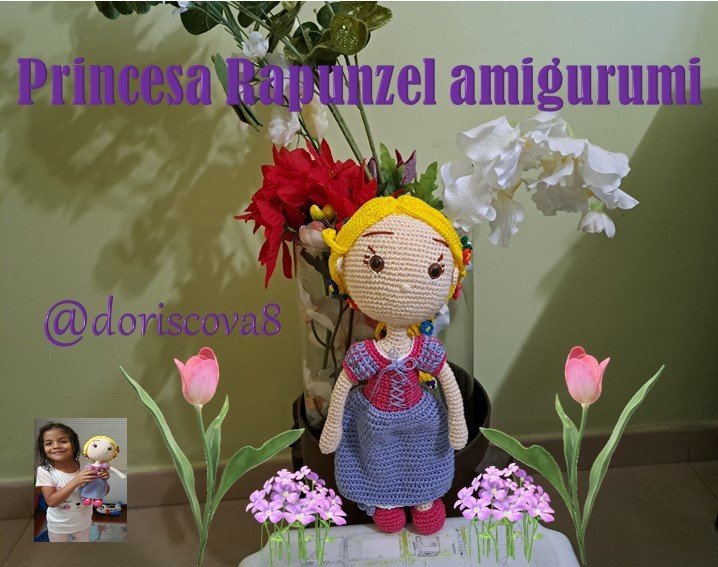
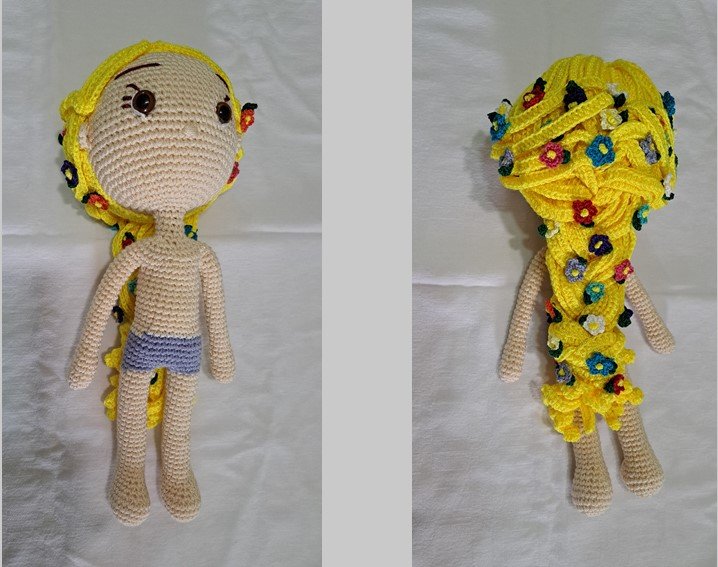
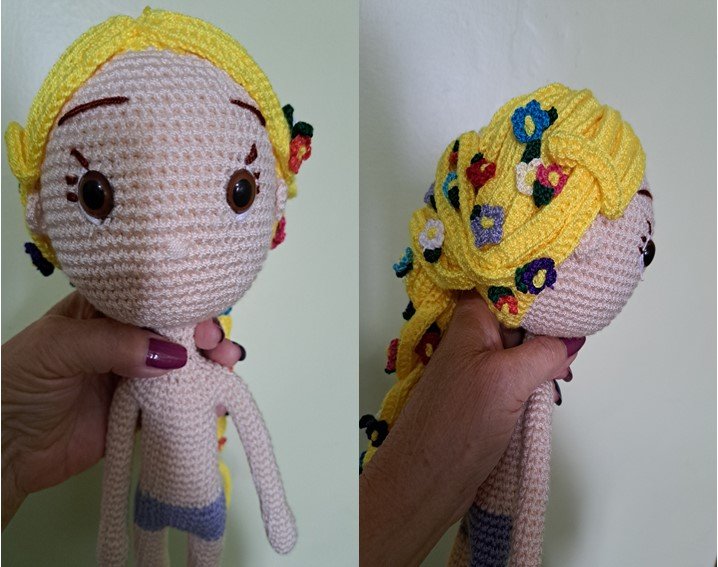
Princesa Rapunzel amigurumi[ESP-ENG]
So, this was a project that I had started before my surgery, but due to the operations I had to stop it, and actually at that time I was not in a hurry to finish it because it was for my granddaughter who is not in the country and I thought I could finish it calmly once I finished my rest, so I felt calm about it, since at that time there was no possibility of how to send it to her.
But it turns out that almost culminating my rest I was informed that an uncle of the girl who lives in Caracas was planning to travel there to visit them and the date they gave me was just 10 days away, then the truth was that I had to put on my skates because when I get these opportunities I take advantage of them to make them other little things and send them to my grandchildren.
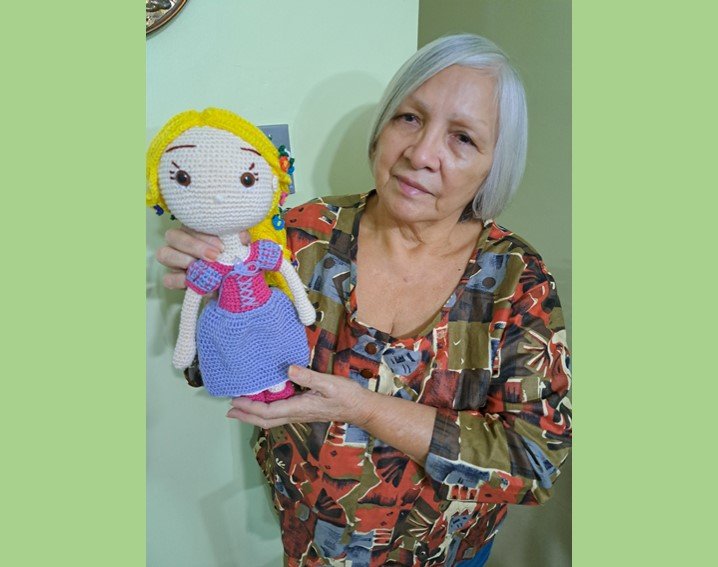
Then I had to dedicate myself intensively to finish the doll to be able to send it to my granddaughter, because she loves the Disney movie about the princess Rapunzel, and I could not miss that opportunity, because the truth is sometimes difficult to plan a trip out of the country, but thank God I could finish in time to take the issues to Caracas and that this person told me that if I had the capacity to carry the orders to my children.
As I had already made the body of the doll and the hair was well advanced, I hurried in those few days to finish what was missing of the doll and the other little things I wanted to send them, the truth was worth the effort because right now my little girl has her doll, which makes me very happy to make the things they want.
Now I will explain the realization of the doll, I tell you that for the realization of the body I already made a body for another princess, but it is exactly the same as this one, and I made it in two parts, so I will leave you the addresses where you can find those realizations the [first part for the realization of the doll's body]( https://peakd. com/hive-127911/@doriscova8/body-for-muneca-amigurumi-first-part-body-for-amigurumi-doll-part-oneesp-eng) and [the second part for the realization of the doll's body]( https://peakd. com/hive-127911/@doriscova8/body-for-muneca-amigurumi-second-part-for-amigurumi-doll-second-partesp-eng), you can also find in a post for the realization of the doll's slippers.
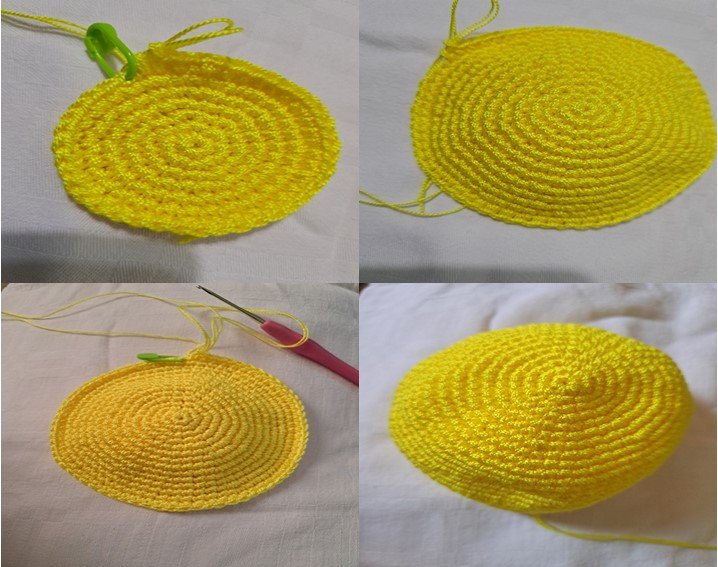
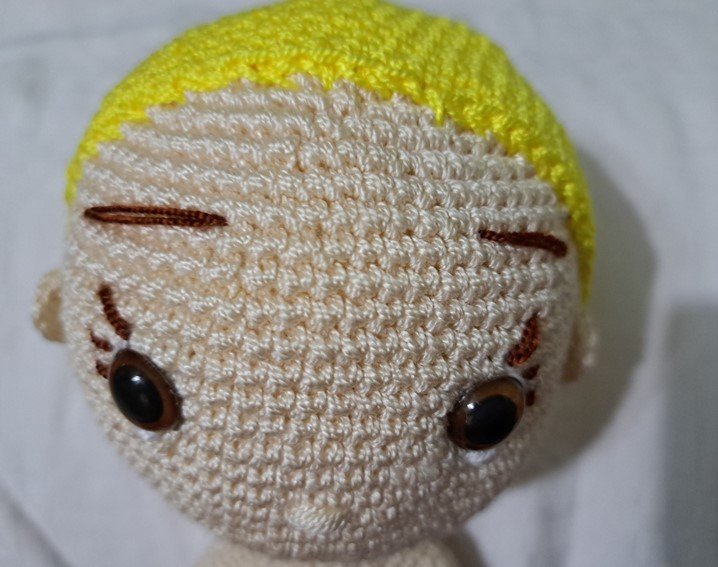
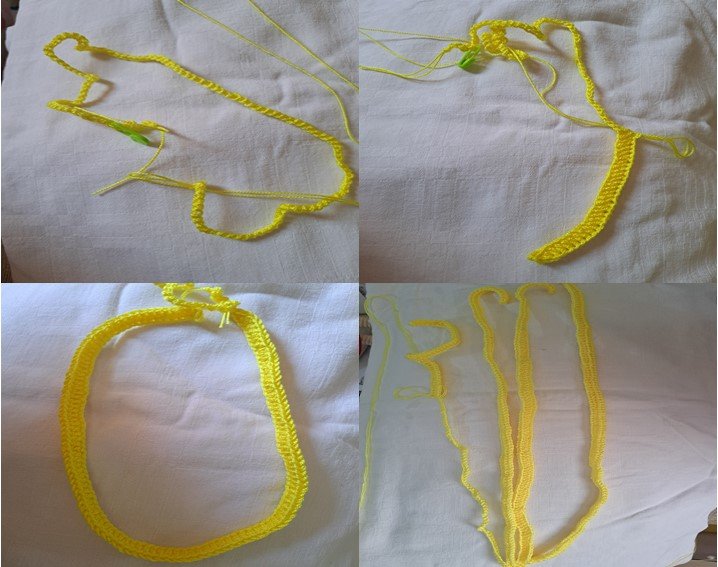
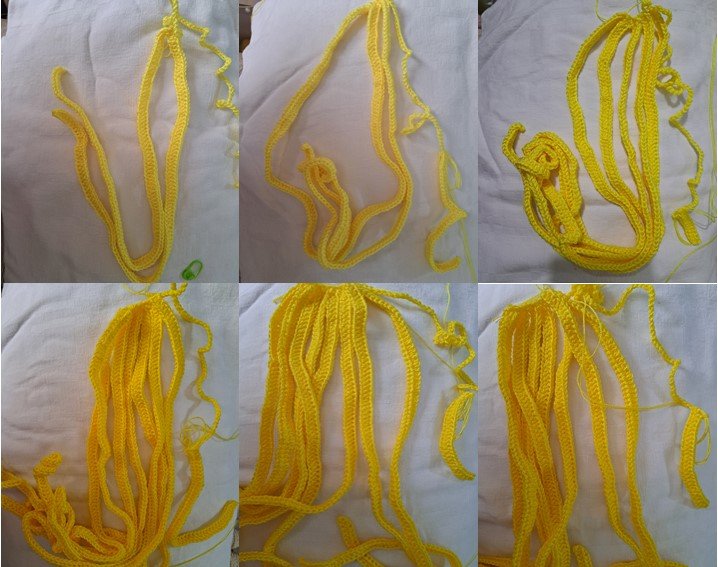
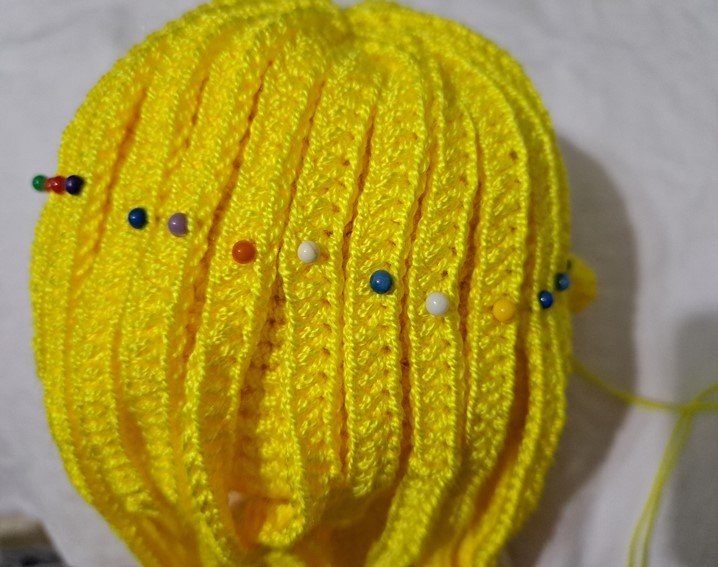
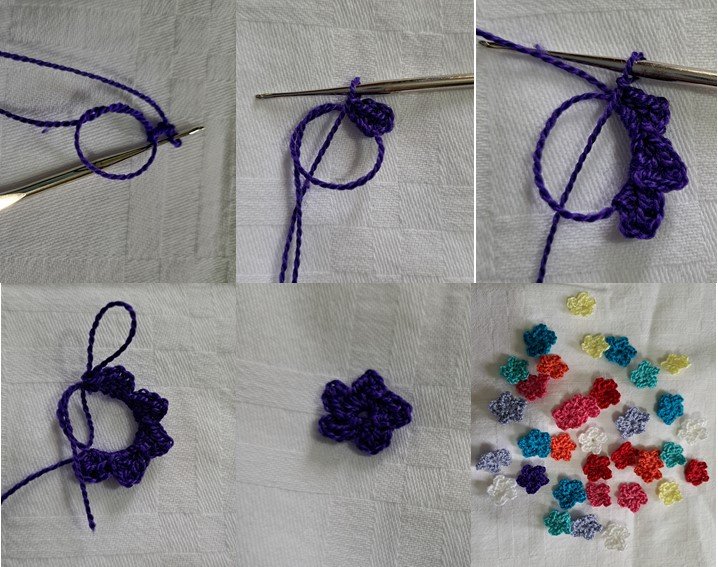
Making the hair
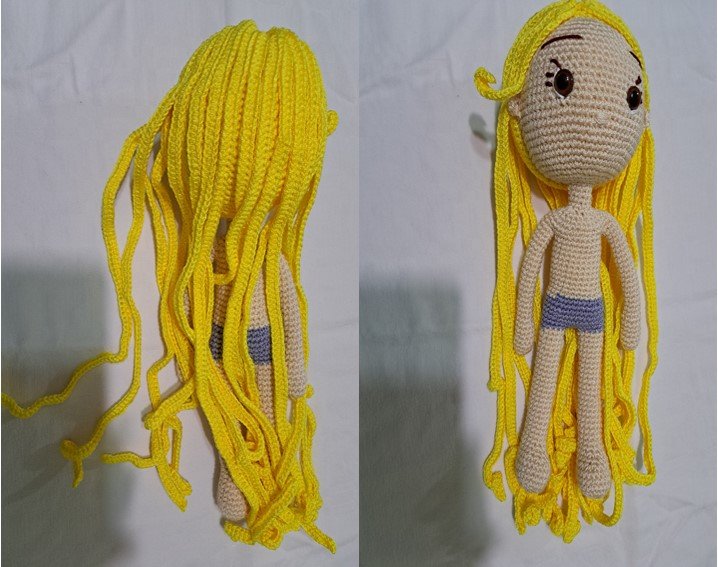
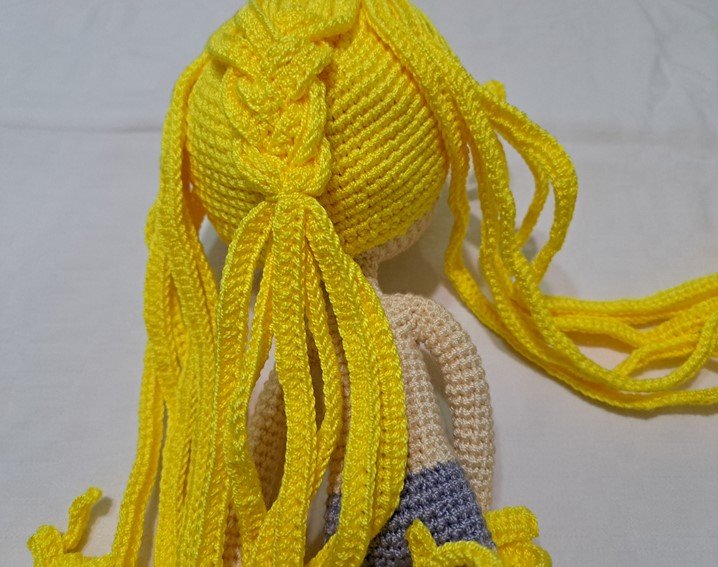
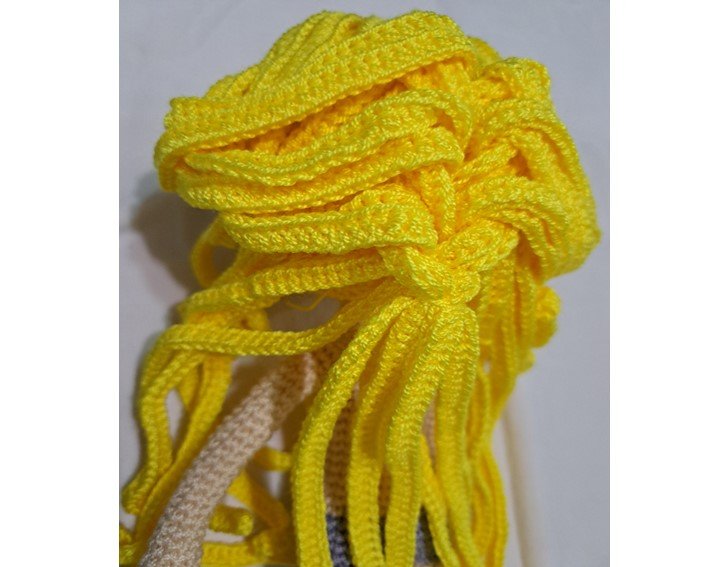
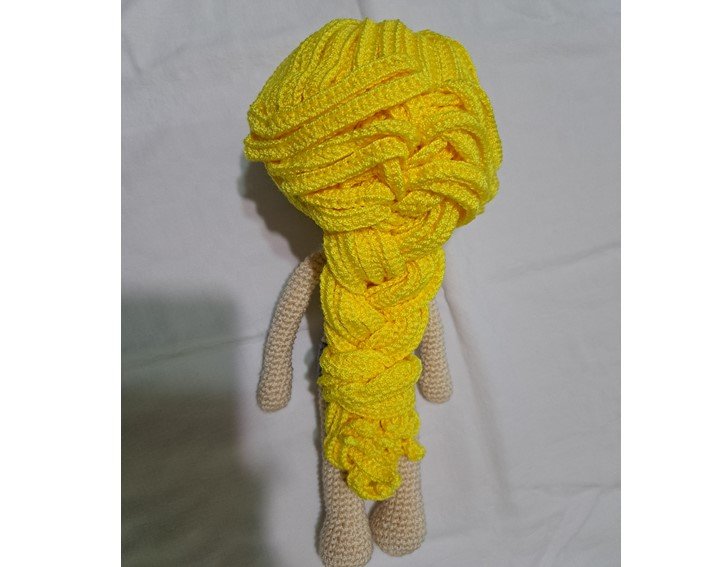
The first thing we make with yellow color is the base of the hair, which starts with a magic ring of low stitches, then we make progressive increases until the 10th row, then in the 11th row no increases or decreases are made, then from the 12th to the 14th row decreases are made and from the 15th to the 20th row no increases or decreases are made and we finish this base.
Entonces, este era un proyecto que había empezado antes de operarme, pero debido a las operaciones tuve que pararlo, y en realidad en ese momento no tenía prisa por terminarlo porque era para mi nieta que no está en el país y pensaba que podía terminarlo con tranquilidad una vez culminara mi reposo, por lo cual me sentía tranquila al respecto, ya que en ese momento no existía ninguna posibilidad de como enviárselo.
Pero resulta que casi culminando mi reposo me informan que un tío de la niña que vive en Caracas pensaba viajar para allá a visitarlos y la fecha que me dieron era que faltaba apenas 10 días, entonces la verdad estuve que ponerme los patines porque cuando se me dan estas oportunidades las aprovecho para realizarles otras cositas y enviárselos a mis nietos.
Entonces estuve que dedicarme intensivamente a culminar la muñequita para podérsela enviar a mi nieta, ya que ella le encanta la película de Disney referente a la princesa Rapunzel, y no podía perder esa oportunidad, porque la verdad a veces es difícil planificar un viaje fuera del país, pero gracias a Dios pude culminar con tiempo para llevar las cuestiones a Caracas y que esta persona, pues me dijo que si tenía capacidad para llevar los encargos a mis niños.
Como ya el cuerpo de la muñeca lo había realizado y el cabello lo llevaba bastante adelantado, pues me apresure en esos pocos días a culminar lo que me faltaba de la muñeca y las otras cositas que quería enviarles, la verdad que valió la pena el esfuerzo porque ya en estos momentos mi niña tiene su muñeca, lo cual me hace muy feliz realizarle las cosas que ellos quieren.
Ahora pasaré a explicarles la realización de la muñeca, les cuento que para la realización del cuerpo ya realice un cuerpo para otra princesa, pero que es exactamente igual a esta, y lo realice en dos partes, por lo cual les voy a dejar las direcciones donde pueden encontrar esas realizaciones la primera parte para la realización del cuerpo de la muñeca y la segunda parte para la realización del cuerpo de la muñeca, también podrán encontrar en un post para la realización de los zapatitos de la muñeca.
Realización del cabello
Lo primero que realizamos con color amarillo es la base del cabello, que se inicia con un anillo mágico de puntos bajos, seguidamente se van realizando aumentos progresivos hasta la vuelta 10, luego en la vuelta 11 no se realizan ni aumentos ni disminuciones, seguidamente desde la vuelta 12 a la 14 se realizan disminuciones y de las vueltas 15 a la 20 se realizan sin aumentos ni disminuciones y culminamos esta base.
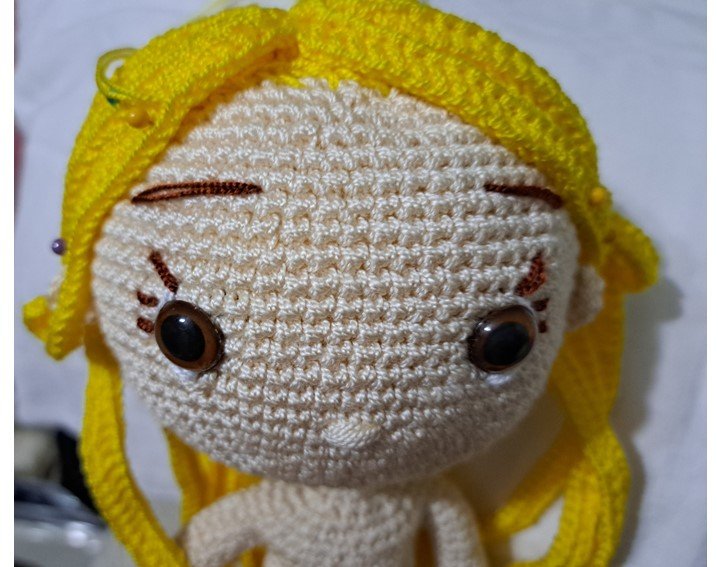
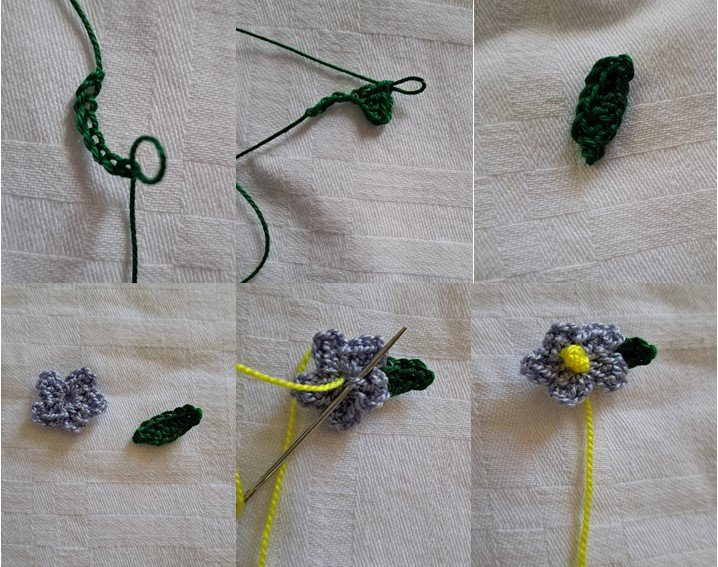
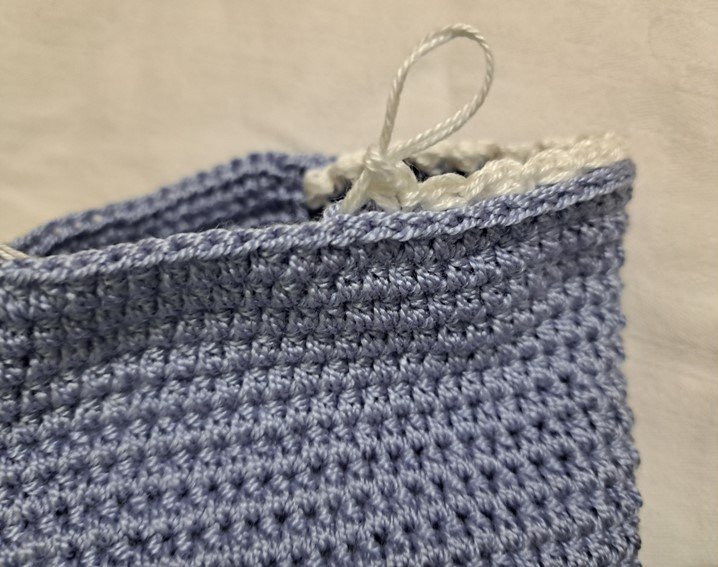
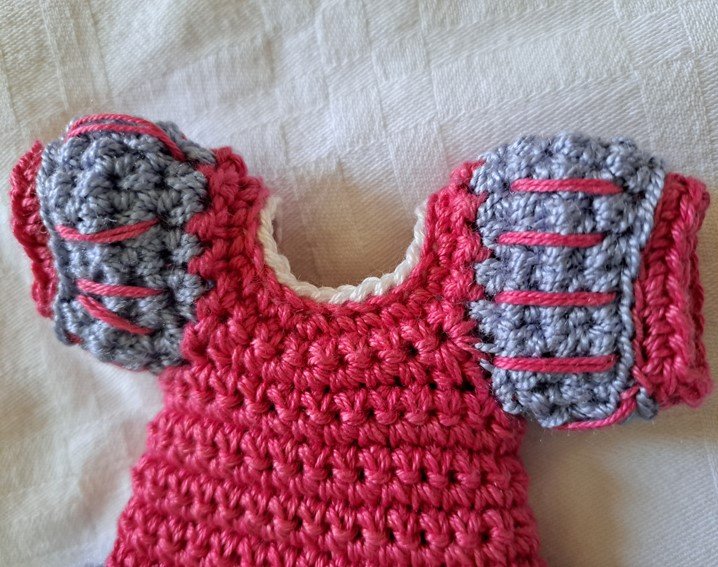
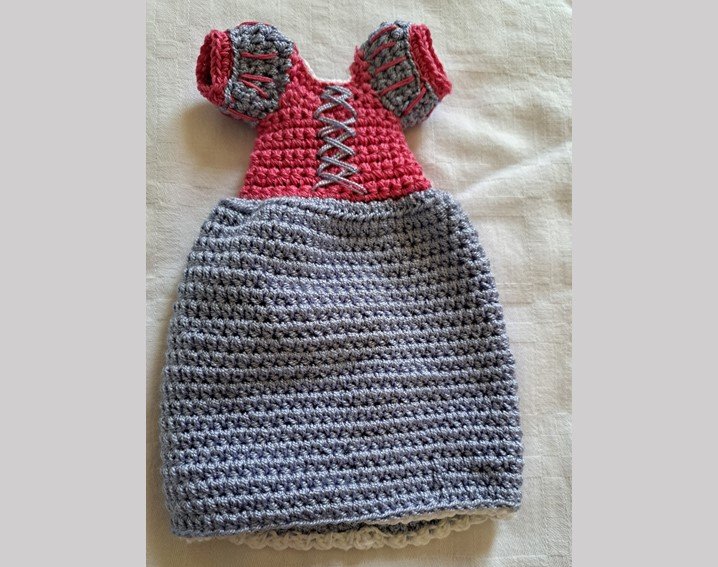
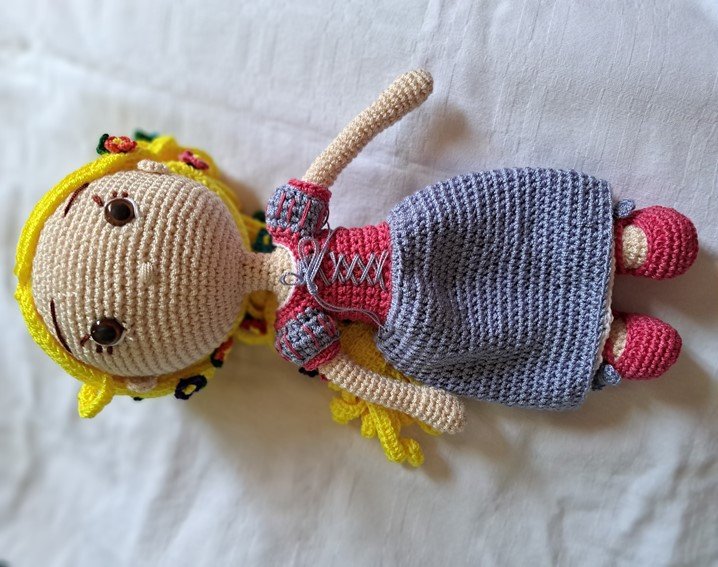
Making the dress
I made it starting with the blouse and with pink thread and the part of the blouse with 37 chains as a base, there we are shaping the blouse until it reaches the size that reaches the waist of the doll using medium high stitches, when we have the length of the blouse we change to the lilac color and we knit in such a way that the dress looks like semi-sheer, in this I made it long, so it is always half to the doll.
Realización del vestido
Lo realice iniciando por la blusa y con hilo del color rosado y por la parte de la blusa con 37 cadenas como base, allí le vamos dando forma a la blusa hasta alcanzar el tamaño que le llegue a la cintura de la muñeca empleando puntos medios altos, cuando ya tenemos el largo de la blusa cambiamos al color lila y tejemos de tal forma que el vestido se vea como semiplisado, en este lo realice largo, por lo cual siempre se lo media a la muñeca.
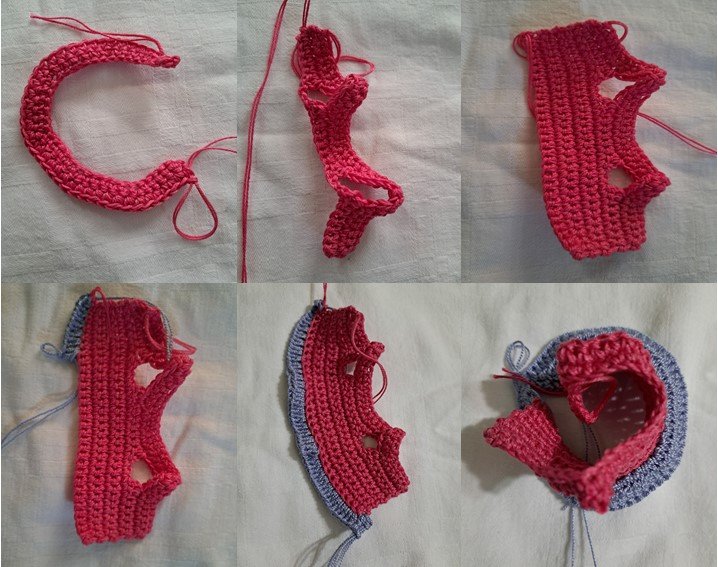


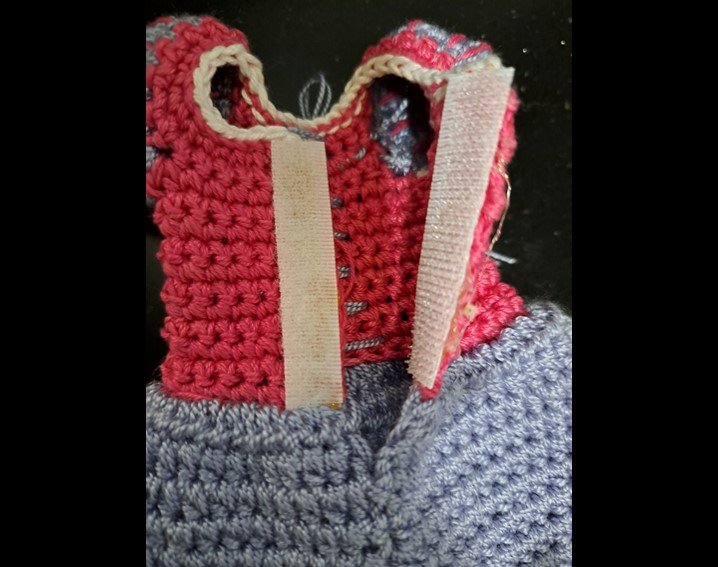
Also in the neck I made a white thread like a trimming with slipped stitches.
También en la parte del cuello le realicé en hilo blanco como un adorno con puntadas deslizadas.

Translated with www.DeepL.com/Translator (free version)
Fuente de imágenes: Archivo Personal.


MIS REDES SOCIALES


OWO que hermosa toda una obra de arte
!PIZZA
!LUV
!PGM
doriscova8, dantemu sent you LUV. 🙂 (5/10) tools | trade | connect | wiki | daily
Made with LUV by crrdlx.
Gracias por tu comentario, eso estimula a seguir compartiendo lindos proyectos en la comunidad, saludos!
Qué linda! Me gustaron mucho los detalles de las flores en el pelo y el vestido quedó hermoso.
Saludos @dulce.crucita, gracias por pasar y comentar. Si queria que me quedara linda porque era para mi nieta y para ellos uno quiere lo mejor, saludos!
Hola @doriscova8, me alegra saber que ya estás recuperada y que has vuelto a retomar tus labores artesanales, la muñeca te quedó hermosa. Muchas gracias por compartir.
Saludos 🤗
Si gracias a Dios ya estoy bastante recuperada de mis operaciones para poder compartirles mis proyectos, gracias por pasar y comentar, saludos!
Hermoso trabajo Doris, me dieron ganas de tener una muñeca jaja. Que bueno que alguien pudo llevarle este regalo a tu nieta, y que bien por vos que pudiste terminarla justo a tiempo. Te quedó muy linda, seguro a ella le encantó. Felicitaciones ❤️
Gracias por tus comentarios, si realmente mi niña estaba feliz con su muñeca, además le encanto el hecho que puede quitarle los zapatos y el vestido, porque por lo general las muñecas vienen para no quitarles el vestido, saludso!
$PIZZA slices delivered:
@dantemu(10/15) tipped @doriscova8
Sweet one I love it so much
Thanks for your comment, best regards!