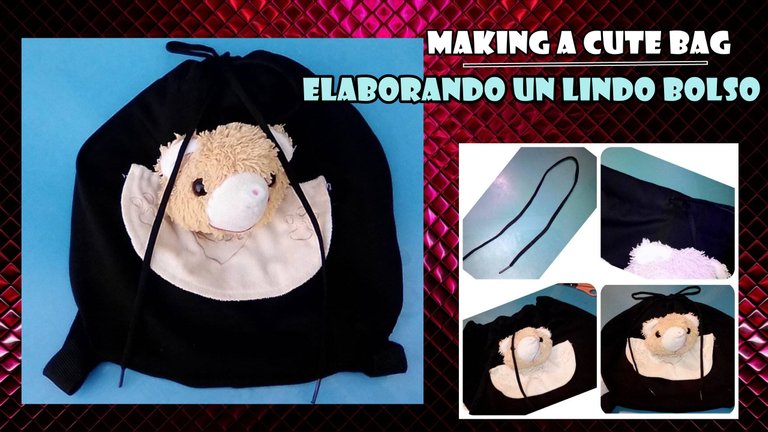
[ENG - ESP] Making a cute bag with a skirt and a teddy bear head | Elaborando un lindo bolso con una falda y una cabeza de un oso de peluche
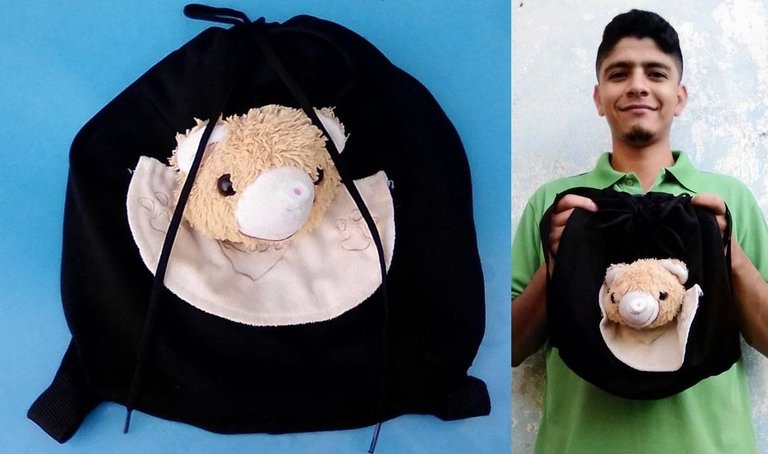
This time I want to show you how I transformed a skirt and an old stuffed animal head into a cute bag or backpack for my daughter.
All the sewing was done by hand, but you can also make it using a sewing machine.
Below I will show you the material and the steps I used:
Hola, hola amantes de la costura, feliz inicio de semana, deseo que esta semana este llena de buenas noticias para todos.
En esta oportunidad quiero mostrarte como transforme una falda y una cabeza de un peluche viejo en un lindo bolso o morral para mi hija.
Toda la costura la realice de manera manual, pero también puedes elaborarlo usando una maquina de coser.
A continuación te enseñare el material y los pasos que utilice:
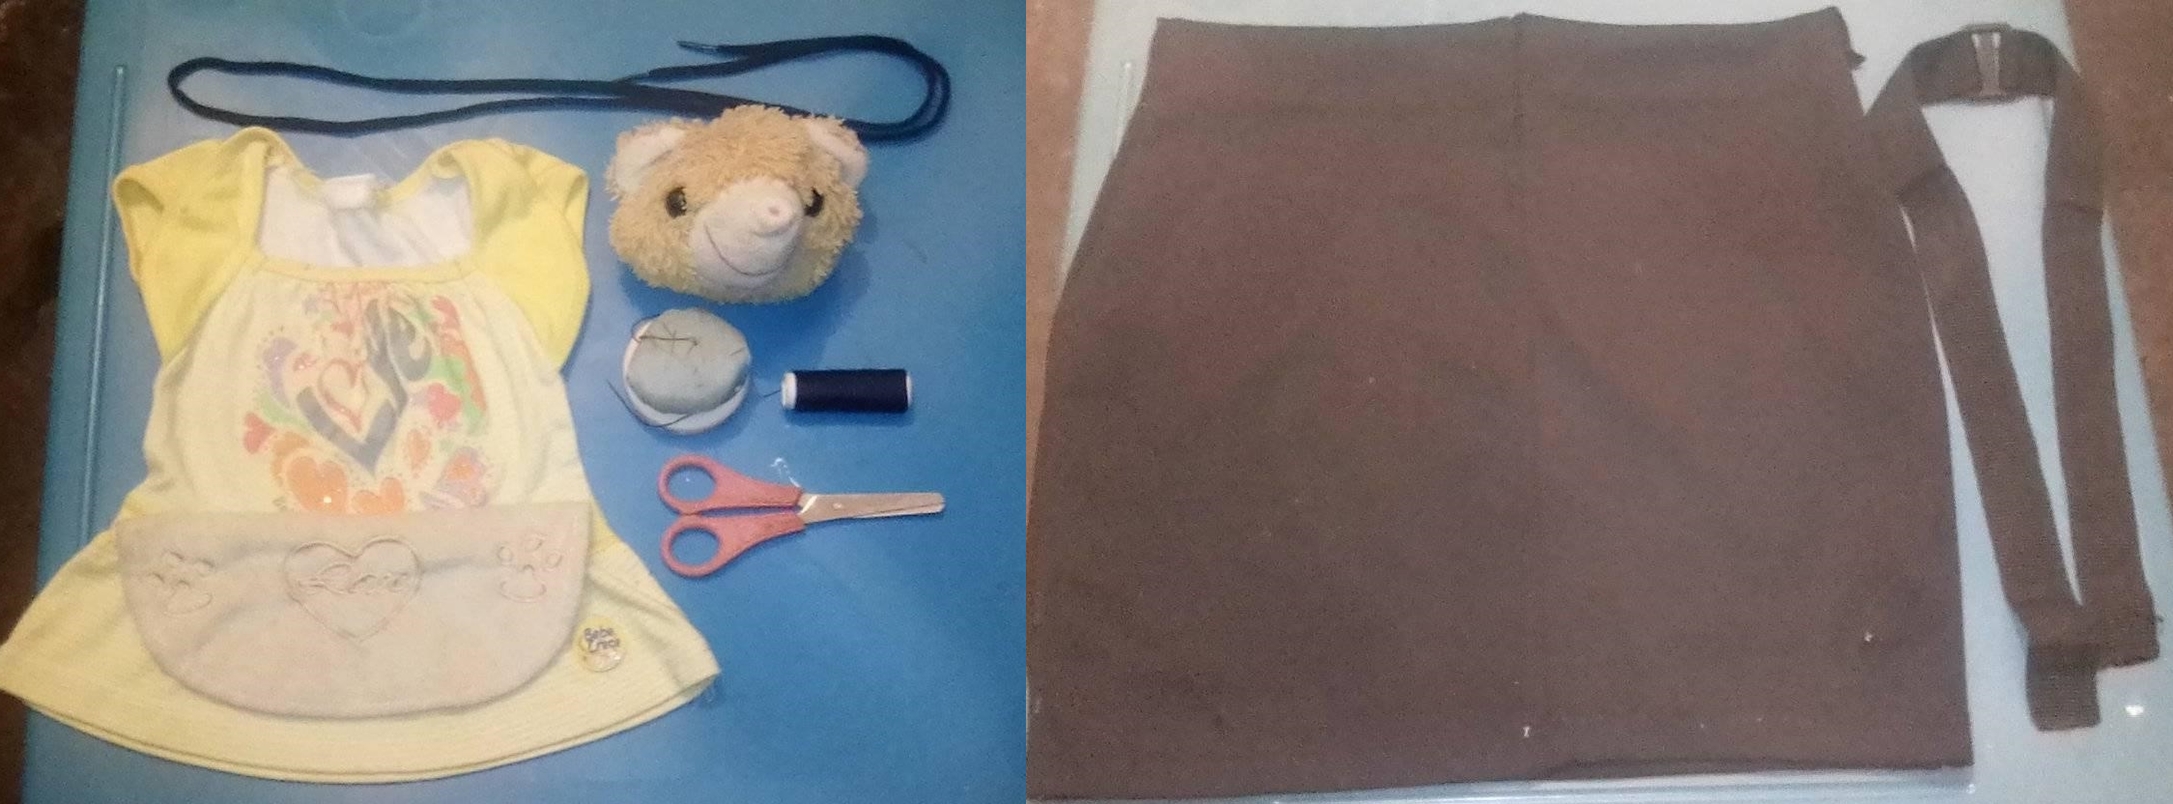
•1 Short black skirt.
•1 ½ strap or adjustable belt.
•1 Large pocket.
•1 Black braid or shoelace.
•1 Head of some reusable teddy bear.
•1 Scissors.
•Thread and needle.
•1 Falda corta color negro.
•1 ½ de correa o cinturón ajustable.
•1 Bolsillo grande.
•1 Trenza o agujeta negra de zapato.
•1 Cabeza de algún oso de peluche reutilizable.
•1 Tijera.
•Hilo y aguja.
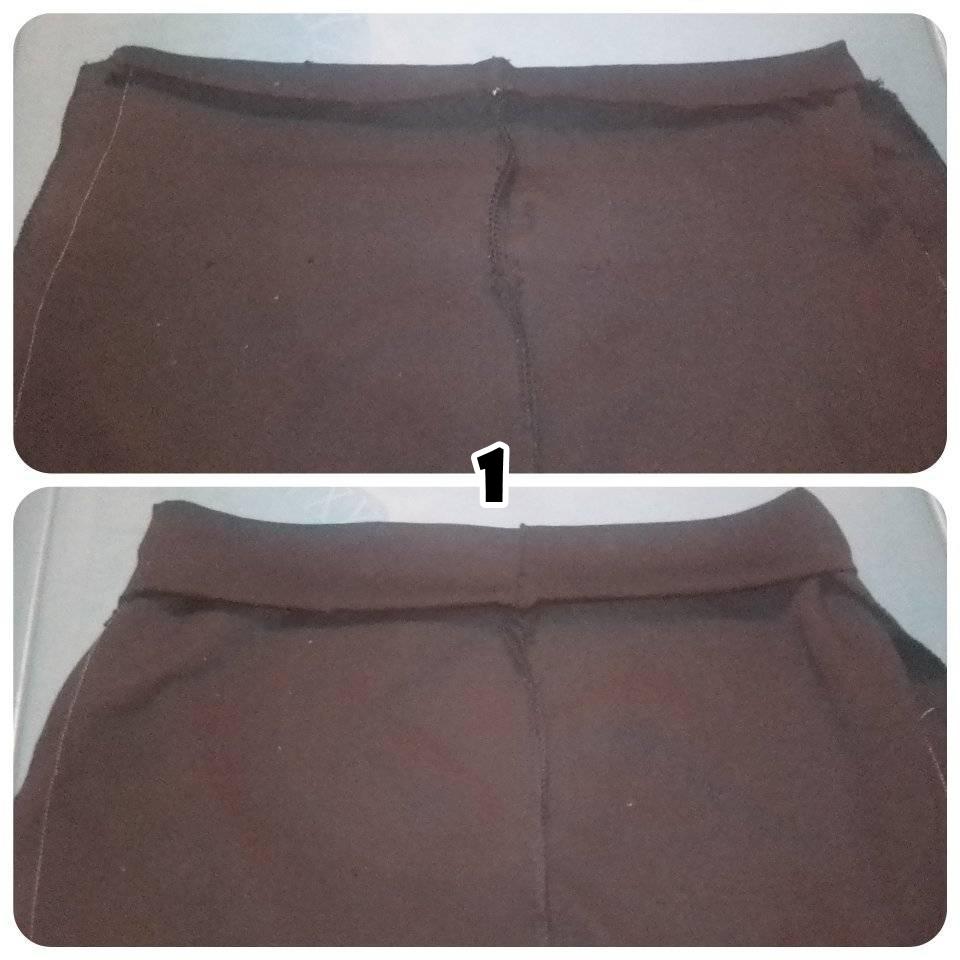
•STEP 1: Turn the skirt to the inside, then fold 2 centimeters of either of the 2 edges without sewing (this is where the braid or the needle to close the skirt will pass through).
•PASO 1: Giramos o volteamos la falda a la parte interior, luego doblamos 2 centímetros de cualquiera de los 2 bordes sin coser (esto es por donde pasara la trenza o agujeta para cerrar).
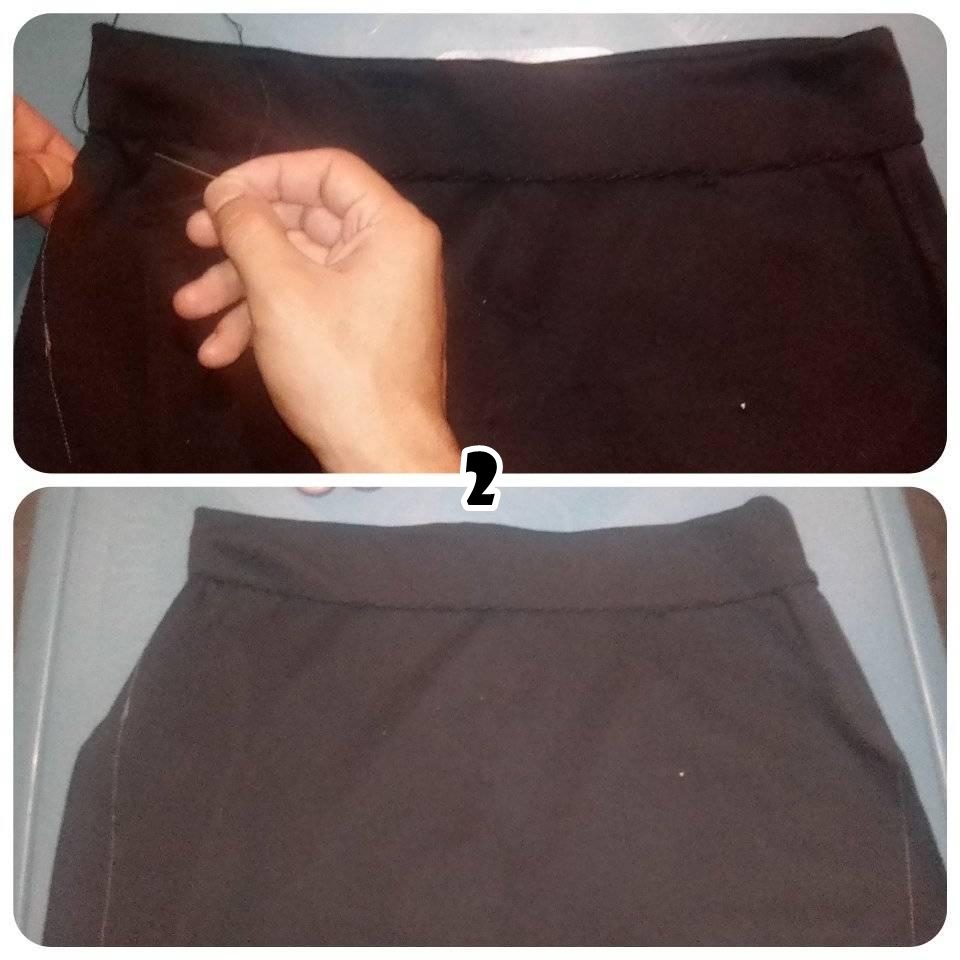
•STEP 2: We sew horizontally the 2 centimeters of the edge of the skirt that we have just folded.
•PASO 2: Cosemos en forma horizontal los 2 centímetros del borde de la falda que acabamos de doblar.
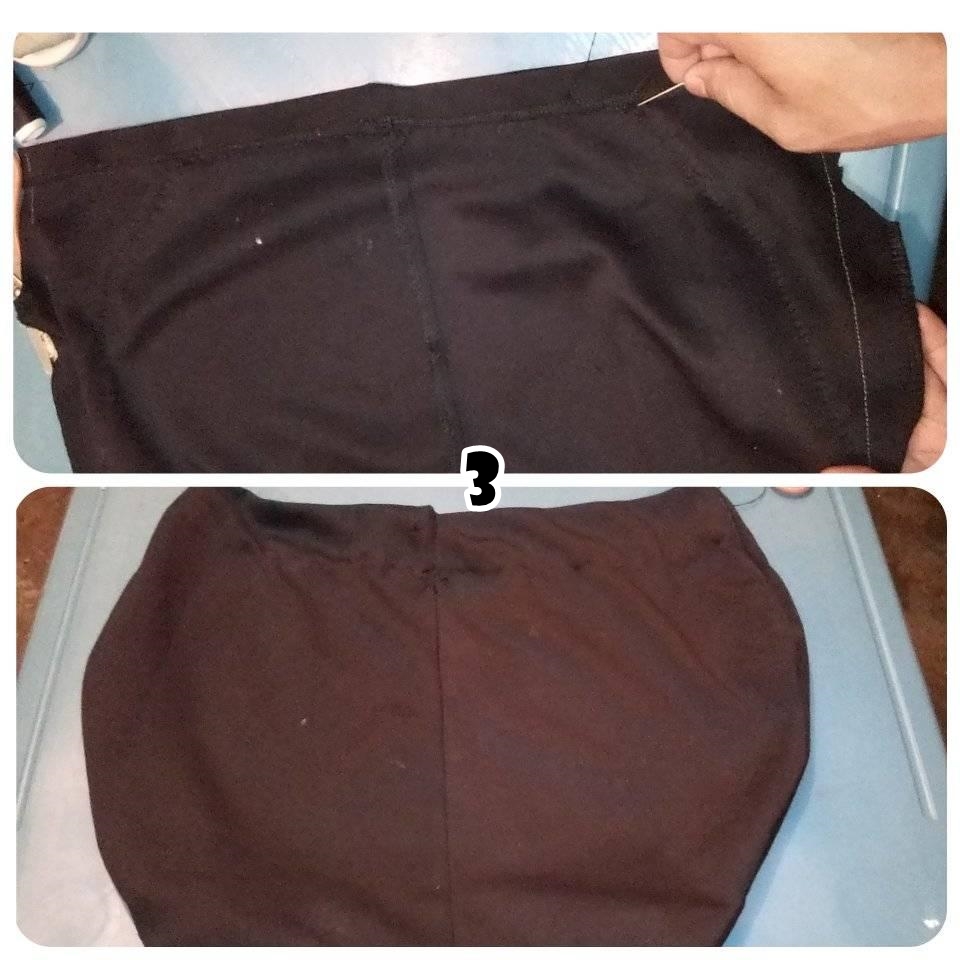
•STEP 3: Now we sew in a circular shape, creating a bag-shaped deposit, trim the excess edges and turn or flip the bag to the outside.
•PASO 3: Ahora cosemos en forma circular, creando un deposito en forma bolsa, recortamos los bordes sobrantes y giramos o volteamos la bolsa a la parte exterior.
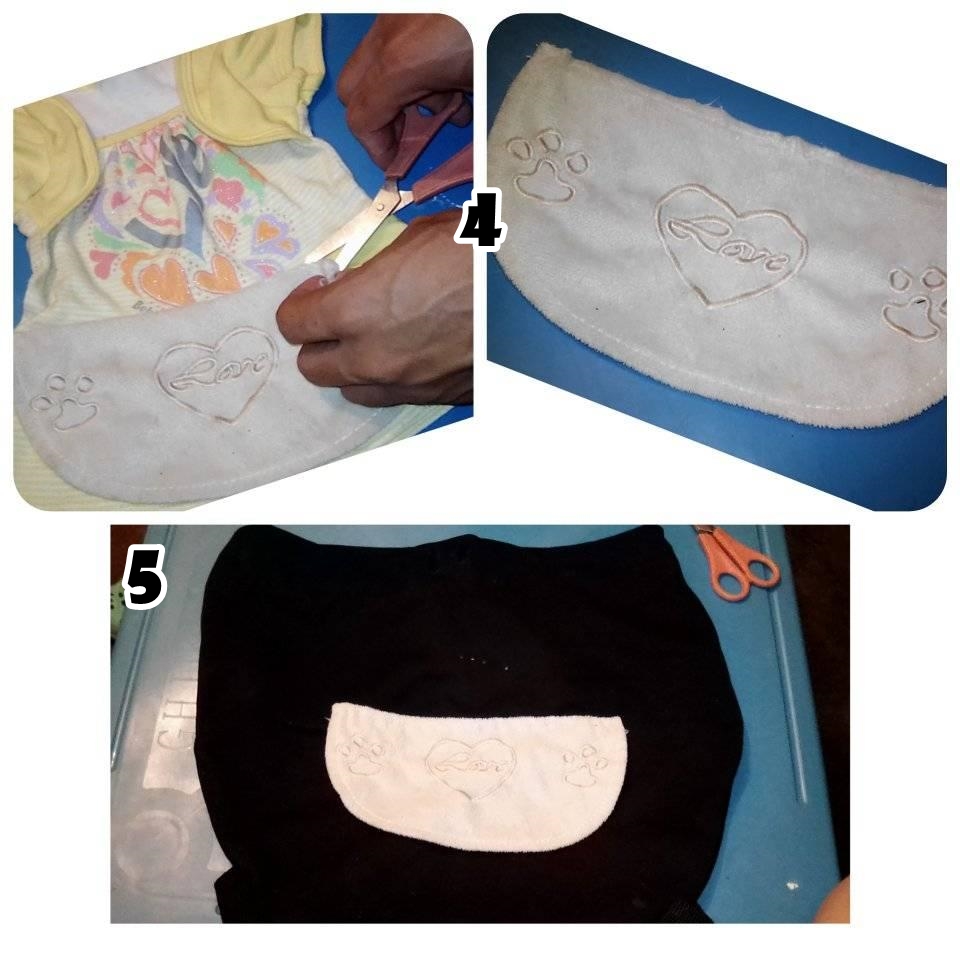
•STEP 4: This step is optional, if you have the pocket you don't need this step. Cut out or peel off the decorative pocket from a shirt or dress (the pocket must be large), I used a pocket of 15 centimeters.
•STEP 5: Sew the pocket to the bottom of the bag or backpack.
•PASO 4: Este paso es opcional, si tienes el bolsillo no necesitas este paso.
Recortar o despegar el bolsillo decorativo de una camisa o un vestido (el bolsillo debe ser grande), yo use un bolsillo de 15 centímetros.
•PASO 5: Cosemos el bolsillo a la parte inferior del bolso o morral.
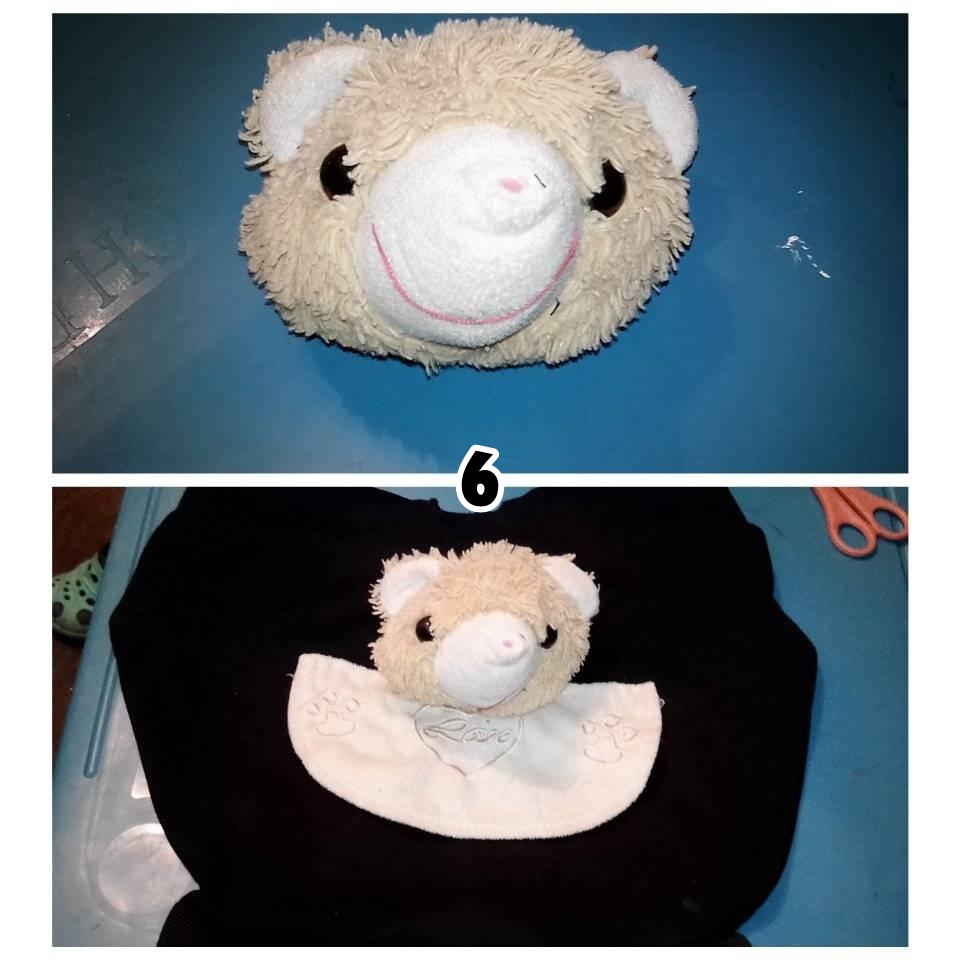
•STEP 6: Take the head of the stuffed animal and sew it to the top of the pocket (being careful not to interrupt the pocket entrance).
•PASO 6: Tomamos la cabeza del peluche y la cosemos a la parte superior del bolsillo (con cuidado de no interrumpir la entrada del bolsillo).
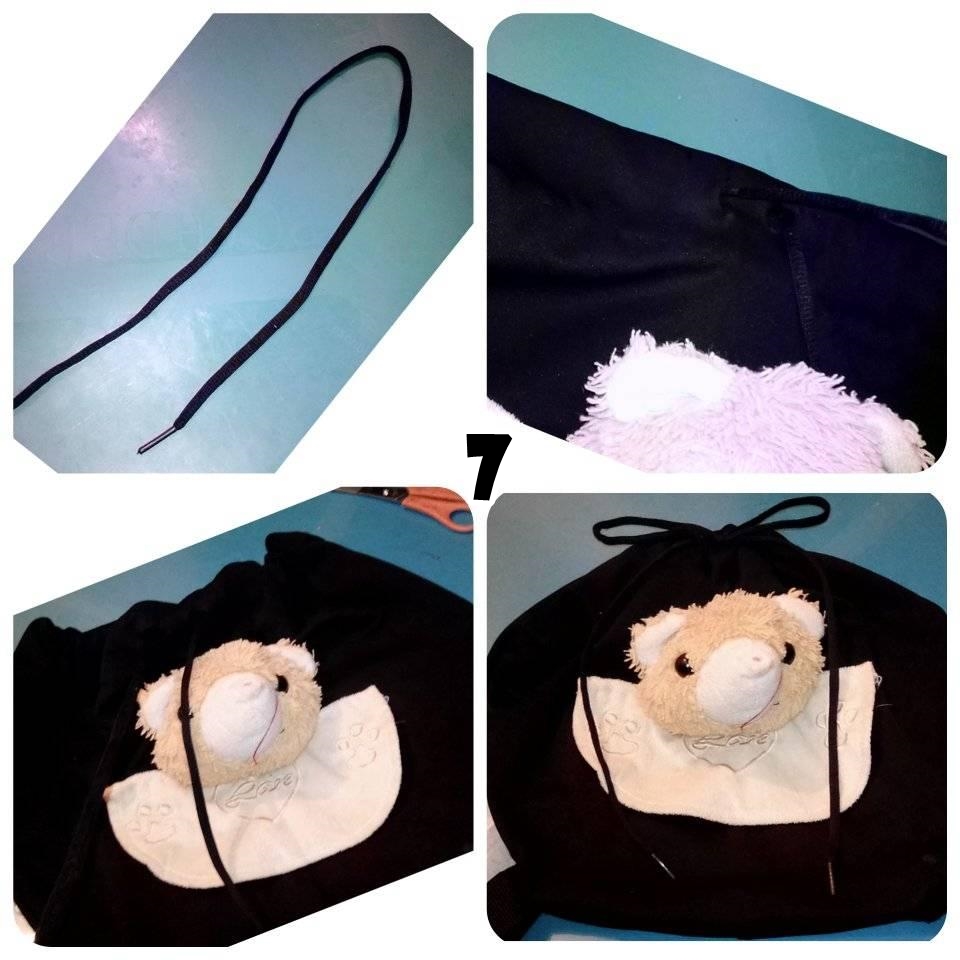
•STEP 7: With the scissors we open a hole in the upper front part of the bag "the 2 centimeters that we folded in the upper part", then we introduce one of the two ends of the braid or shoelace through the hole that we just opened, now we take the 2 ends and we make a knot and thus we leave ready our bag or backpack.
•PASO 7: Con la tijera abrimos un agujero en la parte delantera superior del bolso “los 2 centímetros que doblamos en la parte superior”, seguidamente introducimos una de las dos puntas de la trenza o agujeta de zapato por el agujero que acabamos de abrir, ahora tomamos las 2 puntas y hacemos un nudo y así dejamos listo nuestro bolso o morral.
All photos are my own, edited in PhotoScape, translator used: DeepL.
YOur bagback is really cute and the way you made it from reused materials is so clever. I especially love the bear as an adornment! Did your daughter already received the bagback? Does she like it (I am sure she will)?
Hi @neumannsalva, thanks for your comment. Yes, I really liked the result, it was very nice, literally my daughter liked it a lot and was surprised and laughed a lot that I used that bear head to create a nice backpack hahaha! She really liked it.
Sometimes we have disposable material at home, but with a little imagination we can create amazing things. Cheers!
Congratulations @deivisperez! You have completed the following achievement on the Hive blockchain and have been rewarded with new badge(s) :
Your next target is to reach 50 posts.
You can view your badges on your board and compare yourself to others in the Ranking
If you no longer want to receive notifications, reply to this comment with the word
STOP