Preparándonos para el verano. Camiseta de Libélula original DIY // Getting ready for summer. Original DIY Dragonfly T-shirt
¡Hola a todos! Quise participar en este concurso porque me encantan las #manualidades y la costura es una de ellas. Quiero inscribir en el concurso este trabajo que hice para mi hija ya que se aproxima el verano y renové uno de sus suéteres para convertirlo en una camiseta que pueda usar en un día caluroso. Les presento el paso a paso, así que ¡Empecemos!
Hello everyone!!! I wanted to participate in this contest because I love #crafts and sewing is one of them. I want to enter in the contest this work I made for my daughter since summer is approaching and I wanted to renew one of her sweaters to turn it into a t-shirt that she can wear in the hot summer. I present to you in step by step, so let's get started!

Materiales:
Tijera
suéter
Hilo y aguja (máquina de coser)
Retazos de tela
Algodón
Esponja, un pedacito.
Ojitos
Materials:
Scissors
sweater
Thread and needle (sewing machine)
Fabric scraps
Cotton
Sponge, a small piece.
Eyes
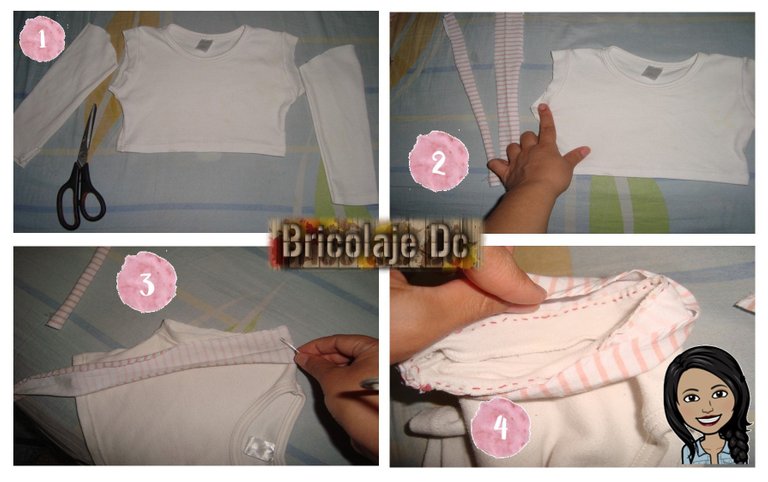
Paso 1: Cortamos las mangas del suéter dejando un pequeño borde de 1 centímetro que serán las mangas.
Paso 2: De los retazos de tela cortamos 2 tiras que abarquen toda manga.
Paso 3: Cosemos las tiras a las mangas enfrentando los derechos de las telas. Yo lo cosí a mano porque no tengo máquina de coser, pero si tienes maquina será muchos más rápido.
Paso 4: Doblamos la tira para coser el lado que quedara por dentro.
Step 1: We cut the sleeves of the sweater leaving a small edge of 1 centimeter which will be the sleeves.
Step 2: From the fabric scraps we cut 2 strips that will cover the entire sleeve.
Step 3: Sew the strips to the sleeves facing the right sides of the fabrics. I sewed it by hand because I don't have a sewing machine, but if you have a machine it will be much faster.
Step 4: We fold the strip to sew the side that will be on the inside.
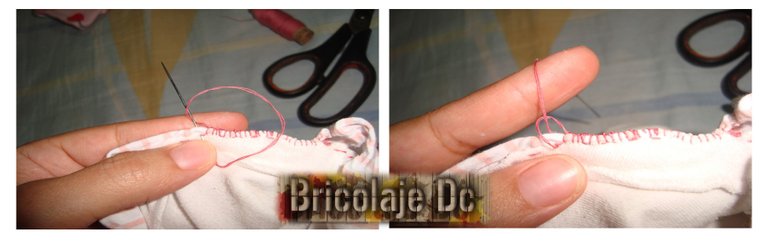
Nota: Yo use esta costura que me parece que es resistente y no va a descoserse.
Note: I used this stitching which I find to be sturdy and won't unpick.
Paso 5: Repita el mismo procedimiento con la otra manga.
Step 5: Repeat the same procedure with the other sleeve.

Quedará de la siguiente manera
It will look like this.
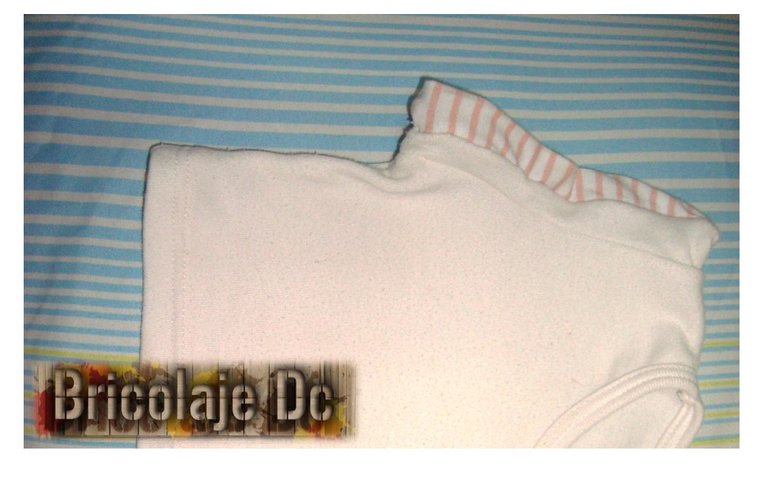
Así se ve
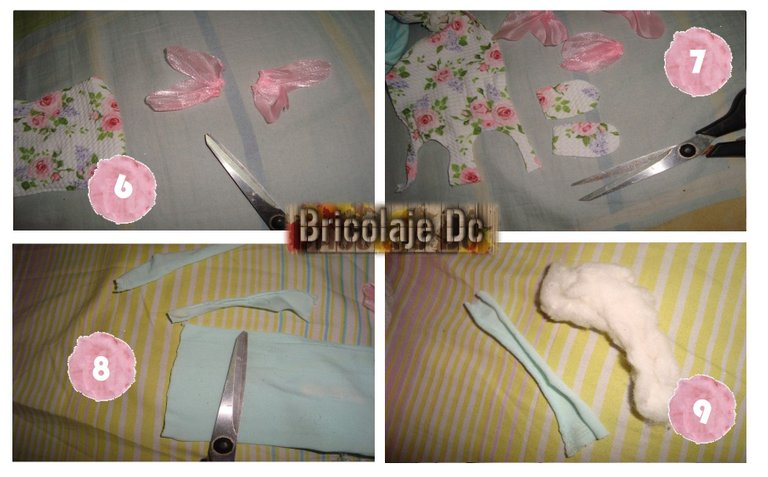
Para que mi trabajo represente mi carácter, decidí agregarle mi animal favorito, la libélula. siempre me ha encantado y me parece mágica la forma de sus alas y como vuelan. Entonces agregue una pequeña libélula que sé que a mi hija le va a encantar.
Para la elaboración de la libélula:
Paso 6: De un retazo de tela que sea brillante o transparente, cortamos unas pequeñas alitas. Necesitamos 4 piezas. Estas le darán volumen a las alas.
Paso 7: De un retazo de tela de color o estampada sacamos las alas que quedaran debajo de las anteriores. Necesitamos 4 piezas.
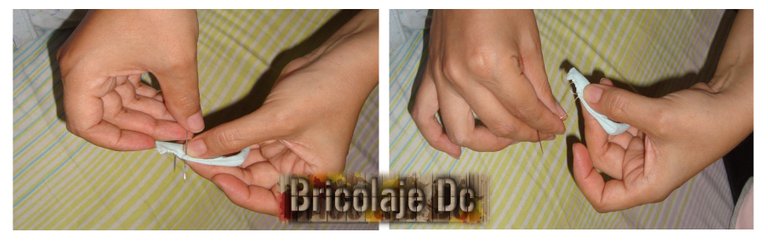
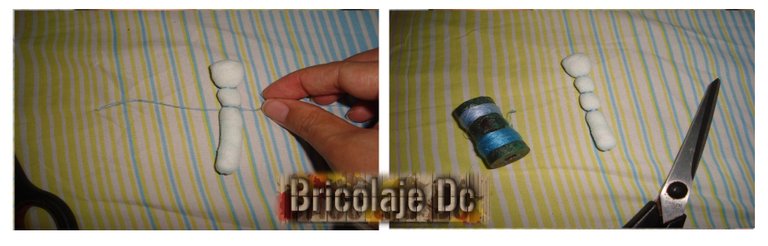
Paso 8: de un retazo de tela unicolor cortamos una tira que se convertirá en el gusanillo de la libélula.
Paso 9: Acomodamos el algodón para rellenar el gusanillo.
To make my work represent my character, I decided to add my favorite animal, the dragonfly. I have always loved it and I find the shape of its wings and how they fly magical. So I added a little dragonfly that I know my daughter will love.
To make the dragonfly:
Step 6: From a scrap of fabric that is shiny or sheer, we cut little wings. We need 4 pieces. These will give volume to the wings.
Step 7: From a piece of colored or printed fabric we cut the wings that will be under the previous ones. We need 4 pieces.
Step 8: From a piece of unicolor fabric we cut a strip that will become the dragonfly's little worm.
Step 9: We arrange the cotton to fill the worm.
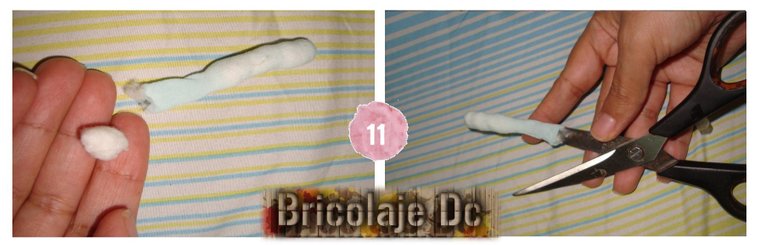
Paso 10: Procedemos a cocer el gusanillo. Formamos un pequeño cilindro. Yo utilice tela de unas pantimedias de mi hija que ya no usaba porque estaban rotas, de esta manera la tela estira al rellenar y se ve muy bien.
Step 10: We proceed to bake the worm. We form a small cylinder. I used fabric from a pair of my daughter's pantyhose that she no longer wore because they were torn, this way the fabric stretches when stuffed and looks great.
Paso 11: Hacemos pequeñas bolitas de algodón y vamos rellenando el cilindro del gusanillo. Podemos ayudarnos con el pico de la tijera o con un lápiz.
Step 11: we make small cotton balls and fill the cylinder of the worm. We can help us with the tip of the scissors or with a pencil.
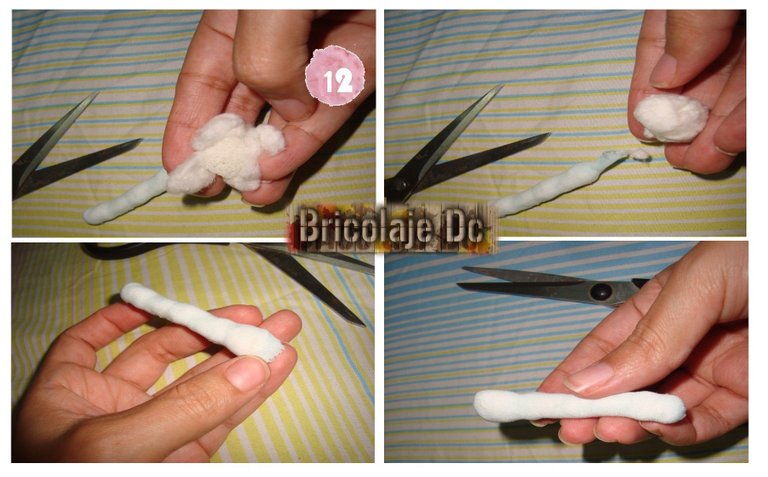
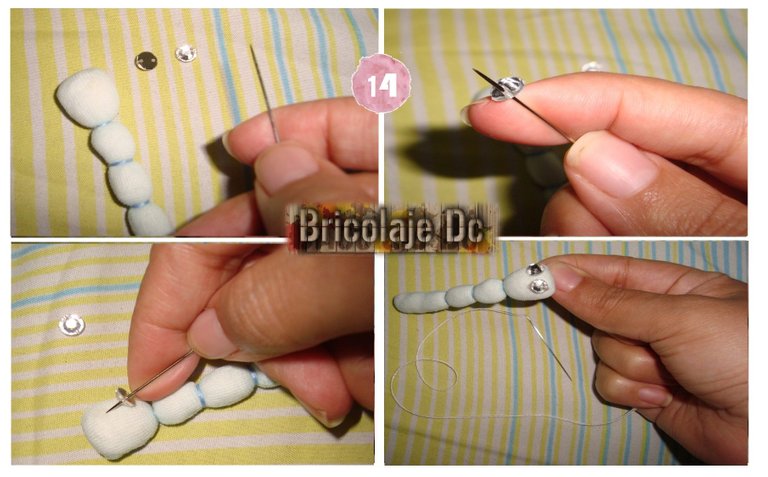
Paso 12: Para la cabeza, tomamos un pedacito de esponja, la cubrimos con algodón hasta que quede una bolita y rellenamos. Cerramos el cilindro y ya tenemos armado el gusanillo de nuestra libélula.
Step 12: For the head, we take a small piece of sponge, cover it with absorbent cotton until it is a ball and fill it. We close the cylinder and we have already assembled the little worm of our dragonfly.
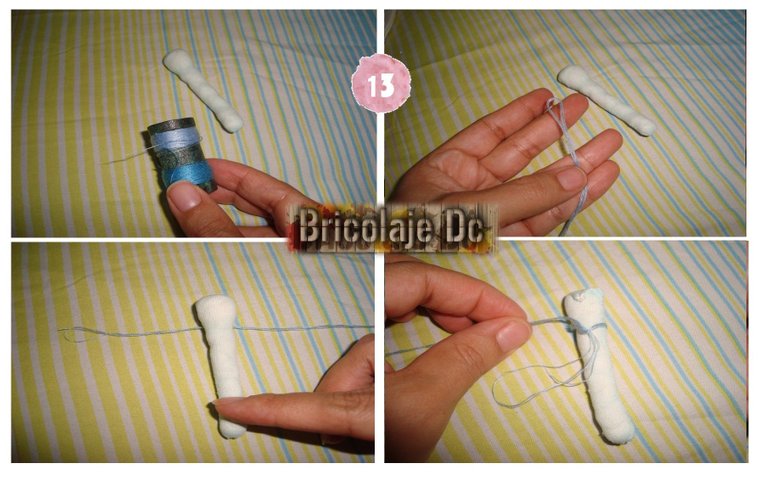
Paso 13: Con un hilo que combine con el color del gusanillo (en mi caso azul) tomamos una hebra larga y la doblamos varias veces para que quede gruesa y vamos a amarrar, apretando bien fuerte, la cabeza y 2 roscas más para hacer las divisiones del gusanillo.
Step 13: With a thread that matches the color of the worm (in my case blue) we take a long strand and bend it several times so that it is thick and we are going to tie, squeezing tightly, the head and 2 more threads to make the divisions of the worm.
Paso 14: Unimos los ojitos. En caso de no tener ojitos podemos hacerlos con hilo, es decir, bordados.
Step 14: We join the eyes. In case we don't have little eyes we can make them with thread, i.e. embroidery.
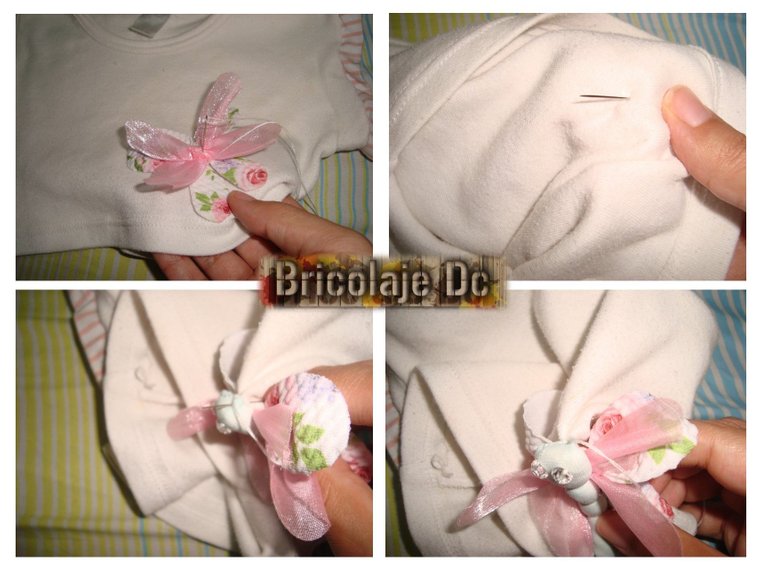
Paso 15: Unimos las alitas, las sobre alas y el gusanillo a la camiseta.
Step 15: We attach the wings, the overwings and the little worm to the T-shirt.

Y listo tenemos una camiseta reciclada lista para usar en el verano.
And presto we have a recycled t-shirt ready to wear in the summer.
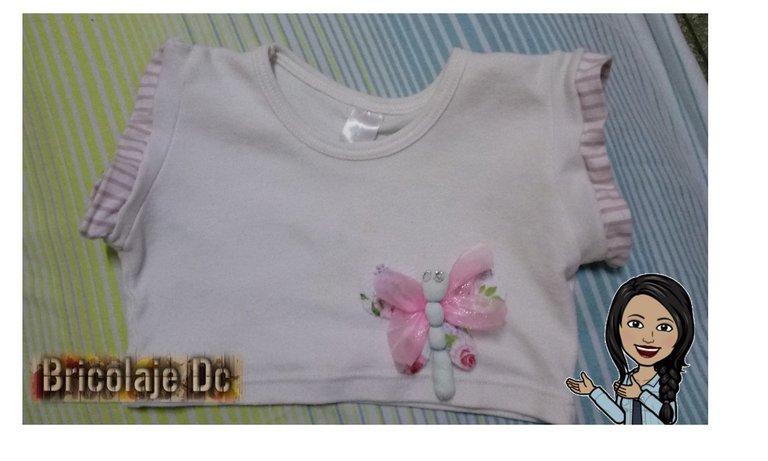 Trabajo terminado
 Espero que les guste este trabajo sencillo que hice con mucho cariño para compartirlo con esta bonita comunidad @needleworkmonday.
Dejen sus comentarios.
Gracias por leerme.
I hope you like this simple work that I made with a lot of love to share with this nice community @needleworkmonday.
Leave your comments.
Thanks for reading me.

Congratulations @chacald.dcymt! You have completed the following achievement on the Hive blockchain and have been rewarded with new badge(s) :
Your next target is to reach 200 replies.
You can view your badges on your board and compare yourself to others in the Ranking
If you no longer want to receive notifications, reply to this comment with the word
STOPCheck out the last post from @hivebuzz:
Support the HiveBuzz project. Vote for our proposal!
Que hermosa libélula, quedó muy linda, me gustaría verla puesta en tu niña bella, le debe quedar perfecta. Te felicito y bienvenida a la comunidad <3
Gracias...es que la modelo se quedo dormida 😂....se le ve muy linda.
Bienvenida a la comunidad. Reutilizar y renovar prendas es una excelente opción. La libélula quedó espectacular, te felicito. Ya que te agradan la costura te invitamos a participar en nuestros lunes de agujas, usando la etiqueta #needleworkmonday, donde nos reunimos a compartir nuestras creaciones. Saludos!
Muchas gracias por la invitacion....estare participando...😌
QUe gran trabajo, te felcito.
Muchas gracias!😌
Congratulations, your post has been upvoted by @dsc-r2cornell, which is the curating account for @R2cornell's Discord Community.