Mazunte Build - Starting The Long Finish
I remember @eco-alex mentioning in a comment to one of my posts how important it is not to have deadlines in an Earthship build. Well, I just want to stress how right he was!
It is this weekend by which we had planned to have the roof beams in place, as Stephane, the mind behind the reciprocal roof, was going to fly back to France. The rest of us would have spent the following weeks straightening up the property, getting it ready to be closed up for the season, until our return in December.
Well, as it turns out, the beams are nowhere ready. In fact, even the bond-beam hasn't been poured yet. However, due to the worldwide quarantine, it seems like we'll have more than enough time to get everything completed, even if it's just our small group of six doing all the work. In this sense, it can be said that we are almost done... but finishing the build is still going to take some time.
Welcome to the Long Finish
As we're settling into what is likely to be a good few weeks, we are also making new plans. At first we need to complete the form that will hold the concrete. This is likely going to take most, if not all of next week. Then we have to spend a day making and pouring the concrete, since the bond beam needs to be one continuous pour. Following that we have to let it set for a week. During this time we can continue preparing the vigas, immersing them in a bath of boric acid, to prevent the termites from eating them up. Finally, we will have another intensive day, where we set them in place. Even if we leave a good amount of buffer time, this should keep us busy for most of April.
Seven Columns Later: Preparing for the Big Pour
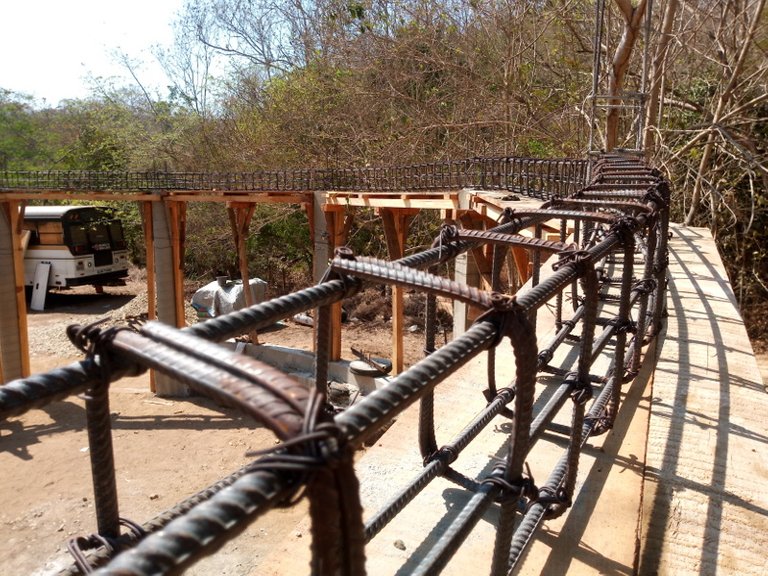
Concrete is no fun. It has to be measured out (the more precisely, the better), mixed up properly in hard labor under the sun, and then scooped up and bucketed into its prepared place. All the while, it splatters onto you, clumping up your hair and burning your skin if you're a bit sensitive to the alkalinity. Gloves and vinegar do help, but both have their limits.
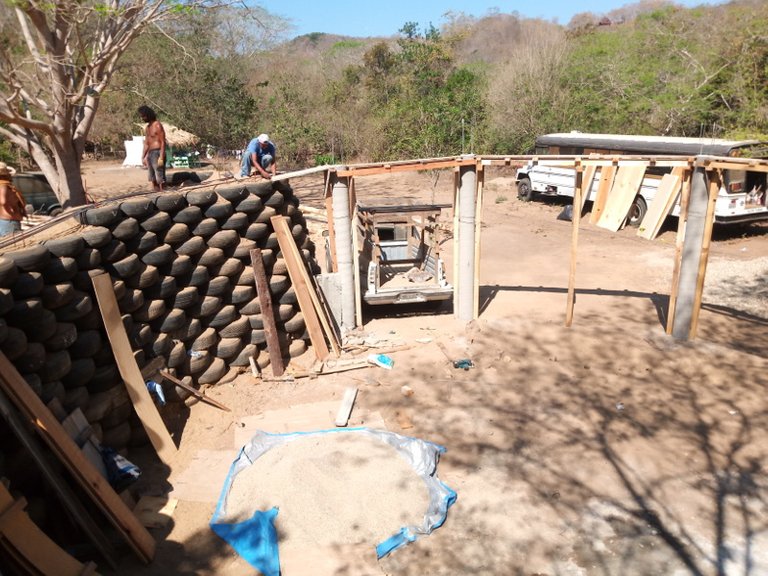
So far we have proudly completed our seven columns, and with the help of our hired mason, have built a structure connecting them into the circle that will hold up the beam. Next came the rebar, with lots of rings, that had to be tied firmly at each crossing point. This part we're almost done with. They still need to be boxed in, plus the other side above the tire wall must be assembled.
Climbing Around in Precarious Heights - Euphoria Guaranteed!
Standing on a freshly built structure in three meters (ten feet) height can be a bit scary. Each step, or even the slightest move must be carefully considered, or else ... let's not even go there! While lifting and moving around heavy objects at that height, maximal focus is required. Thus, my movements became slower, more deliberate, and also more fluid. My mind shut out the music and the noise around me, and even my rambling thoughts were put on hold for a while.
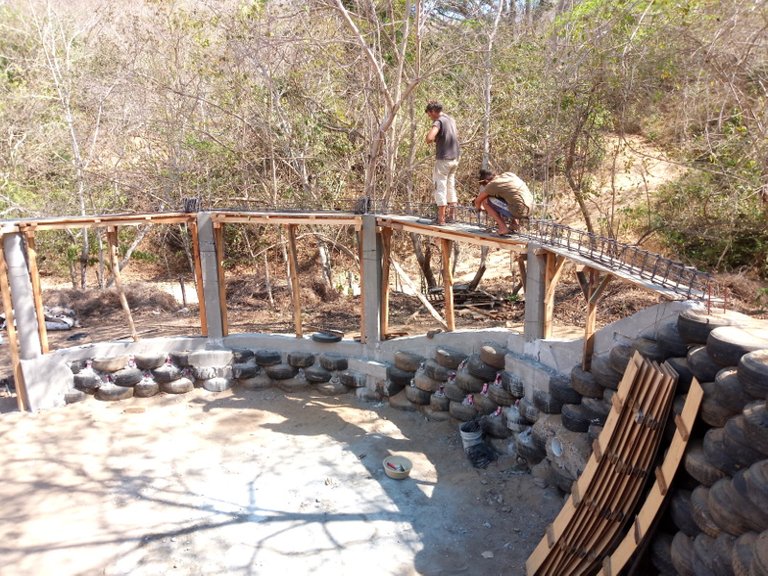
As soon as I was done putting the rings in place, and once my feet were on firm ground again, something else hit me: A sudden burst of happiness! It was like deep gratitude and appreciation for being well and alive, in this wonderful world, with these beautiful people, doing these amazing things. Suddenly tears came into my eyes, and I felt like laughing and crying at the same time. A powerful case of adrenaline rush. Really, who needs drugs when you can climb around in neck-breaking conditions?
The Bee Line to Treating the Wood
Our reciprocal roof will be made of thirteen Royal Palm logs. They each weigh somewhere about 200-300 kg (440-660 lbs), so moving them around is always a challenge, requiring ropes, levers, and the combined forces of most of us. But move them around we must, since they need to be stripped of their bark, and taken to our neighbor's property, where he has a tank for immersing them in boric acid.
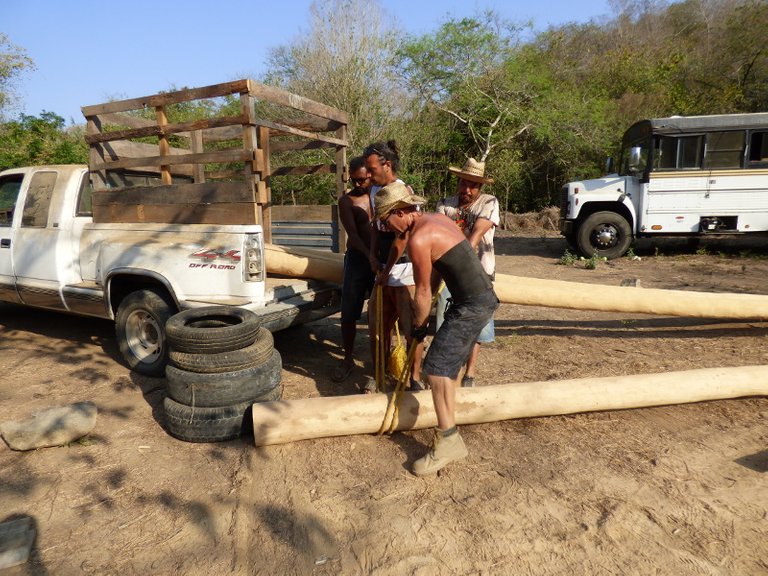
The tank can accommodate four logs at the same time, and it's recommended to leave them in for at least four days. Even if we manage to put five in one at one time, this will take just under two weeks before the treatment is completed. Fortunately, the first four are already in, but the last two logs still have their bark on them. Though given our work flow, we should have them done in time.
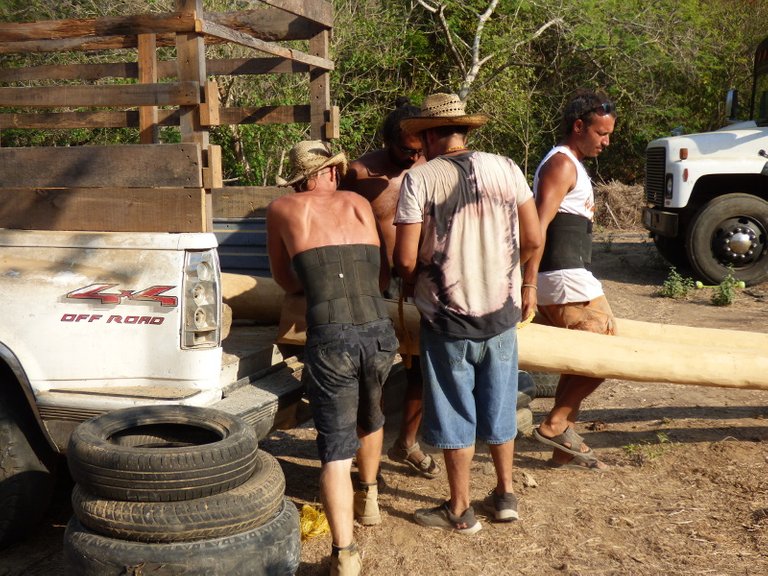
Although we are lucky in the sense that we don't need to transport the logs further than a five minute drive, literally to the property next to ours, tying them to the pick-up truck, and dragging them over the dirt road is its own challenge. Once there, we have to unload them, taking care not to rip off the bumper or the tailgate in the process.
Once they are all back at our place, ready to be placed on the firmly set bond-beam, we'll need to hire a machine once again. There is simply no other way, especially if this alternative requires dozens of helping hands in the same place at one time. Not during the quarantine. You may even say we could consider ourselves lucky to get a back hoe hired... But at the moment I'd say, let's cross that bridge once we get there. For now, we have enough to do as it is, providing material for a number of posts...
Follow our Construction Adventure in This Series:
Concrete Plans and Concrete Actions
Earthship Build in the Time of Hive and Coronavirus
Machines Taking Over Work: The Day Everything Changed
Zome Building Workshop in Mazunte
The Ceremony of a Minka
Hay Pase, Got the Permit!
The Diverse Cars at Itínera
Waiting for the Man
An Impression of Hyperadobe in La Boquilla
Bending Rebar Like a Mexican
Working at Night for the Perfect Level
The Challenge of Scoring Tires
Creating Conditions to Work and Live
Previous series: A Theater on the Beach
Really appreciating how much you're achieving, and the PLANNING involved. It's not quite the weekend hippie-fest it would appear to be sometimes. 🤣
I helped build my brothers mud brick house 30 years ago and I KNOW how long some of these steps can take!
Fabulous team work - inspiring.
Hehehe, yeah we may look like hippie beach bums, but bending rebar all day and mixing concrete in the sun puts us in another category.
Mixing concrete is totally a girls job - we have sooooo much more stamina! LOL 😂 Most of the beach bums in my world have been superb surfers and fitter than most construction workers. 🙂
No doubt about that, hahaha! Though there are some people who just like to look like they do things (like ride motorcycles, surf, or mix concrete) and others who actually do them. Our girls do mix concrete too! I have to take cool pics when the big day comes.
Looking fwd to images of beautiful women displaying strength and stamina. 👍
GREAT update.. that metal work for the bond beam looks GREAT,, nice thick metal,... brings back many memories for me.. when i did the cement pour it was LASHING rains for two days.. and we could not stop.. oh what fun!
u GOT THIS! lovely to see this milestone about to happen.. HOWEVER long it takes.. it will come ;-) xxx
Oh yes, we're using 1/2" and 3/8" rebar, since it's not just the super heavy roof beams they have to support, but also the green roof (gravel, sand, soil, all soaked full of water, plus plants on top).
And as for the rain... sure, the rainy season is approaching fast, but hopefully not before May.
Looks like there´s a mistake in your steel work! 😘
It is difficult for me to explain in English, because I never did any construction work in English, but I try, and you understand German, don´t you?
In a Sturz (lintel/ beam) you put the Bügel (brackets?), the rectangular iron things which hold the bars in place, in a way so that the Schlösser (locks?), the parts of the Bügel where the steel is overlapping to close the Bügel, are at the topside of the beam, and you swap between right side and left side.
The logic behind is that the lintel, when it gets load from the top, bends more at the bottom side, so you don´t want to put the locks there, because they are the weakest part of the bracket.
On your first photo the lock of the third bracket is at the bottom left side.
In a vertical column you put the locks in all four corners and alternate evenly between them, because pressure force acts equally on all corners.
At least that´s what we used to do 30 years ago.
And it was in Germany not Mexico. 😘
Thanks for your comment, @likedeeler, and how right you are. In fact, once the Bügel (anillos = rings in the local Spanish) were tied in place, we even discussed this, as not everyone knew about all the details. The ones seen in this pic were done by someone who put them on randomly. I placed mine with the locks on top (so far so good) but all on the right side (not so good). That's the thing with these builds, where volunteers with little experience make inadvertent mistakes. But in the end it was decided that it would be worse to remove and redo them all. But thanks for pointing out this flaw, so even those of us who may want to build in the future can learn from our mistakes. And let's hope this won't compromise our bond beam.
I just talked to our hired professional albañil, and according to him the "proper" way to place the Bügel is alternating the Schlösser both top-bottom as well as left-right. The fact that this differs from what you said puts me at ease that my mistake won't compromise the integrity of our structure.