Spanish and English Tutorial paso a paso de brazalete o Pulsera con Balines laminados modelo 2 / Step-by-step tutorial of bracelet or bracelet with laminated pellets model 2

Hello hello happy start of the week, this day I have made a tutorial of a second model of bracelet it is simple, practical and it looks super beautiful good I am delighted it serves as a present a gift simple and the best thing is that we have done it with our hands. Try it this will help you spend time entertaining yourself and at the same time you are learning something new
Puedes encontrar el modelo 1 / You can find model 1 AQUI/ HERE
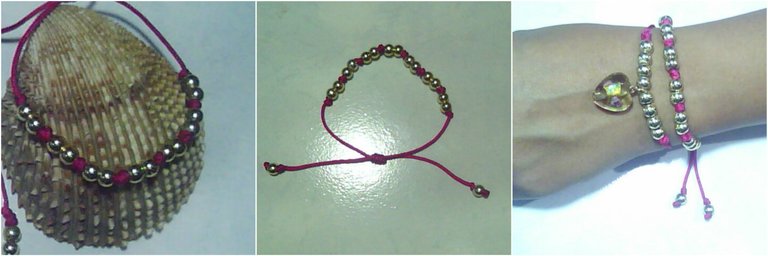
Materiales: hilo chino 55 centímetros, Encendedor, Tijera, 16 Balines laminados 6 milímetros hueco grande. Mucha Energía positiva!
Materials: Chinese thread 45 centimeters, Lighter, Scissors, 16 large hollow 6 mm rolled pellets. Lots of positive energy!
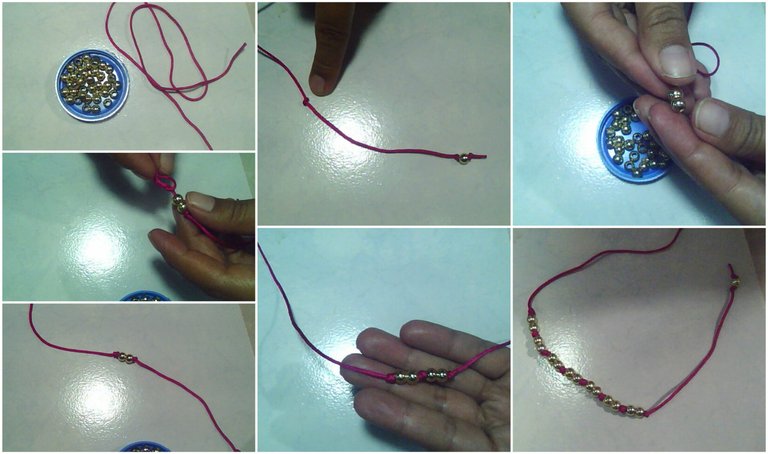
1: Insert a laminated pellet in the thread, make a simple tie at the tip and the other end so that the pellet does not move, measure 10 centimeters and make another simple knot as you see in the image 2 from the other end introduce 2 rolled pellets and make a simple knot again so that they do not run, reintroduce 2 pellets and carry out the same procedure successively 5 more times to complete the bracelet when finishing inserting the last 2 pellets make the simple knot we measure 10 centimeters and another simple knot will be made, insert a pellet and then a simple knot cut the excess thread should be seen as I show you in the last image.
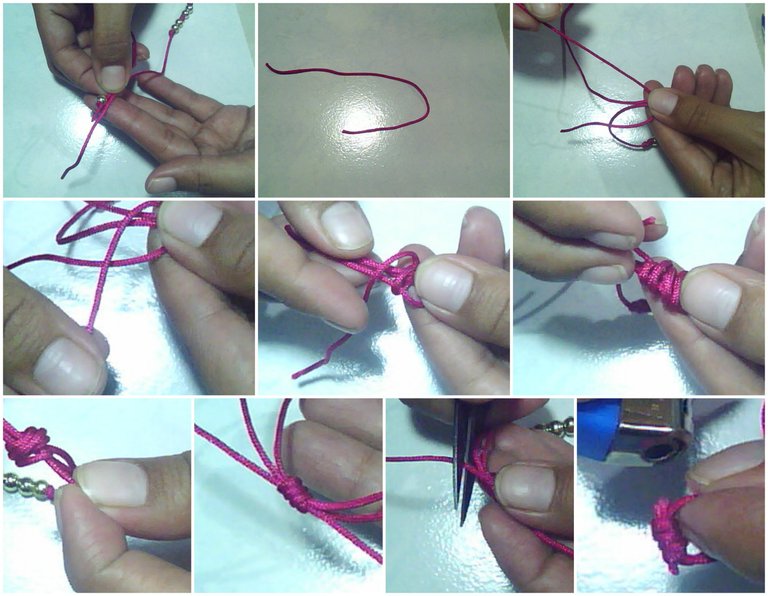
2: From the previous process you should have left a piece of thread of about 10 or 8 centimeters that you are going to place it as I show in image 2 one side longer than the other, I explain grab the bracelet place it between the fingers as I show you in the first image you are going to place the excess thread the long side outwards and the short side towards you, start to thread the long side around the small thread without tightening as forming a tunnel, grasping the two strands of the bracelet crossed as I showed you in image 1 you must give it 3 turns and the tip of the long thread that is the one that was wound is going to enter through that tunnel formed then carefully pull both ends cut the excess and burn with the lighter to seal and fix the thread in order to open and close the bracelet without breaking it.
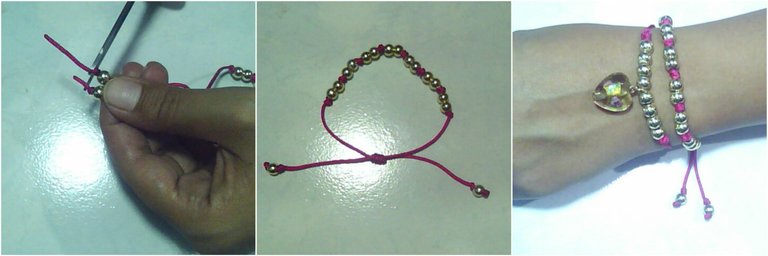
3: To give it the final touch you just have to cut the excess of the tips and burn with the lighter, in this way you finished this second model I hope it is to your liking you can vary the stones you use So it will be the same model but with different stones it will look different, try it you will not lose anything but if you win a lot, if you see the two models look super beautiful together.
El hilo puedes usar el que desees o el que tengas a la mano recuerda que lo mas importante es que te quedes en casa.
The thread you can use the one you want or the one you have on hand remember that the most important thing is that you stay at home.
Autoría del texto y todas las imágenes: @Migda
¡Por favor no tomes, edites ni re-publiques mi material
¿Deseas ponerte en contacto conmigo? Escríbeme https://discord.gg/TanA7tW allí también puedes compartir ideas y tus post para que aprendamos juntas.
Authorship of the text and all the images: @Migda
Please do not take, edit or republish my material!
Do you want to contact me? Write me https://discord.gg/TanA7tW there you can also share ideas and your posts so we can learn together.
![]()
Gracias por compartir tu contenido con la comunidad de El Arca (@elarca), el mismo ha sido votado por nuestra iniciativa de curación artística @stellae. Si deseas puedes delegar HP al proyecto: Delegate 25 HP Delegate 50 HP Delegate 100 HP Delegate 250HP Delegate 500HP
Congratulations, your post has been upvoted by @dsc-r2cornell, which is the curating account for @R2cornell's Discord Community.