origami (Qurator's monday missions)
My post goes for Qurator's Monday Missions.
This week prompt was: "Origami"; and I do have something to share: a little story, and a decent guide, I hope you will not find it too difficult. And no big photo-masterpieces this time.
So, Orirami. The art of folding paper shits into figurines. Funny timekilling job for children, or a serious art? Who knows the answer! Probably, everyone may decide it for himself. Japanese themselves, count it to be serious and very honorable job, so am I. Also, I share their great love and obsession with a good paper.
The little story I wanted to tell you. When I was a teenager, I was a soviet pioneer (that was sort of a soviet analogue for #scouts). On summer vacays, pioneers used to spend time at the leizure camps outside of big cities... doing a lot of intresting teenager activities there, like sports, etc. Once, I do not remember exactly what year it was, I was attracted by the opportunity to learn Origami. For a whole month, or maybe two, I attended the 'lessons' and learned how to create the most easy models.
Japanese crane / Японский журавлик

Guide / Schema / Пошаговая схема изготовления
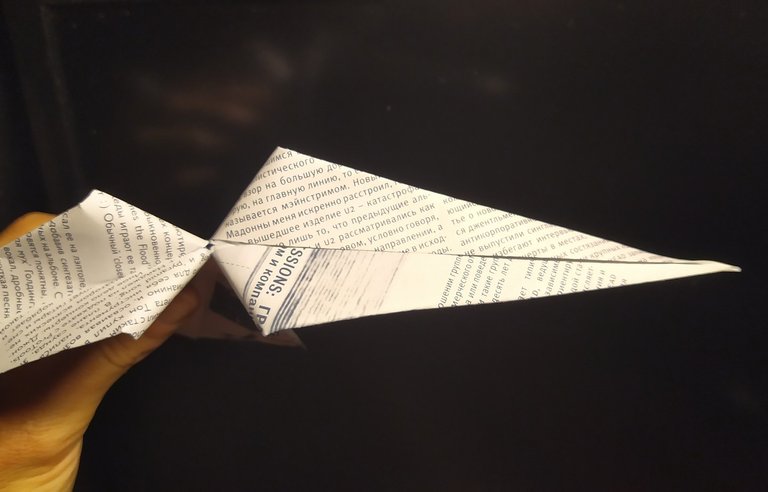
The starting point is most often a rectangular piece of paper. Bend the corner diagonally exactly to outline the square. Take scissors and cut off the excess. // Отправной точкой чаще всего является прямоугольный бумажный лист. Ровно сгибаем лист по диагонали, чтобы наметить квадрат. Берем ножницы и отрезаем лишнее.

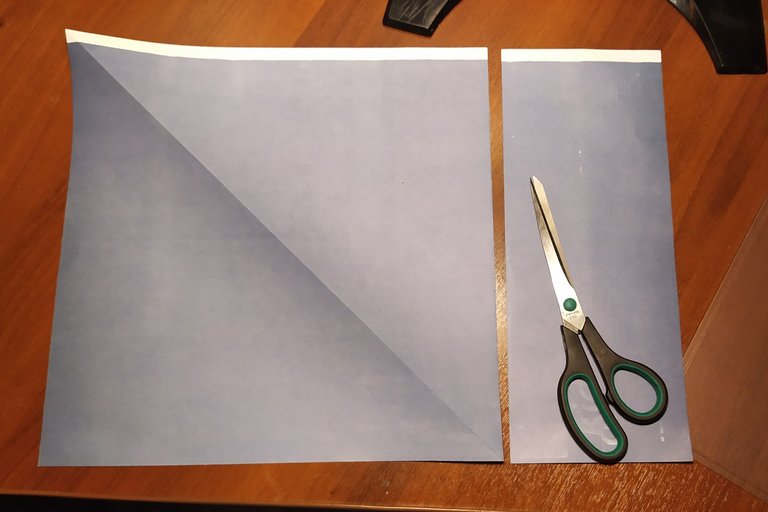
Thin paper is easier to bend, so you better do not take a sheet that is too thick. If the paper has a texture, or even a color, it will benefit a lot to the appearance of the finished result. I chose a plain A3 printed sheet of paper. The grey side, after all the operations, will become an inside and will not be visible. // Тонкая бумага лучше сгибается, лучше не брать слишком плотный лист. Если бумага имеет текстуру, или хотя бы цвет, это скажется на внешнем виде вашей фигурки самым положительным образом. Я выбрал простой запечатанный лист бумаги формата А3. Серая сторона, после всех операций, окажется внутри фигурки и не будет видна.
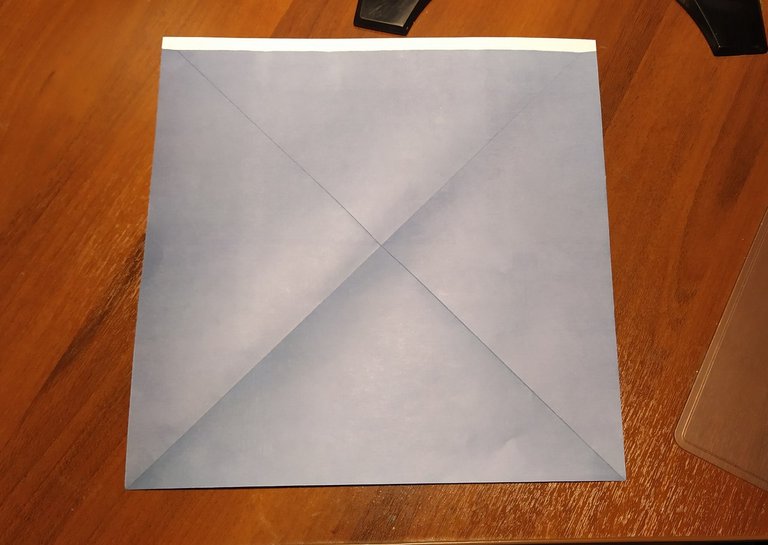
Step 1. Billet. Take the resulting square sheet, bend it diagonally twice, turn it over, and again bend it twice in the middle. // Берем получившийся квадратный лист, два раза сгибаем по диагонали, переворачиваем, и снова два раза сгибаем по середине.

Step 2. Along the diagonal lines, from each corner, bend the edges of the sheet as shown in the figure - not completely! to the point where the pencil is pointing. // Вдоль диагональных линий, с каждого угла, загибаем края листа так, как показано на рисунке - не до конца! до места, на которое указывает карандаш.
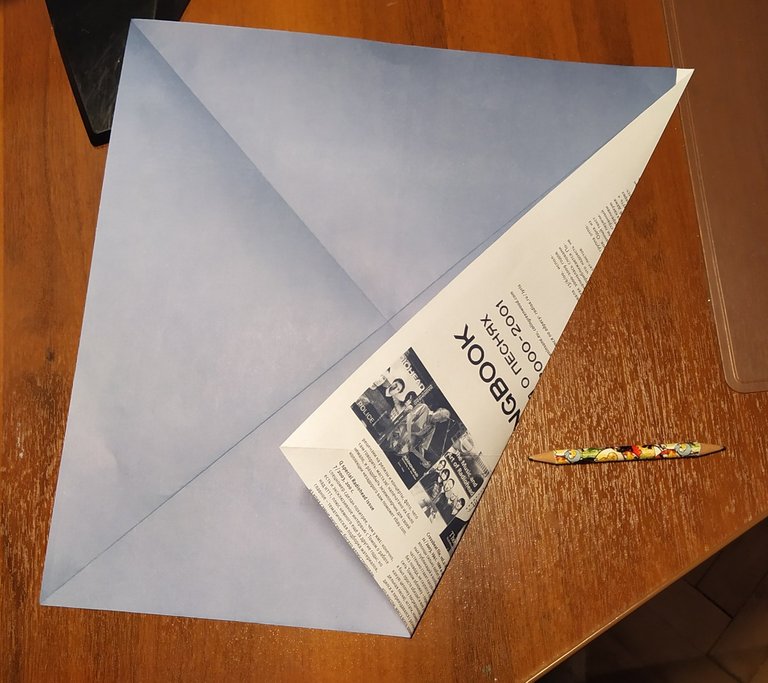
I.e. you have to make 8 folds. // Вы должны сделать 8 сгибов.
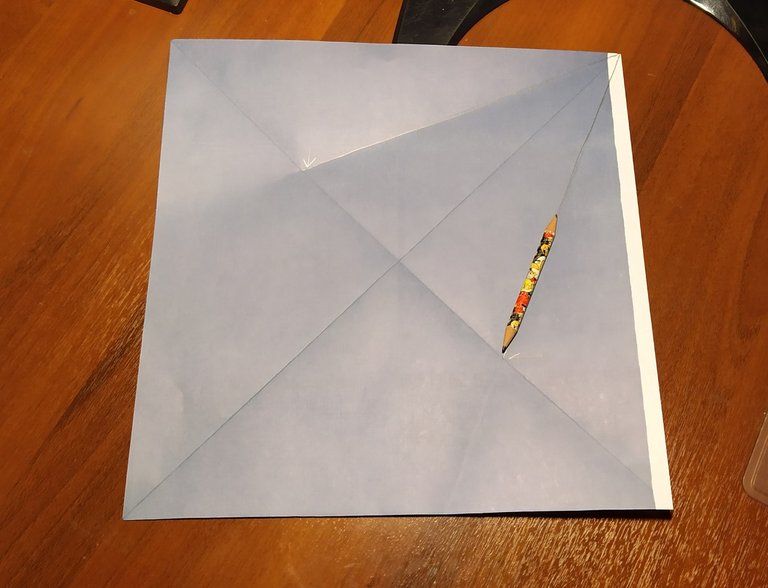
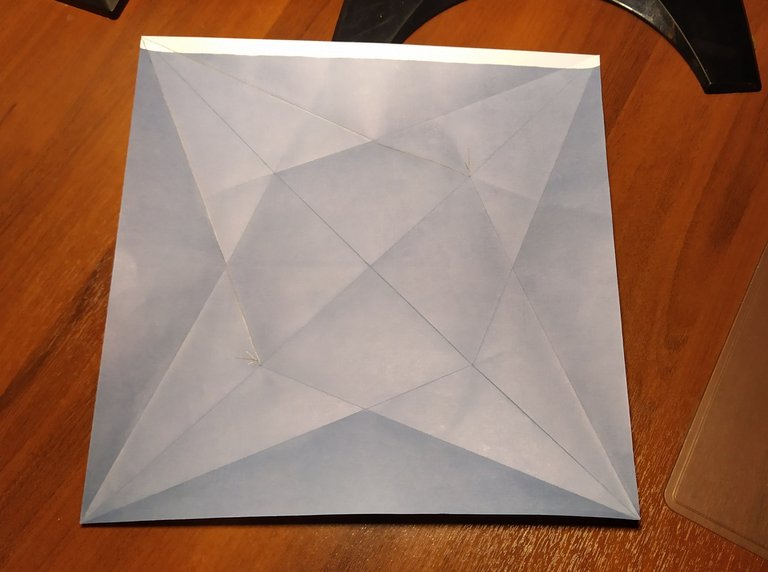
The result should look like this. Your sheet, along the folds made, shapes "a shallow plate".// Результат должен выглядеть таким образом. Ваш лист, по сделанным сгибам, сам собой выгибается "в виде неглубокой тарелки".
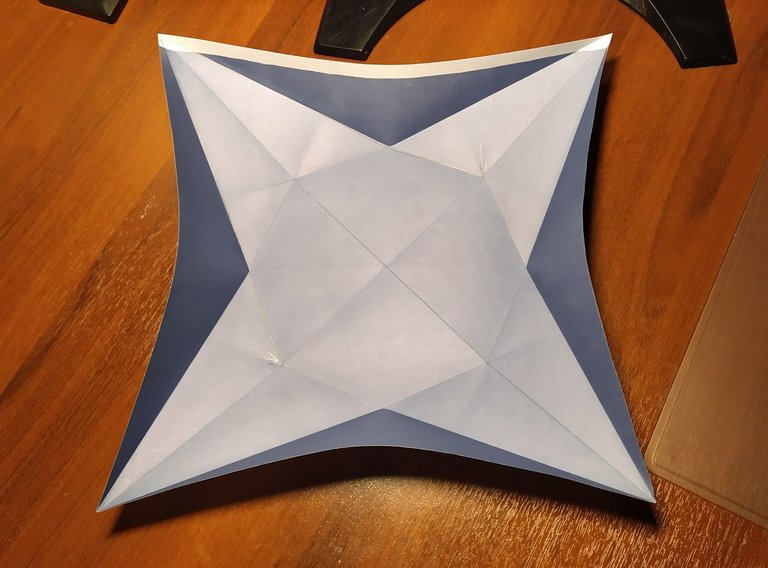
We help and strengthen this form. Next, turn the sheet over. This is how the outer side of the sheet looks like - it will be the outer surface of my future figurine.
// Помогаем ему, усиливаем эту форму. Далее переворачиваем лист. Так выглядит наружняя сторона листа - она же, внешняя поверхность будущей фигурки.
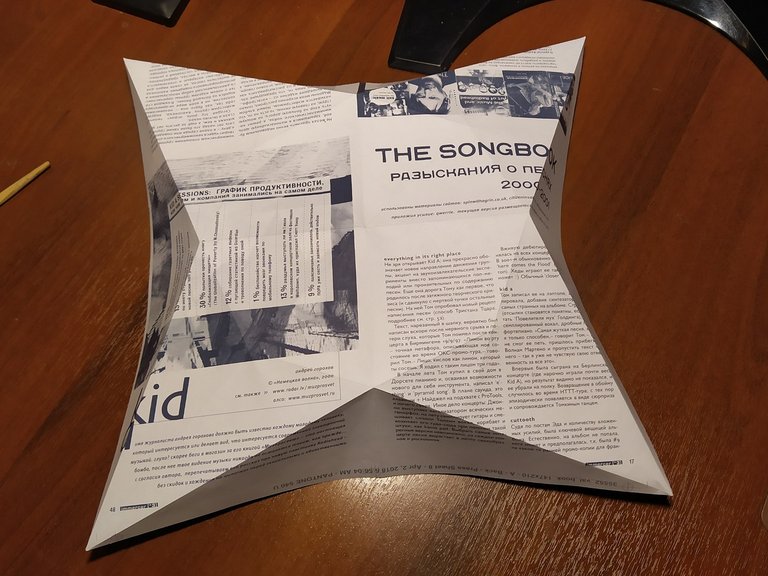
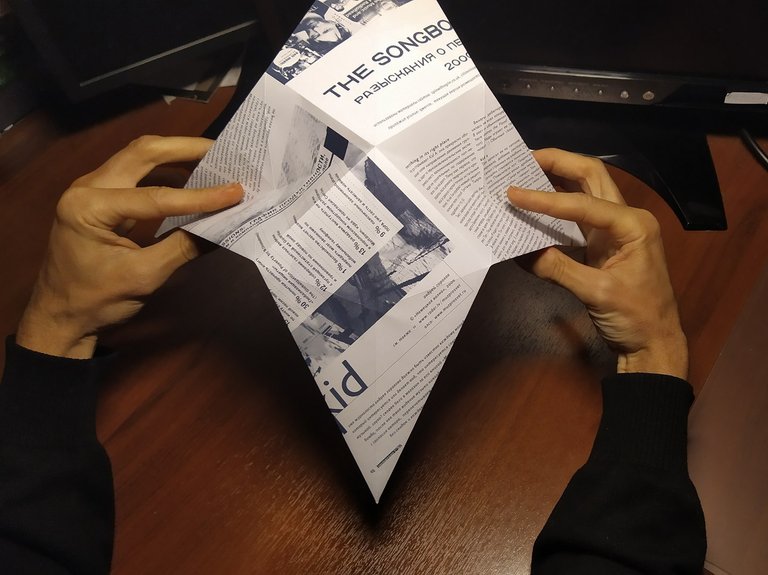
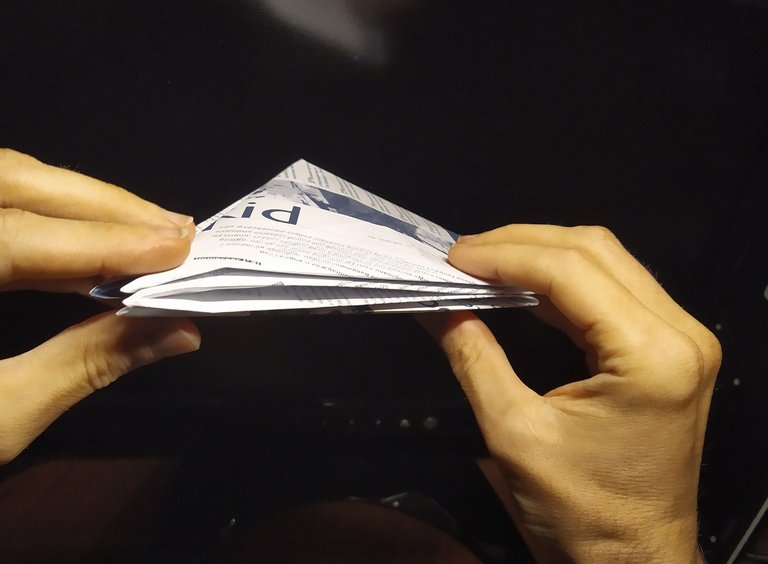
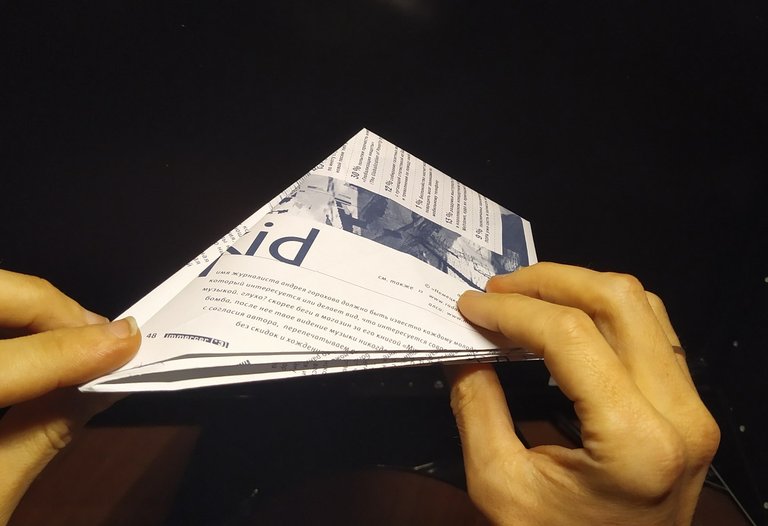
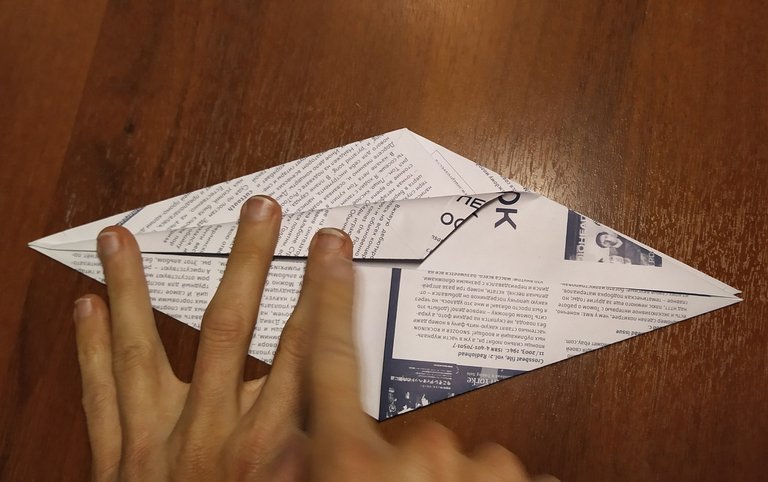
Step 3. Now a bit tricky part. During step 2, we got the "stiffeners", the guide lines, which now we shall use. Using your fingers, help the figure to fold along those guides in the manner shown at the photo below.
// Теперь немного сложная часть. Во время шага 2, мы получили "ребра жесткости", направляющие линии, которыми сейчас и воспользуемся. Пальцами помогаем фигурке сложиться по тем направляющим таким образом, как на фото ниже.
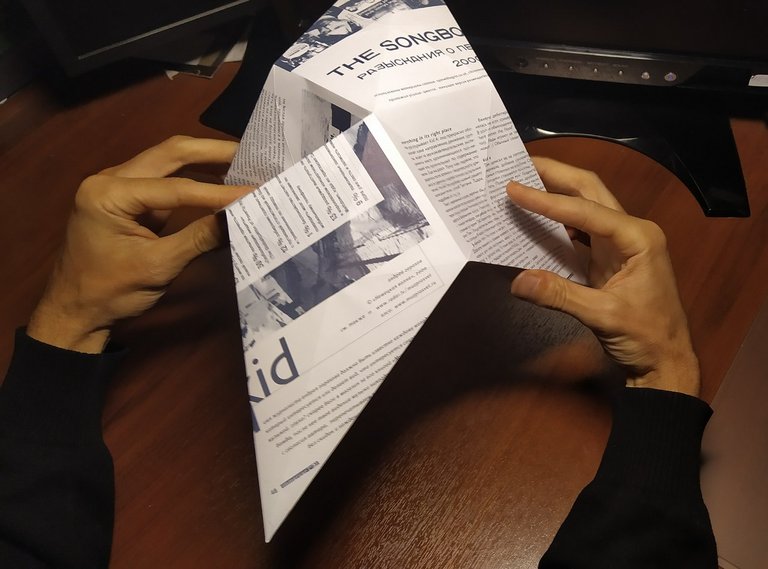
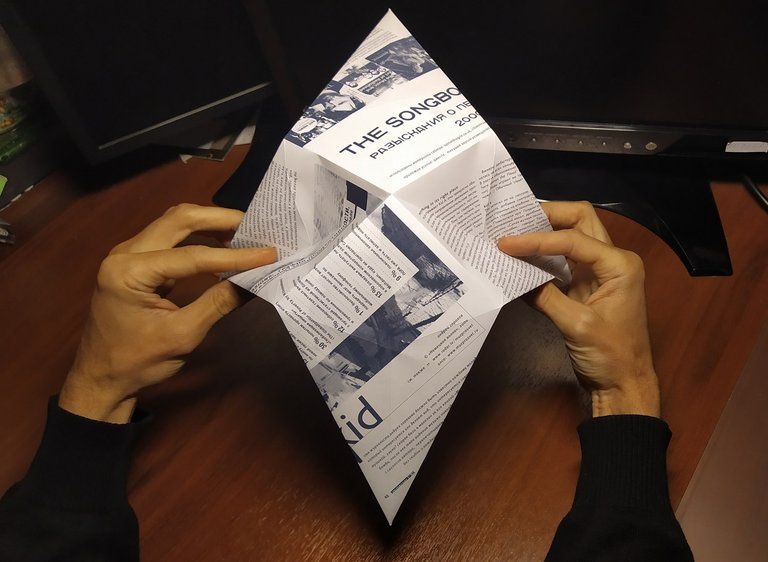
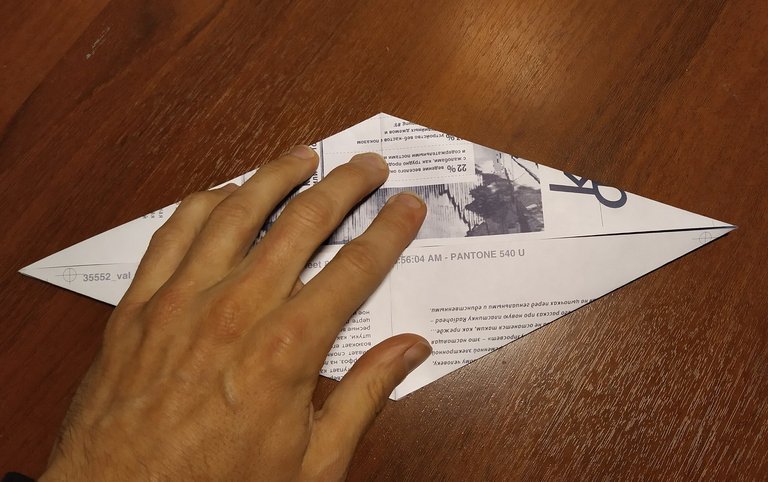
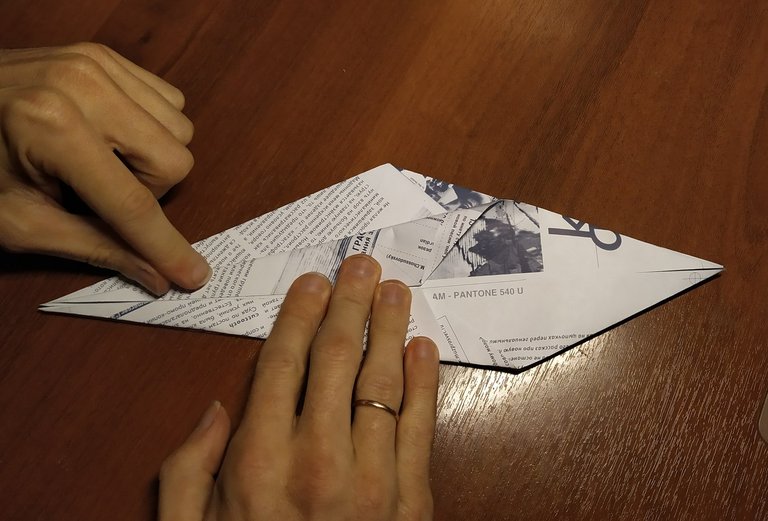
Step 4. We got this shape.
Raise and bend two elements by 180 degrees, those will become the wings. (The two elements that remain below are the future neck and tail).
// Подними и загни на 180 градусов два будущих крыла. (Два элемента, которые остались внизу - будущие шея и хвост).

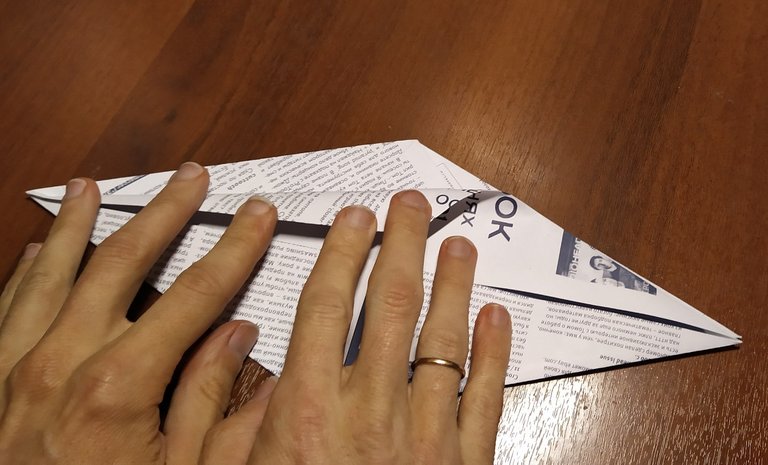
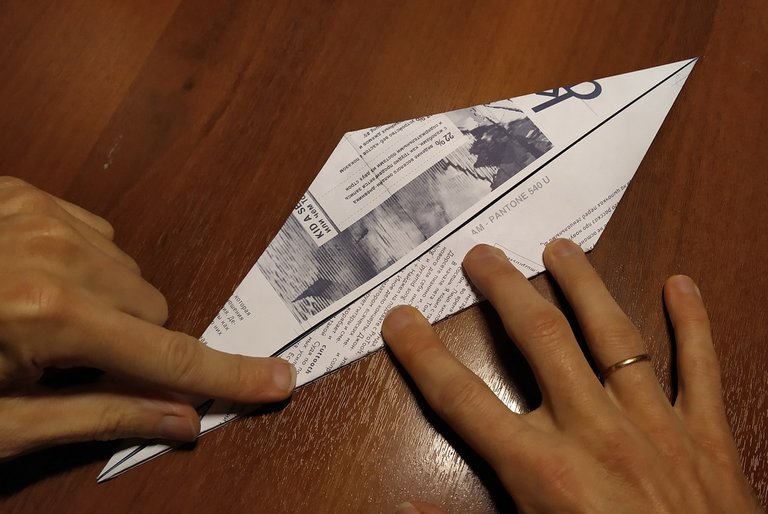
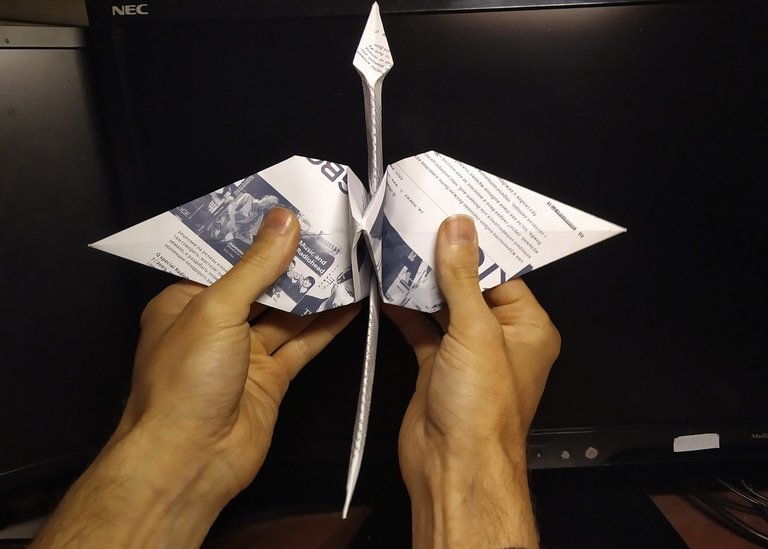
Step 5.
Place the billett on the table, smooth the folds neatly and firmly. (At the foto , head and tail are on the left, wings elements are on the right).
// Положи заготовку на стол, аккуратно и сильно разгладь сгибы. (Слева - голова и хвост, справа - крылья)
Bend the billet four times as at the photo below. This is an important step. Your crane figurine will have a beautiful, accurate head and tail -- depending on how neatly you will make these four folds.
// Четыре раза загибаем заготовку так, как показано на фото ниже. Это важный шаг. От того, насколько аккуратно вы сделаете эти четыре сгиба, зависит насколько красивые, аккуратные голову и хвост будет иметь ваш журавлик.

Step 6. Bend the head and the tail in different directions to the angle greater than 90 degrees ... you will understand yourself empirically, by trying, what angle these elements need.
At this step, you should get this shape.
// На этом шаге, должна получиться такая заготовка.
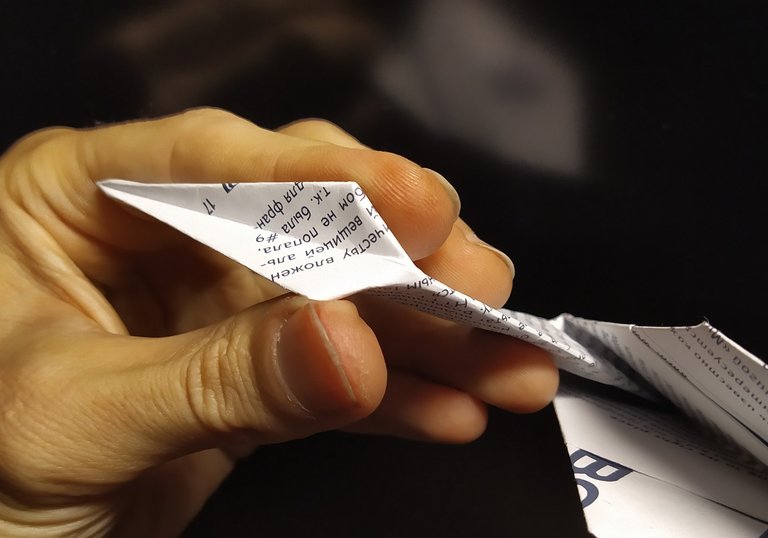
Step 7 is easy as a pie!
Fold crane's head. Press firmly and strengthen the final folds for the head and tail elements. At the photo below, I just gently outlined the shape of the future head, the fold is not final.
// Делайте журавлю голову. Крепко проминайте, разглаживайте, укрепляйте получившиеся сгибы головы и хвоста. На фото ниже, я лишь мягко наметил форму будущей головы, это неокончательный сгиб.
Now your figurine has a little hole, it will be used at next step 'to inflate' the body. Yes, inflating it up with your mouth would really help to shape it.
I made final fold for the head.

I strengthen the fold for the tail.
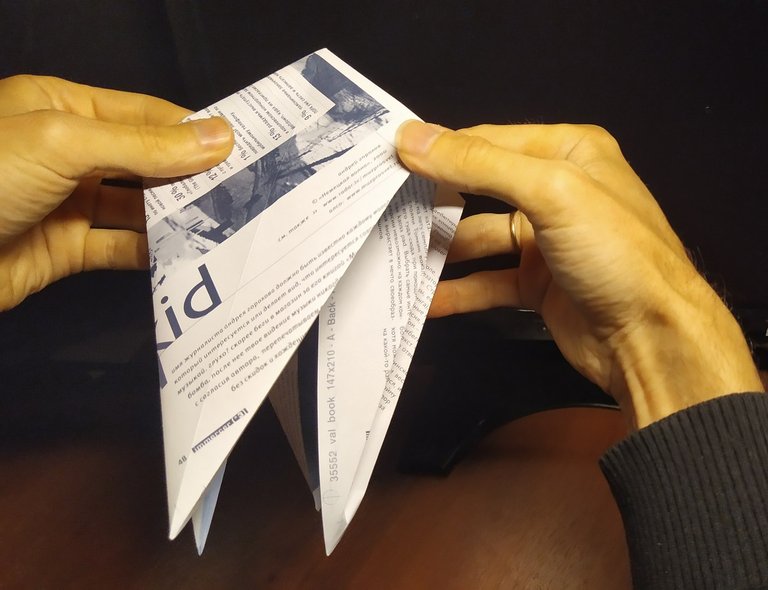
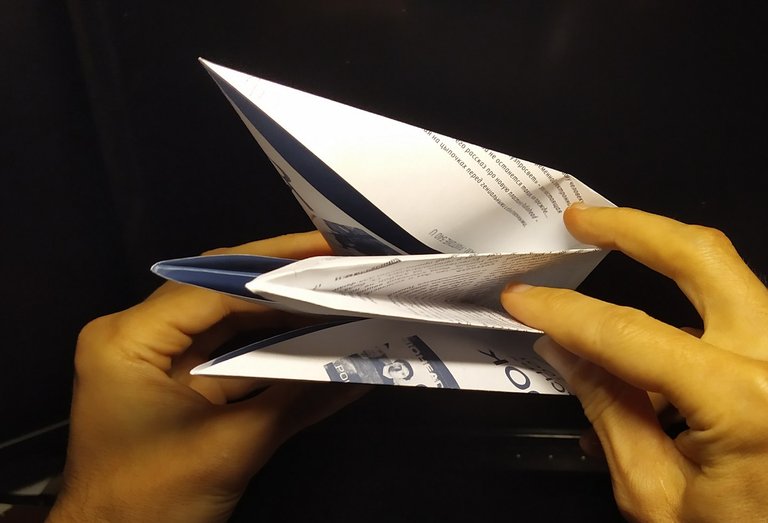
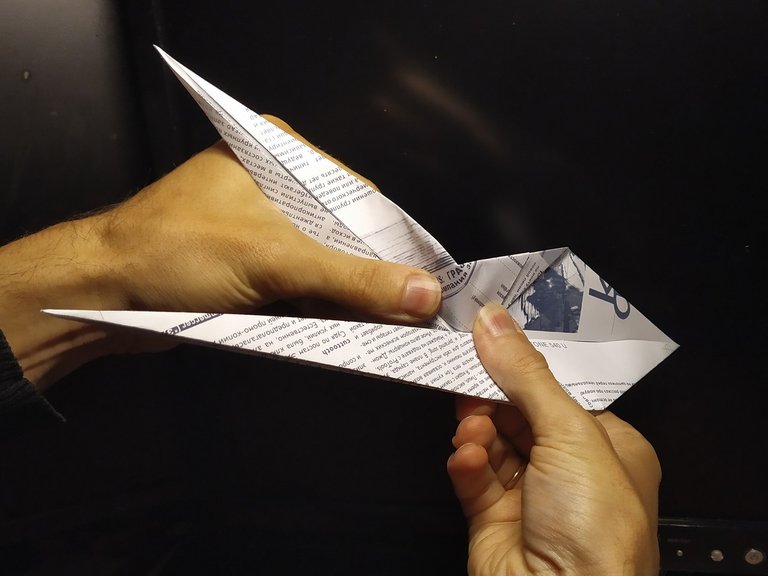
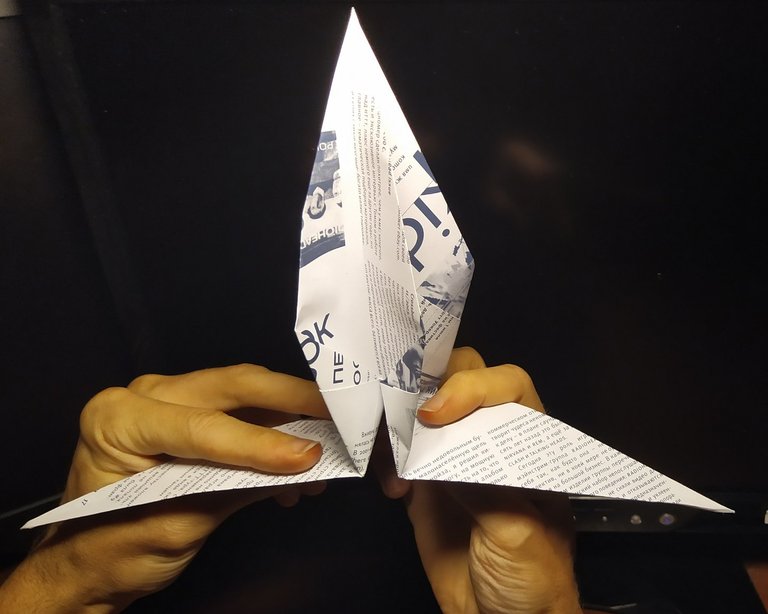
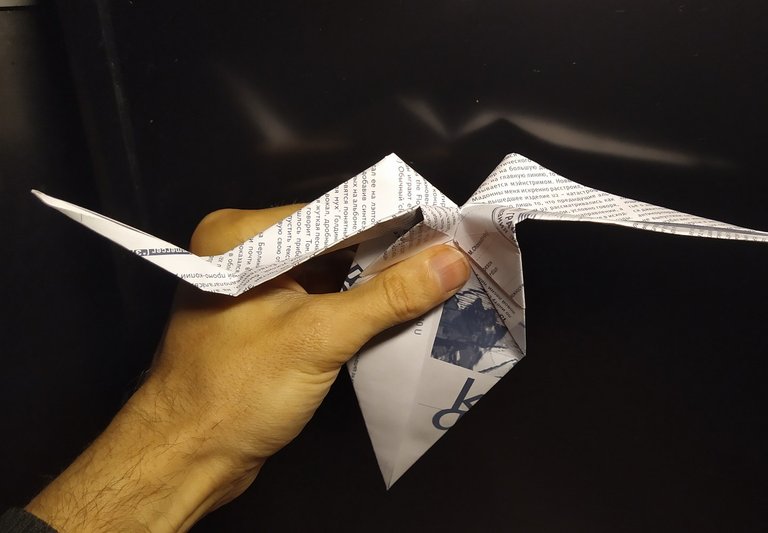
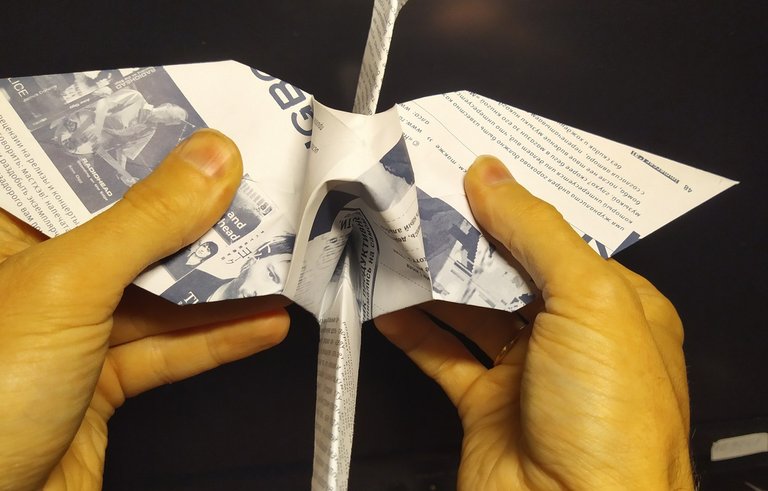
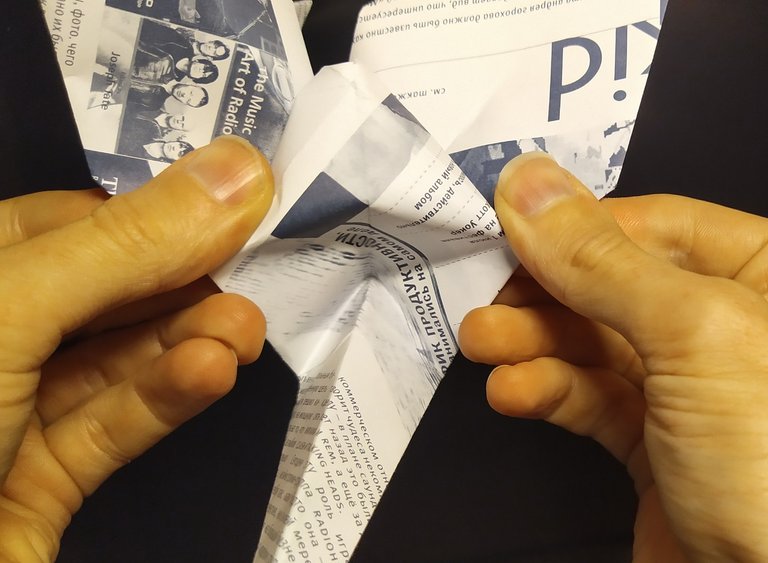
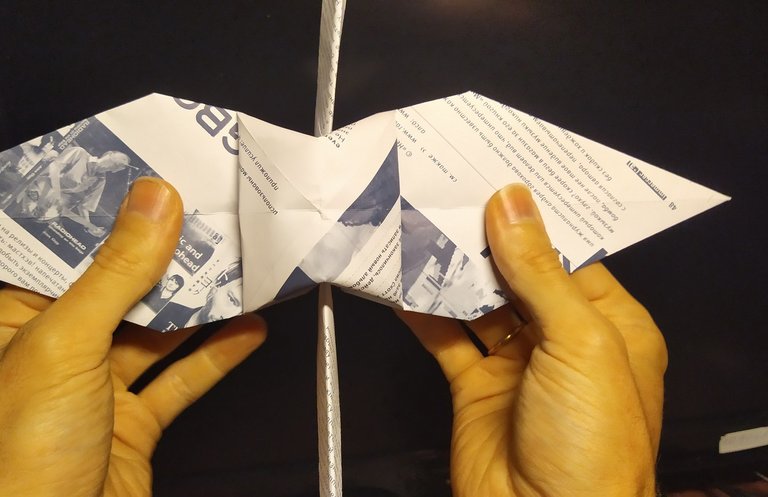
Step 8 can be a bit tricky if you do it for the 1st time, but actually, there is nothing difficult with it.

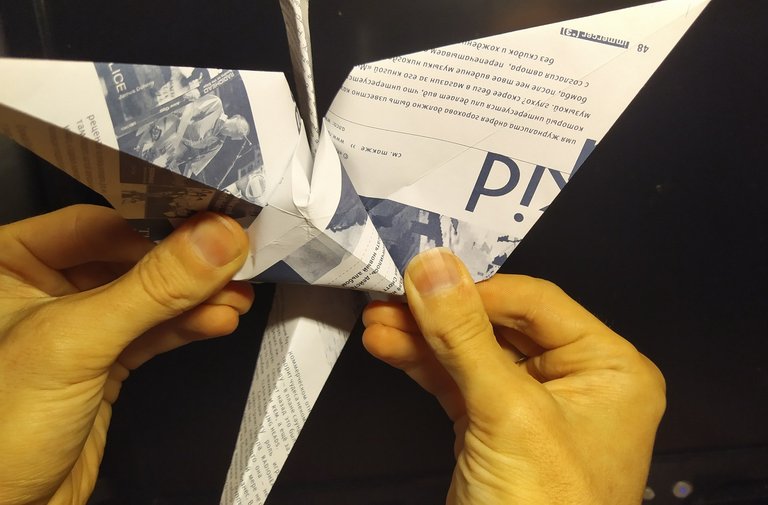
Crane's body is empty inside. To give it the desired shape, you need to spread the wings (pull the wings to the left and right, as in the photo above), put on the body with air through the hole, and press the folds with your fingers as in the photo below.
// Тело журавлика пустое. Чтобы придать ему нужную форму, нужно расправить крылья (тянем крылья влево и вправо, как на фото выше), надеваем тело воздухом через дырочку, и проминаем пальцами складки как на фото ниже.
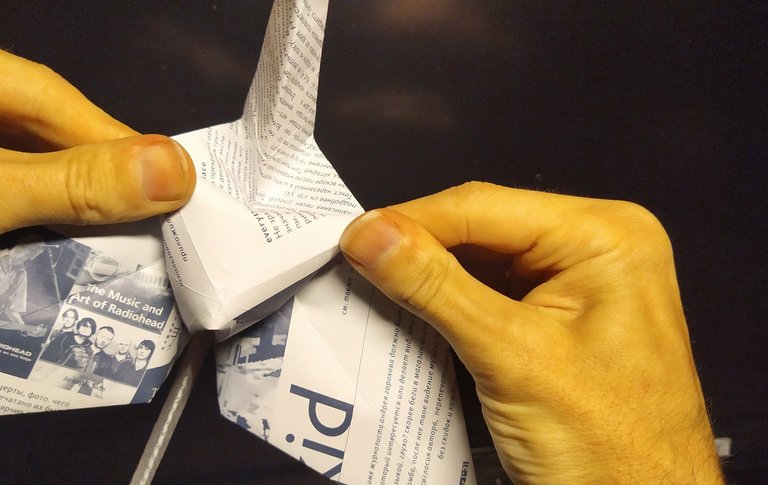
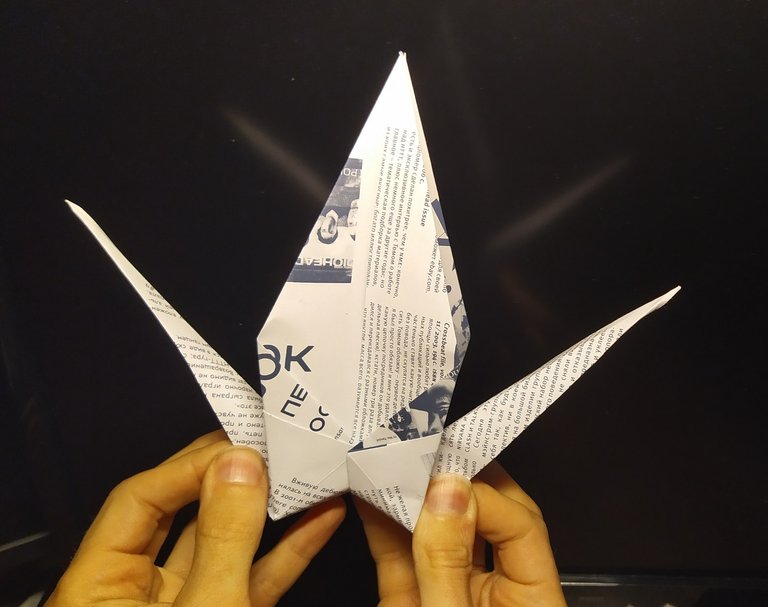
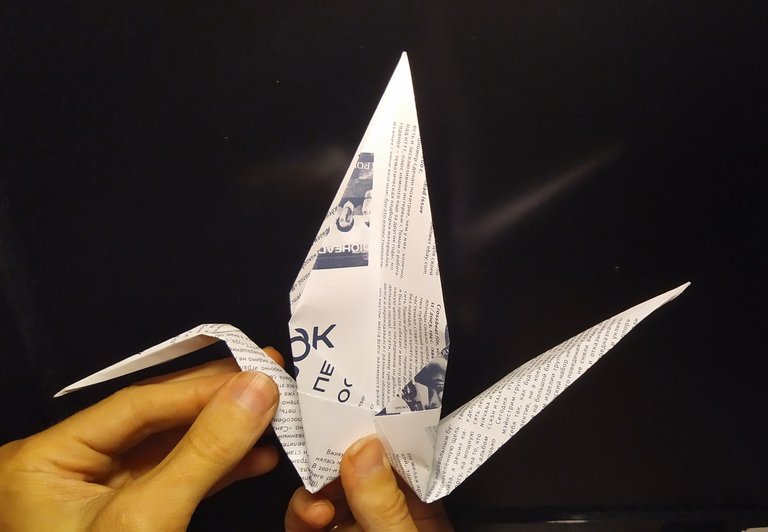
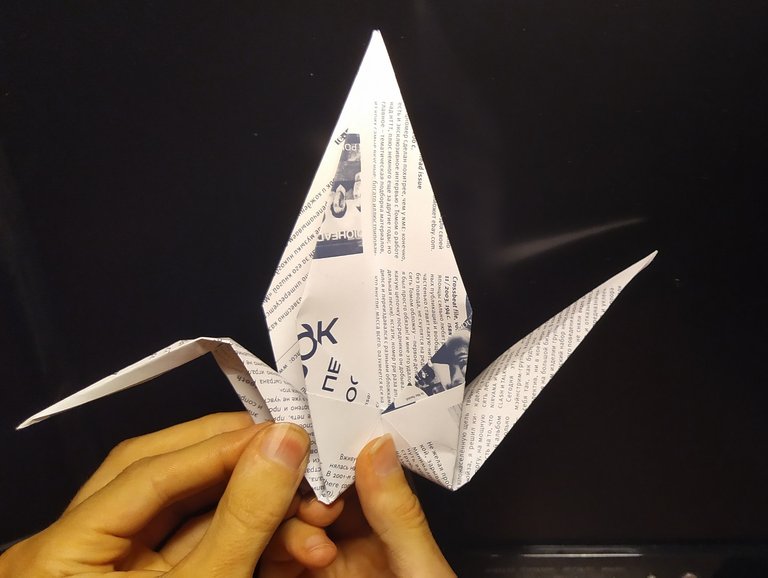
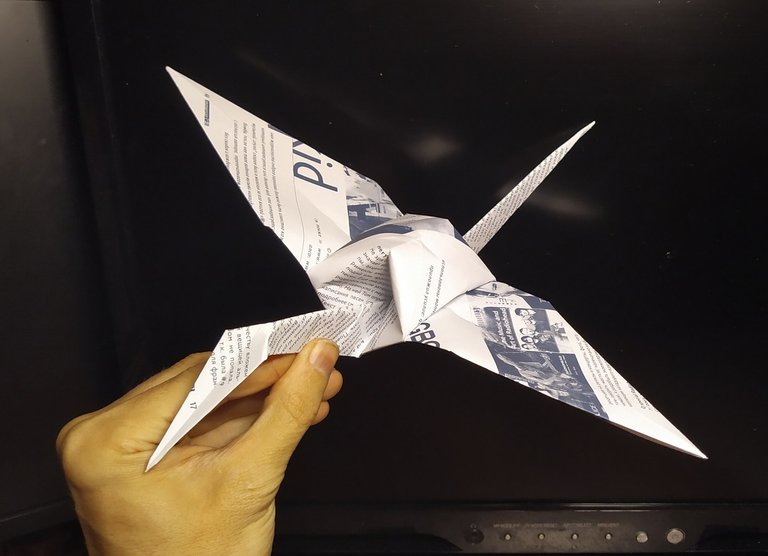
This is what you have to get finally. Voyla! We have finished.
// Вуаля! Вотчто должно получиться на выходе. Осталось только сфотографировать результат, и радоваться!

I hope you enjoyed this little guide. Sorry for the picture's quality -- had to capture this with smartphone, instead of camera as always. If you have any questions, ask away! And I'd be more than happy if you make your own Japanese Crane, at least once.. or better twice. See, this is not a useless time-killing as one may think. It is actually a meditation. That cleans your thoughts and gives you a better mood. Simple as that!
Congratulations @qwerrie! You have completed the following achievement on the Hive blockchain and have been rewarded with new badge(s) :
You can view your badges on your board and compare yourself to others in the Ranking
If you no longer want to receive notifications, reply to this comment with the word
STOPthis is great work! congratulations my dear friend
thank you. but the photos are 3rd grade, hehe. I still have to build a set up for making good guide videos, probably that would be better then a pile of bad photos.
but the crane itself is beautiful thingie, I cannot but agree with you!
таки...видео в студию! ))
хорошее занятие для нервной системы и моторики, но воспроизвести по фото...ммм . Сложновасто будет)
Curated for #naturalmedicine by @drrune.
I find this so beautiful! I'm also profoundly interested in Origami, although I don't practice it much. Thank you for the detailed explanation and the great pictures! I'll try and reproduce this as soon as I get the chance!
We encourage content about health & wellness - body, mind, soul and earth. We are an inclusive community with two basic rules: Proof of Heart (kindness prevails) & Proof of Brain (original content). Read more here.
Our website also rewards with its own Lotus token & we'd love you to join our community in Discord. Delegate to @naturalmedicine & be supported with upvotes, reblog, tips, writing inspiration challenges for a chance to win HIVE and more. Click here to join the #naturalmedicine curation trail!
We also encourage you to follow our sister accounts, @lotusshares and @uplotus for announcements and rebogs.
@drrune, its a pleasure to hear for me!
do try, I would be very intrested to see if this guide worked well, or there are moments that left "uncovered" and you cant go further.
I am not learning Origami and not practicing it (alas), but this certain figure, is a 'remnant from my past', I create quite often. it is an extremely noble and pleasurable meditation for a mind, believe me. I wish you well. if there will be questions, please feel free to ask!
once again, thank you. its a pure a pleasure to receive such a warm feedback.