Limpieza al Flotador de Gasolina [Esp-Eng] Fuel Gauge Cleaning

Versión Español
Limpieza al Flotador de Gasolina
Hola amigos de HIVE, ¿Alguna vez han tenido una falla en su carro, la cual es que el indicador del nivel de gasolina no les funciona?, ¿o en ocasiones el indicador de gasolina les muestra una lectura equivocada? ¿El nivel de gasolina reflejado no es el correcto?, pues si es así, en esta publicación les guiare para solucionar estas fallas.
El indicador del nivel de gasolina se encuentra ubicado en el tablero de los carros, con mucha visibilidad, este es de gran ayuda e importancia, ya que este nos sirve de guía para saber cuanto nos queda en el tanque de combustible y así evitar quedarnos varados en la carretera.
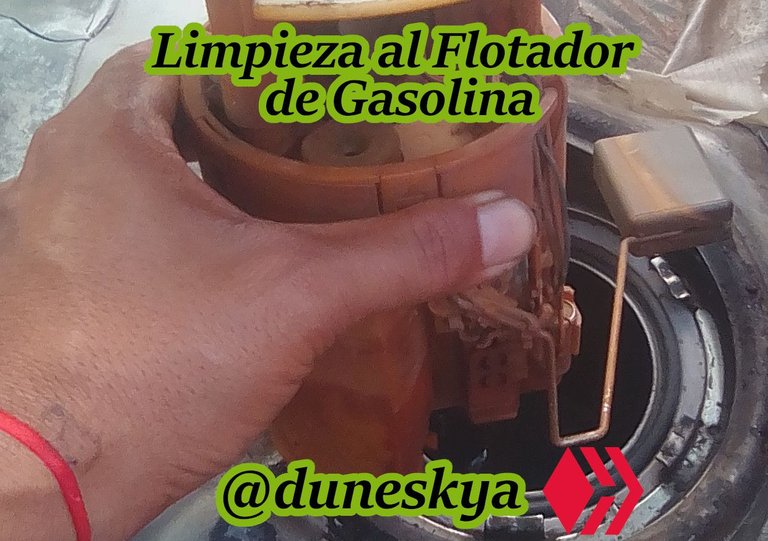
Como les indique anteriormente, les guiare para solucionar las fallas más comunes que suelen presentarse con la lectura del nivel de gasolina, en esta ocasión mi esposo logró resolver dichas fallas realizando una limpieza y ajuste al flotador que posee la capsula contenedora de la bomba de gasolina, esta capsula se encuentra sumergida en el tanque de gasolina, y a través del flotador se emite la señal al indicador que esta en el tablero del carro.
Los materiales utilizados fueron los siguientes:
- 01 Destornillador Plano.
- 01 Martillo
- 01 trozo de tela de algodón (usado)
- 01 Pinza
Para realizar la limpieza y ajuste en el flotador de gasolina, previamente se desconecto el cable positivo que está en la batería del carro, para trabajar con mayor seguridad y evitar un posible cortocircuito.
Pasos empleados en la limpieza del flotador de gasolina:
01.Se retira el haciendo trasero, para así tener acceso al área donde se encuentra la capsula que contiene la bomba de gasolina y a su vez el flotador.
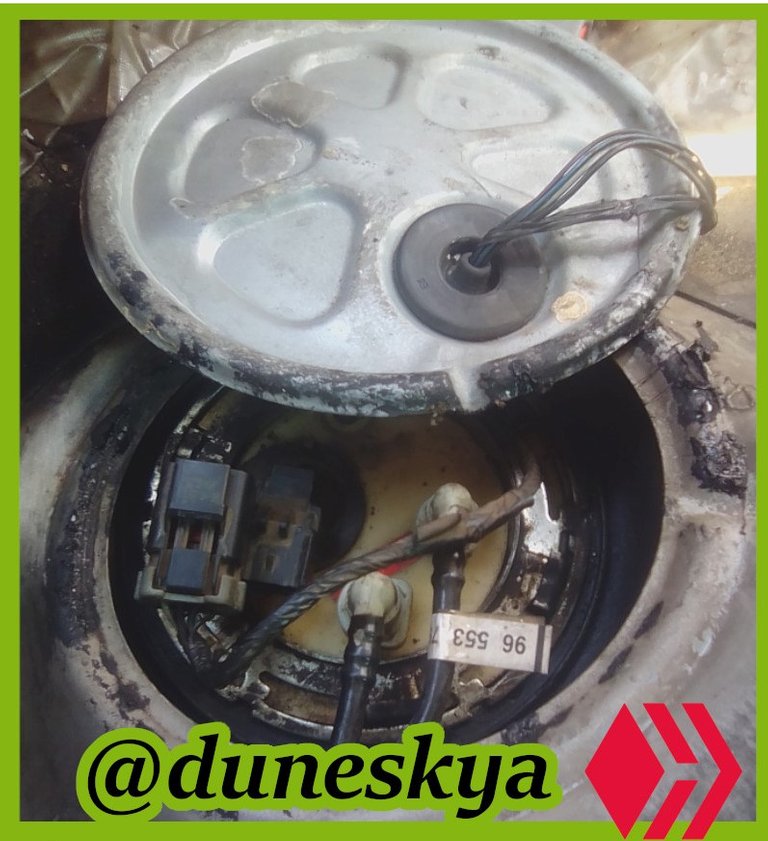
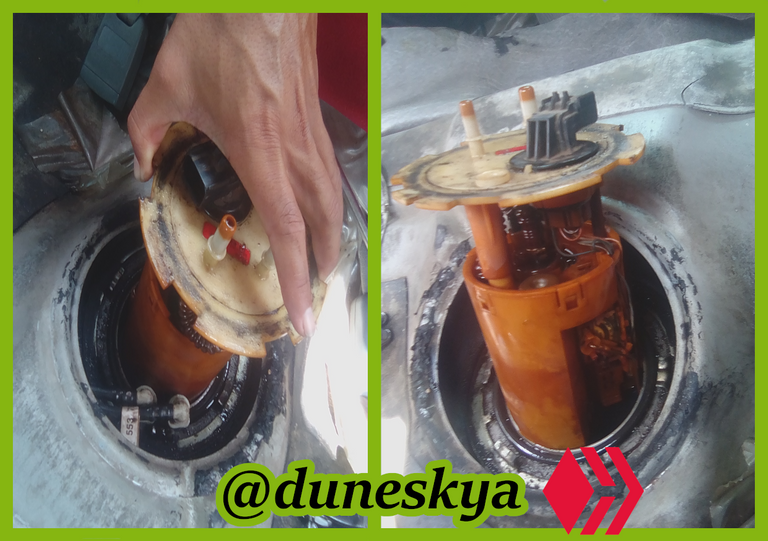
02.Con el martillo y el destornillador plano se afloja una grampa en forma de circulo que se encuentra en la parte superior de la capsula, y hace la función de sujetarla, logrando mantenerla sumergida en el tanque de gasolina.
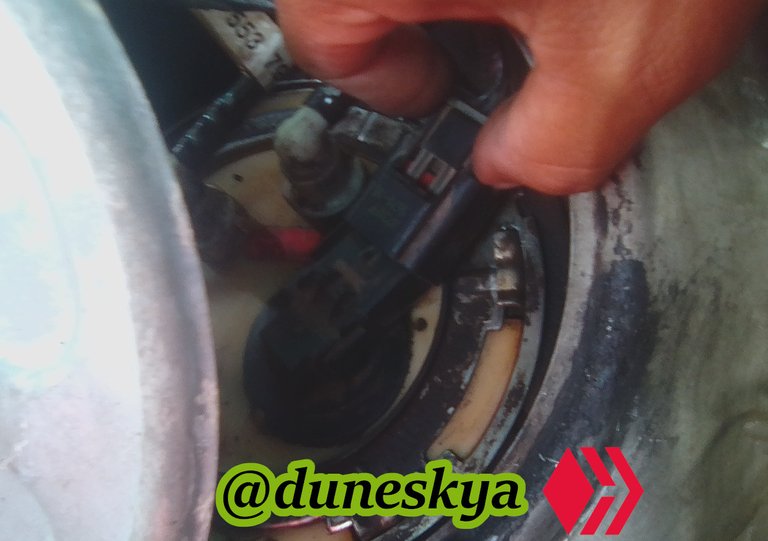
03.Utilizando nuestras manos, y con mucho cuidado se desconecta el enchufe que tiene la capsula, este es el que permite la entrada de corriente a la bomba de gasolina, así como también suministra energía al flotador.
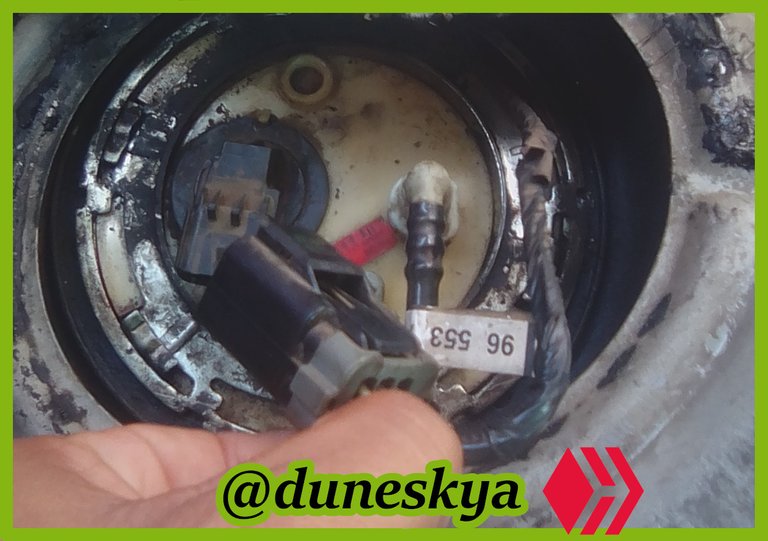
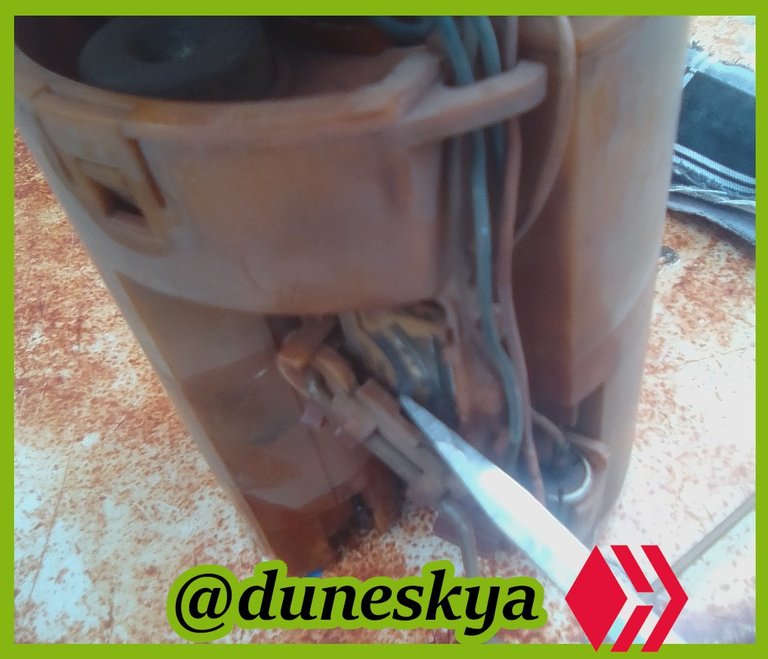
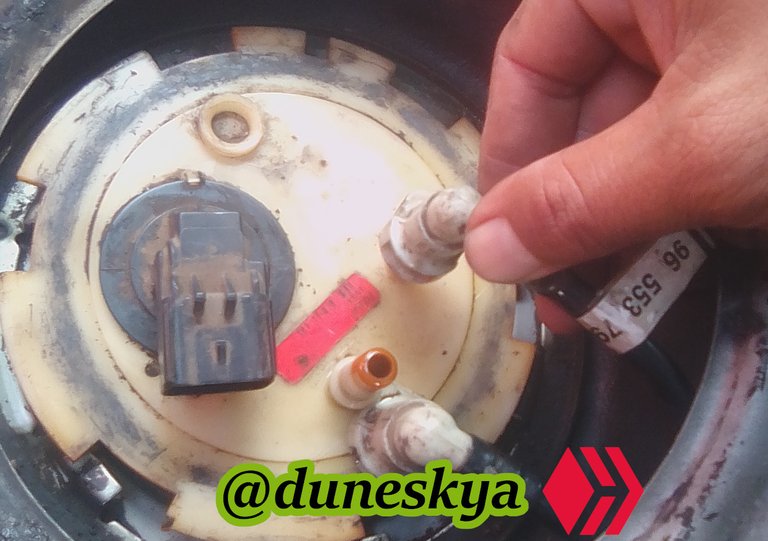
04.Haciendo uso de la pinza se extraen los clics de seguridad que poseen los conectores de las mangueras encargadas de inyectar gasolina hacía el motor, como consejo les puedo decir que marquen la posición de cada manguera antes de retirarlas, ya que son dos, para así evitar equivocarnos cuando toque conectarlas nuevamente.
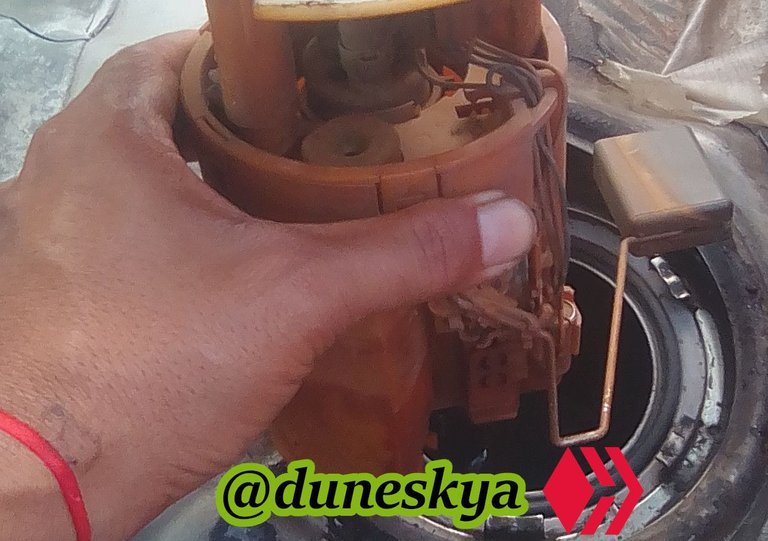
05.Con mucho cuidado extraemos la capsula, la levantamos poco a poco para que vaya escurriendo el combustible que le queda depositado.
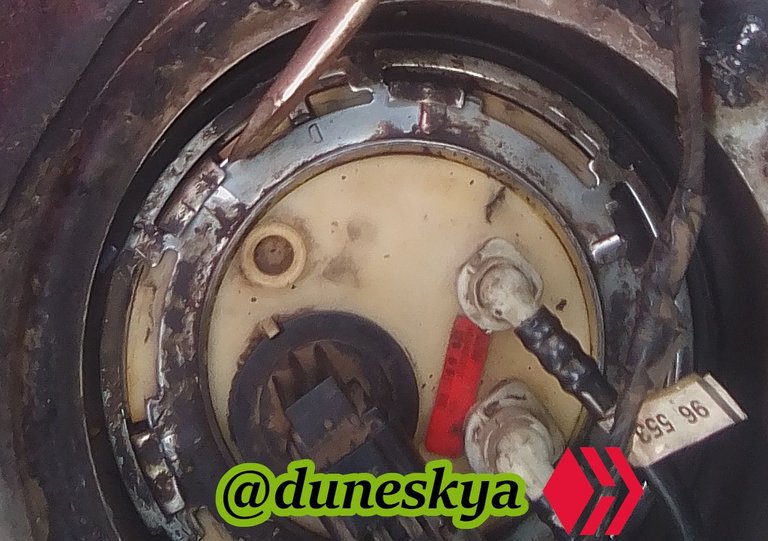
06.Ubicamos el flotador en la capsula, este se encuentra en los laterales, allí se evidenciará el lector que posee la capsula el cual de forma sincronizada trabaja en conjunto con el flotador para emitir la señal de nivel de gasolina al indicador del tablero.
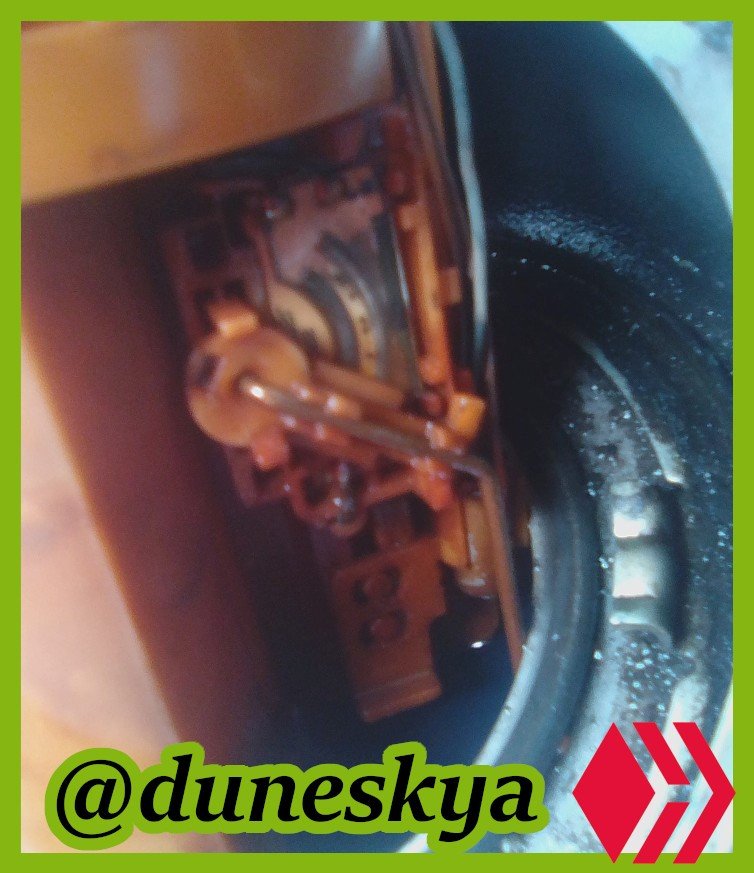
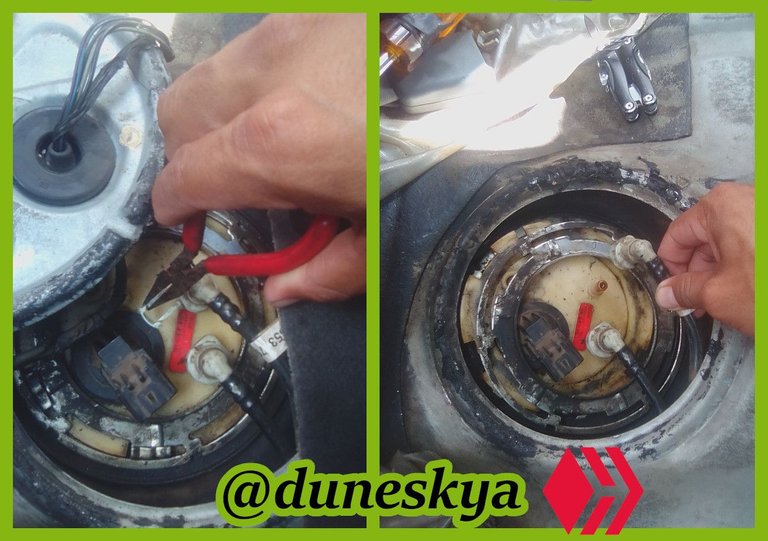
07.Usando el trozo de tela de algodón, aplicamos fuerza con este y lo pasamos por el lector que tiene la capsula, de esta manera limpiaremos los contactos que tiene tanto el lector como el flotador.
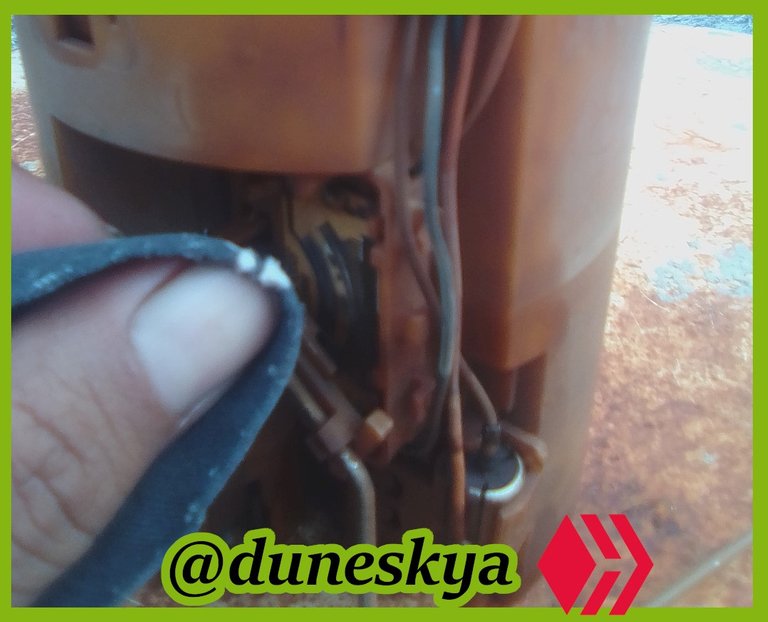
08.Con el destornillador plano, le damos un poco de abertura a la lamina que tiene el flotador para que así tenga más proximidad hacia el lector y tenga mejor contacto, para dar la lectura correcta.
09.Con el trapo y el destornillador plano, limpiamos el eje que permite el movimiento del flotador, de esa manera nos aseguramos que este puede subir y bajar de acuerdo a la cantidad de combustible que posee el tanque.
10.Introducimos nuevamente en el tanque de combustible la capsula contenedora de la bomba de gasolina y del flotador, esto lo hacemos con cuidado evitando golpe algunos de los componentes.
11.Utilizando martillo y destornillador plano, apretamos nuevamente la grampa circular, para así lograr que la capsula quede fija y sumergida en el tanque de combustible.
12.Conectamos nuevamente cada manguera, recordando la posición de cada una, así mismo se le coloca el clic de seguridad a cada conector que poseen las mangueras.
13.Nuevamente conectamos el enchufe encargado de suministrar energía a la capsula contenedora de la bomba de gasolina y el flotador.
14.Se conecta el cable positivo en la batería del carro.
Con este fácil proceso se logro tener otra vez una lectura correcta en el indicador de nivel combustible, lo que me sirve para poder transitar de forma despreocupada, sabiendo la cantidad exacta de gasolina que posee el carro y así poder disponer de la manera adecuada.
Esperando que sea de mucho aporte para todos ustedes, y les permita corregir estas distintas fallas en el indicador de nivel de gasolina, me despido hasta una nueva publicación.
Fotos de mi propiedad, modificadas con el editor de imágenes GIMP.

English Version
Fuel Gauge Cleaning
Hello friends of HIVE, Have you ever had a failure in your car, which is that the fuel level indicator does not work, or sometimes the fuel gauge shows a wrong reading? The fuel level reflected is not the correct one, well if so, in this publication I will guide you to solve these failures.
The gas level indicator is located on the dashboard of the cars, with high visibility, this is of great help and importance, as this serves as a guide to know how much we have left in the fuel tank and thus avoid getting stranded on the road.
As I indicated previously, I will guide you to solve the most common failures that usually occur with the reading of the gasoline level, this time my husband managed to solve these failures by cleaning and adjusting the float that has the capsule containing the fuel pump, this capsule is submerged in the gas tank, and through the float the signal is emitted to the indicator that is on the dashboard of the car.
The materials used were the following:** ** 01 Flat Screwdriver
- 01 Flat Screwdriver.
- 01 Hammer
- 01 piece of cotton fabric (used).
- 01 Tweezers
To make the cleaning and adjustment in the gasoline float, previously the positive cable that is in the battery of the car was disconnected, to work with greater security and to avoid a possible short circuit.
Steps used in the cleaning of the gasoline float:** ** 01.
01.The rear part is removed, in order to have access to the area where the capsule containing the fuel pump and the float is located.
02.With the hammer and the flat screwdriver loosen a clamp in the form of circle that is in the superior part of the capsule, and makes the function to hold it, managing to maintain it submerged in the gasoline tank.
03.Using our hands, and very carefully disconnect the plug that has the capsule, this is the one that allows the entry of current to the gasoline pump, as well as it also supplies energy to the float.
04.Making use of the clamp the security clicks that have the connectors of the hoses in charge of injecting gasoline to the motor are extracted, as advice I can tell you that mark the position of each hose before retiring them, since there are two, in order to avoid to make a mistake when it touches to connect them again.
05.With great care we extract the capsule, we raise it little by little so that it goes draining the fuel that remains deposited.
06.We locate the float in the capsule, this is located on the sides, there will be evident the reader that has the capsule which synchronously works in conjunction with the float to issue the fuel level signal to the dashboard indicator.
07.Using the piece of cotton cloth, we apply force with this and we pass it through the reader that has the capsule, in this way we will clean the contacts that has both the reader and the float.
08.With the flat screwdriver, we give a little opening to the sheet that has the float so that it has more proximity to the reader and has better contact, to give the correct reading.
09.With the rag and the flat screwdriver, we clean the axis that allows the movement of the float, this way we make sure that this can go up and down according to the amount of fuel that has the tank.
10.We introduce again in the fuel tank the capsule containing the fuel pump and the float, this we do it carefully avoiding to hit some of the components.
11.Using hammer and flat screwdriver, we tighten again the circular clamp, so that the capsule is fixed and submerged in the fuel tank.
12.We connect again each hose, remembering the position of each one, likewise the security click is placed to each connector that the hoses have.
13.Again we connect the plug in charge of supplying energy to the capsule containing the gasoline pump and the float.
14.The positive cable is connected to the car battery.
With this easy process I managed to have again a correct reading in the fuel level indicator, which serves me to be able to travel in a carefree way, knowing the exact amount of gasoline that has the car and thus to be able to dispose of the suitable way.
Hoping that it will be of much contribution for all of you, and will allow you to correct these different faults in the fuel level indicator, I say goodbye until a new publication.
Photos of my property, modified with the image editor GIMP.
Translated with www.DeepL.com/Translator (free version)
Excelente!!! Parece algo complicado pero es algo que podemos hacer en casa, felicitaciones.
Es algo que se ha convertido en el día a día de los venezolanos, nos estamos haciendo expertos en mecánica 😅
hola que bien detallas el paso a paso así cualquiera puede aprender a hacerlo, yo particularmente lo limpio con una goma de borrar de lápiz y me funciona bien y si esta muy sucio le agrego un poco de limpia hornos y queda como nuevo
Congratulations @duneskya! You have completed the following achievement on the Hive blockchain and have been rewarded with new badge(s) :
Your next target is to reach 1500 upvotes.
You can view your badges on your board and compare yourself to others in the Ranking
If you no longer want to receive notifications, reply to this comment with the word
STOPCheck out the last post from @hivebuzz:
Support the HiveBuzz project. Vote for our proposal!
Muy buen trabajo, siempre hay que tener cuidado con este tipo de reparaciones con los componentes eléctricos, ya que se esta manipulando gasolina. siempre esta falla es causada por la mala calidad de la gasolina.
Muy buen trabajo, siempre hay que tener cuidado con este tipo de reparaciones con los componentes eléctricos, ya que se esta manipulando gasolina. siempre esta falla es causada por la mala calidad de la gasolina.