Building a guitar body, part 5
Hello, and welcome to my page!
It's been about a week and a half since my last post about this project. You can read that post at this link.
https://steemit.com/guitar/@amberyooper/building-a-guitar-body-part-4
I had the time to get a bit more work done on the body over the weekend, so I decided to route out the pocket for the pickup, and figure out where to put the jack for the guitar cord for plugging it into an amplifier. the first thing I worked on was getting the pickup pocket cut out with the router.
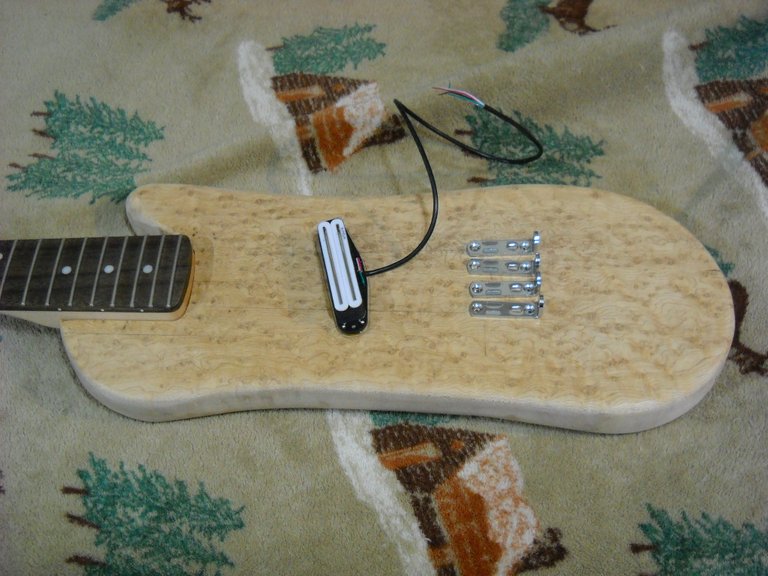
I started by tracing around the base of the pickup onto the wood while it was sitting where I wanted the pickup to be mounted. I decided to put the pickup about half way between the end of the neck and the bridge.
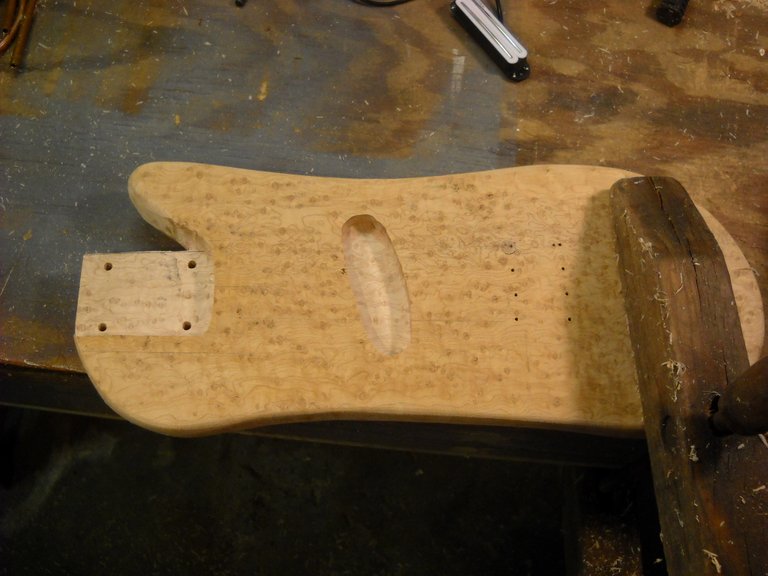
Once I had the position set and the hole marked, I drilled a hole in the middle of the area of the hole for starting the router bit. I had to drill a 3/4s inch hole because the router bit is a 1/2 inch diameter bit. I started out by routing out the pocket 1/2 inch deep, but after test fitting the pickup, I decided to make the pocket a bit deeper to allow for a bit more height adjustment of the pickup. I had to route out the pocket freehand, I don't have a template for the pocket, or the proper router bit to use with a template. The edges of the pocket aren't quite as smooth as they would be with a template, but they came out pretty well.
The pickup fit in the pocket nicely.
The next thing I did was to decide where to put the plate for the jack that the guitar cord plugs into. The position of the jack was determined by the need to drill a small hole through the body from the pickup pocket to the jack position. That's the easiest way to route the pickup wire back to the jack. It was either drill a hole through the body with a long drill, or cut a slot in the face of the guitar to run the wires through, and then I would need a pickguard to cover the slot, which would also cover up a lot of the face of the body. I want to be able to see as much of the birdseye figure as I can.
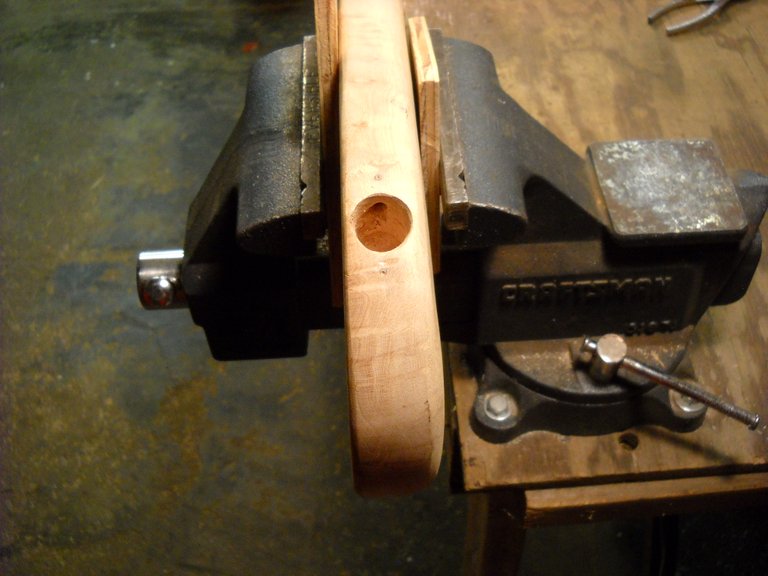
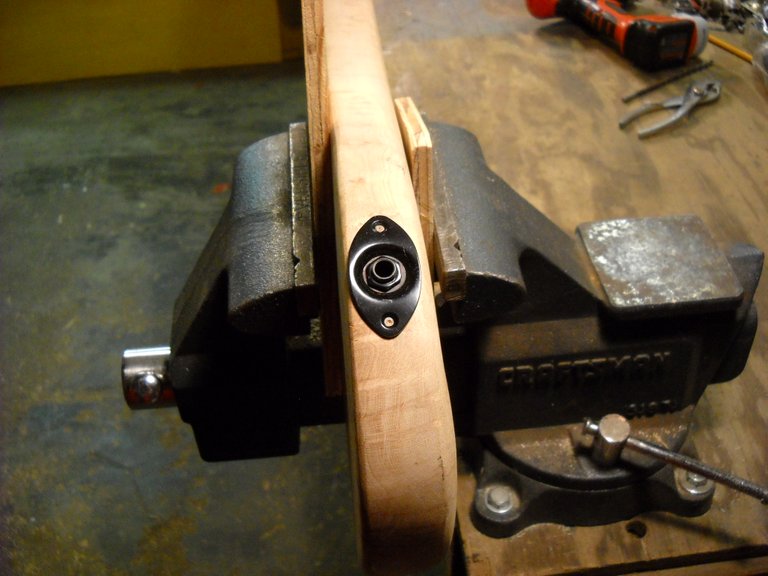
I started drilling the hole for the pickup wires and discovered that my longest drill bit wasn't long enough to get all the way through the body. Since I already had that hole started, I drilled the large hole into the edge at that spot for the jack to fit into. You can see the small hole going off at an angle from the large hole for the jack.
This is how the jack plate will fit once I get the wiring done.
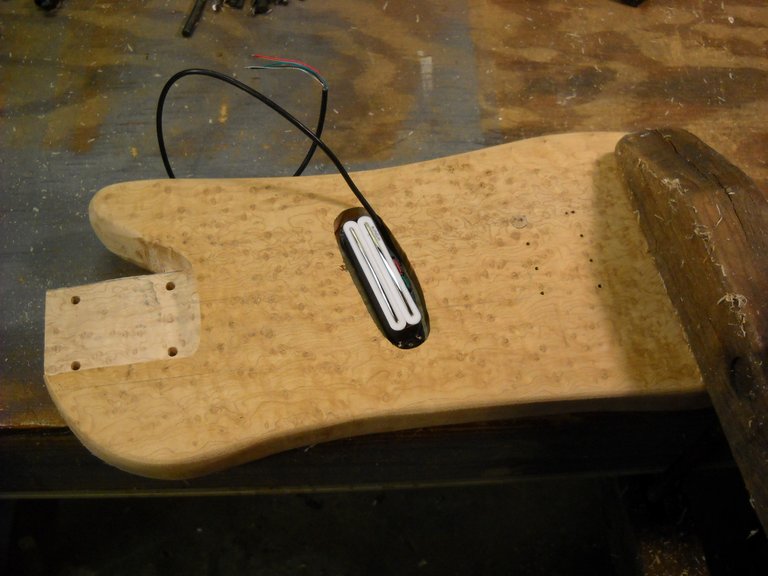
I went to the hardware store yesterday and bought a long drill to finish the hole for the pickup wires. I got a 3/16s inch drill bit that is 12 inches long. That was long enough to finish drilling the hole to the pocket for the pickup. After drilling the hole all the way through, I was able to run the pickup wires through to the hole for the jack. I mounted the pickup in it's pocket to check for proper fit, it seems to have worked out pretty well.

You can see that there's a little chip out of the edge of the pickup pocket. The alignment of the hole was not quite as good as I thought it was when I started drilling, so the hole came out at the top edge of the pocket instead of the bottom where I wanted it. Still, I'm sure it could have been worse, it could have come out of the body before it got to the pocket.
At this point, I'm not sure if I'm going to put a volume control or tone control in the body. There's not much room for them along the lower edge of the body. I'm still trying to decide what to do for that. I also have to finish shaping the body around where the neck attaches. I hope to get more work done on this some time this week.
That's all I have for this project update, thanks for stopping by to check it out!


Hello!
This post has been manually curated, resteemed
and gifted with some virtually delicious cake
from the @helpiecake curation team!
Much love to you from all of us at @helpie!
Keep up the great work!
Manually curated by @torico.
@helpie is a Community Witness.
This post was shared in the Curation Collective Discord community for curators, and upvoted and resteemed by the @c-squared community account after manual review.
@c-squared runs a community witness. Please consider using one of your witness votes on us here
Congratulations @amberyooper! Your post was featured on our daily build newsletter! We set you as a %15 beneficiary of our newsletter rewards.
Keep sharing your awesome DIY and How-to tutorials together with the recommended tags.
Sup Dork?!? Enjoy the Upvote!!! Keep up with the dorky content for more love!!!
Just carve a similar chip on the top to make it symmetrical looking so it looks like it was done on purpose. Daub a bit of turquoise paint into it for flair.
Posted using Partiko Android
I was thinking about making a small "pick guard" to put around the pickup to cover the hole that the pickup sits in. I have some pick guard material to use for that.
What color pickguard? If you had any wood laminate laying around it would be a cool accent to have a stained wood pickguard on the birdseye.
Posted using Partiko Android
The pickguard material that I have is black. It doesn't thrill me much, but it's certainly better than white on this guitar. I have to look in my pile of assorted wood that I have to see if I have any really nice thin hardwood plywood. That might be an interesting way to go with a pickup cover. I would use the same material for the cover plate for the volume and tone controls. I had wanted to use a dual pot with coaxial controls, but I only found one pot like that, and it's a big one, so I'm going to use 2 mini control pots instead. I don't have to make the hole in the body as deep for the mini pots.
Something keeps messing up with the photos but I saw from the first one what the wood looks like and I love it. What kind of wood is it?
The wood is bird's eye maple. It's a really nice piece of wood.