Garden Journal, Tomato Plant update
Hello, hivers! Welcome to da garden, eh!
It's been a couple of weeks since my post about starting my first batch of tomato seeds, so I decided to write an update about the tomato plants.
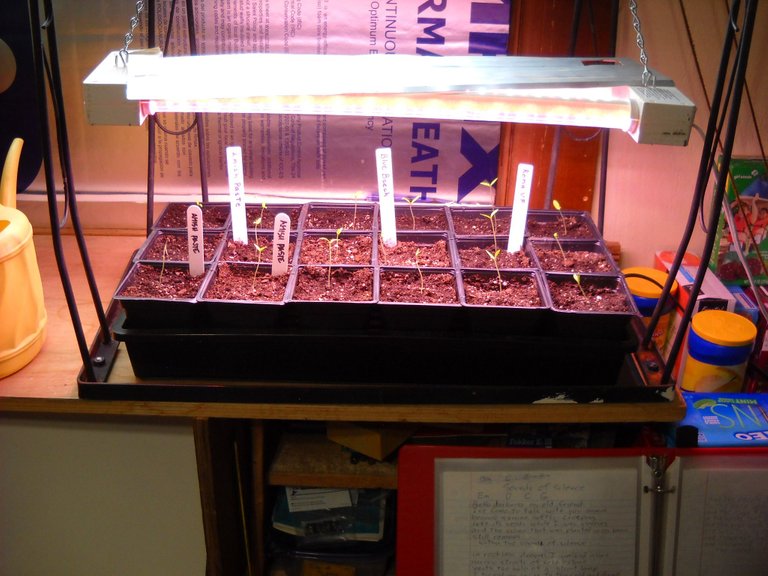
According to my picture files, I started the first batch of tomato plants on the 13th of April. All 18 of the seeds that I planted came up, and all but 2 of them have done well so far. Two of the plants have failed to grow and develop. They're still alive, but they just aren't growing. I took this picture on April 19. The seedling starter light helped a lot with early growth.
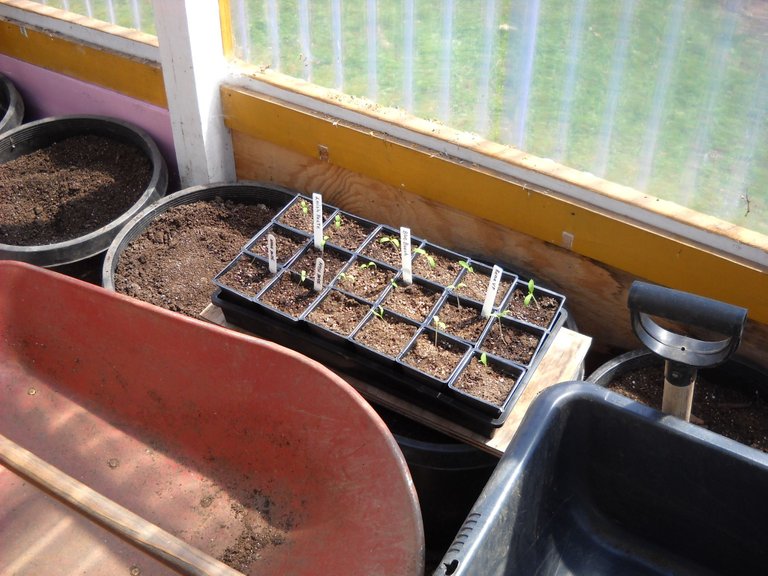
I started carrying the flat of plants out to the greenhouse during the day so they could get natural sunlight. I wasn't able to leave the plants in the greenhouse overnight until the past few days because of the night time temperature. This picture was taken on April 22.
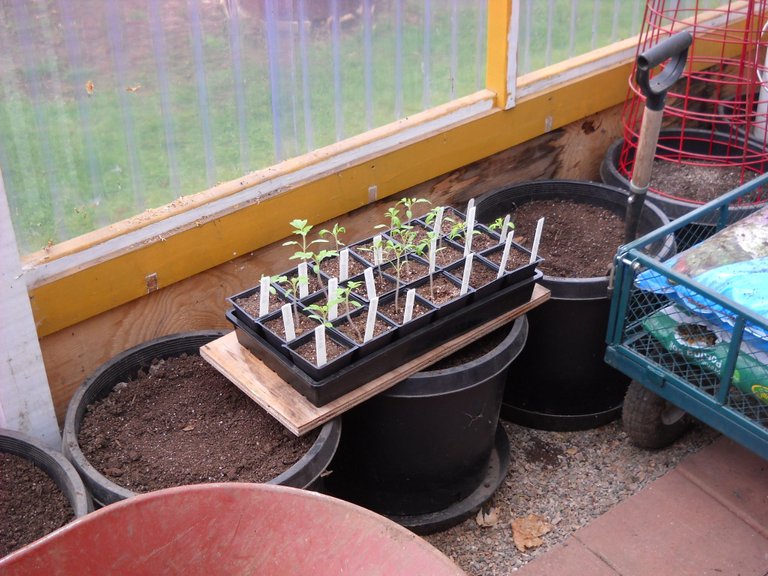
This picture is from April 28.
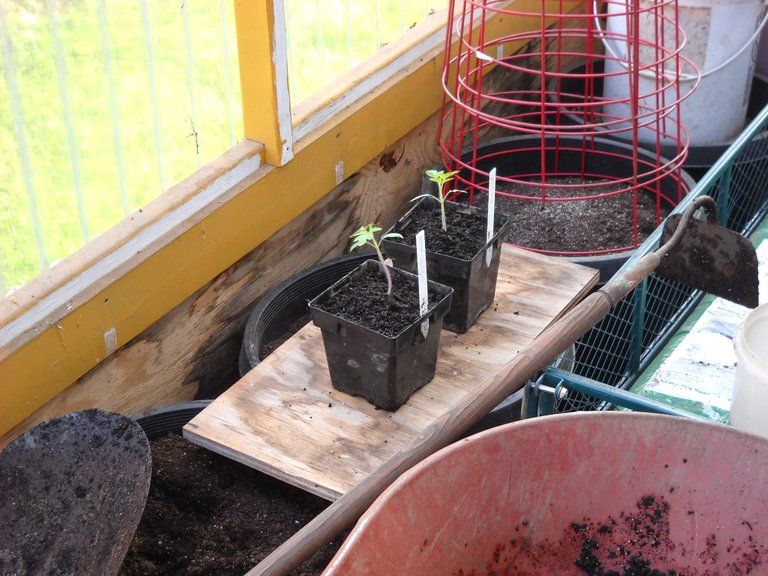
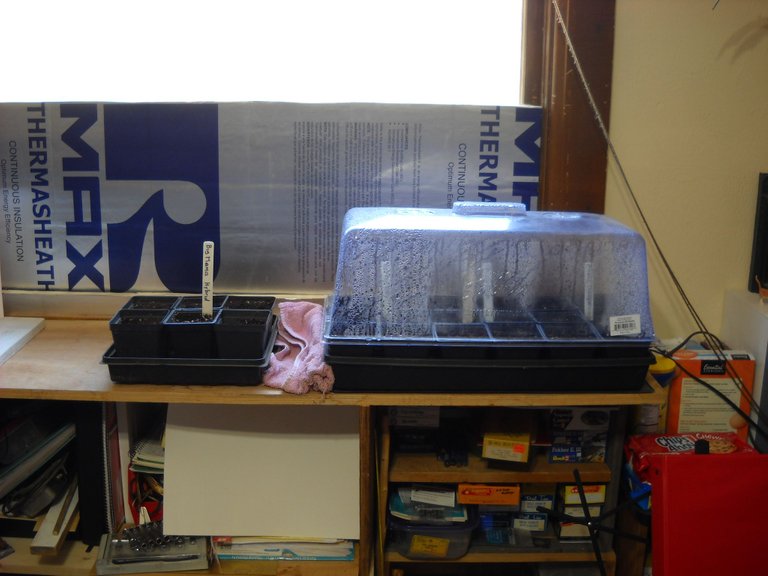
I started my second batch of tomato seeds on April 28. For the second batch, I planted 6 seeds each of 4 different varieties. I can only fit 18 of the little seed starter pots in a standard size flat, so I had to find another container for the extra 6 starter pots. I ended up short 2 pots when filling them with the starting soil, so I decided to transplant the 2 largest plants into bigger pots so I could use those 2 small pots.
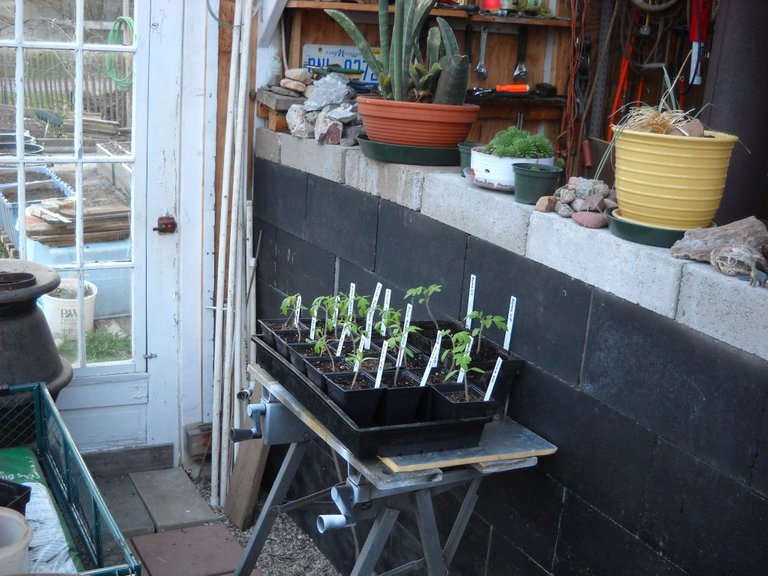
I finally decided to leave the plants out in the greenhouse overnight a few days ago. I put them on a stand next to the heat wall in the greenhouse. The heat wall absorbs heat during the day and gives it off at night, so the plants on or near it stay a bit warmer than they otherwise would.
I have the second batch of seeds in the house on the seed starting heat match. The mat is only big enough to put the standard size flat onto, so the other container of starters doesn't have that heat advantage. The seeds will still sprout, it just takes longer. This picture is from a couple of days ago.
I noticed last night that a few of the seeds were starting to sprout in the second batch of seeds, so today I did a bit of rearranging of the starter pots. 5 of the 6 Black Krim seeds were up, so I took them out of the big flat and swapped them with the 6 starter pots that weren't on the heat mat. Now that the Black Krim seeds have sprouted, they don't need the heat mat. I also put one of my desk lamps over the Black Krim plants to give them more light.
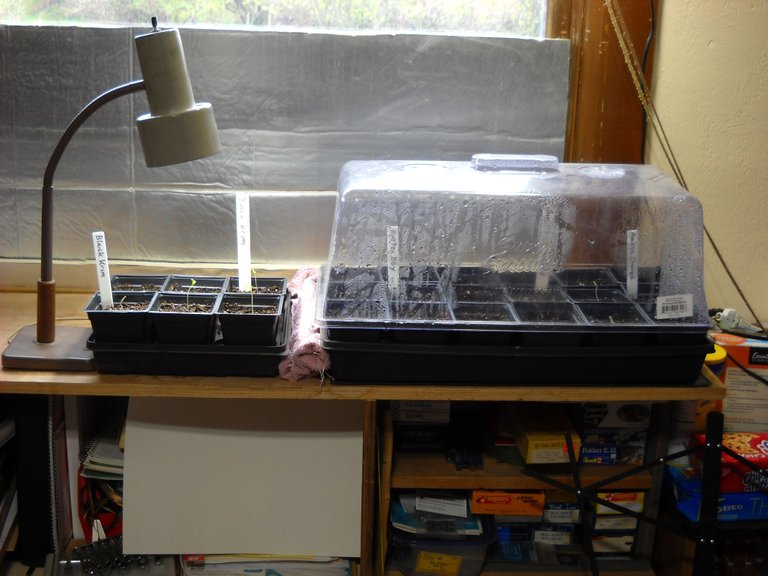
Not the best focus on this picture, but you can sort of see the plants...

Meanwhile, out in the greenhouse, the first batch of tomato plants are continuing to grow.
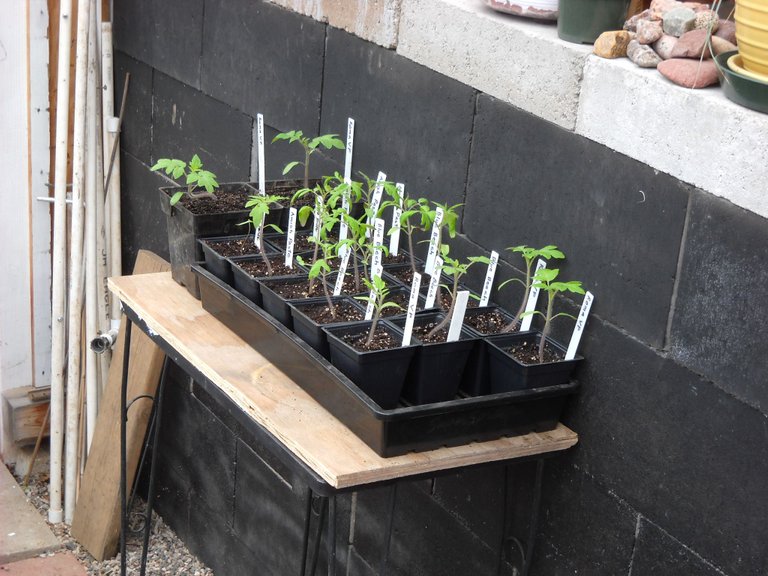
Normally, I move the plants away from the heat wall during the day, but today was overcast and sprinkling rain, so I just left them where they were.
Well, that's all I have for this update, thanks for stopping by to check it out!

Ooh so many tomatoes! And I love your title in your signature. 😀
If I might suggest something, I'd lower the light on the early seedlings. They got rather stretched reaching for it. I don't use LED (Lyme crap) and am aware they have different height requirements. But for the T5 I do use, I start them at 2" above the (much lower) domes and raise them as the plants grow, always keeping the 2".
Glad you could use the greenhouse overnight finally. :))
You can never have too many tomatoes and from the look of things you're going to have a bunch. I like the idea of placing them next the heat wall. The wall looks like it is made from concrete blocks. I would imagine the blocks absorb the heat during the day and let off the heat as the nighttime temps drop. Pretty hot idea. 😁
Some great advice from @goldenoakfarm about keeping the light source 2" from the plant to keep it from stretching out.
One is never to old to learn a few new tricks and up until last year I was also keeping the light source too far from the plants. This year I have the light almost on top of the new seedlings and it has really made a difference.
Happy gardening my friend.
Yeah, I had not thought too much about the distance of the light from the plants, it does make sense.
The heat wall is made from dry stacked concrete blocks. I painted the sun facing side to absorb more heat during the day. Once summer gets here, I cover up the wall with something to keep it from absorbing too much heat. It gets hot in there when the sun is shining. I have to leave both doors open all summer. I really should set up a roof vent to help control the heat in the summer.
Since heat rises, a roof vent may work out great. Besides letting the heat out through the roof, you may be able to close the doors to the greenhouse which may help to control any pests that may enter through the open doors.
I like laying the block dry, it allows you to change the arrangement if need be, plus it's a lot less w--k.
Garden wizard! Love that new footer (maybe it's old and I just noticed it?). Good to see that snow has passed and you have an early start on those tomatoes!
Thanks! That footer was made about 2 years by another person back when we were all still on steem. I just recently started using it.
It's super groovy!
Congratulations @amberyooper! You have completed the following achievement on the Hive blockchain and have been rewarded with new badge(s) :
Your next target is to reach 40000 upvotes.
You can view your badges on your board and compare yourself to others in the Ranking
If you no longer want to receive notifications, reply to this comment with the word
STOPCheck out the last post from @hivebuzz:
Support the HiveBuzz project. Vote for our proposal!