Grow Summer Cilantro: Best Method, Quick Results [Gardening]
In this article I will describe step by step how to grow cilantro with almost 100% germination success. Additionally, this method ensures the sprouts will continue to grow strong into maturity, so you can harvest lots of fresh leaves for weeks.
First, My Experience
Personally, I still consider myself a new gardener. I am learning new things every season.
Let me first describe my past experience with growing cilantro, also called coriander.
Cilantro has been one of those finicky herbs I have been trying to master for years, and now I think I finally have learned the secret!
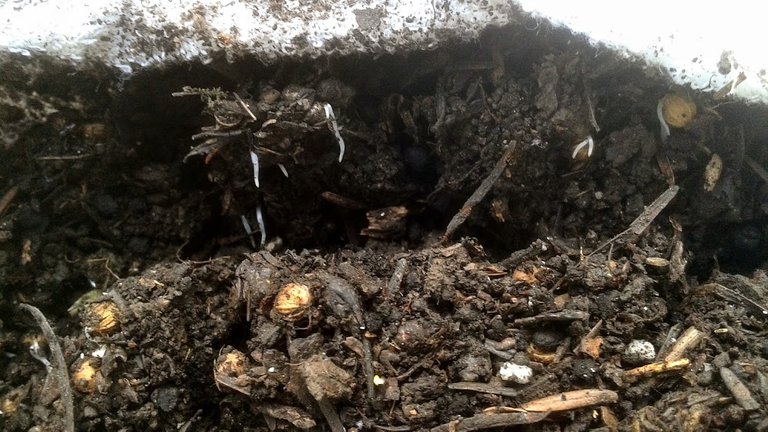
In the past, it never grew well where I planted it. I could get it to grow indoors, but then it would not adapt well when moved outdoors. I would direct sow into containers and garden beds, and most of the seeds would never sprout. It would sometimes spring up on its own and grow well in places I did not intend for it to grow, such as my compost bucket.
Anytime a plant is not growing well using standard instructions provided on the seed pack, it is a signal to me. It probably isn't a plant that grows natively in my area.
Cilantro grows in warm climates. I would need to learn from people who live in warmer regions how it is grown to duplicate the results where I live.
After watching this youtube video of a how a master gardener grows cilantro in India, I followed his steps as close as possible, and Eureka! It was super easy, and the success rate, for me, a novice gardener, was amazing.
The only thing I do not recommend: Don't wear a dry-clean-only formal suit in the garden when getting your hands dirty with soil and compost. Yes, it will stain the clothing. I was pretty impressed the man in this video was able to rock a suit and get his hands dirty without getting a speck on his clothes. Clearly a man of many talents.
Materials
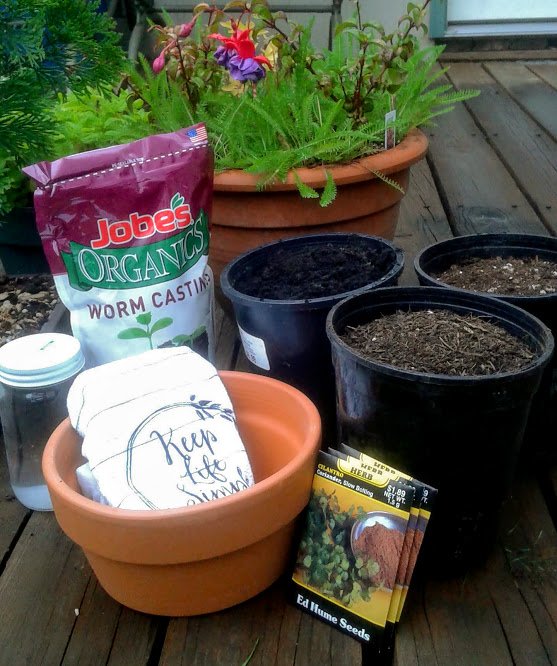
Here is a list of the items I used for this project.
- Worm castings
- Composted Steer manure
- Potting Soil Mix (slightly nutrient enriched is good)
- Compost (sifted to fine particles)
- Jar of water
- Terra cotta pot (with a drainage hole)
- Kitchen cotton dish cloth (18" x 18" at least)
- Cilantro seed packs
In the video instructions, the master gardener recommends using vermicompost. This is the soft, drippy, black gold made by worms after they are fed kitchen scraps. If you have a worm farm, by all means, use the fresh worm pulp as a primary soil medium. Collecting vermicompost is beyond the scope of my skills or interest.
Vermicompost is not an item available to purchase off store shelves (possibly because storing it would introduce bad pathogens and diseases if not used fresh). This is why I substituted dry worm castings and homemade compost in place of the recommended vermicompost.
Any type of compost will be work fine as long as it is well aged, and not a hot compost (ie. fresh steer manure, fresh chicken manure). Fine particle size is ideal for good drainage. I used a 1/4 inch screen to sift out any large clumps, sticks, and leaves. My compost is made from my own cold compost pile, and isn't very nutrient enriched. However, it will break down slowly over time, and encourages worms to burrow through and improve the health of the soil.
Rolling the Seeds
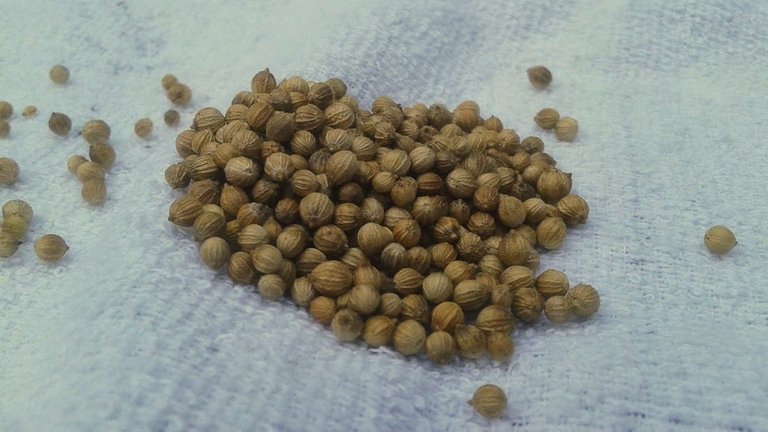
This is the fun part! This is where the magic happens that will increase germination rates. Best of all, this step ensures the seeds will sprout in a few days instead of a few weeks. Faster germination means less wilt and leggy sprouts.
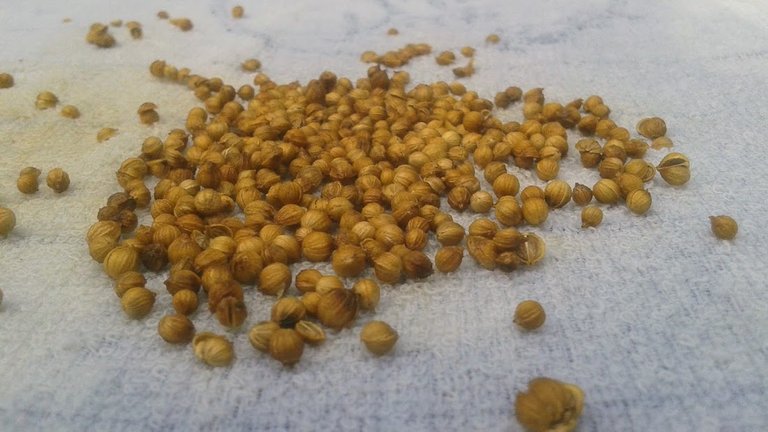
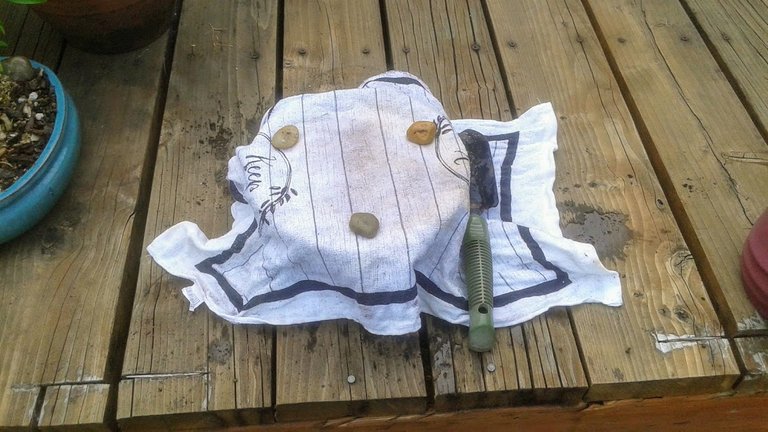
Pile up seeds into the center of a dry kitchen cloth. 50 to 100 seeds is ideal.
Spray with water until the cloth and seeds are fully moistened.
Fold all four sides of the cloth over the seeds, so that they cannot fall out.
Firmly mash the seeds using a rolling pin (or a glass jar, as I did). Use a gentle, but firm rolling action. The goal is to apply even pressure across the seeds to gently fracture the shells.
Do not pulverize the seeds too hard. The true seeds are actually fine grains inside of these round hulls. Try not to damage the inner seeds by crushing everything too hard. Try using a wood surface, such as a cutting board or the wood of a deck will help to cushion the hulls from fully shattering.
Open the cloth and examine the seeds.
More than half of the shells should be visibly split or cracked open.
Notice the seed shells have slightly stained the cloth. This is the natural oils coating the hulls mixed with the water. The cracked hulls and natural oils with both aid the seeds to germinate faster (days instead of weeks!). Fast germination ensures more seeds will succeed and become healthy sprouts.
Wet Towel Technique
Never heard of the Wet Towel Technique? Neither have I, but it is an absolutely brilliant way for starting seeds quickly in a warm climate.
Add about a cup for compost (or vermicompost) and a few tablespoons of dry worm castings. It only needs to be enough compost so the seeds do not clump together when this is all mixed together.
Mix the seeds into the mixture by hand until the seeds are somewhat evenly spaced apart.
Spritz with water until the mix is fully moistened.
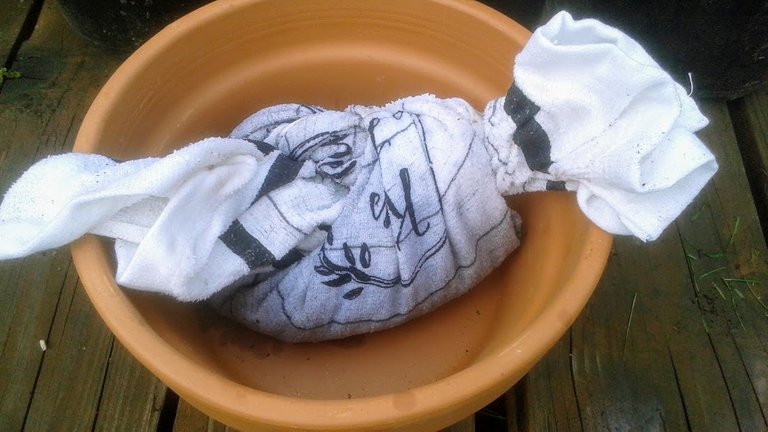
Fold the corners of the cloth over the compost and seed mixture. Form it into a rolled burrito shape.
Twist the other two opposite corner to seal the ends. Fold the twisted end over the top and tie them tightly into a half knot.
Spritz the outside of the cloth with water until it starts to visibly seep into the cloth.
Store for 3 to 6 days until rootlets emerge.
Notes on Climate, Season, Weather
Summer or late Spring is the ideal time for this project. Leave the wet wrapped cloth outside. Let the sunlight warm it up, and let the rains keep it damp.
When I started this easy project, my weather was a full week of Summer heavy rains. Perfect for warm air temperatures and rain keeping the cloth dampened. I kept it in an area that normally receives full sun (even though the sky this week was gray and cloudy).
If the weather is in the middle of a heat spell, I would recommend putting the wet cloth in a cool, shady spot outside. Spritz it each morning and evening to make sure it stays slightly damp.
Checking for Early Results
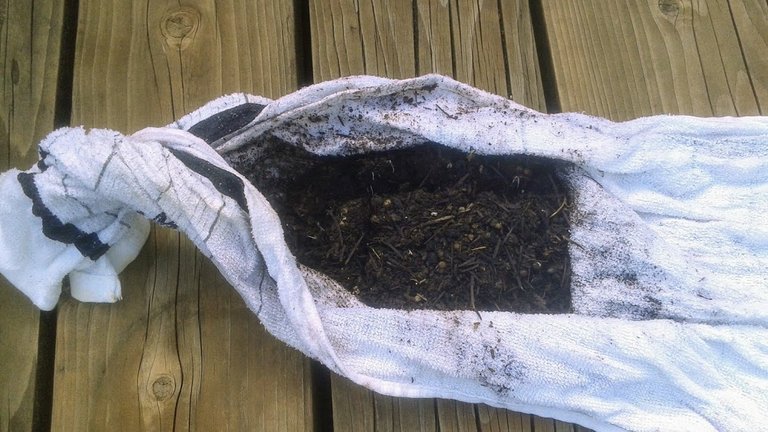
Open the cloth after three days, and inspect the progress.
Look for white rootlets extending out of the seeds.
If the roots have not yet appeared, wrap the towel again, spritz with water, and wait another day.
Check again every day until rootlets are visible.
Here is a close-up of the healthy rootlets.
For me, they sprouted on the sixth day.
Once they look like this, they are ready to plant.
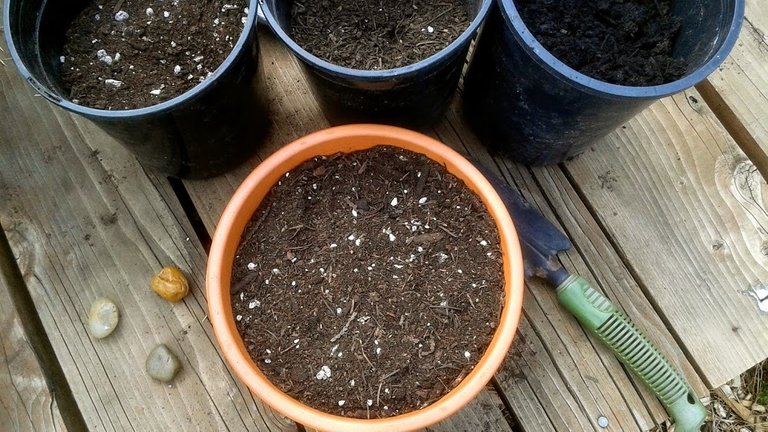
Preparing to Plant
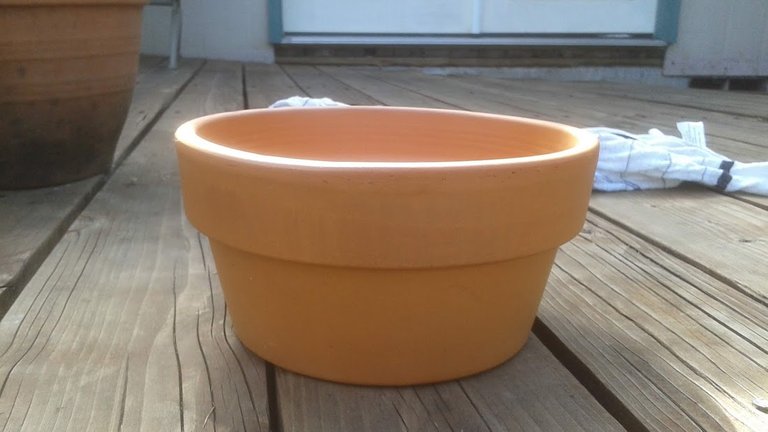
This is the terra cotta pot I selected for this project. It is the shallowest pot I could find that has a drainage hole. A low tray-shaped terra cotta pot is recommended if you have one.
A glazed or plastic pot is not recommended. You might get decent results by choosing a pot that is not made of terra cotta. This unglazed clay material has a unique ability to wick water out of the soil so it dries faster. This will help the soil to mimic the soil that exists in more tropical regions of the world.
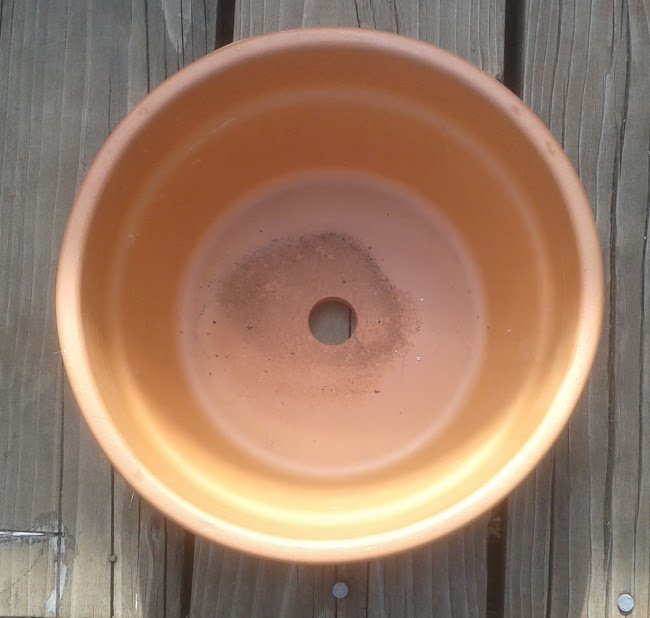
Notice how wide the hole is.
To prevent the soft soil from falling out of this hole, I place a river rock over it.
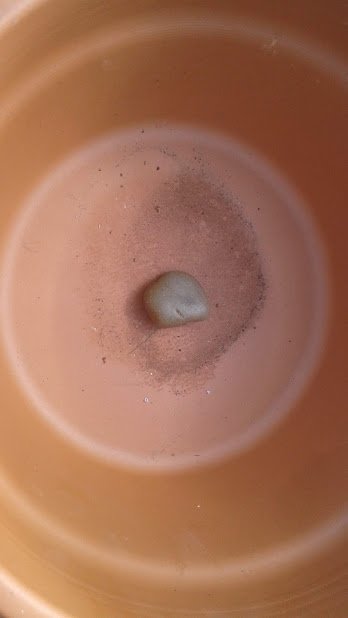
The slightly irregular shape of the smooth rock will allow water to drain through more slowly. The terra cotta pot will also wick lots of water out of the soil through the sides, so there is less need for fast drainage.
In my bonsai tree pots, I usually want lots of large drainage holes and a fast draining rocky soil. Cilantro is not a tree (obviously!), and will only live for a few months. Soft organic soil kept slightly damp allows the delicate roots to nestle in and feed on the rich nutrients buried within.
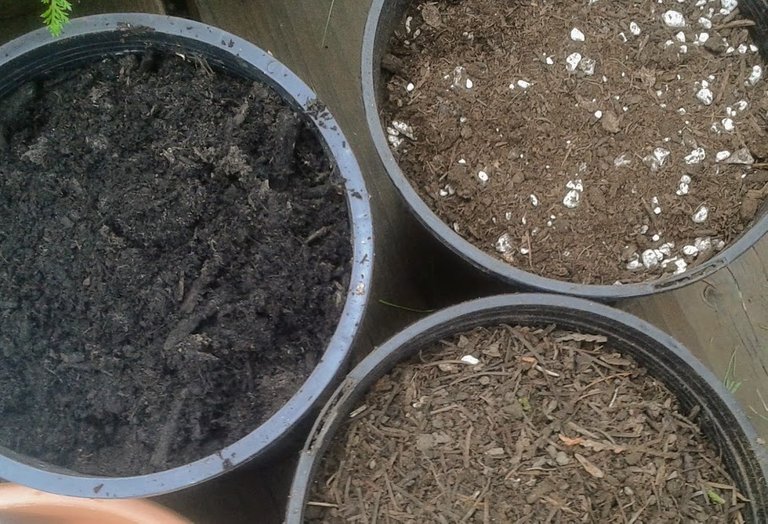
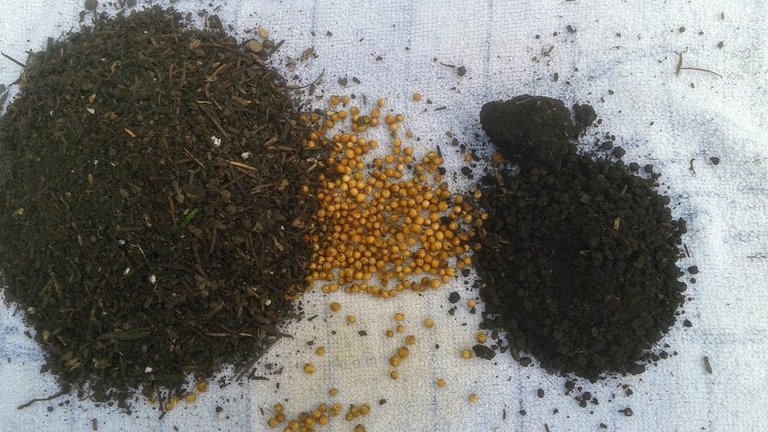
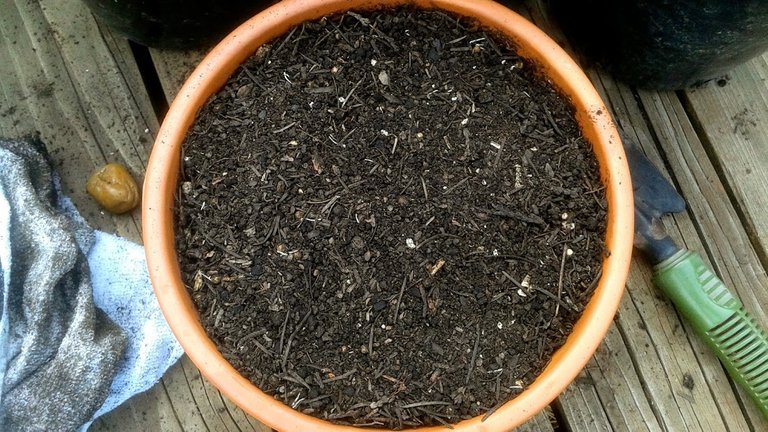
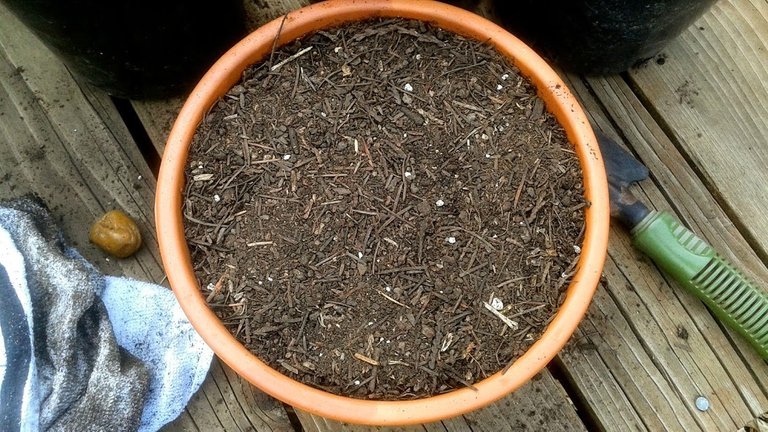
Mix together the three soils.
- Composted Steer Manure
- Enriched Potting Soil
- Compost (or Vermicompost)
Equal parts of each soil.
Add some more dry worm casting in for good measure. I think I added 3 more tablespoons, at least.
Fill the pot less than 1 inch from the top.
Plant the Sprouted Seeds
Find a shady spot, work indoors, or do this next step on a cloudy day. Do not allow the rootlets to be exposed to strong sunlight.
Carefully unwrap the wet towel.
Remove the seeds and soil from the wet towel and transfer on top of the soil in the planter. Lay everything on top. Do not press. Do not bury. Do not make holes in the soil.
I used my hands to carefully lift out small clumps of the sprouted soil mixture, and delicately placed the pieces onto the bare dry soil. Try not to dislodge the roots from the attached soil in the towel.
Arrange the seeds and wet compost mixture to completely cover the dry layer of soil, like cheese over pizza dough.
Pick off any seeds stuck to the wet towel and plant them too. Shake of any remaining pieces of wet compost, and sprinkle it all onto the top layer in the planter.
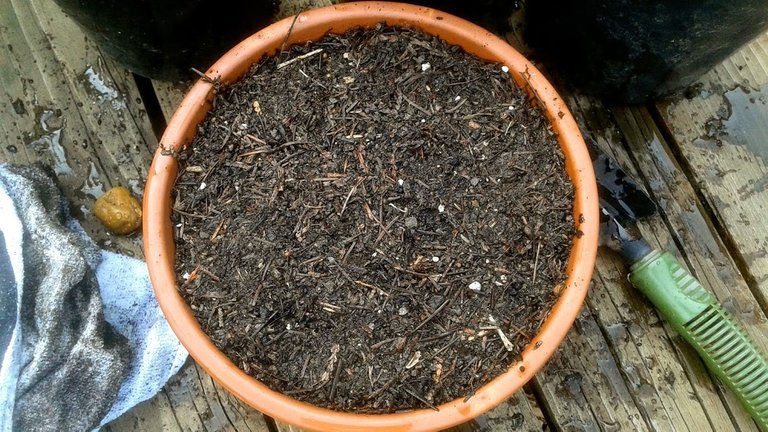
Mulching
Choose your favorite loose soil type to act as an additional top layer mulch. The mulch layer will lightly bury the seedlings.
The purpose of the mulch layer is to protect the rootlets from exposure to the sunlight. While the top visible layer will quickly dry out in strong sunlight, a good mulch will also preserve moisture in the soil underneath.
I chose to mulch with a 1/4 inch layer of fine sifted compost.
Watering
Yup, I took a photo of that too!
The ideal way to water seedlings is with a watering can with a nozzle that gently rains the water down through small holes.
Water the soil and allow it seep fully into the deep layers. In Bonsai tradition, I was taught to water the pot fully three times before walking away. This allows time for the capillary action of the soil to fully wick into the driest soil and air pockets.
Avoid watering with a jet stream, hose, bucket, or a watering can that dumps water out too quickly. Use a cup to water if you must, but do it slowly and gently to not disturb the soil surface. Avoid splashing and pooling of water.
If the soil is mounding above the rim of the pot, it will become difficult to water the soil without it overflowing off the edges. Remove some mulch around the outside closest to the rim to help prevent overflow when watering.
Shade
For the next three days, as the sprouts begin to emerge from the soil, strong shade is recommended.
I actually decided to use the damp cloth to cover the entire planter. This allowed me to leave everything in the full sun, while protecting the seedlings underneath from direct sunlight damage. The damp cloth will also increase the humidity in the air and prevent tender seedlings from drying out.
This actually wasn't the best idea, because I soon realized the cloth was pressing down on the seedlings, and not allowing them grow upward. So I modified this method and place a few river rocks under the cloth, to sort of tent the cloth from touching the soil directly.
Still, I decided even this had some fault. The river rocks were also pressing down on some of the seeds, preventing them from emerging. The cloth was still sagging down on some of the soil.
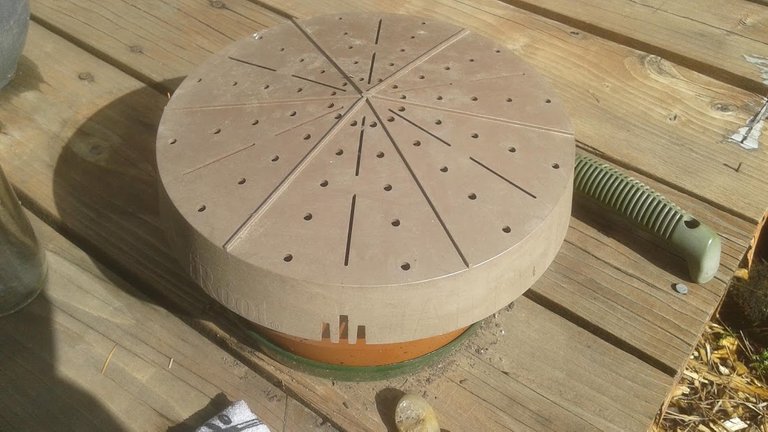
Then I found this piece of plastic with holes in it, which acted as a much better shade over.
This type of plastic piece is something I bought years ago. It is marketed as something you can place inside the bottom of large planter and under the soil to assist with drainage and aeration.
I think using it as a sun screen for seedlings works much better. The top is slightly cone-shaped, which is excellent as it rests on the rim of the pot, while allowing plenty of open air space for the seedlings to spread up.
You can probably make your own by drilling holes through a plastic coffee can lid, or a plastic milk jug cut in half (the top half of the jug is a decent cone shape, and cut slits to conform it to a wider pot rim). Even and old baseball cap might do the trick.
If you don't have a sun cover, place the planter somewhere cool and shady for a while; a garage if you must. Outdoors, you might need to create a barrier (screen or cage material) to protect it from animals and birds.
In my garden, slugs are the biggest pests for young seedlings, and they get into everything in the cool, damp, shady spots in the yard. That is primarily why I chose to keep mine on the deck in full sun with the dry sun cover on to help deter slugs.
Maintenance
After three full days of shade protection from the sun, change things up.
Time to allow the planter to finally have access to full sun once the seedling stems are mostly upright.
Keep watering the soil every two to three days. Water more often if the soil is ever drying out completely.
Weather Tip: We actually had a sudden temperature change from cool and wet to super hot and dry yesterday. To protect the seedlings, in the morning I placed the planter in a shallow tray of water, and I gently watered through from the top again.
Weather and Climate Problems May Occur
If the weather is still dark and cloudy even though it should be time for warm Summer or Spring temperatures, don't worry too much as long as the warm sun is expected to return in a few weeks.
Cilantro grows fastest in the hot Summer light, but it can also perform well and slowly grow delicious leafy greens in part-shade as long as it isn't overly dark and damp.
Look out for wilting stems, a sign of lack of sunlight, or the soil is staying too wet. Molds and mildew will form, and soon pests will arrive too. A heating mat can help dry out the soil slightly between waterings.
Watch out for super hot days too! Seedlings can suddenly lay down on the soil and die. Water and heat makes steam, and this can really cook the cilantro fast! Move the planter to cool shade if extreme heat is a potential danger, and give it additional water if the soil is drying out.
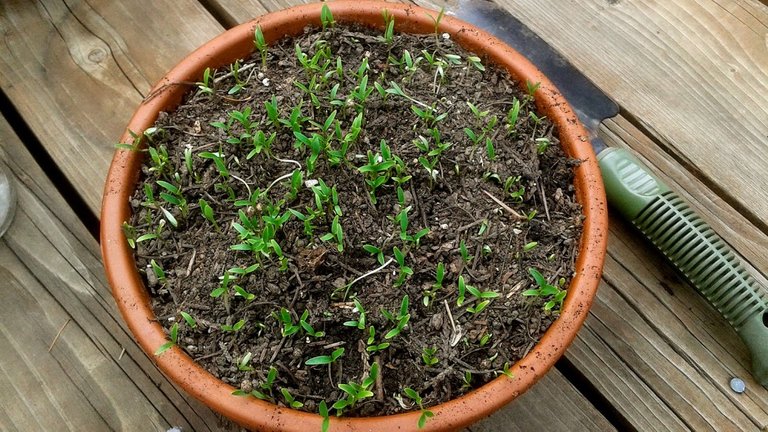
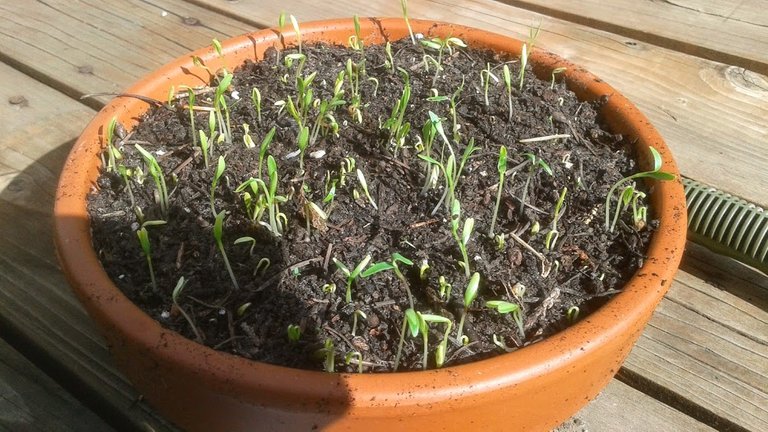
Looks like my temporary water tray method worked pretty well. No signs of damage.
I didn't give the seedlings any shade protection. Temperatures were soaring into the mid 80's F for the first time.
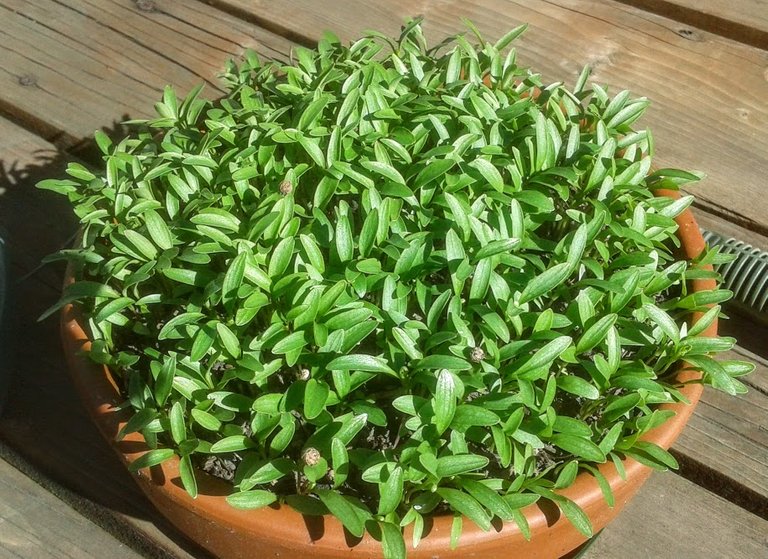
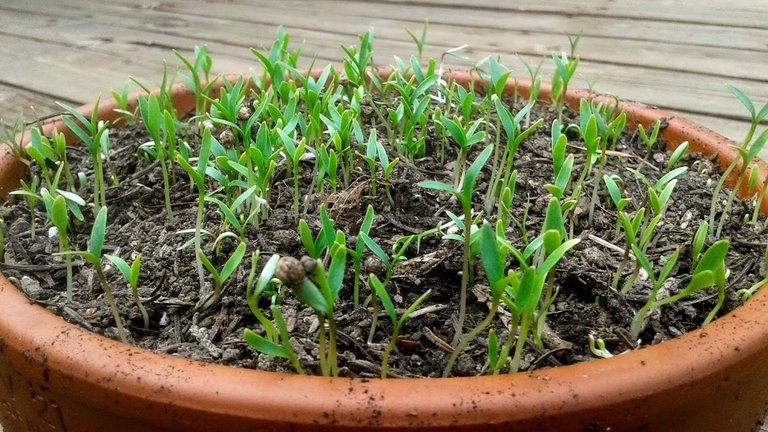
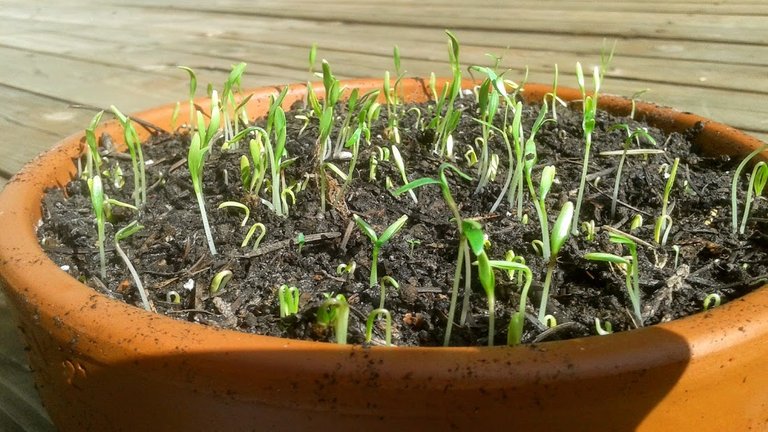
Here is an update of the same seedlings about six days later.
Soon, I'm going to try this same planting method on Anise seeds, and see if it works this easy too. I bet this method will work for many other summer flowering annuals with small seeds too.
Conclusion
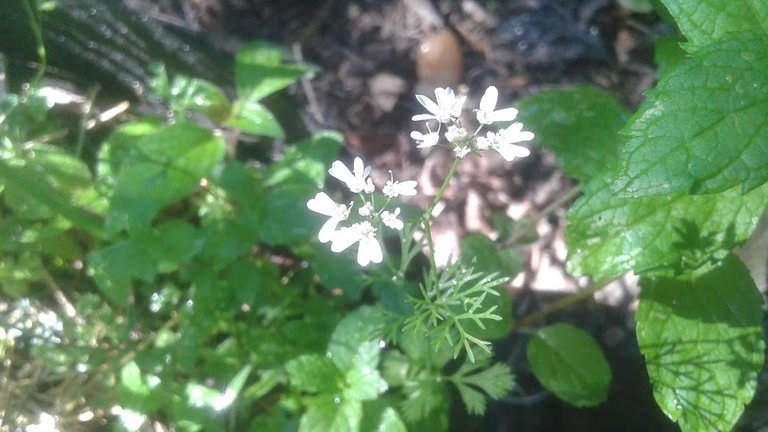
As much as cilantro loves the sun, beware the hot radiation will also increase the speed at which this herb bolts.
Bolting is when the plant stops forming leafy greens, and starts producing flowers, and soon after focuses on forming seeds. Once it flowers, the last remaining leaves will not be as sweet and tasty either. The leaves on a bolting plant will start to resemble thin snowflakes instead of the flat flourdelis shape.
On the bright side, collect those seeds once they turn dry and brown, and you might have enough of the warm season remaining to start over and grow more plants from scratch. Cilantro seeds also store well. I've kept harvested seeds a few years, and they still germinate.
Prevent early bolting by moving the plants out of full sun for them to grow in the cooler shade. Harvest some leaves on only the tallest plants to force them to grow new leaves to replace the ones removed. The smaller plants will soon grow over them until they are ready to be harvested too. Sometimes harvested plants will continue to yield additional harvests of more greens.
Stems, leaves, flowers, seeds, and seed hulls are all edible and have similar flavor. Seeds can be eaten when dried, fresh, or when they are unripe and green. I think green seeds and the leaves provide the best cilantro true flavor and ideal crunchy texture.
Cilantro has a unique flavor that some people dislike, as it tastes soapy to their palette. Others enjoy it for the fresh parsley-like flavor, which goes well with onion, lime, lemon, avacado, salsa, and meats. A common ingredient in south-of-the-border cuisines.
Thank you for viewing.
#herb #herbs #annuals #garden-hacks #summer-gardening #gardening-ideas

i have to try
This post has been rewarded with an upvote from city trail as part of Neoxian City Curation program
 . We are glad to see you using #neoxian tag in your posts. If you still not in our discord, you can join our Discord Server for more goodies and giveaways.
Do you know that you can earn NEOXAG tokens as passive income by delegating to @neoxiancityvb. Here are some handy links for delegations: 100HP, 250HP, 500HP, 1000HP. Read more about the bot in this post. Note: The liquid neoxag reward of this comment will be burned and stake will be used for curation.
i dont have a green thumb lol, but i loved reading this post haha! maybe one day ill grow something my self
I absolutely suck at growing cilantro. End up killing it every time!
It's def something I want to learn to grow as I can't have my homemade salsa without it.
Still have one plant but it's rather sad right now. Gonna read through your post and see if anything occurs to me so I can help it out.
My sad cilantro plant.
That looks like my attempt last year. What are the bluish things on top?
I think the key to the method that works best is to use an ultra nutritious, soft soil to start the seeds in. Almost so nutritious that it would burn the roots of other plants.
Crushing the seed hulls and using soft soil probably helps the seeds grow fast enough so they don't rot while trapped inside the wet, buried hulls.
Good luck!
I chunked a handful of burnt wood from a firepit I had to get rid of the day prior. Figured it would add some nutrients.
I also have a liquid fertilizer I use but probably could be a bit more generous. Thanks for the tips
Awesome post. Thanks for share it @creativetruth
very nice! @activeblog, you don't need a green thumb to plant brother. We need knowledge to start planting or gardening. You can start in TOMATO seeds... Fast and easy to grow even in a very small pot! (^_^)
Thanks for sharing your creative and inspirational post on HIVE!
This post got curated by our fellow curator @rehan12 and you received a 100% upvote from our non-profit curation service!
Join the official DIYHub community on HIVE and show us more of your amazing work!
that was the fastest growing cilanto I've ever read. Might try this trick.
If only there were methods related to ginger and turmeric. By the way, the post is awesome.
Yeah I grow both of those too. They aren't looking so hot though. Probably because I did not use new, rich soil like I did for the cilantro.
I think we need easily breathable soil.
Maybe you can give me some tips @mehmetfix.
I have been growing ginger & turmeric in a very sandy mix, and it worked somewhat well last Summer. In Autumn before frost, the turmeric, I transplanted it into perlite and moved it indoors near a window, and it grew green leaves over winter. The ginger I allowed it to stay in the container with the sandy mix and moved the container to the garage where it stayed dormant.
In Spring after frost was over, I brought the container with ginger back outdoor, and it has not sprung back to life after months of rain and warm sun. Still hoping it might be dormant. When I dig in the soil to expose the surface of the ginger, it still feels hard and smooth. I should check if it has roots, or rot underneath.
The turmeric was transplanted back into the main pot, and it looks weaker than it was before, struggling to grow new leaves. Maybe it isn't getting enough sunlight in my part shady spot.
I still think the sandy soil might be totally drained of nutrients. Maybe the sand has compacted too. I'm thinking of mixing in manure compost and see if the nitrogen forces it to green up.
First of all, can I ask which country you live in? I will give him a few pieces of information.
Pacific NW USA
I guess the climate of the place you live is not wet.
Turmeric grows best in warm, humid weather conditions. It also loves water. Keep the soil moist, especially if you are in a hot and dry climate. Water at least every two days. This herb also loves mist, so it is recommended to spray it once a day with a spray bottle of water. But make sure that the plant does not stay in the water, the turmeric must be well drained in order for it to grow properly.
Harvest time:
It takes between 6-10 months for turmeric underground stems to become edible. As the underground stem matures, you can collect and eat the stems and leaves of the plant.
After six months, start checking regularly whether the underground hull has grown sufficiently to about ginger size. It is best to collect the underground trunk all at once, so when it reaches the required size, remove it completely from the pot.
At the time of the next crop, you can take one of these healthy underground stems that you have grown and plant it as you planted in the first one. But you should change the soil, because the first plant will probably have consumed most of the nutrients in the soil.
Ginger grows in temperate climates. It needs precipitation. It can be developed with irrigation method in places that do not receive precipitation, that is, when you grow it on the balcony of your home. At the same time, planting months should be done in spring and February.
Soak the plentiful ginger root in water for 12 hours.
Then you can start the process of planting ginger, which has rooted on the edges, in the ground.
Plant the ginger 5-10 cm below the soil. You should ensure that the flower pot you will grow ginger will light up.
In addition, it will be sufficient to give the juice of ginger daily.
After planting your ginger, you will see that ginger grows in 10 months. Note that you need to be a little patient for this process.
if you have any other questions please ask.
Thanks. Is this information from your own experience or gathered from another resource?
Fantastic blog. I love cilantro, but have not had huge success in growing it. Maybe I'll give it another try.
Oh, great, I love this in food.
Hola amigo laverdad muy explicito tu comentario en este post, lo pondre en practica y espero seguir viendo mas de lo que haces, gracias por compartir.