Replacing a Post for the Grape Arbor
Hello, hivers! Welcome to my page!
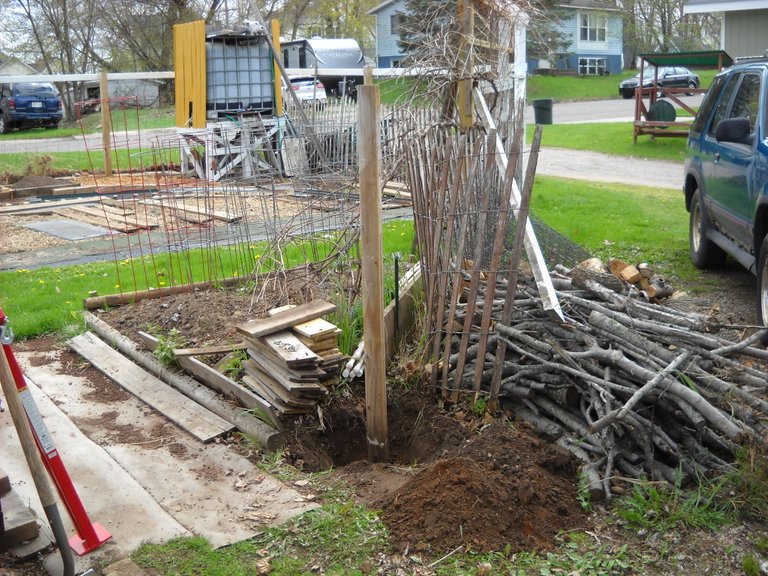
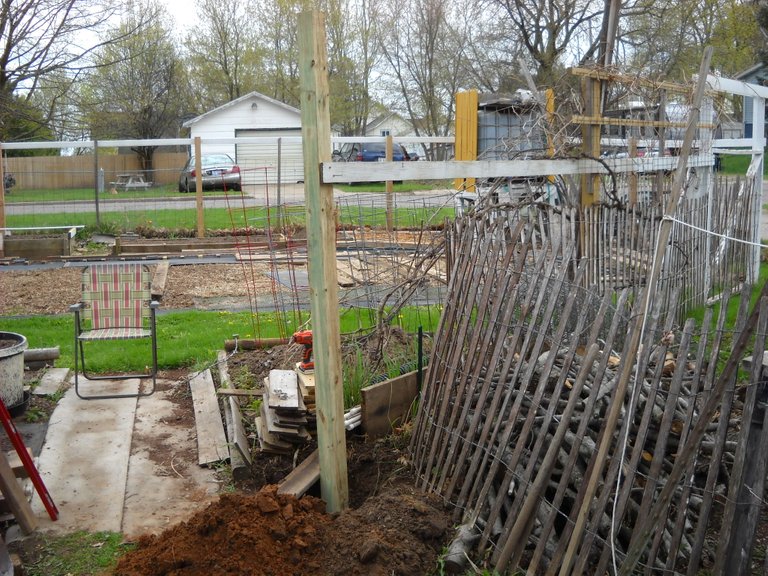
Yesterday, I ended up working on a fairly big project. I had to remove the end post for the grape arbor at the back of my garden and replace it. The 3 posts of the grape arbor were originally landscape timbers, and they don't usually last more than a few years when buried. Last year, the 2 worst ones were replaced with 10 foot long treated 4X4s. That raised the height of the fence to about 7 feet or so and gave the wild grapes more space to grow.
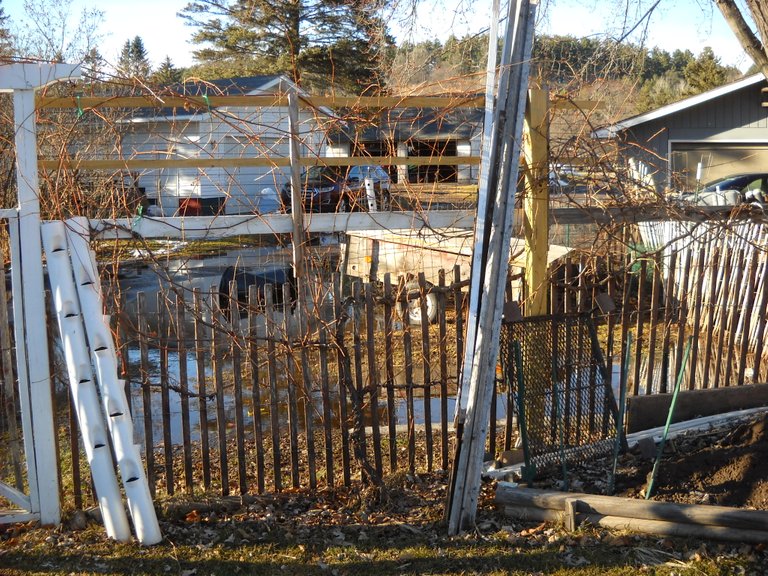
This is a picture of the grape arbor from the middle of March of this year. Apparently I haven't taken many pictures of the arbor. The tall part of the arbor extends from the back garden gate to the center post of this bit of fence. I had added braces and some fence wire above the snow fence to give the grapes more space to grow up into. The wild grape vine has been there for probably about 10 years now. I prune it about the same way as cultivated grape vines are pruned, except not as severe.
As usual, I forgot to take a picture before I started the project. In these photos, I've dug around the base of the post to make it easier to remove it.

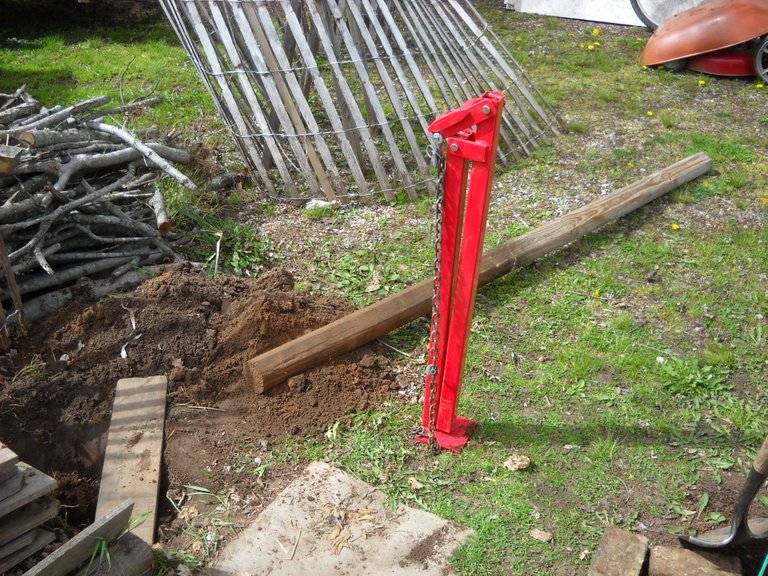
The next step is to hook up the post puller to the post with a chain. This post puller has been well worth what I paid for it at the farm supply store. This is the first wood post that I've pulled with it, but there have been several steel T-posts pulled with it so far this year. This makes the job way easier. I'm guessing that a good welder could make one of these things, but I'm not a good welder, plus I don't own a welder.

When you pull the handle down, the chain tightens up and pulls the post up a bit. When you raise the handle, the chain loop slides down the post and you're ready for another turn. It takes several pulls to get the post out, depending on how deep the post is in the ground.
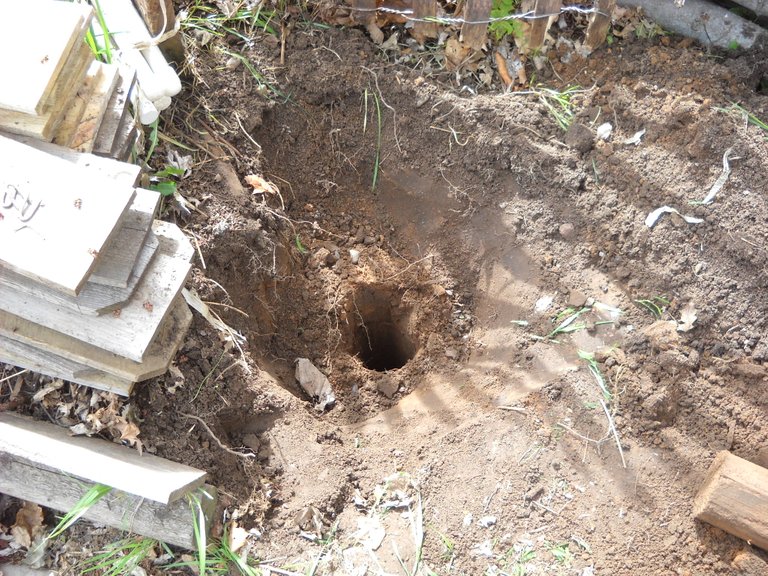
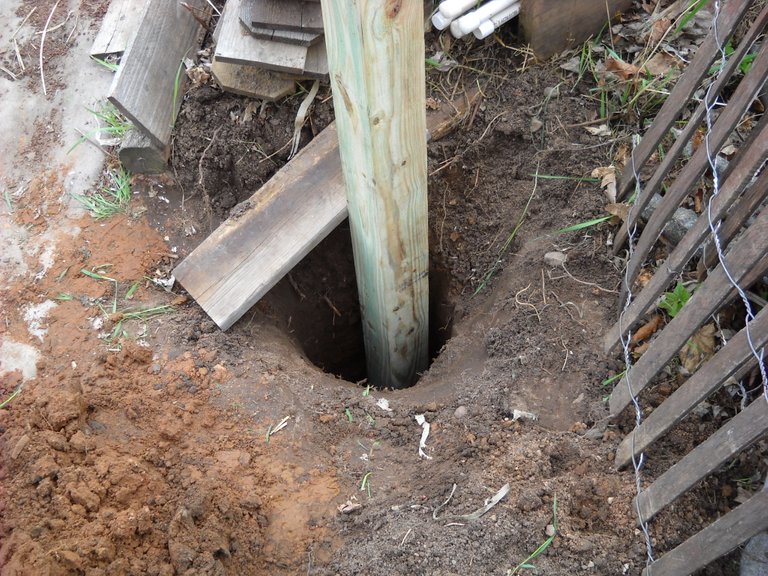
The old post is out.
This is the original hole that the post was in. I had to dig this hole out wider for the 4X4, but it's a bit easier to dig out with the small hole already there.
This is testing the 4X4 for proper position.
I had to make the hole a fair amount bigger to get the 4X4 into position where I wanted it.
I took a lot of dirt out of that hole.

Here's the post in position with all the dirt tamped in around the post to hold it in place. I remounted the original fence top board to brace the post with the other 2 posts.
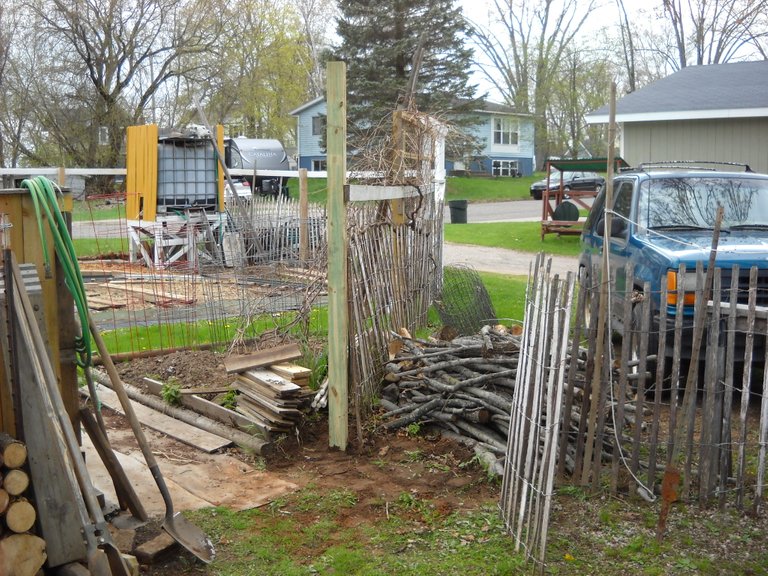
The snow fence is back in place.
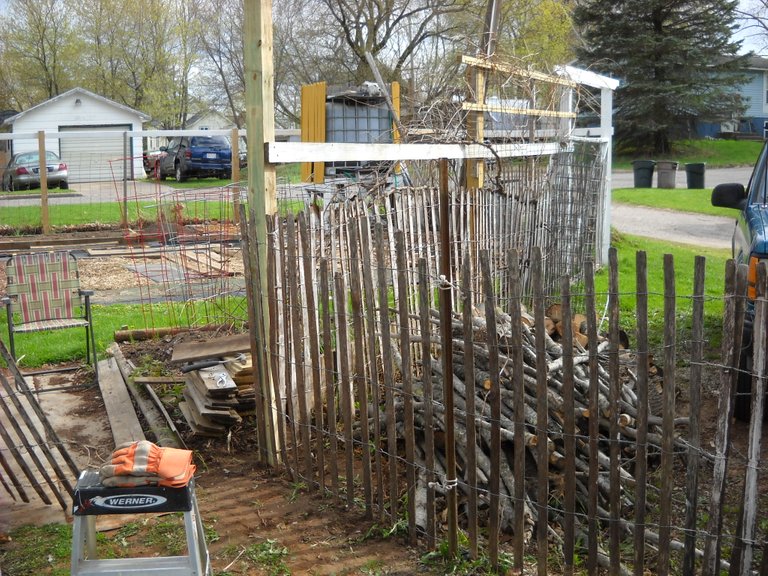
I'll need to go to the local lumber store to get a 10 foot long treated 2X4 or 2X6, depending on what I can find that's worth buying. The space between these posts is about 9 feet, so I can't use an 8 foot board to span the distance. I'll rip the board to make 2 pieces to mount between the center post and the new post, like I have on the other side. Then I can put a piece of fence wire on the boards and it will be ready for the grape vines. I'm also thinking about getting a tame grape plant to put in the middle of this section of fence. There's plenty of room for it to grow there. I'm not sure what kind of grape I want, but since I have a blue grape vine on the front fence, I might get some variety of red grape. Right now is the time to get a grape vine while they're still available for spring planting.
That's all I have for this post, thanks for stopping by to check it out!

Looks like a lot of work. Don't forget to take pictures as you plant...
Hopefully I'll remember before I start...LOL
You aren't the only one that forgets to take photos when you start @amberyooper! But it will look gorgeous once those vines are trailing up and big bunches of grapes dangling down.
Yes indeed! I'm looking forward to seeing that myself! 😀
That was a big project. it should last you a whole lot more years now.