Game Development | Getting In the Basics

It feels like I’ve gotten quite far in just two weeks and that is because I have. Prior to finally getting things done, I spent quite a lot of time researching, learning, and taking a look at how went about it. After I had settled on using Unreal Engine 4 and went for it. It feels like I’ve leaped forward in time.
Character Select Screen Iterations
Being so new to game development I knew one thing going into it that I had no idea what I was really getting myself into. There are so many systems, layers, and just random stuff that needs to be done you don’t start to get an actual idea till you are deep into the woods of it.
One of those things is just how many times you will end up reiterating something. You start off with nothing and need to build out something so you can build from that point. You then go back and expand out those systems making adjusting and improvements as needed to meet current and future needs.
One of the best examples of this has been my character select screen.
In week one I had a far more complex model I was using for my character and it was my only class with nothing else. I then changed out its mesh, animations, and bunch of other stuff into something far more useable for where I am at skill-wise that would be easier to work with. Up till that point, I had no need for a character selection screen. I simply added a spawned actor and moved that node to where I wanted the character to start on my first level.
Second Iteration
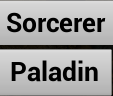
After that, I added in a second class and my simple solution of just spawning as a single class was no longer valid. Unless I just wanted to keep using manual override settings to switch between the two classes to use either of them. For testing purposes and to keep moving forward I simply added in two buttons and text with their class names above the buttons. Along with the ability for each button to spawn the individual class into the game.
After building out a number of other systems it was getting bored of looking at a buggy screen that was my character selection. The game used a camera view that was halfway underground and there was not much I could do until I build things out further.
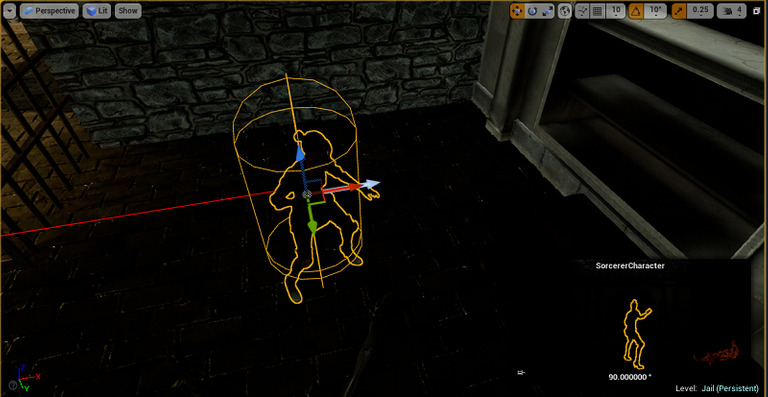
Third Iteration
So it was time for the third iteration which included showcasing the two classes in a live scene for animation and possibly other effects in the future. This took place in my main room that I’m testing everything else in. While it’s not perfect that is when this finally started to feel like an actual game.
Like many times before this, I used it as a learning experience. There were a bunch of new things I had never done before. What I thought of how it was going to be created and the examples if found in how to do so were not even close. This is always great when you can expand out how you think about problem-solving with the given tools you have.
There are a number of things that will change in the scene above as I work in the main room and start to expand out the rest of this zone level. So I did not want to spend too much time trying to make something look more perfect with text alignment, sizing, and horrible lighting.
Fourth Iteration
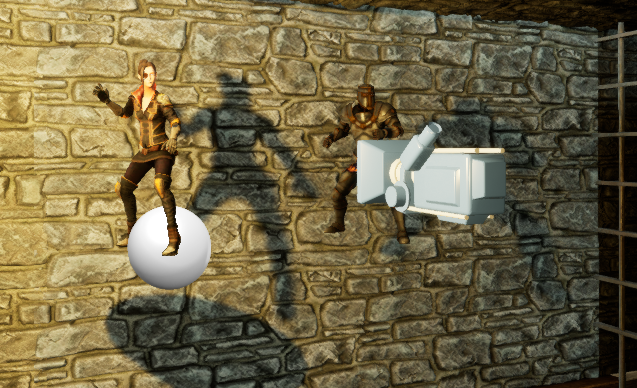
This next one is not built out yet and is going to require a massive overhaul of quite a few systems. I’m also hoping by then I will have a better understanding of the materials I’m using to build out the actual level that I can make an interesting character select screen room with them in it.
As you can see in the screenshot above that is what the actual behind the scene looks like. This for better terms is rigging they are attached to as they float hidden above from the player once they enter the game will be moved to its own actual room. I find it rather interesting and even amusing this is all going on in the first starting room.
I’m also going be added in other playable classes to the game as well. This in itself will require a lot of systems to be expanded on for them to work. It will be quite a massive undertaking. I’d rather get it done sooner than half a year from now when the amount of work to do so will be even bigger.
I also want to remove the buttons I’ve been reliant on for quite some time now. There is some cool stuff I want to do where it hopefully won’t look as armature either. All that is something to think about for another day as it’s doing everything I need to for the moment.
The character selection screen is a great example of going from nothing to something I had no idea I could even accomplish. All of which was done in only a couple of hours including time spent on it from learning how to do it and some other research for different routes I could have taken.
Building Out The Basics
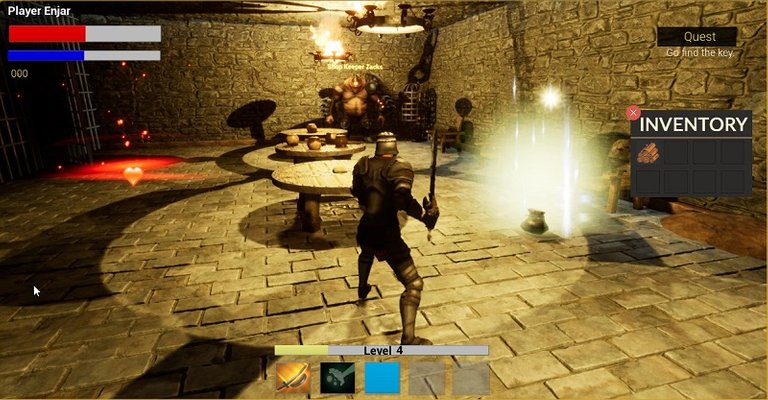
The character select screen was just one tiny part of what I’ve accomplished this week. There were far more complex things like getting an inventory, shop, and bag system up and running. In fact, just about everything seen in the screenshot above is fully working. While some of it was done last week most of it was improved or implanted over the last week.
While the UI itself could use some massive improvements, graphics have never been my thing. At some point, I’ll more than likely spend some time and do a UI overhaul of quite a few elements if I’m unable to come up with something better looking on my own. I’m using a lot of prefabricated and free assets for the time being. Most of them I plan to keep as I rather like how they look and they fit in place for what I’m looking to accomplish.
A lot of these things are also just building blocks. I now have a questing system that was not that hard to implement. The organization is going to be more important than anything else I feel for it as it gets more involved. The above screenshot is on step 3 that will be built out further with the end goal of the player escaping this level once.
There are health pickups, gold, and crafting supplies the player can acquire. The monsters in this zone also drop random loot based on the “loot tables” I’ve created for them. There are some loose items on the ground the player picks by running over. The player's inventory will fill up with items that he can get to take with him and will be stored in a future bank.
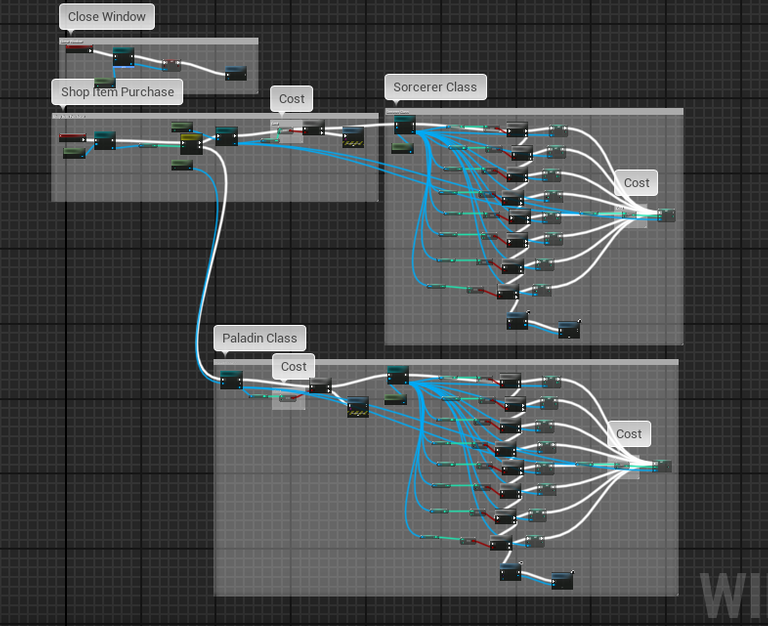
The giant NPC in the back corner is a shopkeeper which I’ll admit I need to find a more elegant way of handling buying and items. For now, he is just selling some basic crafting supplies which have no use at this time. Each item has a gold cost that also works and deducts from the player's total while adding the item to their bag if they click on the item.
Each class has two basic skills that both work and have a cooldown. For now, I’m sticking to a five slot action bar. I can always expand it out later if needed. I, however, don’t want to get to carried away where this project gets far beyond reasonable for me to complete solo.
The player also gains experience on kill and there is part of a leveling system in place. I do need to expand out further once I have a better understanding of how I want to handle and balance stats, skill level requirements, items, and some other stuff.
Some of this stuff for now also saves when I exit the game. Along with there being a rather ugly but functional options windows. Some of it does not save as I don’t want to keep having to wipe the save file for each character for basic testing at this time. Enough of it was done to a point that I now understand how to go about these systems.

I’ve also been trying to take my time organizing and even commenting on important things. So later on when I go back to find something or forget why something was done a certain way. I’ll have a bit of a reminder as the amount of files and items it takes to make a game is quite massive.
Final Thoughts
While there are so many little things I want to chase after and improve or expand out. The next step I’m going to take before I lose sight of my goals is further building out my starting level and a town. Doing so will help me understand quite a lot of things and require some heavy time in researching, doing, and failing as I learn and move forward.
Not quite sure how often I’ll make such kinds of updates. I can totally understand how weeks or even months could pass by without feeling like much is being done. Then you just have a crazy week where a lot of things are all implemented and worked out.
Other Posts:
- 1. Unknown WIP
- [2. Getting In the Basics]
- 3. First Level
- 4. Outdoor Level Attempt Number 1
- 5. Using BSP Method For Making A Zone In Unreal Engine 4
- 6. Structure, Enumerations, Data Table --Oh My
- 7. Creating A Trial Arena
- 8. Roadmap On My Game
- 9. Soldier Quarters Dungeon
- 10. Game Development | Underground Crypt
- 11. Basic Portal To Another Map
- 12. Shoestring Budget And Getting A Great Deal
- 13. Lower Prison Map
- 14. Anguish Map
- 15. Abyss Map
Information
Screenshots were taken and content was written by @Enjar. Screenshots are from Unreal Engine 4.


Cool glimpse into the world of unreal development, thanks for sharing with #battle!
This post was shared in the Curation Collective Discord community for curators, and upvoted and resteemed by the @c-squared community account after manual review.
@c-squared runs a community witness. Please consider using one of your witness votes on us here
Thanks for the support, have a great weekend.
Solid review @enjar
Thanks for sharing those tips and tricks with us :)
ps. is there any way to DM you? Do you use discord by any chance?
Cheers,
Piotr
This is not a review.
I'm not interested.
If you would like to further support this post you can do so on Twitter where I have shared it.
https://twitter.com/EnjarGames/status/1220516552086315011
Cool i love the unreal engine. Though i only use it for arch vis not advanced gaming.
I’ve been really enjoying it. I’m still quite a noob.
I'm more of a noob, gotta figure out lightswitches for entering different rooms etc. Character animating is way more complex than what I know how to do.
Hi @enjar!
Your post was upvoted by @steem-ua, new Steem dApp, using UserAuthority for algorithmic post curation!
Your UA account score is currently 5.363 which ranks you at #719 across all Steem accounts.
Your rank has not changed in the last three days.
In our last Algorithmic Curation Round, consisting of 73 contributions, your post is ranked at #8.
Evaluation of your UA score:
Feel free to join our @steem-ua Discord server
Coming along nicely. Looks like you are following the RPG tutorial from Virtus Learning Hub on Youtube? I notice a lot of things from it. ;)
I was applying it to my own stuff, which is only the mannequin but it would be cool just using that stuff he uses and having proper characters.
But in March when I get my Oculus Rift S, I will be going into VR game development instead so I am not as fussed with getting far in my normal game at the moment.
Keep it up mate!
Yep, I followed a couple of his tutorial videos. They were quite helped when I got stuck and gave me some ideas on how to go about things moving forward. Some things like using bone sockets in the skeleton to attach items to are going be great to know about. Other things like item drops and the inventory system I’m hopefully going to be able to redo using data tables and some other more advanced techniques once I get a better grasp of things.
I was hoping the Epic Games Unreal Engine learning website would have been a bit quicker and easier to search for specific things. I finished there getting started course last week and am working on the Blueprint one which should hopefully help me out a lot.
There are plenty of tutorials out there as well as helpful videos etc for anything you need. I am still only newish in some aspects, but being a quick learner I quickly get things down. Always feels great when you start applying things and seeing it come together, like animating your assets through Unreal Engine.
To listen to the audio version of this article click on the play image.

Brought to you by @tts. If you find it useful please consider upvoting this reply.