DIY ~ Washtub Burn Barrel Version II ~ Step 2 - The Frame ~DIY
We are back at it again at the Splatts house, doing what we do... DIY!!! So my fellow DIY’ers let’s dig in and see what kind of creative juices are flowing at the Splatts house this time.
So after tearing the Washtub out of my old broken down clothes washer, (Tear Down Post Here)it was time to get a little help from @lil-splatts to build a frame for the Washtub Burn Barrel Version II.
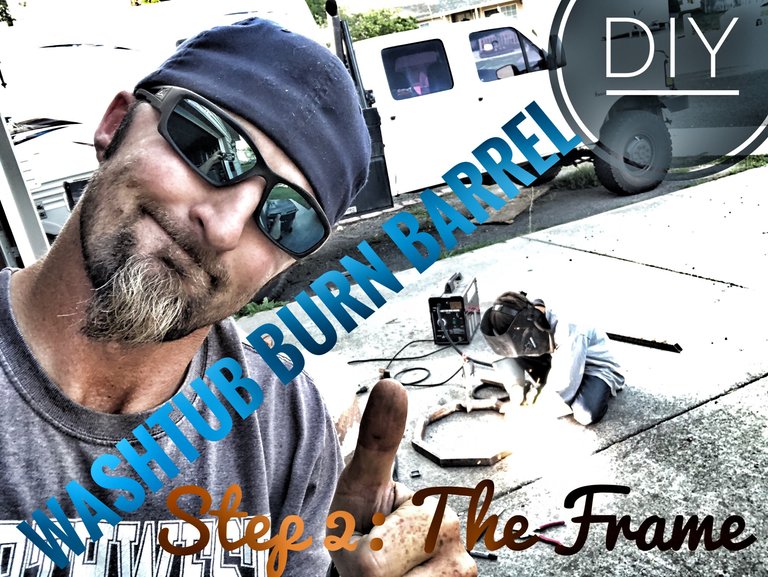
Step 2 ~ Building the Frame
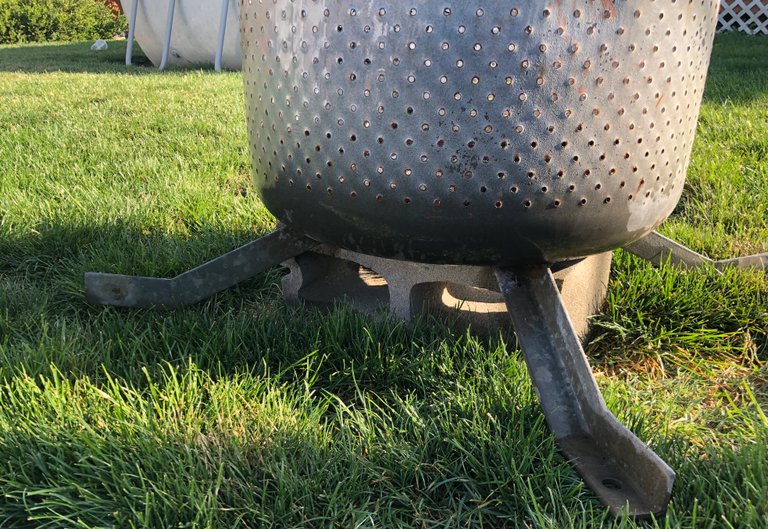
Our last Burn Barrel Just isn’t holding up too well. The legs that I welded on it start to sag after having a good fire blazing in it. I believe it has to do with where and how they are welded on. Plus the fact that the barrel is a little heavy and the distance of the legs away from the weight is just a little far. Oh ya, and the bottom of the barrel gets super hot and seems to soften up the metal, therefore causing it to sag. So I have been placing a cinderblock under it to hold it up and keep the ashes from burning the grass.
I am hoping this is the last fire we have in this Washtub Burn Barrel. The new one is going to have wheels, a nice frame, marshmallow stick holders.... great I just revealed my master plan!! Oh well guess what... plans change :wink:wink
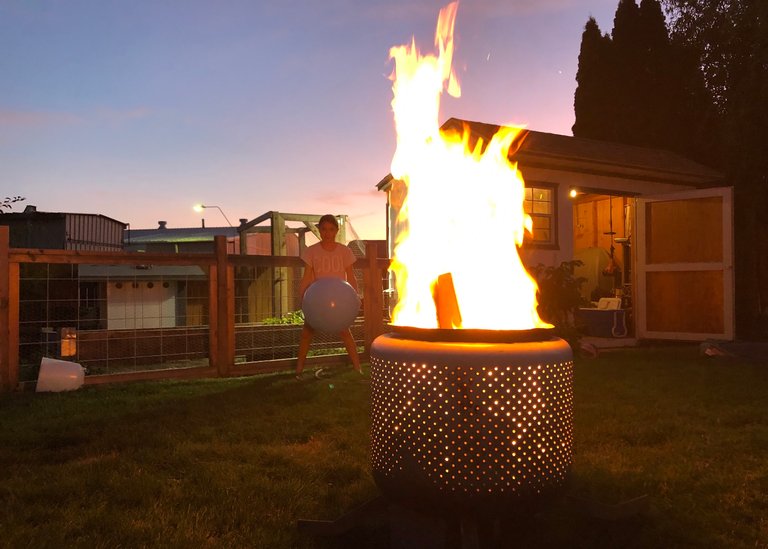
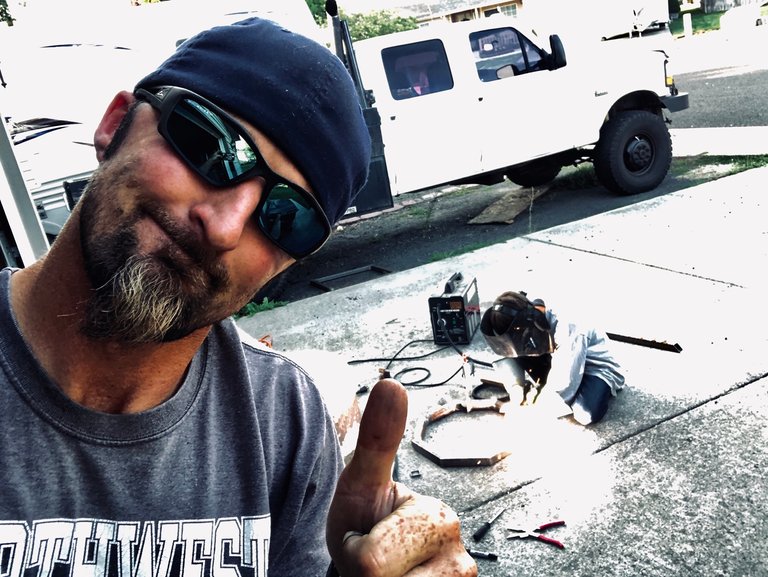
Pay No Attention to the Kid with the giant ball
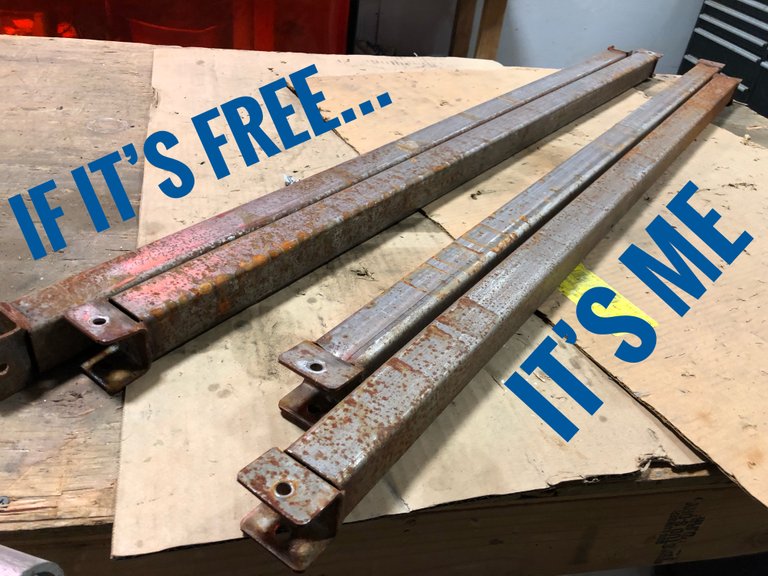
Let’s get into this frame building shall we? Again, I scored some free steel from work.. If it’s free, it’s me You see we get what is called Bore Pipe on big metal reels made out of tubular steel. They then get taken apart and recycled, that is unless we would like to use some... Don’t mind it I do!!
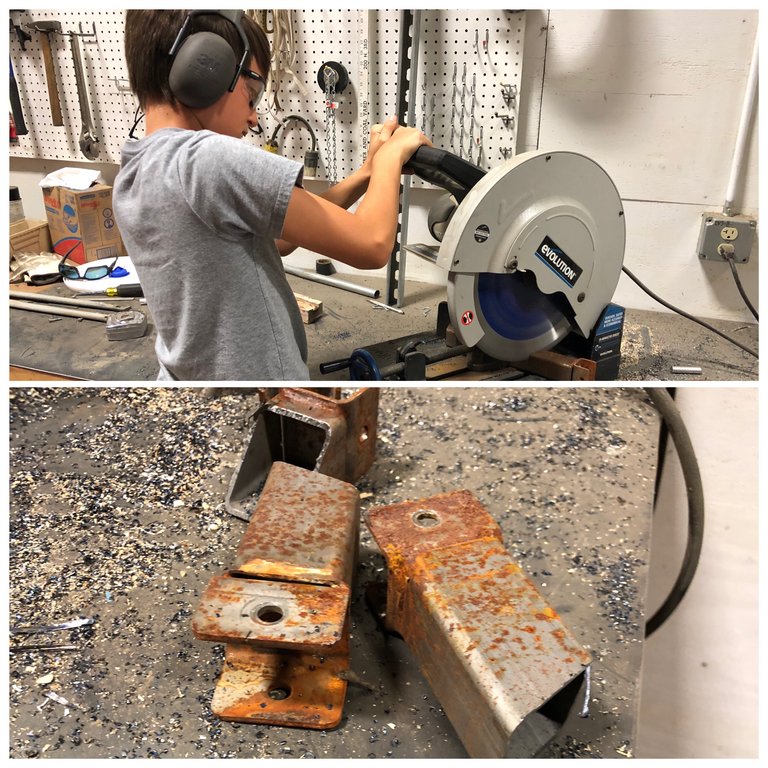
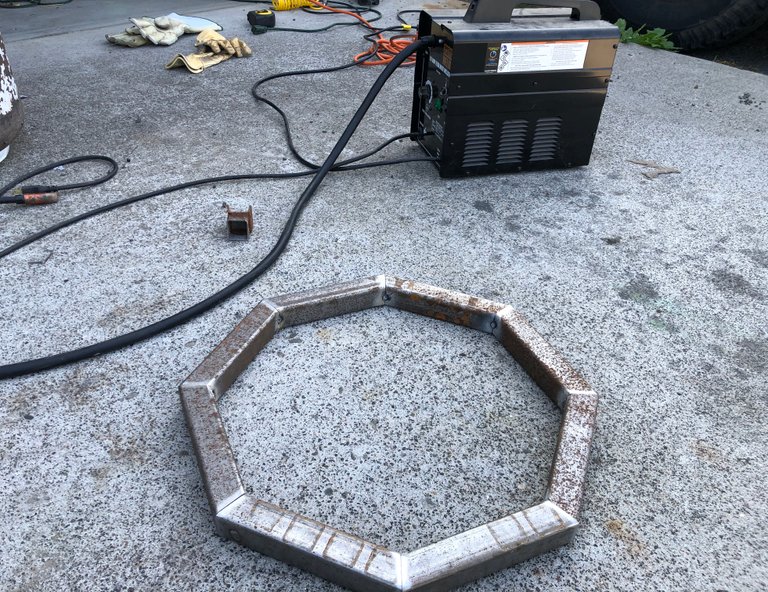
@lil-splatts and I headed to the shop to put some of this metal to use building a frame for the burn barrel. We figured the base would be just a simple square ~ 2 feet by 2 feet ~ This will make the base just a little wider than the Washtub itself. A square has 4 equal angles of 90 degrees, so each piece need a 45 degree angle cut on each end. Using a good chop saw is the way to go with this. I tried a cutting a couple at home with portable band saw and it just wasn’t working out at all.
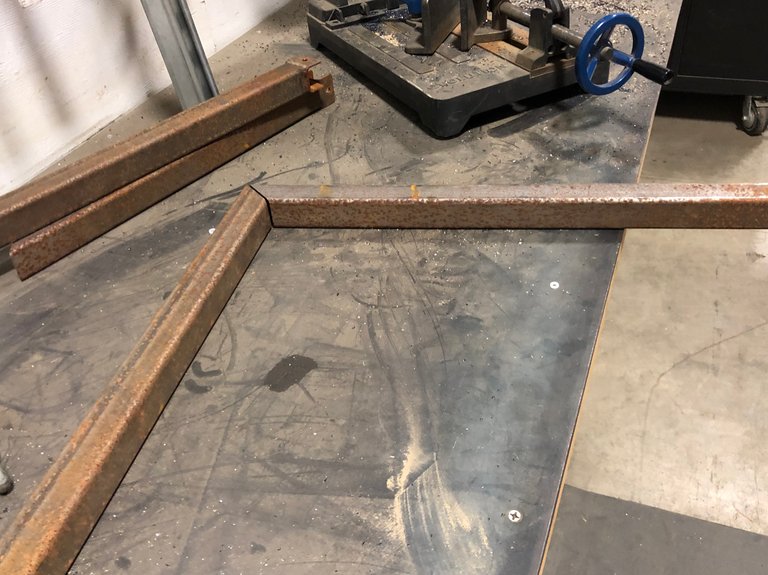
After we got all four sides of the base cut out, we started cutting the upper portion of the stand. We decided on making an octagon shape for the Washtub to set in. Each piece was 7 inches from the short point of the angle to the short point of the angle. Oh ya, the angle is a 22.5 degree angle. You see when you double the amount of sides, you cut the angle in half. So instead of 45 degree angles which are used for 4 sides, we will be using 22.5 degree angles for 8 sides... make sides sense?
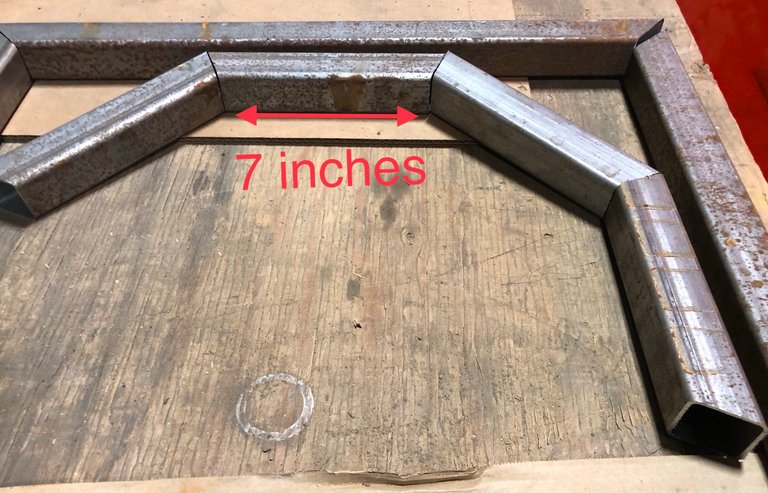
Talk about being conservative, and not having much waste. Check this out, we were able to use the left-over piece from cutting the 2 foot square pieces, to cut 2 sides of the octagon. So 4 pieces was enough to make all the parts that we needed.

Leaving just these little end pieces to be thrown into the recycle bin. Nice cuttin’ Boy!!
The only pieces we didn’t get cut were the ones that would run vertically between the base and the Washtub. I was just totally unsure of how high we wanted the barrel and no clue as to what kind of angle I need to put on them. We will save that for another day.
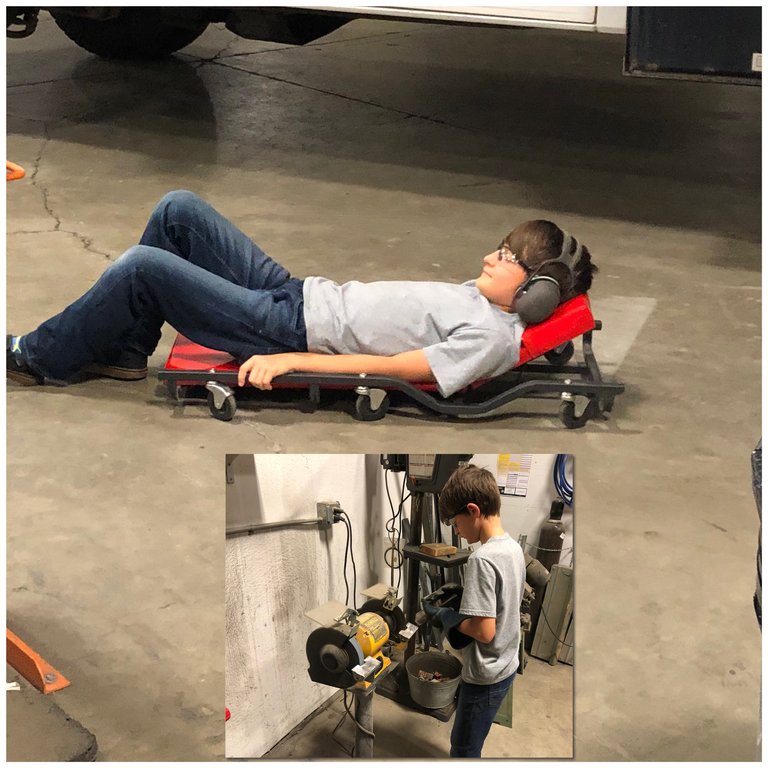
So after @lil-splatts did some scootin’ around while I was cleaning up the ends of the pieces getting them prepped to be welded together.... it was his turn to clean some pieces. We try and keep the work 50/50 around here. You know, even out the workload of you will.
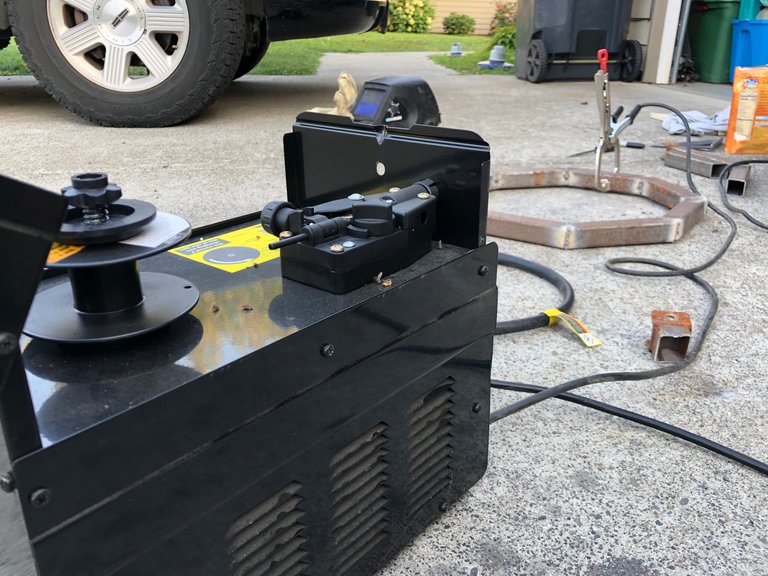
So we took all the pieces home and made some room in the driveway to start welding these pieces together. I purchased a flux-core welder from Harbor Freight a while back for about $90 USD. It plugs into a typical 120 volt outlet and needs to be on a 20 amp breaker. I’ve used it a few times and it does pretty good on these smaller jobs.
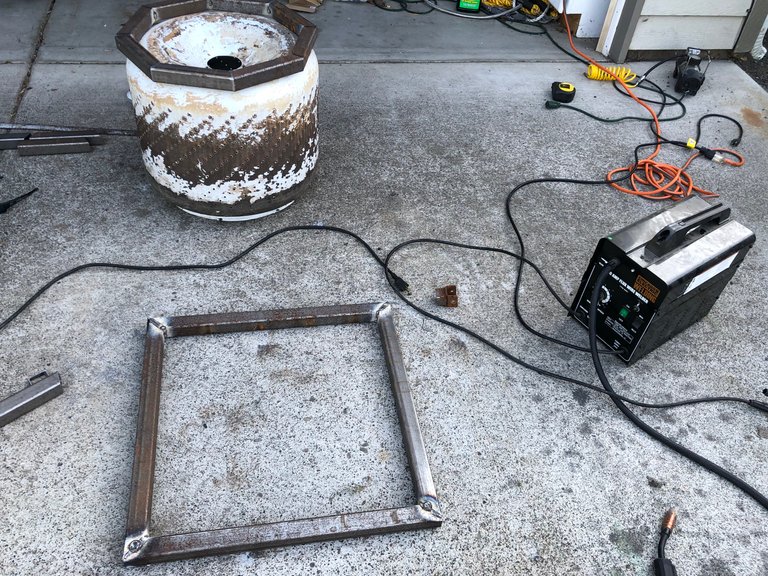
First I tacked all the pieces of the octagon together. Then placed I placed it on the Washtub to make sure it fits nice.
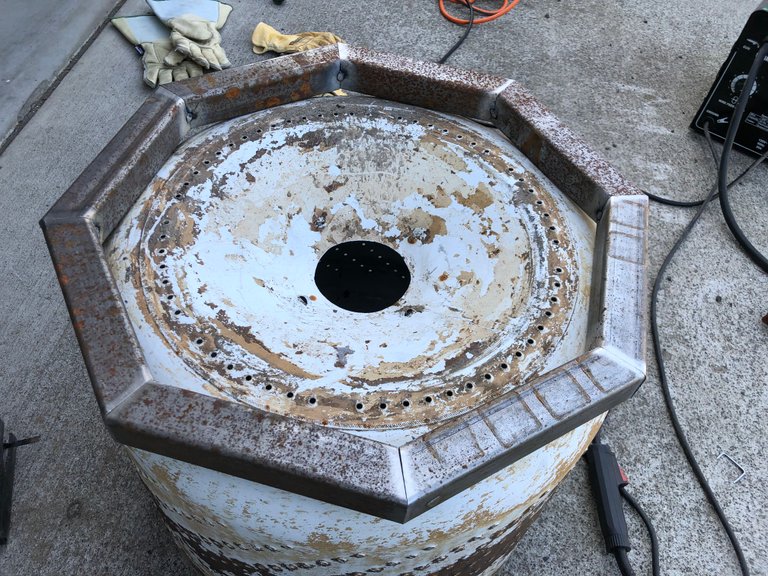
Yep, that’s the figment I was looking for... Perfect!!
I did end up cutting a little more out of the middle of the Washtub. You see the middle of it kind of forms a cone shape in the middle and I wanted to get rid of as much of that as possible. This hole will eventually become a place to light the fire.
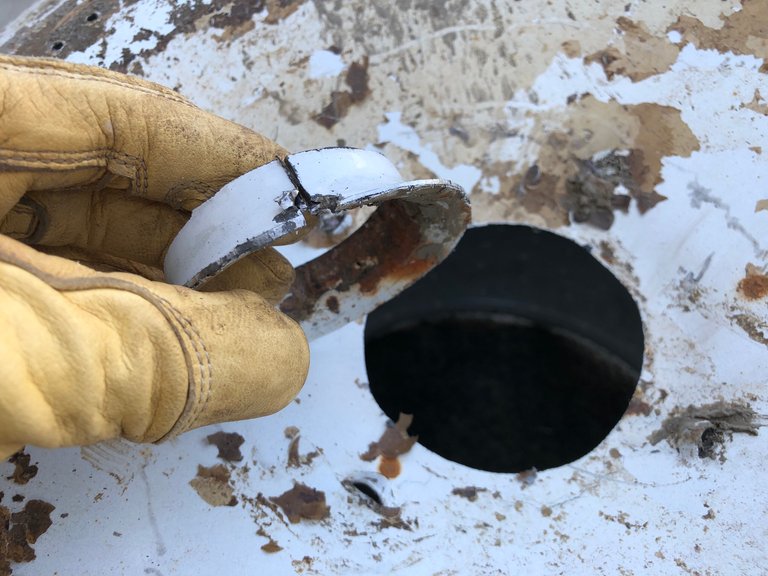
I first drilled a couple 1/2 inch holes, then cut the remaining with a jigsaw. The plan is to have a plate underneath this hole, it will keep the ashes from falling out and burning whatever is underneath, also it will... should work for a place to light the fire. Build a teepee style fire over the top of crumpled papers on the inside, and light the paper from the bottom. Well it sounds good anyway, we will just have to see how it will work out.
Proud Dad Moment
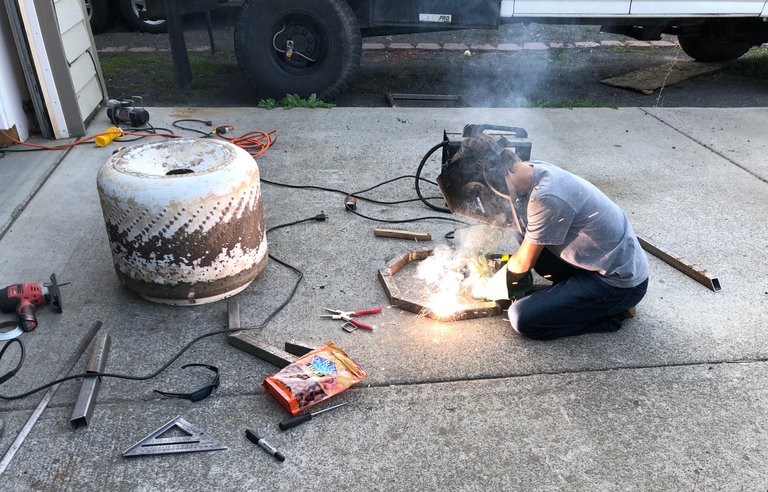
Only having one welding mask, I didn’t even think about giving @lil-splatts a go at the welder. I was going to watch him weld so I could guide him through. But I couldn’t really watch him weld without a helmet and he couldn’t really weld without a helmet.... so I gave him the best explanation I could and he was super excited to be able to weld up some of these pieces that we had cut and cleaned up.
Now who in the world turns their back on an 11 year old boy while he is laying down his first weld unsupervised...
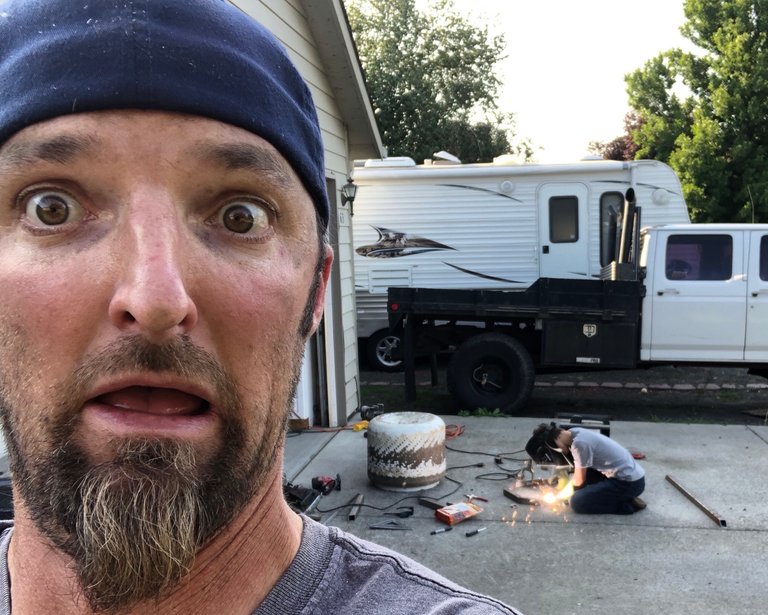
THIS GUY
Call me crazy... I call it confidence. Lol. Once I got him started he just kept going and going. I asked him if he was having fun and he said, “Ya, but my hands are getting sweaty and my knee hurts from the concrete” HAHAHAHA Well when you weld all the inside seams and all the seams on one side... I wouldn’t expect much less.
So while he was laying down his last couple welds it was time for Daddy to crack a cold one to celebrate.
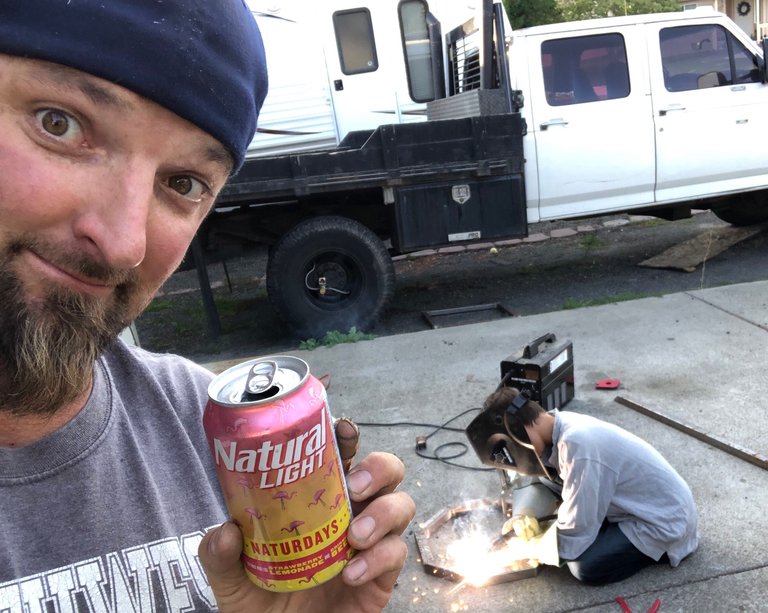
It isn’t Saturday but it sure is Naturday
Then just as things seemed to be going so well and we were making soo much progress... we ran out or wire in the welder!! You have got to be kidding me!! Have I really used this little welder that much???
Well I guess this gives me sometime to think about how I want to tie the square and octagon pieces together to complete the stand. Plus, there are some burgers on the grill and we have built up a good appetite after doing some Man-Stuff.
Overall we made some great progress to the Washtub Burn Barrel Version II. It’s amazing how much nicer it is to be able to have a little help on a project. I’ve got this whole week off of work so hopefully @lil-splatts and I can get back under the helmets and weld up the rest of this Washtub Burn Barrel.
Thanks for stopping by and checking out yet another DIY project done by yours truly. The next update to this project will be the finished product. My vision is for it to have wheels, stick holders, fire stir stick holder, and some way to clean the ashes out easily... now that could be difficult but I know we can do it.

Steem On
and
Yep...
That’s My Boy


Don’t forget to mention @splatz when you encounter a post that deserves a good Splattin’ by the @splatz trail

Thanks for using eSteem!
Your post has been voted as a part of eSteem encouragement program. Keep up the good work! Install Android, iOS Mobile app or Windows, Mac, Linux Surfer app, if you haven't already!
Learn more: https://esteem.app
Join our discord: https://discord.gg/8eHupPq
You know you’re everyone’s first pick when there’s some DIY stuff, right?
How much is a reel of that flux core these days anyway?
Well when you got Harbor Freight Down the road... I think this 1 lb reel was $25 or so... sometimes I fail to look at prices when it is something I need and I am at Harbor Freight so I know it is cheap. Lol
Hopefully I don’t DIY taking the kids school shopping this week!! Hey maybe Daddy can get some new Chonies??? Probably not, I will just have to turn them inside out, then eventually backwards.
Here have a !BEER
Posted using Partiko iOS
!Beer
Posted using Partiko iOS
To view or trade
BEERgo to steem-engine.com.Hey @dandays, here is your
Do you already know our BEER CrowdfundingBEERtoken. Enjoy it!You got @lil-splatts using a chop saw, a grinder, as well as the welder. Talk about a great little math lesson, angles, degrees, measurements, Sounds like a geometry class. give him a couple more years and you will be able to pull up a lounge chair.
Love using recycled stuff.
Love the burn barrel.
Love the interaction.
Love the humor.
Keep it up my friend, and you will be the centerfold for this months Awesome Dads Magazine.
There is a million dollar idea, I just need to find an agent, publisher, photographer, writer etc.
Enjoy the remainder of your vacation @jlsplatts.
He is always a little hesitant at first but what kid isn’t right?? Then once he sees it isn’t so bad he is good to go. Of course I lay out all the does and don’ts prior and continually remind his about it. Safety Safety Safety i just keep pounding that into his head.
I’m going to patent something one day😉😉
Posted using Partiko iOS