Design of a Tea-set (2019) ▪️ | MAKING OF | ▪️ | STEP BY STEP | ▪️ By Andrey Lebed ✅
Hello everyone!
Since I have a few hours I want to share with you my last design study project. Do you like design or concept design? And what about tea? I'm a big fan of Asian tea, but coffee its the most part of my life. What about you? :)

Resume
Summary
You will know about the history of creation and info about clay products application and movement in the world. Also, where it is used and how popular this black clay technique nowadays.
You will see how to create a prototype which was based mainly on traditional modeling. Each stage shows in detail the technique and the possibility of creating this design for mass production.
You will also see how it was created by using a 3D modeling program and the removal of the three-dimensional model as a result in the form of render images.
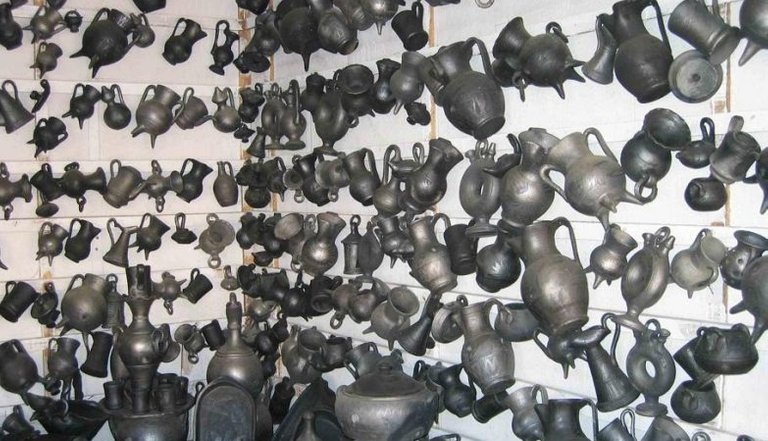
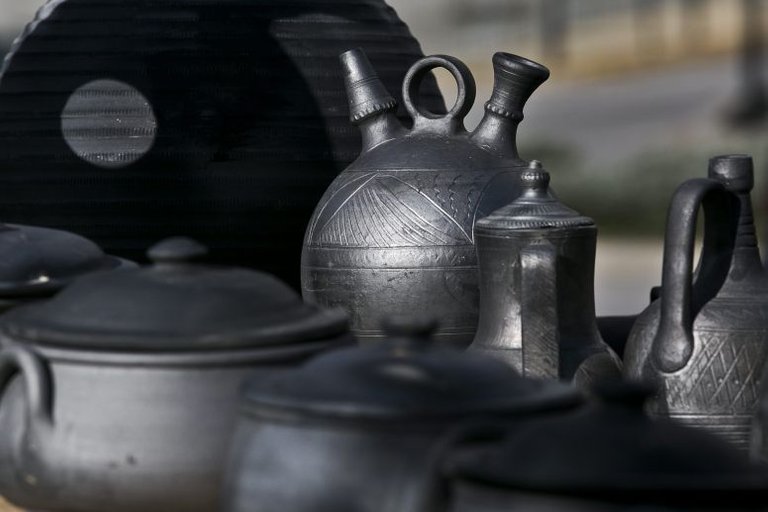
Figure 1 Example of black clay products
Introduction
Why is this have been done?
In order to make these products more popular as well as to popularize the technique of making these products using black clay technology.
What the ideas do we have?
The ideas that I used were products that people in society use in their daily routine or often during the week, namely: cups, kettle, sugar bowl of different types of dishes in which you can put fruits and vegetables, different varieties of tea, as well as a sugar bowl for various other spices.
What has been chosen?
In order of creation, it was decided to use as a basis and work on the final results a component of a teapot 6-5 cups, also a sugar bowl, dishes for seasonings or for a different type of tea.
.jpg)
Figure 2 Example of black clay products
Methodology
For whom oriented design and the product?
This product will be focused on a wide range of people ranging from a married couple to a person who invites friends and wants to surprise as well as residents who have children and a large family who want to sit at the table and spend time together in conversations and tea-drinking conversations.
What will be used to create? What materials will be used?
As mentioned above, only cork wood and black clay are used. Before you begin to make sketches and also to write information about what for how and by whom the created product will be used in the future. It was first made a search for information about the cork tree, its properties and quality, and how this product is available.
After selecting the material for use, work began on the design of the product. Since there was very little time to create this design, I immediately began to create sketches in my sketchbook. After that, the best and most suitable option for creating the product was chosen and work on the creation of a 3D model was started.
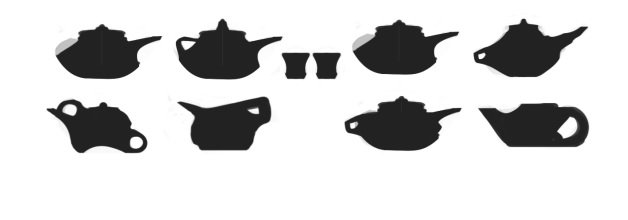
Figure 3 Sketches "black spot technique"
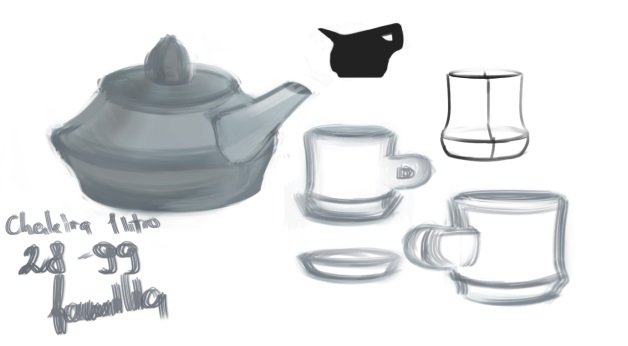
Figure 4 Detailed sketches"
Creation process
First step.
Before creating a highly detailed model, it was necessary to first prepare the basic form from which a lot of manipulation oversimplification was made. For work, was used the 3dsmax 2019.
Work began to build polygons on a simple surface. This surface makes it possible to create exactly those basic forms that were necessary in order to make, after certain changes in the form, the necessary object, or rather its exact copy, which we would like to convey.
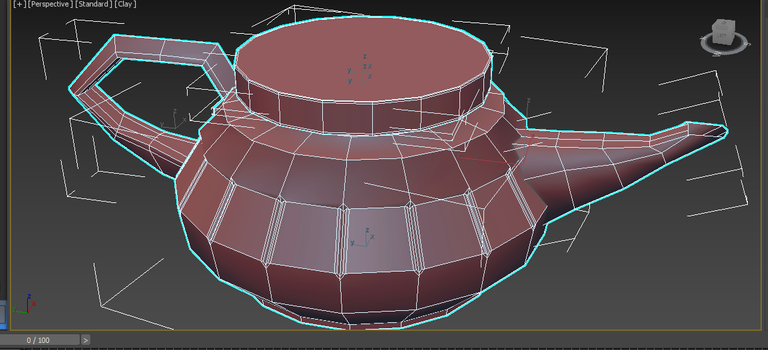
Figure 5 Screenshot of the teapot
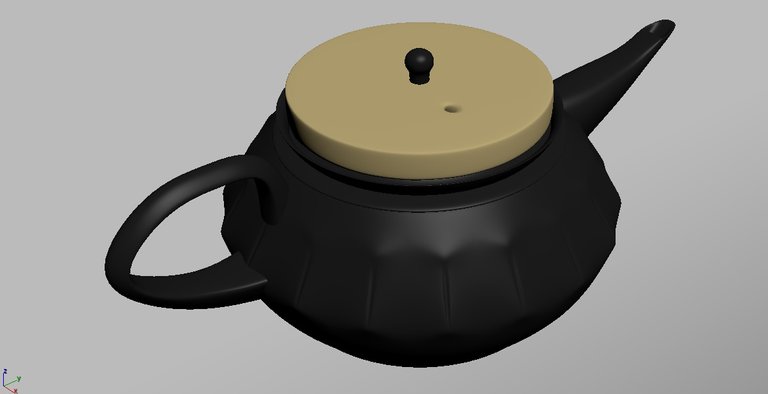
Figure 6 Screenshot of the teapot with the grid
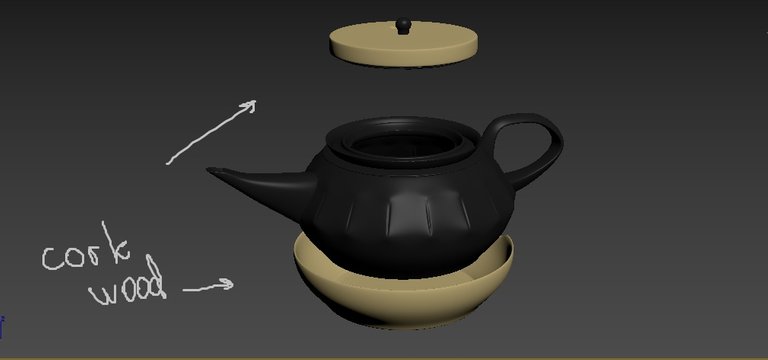
Figure 7 Screenshot of the teapot in 3dsmax

Figure 8 Screenshot of the teapot in 3dsmax
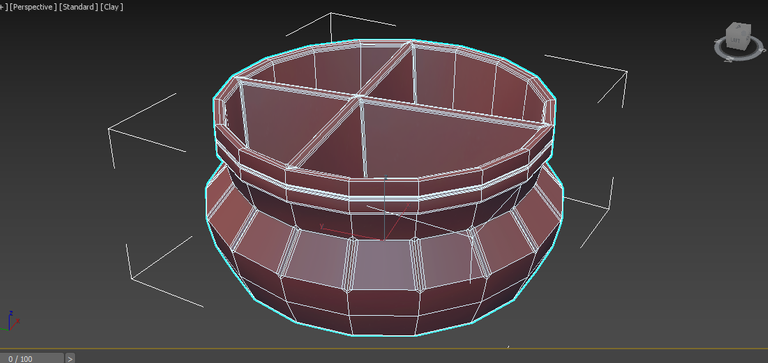
Figure 9 3D Sketch of sugar pot
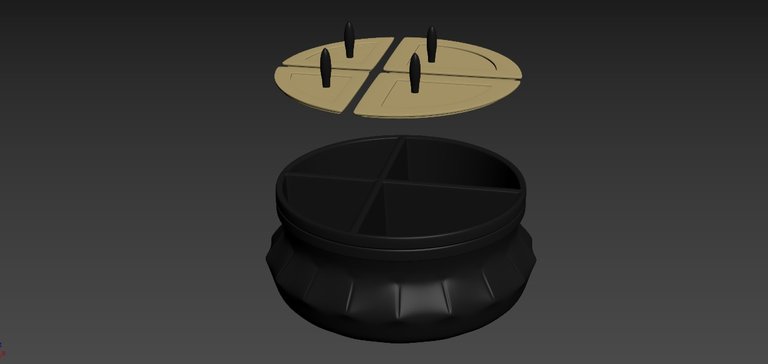
Figure 10 3D Sketch of sugar pot
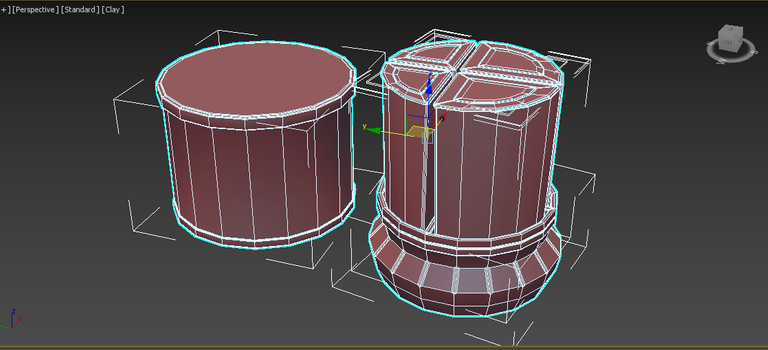
Figure 11 3D Sketch of the pot for tealeaves
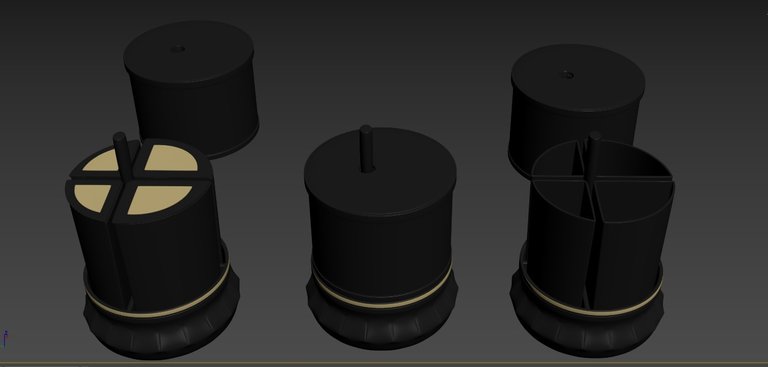
Figure 12 3D Sketch of the pot for tealeaves
Second step
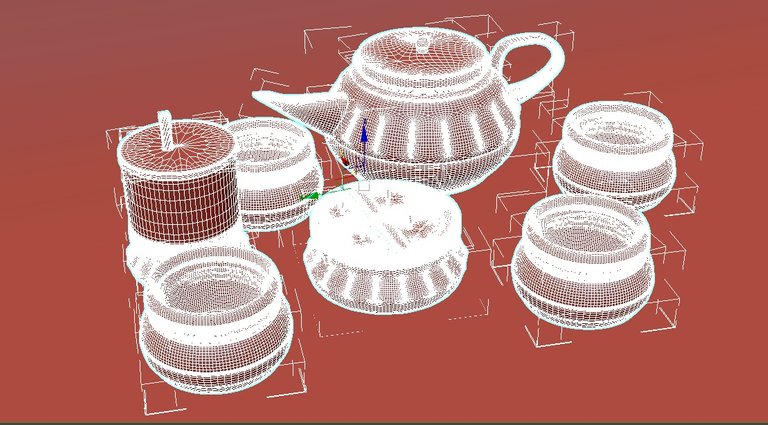
Figure 13 Screenshot with all objects with grid. Hi-poly models.
Final stage
Figure 14 The final render
Conclusion
It was an interesting experience of creating a tea set, as I had never done so before I achieved a new level up :). Since there were some problems with the creation of the outline and the shape of the clay. It's also given me understanding about the black clay creation process and all aspects that person needs to know to create a good design of the product.
As a participant and the winner of the "Six of the Best" MAP17 Minnow Contest project, I want to say thank you for watching and for all your support.

Thank you for reading to the end! If you liked "design of a Tea-set" vote and follow me to see more new artworks🔍
Sincerely yours,
Andrey Lebed
Congratulations @djei.art22! You have completed the following achievement on the Steem blockchain and have been rewarded with new badge(s) :
You can view your badges on your Steem Board and compare to others on the Steem Ranking
If you no longer want to receive notifications, reply to this comment with the word
STOPVote for @Steemitboard as a witness to get one more award and increased upvotes!
Great, thanks :)
Congratulations for all this process, such a pretty result. I already make some 3D, i really liked it but sometimes it's not the easier thing, my most difficulties parts was when the software was doing a thing that i didn't wanted and understood, and that i didn't knew how to fix it.
Posted using Partiko Android
Thanks. Yes, It takes a lot of time to know how to get the best result by using 3D software! The worst part its when you don't use auto safes when a program crashing down.
Wow! That’s a very thought out review of the entire process.
Very informative and insightful.
The final design looks great!
Posted using Partiko iOS
Thank you! Of course, it's not for a huge audience, but maybe someone who just started learning the design of a product can find some interesting information here.
Hello @djei.art22, thank you for sharing this creative work! We just stopped by to say that you've been upvoted by the @creativecrypto magazine. The Creative Crypto is all about art on the blockchain and learning from creatives like you. Looking forward to crossing paths again soon. Steem on!
Wow! Thank you so much for your support!